200,000 mile GT build

OP
OP
Akurma

Akurma

Active Member
Joined
Apr 22, 2020
Messages
283
Reaction score
353
Location
Pennsylvania
I don’t think it’s strange at all. A lot of older stuff had black engine bays regardless of color. Not too often you see it in a sn though. How are you planning the transition from black to body color? Just leave the fenders red and bolt them on?

Im glad someone remembers the older stuff having black bays regardless of exterior color lol, that's sort of what I was going for because the original Mustangs were like that. As for transitioning, I am just bolting the fenders up to it, I painted a bit past the upper fender rail so when the fenders are bolted on the black will just disappear under neither the fender.

good work! i should do something like this with mine but we'll see if i ever get to it.

Thank you! it was alot more work than I expected but worth it
 
OP
OP
Akurma

Akurma

Active Member
Joined
Apr 22, 2020
Messages
283
Reaction score
353
Location
Pennsylvania
Is anyone able to help me identify this oil pan? I was told it was an MMR pan but cant really find any markings on it.

50936985248_1fc22c12b7_c.jpg


50936985258_a7cb033c00_c.jpg


50937785127_7bb3c51f25_c.jpg
 
OP
OP
Akurma

Akurma

Active Member
Joined
Apr 22, 2020
Messages
283
Reaction score
353
Location
Pennsylvania
Not sure
Definitely aftermarket

For sure aftermarket, I bought it used and lost the message on what the guy said it was. Now i forget how many qts of oil it takes :( Might just buy a stock pan as I dont really think i need a larger capacity oil pan for a primarily street driven car
 
Last edited:

RAU03MACH

Legend
Joined
Apr 23, 2019
Messages
6,813
Reaction score
6,652
Location
NEW MEXICO
something like that is a 7 to 8 quart
but in reality a regular street car the original pan will due
keep in mind you may have to change out the pick up tube with a pan , if you decide to change the pan , that pick up tube will be a little longer deeper in the pan
 

RAU03MACH

Legend
Joined
Apr 23, 2019
Messages
6,813
Reaction score
6,652
Location
NEW MEXICO
For sure aftermarket, I bought it used and lost the message on what they guy said it was. Now i forget how many qts of oil it takes :( Might just by a stock pan as I dont really think i need a larger capacity oil pan for a primarily street driven car
That might be a moroso oil pan its 6- to 8 capacity depending on the full mark on the dip stick
 
OP
OP
Akurma

Akurma

Active Member
Joined
Apr 22, 2020
Messages
283
Reaction score
353
Location
Pennsylvania
Another item crossed of the seemingly never ending list!

this weekend I tackled the inner fenders, got them all scuffed and taped up. Aluminum foil works wonders for wiring harnesses that you dont/cant remove easily. First photo is of the bay all dried, really happy with out it turned out! I left parts of the wiper cowl red as you'll never see it once the plastic bits are all back on and i truly didn't feel like removing the wiper motor and assembly and prepping that entire area for paint lol

50943069083_a61266ef3d_c.jpg


50943068998_4ba98ee177_c.jpg


50943768731_e917a5afaa_c.jpg


50943768666_2791a58fbb_c.jpg


50943868457_a5d325fc1a_c.jpg


50943768341_2201ff6215_c.jpg


50943768316_3b782987e5_c.jpg


50943768306_9996ec35be_c.jpg


Next up its getting it back on it off jack stands and on its own wheels for the first time in almost a year!

something like that is a 7 to 8 quart
but in reality a regular street car the original pan will due
keep in mind you may have to change out the pick up tube with a pan , if you decide to change the pan , that pick up tube will be a little longer deeper in the pan

That might be a moroso oil pan its 6- to 8 capacity depending on the full mark on the dip stick

The Moroso does look very similar! and good catch on the pickup tube! I might just leave well enough alone, as long as it doesn't leak and fits im sure its fine. it just looks like hell lol.
 

RAU03MACH

Legend
Joined
Apr 23, 2019
Messages
6,813
Reaction score
6,652
Location
NEW MEXICO
Take a buffing scotch pad that connected to a die grinder and buff all the crud a repaint
 

d.garza18

Active Member
Joined
Jun 23, 2017
Messages
687
Reaction score
146
Location
TEXAS
Another item crossed of the seemingly never ending list!

this weekend I tackled the inner fenders, got them all scuffed and taped up. Aluminum foil works wonders for wiring harnesses that you dont/cant remove easily. First photo is of the bay all dried, really happy with out it turned out! I left parts of the wiper cowl red as you'll never see it once the plastic bits are all back on and i truly didn't feel like removing the wiper motor and assembly and prepping that entire area for paint lol

50943069083_a61266ef3d_c.jpg


50943068998_4ba98ee177_c.jpg


50943768731_e917a5afaa_c.jpg


50943768666_2791a58fbb_c.jpg


50943868457_a5d325fc1a_c.jpg


50943768341_2201ff6215_c.jpg


50943768316_3b782987e5_c.jpg


50943768306_9996ec35be_c.jpg


Next up its getting it back on it off jack stands and on its own wheels for the first time in almost a year!


The Moroso does look very similar! and good catch on the pickup tube! I might just leave well enough alone, as long as it doesn't leak and fits im sure its fine. it just looks like hell lol.
Like the black! I plan on painting my bay black as well. But I’m going to be quick and rattle can it
 
OP
OP
Akurma

Akurma

Active Member
Joined
Apr 22, 2020
Messages
283
Reaction score
353
Location
Pennsylvania
Take a buffing scotch pad that connected to a die grinder and buff all the crud a repaint

Yeah ill probably end up doing that, dont know why someone went through the trouble to paint it when it'll never been seen lol. I also figured out what pan it is, it is a Canton 7qt oil pan. So that takes care of me not knowing how much oil to fill it with, wonder if the stock dipstick will read though?

Like the black! I plan on painting my bay black as well. But I’m going to be quick and rattle can it

Make sure to post pictures!
 
OP
OP
Akurma

Akurma

Active Member
Joined
Apr 22, 2020
Messages
283
Reaction score
353
Location
Pennsylvania
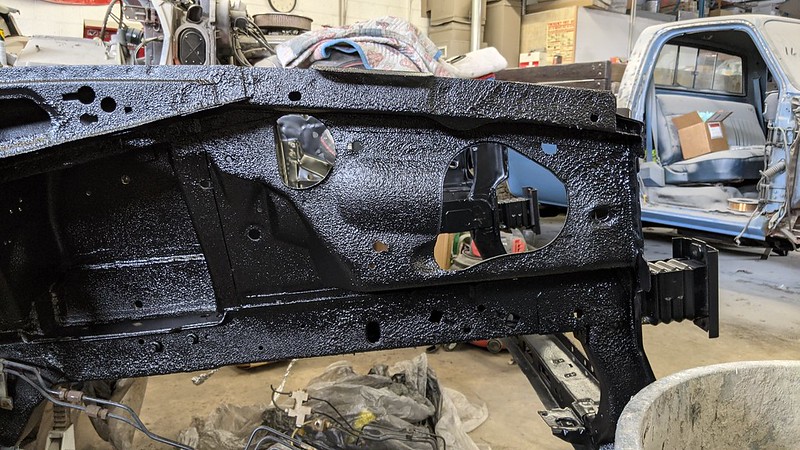
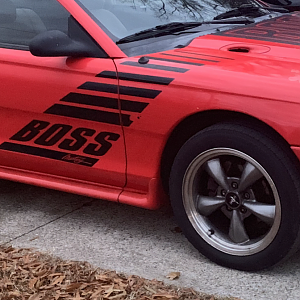
Frustrating weekend but made progress nonetheless

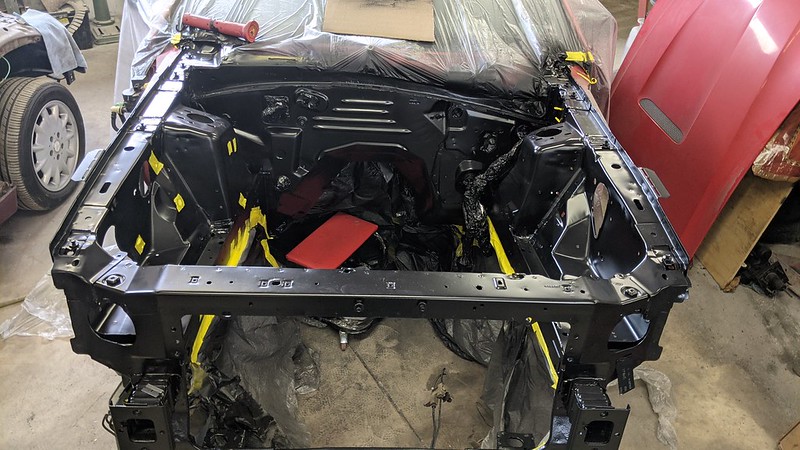
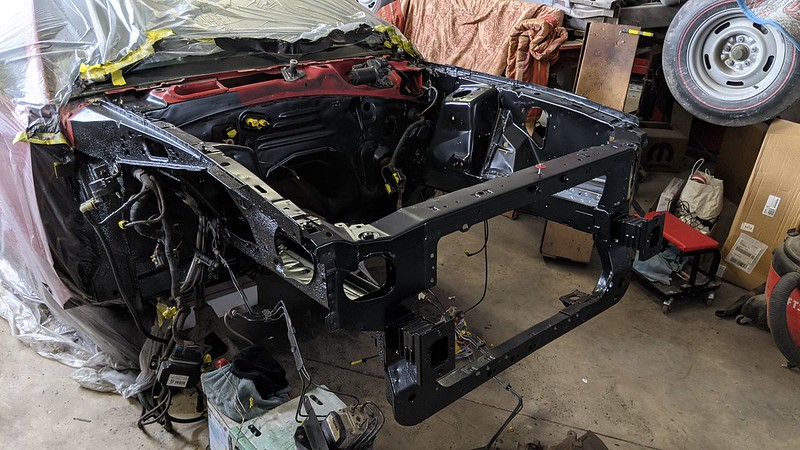
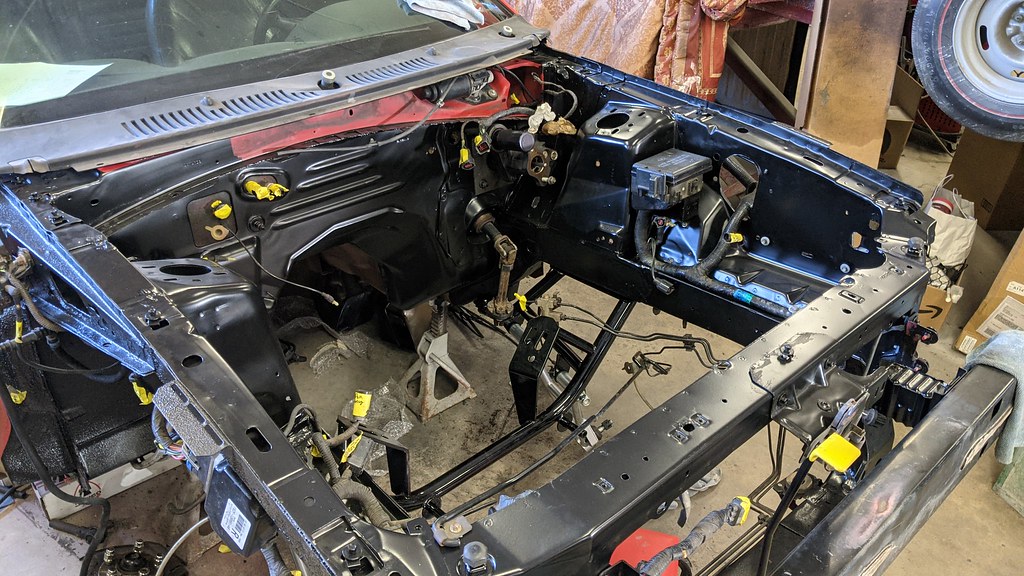
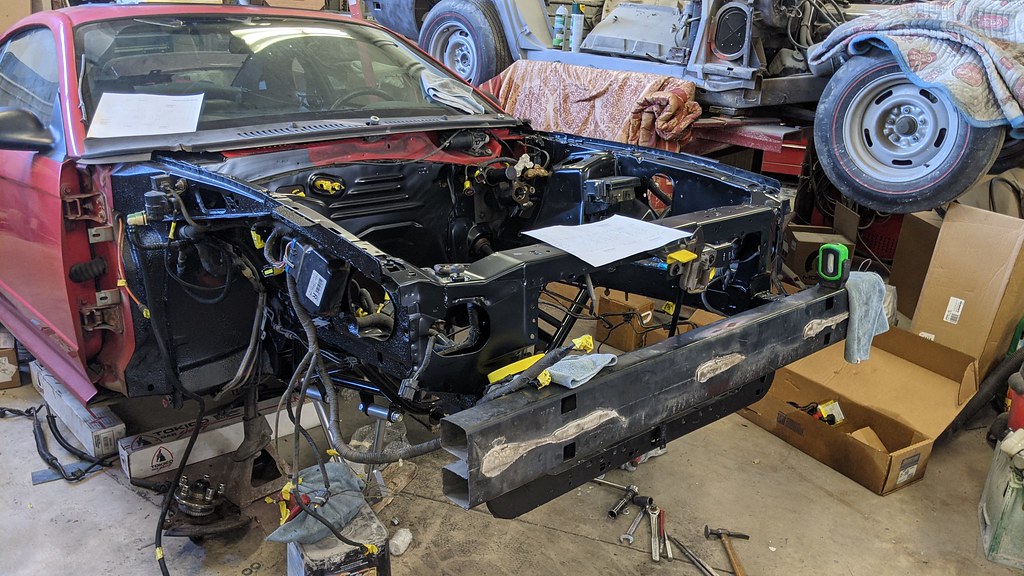
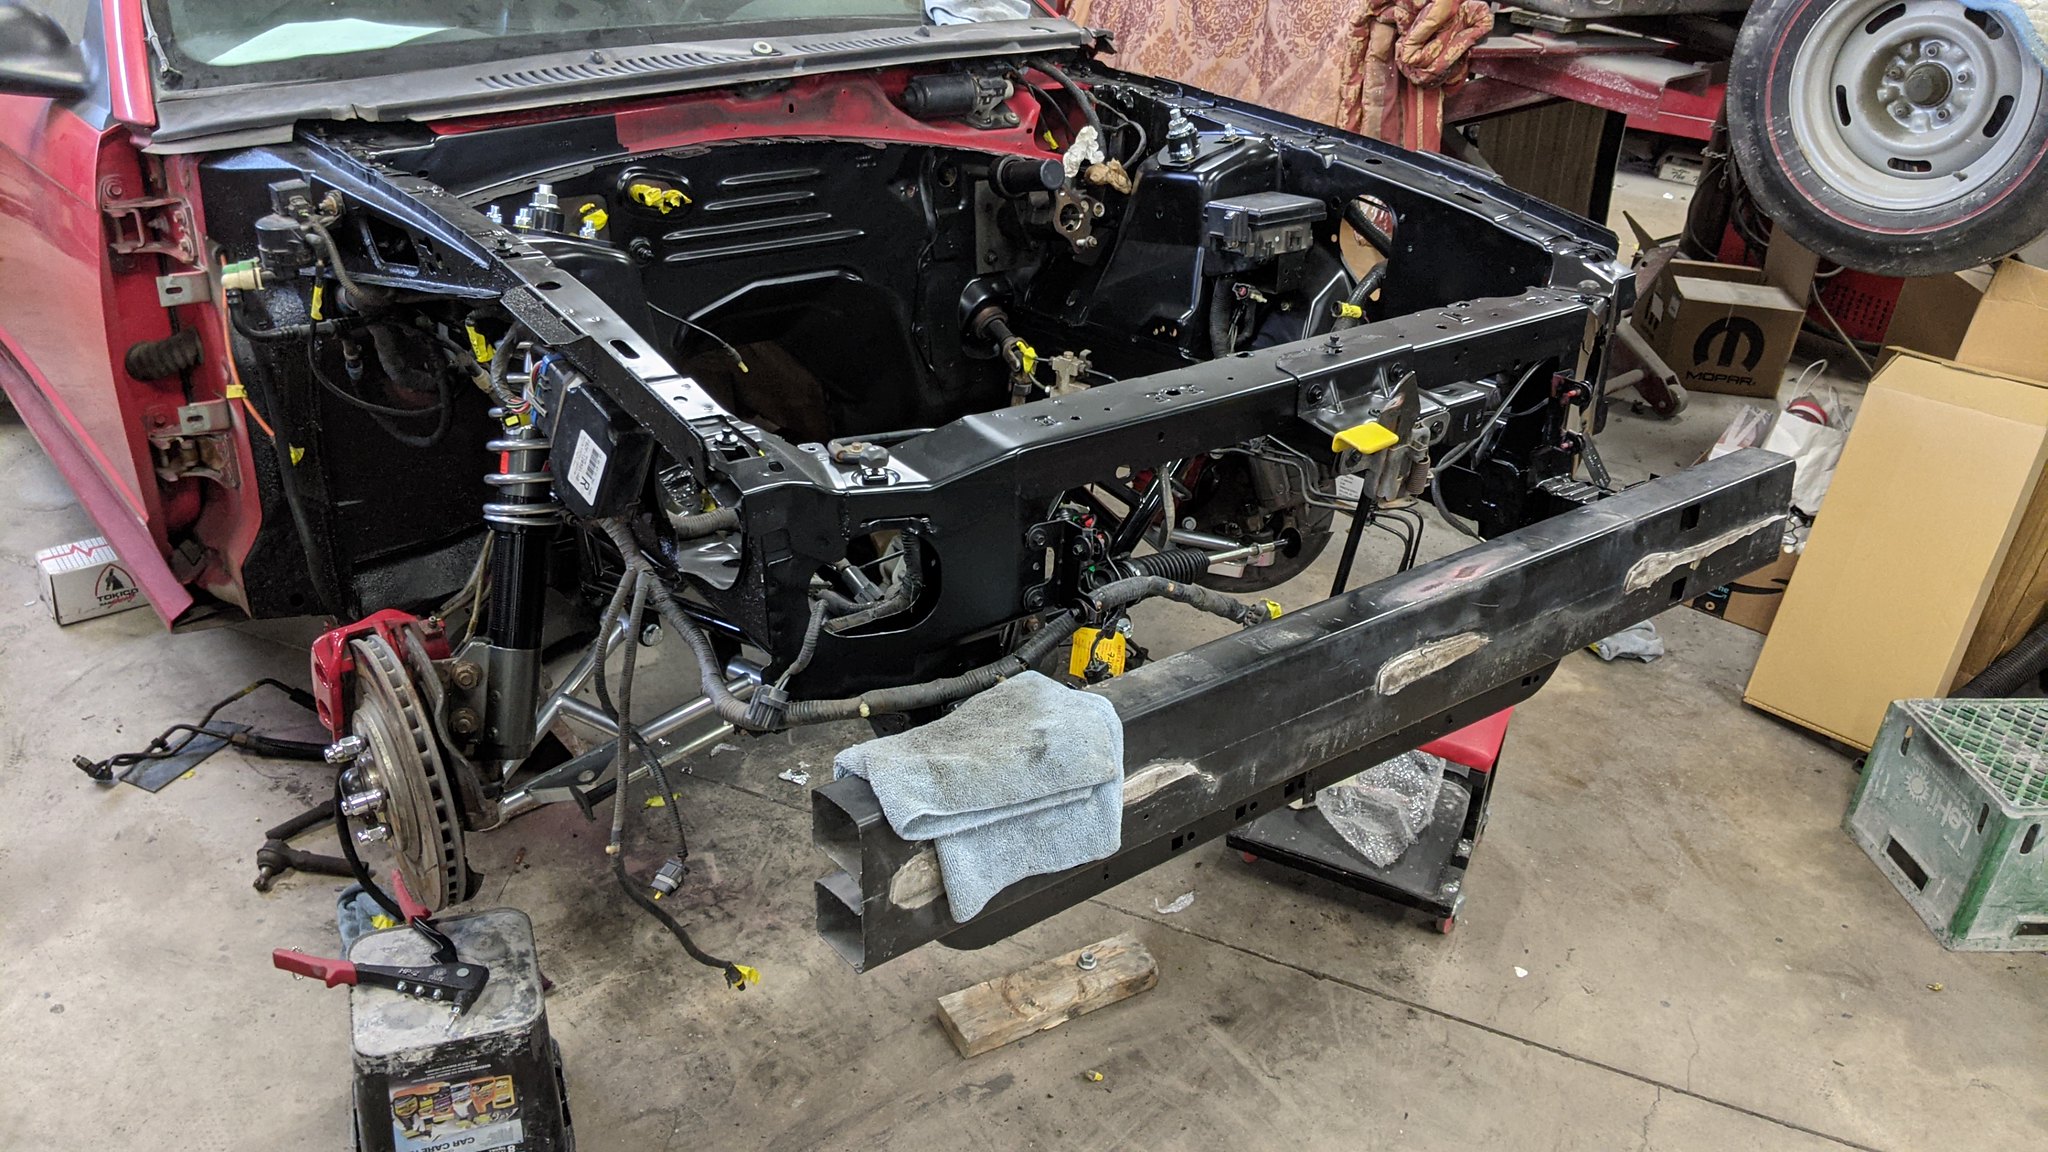
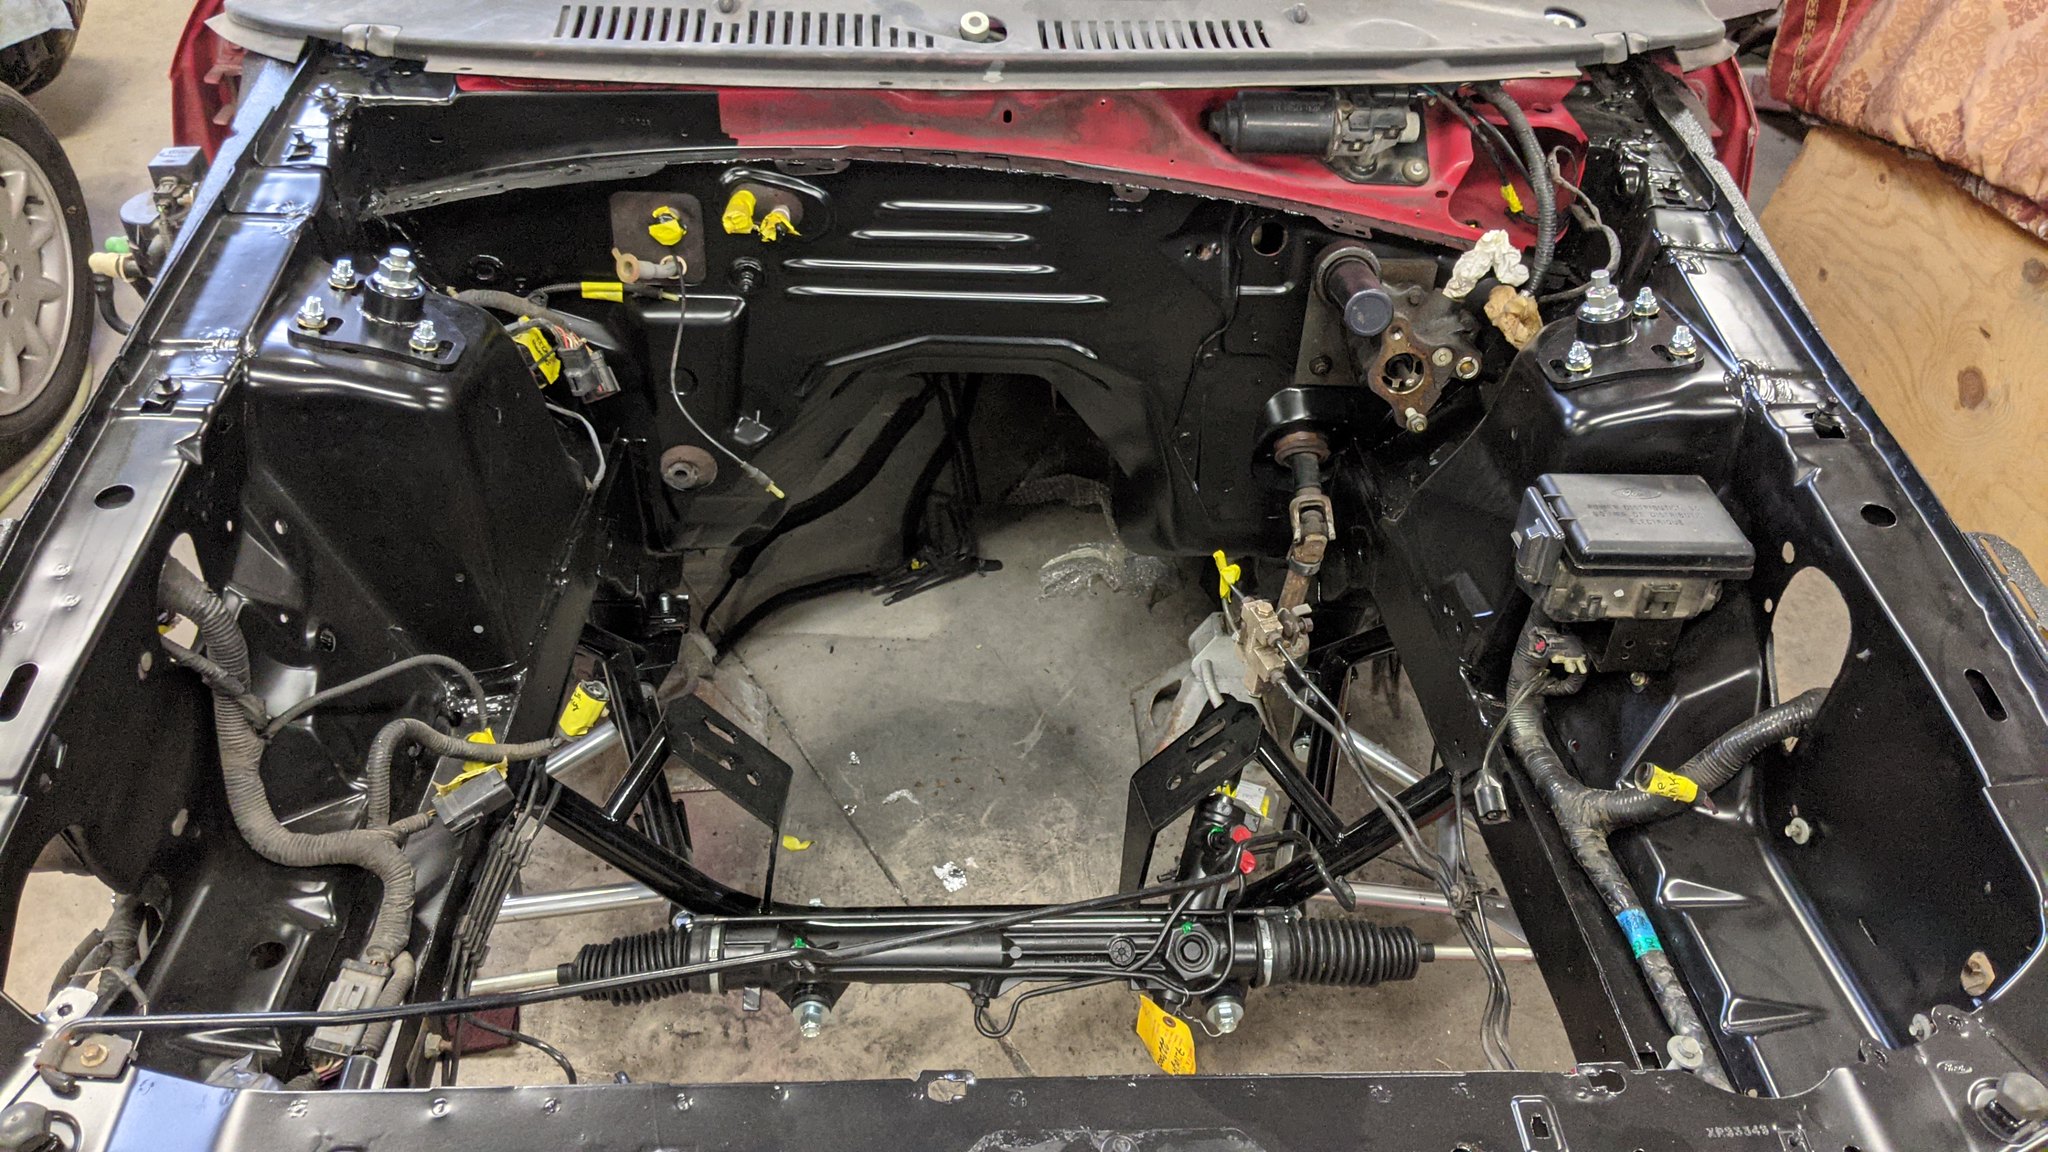
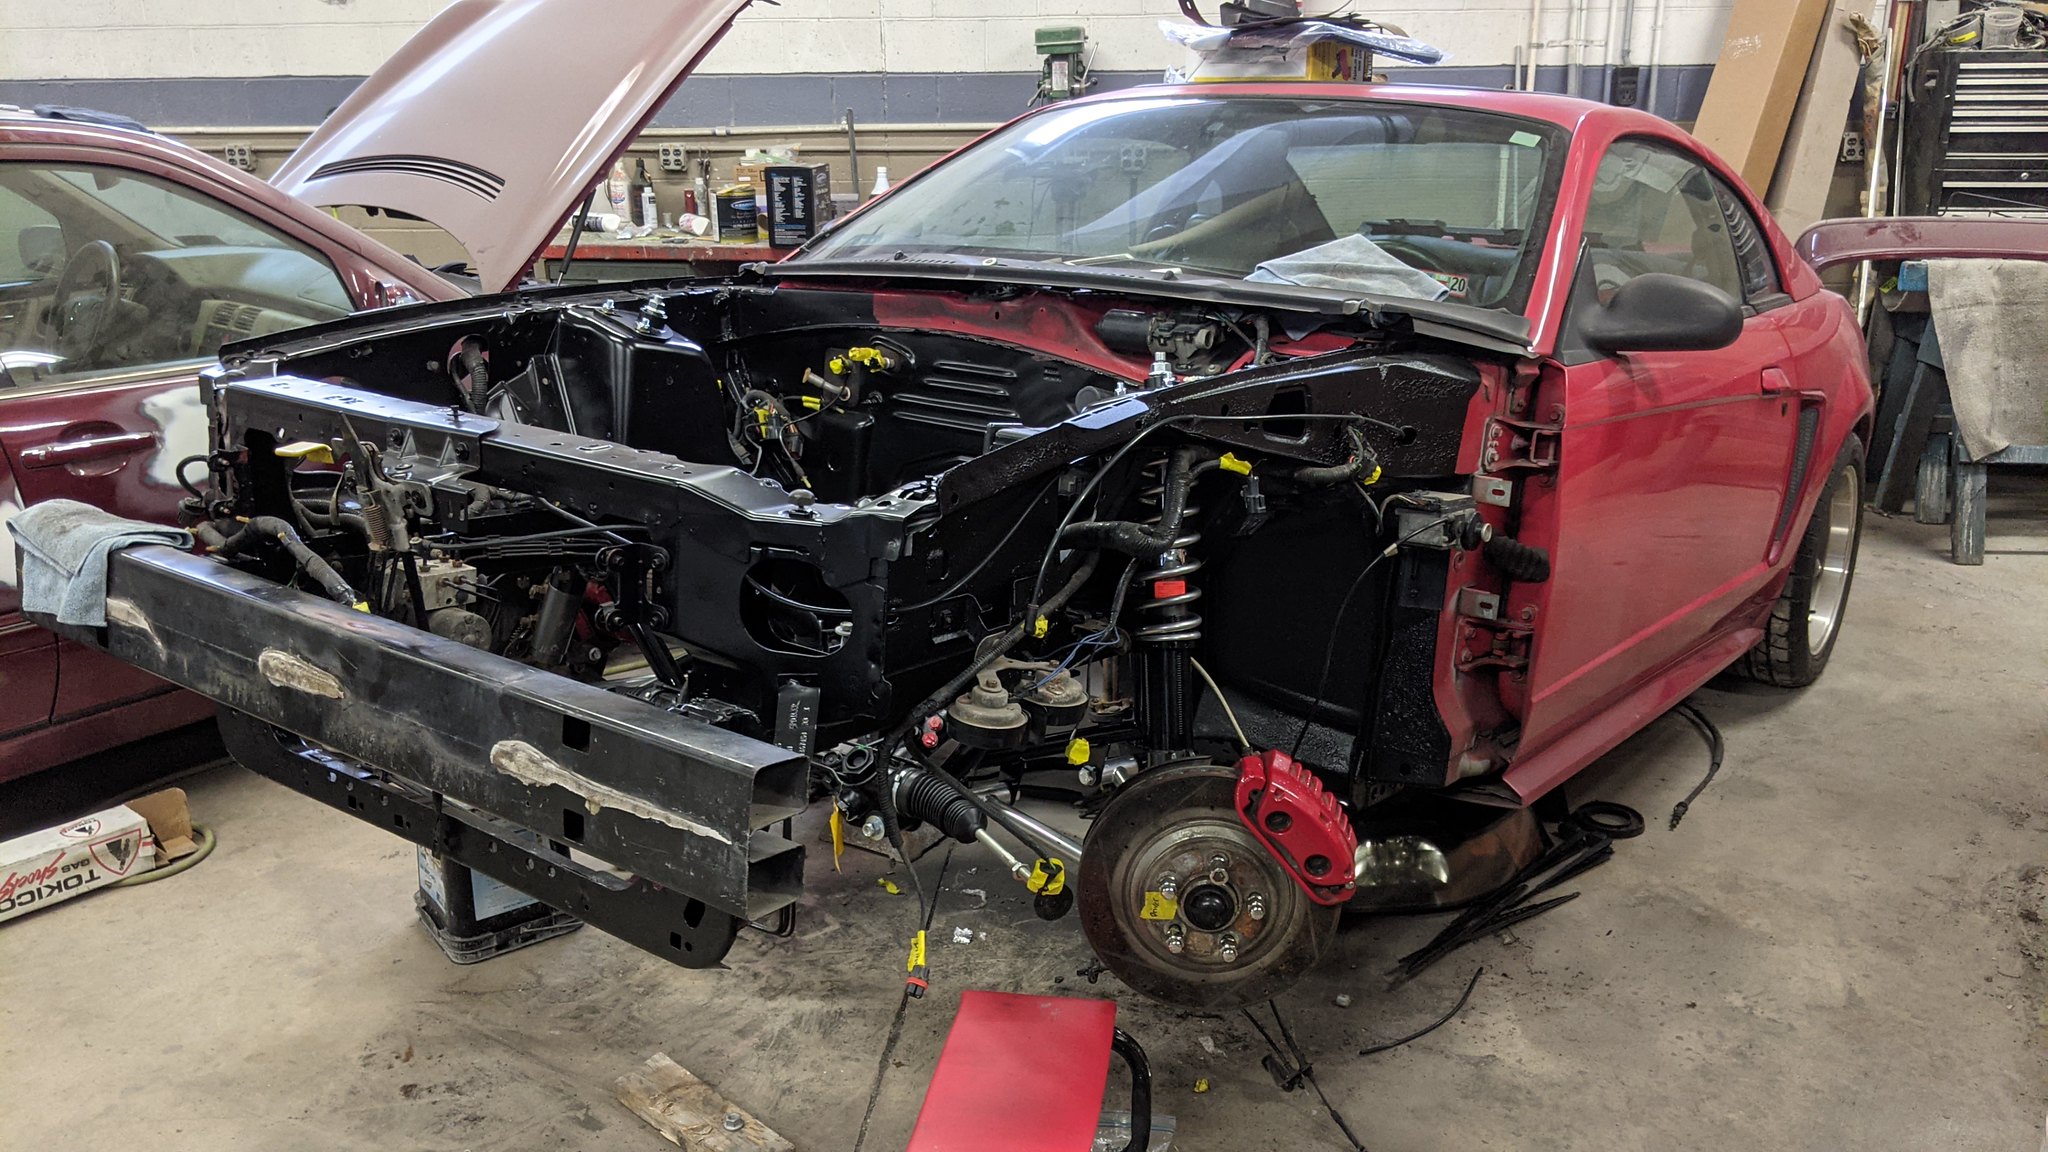
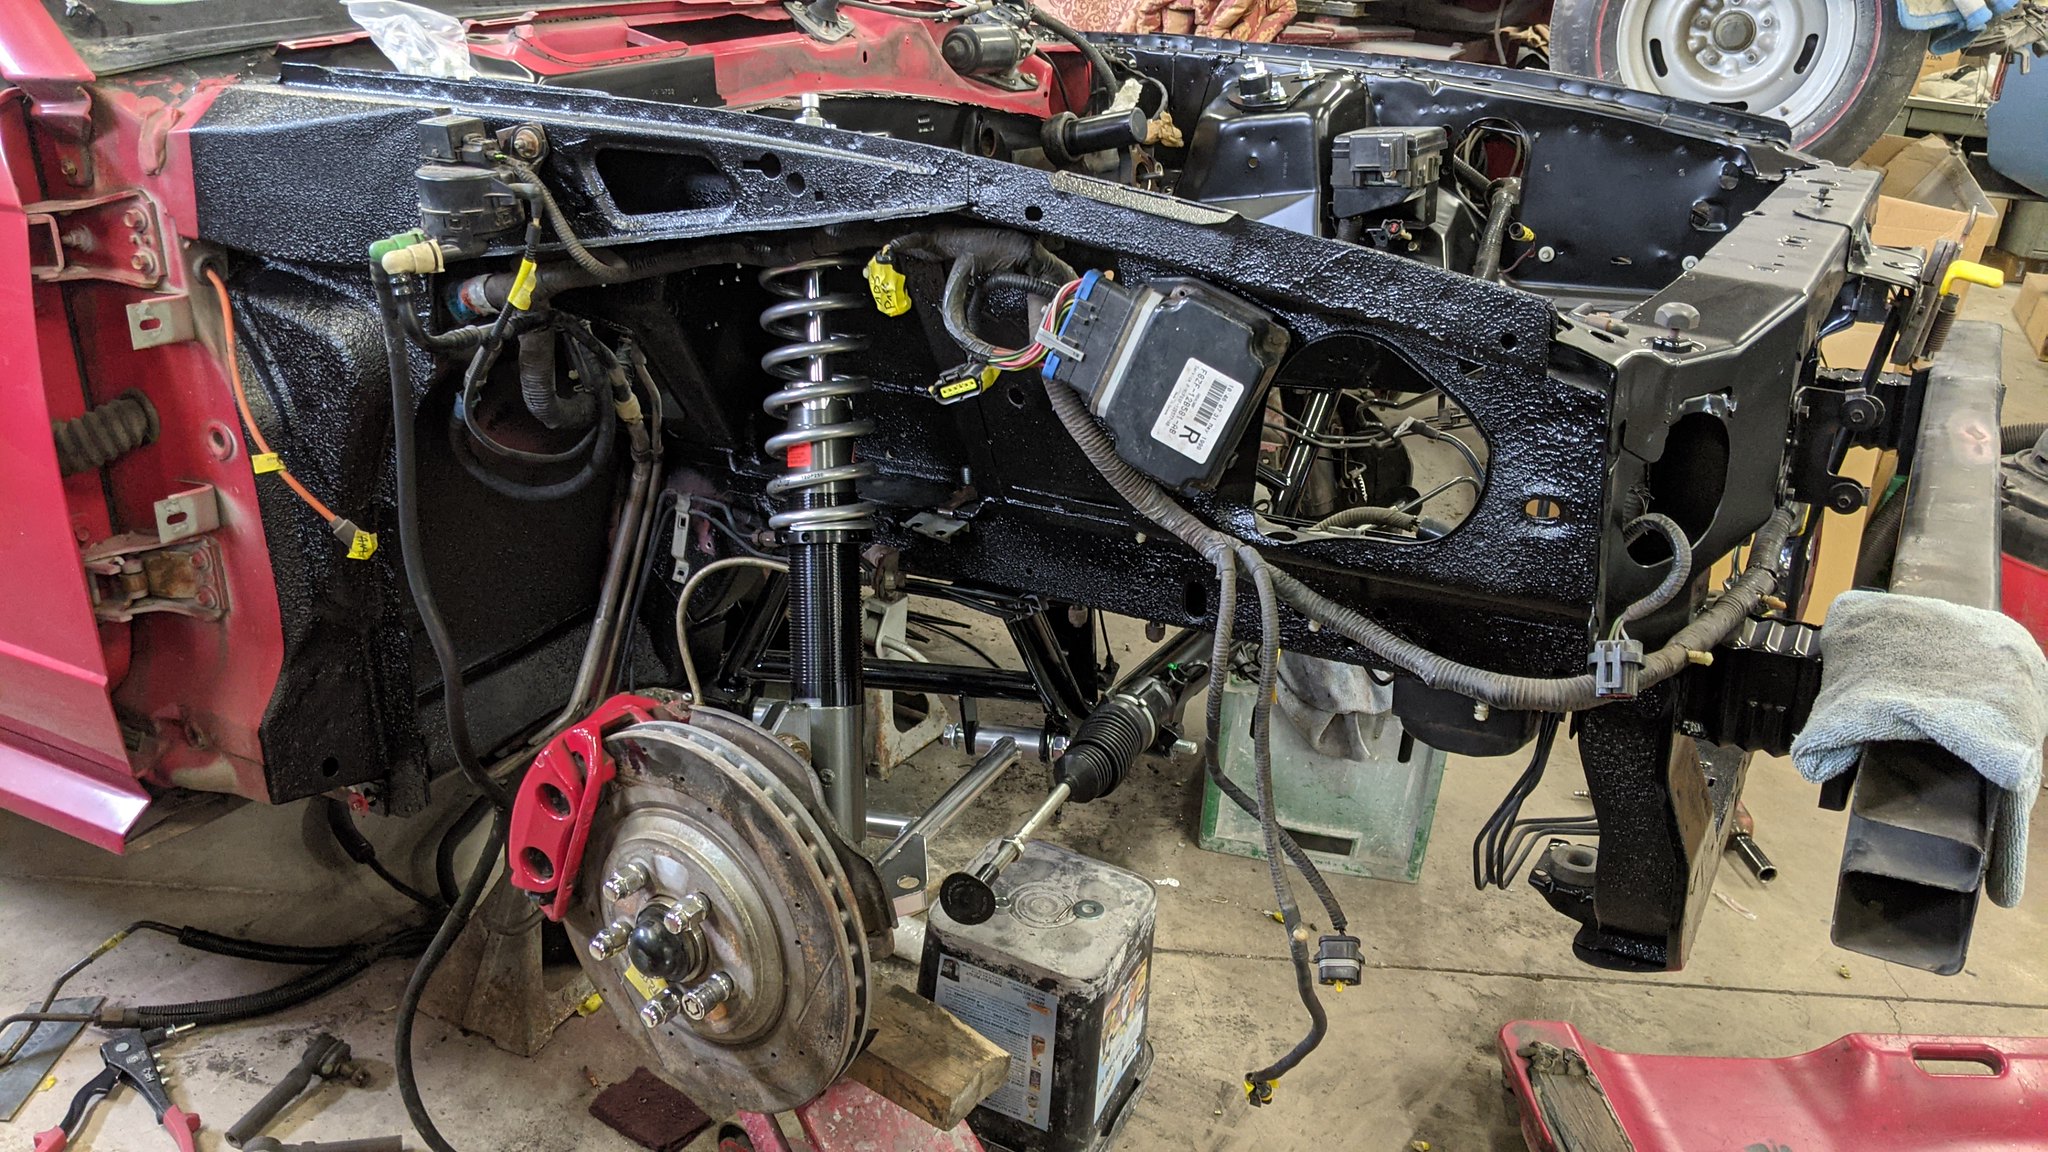
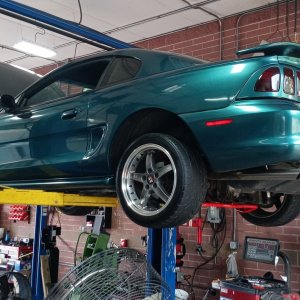
The plan for this weekend was to get the UPR K-member bolted in as well as the entire front suspension and have the car on all four wheels for the first time in a year. That quickly changed once I went to install the K-member

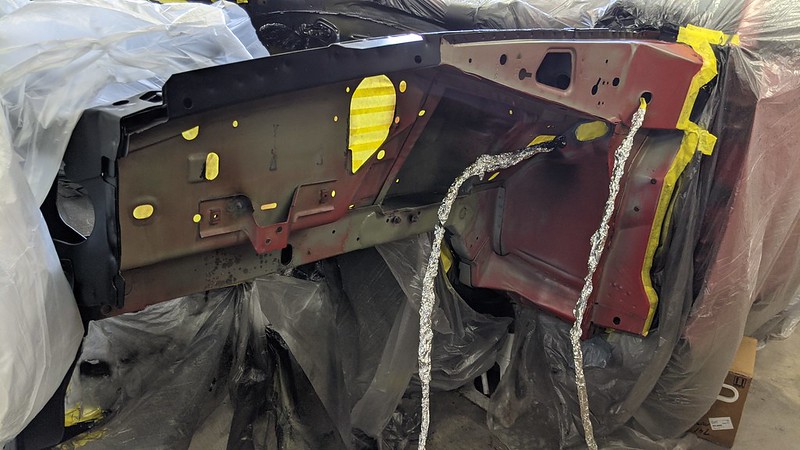
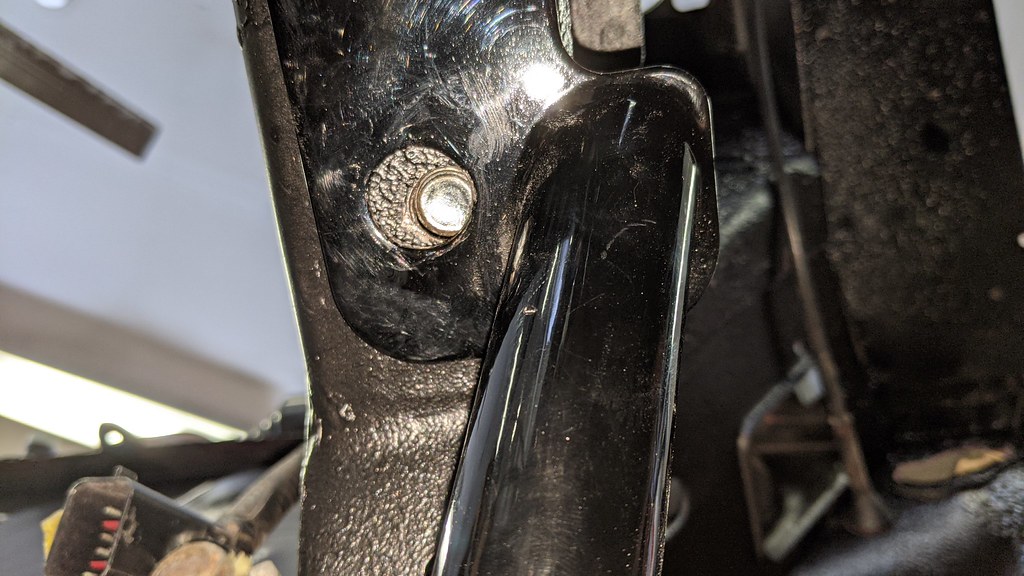
Every simple bolt on is one misaligned bolt away from turning sour lol. I quickly realized that one hole was just enough off center to not let the frame rail bolt drop through :mad: I can't blame UPR for this, as it is possible that holes were drilled out ever so slightly off center when the shock tower areas rust was repaired. I tried pulling the K-member over, adjusting the bolts on the opposite side as the passenger side is oval to allow for some adjustment. Nada. My only choice was to enlarge the hole out a tad more to allow the bolt to drop through correctly. Not hard just annoying to do. also, fuck those J clips as they scratched up my fresh undercoating

50967095828_9b926b7445_b.jpg


50967908082_cb9fda50a7_b.jpg


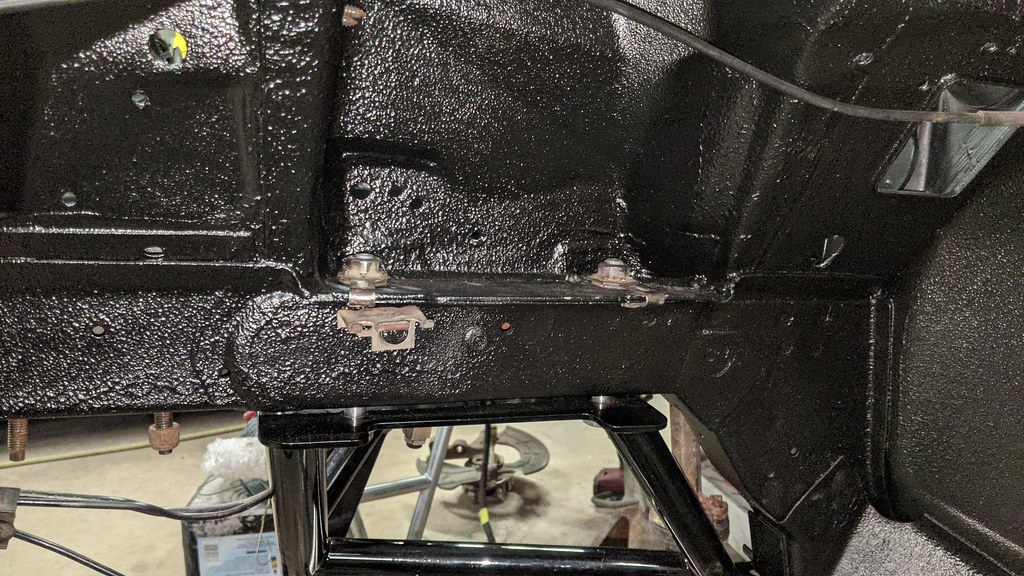
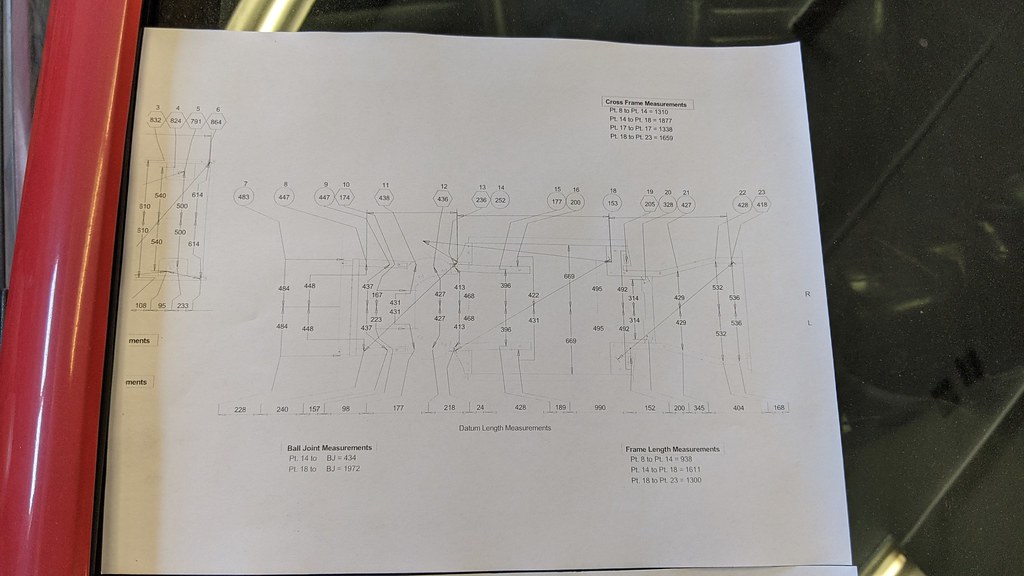
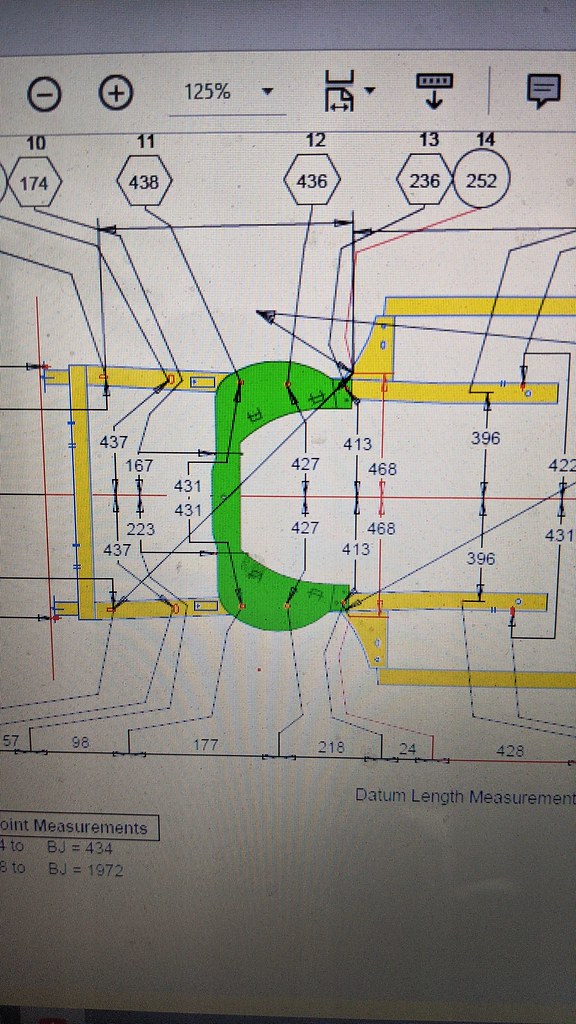
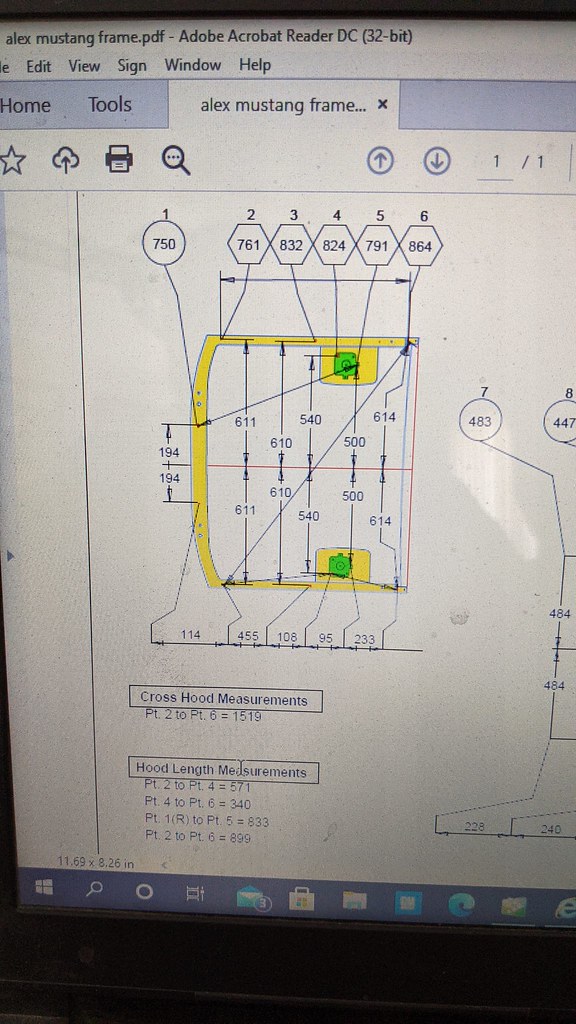
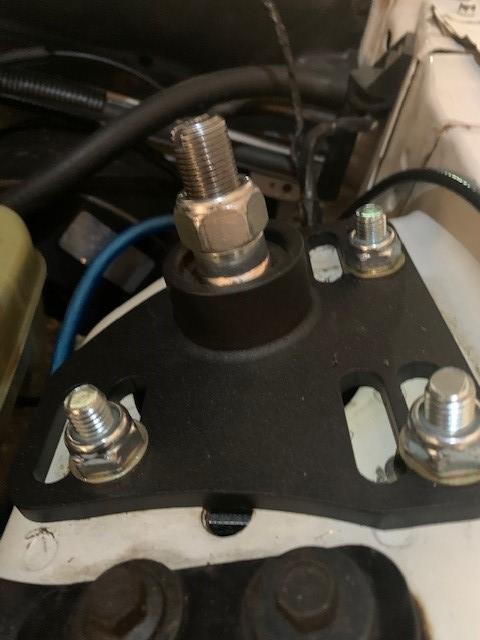
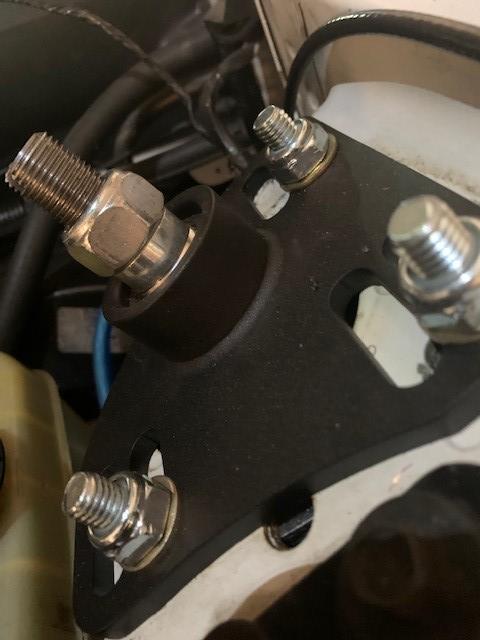
Once the UPR K-member was loosely in place my dad made the suggestion to make sure it was actually square. Grabbed some chassis measurement from specialize collision repair software and got out the measurement gauges. Ill post photos of the measurements below, maybe someone else could use them

50967094188_a7f71cfc5e_b.jpg


50967899672_c292ff533b_b.jpg


50967900442_070d697494_b.jpg


To our surprise everything checked out! Which was a huge relief to me. I am still going to check it out with a plum bob just to double check. EricTheCarGuy has a great video on YouTube on how to do this.

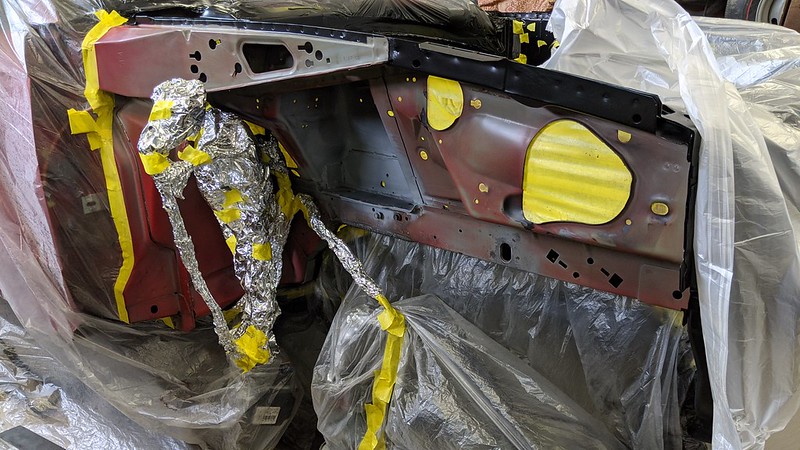
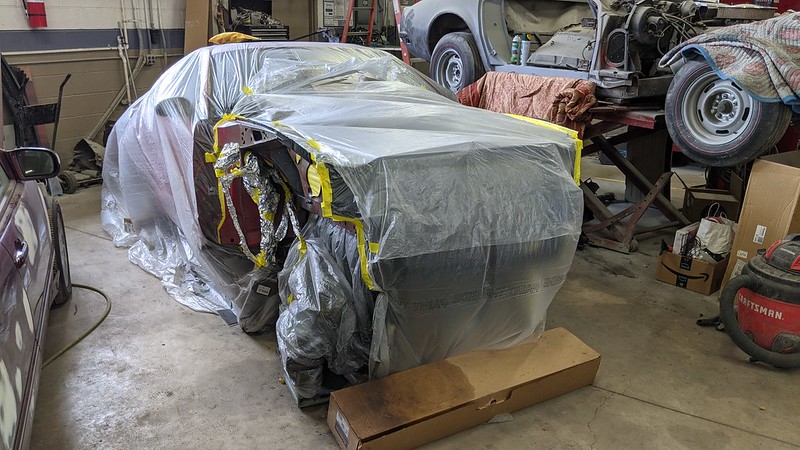
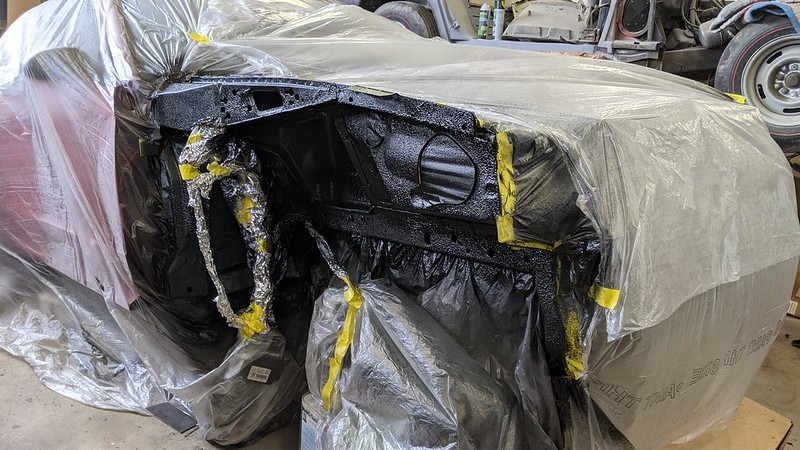
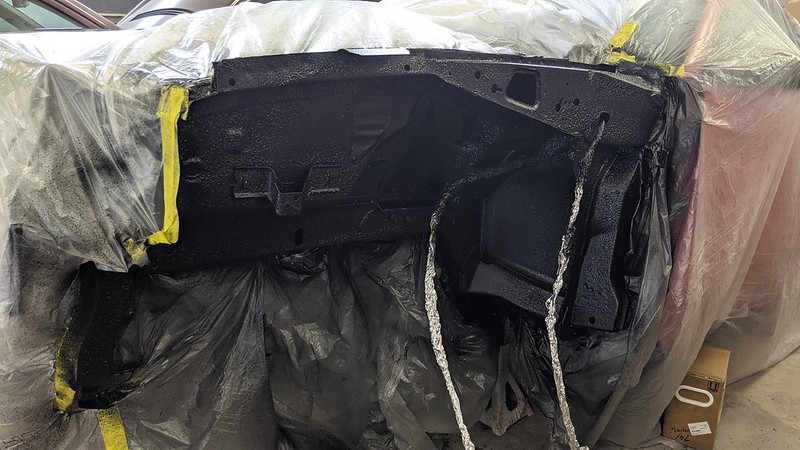
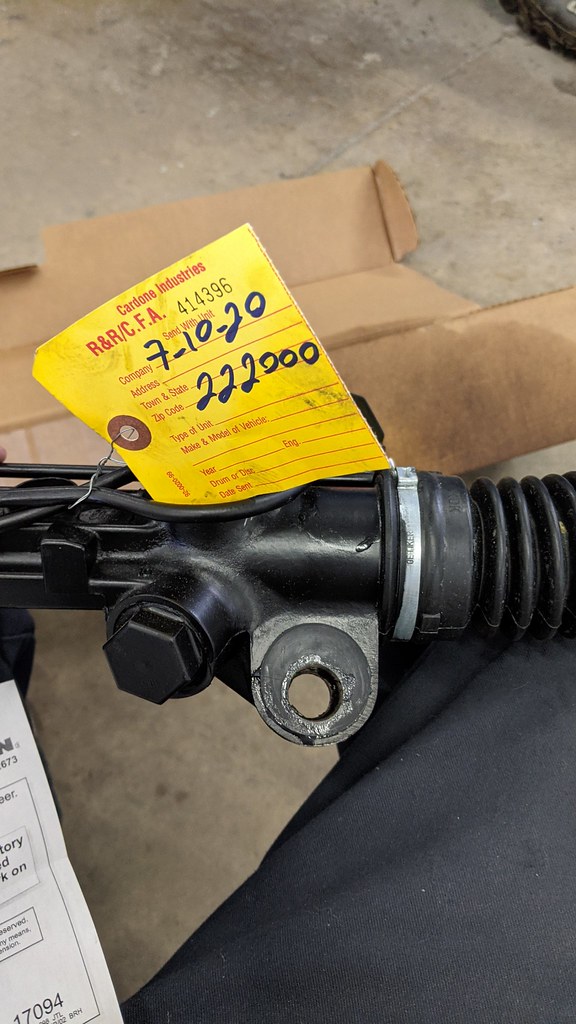
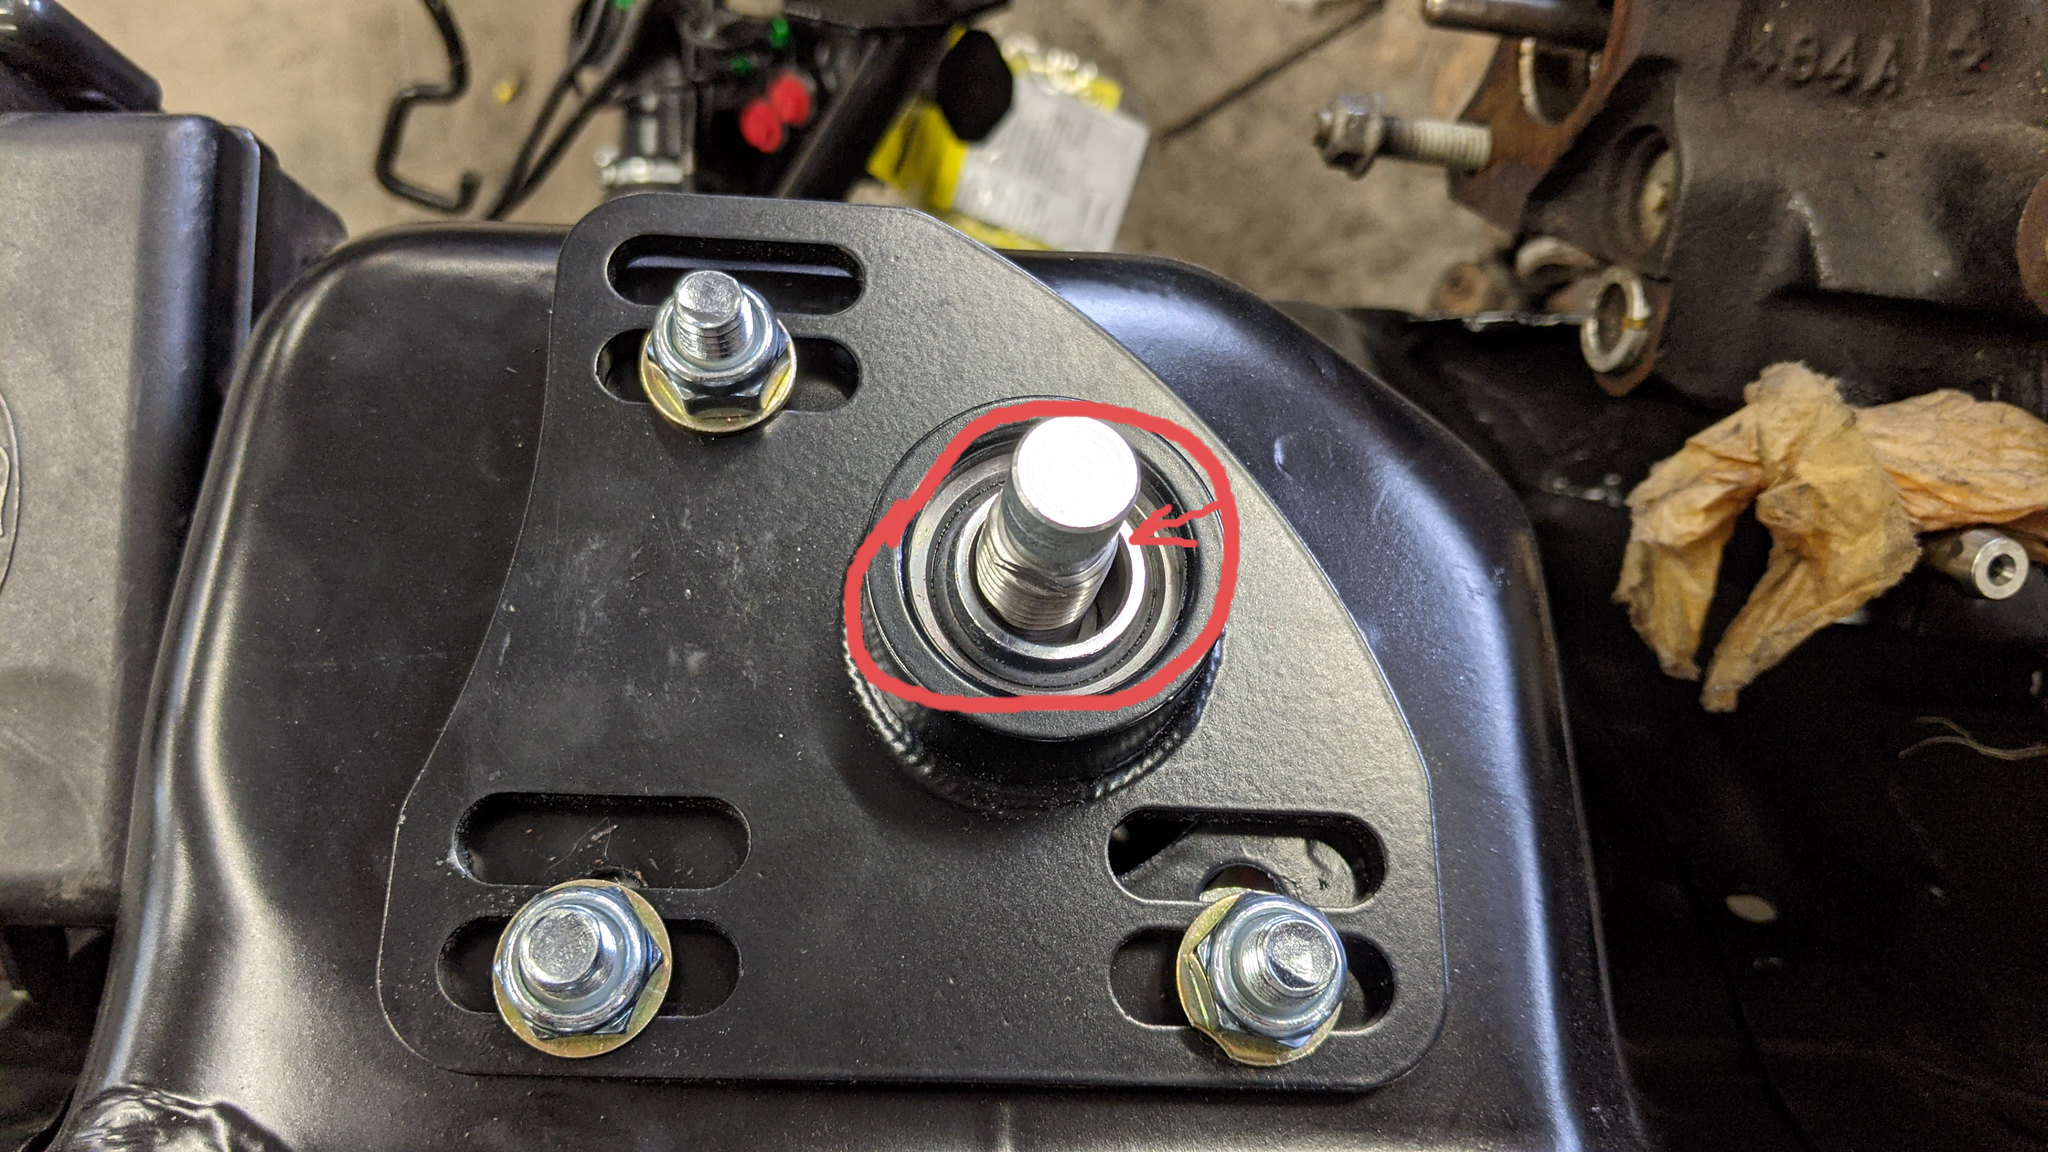
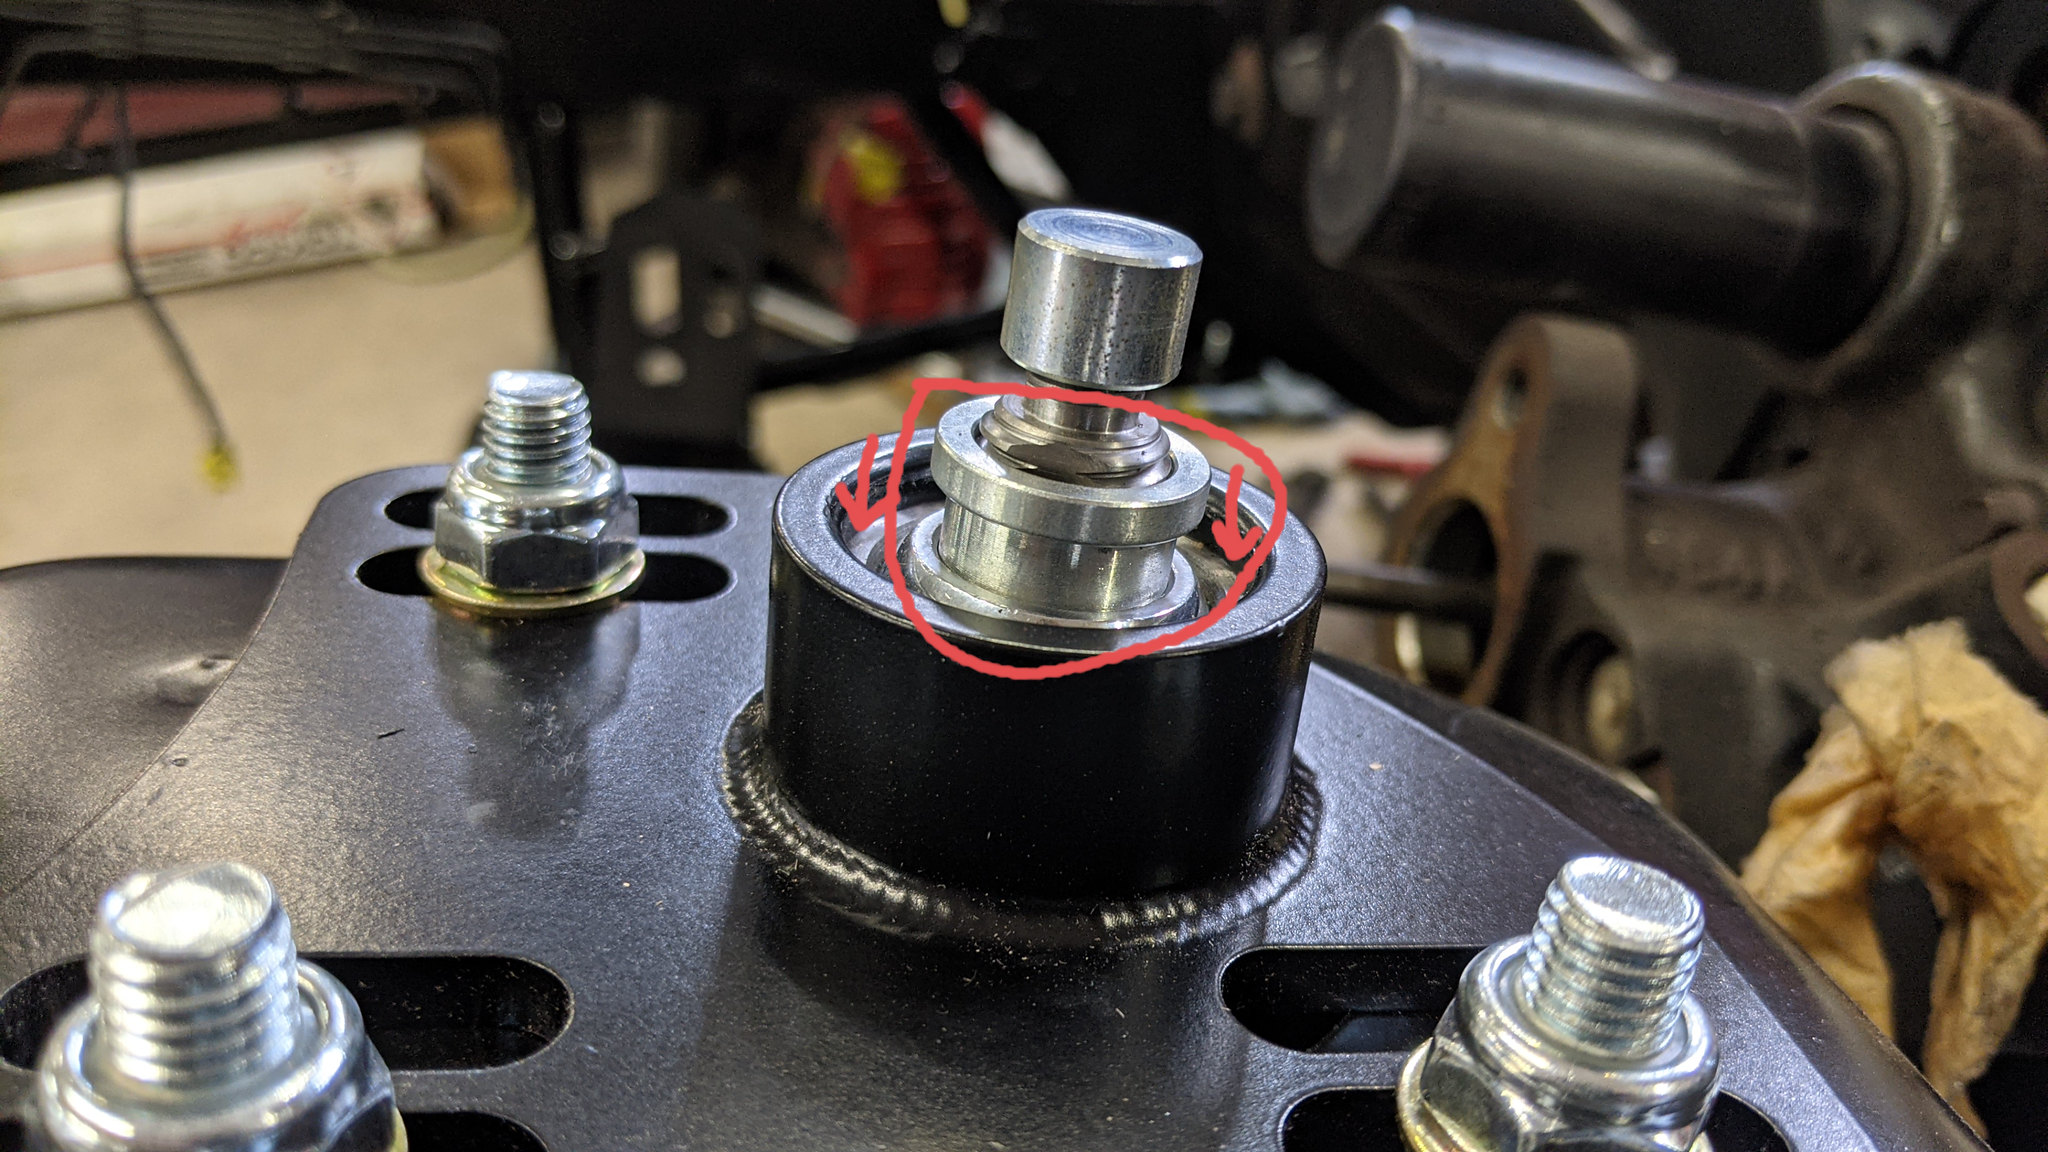
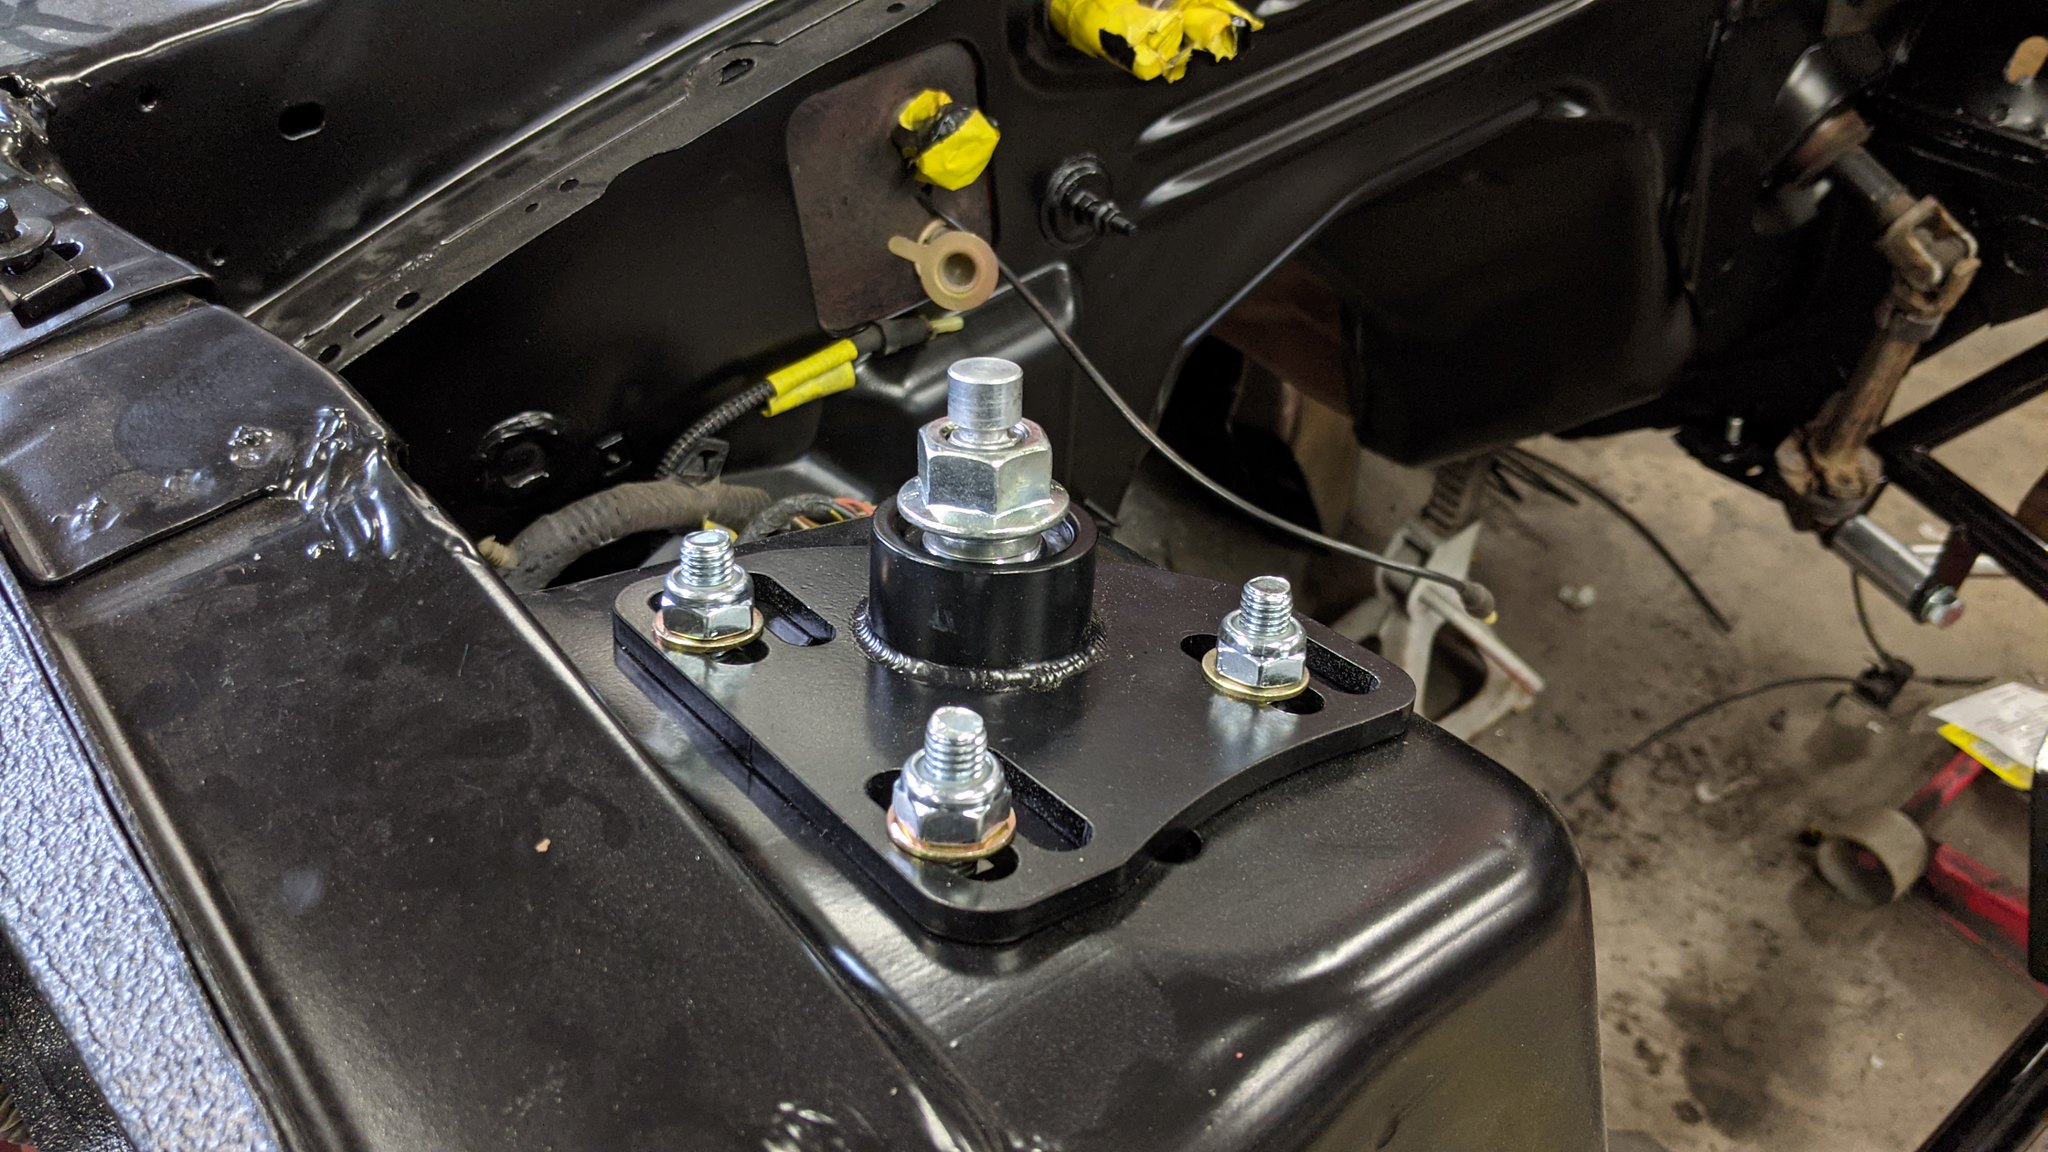
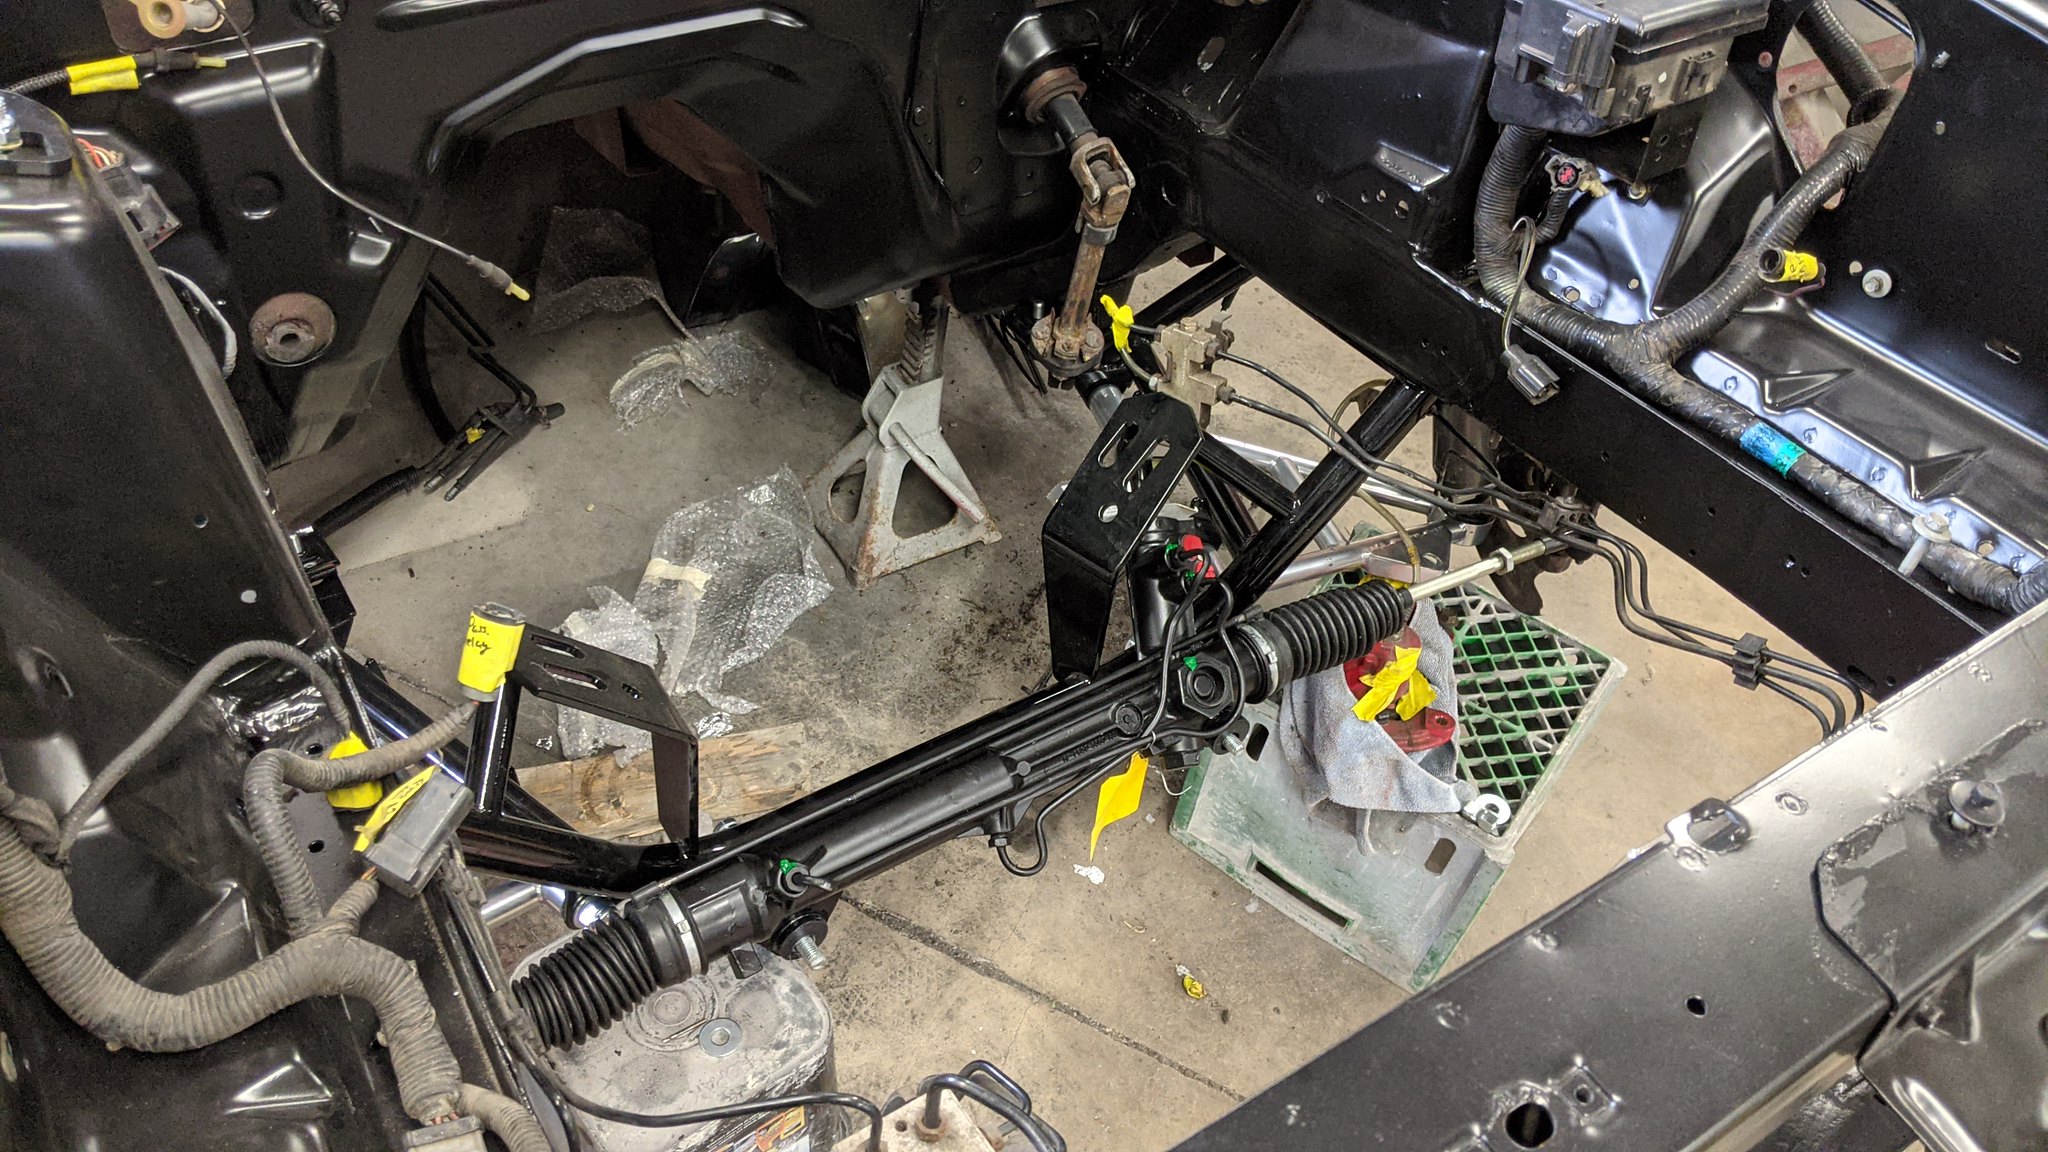
Once the K-member was all set up I started getting as much of the wiring harness set in place as I could. The only harnesses I have left are for the top & Bottom on the engine and the trans harness. Got my offset Power steering rack bushings press in as well. Excited to see if the 03-04 cobra rack upgrade was worth it.

50967907422_14aef5521a_b.jpg


50967800771_e450060d68_b.jpg


50967095383_881f28f1de_b.jpg


50967801056_3447a75d6c_b.jpg


Plan for next weekend is to make up two brake lines that go from the master cylinder to the distribution block and get the front suspension all set up and get the car back on the ground... we'll see how that goes
 
OP
OP
Akurma

Akurma

Active Member
Joined
Apr 22, 2020
Messages
283
Reaction score
353
Location
Pennsylvania
Another weekend, another progress update.

Finished up installing the UPR K-member as well as mocking up the front suspension. It's finally starting to look like a car again!


50990628236_718be7fffe_k.jpg


50989930263_901efd1c34_k.jpg


50990739742_5a631c82bf_k.jpg


Now I do have a question for everyone here. I am using SVE caster/camber plates with my Maximum Motorsports coilover kit and was a little puzzled. in the first picture below you'll see that when the strut is off center(towards the front on the car) inside the CC plate. In the box there were four stepped washers/spacers that could slide into the spherical bearing of the SVE CC plates. These four stepped washers/spacers are not mentioned anywhere in the SVE instructions nor were they listed on the hardware page? I assume that they are to slide onto the shaft of the strut in order to center it inside the spherical bearing of the CC plate? The second picture shows the stepped spacer I am referring to. Last picture is how the strut sits with the spacer in place, forgot to get a top down picture.

Does anyone know if I am correct on where these spacers are suppose to go? I am going to call LMR this week and ask.

50990294233_2efd135010_k.jpg


50991145947_9eac594f62_k.jpg


50990739897_47f103c3f6_k.jpg


Besides that I got the new 03/04 cobra rack in place, and got the front brakes back on as well. I replaced the caliper bolts as well, if it helps anyone else the part # for them is Dorman 13898 and I picked them up at my local parts store.

50990739877_f0a5839309_k.jpg


50990740102_457f9bdbe7_k.jpg


50990740142_a5add6e2f0_k.jpg


50990740017_f0c17e99e1_k.jpg
 
Last edited:

joemomma

Well-Known Member
Joined
Dec 9, 2020
Messages
1,241
Reaction score
752
I had a heck of a time with my SVE CC plates and KYB struts. I could only find videos/pics of installs with stock struts or some other make of plates, none with aftermarket struts and the SVE plates. Best I remember, I used one spacer below the plate and one on the top. I think I took it apart 3 or 4 times before I settled on that configuration. I haven't had any issues with it in that setup.
 
OP
OP
Akurma

Akurma

Active Member
Joined
Apr 22, 2020
Messages
283
Reaction score
353
Location
Pennsylvania
I had a heck of a time with my SVE CC plates and KYB struts. I could only find videos/pics of installs with stock struts or some other make of plates, none with aftermarket struts and the SVE plates. Best I remember, I used one spacer below the plate and one on the top. I think I took it apart 3 or 4 times before I settled on that configuration. I haven't had any issues with it in that setup.


Would you mind posting a picture of how you have yours set up?
 

joemomma

Well-Known Member
Joined
Dec 9, 2020
Messages
1,241
Reaction score
752
Couldn't see anything from underneath, but here are a couple of shots from the top:
vH7lxSL.jpg

nAb8aJj.jpg


Fairly certain I used a similar-sized spacer underneath as well.
 
OP
OP
Akurma

Akurma

Active Member
Joined
Apr 22, 2020
Messages
283
Reaction score
353
Location
Pennsylvania
thank you! Looks similar to how I have mine set up. Although you have a lot more thread on the strut nut than I do, hmmm I wonder if that is because I have the coils adjusted up high
 

lwarrior1016

Mr. Secondary Timing Chain
Staff
Joined
Sep 22, 2014
Messages
8,536
Reaction score
4,335
Location
South Mississippi
The thread amount on top will be different depending on how many spacers you have on the bottom. If you put spacers on the bottom, it decreases strut travel before bottoming out.
 
OP
OP
Akurma

Akurma

Active Member
Joined
Apr 22, 2020
Messages
283
Reaction score
353
Location
Pennsylvania
The thread amount on top will be different depending on how many spacers you have on the bottom. If you put spacers on the bottom, it decreases strut travel before bottoming out.

Well shit, guess I have to take them both out and check to make sure I have the same amount of spacers on each. Thanks for the heads up!
 

Latest posts

Forum statistics

Threads
77,492
Messages
1,503,740
Members
14,965
Latest member
wbarter

Members online

Top