9838stang's Money Pit Pony

OP
OP
9838stang

9838stang

Well-Known Member
Joined
Sep 13, 2010
Messages
2,563
Reaction score
204
Location
Minneapolis,MN
I made more progress on the fog lights.

I received them a couple of days ago and started to modify to cobra brackets.

First off I had to drill out the factory screw hole location on the arms that hold the cobra fog light to be able to hold the Dodge Dakota fog light. I used a 3/8 drill bit. Looking back after I completed to project, wished I used a bit smaller.


Next was to bend the arms to be able to craddle to new fog light. The Dakota fogs were a little narrow compared to stock


Once I got the shape of the arms where I wanted them, I test fitted the fog lights into their new home. Well I say that the arms at end, were digging into the fog lights. So I had to grind the ends down a bunch to be able to get enough movement for the light to go up and down.


Now as you can see here by the picture the adjustment screws aren't anywhere near the stock adjustment tab on the fog light, so a new one had to be created


I didn't get any pictures of the tabs I made I'll have to crawl back under to get them when I pull the lights back off to paint the brackets.


I got a lot of my stuff from this site

https://www.svtperformance.com/forums/threads/how-to-dodge-dakota-fogs-on-a-sn95-cobra.652612/


And I used 00 dodge Dakota fog lights.
 
OP
OP
9838stang

9838stang

Well-Known Member
Joined
Sep 13, 2010
Messages
2,563
Reaction score
204
Location
Minneapolis,MN
I hate the way my aluminum brackets came out. Someone sent my this picture after they did their swap and it made so much more sense.

 
OP
OP
9838stang

9838stang

Well-Known Member
Joined
Sep 13, 2010
Messages
2,563
Reaction score
204
Location
Minneapolis,MN
Well yesterday it was a little warmer outside, but i couldnt drive the mustang, well cant drive it for a while now since we had gotten snow and salt. and looks like freezing rain the other day. So since it is warm out thought i would get the UPR k member swap and header swap started.

I had the sway bar disconnected and bump steer kit disconnected. I tried pounding the ball jpoints out but to no prevail. gunna borrow a ball joint separator from work tomorrow. and pull the a arms off and have new bushing pressed in. Also gunna take the alternator out and get a pair of hardened bolts to let the motor hang from the engine brace.

also found out that i didnt get a pair of bolts and hardware for the k member. So i had to get a pair of them from work.

Hardened 8.8 M12 x1.75 at 130mm length bolt. i would maybe go a bit long bit these will work just find.

IMG_20170314_170000727.jpg IMG_20170314_184542606.jpg IMG_20170314_184602017.jpg
 
Last edited:

lwarrior1016

Mr. Secondary Timing Chain
Staff
Joined
Sep 22, 2014
Messages
8,536
Reaction score
4,334
Location
South Mississippi
You dont need the hardened bolts to hang form, just make sure its tightened all the way down on the chain. I pull my engines and transmissions together with one alternator bolt and one transmission housing bolt. Works just fine.
 
OP
OP
9838stang

9838stang

Well-Known Member
Joined
Sep 13, 2010
Messages
2,563
Reaction score
204
Location
Minneapolis,MN
You dont need the hardened bolts to hang form, just make sure its tightened all the way down on the chain. I pull my engines and transmissions together with one alternator bolt and one transmission housing bolt. Works just fine.

I wasnt sure if it could. But the engine brace I have just had two hooks. I might have to get chain idk. Was gunna tray to get the hooks to hang by both alternator bolts. We will see later tonight
 

lwarrior1016

Mr. Secondary Timing Chain
Staff
Joined
Sep 22, 2014
Messages
8,536
Reaction score
4,334
Location
South Mississippi
I wasnt sure if it could. But the engine brace I have just had two hooks. I might have to get chain idk. Was gunna tray to get the hooks to hang by both alternator bolts. We will see later tonight

You can do that too, just tightn the bolt all the way down on the hook. The less the bolt is sticking out, the stronger it is. Youll be ok to just support it there.
 
OP
OP
9838stang

9838stang

Well-Known Member
Joined
Sep 13, 2010
Messages
2,563
Reaction score
204
Location
Minneapolis,MN
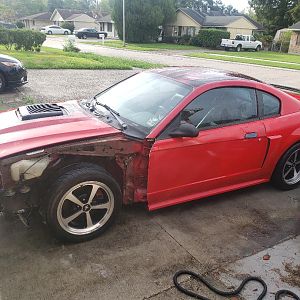
Alright everyone! Time for an update! But first, a tiny bit of carnage lol. I tried smashing the back of the spindles to pop the ball joints out, but they just wouldnt budge. So I bought a "press" to pop the ball joints out.


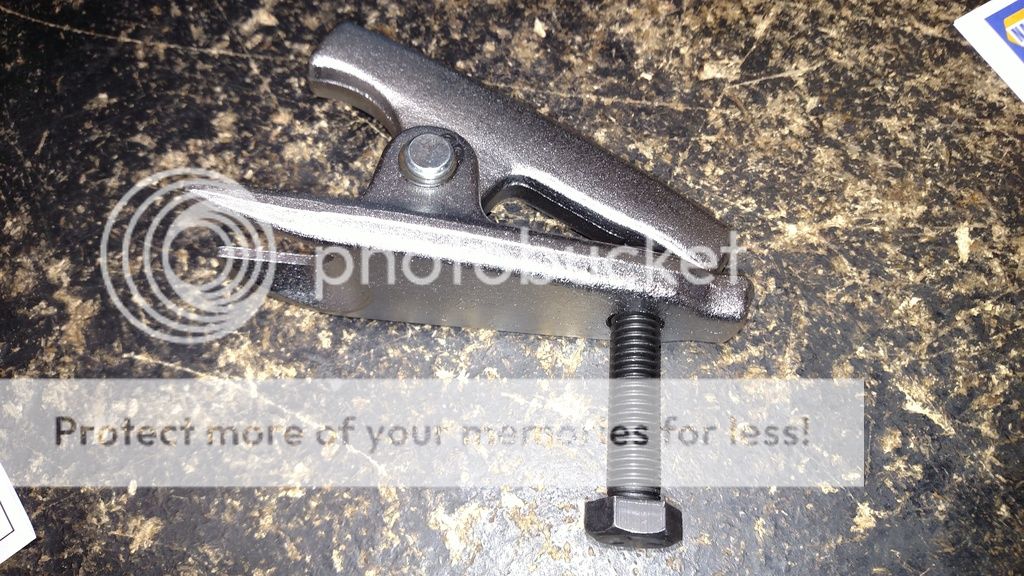
The fork goes under the spindle, around the ball joint and the "hook" or clamp goes on top of the ball joint stud. Well, it wouldnt open far enough so i had to shave the back of the tool to allow it to open more


to much pressure


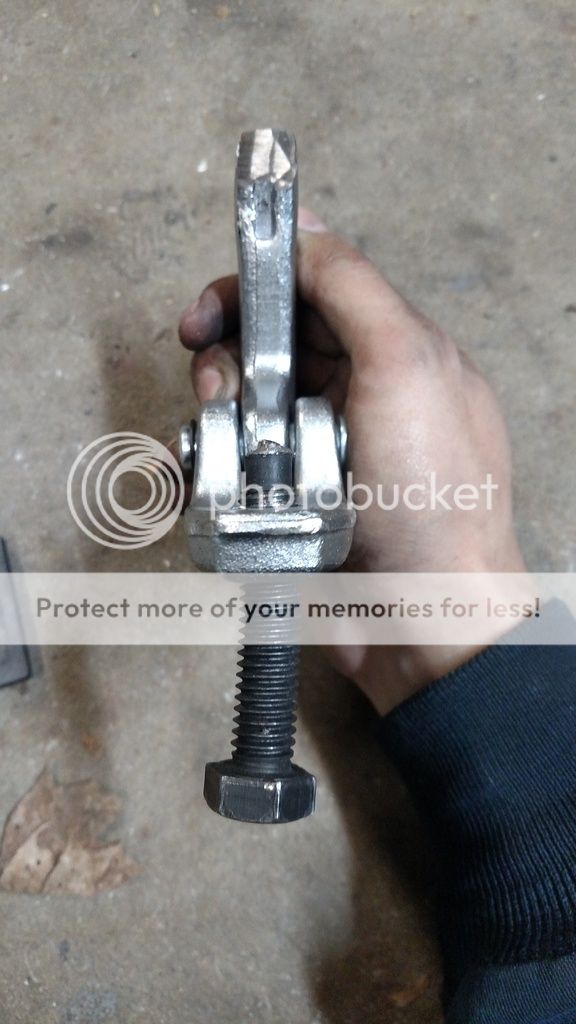
But i went and rented one from autozone and tada!!


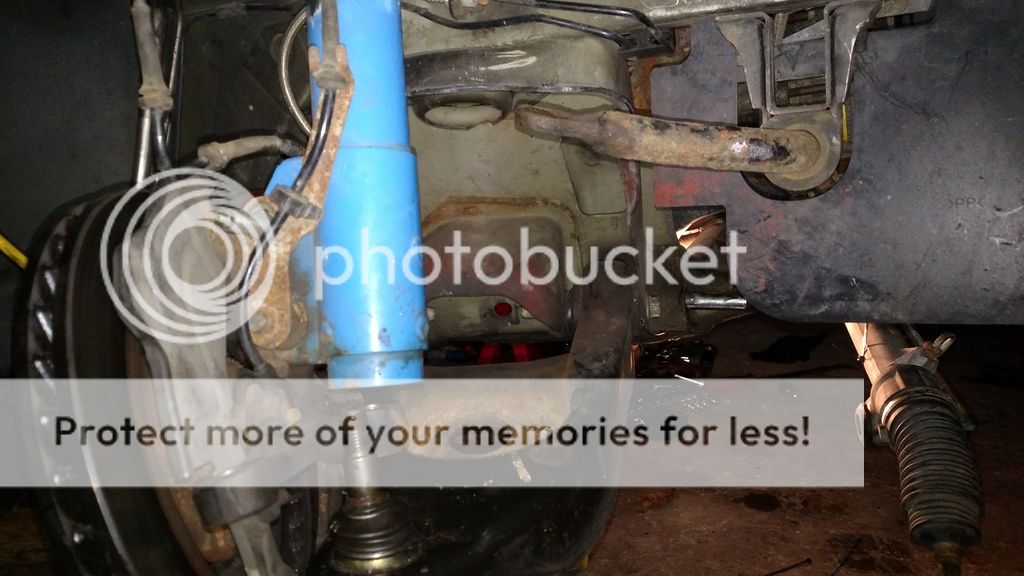
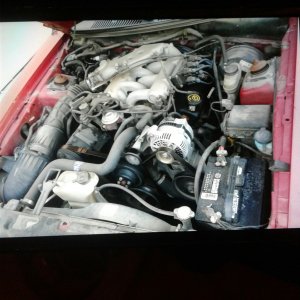
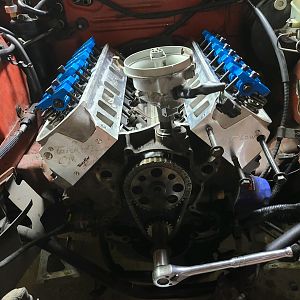
Finally had a friend stop by and lend a hand in ripping the old k member out, and luck for me he brought his electric impact gun. K member came out pretty smoothly.


But this came up short lol. We finally removed the old exhaust out and didnt break any of the bolts which was awesome! But the manifold to midpipe bolts were a pain in the aarse. and the driverside 02 sensors broke so i had to buy two new sensors. We pretty much have the passenger side long tube in the car, but the driver side was proving to be a pain. the oil dipstick wouldnt come out... easy. finally got it out with the motor mount removed. the oil tube came out. and them had to install the exhaust studs.

Well the 3rd cylinder on the driver side.... the pipe for that cylinder i guess is known problem with manifold studs. so i am having my buddy trim the stud a bit and should have it tomorrow.

As you can see on the middle pipe it was digging into the header and prevented the header from sitting flush. Well this haulted the whole day. couldnt install the k member, couldnt install motor mounts and couldnt install the oil dip stick tube.

So tomorrow should have the bolts broken loose from the stock k member, and swap the control arms over, should have the header inplace, and k member installed. then the small tiny stuff after that.
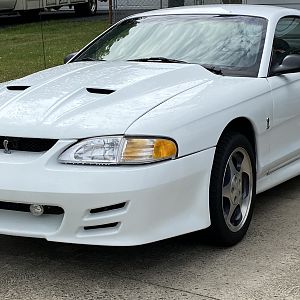
yay mustang stuff
 

DKblue98GT

Well-Known Member
Joined
Dec 19, 2009
Messages
1,406
Reaction score
333
Wow that looks familiar. I just pulled my K out and replaced the oil pan gasket on Sunday. I got it back together the same day. I wish I had a set of headers to install while I had it out but didn't plan that far ahead.

I would recommend using anti seize on the bolts for the next time you have to go in. Looking forward to seeing the finished product.
 
OP
OP
9838stang

9838stang

Well-Known Member
Joined
Sep 13, 2010
Messages
2,563
Reaction score
204
Location
Minneapolis,MN
Yay k member is in!!!

Both headers done too.


All that's left:
O2 extensions, steering rack install, steering shaft, mid pipe, tighten O2 sensors, re route front brake lines on passenger side, install a arms, clutch cable and tension it, ground wire, alignment and then install new tune. And re install cold air intake.
 

lwarrior1016

Mr. Secondary Timing Chain
Staff
Joined
Sep 22, 2014
Messages
8,536
Reaction score
4,334
Location
South Mississippi
You still have the magnaflow catback, and youll have an o/r midpipe right?

Make sure you get an exhaust video after all this is done.
 

RedTwilight

Active Member
Joined
Jun 12, 2011
Messages
635
Reaction score
56
Location
Roxboro, NC
How the heck did you remove the spindle nut without pulling the calipers or struts from the spindle?
I just did the ball joints on my Cobra the other week and I'm going to be swapping the K out in my notch this weekend. In both instances I don't see how I could access to the spindle nut without pulling something off or using an open end wrench.
 

Tally_4.6

Well-Known Member
Joined
Feb 1, 2007
Messages
3,862
Reaction score
75
Location
Orlando, Fl
Some struts run long, some run short. Depending on where the sleeve for the spindle is you might get lucky and not have to loosen the struts to get to the balljoint nut.
 

Dalamar

Post Whore
SN95 Supporter
Joined
Feb 3, 2006
Messages
13,863
Reaction score
124
Location
SLC, UT
Fog lights look great.

uuugh, pully puller pita... feel your pain.
 
OP
OP
9838stang

9838stang

Well-Known Member
Joined
Sep 13, 2010
Messages
2,563
Reaction score
204
Location
Minneapolis,MN
Well, the only thing left, install control arm bushings should be here Tuesday, clutch fork cover, play with brake lines, and install control arms and alignment.


Did come into a small hiccup, O2 extensions and O2 sensors... Hmmm that is how lmr one are, AM, and cj pony... So wtf lol I just shaved the little tabs off and plugged them in


https://youtu.be/Uczhs0b1WWc

https://youtu.be/cEdVY4dRM00
 
OP
OP
9838stang

9838stang

Well-Known Member
Joined
Sep 13, 2010
Messages
2,563
Reaction score
204
Location
Minneapolis,MN
Found out my catted mid pipe was tapping the trans crossember. So I thought I'd massage it a little on the top. Well I took it to far and destroyed the internals. So now I'm running a catless midpipe lol.


https://youtu.be/geRFdlI0b0Q

Well car is buttoned up and back on the ground for now. Have to pull the rear wheels off to get the drag wheels mounted.
 

Latest posts

Forum statistics

Threads
77,492
Messages
1,503,732
Members
14,964
Latest member
bs.austin.tx

Members online

Top