Full link here: https://maddmotorsportsdesign.blog/2017/09/26/making-a-splitterair-dam-for-the-sn95-mustang/
Many people have asked me "where did you get your splitter?" or I see people post on Facebook asking about splitters. Truth is, for a lot of older cars, they are all custom-made and can be pretty expensive. For one of my splitters, you are probably looking at $400-$450 shipped, without any hardware. You have companies like Carter's Customs that can make you one for $400-$500 with a better material. However, if you are feeling adventurous and creative, you can easily tackle it yourself in a weekend.
I've made a total of 4 splitters, and they all failed at some point. Why? Because the streets are not friendly for splitters. You have to be extra careful when driving, and pay extra attention when mounting. For this reason, I DO NOT recommend that you cheap out on materials. I've used ABS and Polycarbonate plastics, and two different thickness, 1/8" and 1/4". Stay away from 1/8", it will flex, it will break.
First thing you need to figure out is what air dam will you be using. You absolutely cannot run a splitter without an air dam of some kind. What happens if you don't? The splitter will flex and become inefficient and will counter everything the splitter is made to do.
Do some research on the air dams, you try to attempt your own:
1994-1998 Cobra Bumper: https://maddmotorsportsdesign.blog/2017/09/26/making-an-air-dam-for-the-sn95-mustangs/
1994-1998 GT Bumper:
[video=youtube;bxw43XKOyeQ]https://www.youtube.com/watch?v=bxw43XKOyeQ&w=560&h=315[/video]
Once you figure out the air dam situation, you can think about a splitter. What material do you want to use, how much do you want to spend, and how do you want to mount it. I've used both 1/8" ABS and Polycarbonate, and I DO NOT recommend that you use that. I recommend that you use 1/4" ABS or Polycarbonate. If you can get your hands on carbon fiber, even better. Or if you can get some 6061 aluminum with 0.125" thickness, you are good. Or, you can go to your local Home Depot and use 15/32" Birch Plywood.
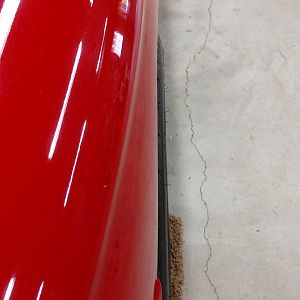
If you are looking for "street use", I recommend that you cut the back side of the splitter like this, so that you can mount the splitter to the radiator support. The reason you want to do this is because if you do not support the rear of the splitter, it will created turbulence and cause some issues and may even rip off. So if you are just using it for looks, cut it like this.

If you intend on using it for racing, make sure to get the splitter to extend to the k-member and support the rear of it there. Or if you want to be creative, start making brackets and braces.
The first splitter, I bolted the air dam to the bumper and the splitter to the air dam using "L" brackets. In the rear, I bolted the splitter directly to the bumper. In the front, I mounted the two support rods directly to the bumper. It was well supported and didn't flex or make any noises, however, I do not recommend that you do this for track.


Final look:


The second splitter, I mounted a similar way, however, I did not cut the rear of the splitter, and used the k-member for some support in the rear. The air dam was bolted directly the bumper, and the splitter to the air dam. Since this splitter was bigger, I needed to add two more support rods, and I bolted those to the outside of the splitter.


Here is why I do not recommend mounting a splitter to a bumper. Yes, it broke my bumper too.

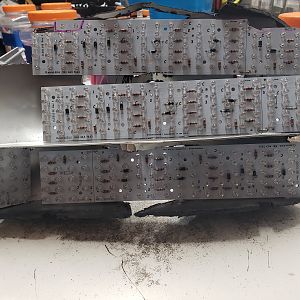
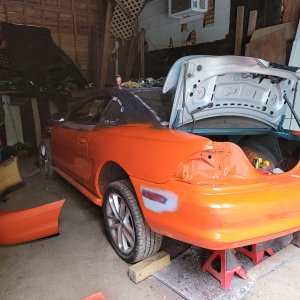
For my third splitter, I decided to mount it a different way, directly to the frame and not to the bumper. And i used four splitter rods, all bolted to the bracing I made.


Final look:


Once you have the mounting done, it is time to design a splitter. When designing the splitter, I wanted the shape of the bumper, but had no idea how to get it. I had just purchased a tubular bash bar, and decided to use that for the shape. It was the easiest thing to do at the moment.


If you do not have a bash bar handy like I did, you can still get the shape by thinking outside of the box. You need to create a tracing device in the shape of an "L". You will need to figure out how far you want the splitter to stick out, that will be the shorter length of the "L". The longer length from will be from the bash bar to the splitter. You will use this section of the bumper to create your design:

Attach a pencil to the longer length of the "L" and just trace on to the sheet that is mounted. Once you get the shape, you can just a jig saw to cut the material. Because you already mounted it behind the bumper, you will need to support it outside of the bumper. If you can use OEM bash bar, that will be a great point, other than that you will need to fabricate your mounting point.
Disclaimer: Madd Motorsports is not responsible for any injuries, any damage whatsoever, or for incorrect installation. This is a guide meant to help, it is in no way guaranteed.
Many people have asked me "where did you get your splitter?" or I see people post on Facebook asking about splitters. Truth is, for a lot of older cars, they are all custom-made and can be pretty expensive. For one of my splitters, you are probably looking at $400-$450 shipped, without any hardware. You have companies like Carter's Customs that can make you one for $400-$500 with a better material. However, if you are feeling adventurous and creative, you can easily tackle it yourself in a weekend.
I've made a total of 4 splitters, and they all failed at some point. Why? Because the streets are not friendly for splitters. You have to be extra careful when driving, and pay extra attention when mounting. For this reason, I DO NOT recommend that you cheap out on materials. I've used ABS and Polycarbonate plastics, and two different thickness, 1/8" and 1/4". Stay away from 1/8", it will flex, it will break.
First thing you need to figure out is what air dam will you be using. You absolutely cannot run a splitter without an air dam of some kind. What happens if you don't? The splitter will flex and become inefficient and will counter everything the splitter is made to do.
Do some research on the air dams, you try to attempt your own:
1994-1998 Cobra Bumper: https://maddmotorsportsdesign.blog/2017/09/26/making-an-air-dam-for-the-sn95-mustangs/
1994-1998 GT Bumper:
[video=youtube;bxw43XKOyeQ]https://www.youtube.com/watch?v=bxw43XKOyeQ&w=560&h=315[/video]
Once you figure out the air dam situation, you can think about a splitter. What material do you want to use, how much do you want to spend, and how do you want to mount it. I've used both 1/8" ABS and Polycarbonate, and I DO NOT recommend that you use that. I recommend that you use 1/4" ABS or Polycarbonate. If you can get your hands on carbon fiber, even better. Or if you can get some 6061 aluminum with 0.125" thickness, you are good. Or, you can go to your local Home Depot and use 15/32" Birch Plywood.
If you are looking for "street use", I recommend that you cut the back side of the splitter like this, so that you can mount the splitter to the radiator support. The reason you want to do this is because if you do not support the rear of the splitter, it will created turbulence and cause some issues and may even rip off. So if you are just using it for looks, cut it like this.
If you intend on using it for racing, make sure to get the splitter to extend to the k-member and support the rear of it there. Or if you want to be creative, start making brackets and braces.
The first splitter, I bolted the air dam to the bumper and the splitter to the air dam using "L" brackets. In the rear, I bolted the splitter directly to the bumper. In the front, I mounted the two support rods directly to the bumper. It was well supported and didn't flex or make any noises, however, I do not recommend that you do this for track.
Final look:
The second splitter, I mounted a similar way, however, I did not cut the rear of the splitter, and used the k-member for some support in the rear. The air dam was bolted directly the bumper, and the splitter to the air dam. Since this splitter was bigger, I needed to add two more support rods, and I bolted those to the outside of the splitter.
Here is why I do not recommend mounting a splitter to a bumper. Yes, it broke my bumper too.
For my third splitter, I decided to mount it a different way, directly to the frame and not to the bumper. And i used four splitter rods, all bolted to the bracing I made.
Final look:
Once you have the mounting done, it is time to design a splitter. When designing the splitter, I wanted the shape of the bumper, but had no idea how to get it. I had just purchased a tubular bash bar, and decided to use that for the shape. It was the easiest thing to do at the moment.
If you do not have a bash bar handy like I did, you can still get the shape by thinking outside of the box. You need to create a tracing device in the shape of an "L". You will need to figure out how far you want the splitter to stick out, that will be the shorter length of the "L". The longer length from will be from the bash bar to the splitter. You will use this section of the bumper to create your design:
Attach a pencil to the longer length of the "L" and just trace on to the sheet that is mounted. Once you get the shape, you can just a jig saw to cut the material. Because you already mounted it behind the bumper, you will need to support it outside of the bumper. If you can use OEM bash bar, that will be a great point, other than that you will need to fabricate your mounting point.
Disclaimer: Madd Motorsports is not responsible for any injuries, any damage whatsoever, or for incorrect installation. This is a guide meant to help, it is in no way guaranteed.