VooDoo95Cobra
Active Member
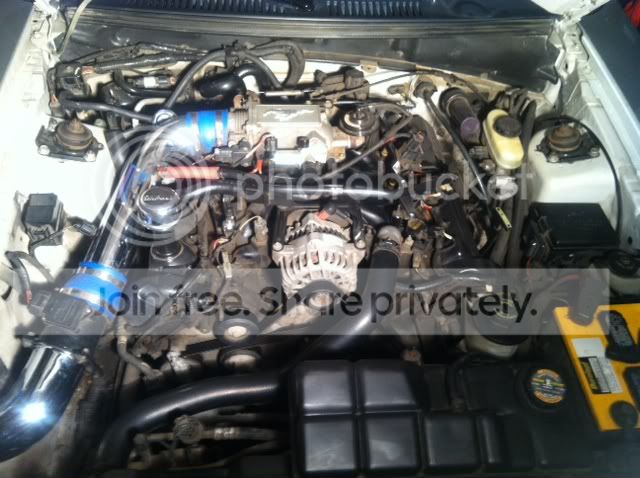
I have long looked for a simple way to get an engine bay spotless without braking my back in the process to no avail. Earlier this week I was reading up on engine bay detailing and I ran across a very good write up on a WRX forum on engine bay cleaning. I figured I would give it a go and it worked out pretty awesome so I figured I would do it again and take some pics to share the wealth. I must apologize as I dont have a very good before picture because I did this two days ago so it was already clean. I can say though that it was pretty bad before. Grease stains and hand prints all over from all of the work that has been done recently as well as lots of dust and dirt.
A few tips before we get started.
1. Do this on a cold motor. A hot motor will cause the water and cleaner to evaporate too quickly and it will not be as effective
2. Do this with the motor OFF. With the motor running electricity is running all over the place and the motor is also heating up,
Im not sure who came up with the idea that you need to clean your engine bay with the motor running but they were wrong. Thats a quick
way to screw some stuff up. There is no need to disconnect the battery or anything, just use common sense. If you have a
open air filter cover it up with a plastic bag, Dont go spraying high pressure water into your fuse box. Engine bays were designed to get wet,
your not going to hurt it as long as your smart about it.
3. Take the hood liner out. This thing is a dirt trap and aids in engine heat soak. If you dont need it, remove it. This part is optional but as you will see in the photos I took mine off. the guy that did the original write up has been doing this for years and has never had a problem with engine heat affecting the paint on the hood.
First we will start with what you need to get the job done.
A simple multi-head spray nozzle, you can pick one up for pretty cheap if you dont already have one.

A small scrub brush and a soft bristled tooth brush comes in handy if you really want to get in there like I did.
A bottle of Simple Green. You can get it at Wal-Mart and most parts stores. You can find the gallon jug concentrate in the hardware section of wal-mart.
I mixed mine at about a 1:1 ratio simple green to water. you can adjust the ratio anyway you want all the way up to full strength depending on how much grease cutting you will have to do.


Start by taking off the hood liner. This can be done with a long flat head screwdriver. Slide it under the hood retainers as close to the center as you can get it and twist the screw driver. They should pop out pretty easily. On the passenger clip closest to the hood hinge might be a ground strap you need to disconnect depending on the model your working with.

Hose down the engine bay until everything is pretty wet and then apply generous amounts of Simple Green covering the entire engine bay.
This is where you can go in one of two directions depending on how dirty your car is or how much effort you want to put into this project. The original write up didn't include anything about scrubbing but I found you get better results with a light scrub. It didn't take much as the simple green does a great job. If no scrubbing is necessary then let the simple green soak for 5 minutes and wash it all off. Its that easy.
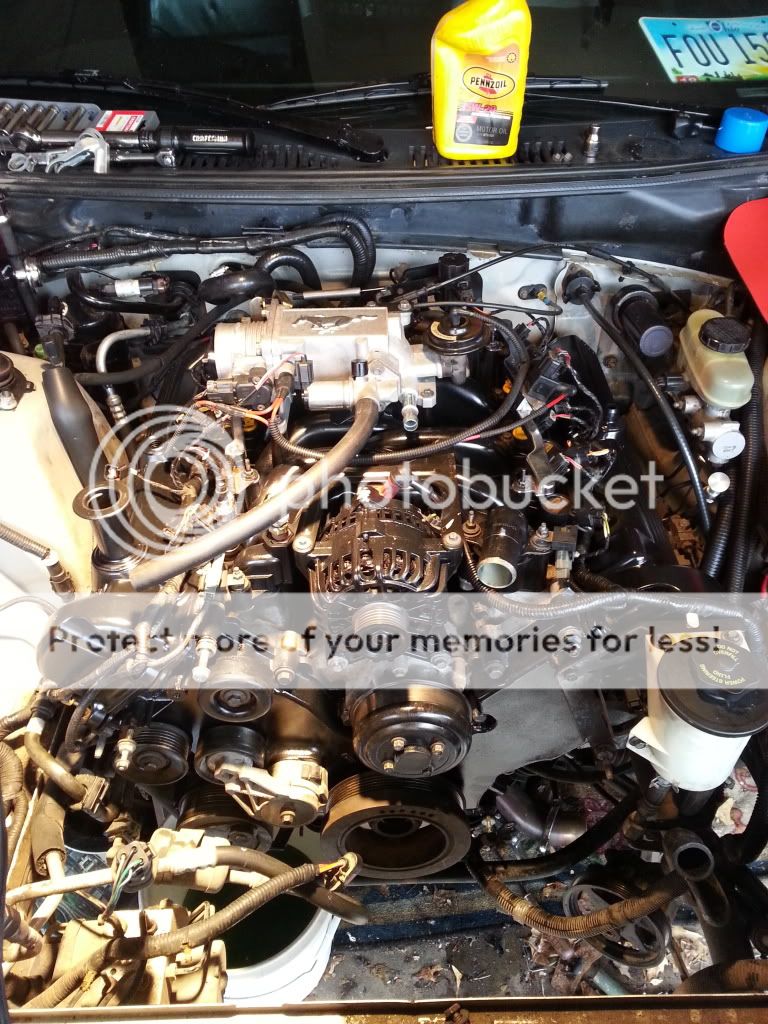
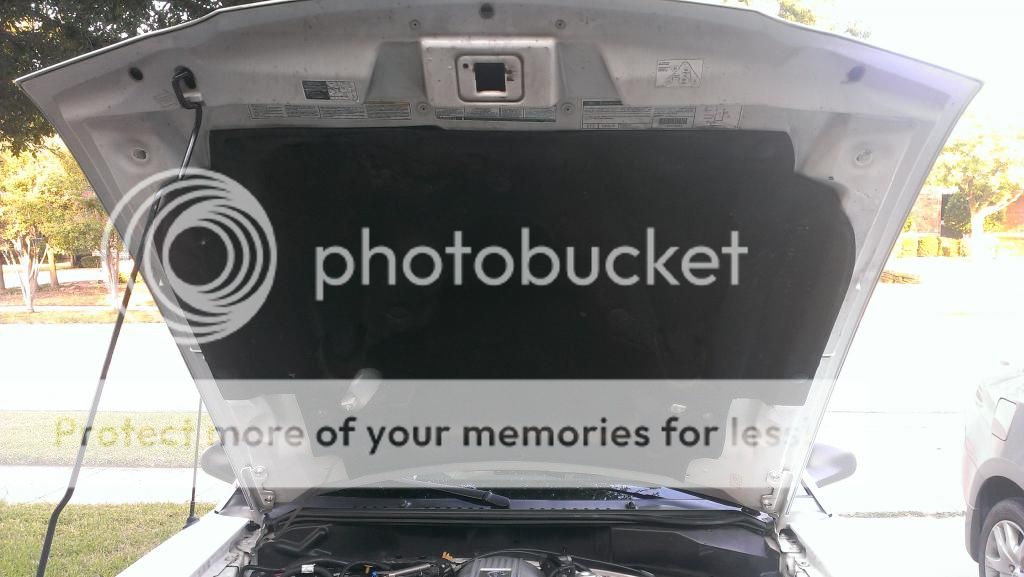
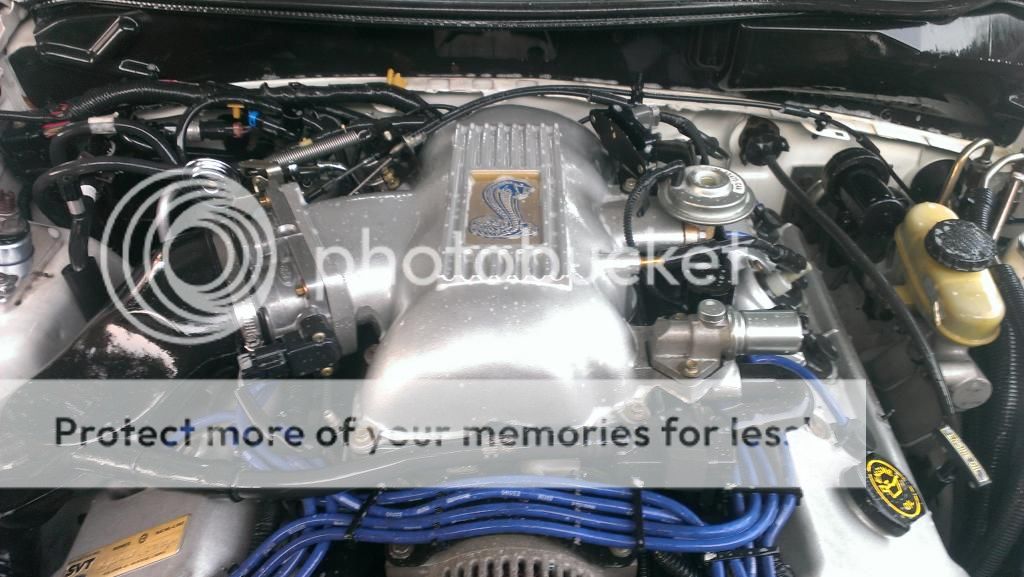
Here is the under hood after a light scrub. I had to reapply some of the cleaner from time to time.

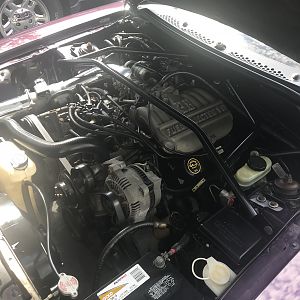
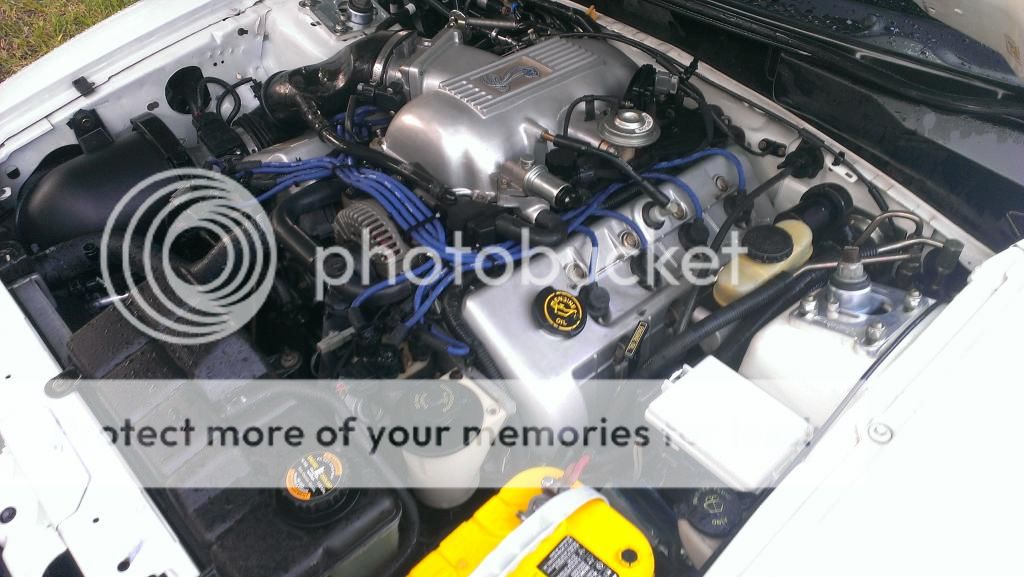
When your all finished I would advise going for a little drive to evaporate all of the water from the engine bay. I haven't done it yet but I plan on getting some moters plastix and going over all the black pieces in the engine bay. It was 105* Outside today and I barley broke a sweat. The results speak for themselves. Don't be shy about popping that hood again. The guy from the original write up suggests doing this once every 2-3 months to keep it looking it top shape.

Enjoy!
A few tips before we get started.
1. Do this on a cold motor. A hot motor will cause the water and cleaner to evaporate too quickly and it will not be as effective
2. Do this with the motor OFF. With the motor running electricity is running all over the place and the motor is also heating up,
Im not sure who came up with the idea that you need to clean your engine bay with the motor running but they were wrong. Thats a quick
way to screw some stuff up. There is no need to disconnect the battery or anything, just use common sense. If you have a
open air filter cover it up with a plastic bag, Dont go spraying high pressure water into your fuse box. Engine bays were designed to get wet,
your not going to hurt it as long as your smart about it.
3. Take the hood liner out. This thing is a dirt trap and aids in engine heat soak. If you dont need it, remove it. This part is optional but as you will see in the photos I took mine off. the guy that did the original write up has been doing this for years and has never had a problem with engine heat affecting the paint on the hood.
First we will start with what you need to get the job done.
A simple multi-head spray nozzle, you can pick one up for pretty cheap if you dont already have one.

A small scrub brush and a soft bristled tooth brush comes in handy if you really want to get in there like I did.
A bottle of Simple Green. You can get it at Wal-Mart and most parts stores. You can find the gallon jug concentrate in the hardware section of wal-mart.
I mixed mine at about a 1:1 ratio simple green to water. you can adjust the ratio anyway you want all the way up to full strength depending on how much grease cutting you will have to do.


Start by taking off the hood liner. This can be done with a long flat head screwdriver. Slide it under the hood retainers as close to the center as you can get it and twist the screw driver. They should pop out pretty easily. On the passenger clip closest to the hood hinge might be a ground strap you need to disconnect depending on the model your working with.


Hose down the engine bay until everything is pretty wet and then apply generous amounts of Simple Green covering the entire engine bay.

This is where you can go in one of two directions depending on how dirty your car is or how much effort you want to put into this project. The original write up didn't include anything about scrubbing but I found you get better results with a light scrub. It didn't take much as the simple green does a great job. If no scrubbing is necessary then let the simple green soak for 5 minutes and wash it all off. Its that easy.
Here is the under hood after a light scrub. I had to reapply some of the cleaner from time to time.

When your all finished I would advise going for a little drive to evaporate all of the water from the engine bay. I haven't done it yet but I plan on getting some moters plastix and going over all the black pieces in the engine bay. It was 105* Outside today and I barley broke a sweat. The results speak for themselves. Don't be shy about popping that hood again. The guy from the original write up suggests doing this once every 2-3 months to keep it looking it top shape.


Enjoy!