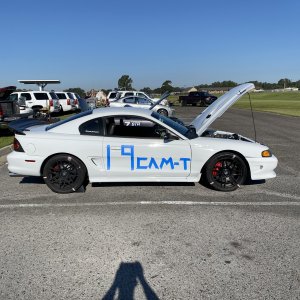
Disclaimer: Please don't read this, go outside, and decide you're sick of you're color and going to do a color change or something. There's some serious hours that need to be taken under your belt to do anything serious. Things such as spraying a body panel should not be attempted until you've done at least some practicing on other things. Going out and buying a piece of sheet metal roughly the size of a hood is something I strongly recommend so you can not only get practice, but when spraying something of that area, it will let you be able to see if you have a streaking issue that needs attention.
Disclaimer 2: One of the things about anything in the auto body field is many people have different ways of doing things, I'm simply making this write up to help out anyone I can by teaching my ways.
So as chris91 suggested - here's your painting go-to thread. If i leave anything out, or if anyone has any questions regarding a specifc issue, please feel free to either post it here or pm me. I'm always happy to help and would rahter have someone ask then see someone ruin a part and have to do twice as much work to fix it. I'll try and keep this somewhat categorized so its easy for someone to find what theyre looking for.
PAINT GUN -
There's exceptions of course, but you get what you pay for with guns. This depends on what kind of finish you're wanting in the end, how experienced you are, and what kind of usage you'll get out of it. Most people would do just fine with a $100 gun, hell I use my Sharpe all the time but that's the minimum price tag I would suggest when looking for a gun. Funny thing is that my $120 gun sprays metallic better than the $500 gun because the Sharpe guns spray at higher psi than Iwata or Sata guns do, so that's something to keep in mind for anyone thinking of getting serious with spraying. I wouldn't go lower than $100 with a gun simply because below that price tag they are all garbage. I don't care what someone says about the "showcar paint job" they did with a $45 gun, anyone that says that simply doesn't know what they're doing. A nice gun doesn't just spray itself tho, put Martin Van Buren in front of a computer for as long as you want; he still ain't doin' shit.
There are different air caps and needle sizes, the air cap is something that there isn't really a need to worry about but the needle size is very important. Make sure you look into what the tip size is before you buy a gun. The general rule of thumb is: 1.3mm-1.4mm for bascoat/clearcoat and 1.6mm-1.8mm for primer. There is a huge difference between these, please don't think "oh it's only .1mm bigger, it shouldn't be a big difference." Trust me, I have a 1.8 I use for primer and I'm almost surprised I can't see the funnel effect in the cup like when you flush a toilet. My personal preference is 1.3 for bc/cc and 1.7 for primer if someone is looking for a starting point to go off of.
You'll also need an air regulator. There is an air control on spray guns but most people just open it all the way and adjust pressure with the regulator. If your gun didn't come with a small manual (usually a folded up piece of paper) then it will say the recommended air pressure on the gun itself. No manual and no etching on the gun? Simply refer to the last sentence in the "technique" section below. After you spray enough, you'll start to get a feel for what kind of pressure you like spraying at and it'll just become natural to adjust it by sound. No one in a shop pays attention to what their regulator reads and half the time sight lens is broken and you can't read it.
Anywho/anyhow/anyways, next is GUN CLEANING - This is utterly important on any gun that you plan on keeping. Lacquer thinner is the way to go with this. Why? Because there is nothing out there (including paint stripper (wtf you'd be doing with paint stripper in your gun i have no clue)) that lacquer thinner won't break down. I'd say grab a gallon of it. Since it doesn't really go bad, you can always use it on other things around the house down the road. Do a simple cleaning break down of the gun after spraying (air cap and cup off) and rinse it out extremely thoroughly with thinner. If the gun is going to be sitting for a while then I suggest breaking it down completely and cleaning it. I won't go into detail on that but I'm sure a quick google search could come up with something (HVLP gun cleaning). There is no such thing as "too clean" with a gun, if you think you missed something, clean it again. Pipe cleaners of various sizes work really well when you pull the needle for cleaning, I also suggest a small paint brush that can be dedicated to cleaning the gun. Using a red scuff pad with some thinner works really well for cleaning the needle.
TECHNIQUE -
When spraying, shoot the back of the panel first (if needed, like the bottom of a hood or bottom side of a spoiler), then spray edges, then the front of the panel. This order is best because, when spraying from the back and sides, there is paint overspraying onto the front of the panel. If you did the edges last then you would have overspray dried onto the front and drying on top of what is typically what you want to look best. So to avoid this, you spray the front last which allows the material you're spraying to soak and blend with the overspray from the edges. With something like a bumper cover, typically you would shoot all the hard-to-get areas first, areas such as fog holes and air dams; Then you would come across the front with a nice coat to blend it all together. A good rule of thumb to go by with overlap is 50%. This means that with each pass across a panel, you're going to try and overlap your previous pass by 50%. Remember to start with 50% of your fan off of the panel to ensure even lay. 50% is your typical overlap because this allows good blending and reduces dry spots with most materials. There's clear out there that calls for 75%, 80%, etc but chances are most of you won't be in that part of the painting world for a while. I suggest practicing on a decent sized piece of sheet metal to simulate a hood because this would show if you have a steaking problem very easily. Streaking can be caused by a few things; 1. A piece of something (usually metallic when spraying basecoat) can be lodged in the air cap. 2. You may have your air pressure too high or too low. 3. You're not overlapping enough. 4. Not keeping even passes. 5. All of the above. If you're getting streaks and you stop and look at this thread and choose option 5, simply throw the paint gun in the air and proceed to shoot it with a 30.06 and go back to the rattle can.
PREP -
Primed Plastics (such as bumper covers) - Take a red scuff pad and scuff the entire area until it's dull. Be sure to get everything scuffed, don't leave anything shiny even if it's a btich to get at. Any area not scuffed will flake off. If a scuff pad is wore out, get rid of it; There's no need to beat yourself up just to save $1.00.
Bare Plastics (such as unprimed bumper covers) - Scuff with grey scuff pad. Otherwise it's the same process as primed plastics.
Painted Plastics - 600 grit on a softpad DA on all the larger areas you can get at. Any area you can't get at with a DA, scuff with a red scuff pad. Be careful not to go through the clear coat.
Primed Metal - 220 grit on a regular DA (not a softpad). Don't worry about going though the primer since you'll be priming it anyways. Always go over it again with a red scuff pad quickly just to ensure everything is sanded. No need to get crazy with this, just give it a good once-over. Once you have everything sanded down, hit the edges with either a piece of 220 or a red scuff pad and get the edges down to bare metal along with roughly 1/4" inwards. Is this necessary? No, but it's an easy way to know you're sanded on your edges, it takes the guess-work out of it.
Painted Metal - Same as painted plastics. Remember to be careful not to go thru the clearcoat.
Painted Fiberglass - Same as painted plastics and painted metal.
Head/Tail Light Lenses (typically for tint but is obviously the same for clearing lenses (like i do with my lenses that aren't tinted)) - Scuff with grey scuff pad until the entire lens is scuffed and not shiny.
Post-Prep/Pre-Spray -
Clean, clean, clean, clean. There's no such thing as too clean when it comes to cleaning parts you've just prepped out. If there's streaks then clean it again. I suggest using a decently soaked rag for the initial cleaning and then a damp one to go over again. Cleaning chemicals are pretty typical - You've got alcohol (PPG DX103), wax/grease remover (PPG DX440), and a final prep wax/grease remover (PPG DX330). DX103 is basically rubbing alcohol and used on plastic parts, it's used on plastics because some wax/grease removers can "melt" plastics. DX440 and 330 is used on metal parts. If you don't feel like flipping out a decent chunk of change for actual 440 or 330 you can talk to a paint shop rep about different general prep-sols they have. Nobody spraying at home (including me) uses PPG brand prep-sols, there's no need to spend the money when general prep-sol does just fine.
EDIT: i'll just keep this updated instead of keeping a Word doc and copy/pasting it here

