Are 315/35s not doing it for you? Or do you have a drag tire that scraps a little too much on those hard launches? Well I have the how to for you!
Background: Yes I know the majority of us will not ever do this, but I ran into a rare situation with my Dad's 89 GT with his 15x8 Drag star with a 275/60R15 was way to much tire for his stock springs to handle. It was scrapping the upper side wheel up so we got the fenders rolled, still scraps. After buying some drag springs for it for the added stiffness and weight rating, it still scrapped and was causing pieces of the side wall to go missing. I bought him isolators for his birthday, and we found that it probably wouldn't be enough. I went with a trial and error way of heater hosing the springs.
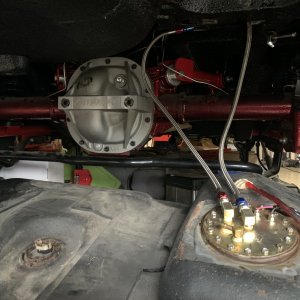
Things done prior to the car in question....
Rear Drag springs
Fender's rolled!
Now a few things I need to point out...
This was NOT done with stock springs, but the added insulation would have a similar effect.
I do NOT find this as a one time fix as the rubber will wear out over time.
Things you need...
Jacks, I used 3 but it could probably be done with 1 or 2.
Jack stands -2
Spring Compressor- Rent it from AutoZone DO NOT get the one that goes in the middle, but the ones that go on the outside!
Rear isolators - 2 top, 2 bottom
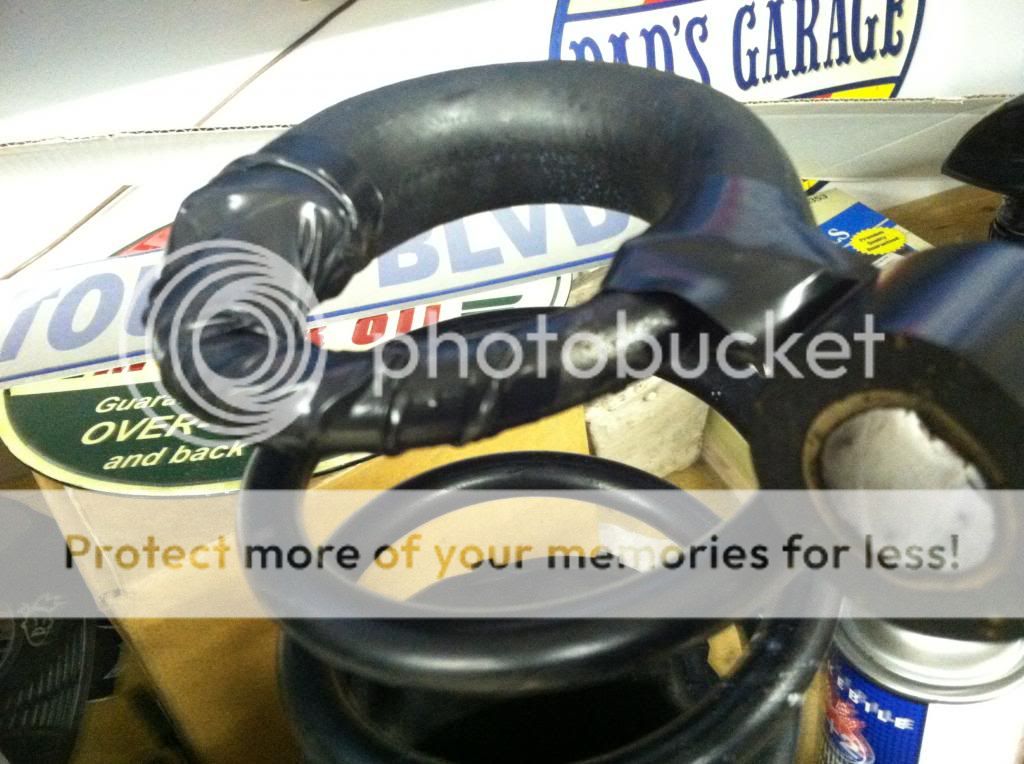
3/4in Heater Hose - I used about 4ft.
Electrical Tape
Assortment of sockets and socket wrenches (15mm, 18mm, 3/4, and any other sizes)
Wrenches for tight fits
I didn't decide to start doing this as a how too until a few steps in but I'll give some Hayne's manual directions!
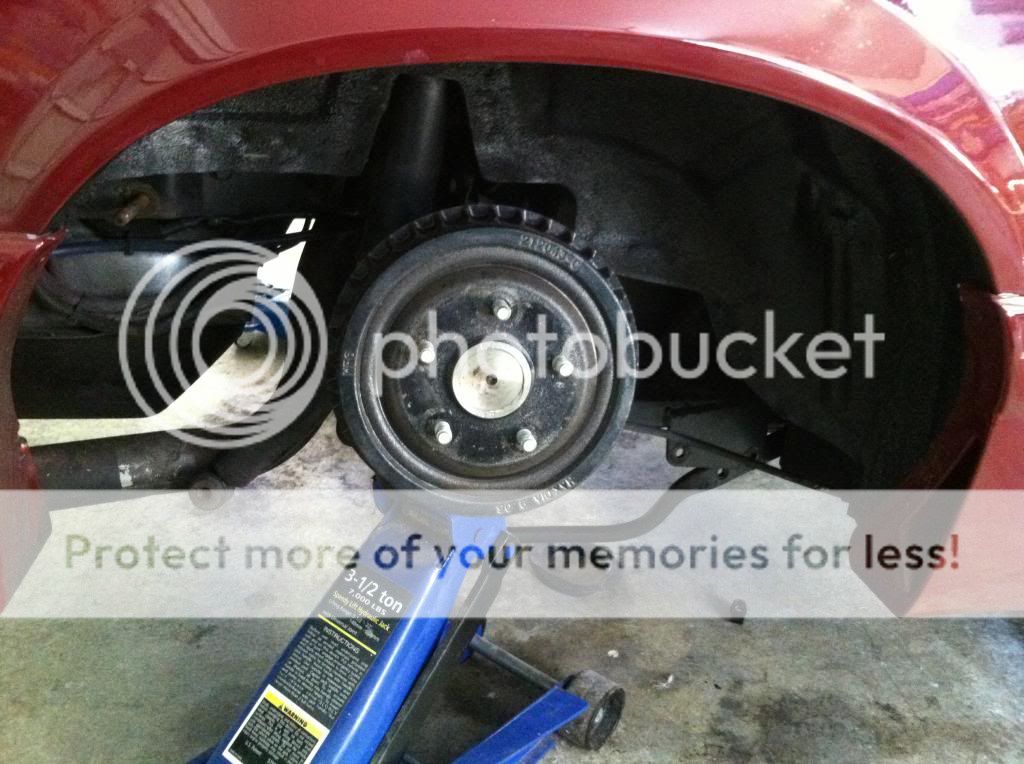
1. Loosen both of the rear wheels lug nuts, raise the rear of the vehicle and support it securely on jackstands placed under the frame. Remove both wheels and block the front tires. E-brake is engaged.
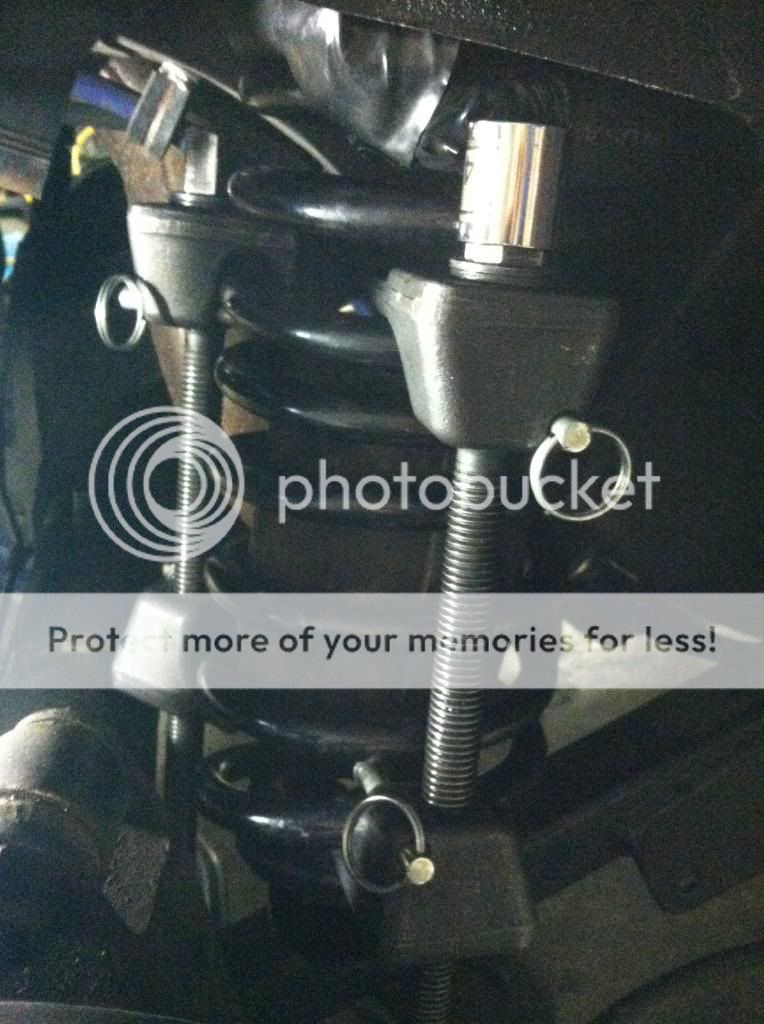
2. Remove the rear sway bar! I believe I used a 15mm, this must be done! it is only 2 bolts on each side.
3. Support the rear axle with a jack placed under the axle housing. Lift it slightly as it will help you with the next step.
4. You will now remove the lowering retaining nut and bolt and disengaged the shock absorber form the axle bracket. It was easier for me to remove the nut from the bolt than the other way around, simply have an adjustable wrench holding the bolt while you remove the nut. This step will be done on both sides!
5. If you still have quad shocks, you will us an 18mm on the nut that connects it to the frame! I found it to be a lot easier to access then removing it from the axle. This step will also be done on both sides!
At this point you should have the sway bar, shocks, quad shocks disconnected from the rear axle.
6. I then removed the jack that was support the axle housing to allow the axle to drop down as low as possible; the drag springs had already been installed and are much taller than stock springs; hopefully they won't come shooting out!
7. Now to move the spring from the car you will proceed to place a jack under the opposite sides axle portion where the lower control arm connects, it is the flat edged metal that is below where you removed your shock from.
8. Jack up the axle as high as it can go without lifting the car up from the jack stands it is supported on. Remove the spring, then repeat on the opposite side to get both springs out. Release the jack, your axle isn't going anywhere from the upper and lower control arms still being attached to it.
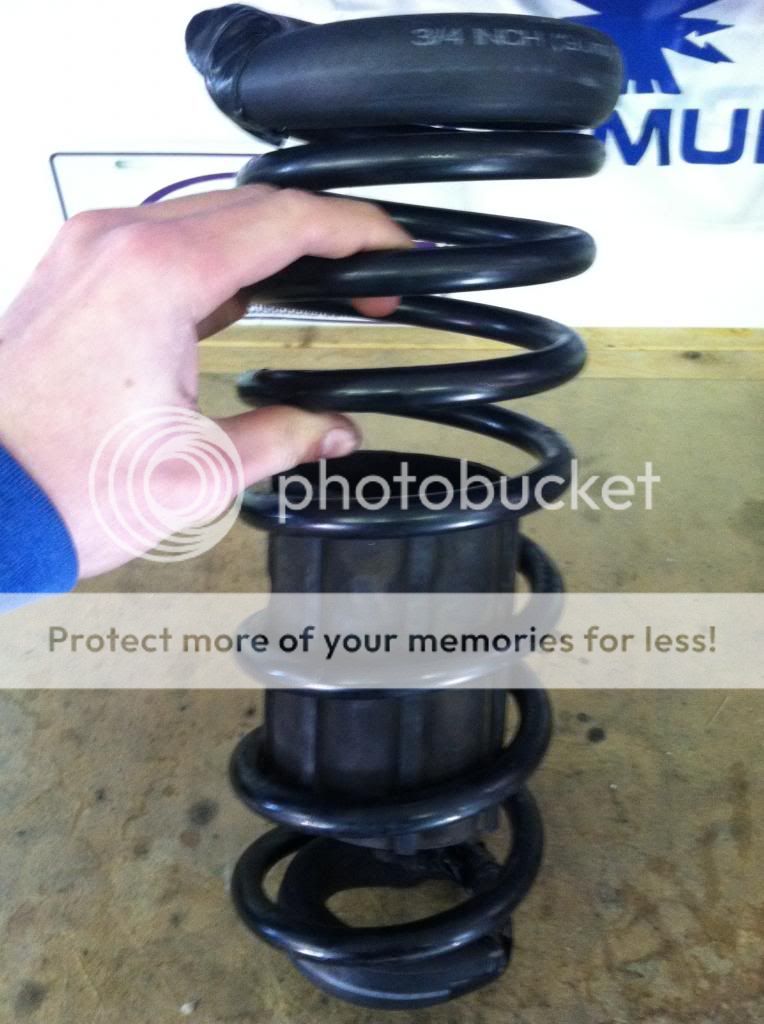
9. One you have both springs removed you will take them to your work bench and now placed the 3/4 heater hose around the springs that will cover where the spring contacts the isolators (or frame/ lower control arm). This sounds like the easy part but its not by any means, the hose is a tight fit and you need to work it with the bend of the springs, I suggest using any product you find most useful when getting something large to fit into a tiny hole.
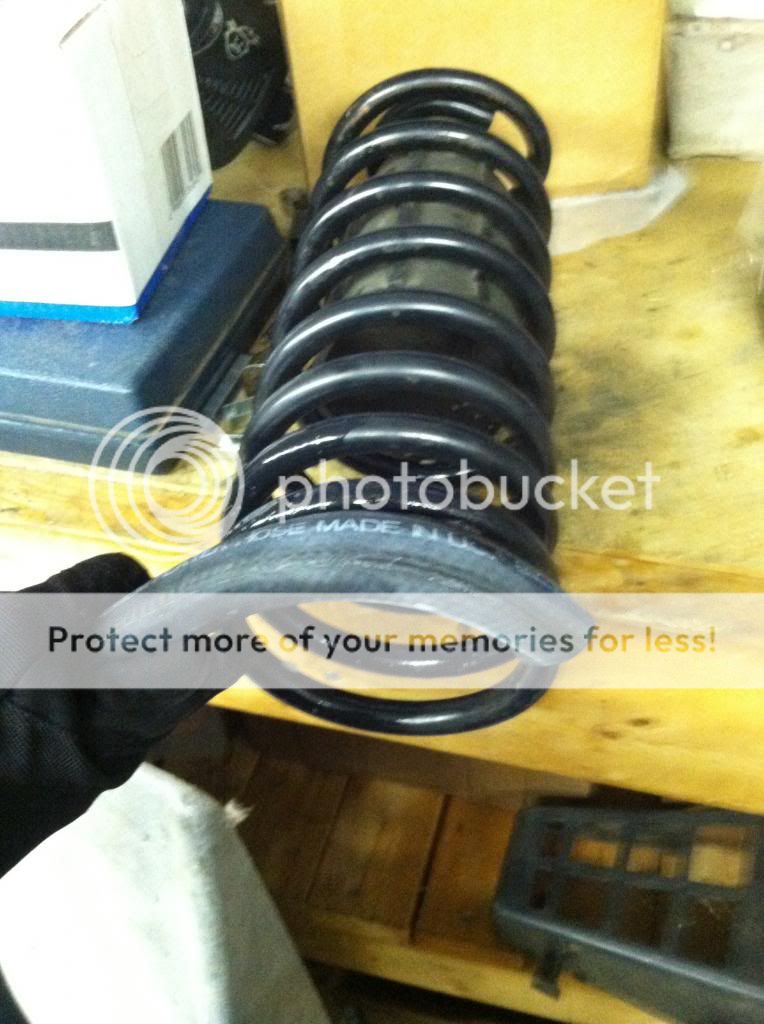
10. Once you have finished the top hose trim it at the end and electrical tape the two open ends shut, not only is it added insulation it will help keep things out from inside the hose.
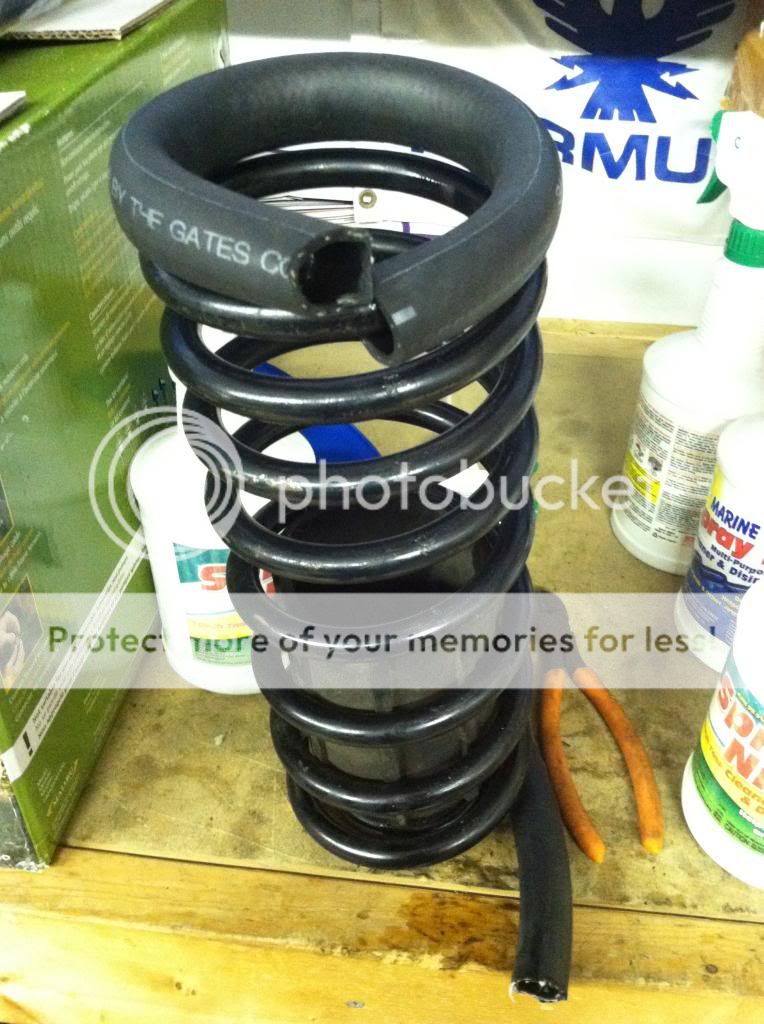
Top finished!
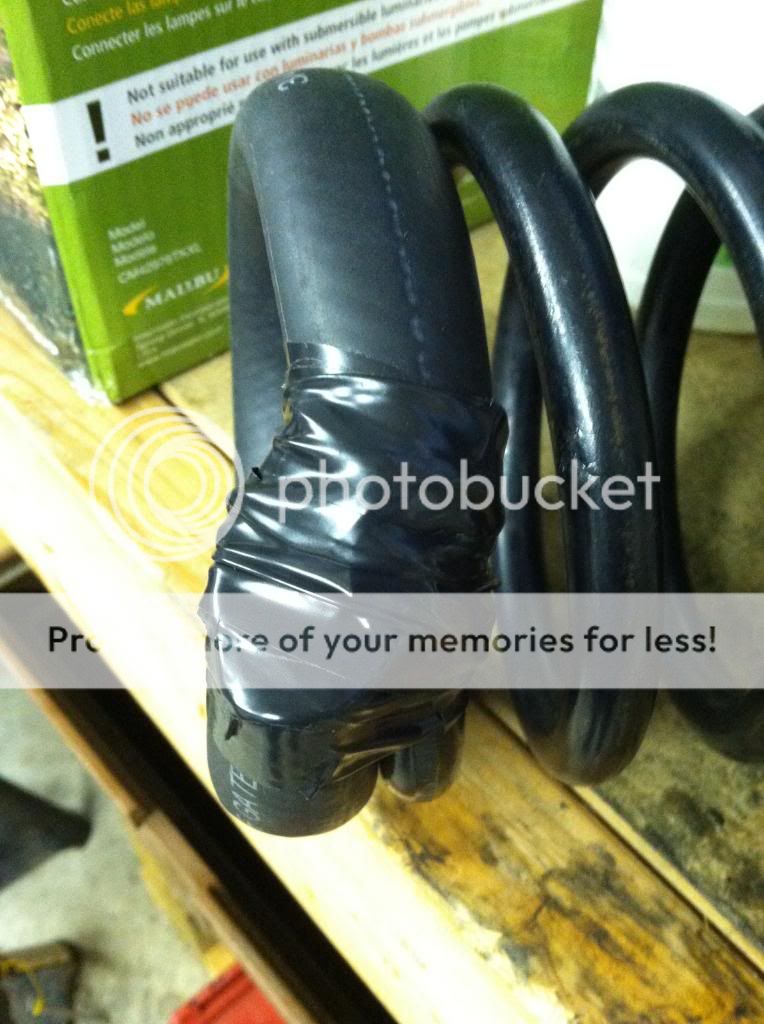
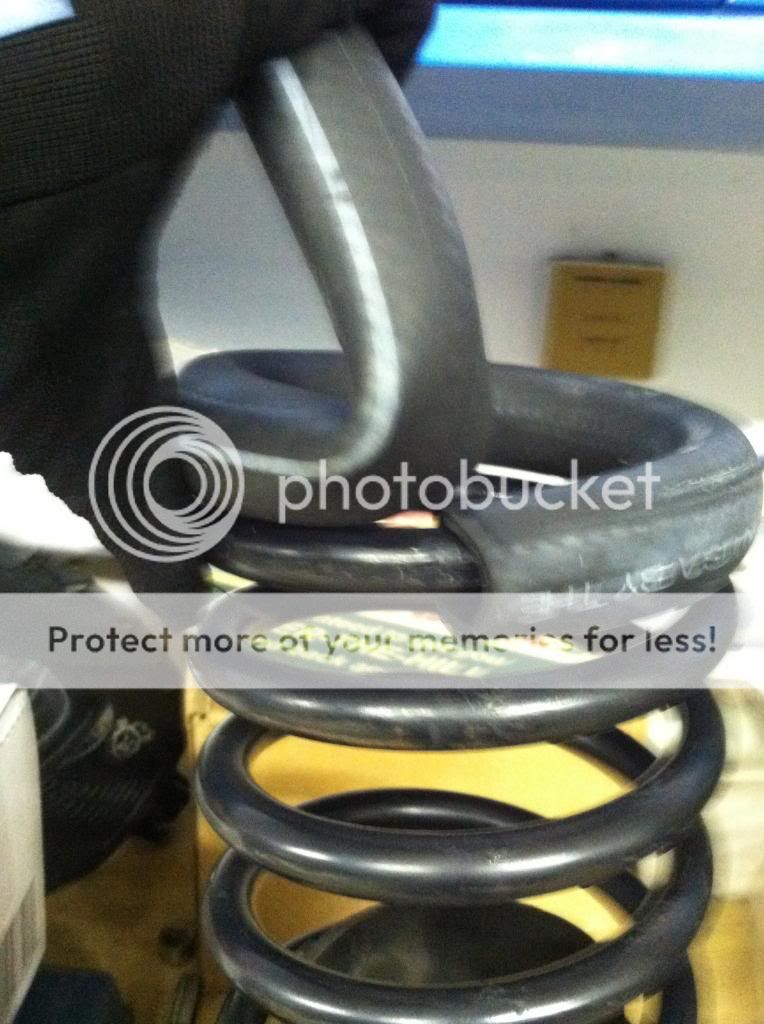
11. The bottom is tricky, but again lube the spring and inside of the hose up and work it in there, again covering where the spring makes contact then taping around the spring to cover any open sections of the hose.
I used white grease on this one...lol
Bottom finished!...almost
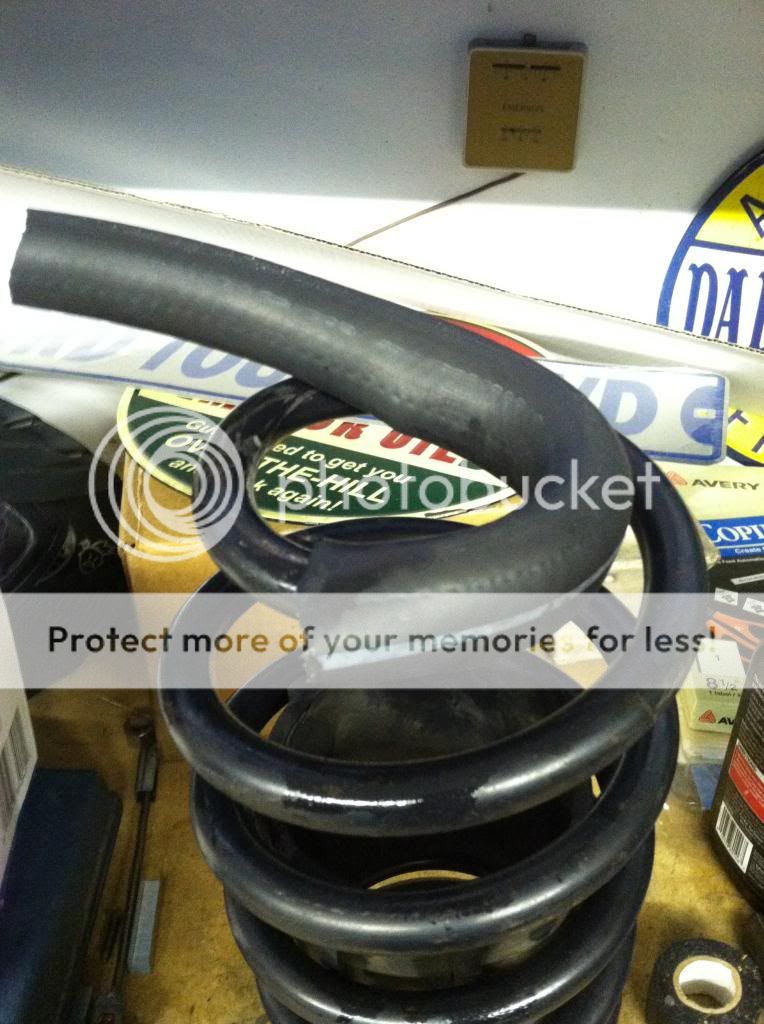
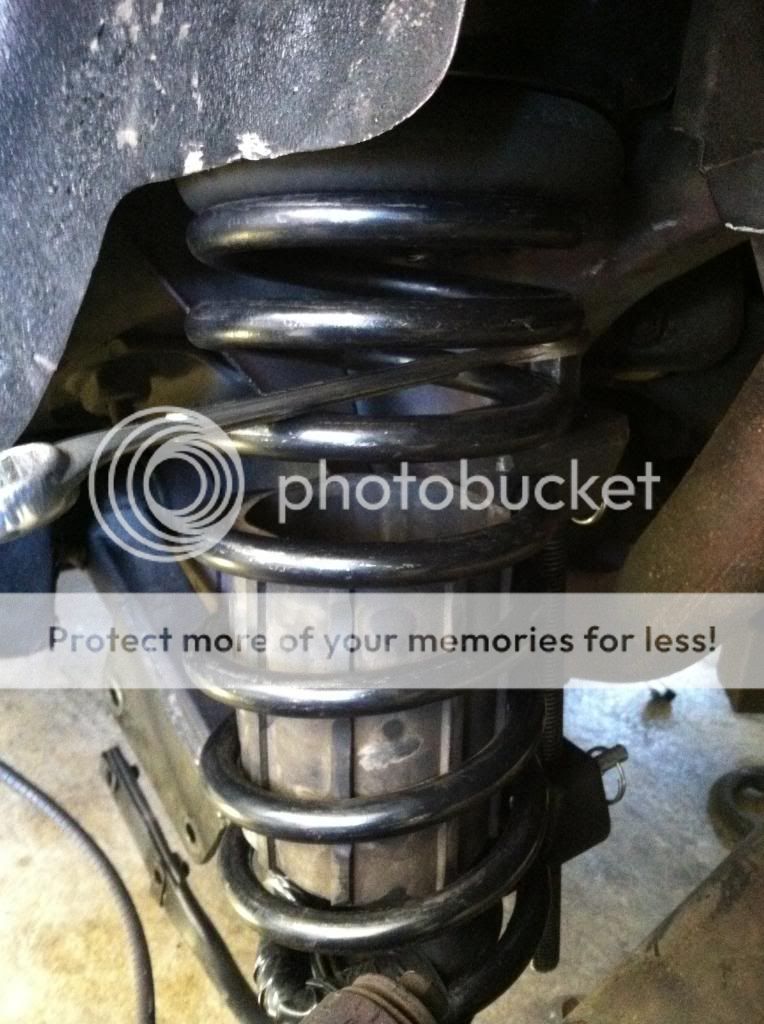
FINISHED PRODUCT!
12. Now that your springs are insulated completely, you can now install the bottom isolator onto the lower control arm mount. Do it on both sides!

13. You will now start to reintall the rear springs; the installation starts off where the removal ended, so jack up the opposite side of the axle you are installing the spring in, it will be able to go much higher now as it doesn't have a spring in it but the extra room is needed!
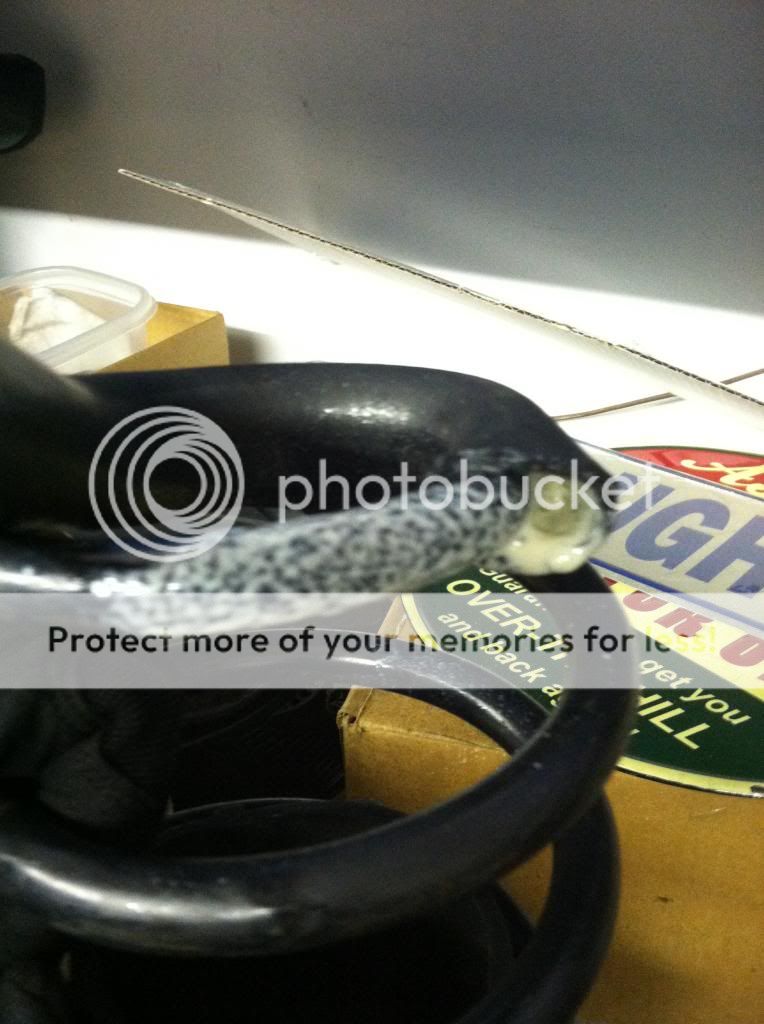
14. Most people will say this step should be done sooner but I went and practice fitted my springs into place to see where I could place my spring compressors without anything getting in the way of them, one you have established a good mounting area on your spring to place the compressors, Place them on the spring start to tighten them down, the springs need to be very compressed, the smaller they are the easier it is.
this is what bad placement will get you...
15 Once your spring is compressed and you can easily fit it into correct mounting position..pig tails facing drive side, you will be able to then jack the axle up from the same spot you did earlier to remove the springs to hold the spring in place; dont forget the top isolator!
16. Once the Spring is firmly in place you can then begin to loosen and remove the spring compressors.
17. You will repeat steps 13-16 on the opposite side!
18. Now you have both springs installed remove any jacks holding up the axle on either side and you can place a jack under the axle housing for safety and raise the axle slightly as you are not reconnecting all your suspension components.
19. To help line up all suspension components I jacked up the side I was working on to whatever I needed to help everything get back into place.
20. Re-Install the shock first, you need to wrench it through the second mounting bracket hole and place the nut on it, have the adjustable wrench/ correct size I believe 18mm wrench holding the nut and socket wrench the bolt back down.
21. Place the quad shock over the mounting bolt you removed it from, I had a metal insulator fall out as it was a tight fit getting it around that bolt; no biggie just push it back in there. Once mounted correctly re-install the 18mm nut and washer back around the bolt.
22. Almost done! Place the sway bar aligned to the two mounting holes and place the bolts through each hole, do not firmly tighten down as you need to line up the other side as well.
23. Repeat steps 19-22 on the opposite side, make sure to tighten down all 4 bolts holding on the sway bar!
24. Reinstall wheels, tighten lug nuts in star formation, jack up the car to remove the jack stands, once the car is on the ground check the lug nuts, make sure they are tight.
You are now done raising the back of your mustang to make sure your tires don't scrape!
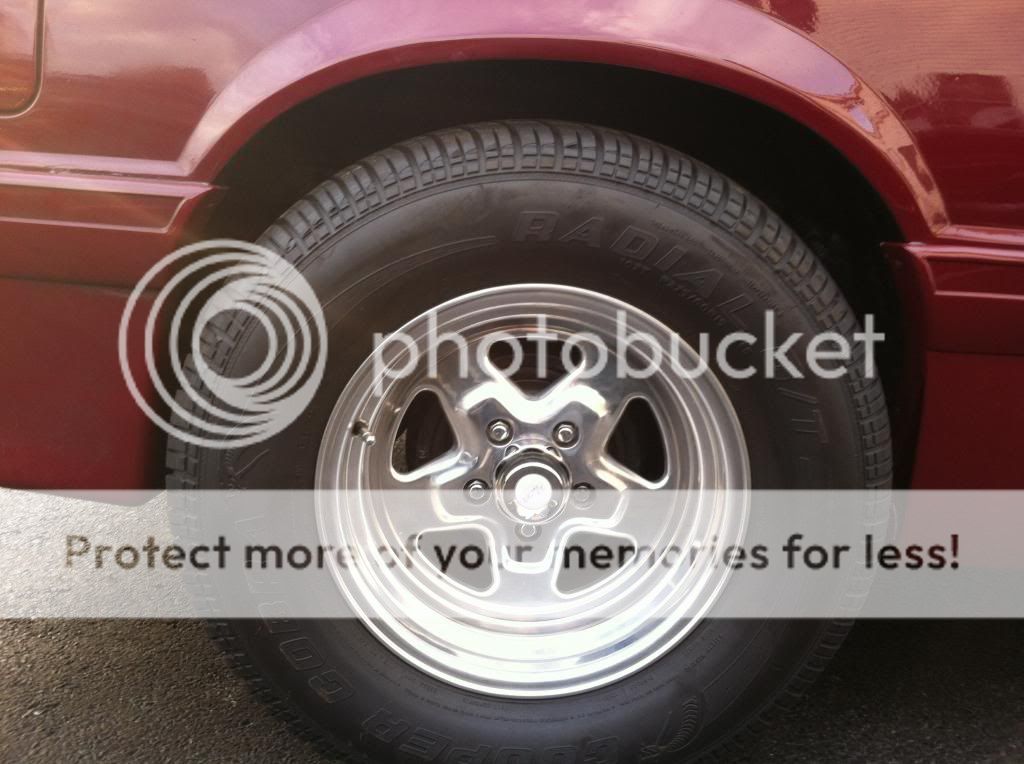
Well I just took the car out about an hour ago and the tires don't even touch at all...though I have substantial wheel gap, which we will now call some impressive rake; it feels great to drive the car again!
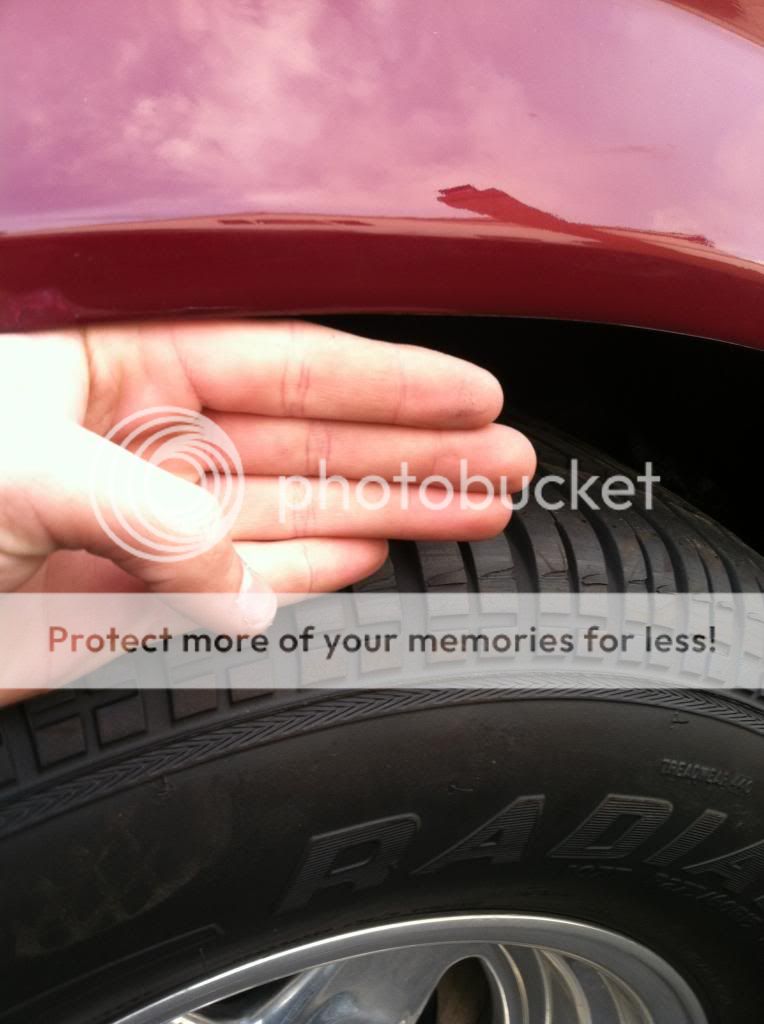
Before I couldn't fit a finger between the tire the and fender...now about 3 1/2

Background: Yes I know the majority of us will not ever do this, but I ran into a rare situation with my Dad's 89 GT with his 15x8 Drag star with a 275/60R15 was way to much tire for his stock springs to handle. It was scrapping the upper side wheel up so we got the fenders rolled, still scraps. After buying some drag springs for it for the added stiffness and weight rating, it still scrapped and was causing pieces of the side wall to go missing. I bought him isolators for his birthday, and we found that it probably wouldn't be enough. I went with a trial and error way of heater hosing the springs.
Things done prior to the car in question....
Rear Drag springs
Fender's rolled!
Now a few things I need to point out...
This was NOT done with stock springs, but the added insulation would have a similar effect.
I do NOT find this as a one time fix as the rubber will wear out over time.
Things you need...
Jacks, I used 3 but it could probably be done with 1 or 2.
Jack stands -2
Spring Compressor- Rent it from AutoZone DO NOT get the one that goes in the middle, but the ones that go on the outside!
Rear isolators - 2 top, 2 bottom
3/4in Heater Hose - I used about 4ft.
Electrical Tape
Assortment of sockets and socket wrenches (15mm, 18mm, 3/4, and any other sizes)
Wrenches for tight fits
I didn't decide to start doing this as a how too until a few steps in but I'll give some Hayne's manual directions!
1. Loosen both of the rear wheels lug nuts, raise the rear of the vehicle and support it securely on jackstands placed under the frame. Remove both wheels and block the front tires. E-brake is engaged.
2. Remove the rear sway bar! I believe I used a 15mm, this must be done! it is only 2 bolts on each side.
3. Support the rear axle with a jack placed under the axle housing. Lift it slightly as it will help you with the next step.
4. You will now remove the lowering retaining nut and bolt and disengaged the shock absorber form the axle bracket. It was easier for me to remove the nut from the bolt than the other way around, simply have an adjustable wrench holding the bolt while you remove the nut. This step will be done on both sides!
5. If you still have quad shocks, you will us an 18mm on the nut that connects it to the frame! I found it to be a lot easier to access then removing it from the axle. This step will also be done on both sides!
At this point you should have the sway bar, shocks, quad shocks disconnected from the rear axle.
6. I then removed the jack that was support the axle housing to allow the axle to drop down as low as possible; the drag springs had already been installed and are much taller than stock springs; hopefully they won't come shooting out!
7. Now to move the spring from the car you will proceed to place a jack under the opposite sides axle portion where the lower control arm connects, it is the flat edged metal that is below where you removed your shock from.
8. Jack up the axle as high as it can go without lifting the car up from the jack stands it is supported on. Remove the spring, then repeat on the opposite side to get both springs out. Release the jack, your axle isn't going anywhere from the upper and lower control arms still being attached to it.
9. One you have both springs removed you will take them to your work bench and now placed the 3/4 heater hose around the springs that will cover where the spring contacts the isolators (or frame/ lower control arm). This sounds like the easy part but its not by any means, the hose is a tight fit and you need to work it with the bend of the springs, I suggest using any product you find most useful when getting something large to fit into a tiny hole.
10. Once you have finished the top hose trim it at the end and electrical tape the two open ends shut, not only is it added insulation it will help keep things out from inside the hose.
Top finished!
11. The bottom is tricky, but again lube the spring and inside of the hose up and work it in there, again covering where the spring makes contact then taping around the spring to cover any open sections of the hose.
I used white grease on this one...lol
Bottom finished!...almost
FINISHED PRODUCT!
12. Now that your springs are insulated completely, you can now install the bottom isolator onto the lower control arm mount. Do it on both sides!
13. You will now start to reintall the rear springs; the installation starts off where the removal ended, so jack up the opposite side of the axle you are installing the spring in, it will be able to go much higher now as it doesn't have a spring in it but the extra room is needed!
14. Most people will say this step should be done sooner but I went and practice fitted my springs into place to see where I could place my spring compressors without anything getting in the way of them, one you have established a good mounting area on your spring to place the compressors, Place them on the spring start to tighten them down, the springs need to be very compressed, the smaller they are the easier it is.
this is what bad placement will get you...
15 Once your spring is compressed and you can easily fit it into correct mounting position..pig tails facing drive side, you will be able to then jack the axle up from the same spot you did earlier to remove the springs to hold the spring in place; dont forget the top isolator!
16. Once the Spring is firmly in place you can then begin to loosen and remove the spring compressors.
17. You will repeat steps 13-16 on the opposite side!
18. Now you have both springs installed remove any jacks holding up the axle on either side and you can place a jack under the axle housing for safety and raise the axle slightly as you are not reconnecting all your suspension components.
19. To help line up all suspension components I jacked up the side I was working on to whatever I needed to help everything get back into place.
20. Re-Install the shock first, you need to wrench it through the second mounting bracket hole and place the nut on it, have the adjustable wrench/ correct size I believe 18mm wrench holding the nut and socket wrench the bolt back down.
21. Place the quad shock over the mounting bolt you removed it from, I had a metal insulator fall out as it was a tight fit getting it around that bolt; no biggie just push it back in there. Once mounted correctly re-install the 18mm nut and washer back around the bolt.
22. Almost done! Place the sway bar aligned to the two mounting holes and place the bolts through each hole, do not firmly tighten down as you need to line up the other side as well.
23. Repeat steps 19-22 on the opposite side, make sure to tighten down all 4 bolts holding on the sway bar!
24. Reinstall wheels, tighten lug nuts in star formation, jack up the car to remove the jack stands, once the car is on the ground check the lug nuts, make sure they are tight.
You are now done raising the back of your mustang to make sure your tires don't scrape!
Well I just took the car out about an hour ago and the tires don't even touch at all...though I have substantial wheel gap, which we will now call some impressive rake; it feels great to drive the car again!
Before I couldn't fit a finger between the tire the and fender...now about 3 1/2