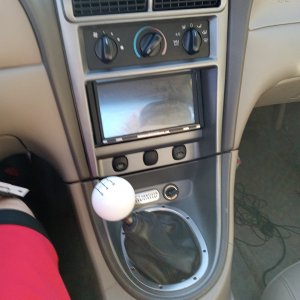
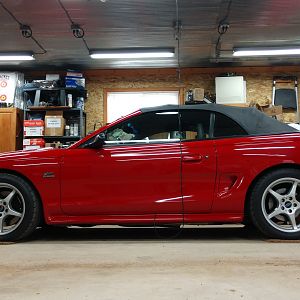
This article will teach you how to save money by rebuilding the distributor in your 94-95 5.0 Mustang instead of just buying a replacement.
Here's what tools you'll need to make this happen:
So, first things first. Unhook your plug wires and remove the distributor cap. If you're not sure exactly where they go, it can be helpful to mark them before removing them. If you get them mixed up, just remember that when looking at the cap, you can reconnect the plug wires to the spark plugs using the firing order of your engine. When looking at the distributor cap, start with the point marked "1" and move counter-clockwise, reconnecting the plug wires in the following order:
1-3-7-2-6-5-4-8
Here?s a picture of the firing order and cylinder numbering.

Next, make sure to carefully mark and note the location of the rotor. It will need to be reinstalled exactly as it is removed to ensure your timing is correct. The picture below shows what it will look like. My upper intake was removed for other repairs - you can ignore that part.

From here, just unscrew the small bolt attaching your hold-down at the base of the distributor. This is the only thing holding the distributor in place. Here's a pic of it removed and ready for disassembly.

The next step is to pull the rotor off, and remove the two small bolts holding the round plastic base. It will end up looking like the picture below, exposing the distributor shaft and reluctor wheel.

Unfortunately, you can't remove the distributor shaft yet. The reason why is that the distributor gear and round spacer thingy is holding it in place. See the pic below. You'll notice that they are both pinned in place.

You will need a hammer and small punch to get those pins out. I bought a really cheap set at Harbor Freight and they work like a champ. One of these is a perfect fit.

Simply line up the punch with the pin, and tap them out with a hammer. Be careful once you get close to getting them completely out - hit it too hard and that little pin can go flying. They're small and not much fun to try to find on the floor. You may want to hold onto the pin for the last couple taps with the hammer.

Repeat this process on both the distributor gear and spacer. It will now look like the picture below. Be sure to keep those pins in a safe place so you don't lose them.

Now if you have a well-equipped garage, you might have a hydraulic press lying around that you can use to press the distributor gear off. Unfortunately, I don't have one so I'll use the next best thing, a hammer and vise! Before trying to get this off, be sure to mark one side of the gear next to the hole, and mark the same corresponding side of the shaft so that the gear is "clocked" right when you reinstall it. Sometimes the hole isn't drilled exactly through the center, and the gear has to go back on the same way it came off or the hole won't line up.
Although perhaps not pretty, I've used this method lots of times with great success. Simply set your distributor in the vise so that the gear is resting squarely on the jaws of the vise. Get the gear as "square" and flat against the jaws as possible to prevent damage to the teeth. DO NOT clamp the jaws of the vise down on the shaft. All you'll do is damage the shaft. Instead, just close the vise jaws enough to seat the distributor gear. It will look something like this:

Now you'll need to knock that distributor gear off. You can do this simply by pounding on the distributor shaft, which will push it "out" of the gear. Make sure the distributor has a place to go, and won't fall on the ground and get damaged. A word of warning here: DO NOT HAMMER ON THE SHAFT WITH A BIG STEEL CLAW HAMMER, SLEDGE HAMMER, OR OTHER COMMON IMPLEMENT OF DESTRUCTION. You should be using a plastic deadblow mallet, brass hammer, or similar. I'm using a brass hammer. Since steel is much harder than brass, the brass hammer is much less likely to do damage to the shaft than a normal steel hammer. I picked up this hammer for around twenty bucks at Harbor Freight. I've used it in engine builds and such before, and it's a handy tool to have around.

Once the gear and spacer are removed, the shaft will simply pull right out with the reluctor wheel still installed.

Now when you look inside the distributor housing, you'll see the stator bolted down in there. This is simply a magnetic hall effect sensor that senses the "teeth" of the reluctor wheel as they pass through it.

Just for informational purposes, I wanted to include a picture of how the reluctor wheel passes through the sensor itself. As long as this reluctor wheel is spinning, it will continue to tell your ignition to fire and keep your fuel pump running. Yes, you heard right - your distributor tells your computer to keep the fuel pump running. Don't believe me? Try this - plug your distributor harness into the main wiring harness and, with the key on, spin the distributor. I guarantee your fuel pump will cycle. Cool eh?

Alright, back to business. Here's where you'll need that special tool I mentioned to you at the beginning of this article. There are 5.5 millimeter bolts holding the stator in place. The same tool that will unbolt your TFI module will take these bolts out. I got mine at NAPA a long time for less than ten bucks I think, and it looks like this:

Now, simply unscrew those two bolts.

Next, pop out the small metal tab that locates the stator inside the distributor. I'm pointing to it here with my punch.

Finally, remove the stator. You can just pull out the small wiring harness, and pull the stator off the small round part of the housing in the center. Here's what you just did all that work for:

It doesn't look like much, but that sensor will wreak havoc on your ignition system if it's not work properly. I picked up a replacement at the local auto parts store for about $30 - the part number is below. That's a big money savings over the ~$100+ for a new distributor! Not to mention you get the satisfaction of having done the work yourself.

Here's a picture of the distributor taken apart, but the stator still installed. Not much to it eh? Carefully clean and inspect everything to make sure it's all in good working order. If your distributor gear is heavily worn or damaged, replace it. If the distributor shaft is marred up or damaged, replace it. At this point, if a bunch of stuff is damaged, then you are probably better off replacing the whole thing. If the rubber o-ring at the base of housing is old, dried out, and cracked or broken - you can simply pull it off and put another one on there. I grabbed one out of an o-ring assortment I've got in the garage.

Now it's time to reassemble everything. Start by installing the new stator, making sure to put the small gold plate back in place to locate the sensor in the correct position.

Slide the shaft back in place so you can reinstall the distributor gear. Make sure the shaft is nice and clean. You can use some steel wool to scrub the shaft of any debris or buildup, but be sure to thoroughly clean it back off before putting it back in the distributor housing.
To get the gear back on, first you will need to very carefully align the holes so that the roll pin can be put back in its place. Make sure you get this lined up right, or you?ll be pulling it off again using the method described above. Mine wasn't exactly spot on the first time, so I had to re-do it myself. You can get it started on the shaft by just pressing it on with your fingers. Make sure it is nice and square so that the gear doesn't damage the shaft during reinstallation.

Now again, since I don't have a press I'm going to use a hammer. First, slide the steel spacer thingy back onto the shaft; it has to go on before the gear. Then, simply grab a deep socket that will seat well against the gear, but clear the shaft. Then just pound the gear down onto the shaft, being careful to keep the holes aligned and not push the gear on too far past the hole.

Once you've got them both back on and the holes are lined up, it should look like the picture below. I had already reinstalled the top pin using the same hammer and punch I used to remove it.

Install the roll pin back in the gear as well. Now it will look like this:

Attach the plastic distributor base back on top, screw the bolts in, and reinstall the rotor. Voila! You've got a rebuilt distributor.

Now you can reinstall it in the motor making sure to keep everything lined up exactly as you noted when you removed it. Put the distributor cap back on, attach the plug wires, distributor wiring harness, distributor hold down, and put a timing light on the car to verify your timing is still accurate. You're done! Great job!
Paul.
Here's what tools you'll need to make this happen:
- 1/2" socket for distributor hold-down
- 5/16" socket for bolts inside distributor
- Steel punches
- Plastic, brass, or other non-marring hammer
- Vise
- 5.5mm "slimline" socket wrench, a specialty "Ignition Module Tool" that can be purchased from Auto Parts stores
So, first things first. Unhook your plug wires and remove the distributor cap. If you're not sure exactly where they go, it can be helpful to mark them before removing them. If you get them mixed up, just remember that when looking at the cap, you can reconnect the plug wires to the spark plugs using the firing order of your engine. When looking at the distributor cap, start with the point marked "1" and move counter-clockwise, reconnecting the plug wires in the following order:
1-3-7-2-6-5-4-8
Here?s a picture of the firing order and cylinder numbering.

Next, make sure to carefully mark and note the location of the rotor. It will need to be reinstalled exactly as it is removed to ensure your timing is correct. The picture below shows what it will look like. My upper intake was removed for other repairs - you can ignore that part.
From here, just unscrew the small bolt attaching your hold-down at the base of the distributor. This is the only thing holding the distributor in place. Here's a pic of it removed and ready for disassembly.
The next step is to pull the rotor off, and remove the two small bolts holding the round plastic base. It will end up looking like the picture below, exposing the distributor shaft and reluctor wheel.
Unfortunately, you can't remove the distributor shaft yet. The reason why is that the distributor gear and round spacer thingy is holding it in place. See the pic below. You'll notice that they are both pinned in place.
You will need a hammer and small punch to get those pins out. I bought a really cheap set at Harbor Freight and they work like a champ. One of these is a perfect fit.
Simply line up the punch with the pin, and tap them out with a hammer. Be careful once you get close to getting them completely out - hit it too hard and that little pin can go flying. They're small and not much fun to try to find on the floor. You may want to hold onto the pin for the last couple taps with the hammer.
Repeat this process on both the distributor gear and spacer. It will now look like the picture below. Be sure to keep those pins in a safe place so you don't lose them.
Now if you have a well-equipped garage, you might have a hydraulic press lying around that you can use to press the distributor gear off. Unfortunately, I don't have one so I'll use the next best thing, a hammer and vise! Before trying to get this off, be sure to mark one side of the gear next to the hole, and mark the same corresponding side of the shaft so that the gear is "clocked" right when you reinstall it. Sometimes the hole isn't drilled exactly through the center, and the gear has to go back on the same way it came off or the hole won't line up.
Although perhaps not pretty, I've used this method lots of times with great success. Simply set your distributor in the vise so that the gear is resting squarely on the jaws of the vise. Get the gear as "square" and flat against the jaws as possible to prevent damage to the teeth. DO NOT clamp the jaws of the vise down on the shaft. All you'll do is damage the shaft. Instead, just close the vise jaws enough to seat the distributor gear. It will look something like this:
Now you'll need to knock that distributor gear off. You can do this simply by pounding on the distributor shaft, which will push it "out" of the gear. Make sure the distributor has a place to go, and won't fall on the ground and get damaged. A word of warning here: DO NOT HAMMER ON THE SHAFT WITH A BIG STEEL CLAW HAMMER, SLEDGE HAMMER, OR OTHER COMMON IMPLEMENT OF DESTRUCTION. You should be using a plastic deadblow mallet, brass hammer, or similar. I'm using a brass hammer. Since steel is much harder than brass, the brass hammer is much less likely to do damage to the shaft than a normal steel hammer. I picked up this hammer for around twenty bucks at Harbor Freight. I've used it in engine builds and such before, and it's a handy tool to have around.
Once the gear and spacer are removed, the shaft will simply pull right out with the reluctor wheel still installed.
Now when you look inside the distributor housing, you'll see the stator bolted down in there. This is simply a magnetic hall effect sensor that senses the "teeth" of the reluctor wheel as they pass through it.
Just for informational purposes, I wanted to include a picture of how the reluctor wheel passes through the sensor itself. As long as this reluctor wheel is spinning, it will continue to tell your ignition to fire and keep your fuel pump running. Yes, you heard right - your distributor tells your computer to keep the fuel pump running. Don't believe me? Try this - plug your distributor harness into the main wiring harness and, with the key on, spin the distributor. I guarantee your fuel pump will cycle. Cool eh?
Alright, back to business. Here's where you'll need that special tool I mentioned to you at the beginning of this article. There are 5.5 millimeter bolts holding the stator in place. The same tool that will unbolt your TFI module will take these bolts out. I got mine at NAPA a long time for less than ten bucks I think, and it looks like this:
Now, simply unscrew those two bolts.
Next, pop out the small metal tab that locates the stator inside the distributor. I'm pointing to it here with my punch.
Finally, remove the stator. You can just pull out the small wiring harness, and pull the stator off the small round part of the housing in the center. Here's what you just did all that work for:
It doesn't look like much, but that sensor will wreak havoc on your ignition system if it's not work properly. I picked up a replacement at the local auto parts store for about $30 - the part number is below. That's a big money savings over the ~$100+ for a new distributor! Not to mention you get the satisfaction of having done the work yourself.
Here's a picture of the distributor taken apart, but the stator still installed. Not much to it eh? Carefully clean and inspect everything to make sure it's all in good working order. If your distributor gear is heavily worn or damaged, replace it. If the distributor shaft is marred up or damaged, replace it. At this point, if a bunch of stuff is damaged, then you are probably better off replacing the whole thing. If the rubber o-ring at the base of housing is old, dried out, and cracked or broken - you can simply pull it off and put another one on there. I grabbed one out of an o-ring assortment I've got in the garage.
Now it's time to reassemble everything. Start by installing the new stator, making sure to put the small gold plate back in place to locate the sensor in the correct position.
Slide the shaft back in place so you can reinstall the distributor gear. Make sure the shaft is nice and clean. You can use some steel wool to scrub the shaft of any debris or buildup, but be sure to thoroughly clean it back off before putting it back in the distributor housing.
To get the gear back on, first you will need to very carefully align the holes so that the roll pin can be put back in its place. Make sure you get this lined up right, or you?ll be pulling it off again using the method described above. Mine wasn't exactly spot on the first time, so I had to re-do it myself. You can get it started on the shaft by just pressing it on with your fingers. Make sure it is nice and square so that the gear doesn't damage the shaft during reinstallation.
Now again, since I don't have a press I'm going to use a hammer. First, slide the steel spacer thingy back onto the shaft; it has to go on before the gear. Then, simply grab a deep socket that will seat well against the gear, but clear the shaft. Then just pound the gear down onto the shaft, being careful to keep the holes aligned and not push the gear on too far past the hole.
Once you've got them both back on and the holes are lined up, it should look like the picture below. I had already reinstalled the top pin using the same hammer and punch I used to remove it.
Install the roll pin back in the gear as well. Now it will look like this:
Attach the plastic distributor base back on top, screw the bolts in, and reinstall the rotor. Voila! You've got a rebuilt distributor.
Now you can reinstall it in the motor making sure to keep everything lined up exactly as you noted when you removed it. Put the distributor cap back on, attach the plug wires, distributor wiring harness, distributor hold down, and put a timing light on the car to verify your timing is still accurate. You're done! Great job!
Paul.

