Nice job.
You are using an out of date browser. It may not display this or other websites correctly.
You should upgrade or use an alternative browser.
You should upgrade or use an alternative browser.
Joshuaw3's 96 gt build
- Thread starter joshuaw3
- Start date
Silver95bird
Active Member
- Joined
- Sep 5, 2016
- Messages
- 491
- Reaction score
- 113
The spots where it's heavy are where it's cracking. It's a symptom of using rattle cans. Go for light coats, it will work much better. Just sand those areas out, lightly scuff the rest in grits as I replied above, and respray those parts, or as much as you feel like doing. You're going to sand quickly through rattle can primer, it won't have a high build, so if there's a spot you know needs blocking put extra shots on that spot. Leave enough time between shots for it to fully flash off before you put the next layer on.
Using rattle cans?.....gotta heat the can up real good before use. Makes a WORLD of difference.
The spots where it's heavy are where it's cracking. It's a symptom of using rattle cans. Go for light coats, it will work much better. Just sand those areas out, lightly scuff the rest in grits as I replied above, and respray those parts, or as much as you feel like doing. You're going to sand quickly through rattle can primer, it won't have a high build, so if there's a spot you know needs blocking put extra shots on that spot. Leave enough time between shots for it to fully flash off before you put the next layer on.
I didn’t use rattle cans. The first coat with the good primer worked great. Then with the rustoleum I had issue after issue and it cracked within seconds of spraying exactly the same way I sprayed the first kind of primer.
In other news. I just realized that after putting on the new gauge face that none of the dials are working except for temp and oil pressure. Anybody have any ideas on what the cause could be or any thoughts?
ttocs
Post Whore
check your connection to the dash i have seen where the harness connects traces can lift and not make contact.
Silver95bird
Active Member
- Joined
- Sep 5, 2016
- Messages
- 491
- Reaction score
- 113
If that was done with a spray gun, then I'd lean to questionable materials/ incompatible materials on top of each other. Laquers, enamels, acrylics, epoxies, and urethanes don't always play nice with each other.
Nothing youve described is what im used to using. If I heard someone say rustoleum, I assume it's either a rattle can or put on with a brush, lol. Save that stuff for old iron lawn chairs.
Water in the lines or bad surface cleaning would show up as fisheyes. And when you respray, use light dustings over the trouble spots . It's easier to see and to fix if it's done light. Sometimes paint will dye back if one layer has a component that's too "hot" for the layers below.
The gauge issue was that the new faces were too tall to allow the needles to move. They moved freely by hand but I guess there was enough resistance. Now that it’s all glued down and the needles raised a little they work fine.
Yet no picture...?
Yet no picture...?
Lol I’ll take one tomorrow
Lol I’ll take one tomorrow
Its technically tomorrow and i still see no pic...........
.........fail.........
Sent from my iPhone using Tapatalk
ttocs
Post Whore
what will be a proper penance? I say a video of him singing "I'm a little tea pot" might work.
what will be a proper penance? I say a video of him singing "I'm a little tea pot" might work.
Sounds fair to me.
Sent from my iPhone using Tapatalk
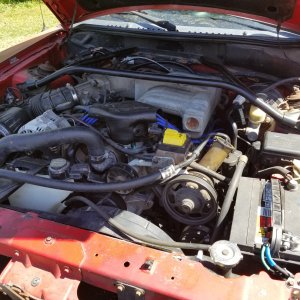
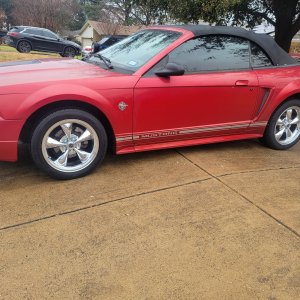
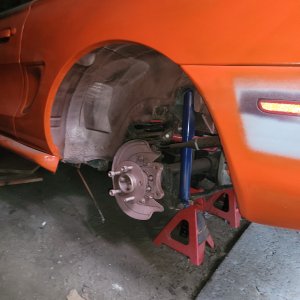
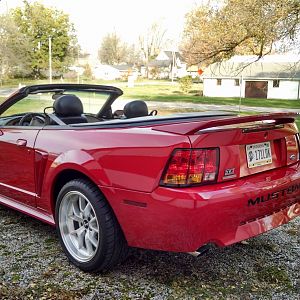
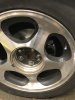
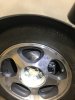
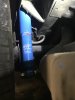
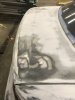
Sorry my car stays at my job in the garage since I don’t have one and have a daily. So today while I was slow at work I replaced the rear shocks and the rear pads, rotors and calipers. Also replaced the fuel filler grommet bc I filled up and gas went everywhere and then would slosh out during acceleration lol. So now my car stops well and the parking brake works properly. Here’s some pics including the gauge face and the trunk with the spoiler holes filled in
Attachments
-
 48D5AF12-772F-4C82-B987-34F2FFC5D2B4.jpeg1.1 MB · Views: 20
 -
 ED725603-A588-4367-AA09-E99BE1C47112.jpeg1.2 MB · Views: 21
 -
 D44E7925-4C69-4D8B-82C6-F8A378D12BC7.jpeg1.1 MB · Views: 21
 -
 A7859D0E-1093-40A8-8E69-A9D003450180.jpeg1 MB · Views: 20
 -
 31071E6E-36C2-4937-B6DB-F4995F3F2CA4.jpeg1,006.7 KB · Views: 19
 -
 3DCC8F06-D02B-4854-A08A-6D510C619914.jpeg1.2 MB · Views: 20

ttocs
Post Whore
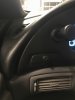
what factory are you thinking of?Here’s the dimmer switch. Looks like it was there from the factory imo
Are you kidding or are you serious? I was saying that the dimmer switch for the gauges that I put in the car looks great and that to the untrained observer you would just think it came like that.what factory are you thinking of?
07GtS197
Well-Known Member
Im a little lost myself, why did you add another dimmer switch? Not knocking it just curious.
Im a little lost myself, why did you add another dimmer switch? Not knocking it just curious.
When you buy the reverse glow gauge faces it comes with a new dimmer switch for the reverse glow. Basically the normal dimmer switch just controls the normal white lights on the instrument panel but those aren’t needed now.