hey gents,
I posted up about wanting to get back into a SN95 and someone asked for me to share my current project on here. I'll copy over all the posts I've made so far and keep it current from there.
Enjoy:
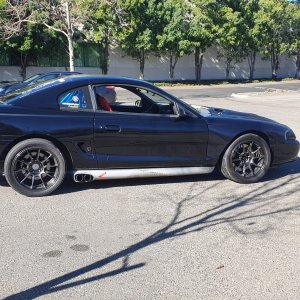
Short version: someone wrecked this 2010 GT500 a few years and it went to auction. The new owner slapped an ebay front clip on it, spray painted the whole car flat black. It changed hands and that owner wrapped it in vinyl and daily drove it until I picked it up earlier this year. I knew exactly what I was getting into and am now making good progress on resurrecting the car.
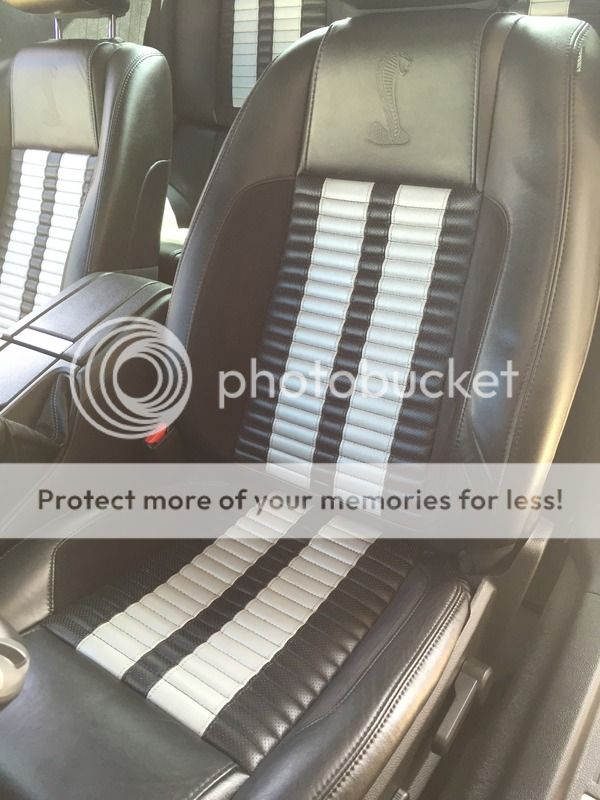
the drivetrain and interior are mint on the car. it has 33k miles and will be great when it's done. I'm going to get it painted crystal white because it's brighter than the original performance white and I miss my sn95.
How I bought it:
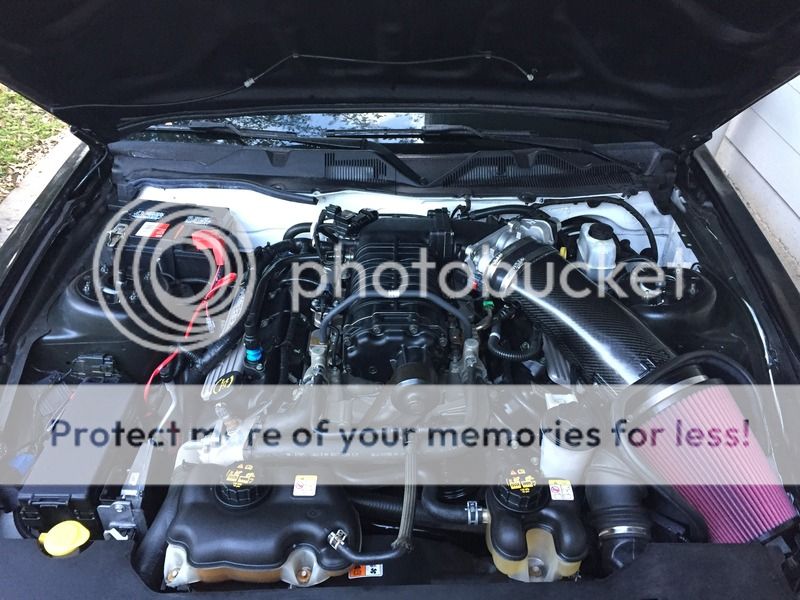
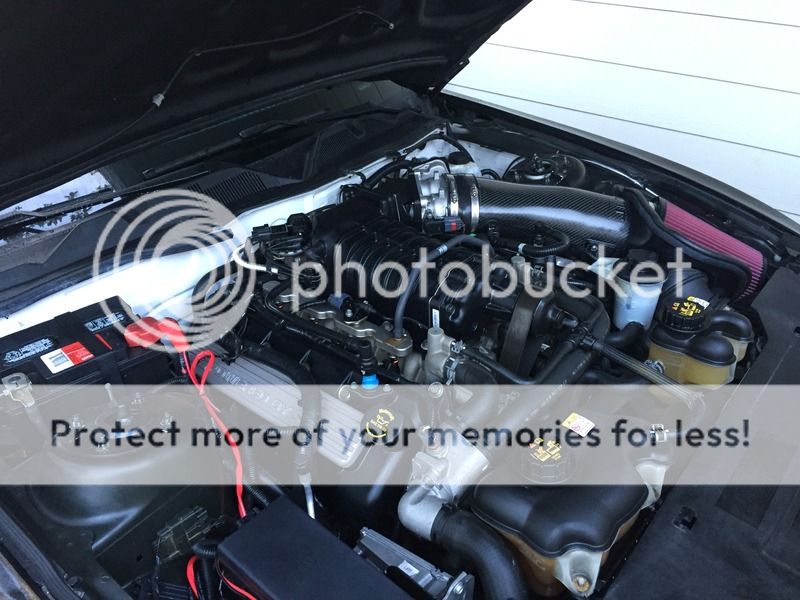
stock pulley
JLT 127mm CAI
BAMA tune (will be VMP now)
Borla S-type mufflers
Koni struts and shocks
Eibach springs
Parts waiting to install:
BPS Bullet cams
all OEM front clip
2.5 pulley and 90mm idler
off road H pipe
AFCO heat exchanger
MGW shifter
performance pack wheels (19/20)
the new NITTO 555 G2 tires
JLT oil separator
BMR rear suspension
other common small upgrades for these cars
I'm also going to do a wire tuck and shave the engine bay.
Here she is after a thorough cleaning and quick detail. it was a good 25 footer. but the panel gap was awful, you could see the waves in the bare fiberglass panels (no prep done), wheels curb rashed, and it was just nasty dirty in and out.


here's the stock front panels. it wasn't a terrible wreck. but the hood did bow a tiny bit and rolled the corner of it and the fender. the radiator support got pushed over an inch. you can see how the radiator mounts are slightly angled different. all this is being taken care of


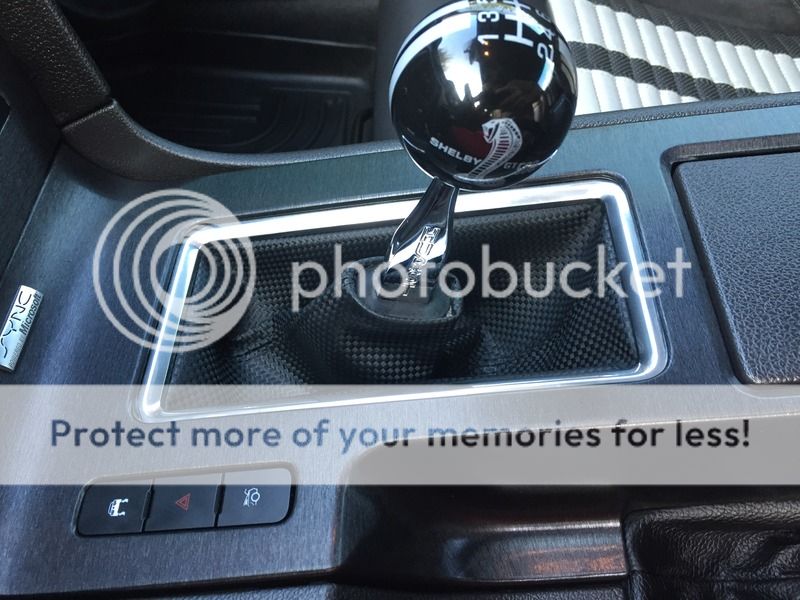
a small project was a quick vinyl wrap on the center console. had some scratches on it, so a 3m brushed aluminum vinyl made it look great again.


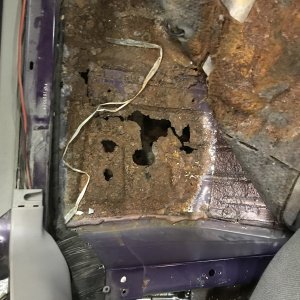
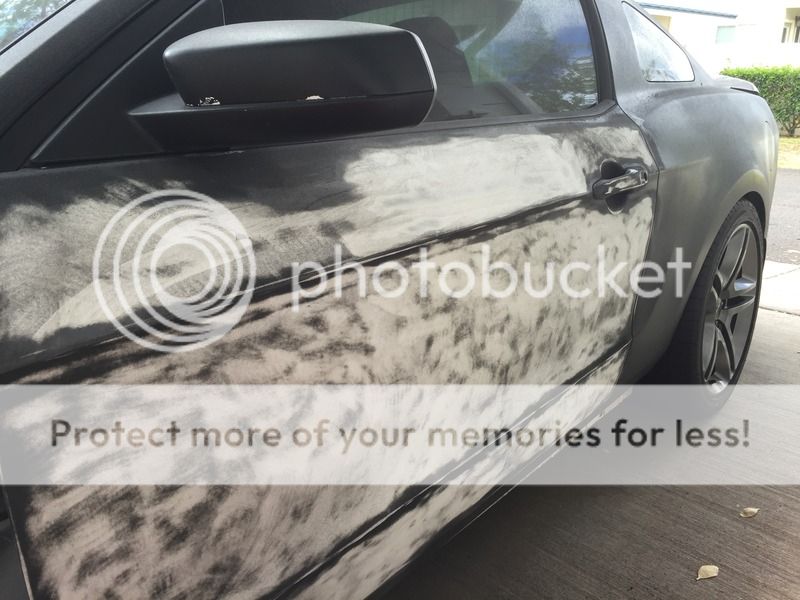
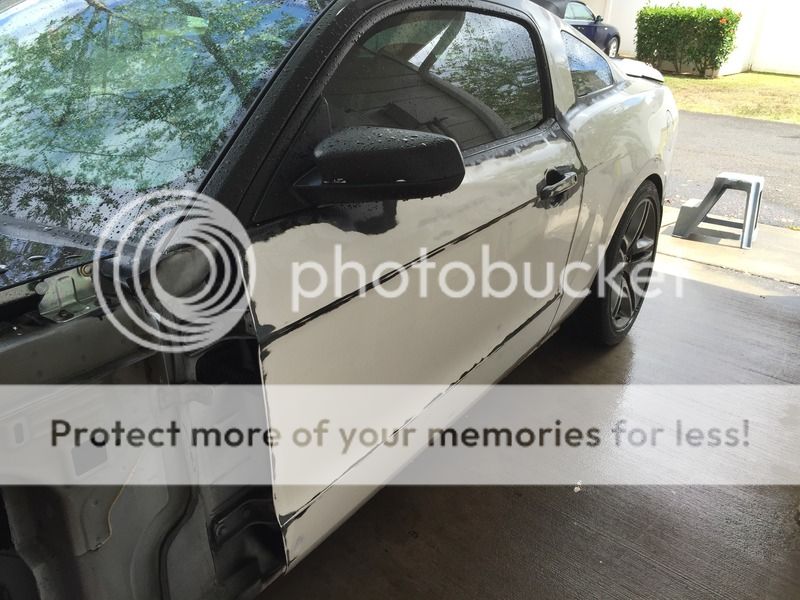
next step was to get rid of the front clip and take off the vinyl wrap. there I found the many coats of rattle can flat black. they painted the door jambs, trunk, engine bay and all. unfortunately they scuffed up the original paint with 80 grit of something very coarse. those are the scratch marks you see where I removed the spray paint. it took over fifty 180 grit sanding discs to remove 90 percent of the spray paint. I'm still working on that as the car isn't ready to be striped down all the way yet.


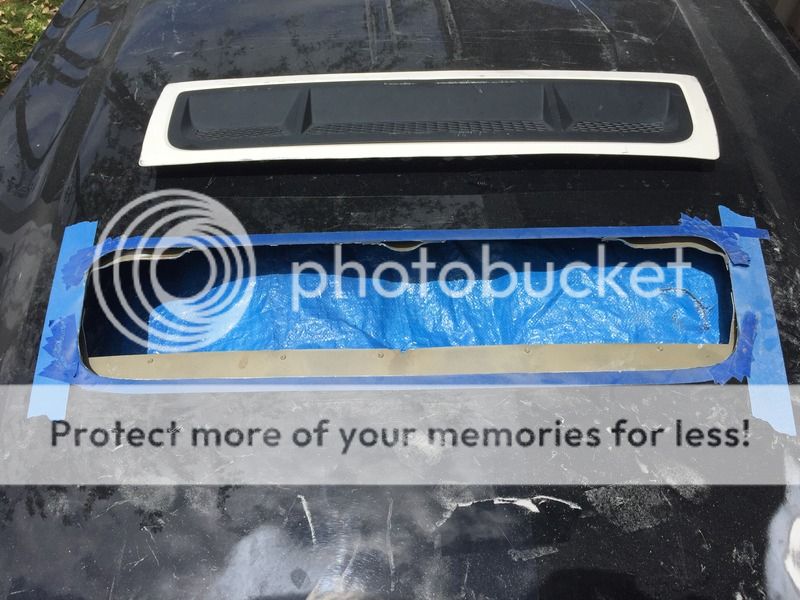
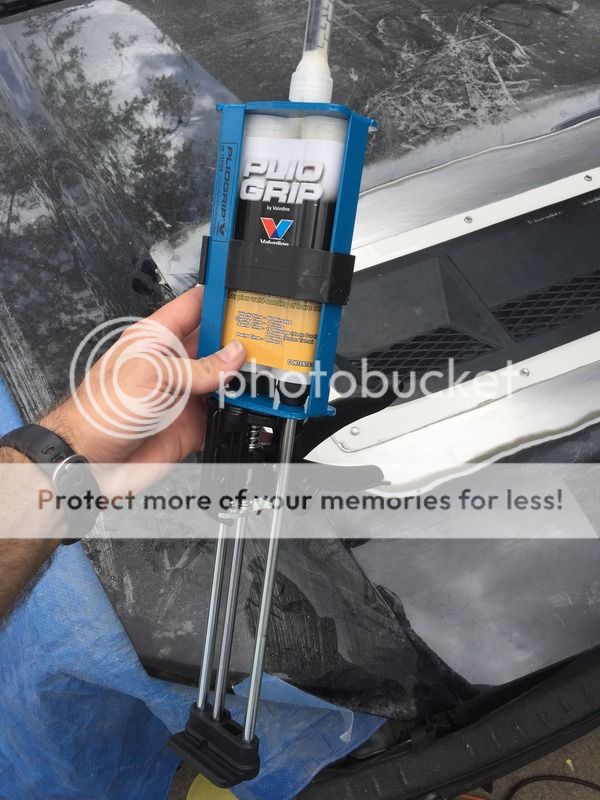
and most recently was grafting the old gt500 vent into the new hood. I live in Hawaii for the next 2 1/2 years and wasn't will to pay $1,000+ in shipping fees for a used hood. so it was time to make my own with a 13/14 v6 hood. here's the full write up on that. wasn't hard at all actually. just took some time and patience
http://www.s197forum.com/forum/showthread.php?t=128967


I posted up about wanting to get back into a SN95 and someone asked for me to share my current project on here. I'll copy over all the posts I've made so far and keep it current from there.
Enjoy:
Short version: someone wrecked this 2010 GT500 a few years and it went to auction. The new owner slapped an ebay front clip on it, spray painted the whole car flat black. It changed hands and that owner wrapped it in vinyl and daily drove it until I picked it up earlier this year. I knew exactly what I was getting into and am now making good progress on resurrecting the car.
the drivetrain and interior are mint on the car. it has 33k miles and will be great when it's done. I'm going to get it painted crystal white because it's brighter than the original performance white and I miss my sn95.
How I bought it:
stock pulley
JLT 127mm CAI
BAMA tune (will be VMP now)
Borla S-type mufflers
Koni struts and shocks
Eibach springs
Parts waiting to install:
BPS Bullet cams
all OEM front clip
2.5 pulley and 90mm idler
off road H pipe
AFCO heat exchanger
MGW shifter
performance pack wheels (19/20)
the new NITTO 555 G2 tires
JLT oil separator
BMR rear suspension
other common small upgrades for these cars
I'm also going to do a wire tuck and shave the engine bay.
Here she is after a thorough cleaning and quick detail. it was a good 25 footer. but the panel gap was awful, you could see the waves in the bare fiberglass panels (no prep done), wheels curb rashed, and it was just nasty dirty in and out.


here's the stock front panels. it wasn't a terrible wreck. but the hood did bow a tiny bit and rolled the corner of it and the fender. the radiator support got pushed over an inch. you can see how the radiator mounts are slightly angled different. all this is being taken care of


a small project was a quick vinyl wrap on the center console. had some scratches on it, so a 3m brushed aluminum vinyl made it look great again.


next step was to get rid of the front clip and take off the vinyl wrap. there I found the many coats of rattle can flat black. they painted the door jambs, trunk, engine bay and all. unfortunately they scuffed up the original paint with 80 grit of something very coarse. those are the scratch marks you see where I removed the spray paint. it took over fifty 180 grit sanding discs to remove 90 percent of the spray paint. I'm still working on that as the car isn't ready to be striped down all the way yet.


and most recently was grafting the old gt500 vent into the new hood. I live in Hawaii for the next 2 1/2 years and wasn't will to pay $1,000+ in shipping fees for a used hood. so it was time to make my own with a 13/14 v6 hood. here's the full write up on that. wasn't hard at all actually. just took some time and patience
http://www.s197forum.com/forum/showthread.php?t=128967