Setrab USA Power Steering Cooler for You Maniacs!

B.mad

Well-Known Member
Preferred Vendor
Joined
Mar 9, 2014
Messages
2,041
Reaction score
21
Location
SoCal
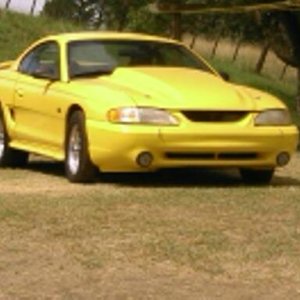
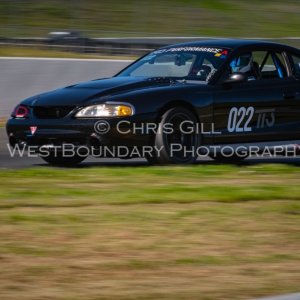
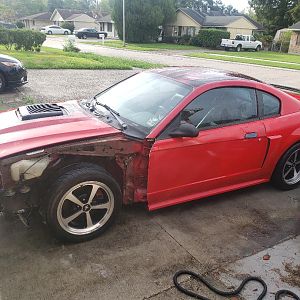
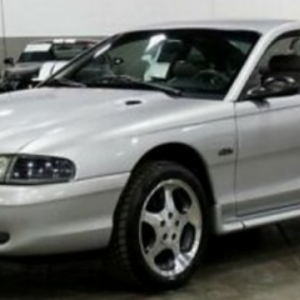
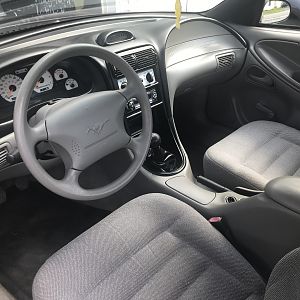
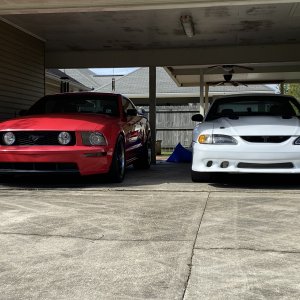
Hello! For those of you who follow the build, you know that I recently got a Tech Sponsorship with Setrab USA! For those who dont follow, now you know lol. So a bit of background, I have a 1994 GT that was a daily driver, now its going to be more track oriented (autocross and road racing). The car was working good, until about the first of this year, when during a canyon run, power steering fluid gushed all over the engine bay. After that, it was downhill from there. Event after event, problems with the pump running dry because of spilled fluid. Had to figure out how to keep the temps low. Tried turning on the oil cooler fans, had to turn off my car in between runs, and had to adjust my driving to the point where I wasnt even trying anymore. One last event, it ran dry, and that was the last of that event. You can see the videos below where the steering locked and prevented me from steering, went straight for the comes.

[video=youtube_share;7HjfA4eB9YQ]https://youtu.be/7HjfA4eB9YQ[/video]


Same video, but different time
[video=youtube_share;7HjfA4eB9YQ]https://youtu.be/7HjfA4eB9YQ[/video]


And another one, but luckily this one was at the end. But you can see how much I had to adjust, brake earlier, and adjust transitions.

[video=youtube_share;t535kCai6aY]https://youtu.be/t535kCai6aY[/video]


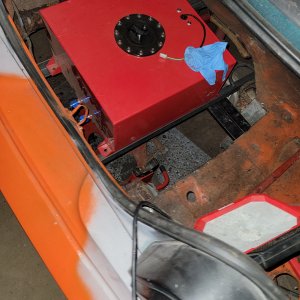
Overall, bad combo. In racing, heat is probably your #1 enemy/competitor. We didnt help the 23 year old power steering pump by mounting huge and sticky 275's up front, and beating it around the track for about a year straight. It was clear the pump did not want to work anymore. How do you solve the problem? First, you should get rid of that pump, and probably NOT go with an OEM replacement. But, many of us do not have fabrication skills, the time, or the money to do that. Even then, there is no guarantee that it will solve your issue. So what do we do? Just keep breaking pumps and hope we dont crash? There is a solution. Ladies and Gentlemen, I introduce you to the Setrab USA's Oil Cooler Fanpack (Part#FP113M22I). As many of you know, Setrab is a leader in the oil cooler industry, and is used by some brands as an OEM oil cooler. Is your diff oil overheating? Oil? What about your power steering fluid? Cooler is your solution. I wont bore you with the technical details of fluid, heat, blah blah blah. I will save that for the blog. However, I will be going over how to connect and install the cooler, as well as places to install, and reap its benefits. For now, enjoy some shitty pictures I took with my phone at work. Because I was too excited to wait till I got home.


OP
OP
B

B.mad

Well-Known Member
Preferred Vendor
Joined
Mar 9, 2014
Messages
2,041
Reaction score
21
Location
SoCal
I know what you guys are thinking. WHAT DOES THIS THING COST?????????????????????? WHY CANT I FIND IT ONLINE??!?!?!?

Heres the deal guys, the product has not been released yet, so it is a bit of a waiting game. Which is perfectly fine, because it will give you a chance to save up the MSRP of $289. And it gives you a chance to source your fittings and hoses and get a good price.

I will be posting up more information as I go on, but for now, ask questions! Also, I highly recommend that you contact Setrab USA. Call them or email them. We are here to help!

http://www.setrabusa.com/consult/index.html

[email protected]

740-625-6228

I decided to make a series of articles to bring awareness to fluid dynamics. Here are the links below:

Why Did I Decide to Install a Power Steering Oil Cooler?
Installation:
 
OP
OP
B

B.mad

Well-Known Member
Preferred Vendor
Joined
Mar 9, 2014
Messages
2,041
Reaction score
21
Location
SoCal
Excited to see this.

I am excited to do this! Ill probably take some photos this weekend, and start the inspection. Start installing the stuff next weekend. I want to drive the car (since I havent done so in 6 month) before I have to park it again...
 
OP
OP
B

B.mad

Well-Known Member
Preferred Vendor
Joined
Mar 9, 2014
Messages
2,041
Reaction score
21
Location
SoCal
Soo the time you guys been looking for, i have some things to say about the install.
 
OP
OP
B

B.mad

Well-Known Member
Preferred Vendor
Joined
Mar 9, 2014
Messages
2,041
Reaction score
21
Location
SoCal
So install. When you purchase the oil cooler, you will need to have the M22 -06 AN fittings to fit to the cooler. When installing the AN, you need to take off the plastic covers. Also, you will need O-rings. The AN fittings came with the o-rings so that was easy, but if you do not have them, you need them to prevent leaks. Screw them in and make sure they are tight.


Fittings:
-Oil Cooler: M22-AN06 Adapter (2)
-Hose to oil cooler:
-"Hot" Side: 90* AN06 RU(Reuseable hose end) (1)
-"Cold" side: 90* AN06 with a 3/8" hose end (barbed) (1)
-Rack (low Pressure): I believe i ended up using a modified 5/8"-18 NPT and AN06 RU(Reuseable hose end) (1)
-Thermal Switch: Thermal Switch Probe, 180ºF, NPT1/8" and 180* AN06-AN06 adapter.
(you can buy this as a kit directly from Setrab USA, part#31-TS180-06).


Now the next step is to install the An fittings for the hoses. Since I am going steel braided, I got the fittings for those hoses. Again, Setrab did a good job and supplied that for me.


However, if you wish to save some cost, you can use the rubber hoses, you do not have to convert to AN fittings. Nor do you have to convert the fittings on the rack to AN. Realistically, you will only use AN fittings for the cooler. So, how do you accomplish this? By getting a fitting that it AN on one side, and barbed in the other side. Just to give you an idea, to convert to AN fittings and steel braided hoses will cost about $100, for just the low pressure side of the system. Versus $13 for the fitting shown below and you get to reuse your hoses and such.

 
OP
OP
B

B.mad

Well-Known Member
Preferred Vendor
Joined
Mar 9, 2014
Messages
2,041
Reaction score
21
Location
SoCal
Now if you are converting to AN fittings and steel braided hoses, you will need to remove the lines. Contrary to what 90% of the people say, you do NOT need to drop the rack. You do NOT need some fancy multi-angle wrench. I spent more time searching for the damn wrench, then it took to take off the fittings.

You'll need to take off the driver front wheel, you will need to remove this plastic thing.


Since my bushings are shot, I took off my sway bar. And it freed up a butt ton of space. To take off the sway bar, its 2 bolts on the chassis, and the sway bar link. I only removed one side.


Once you got that, you just get some pliers and remove the rubber hoses down below from the metal lines.


These tabs. No you don't need to remove the hose from the pump, just slide the pins and take out the hoses.


Make sure you have something to catch the fluid.


Next, take a 8mm socket and take off the brackets that hold the line to the radiator support. Theres two bolts.


Tada.

 
OP
OP
B

B.mad

Well-Known Member
Preferred Vendor
Joined
Mar 9, 2014
Messages
2,041
Reaction score
21
Location
SoCal
If you are using the rubber lines, you can skip this post since it doesn't apply. But if you are going to convert to AN, its easy to get to once you have all that crap out of the way. So how do you take the lines off the rack? Well, first off, you gotta remember what is what. The line on the top is the low pressure. The line below is the high pressure.

In this picture, the high pressure line is the one that was removed. The low pressure is the one that was not removed.


So i am pretty sure you are dying to know what the secret is. Ready? Once you have all that stuff out of the way, you get your NORMAL 11/16's wrench and break loose the high pressure fitting. Get that out of the way. Next, you take that SAME wrench, and take off the low pressure hose. SIMPLE! Took less than 10 minutes to take off both fittings. Here is a picture of my girlfriend taking off the fittings. She wanted to help.


Now that it is off, time to put the low pressure fitting. Putting AN fittings on the line is easy, I will post picture of how to put that together later. But for the AN fitting on the rack, you can use a 90* or 0*. I used a 90*, but i think 0* would have worked better. But whatever.


OP
OP
B

B.mad

Well-Known Member
Preferred Vendor
Joined
Mar 9, 2014
Messages
2,041
Reaction score
21
Location
SoCal
Now the next time is mounting the cooler. Originally, I was going to mount it on the lower frame rail.


However, that look like too much work, so i mount it just below the headlights.


Just because I am on a time crunch, I used the rubber hose for the fluid that exits the cooler, and goes into the low pressure side of the pump. Why? Because the low pressure fittings on the pump is a "nipple" and it will require a lot of work to convert that to AN and i don't have the time at the moment. So i used the rubber hose.


When mounting it behind the bumper and under the head lights, you have to worry about two things: 1.) is the bumper going to fit, and 2.) is there going to be enough airflow.

Answer to #1:


So there are a few advantages of running it in this area, and running this particular fanpack. 1.) The fanpack is small enough to fit where it fit! 2.) you don't have to worry about airflow because you have a 145CFM fan attached to it 3.) if you are worried about airflow, you can duck a hose from the bumper openings. Or you can make your own duct at the high pressure area of the front bumper. You don't even need a lot of ducting because its that close!!

That is it for now. More later.
 
OP
OP
B

B.mad

Well-Known Member
Preferred Vendor
Joined
Mar 9, 2014
Messages
2,041
Reaction score
21
Location
SoCal
Apparently, Ford designed the rack fittings so that you are forced to use theirs because not many people make it. So, I was given a metric fitting (my mistake), however, it is a standard fitting. So it went in (kinda hard) and eventually stopped because the thread crossed. So, that fitting is done. Went to the store and picked up another one with the correct thread, however, because its a Ford fitting, it had to be modified so that the fitting is shorter. Because in the rack, the sizing changes (it gets smaller). So the normal an fittings wont work. So basically, machined some of the fitting off so that it stops right before the port gets smaller. Put some thread lock (its better if you have hydraulic sealant, but thread lock worked good), o-ring seal, and a washer, and no leaks! I will get the thread pitch info later today. So unless you want to modify some of the fittings, I recommend that you either dont convert to AN, or get the MM fittings made specifically for the rack.

The black is the Setrab fitting (left), middle is the new fitting (notice how it is a lot shorter), and right is the stock fitting. I cut off the hard line.


I need to really clean under the car....But no leaks!

 
OP
OP
B

B.mad

Well-Known Member
Preferred Vendor
Joined
Mar 9, 2014
Messages
2,041
Reaction score
21
Location
SoCal
To cut and put together a stainless steel hose is pretty easy. To cut, I recommend that you wrap where you are going to cut in tape, AND put a zip tie on that area to avoid fraying the line. I used a dremel with a cut off wheel to cut the line. Worked decently.


Now to put the fitting. First you will put the end that goes to the hose. Make sure you get it all the way in there. You can twist to help you. Once it is in there, you screw in the fitting. So here is where it gets tricky because you are literally shoving the fitting into the hose. So as you screw in the hose, the hose will start sliding out. So you need to apply a pushing pressure so that the hose doesnt slide out.


After that is done, time to wire the thermal switch, which is pretty easy. The fanpack has two cables, black and red. Black goes to ground, red goes to one of the two prongs on the thermal switch. The other prong on the thermal switch is also a positive connection, so it goes to the constant 12v supply.


You need to use a min of 18 gauge awg wire.


TADA!!!


BigBore96

Active Member
Joined
Oct 2, 2012
Messages
882
Reaction score
172
What are you using to keep the lines from hanging? I see the zip tie which I am assuming is just a temporary placeholder.
 
OP
OP
B

B.mad

Well-Known Member
Preferred Vendor
Joined
Mar 9, 2014
Messages
2,041
Reaction score
21
Location
SoCal

BigBore96

Active Member
Joined
Oct 2, 2012
Messages
882
Reaction score
172
Well...they were going to be permanent...but now that you pointed it out...I may need to change it....


Ill email Setrab for some "Cushion Clamps". Its exactly what I need so that it doesnt look ghetto lol

CHECK IT OUT!

http://www.setrabusa.com/products/connections/pclamps/index.html
That is what I was going to suggest. Theyre what I used for my an oil lines.

If you dont want to wait on them they are very cheap and sold at home depot.

Sent from my SM-N920V using Tapatalk
 
OP
OP
B

B.mad

Well-Known Member
Preferred Vendor
Joined
Mar 9, 2014
Messages
2,041
Reaction score
21
Location
SoCal
That is what I was going to suggest. Theyre what I used for my an oil lines.

If you dont want to wait on them they are very cheap and sold at home depot.

Sent from my SM-N920V using Tapatalk


Why does everyone say things are at home depot.. I could never find them!! lol. I gotta look harder then. But thanks for the heads up!
 

Forum statistics

Threads
77,510
Messages
1,504,055
Members
14,980
Latest member
TreeScholar

Members online

Top