smoothing in a shinoda chin spoiler to a stock GT bumper

ttocs

Post Whore
Joined
Oct 9, 2009
Messages
32,649
Reaction score
5,662
Location
Evansville Indiana
Had some people that were interested in this so I thought I would do it as a separate topic outside of my build page so it will be easier to find later. I will just post a link to this post on the build page so everyone can follow along. I am going to smooth in the shinoda chin spoiler to the stock GT bumper so it is nice and smooth and all looks like one piece.

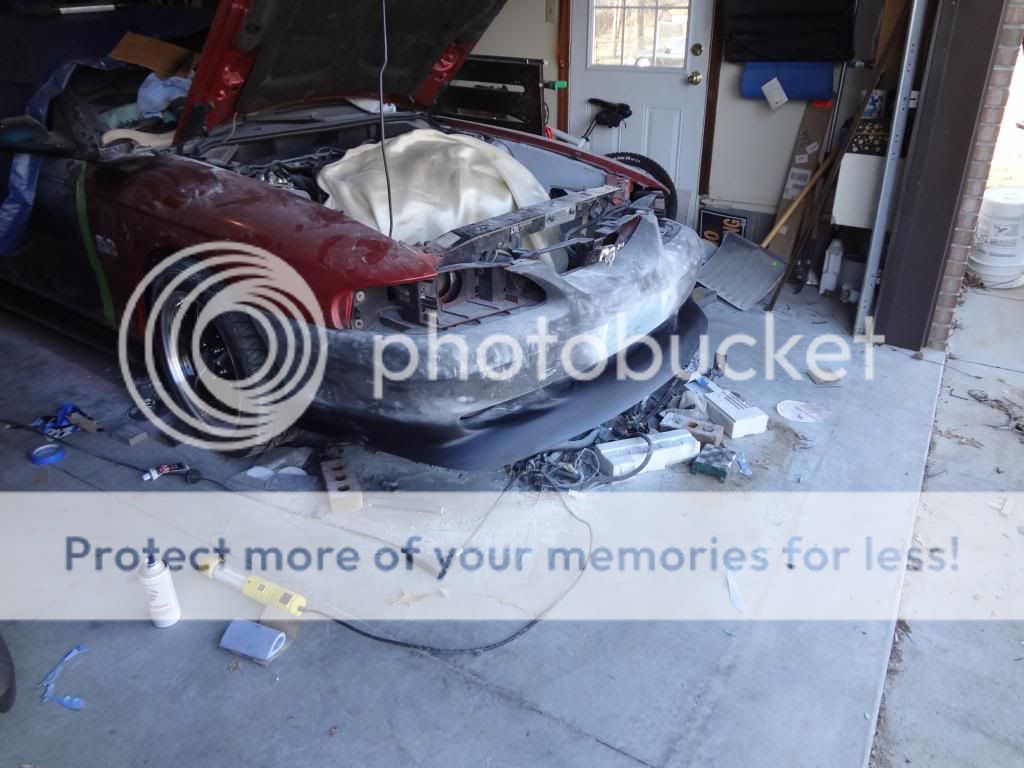
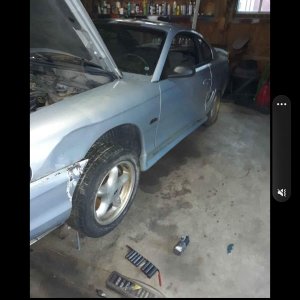
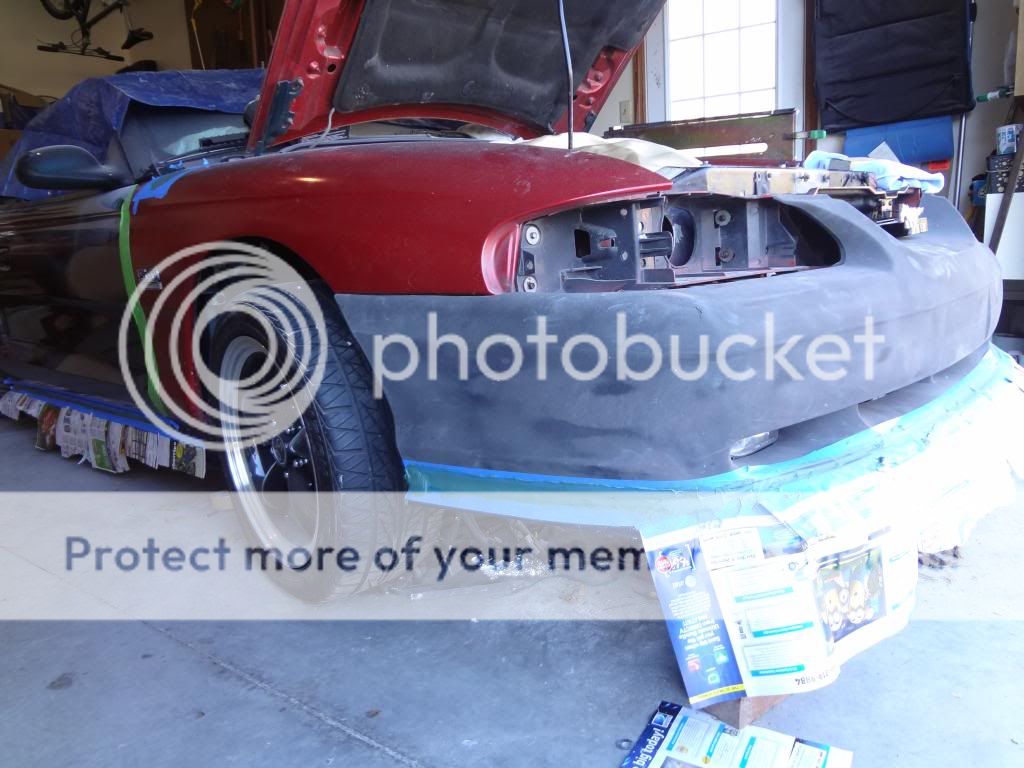
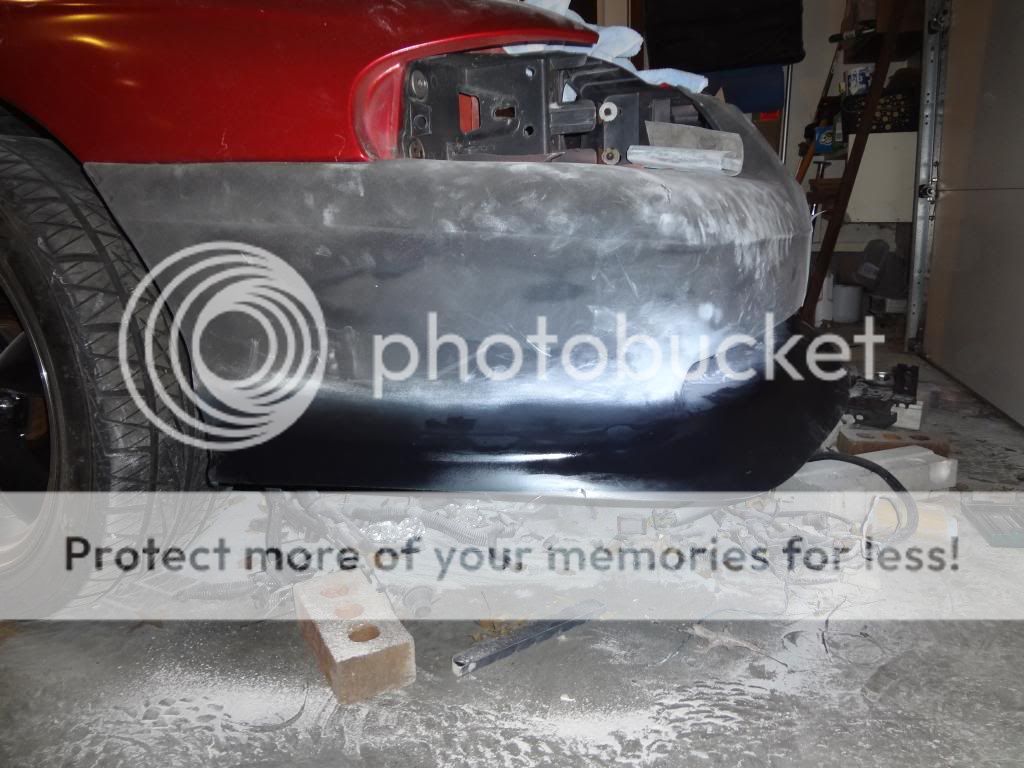
First I can't contain my excitement just to have the fenders/hood/headlight panel/bumper back on the car for the first time in months. It looks like a car again! Sorry for the crappy pic but I was just able to get everything together and cleaned up as it was getting dark.

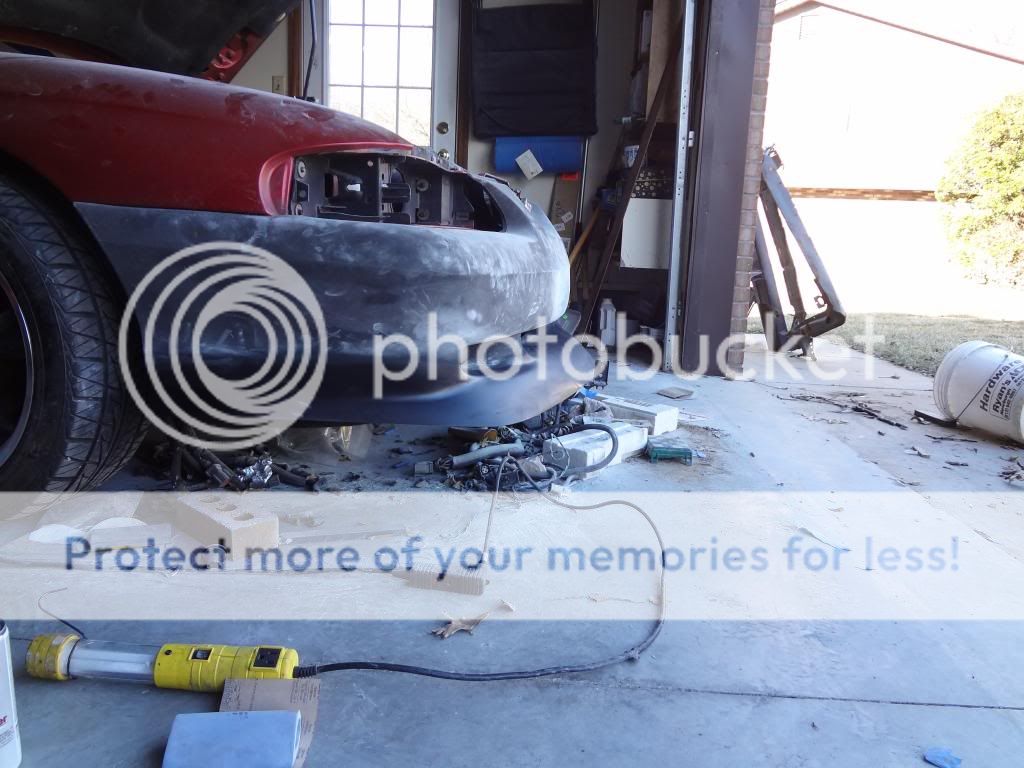
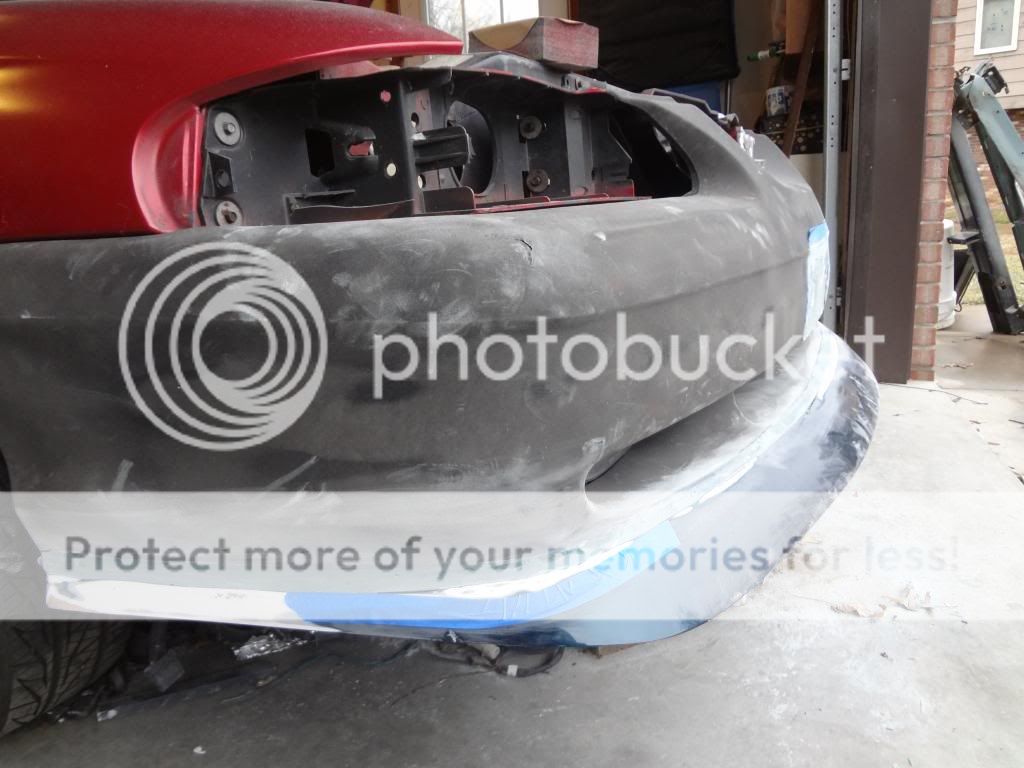
I started off by maching up the bumper and pre-drilling my mounting holes into the bumper. Once I had it lined up I then masked off the area above the bumper, and below the chin spoiler to keep the panel bonding adhesive from getting where I didn't want it to be. After that I scuffed the chin spoiler to get the polish/paint off for a better bond and the bumper had been media blasted prior to this so other then a light scuff it was ready. Once it was masked off I put a generous helping of 3m panel bonding adhesive on the chin. I used some long nails to line up the holes I drilled and to temporarily pin the chin in place. After that I replaced the nails with some screws to hold the two together. I am going to let the adhesive cure over night and start the fill/sand/repeat part of the job.

1560759_580739922007492_1696731179_n.jpg


I will get a better pic to start off with in the morning.
 
OP
OP
ttocs

ttocs

Post Whore
Joined
Oct 9, 2009
Messages
32,649
Reaction score
5,662
Location
Evansville Indiana
I was thinking what else I could do that would look cool while I am there, and what else might be cool/different to do with the pony and got an idea I would love some opinions on. First the license plate area seems pretty simple to delete so its a nice round bumper all the way around right? Then I was thinking about the pony and had the idea to move it down into the bumper.
1.) I could make it so that it just kind of sticks out and blends/smooths right in.
2.) I was also thinking about (again in the license plate area) cutting out around the mustang 1/16-1/8" bigger, painting the horse to match and then mounting it to a polished/chromed piece that would mount to the back of the bumper so the horse would be flush with the bumper(and painted too match).
3.) Same as #2 but mounting it to a piece of plexi with a chrome backing and lighting it so the outline of the horse would glow when turned on. Not something I would drive around with as most places having a blue light on the outside of your car is illegal and its not generally my style, more just for night shows. It would look almost the same as #2 honestly till turned on.

Whatcha thank?
 

Ferocious

Post Whore
SN95 Supporter
Joined
Jun 1, 2011
Messages
12,255
Reaction score
600
Location
San Diego
I love the idea of molding the chin spoiler to the bumper but I can't put my head around moving the pony to the license plate area.
The fact that there will be a large gap above the bumper with nothing there will look odd.
I would just fill in the license plate area and round it off to flow with the bumper and leave the pony in the grille area.
 

the5.ohh

Legend
Joined
Oct 15, 2012
Messages
9,561
Reaction score
129
Location
Shaolin, NY
Nice progress man. Me personally, I hate the pony in the grille. Took mine off and its never going back on. I think if you paint matched it and made it flush with the bumper it would look really cool. Maybe even wire up Leds behind it for shows?
 
OP
OP
ttocs

ttocs

Post Whore
Joined
Oct 9, 2009
Messages
32,649
Reaction score
5,662
Location
Evansville Indiana
Nice progress man. Me personally, I hate the pony in the grille. Took mine off and its never going back on. I think if you paint matched it and made it flush with the bumper it would look really cool. Maybe even wire up Leds behind it for shows?

That was in option #3.

Another reason I would like to move it is so that I can put the radar/laser sensor for the 9500ci where the pony is as that would be the ideal spot. I also thought that with the horse down lower then everyone is use too that it might give it a little lower appearance.
 
OP
OP
ttocs

ttocs

Post Whore
Joined
Oct 9, 2009
Messages
32,649
Reaction score
5,662
Location
Evansville Indiana
DSC01059.jpg

Today I started off by again masking off all the areas I did not want a mess, did a light sand/scuff and then blew out the dust with the compressor. After that I mixed the activator into a fiberglass reinforced bondo and worked it into the seam. I am also filling a small seam between the side exhaust and the body and smoothing out the area the antenna use to be. Just waiting for it to dry so I can make some dust and see what still needs to be filled after that.
 
OP
OP
ttocs

ttocs

Post Whore
Joined
Oct 9, 2009
Messages
32,649
Reaction score
5,662
Location
Evansville Indiana
Today I finished the bottom half of the first inning of my fill/sand/repeat game and sanded down the bondo. I wanted the corners to have a little more of a curve to them so I put the masking tape down to help me fill where I need it.
DSC01062.jpg

Then I put another light coat of bondoglass all over to smooth it out and will continue sanding in the morning.
DSC01063.jpg
 
OP
OP
ttocs

ttocs

Post Whore
Joined
Oct 9, 2009
Messages
32,649
Reaction score
5,662
Location
Evansville Indiana
first coat of high build primer is on it now. I still have some pin holes to fill and some small low areas I need to fill but hope to have it straight tomorrow stomach allowing.
DSC01068.jpg


Forgive the dust been makin lotsa lotsa dust this week.
 
OP
OP
ttocs

ttocs

Post Whore
Joined
Oct 9, 2009
Messages
32,649
Reaction score
5,662
Location
Evansville Indiana
That seems to be the consensus at this point. I think it will be a nice change, certainly unique.

So who hates it so far? Just curious?
 

CC'S95GT

Post Whore
Joined
Apr 19, 2008
Messages
10,738
Reaction score
178
Location
Hampton ,Ga.
Looking good Scott.
I was also thinking about filling in the license plate area when I paint mine. I'm going to try to heat up that area from the back side and push it out some so I won't have to use so much filler.
 
OP
OP
ttocs

ttocs

Post Whore
Joined
Oct 9, 2009
Messages
32,649
Reaction score
5,662
Location
Evansville Indiana
Not a bad idea but its not really all that thick honestly and I would be afraid to mess up the area around it. After looking closely at it(for the first time since owning it in 94), it has some small curves on it and I would be afraid to mess those up.
 

CC'S95GT

Post Whore
Joined
Apr 19, 2008
Messages
10,738
Reaction score
178
Location
Hampton ,Ga.
I'll probably get a damaged bumper and practice on that one first.
If it doesn't work out susccessfully then I'll just cut out a piece from the center part of the damaged bumper and use that as the filler piece in the plate area on my bumper.
 

CWO

Active Member
Joined
Aug 10, 2012
Messages
376
Reaction score
8
Location
Frisco, TX
Man, that's a laaaaarge area with quite a bit of flex. Ever seen a lowered Civic with a fiberglass body kit that wasn't all jacked up?


Me either.


I'm hoping it works out for you, the work look pretty good.
 
OP
OP
ttocs

ttocs

Post Whore
Joined
Oct 9, 2009
Messages
32,649
Reaction score
5,662
Location
Evansville Indiana
Man, that's a laaaaarge area with quite a bit of flex. Ever seen a lowered Civic with a fiberglass body kit that wasn't all jacked up?


Me either.


I'm hoping it works out for you, the work look pretty good.

Are you talking about the license plate area or just the seam between the two pieces? Either way that is why I used bondoglass and also why I have airbags = no fear of speedbumps/dips/curbs = :)
 

CWO

Active Member
Joined
Aug 10, 2012
Messages
376
Reaction score
8
Location
Frisco, TX
I think the licence plate area may be fine but the seam is pretty long, it's tough to keep an area that long from flexing, especially since there is no real support across the bottom of the bumper from the factory.

Like I said, the work looks good and I don't hate it, just have concerns of cracking.

Sent from my SAMSUNG-SGH-I747 using Tapatalk
 
OP
OP
ttocs

ttocs

Post Whore
Joined
Oct 9, 2009
Messages
32,649
Reaction score
5,662
Location
Evansville Indiana
I think the licence plate area may be fine but the seam is pretty long, it's tough to keep an area that long from flexing, especially since there is no real support across the bottom of the bumper from the factory.

Like I said, the work looks good and I don't hate it, just have concerns of cracking.

Sent from my SAMSUNG-SGH-I747 using Tapatalk

I think the biggest part of the problem with most of the broken body work I have seen was because of a static suspension riding low and a meeting with a speedbump/curb/dip/rock... I don't drive around draggin my ass so its not really a concern of mine. Sure there will be some flexing as the seasons/temps change but I think with all the bolts/nuts and a generous helping of panel bonding adhesive should keep that down.

DSC01074.jpg


I don't think it sticks out too far myself, fee free too speak up if you want.
DSC01075.jpg


And the antenna was done as well still just a little block sanding on the bottom.

DSC01076.jpg


It will be a little while till I paint it but its basically ready for primer, some small blocking and then paint. There is also one small spot by the pass headlight I need to fix but I need to get to the back to do that part. I will update it later when its all painted but it might be a while.
 
Top