First I cleaned and painted the O/R X pipe using the same VHT paint.
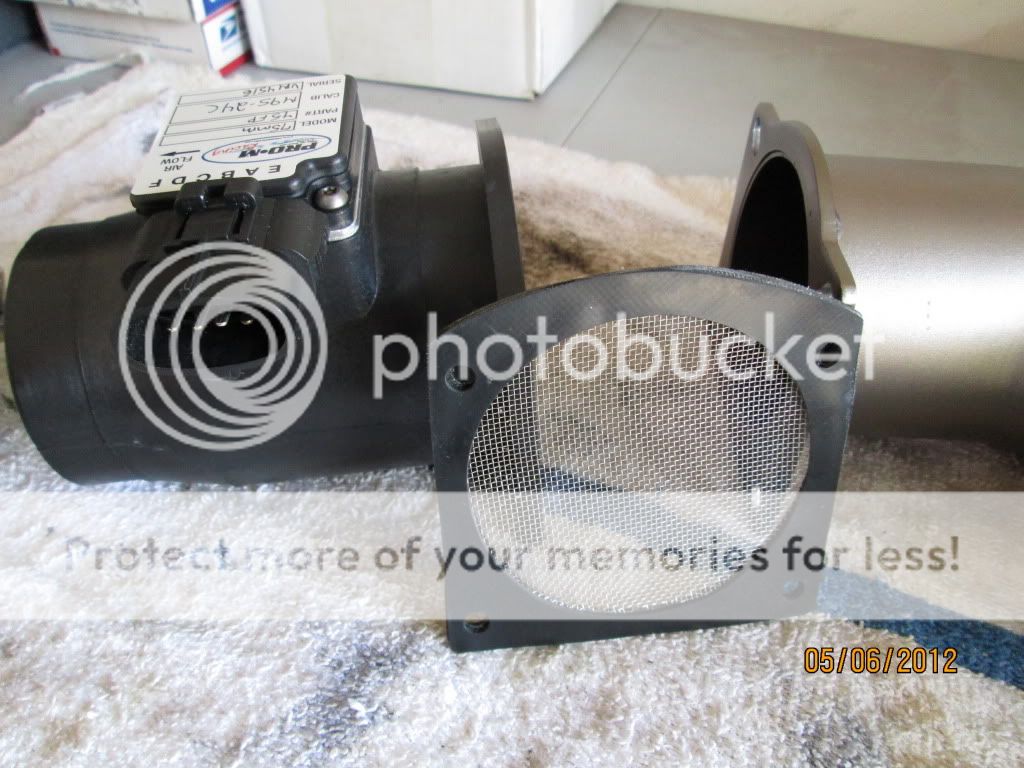
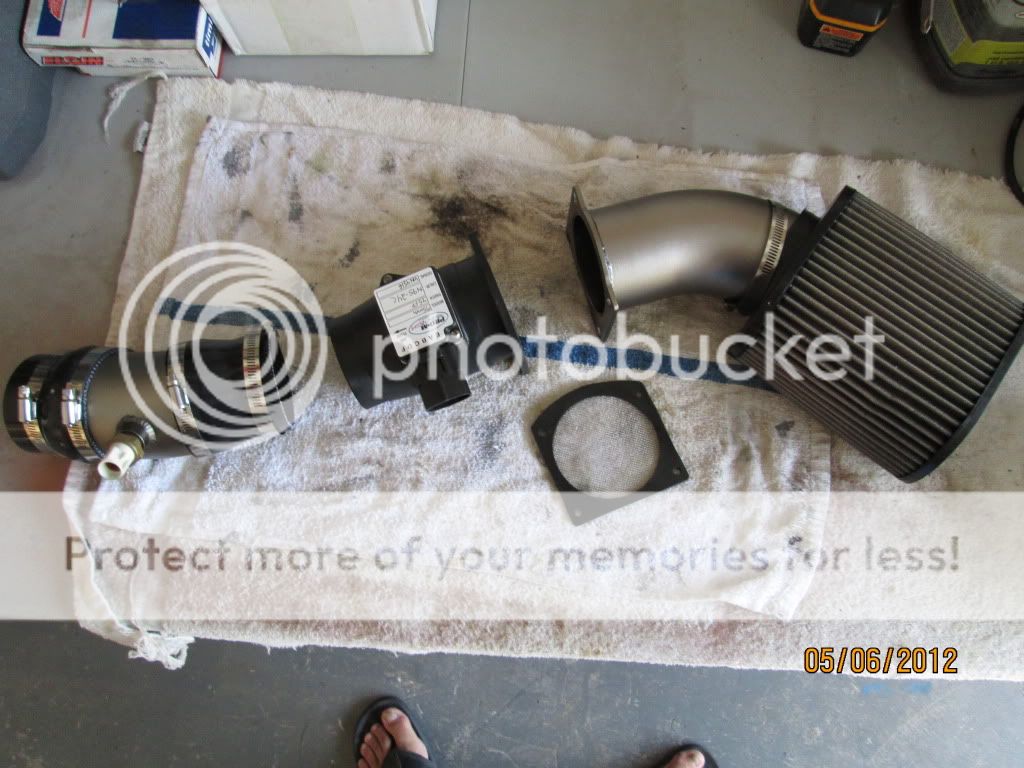
Then I replaced the stock MAF for the new Pro-M unit. It's calibrated for using 24# injectors and for a fender mounted cold air intake which is what I switched to. Also the neat thing about this new meter is it comes with a screen built into the rubber gasket. I read up on it's design and it actually helps in performance. It smooths the flow of air coming into the MAF housing and allows for a more accurate reading.
Fired the engine up today but boy did it put up a fight. Long story short I had to wait for the tranny to get back to me. I sent it back to the boys at PBTH cause there was an issue with the new road race 5th gear. They discovered that this tranny was rare and the part needed to make everything run smoothly was no longer made so it took a while to hunt one down. So now I got the tranny in and everything hooked up. Went to fire it up yesterday and nothing. It started for 3 seconds and then died. Turns out the new fuel pressure regulator was defective. I know this because ther was a puddle of gas under the car and it was coming from the filter on the cold air intake. Looks like the seal inside the regulator was bad and allowed all the fuel to leak out through the vacuum port into the 45* adapter elbow between the upper intake and throttle body. Filling the upper intake and cold air intake tubing with fuel. Lucky for me I had a spare regulator. My biggest fear was that I thought I'd have to take the fuel rails off to replace the regulator. The BBK-SSI intake probably has the worst design fuel rails on the market and installing them on the lower intake while still in the car is a *****. Much easier to do it while the engine is still on the stand. Turned out I didn't have to take them off. I had just forgotten how it went in.
After I installed the back up regulator it fired up but would keep turning off. I had to keep giving it gas to keep it on but it wouldn't idle. I used the set screw on the TB and adjusted it to open the TB some to keep the car on so I could check the timing but when I hooked up the timing gun to the #1 plug wire I was getting an erratic reading. A trip to the local parts store and a new cap and rotor later fixed this. Once I got the timing rite she purred. Tomorrow I'll change the oil and drive it around again slowly. What I'm doing is putting a few heat cycles on the engine by bringing it up to operating temps for a while and then letting it sit to cool off. My plan is to get the car to Thunder Autosports for tunning before next weekend because I'm signed up for the Track Guys event at Sebring.
Here's a quick vid of the car idleing after I adjusted the timing. What the video dosen't show is the low rumble comming from the exhaust that was vibrating my garage.
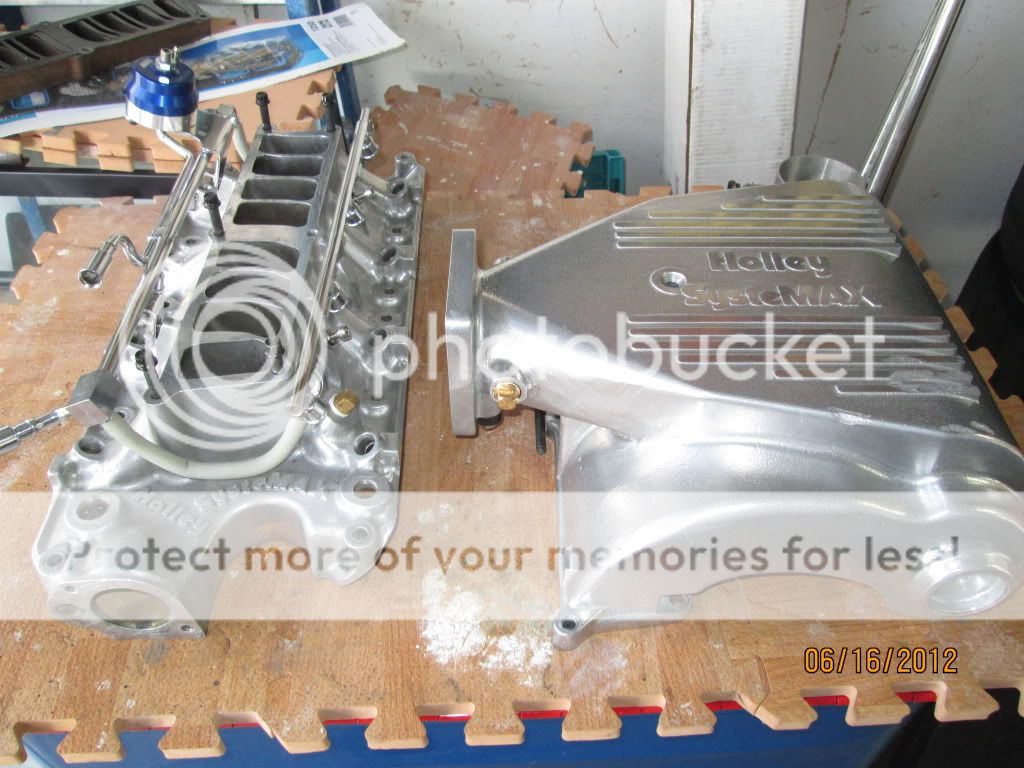
So a few weeks have gone buy since my last post. I did take the car to Thunder for tunning but I never made it to the track. Long story short the tow vehicle I was going to use to tow the car had problems so I decided to stay home. As for the tuning it went smooth but I was a little disappointed with the results. The good news was nothing had to be touched. The car ran perfect with no hiccups and the fuel/air ratio was rite on. The bad news is the car only picked up about 10hp compared to the last time I dynoed it years ago with the old combo. Granted it was cooler weather that day for the first dyno and this was a different type of dyno machine but I thought for sure I'd be in or very near the 300 mark. Also a chip was not used. The tech felt it would've been a waste of money adding a chip to the car because he said it wouldn't have really picked up any more hp. The chip would've been used just for turing the check engine light off and dealing with the slight idle issue. So the attention was then focused on my intake. It is believed that my BBK-SSI intake is the weak link in my combo. I've been told this before from other people. The thing is it's a newer type of intake and not many people run them. I've always loved the way it looked and it does perform very well. It made great power with the old combo I had. Problem is it's not the best out there and that's a fact. One of the best out there is the Holley Systemax which is the intake I've been told to find. My guy runs this intake on his car with great results. It's like racing. You wanna see what works? Then go to a race track and see what most guys are running. The Holley is one of those. They've been proven to make great power. I usually would've just been happy and left well enough alone but I figured hey, I've had the BBK for years now and love it but maybe it's time to change things up. Now the problem is that along with the BBK, the Holley is one of the most expensive intakes out there. I'd already spent enough money on the new engine and such so there was no way I was going to spend over $500 for this new intake. I thought it be a long time before I either find one for real cheap or have to buy it new, NOPE. About a week later my buddy calls and tells me theres a guy selling a Holley on the site for $300. I'm at work so I can't see it but who cares, for that price you don't screw around. I call the guy and setup a meet during lunch and I take the intake off his hands.
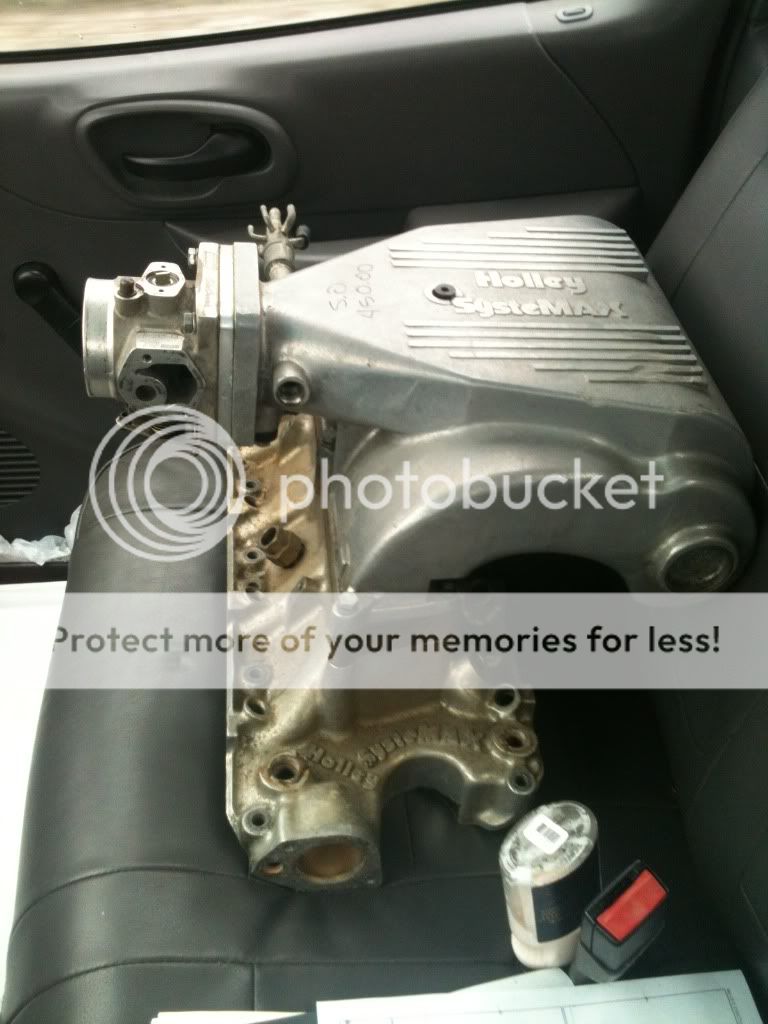
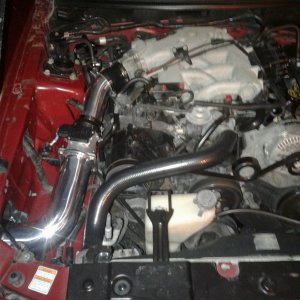
Here's what it looked like when I picked it up.
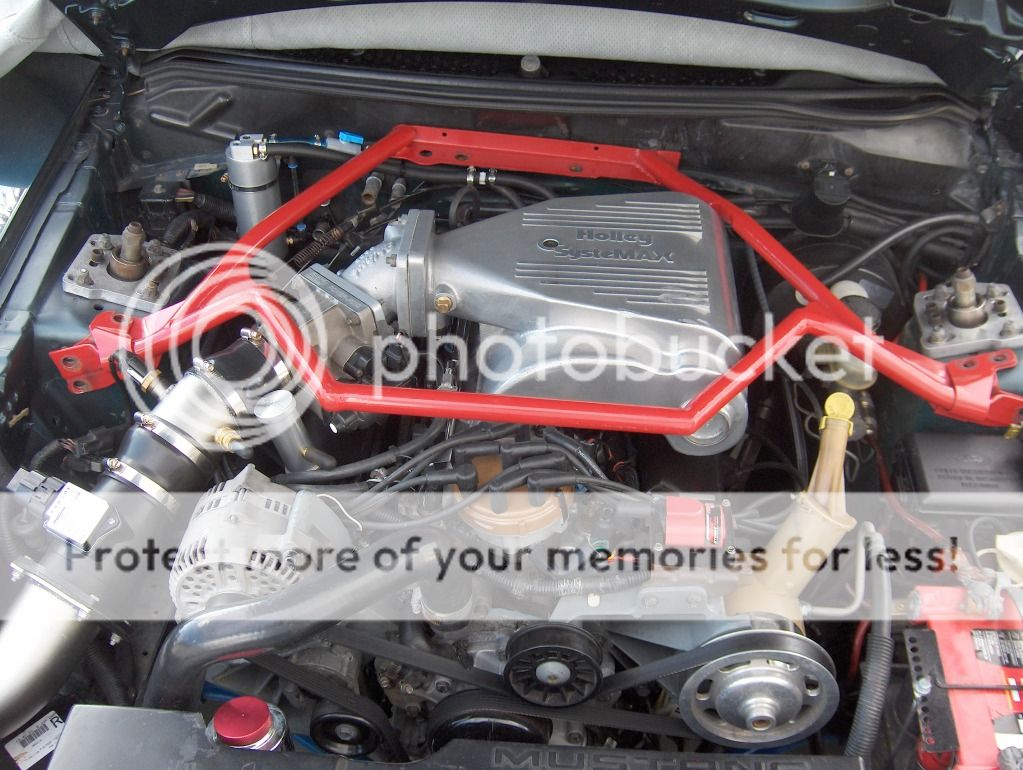
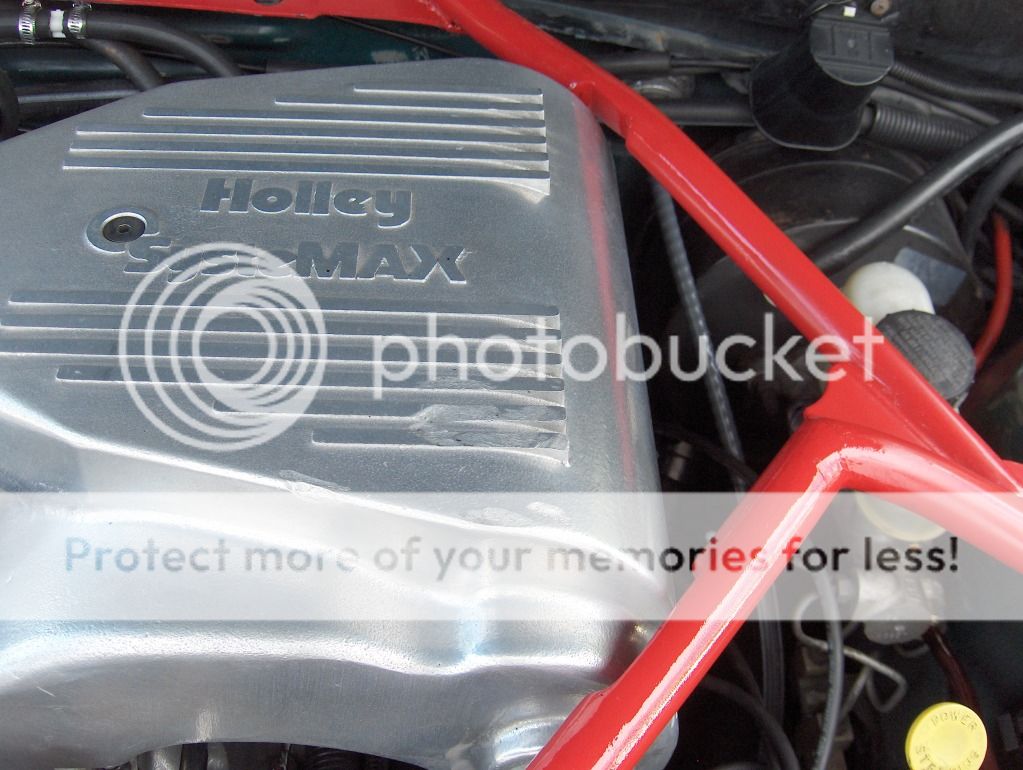
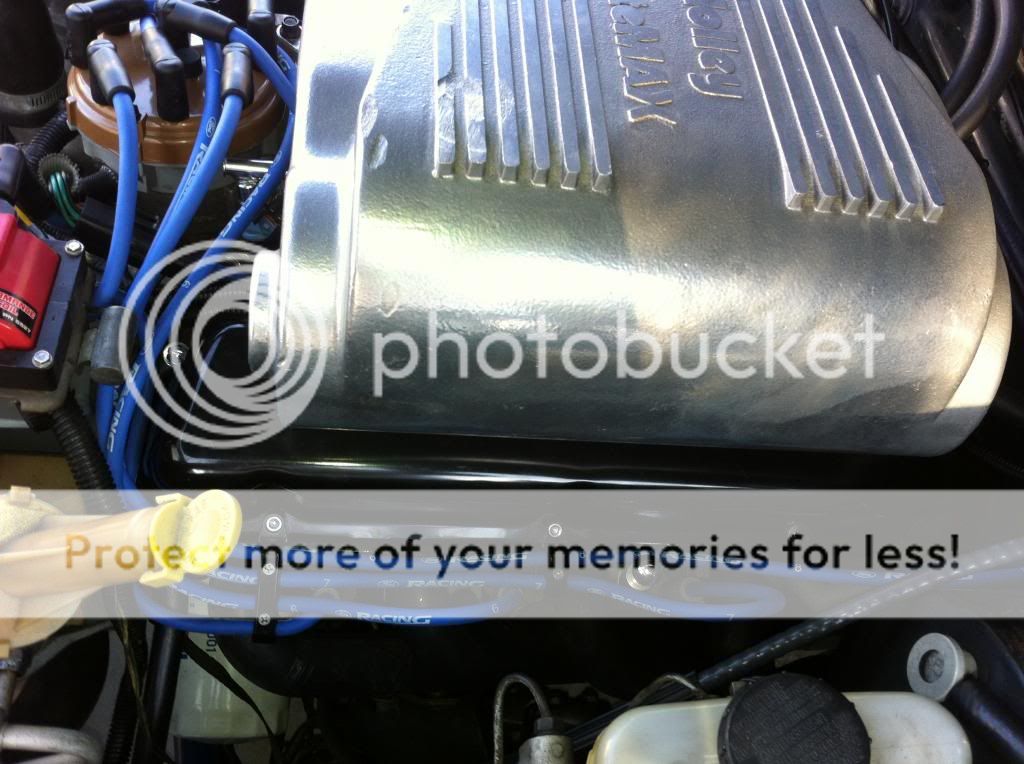
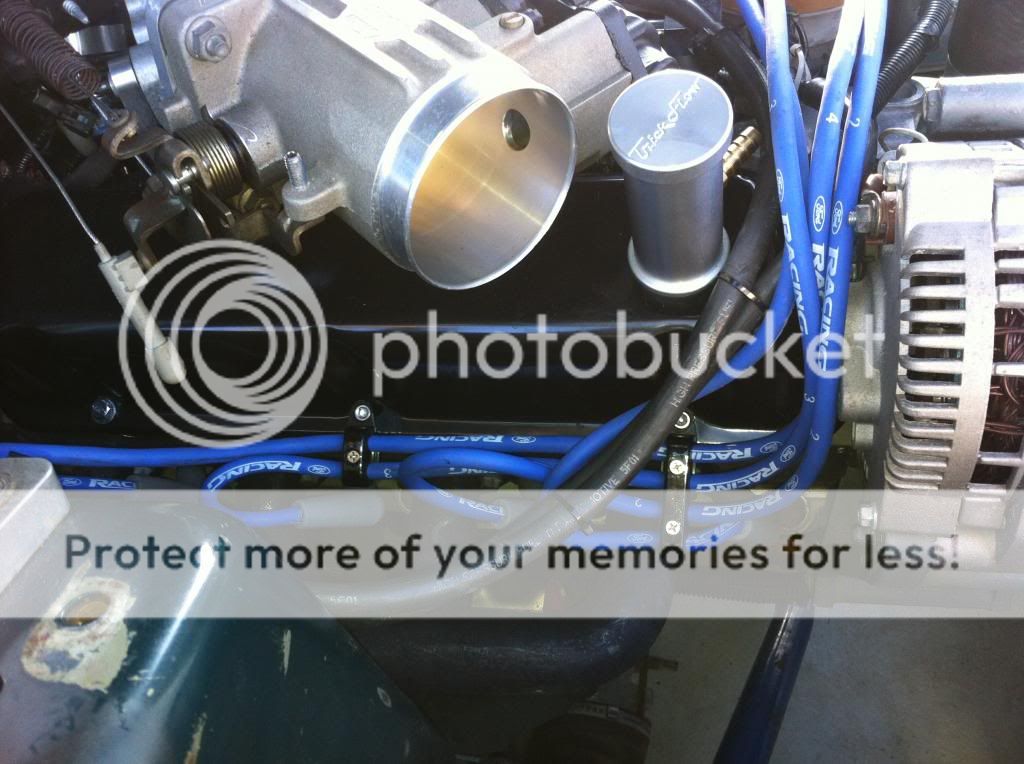
Here's what it looks like now after some cleaning and polishing.
It came with a BBK 70mm TB and a 3/8 spacer. I didn't want to use the spacer so a few trips to the hardware store was needed to get some studs to use for the upper/lower. Of coarse after the lower intake was in the car and I sat the upper on top there were clearance issues with the valve covers. Back to the hardware store to get longer studs and nuts to use the spacer now. Finished the install last night. I'm yet to take the car out on the street's though. I've just been running it to tune the idle and such. I'll be taking it back to the tuner soon for more runs.
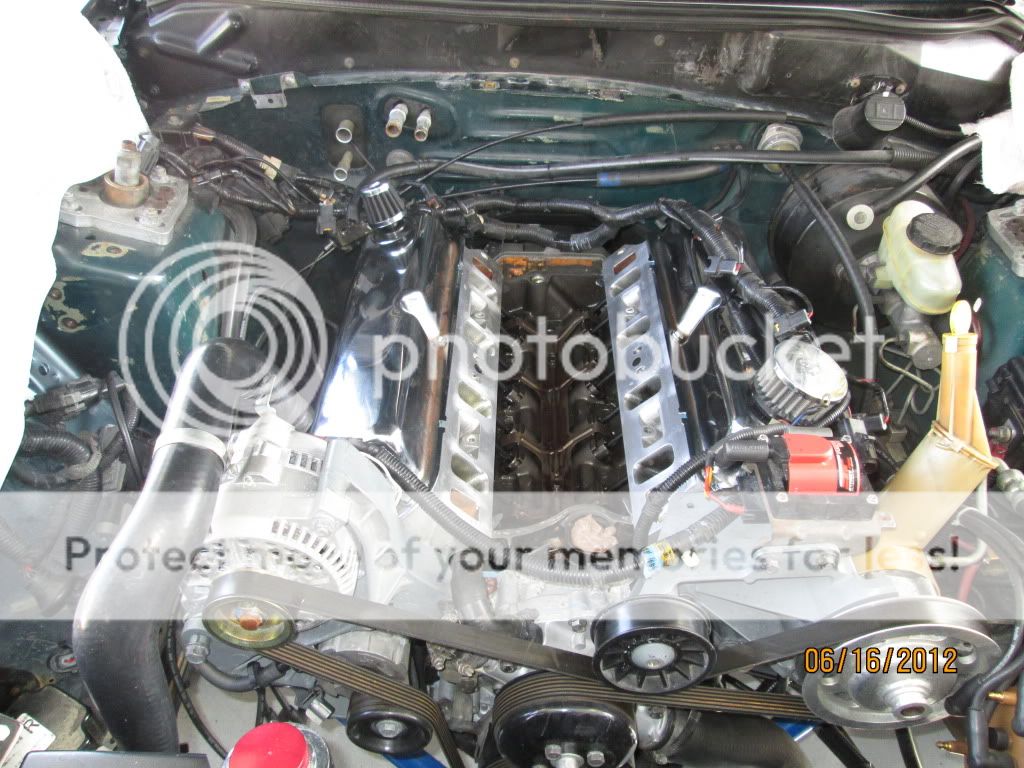
BBK-SSI out.
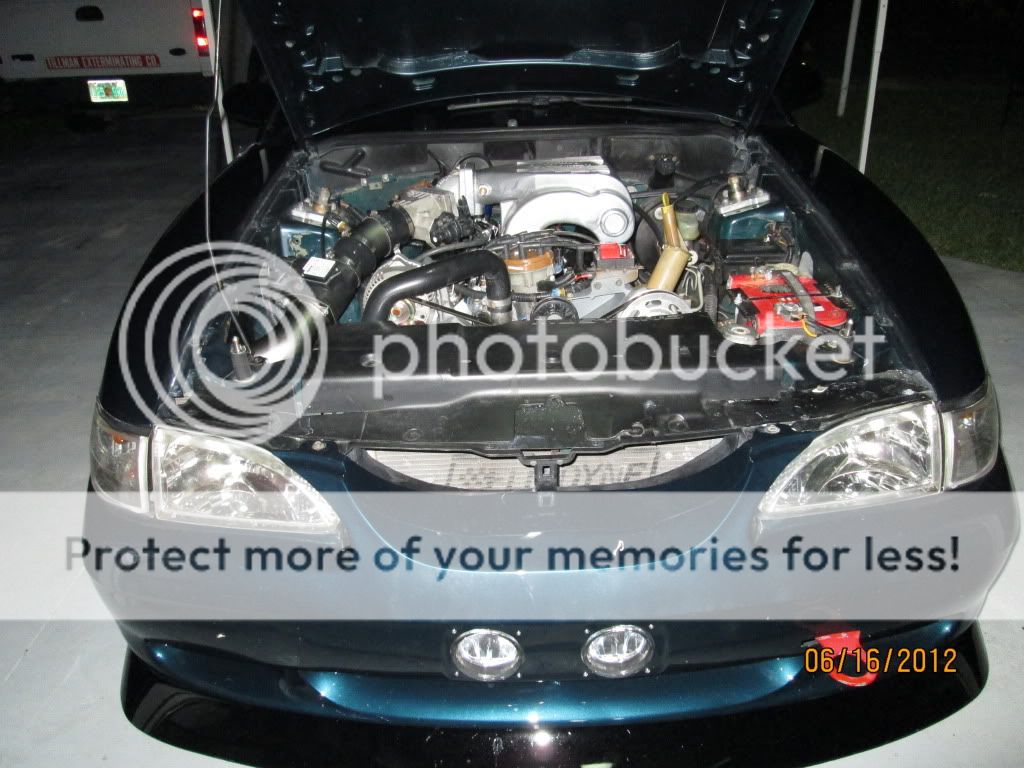
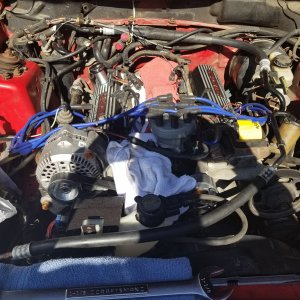
Here is how the engine bay looks now.
Big thanks go out to George for helping out so much with this build and pointing me in the rite direction and Mitch for getting to me so fast when he spotted the intake for sale. __________________
OK, dyno session part two about to commence. Just dropped the car off to Steve at Thunder once again. After driving it here and there since it's last dyno session there's no way I'll be happy with the idle issue. The new combo is just too much for the stock computer. I recently posted a wanted ad for a Diablo chip and got one, thanks Justin=Blown99GT.
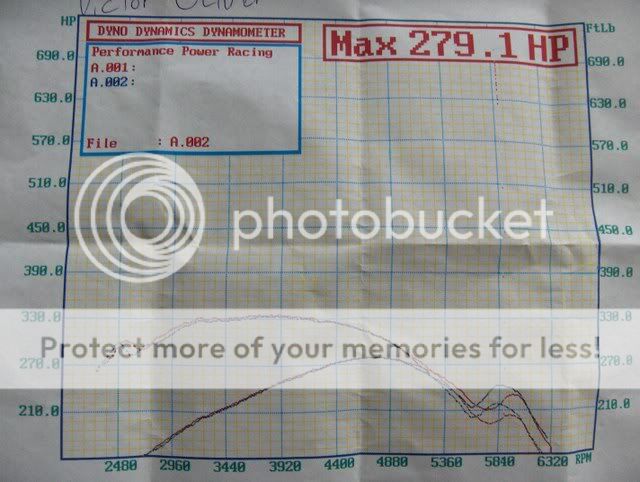
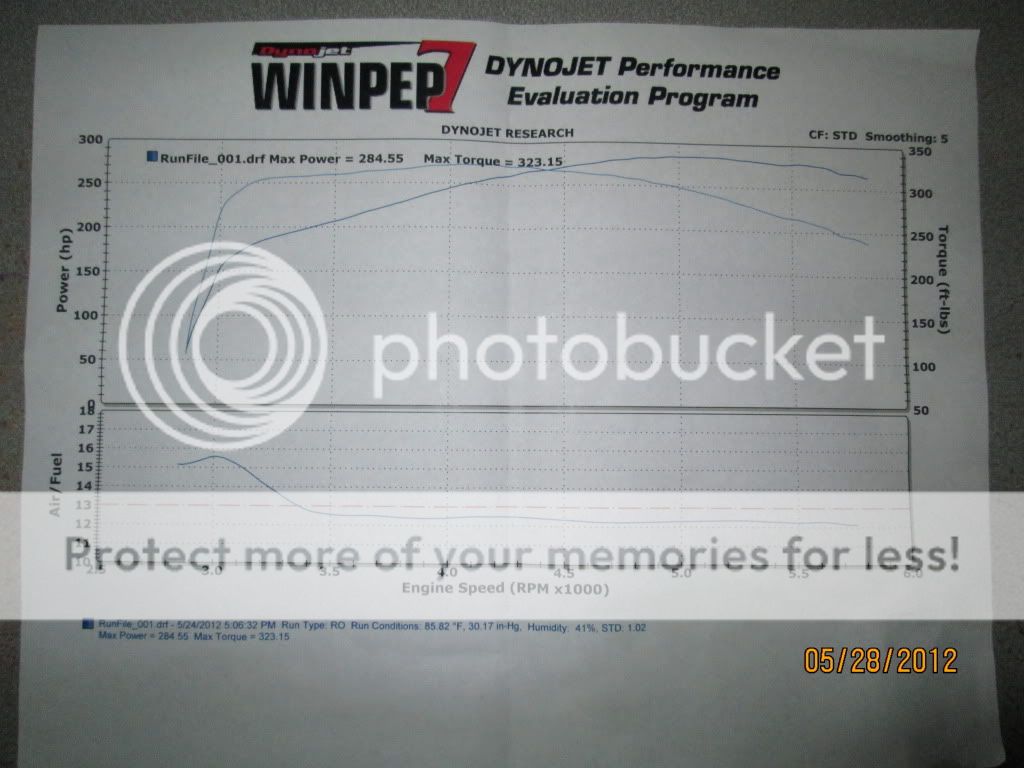
Here's a little more interesting info to go with all this. This is the dyno sheet from years ago with my old setup consisting of the stock bottom end, gt40 iron heads with crane 1.7's, BBK-SSI intake, CAI, full race exhaust, stock cam, injectors and supporting mods.
279hp 330tq
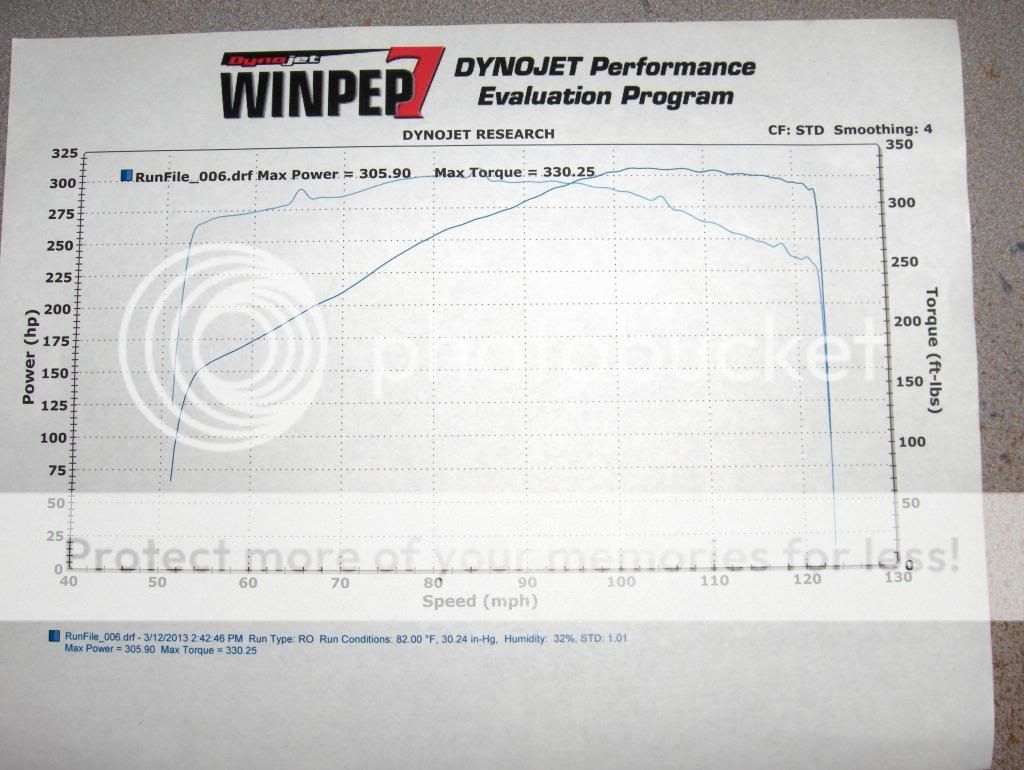
Here's the most recent numbers. Combo now was 306 bottom end, AFR165 heads, Steeda #19 cam, BBK-SSI intake, 24# injectors with Pro-M MAF, full racing exhaust and CAI.
284hp 323tq
This can't be rite. Sure there has to be differences between the types of dyno's used and cool weather for the first dyno vs hot and humid for the second but that's crazy. This is why the attention was focused on the intake being the weak link.
More testing. I'm not a drag racing guy. Never was good at it or got serious with it. My best time ever was years ago when the car was lightly modded and I got a 14.3. Could never get there again. Recently since my Brother got himself a 95 and our cars are identical in every way we've been taking them to the strip for some fun. The best I was able to get was once again a 14.3. I was very happy with that since it's been years since I've seen those numbers. A week later I have the new Holley Intake on the car. Long story short car was running like shit but even with that, another 14.3 with the new intake. Oh boy I thought. If it ran a 14.3 in this condition I wonder what it'll do when I fix the problem. A week later and we're back. Good thing I brought my helmet, 13.8
I don't know about you but that seems big for just switching out the intake. Really curious to see the new dyno numbers. Updates soon to come. __________________
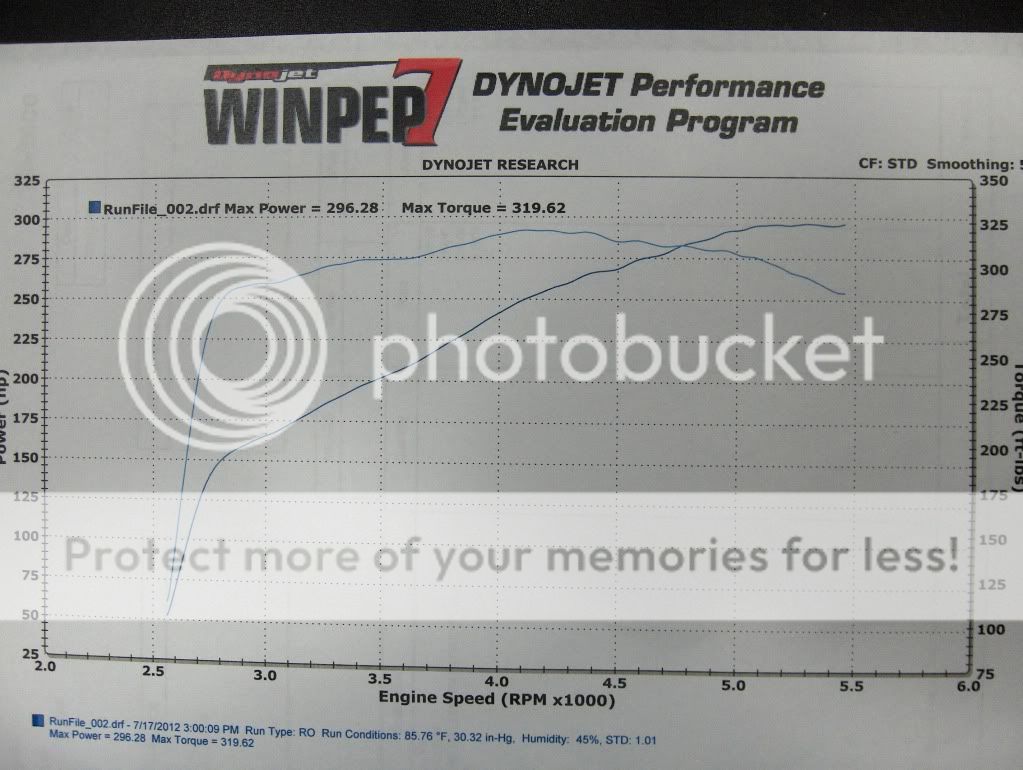
Final numbers are in. I'm 50/50 with the outcome. Thought there be more. Was really hoping to break that 300hp mark. Missed it by a few. I'm sure the 85 degree weather on the day of the pulls didn't help. On a good note I have a new engine and the car is tuned so no more idle issues. It'll be nice to enjoy driving it around again and hopefully soon be back at the tracks.
This is a piece I ripped off the car years ago not knowing what it was for. It's a plastic piece that mounts rite under the radiator. I've read were some have said it deflects air from the bottom of the car up into the radiator and others say it works by creating a low pressure area behind it, causing the high pressure area of air in front of the radiator to be sucked through it. Either way it's important to have it and Ford designed it that way so I found one at the junk yards and put it on.
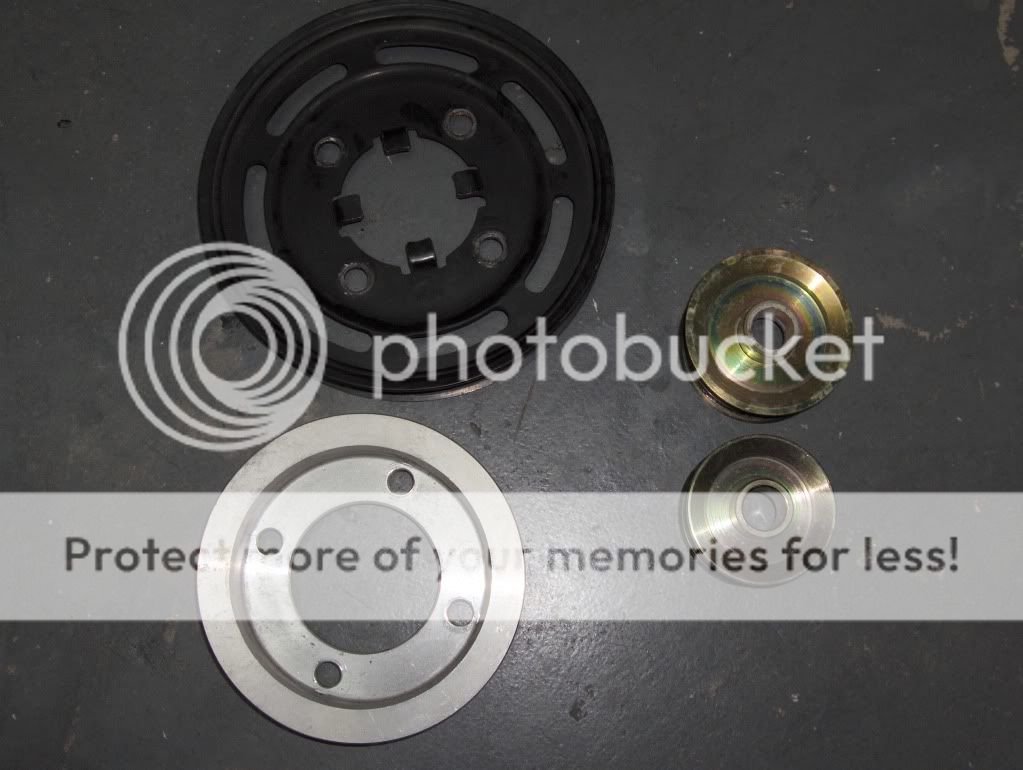
Smaller Crank and Alt Pulley
Decided to install a smaller crank pulley from a BBK under drive kit I have. I didn't use the alt and water pump pulley that were part of the kit. Both of those pulleys are bigger in size then the stock ones for the purpose of slowing down those accessories. I always had problems when I ran the complete kit. Doing it this way still gives me a few ponies problem free. I had an extra alt pulley that was smaller then the stock one. Since the crank would now spin slower with the smaller pulley on it I didn't want the alt to suffer so adding the smaller pulley would allow it to spin faster and it should be close to the speed it spun at with the stock setup. In the picture below you can see the new pulleys at the bottom of the picture under the stock ones.
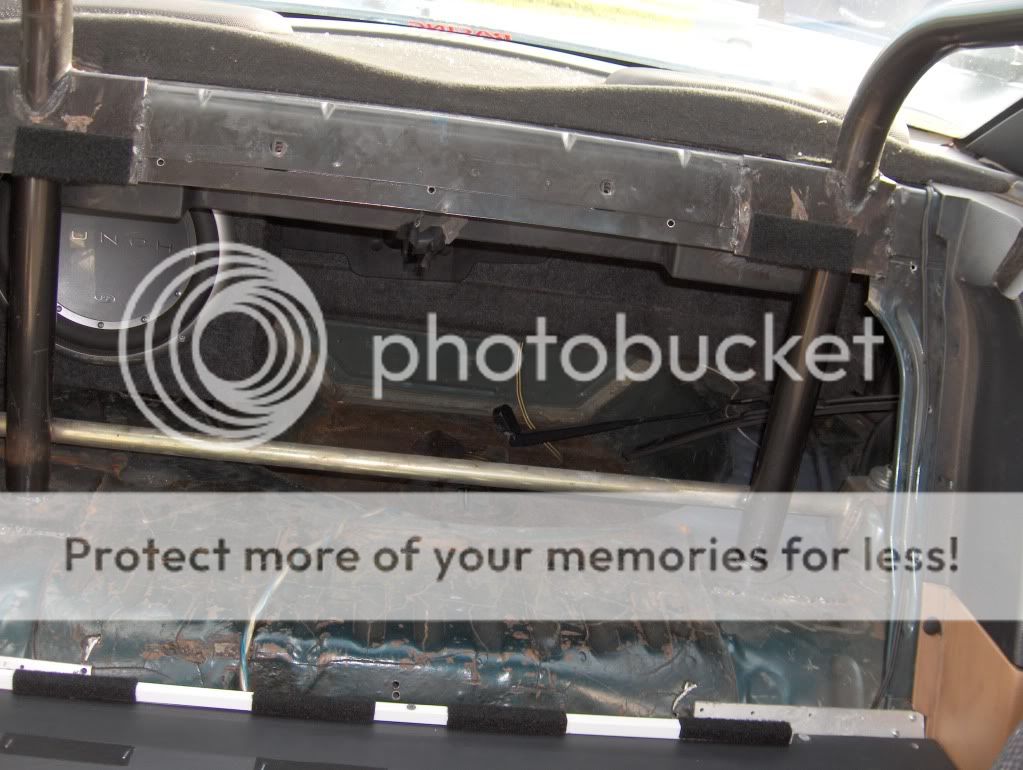
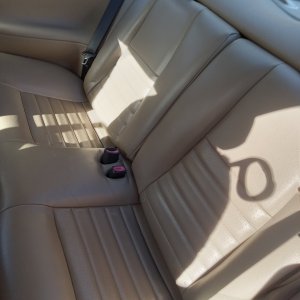
Finally got around to building my own delete kit for the rear seats. I did not know which way to go with it though. Original plan was to use thin board since it's just a cover for looks and didn't need to be strong but I got lazy and just used 3/4" wood from a 4'x8' I had in storage. Thing is since I was now using such a thick board I might as well go with one of my ideas and mount my MTX12" sub on the back rest area. I also originally planed to mount both my MTX amps on top of the bottom piece but instead opted to hide them under for a cleaner look. Here's what I did:
First I cut the top and bottom piece out of the 4x8 board. I used cardboard to get the shape I needed and traced them out on the wood. After mocking up the boards removed them to add the vinyl I bought from Walmart. Here's a picture of the bottom board after I removed it.
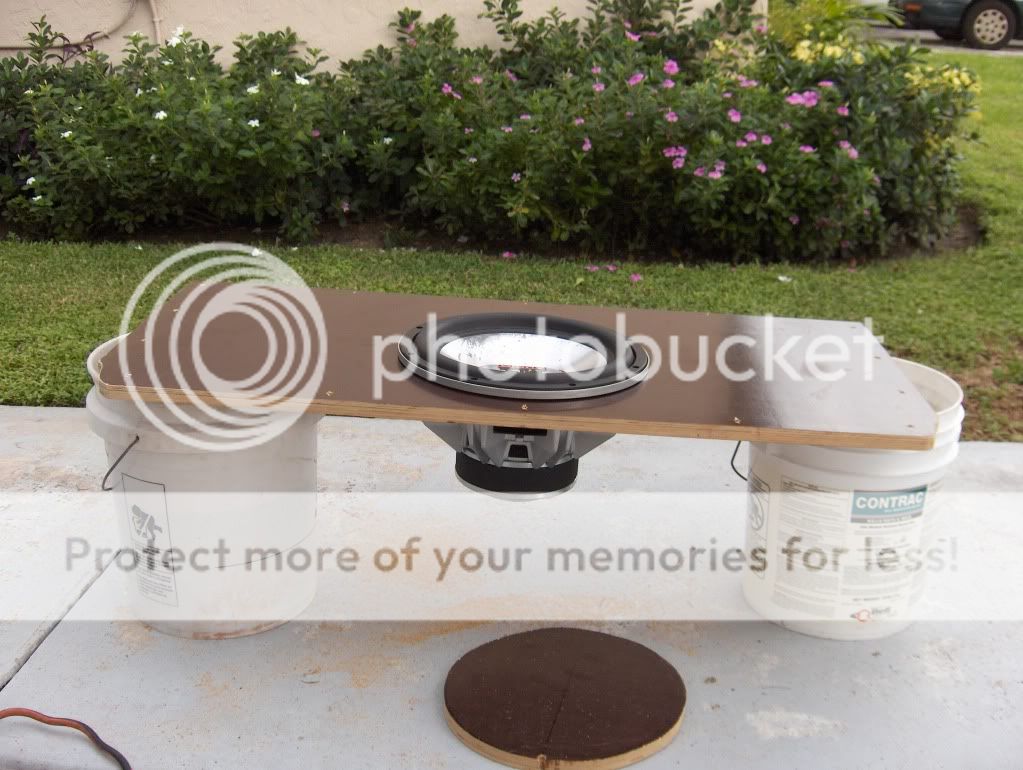
Here's a picture of the top piece after I already cut the hole for the sub.
I placed the amps in the holes of where the rear bottom seat used to go. Plenty of room for them in there and should provide enough cooling.
I finished the vinyl on both pieces and placed the bottom on first covering the amps. You can see in the picture that I used aluminum L angle for supports at the top corners. I had to hammer these a bit to get the rite shape/angle to sit flat under the board.
After adding the vinyl to the top piece with the hole already cut into it I traced around the hole using a razor and then added the sub. I wanted it to be sealed as much as possible so I added rubber seals to the back of the board. You can also see the staples holding the vinyl to the board. I got myself a heavy duty stapler and it does the job great.
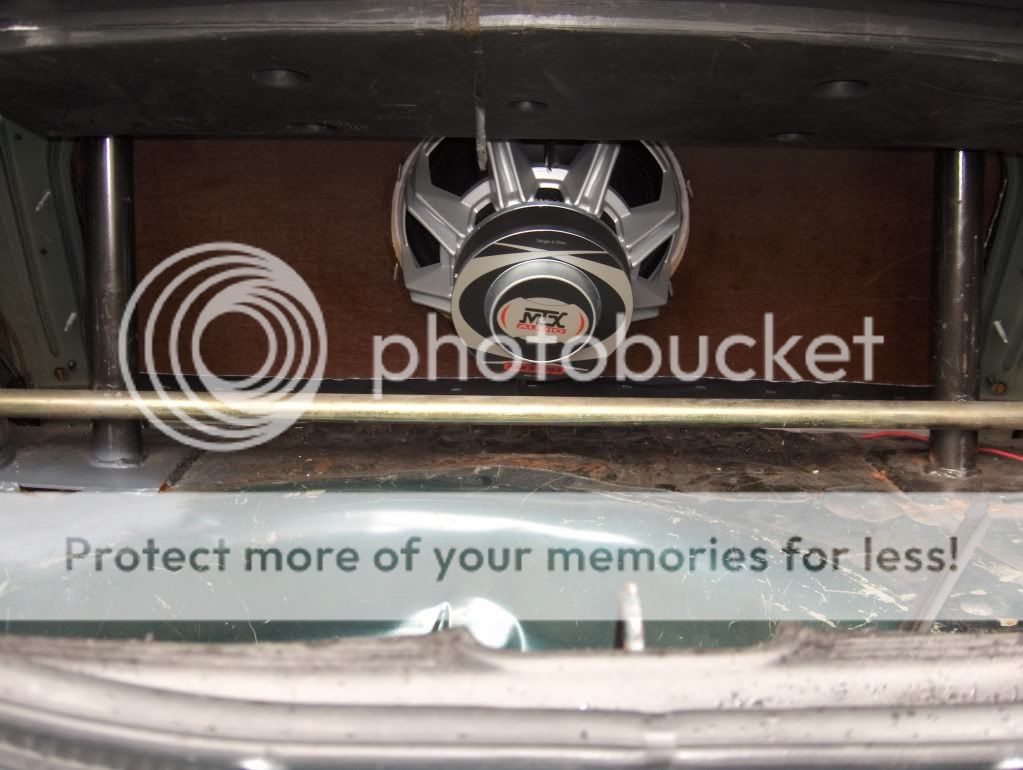
Here's a trunk view of the sub
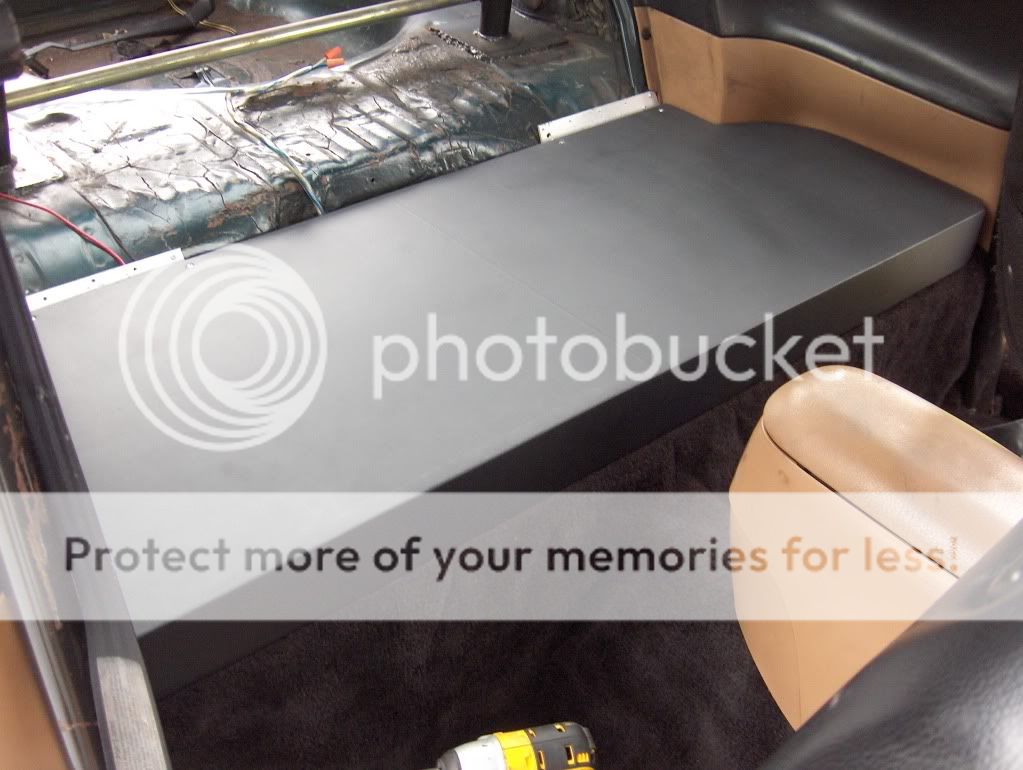
And here is the completed rear seat delete with boom.
The one thing I'm not happy about is the vinyl on the back rest board. I did this one first and used spray glue to help stick the vinyl to the board but when I worked on the second piece I didn't use glue. This allowed me to stretch the vinyl for a nice smooth wrinkle free surface. The top board which I used glue on didn't really allow me to stretch it out so there are some wrinkles in it but nothing major. The bass is not as strong as it used to be with this setup though. I still need to tune the amp but it may be do to this sub being designed for a small sealed box. I think when using a sub for this kind of setup you need one that's designed as a free air sub. If I get tired of not having glass cracking bass then I'll redo the top piece and leave it without a sub and place the 12" back into it's sealed box in the trunk. __________________
I didn't like the way the back rest came out cause I used glue on it and because of that I couldn't stretch the vinyl out smooth like I did on the bottom cover. And the boom didn't sound right with the 12" in the center of the back rest. I take it because that sub is designed to be in a sealed box and not used as a free air speaker. So I redid the back rest part using a thin 1/8 board and put the sub back in it's sealed box in the trunk. Now the boom sounds much deeper and the rear delete looks clean. This time around instead of screwing the board in place I added velcro to allow easy removal of the back board.
1/8 board with vinyl added.
Back of the board showing the staples used to hold the vinyl in place. Also you can see the pieces of velcro I used to hold the board in place and allow easy removal.
Here is the hole and you can see the opposite sides of velcro to hold the board in place.
Here is the finished rear seat delete part 2. No more screws showing anywhere. Nice and smooth.
Since the addition of the new Holley Systemax intake I've had a problem with way too much oil getting sucked up by the PCV valve into the intake. When the car is idling and I pull the PCV out and the suction is crazy. It's like a mini vacuum. I think on a proper working system the PCV is supposed to make a clicking sound at idle because the suction is only great enough to open it but not enough to hold it open so it causes the little pin inside to move up and down in a fast motion causing that clicking sound. I even tried eliminating the PCV valve and using a K&N style push in breather but lots of oil would get pushed out of it and onto the headers causing lots of smoke.
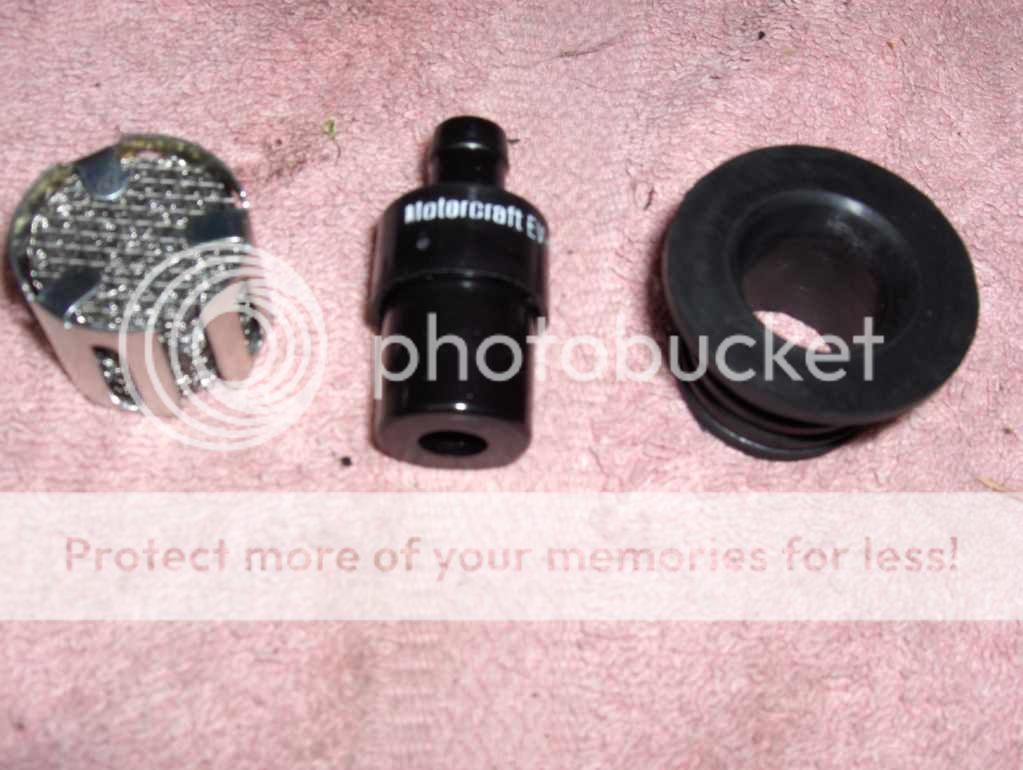
What I ended up doing was putting the cars PCV system back the way it was designed by ford. To do this I had to order new valve covers and a push in style oil fill tube. The VC's that were in there had a hole in each one. When the car was stock only the pass side VC had the hole which was the oil fill tube with the nipple on it's side. I ended up getting black stock style VC's with only the pass cover having a hole in it. I wanted to use a factory PCV valve so I ordered a new Motorcraft unit along with the rubber plug and mesh screen that go into the rear of the lower intake.
Since the new VC's only had a hole I had to order a push in style oil fill tube with a nipple on it's side.
Once I had everything I installed it. I added a nipple to the side of the CAI tube and connected a hose from it to the nipple on the side of the oil fill tube. This is how the car came when it was stock.
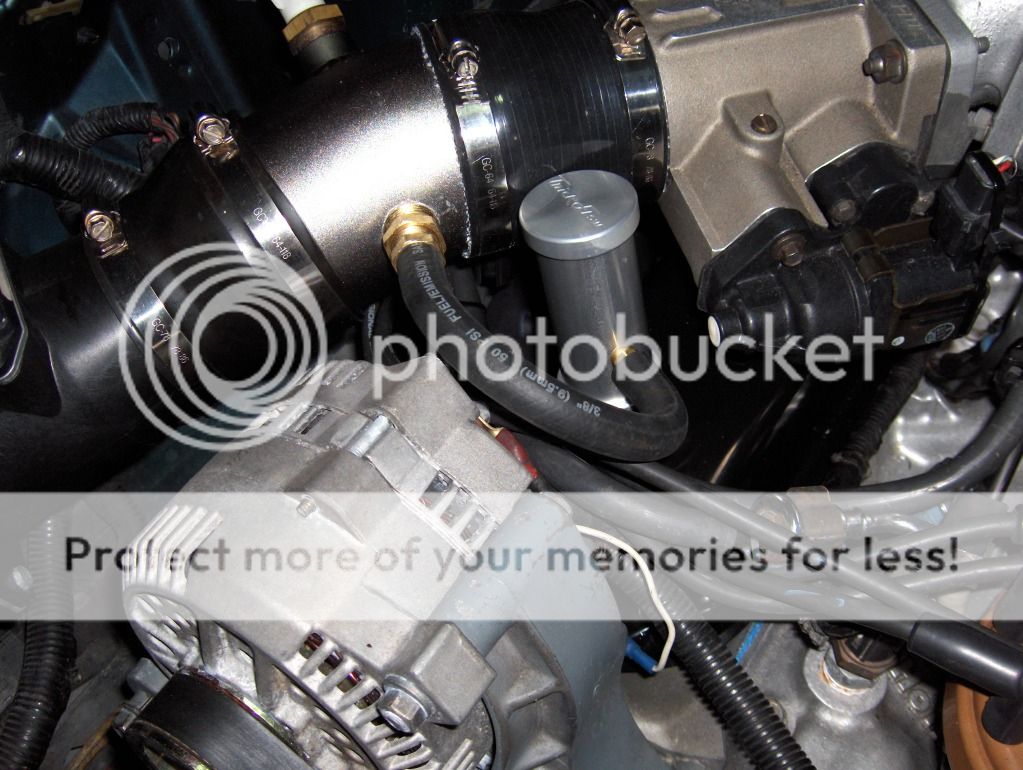
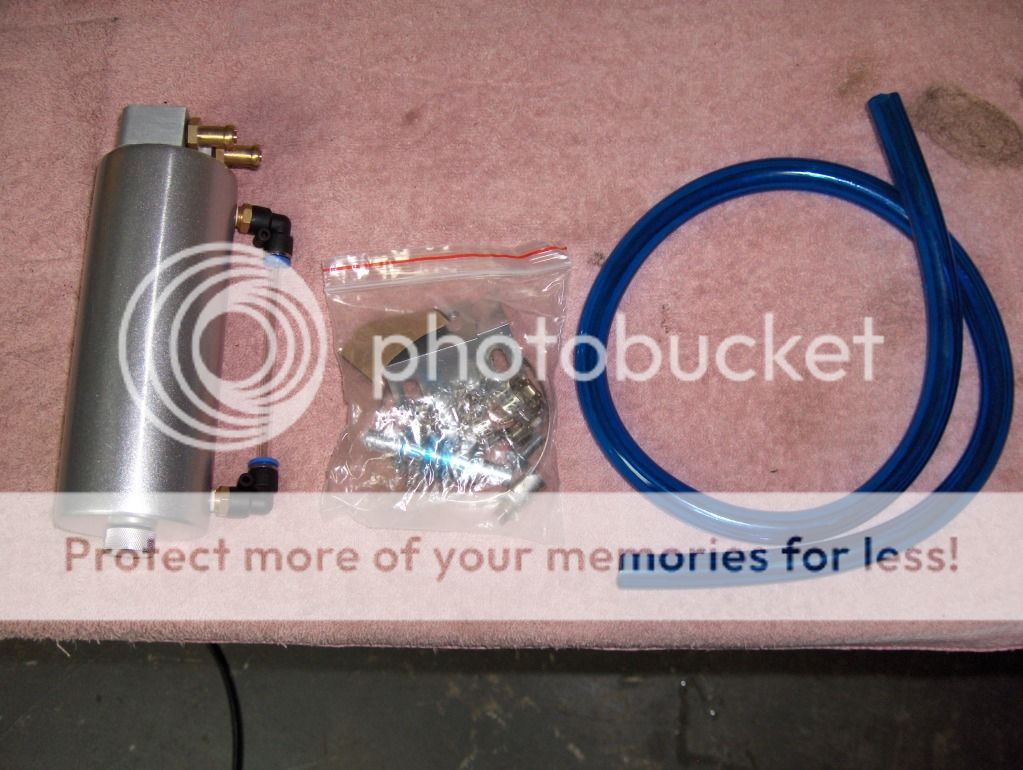
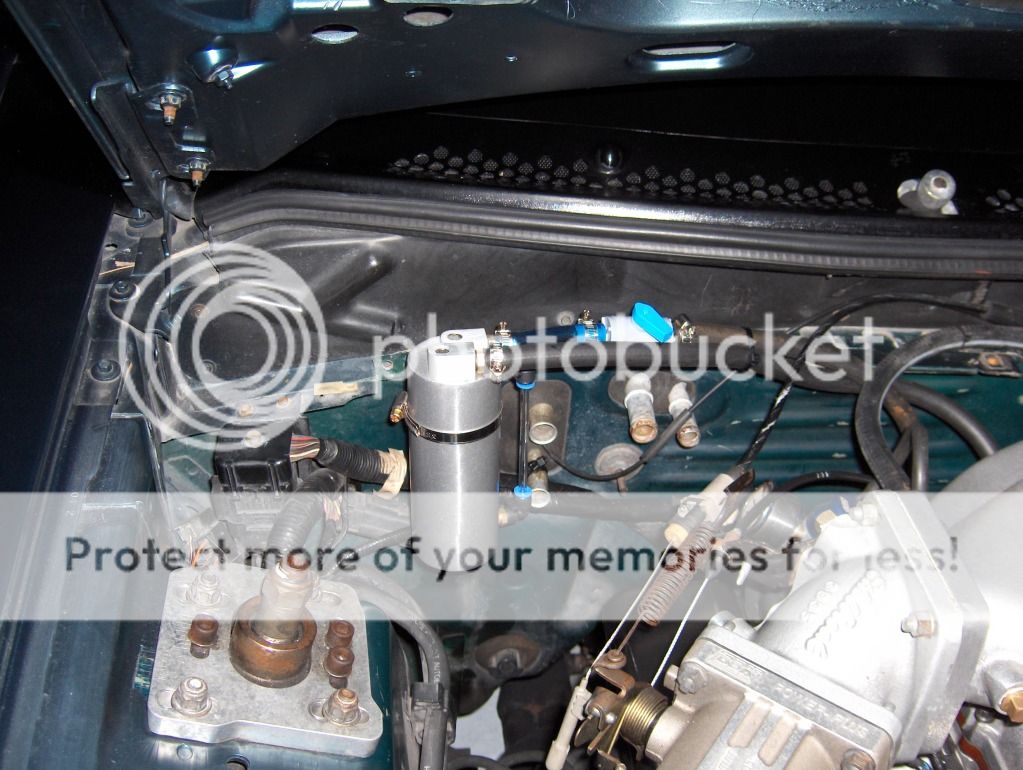
To remedy the problem of too much suction at the PCV I put an adjustable in-line valve. What I did was start the car and while on idle, I pulled the PCV valve and turned the switch on the in-line adjuster until the suction was reduced at the PCV until it started clicking. I also added my home made oil catch can in-line with the PCV to further reduce oil consumption.
I'm still testing the thing out but it seems to be working.
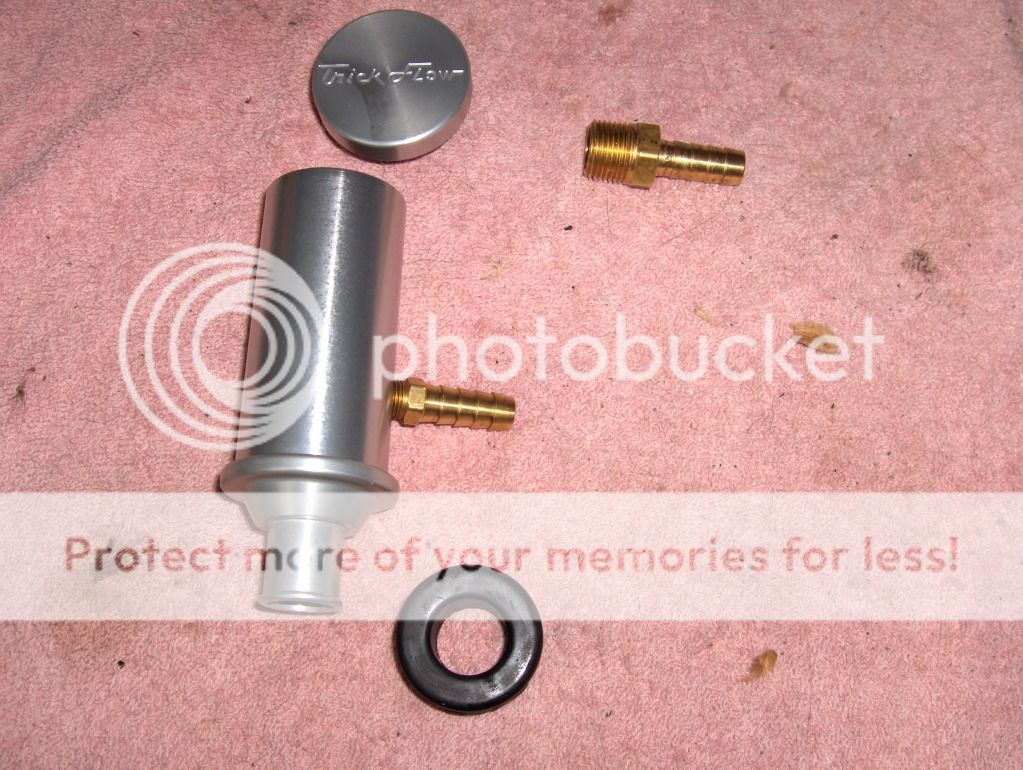
The home made one I built using Home Depot parts started to leak at the little lever at the bottom. Someone told me this would happen after a while. So I ordered a nice one from Ebay.
Shortly after I installed my new Holley Systemax intake I started to notice the car burning allot of oil. There was a ton of smoke coming out the pipes. For months I've tried all sorts of things to try and reduce the amount of oil getting sucked up by the pcv valve. My home made oil separator finally failed so I ordered a nice one off Ebay and that one worked real good cause it showed just how much oil was really getting sucked up. Here is that separator after a drive from my home off Boynton Beach Blvd to my Moms house off Forest Hill Blvd. It's only about a 20 minute ride too and from. Look how much oil got sucked up in that little time.
This is not normal and my motor is new so something is up. I started doing some home work and found that the Holley's didn't come with a baffle under the pcv valve hole like the stock intake has. I guess your supposed to transfer the stock one over to the aftermarket intake before installing. Well this was something I overlooked. I could not remember if the Holley intake I bought used had that baffle. I was hoping it didn't with all the oil coming out of there. I placed and order for a new baffle just in case the intake didn't have one when I planed to take it off. Tonight I decided to do just that and bam, no baffle.
Here is the intake with the new baffle installed. I had to trim it a little for it to fit just rite. Also the holes for the screws in the intake are threadless. I had to use a tap and die set to thread the holes. I'll reinstall the intake soon and hopefully this will fix the huge oil consumption problem.
I'm happy to report that there is no longer and oil consumption problem. The baffle that the intake was missing did the job. I drove the car today for about 20 minutes on the highway and city. Got home and opened the hood to find no oil in the clear tube on the side of the separator.
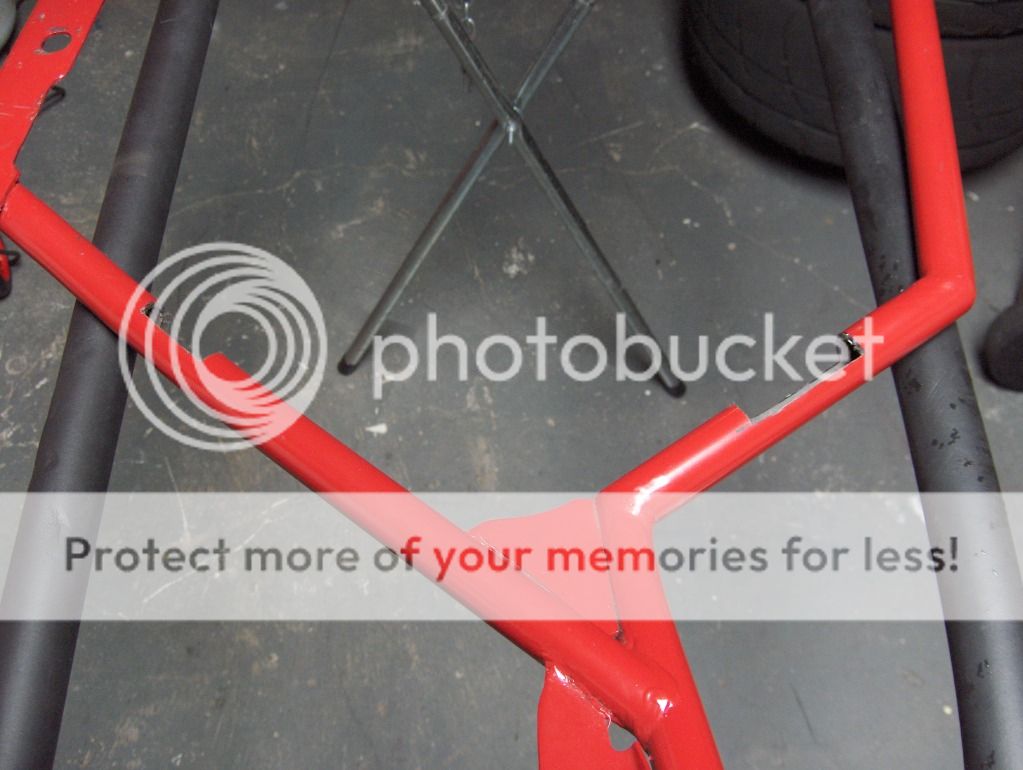
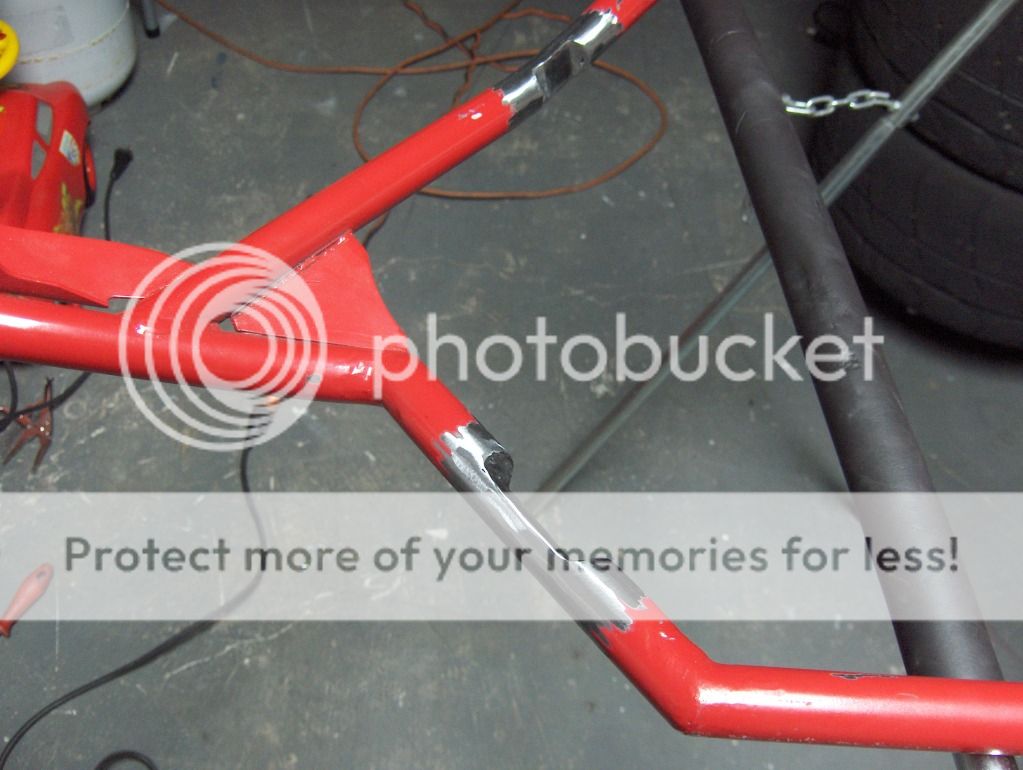
Since the addition of the Holley intake the tower brace again didn't fit. This is I think the forth time I've had to rework it to fit. Not gonna say to much on it. Notched out the area's that were interfering with the fitment and welded in some plate, followed by grinding and paint.
I decided to maximize the output of my new engine with the addition of a proper cam. This new one is larger then the Steeda#19 I had in there. I had my go to guy George Buritica @ GB Performance & Restoration do the install and choose the right cam for me with the help of Ike at MPR. For tuning I once again left it in the hands of Steve at Thunder Autosports. I'm happy to say that the new engine reached and passed the 300rwhp mark I had set for it. It made 306 rwhp and 330 torque. Not bad for a stock bottom end 306 with H.C.I.
I was also informed that the power lasted further into the higher rpm range. I could now shift it at 6000 if I so pleased. Not that I plan to do that much since this is still a stock 5.0 block but it's nice to know if it happens I'll be fine. I had hoped that the dyno runs would've been done during the cold weather we just had but no dice. Temps were 82 during the runs.
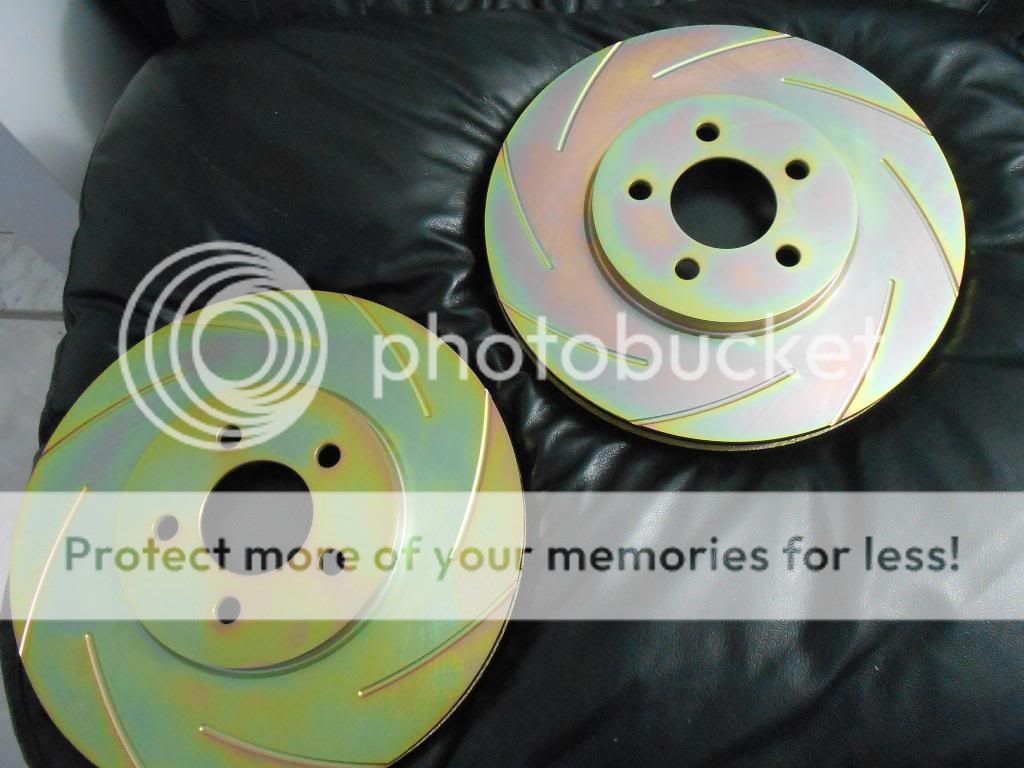
Not a big mod but still something new. It was time for some new front rotors. The stock ones I've been running were full of cracks. Since I run stock style rotors for track events I got these no names that come zinc coated and slotted. Adds a nice touch I think. I may replace the rears with the same style.
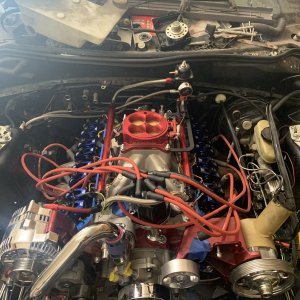
One of my old plug wires once again got to close to the header and melted, causing it to ark off. This is because I don't use wire separators. Before I sent the car off to get tuned I bought new Ford Racing 9mm blue wires and a trick separator kit from Summit. Takes a little time to get it all right but once it's in it ain't going nowhere.
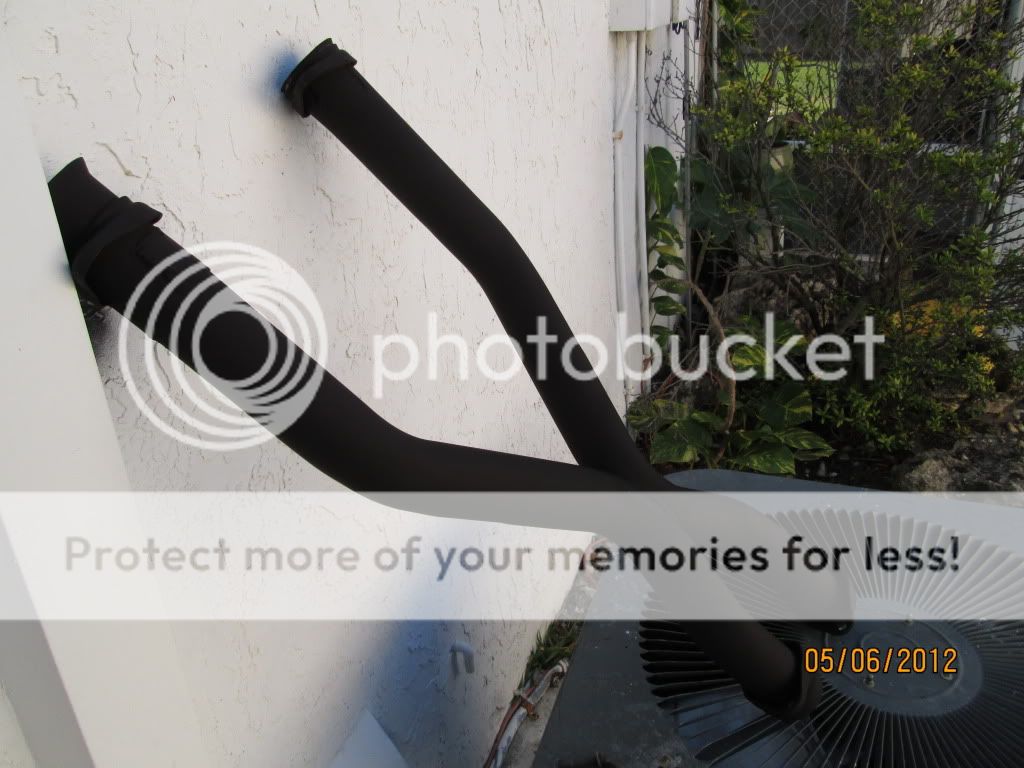
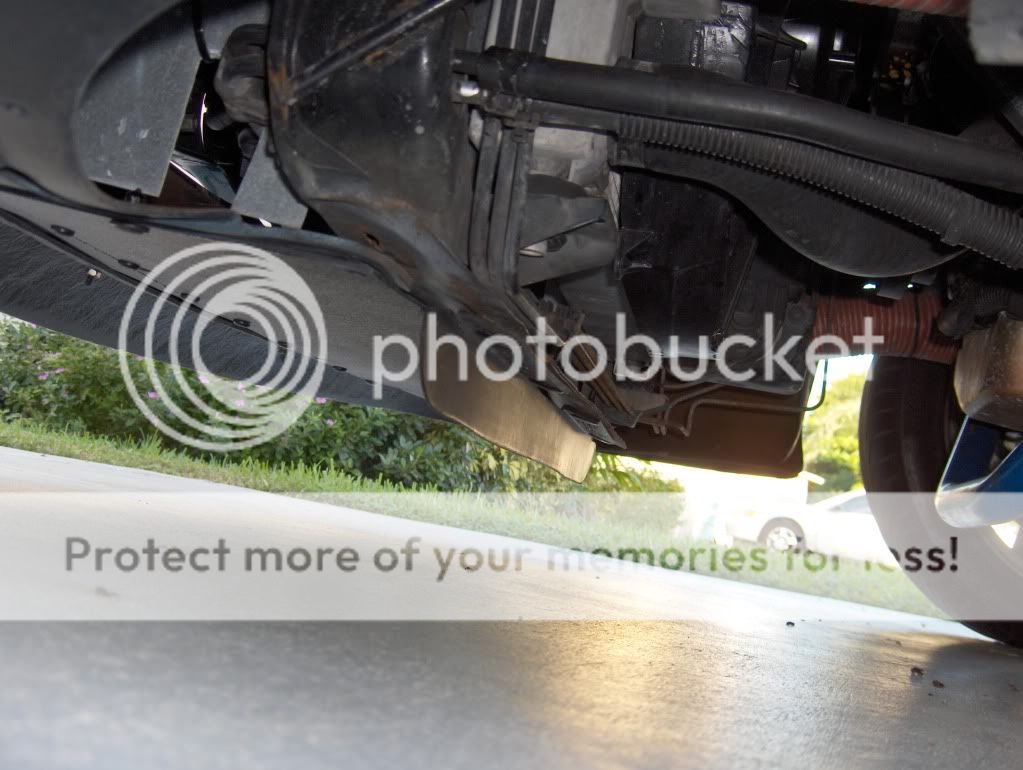
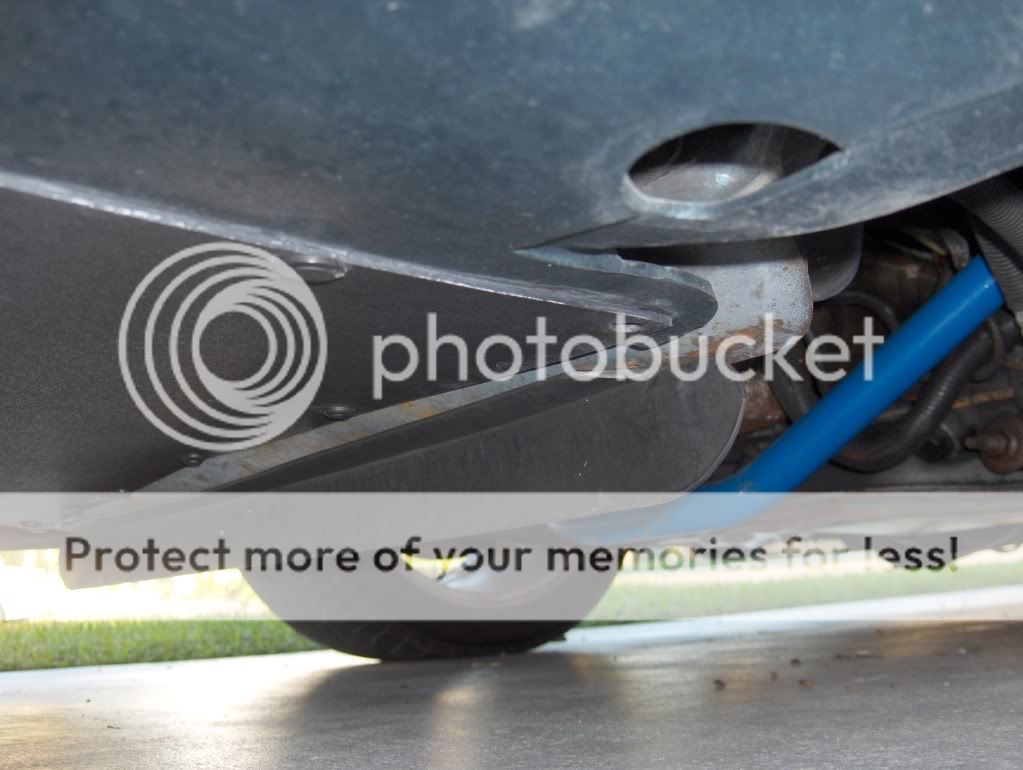
I've always wanted to have that race car side exhaust on my car. I once thought about getting boom tubes, the ones Nascars use that are square. Problem was my full length subframe connectors would push that pipe down even further to the ground and would not look right. It needed to be tight up against the body. Other option would be to run it up inside the car. Lot of work and planning involved in that so it never got done, until today.
I thought about it for months on how it should look and so I bought pieces here and there. The hardest part is doing all this in my driveway. Even though this was months of planning it took me about 24 hours of work to finish. I decided to run both exhaust pipes that are 2.5" into one 3.5". This would result in less time and money. Also remember this is a straight through type of system. The mufflers are Magnaflow race units that have no baffles. Pretty much straight pipes so there is no concern about restrictions. All the turns in the system were done with 90 degree mandrel bent pipe that I chopped up in any way I needed.
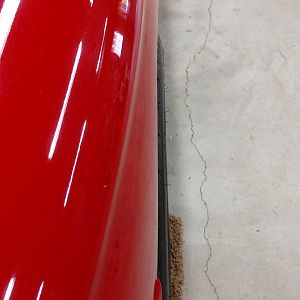
The plate on the outside of the car is polished SS. The exhaust tip is also polished SS. The plate is held in place with SS rivets. I must mention that most of the system is welded together but I did set it up in a way that it can be taken apart easily for service to it or the car.
Finished wrapping up the inside pipe last night. Now all I have to do is replace the pass side interior panel that I had to destroy in order to remove it. My custom roll cage was not built with the removal of those panels in mind. I'll have to think of something in order to put one back.
Carmine=wpbcobra recently installed a gt500 hood vent on his sn95 racecar too only he went further with it. He cut out that honeycomb area for the most airflow possible. I thought this was a great idea so I did it to mine. Should work way better now at extracting hot air from the radiator and under the hood.
A while back I purchased some from a company called Quantum Motorsports. They were nice but their design sucked. They were angled in a way that forced the hose right into the back of the rim. Over a short period of time they eventually ripped. Those hoses are not cheap btw's. Here's a pic of the driver side one. You can see how much it's angled that it's basically pointing to the back side of the rim if it were there.
I sold those cooling plates and ended up not running anything for a while.
I had a good idea of what they should look like so before I finished school I took the opportunity of using their equipment to fab up my own. I made them out of aluminum and tig welded it. All my measuring and ideas payed off cause it fit like a glove. To compliment the new plates I purchased new cooling hoses. Happy to report the car once again has brake cooling.
Here you can see the angle of the new plates and how they now point the duct straight out from the center of the rim. Plenty of room now.