Tips for rattle can paint jobs

9838stang

Well-Known Member
Joined
Sep 13, 2010
Messages
2,563
Reaction score
204
Location
Minneapolis,MN
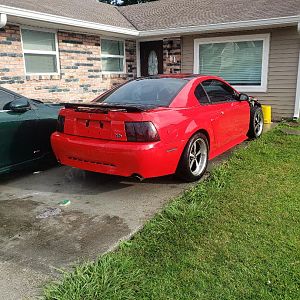
As said above, rattle can paint jobs might sound cheap up front, but it will end up cost a little bit of cash. I ended up rattle bombing my car over 7 years ago. I painted my front bumper, rear bumper, driver front fender and lower half of the door. The lower half of the doors had runs and junk in them from being repainted, and the rear bumper was scratched and had a whole in it. the front bumper was prepped poorly and so the paint was chipping off. The fender was full of bondo and didnt set correctly.

After surveying the work ahead, i tackled each piece with a ton of care. As everyone else says, the details of the paint job are determined by the prep work. On each full panels, i used 2 almost 3 cans. I will say once the can is getting down to about to its last 1/3 maybe 1/4 left i throw the can away or you will start to get splatter effect. It will not work well. If you plan on using clear coat, light coats only. heavy coats will shrink the paint it will not end well.

One bare plastics, you will need a plastic adhesian promoter to attract the paint to the material unless you use plastic type spray paint. I recommend using Brite Touch brand paint. i have had great luck with it!!!


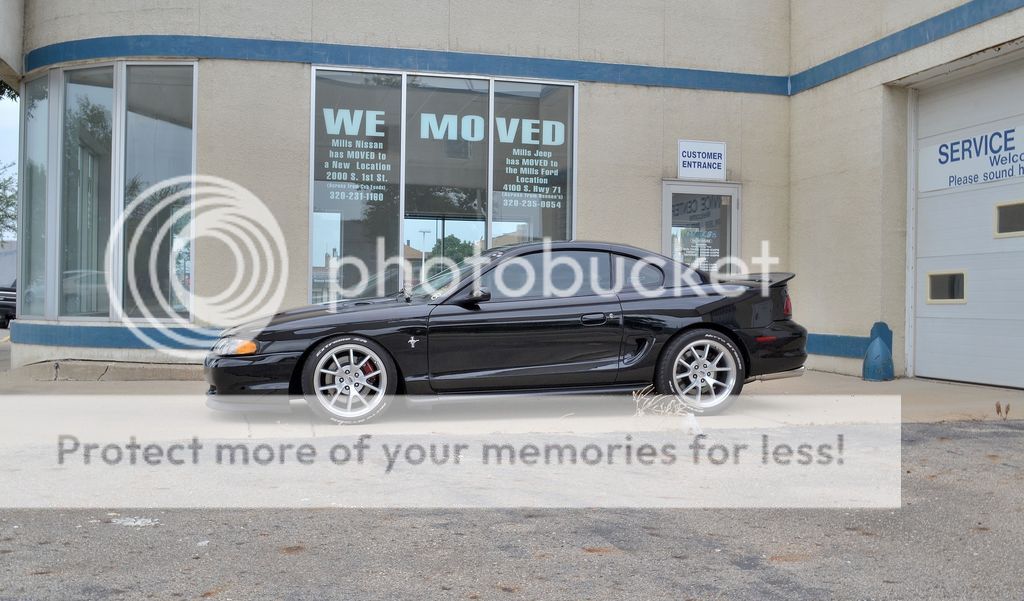
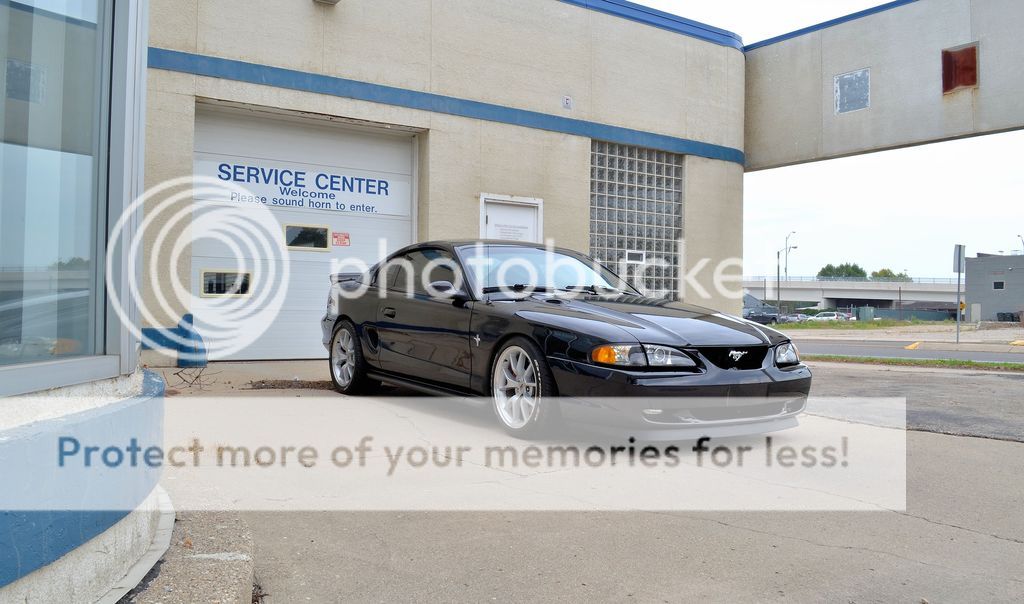
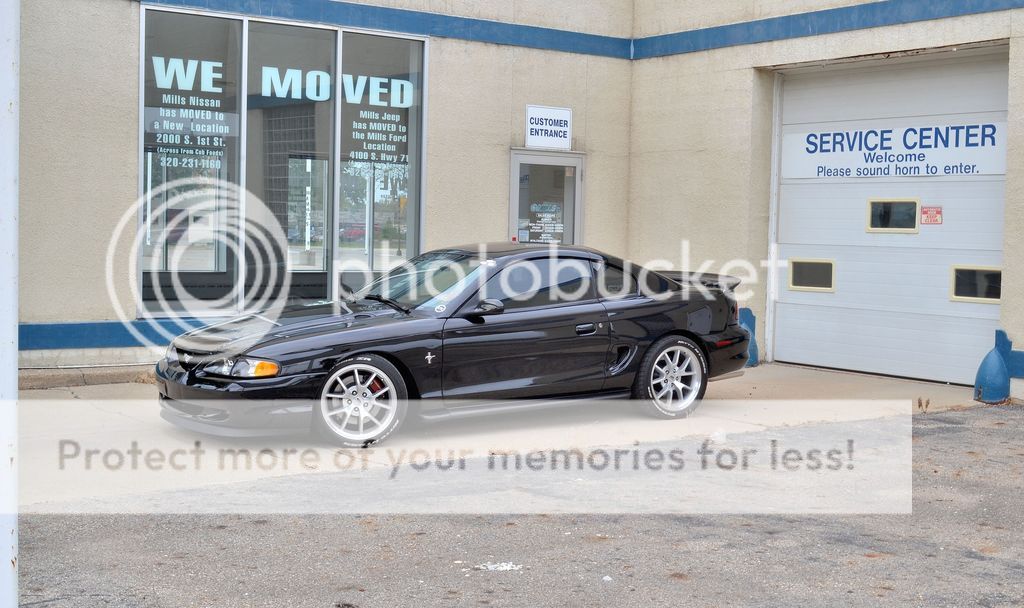
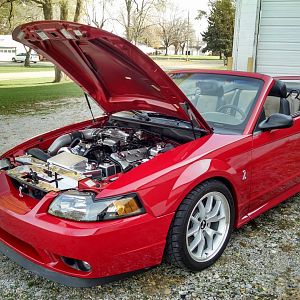
Now these pictures, the front bumper, and rear bumper have been replace since the rattle bomb. the front bumper was damaged by road debris, and the rear bumper was backed into in my 1st year in college. So i happened to find a couple of stock black bumpers for $20.00 each.

The driver side fender was the one that came with the car that i learned how to reshape metal on. So it has very little bondo in it. This is the same picture in all of the pictures posted.


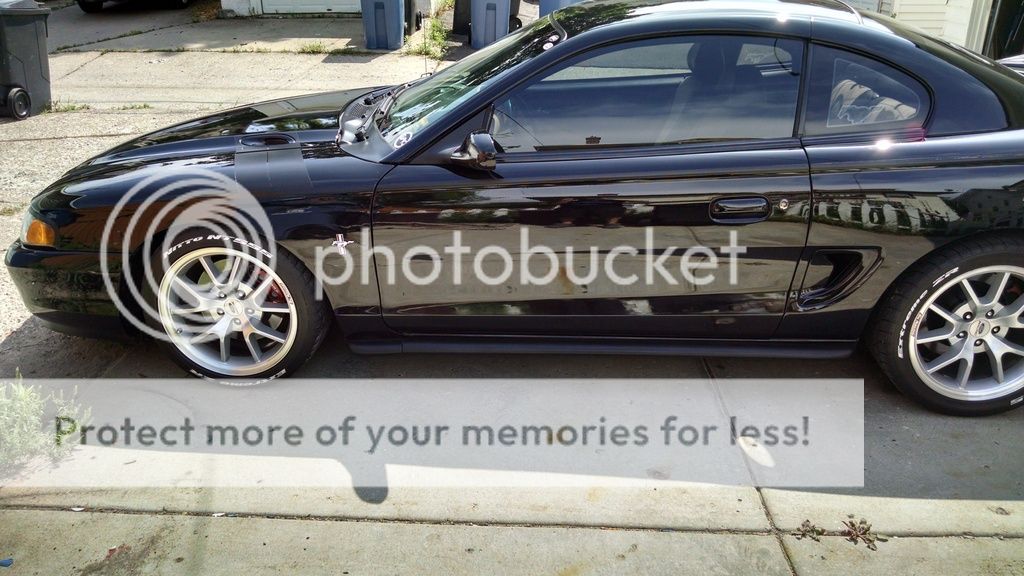
Problem with spray paint. you cannot wax, or use wax soap, and you cannot use anything of other than water and soap. not waterless dry wash. There was someone at a car should that had seen my car and made a comment that it was dirty and it needs to be cleaned. The spray paint was wet and kept drying and would suck debris into the paint. I think when i put the paint on, it was to humid becuase it seemed the paint was soft for 3 weeks. But the guy went to his car got a bottle of his stuff he was selling and used it on my car and he wrecked the paint. what ever agent that was in it, made the paint haze and over the fall made the paint crinkle.
 

9838stang

Well-Known Member
Joined
Sep 13, 2010
Messages
2,563
Reaction score
204
Location
Minneapolis,MN
This the the front end with rattle bomb. fender and bumper


front rear and lower sides are rattle paint.


I will also say for you, watch how people handle spray guns, and adapt that to the method of rattle can jobs. definitely get the adapter that makes the can feel like a spray gun.
 
OP
OP
96blak54

96blak54

Moderator
Staff
Joined
Feb 21, 2011
Messages
10,025
Reaction score
2,866
Location
In the shop
Excellent info! I literally raised my shirt up to show boobys to your car! I love it!

The trigger thing for spray cans is on the list for next purchase. My finger feels goofy today.
 

Tony

Legend
Joined
May 23, 2012
Messages
9,396
Reaction score
978
Location
ohio
laying the base coat (being black) won't be too bad at all. my problem is always getting the clear to build enough to be able to cut and buff it. typically spray cans spray such a fine mist that coverage over a large area is a pita lol. i sprayed my air tank and mirrors and i can tell you be glad your car is not silver lol. metallic silver is tricky to keep it from being cloudy looking. but it took 1 whole can of clear on the tank. i'd say getting the clear to cover and being able to wetsand, buff and polish and also get rid of swirls (especially on black) will be your toughest challenges. but not impossible
 

hondarocks61

Active Member
Joined
Jul 5, 2012
Messages
568
Reaction score
19
Location
MA
Dry film thickness is your friend... Wetsanding and buffing can do a number on soft paint like the enamel in spray cans if its not complely dry, and spray can enamel takes FOREVER to dry. Keeping the spray area warm is going to help alot with that.

Sent from my LGL22C using Tapatalk
 

ttocs

Post Whore
Joined
Oct 9, 2009
Messages
32,597
Reaction score
5,645
Location
Evansville Indiana
when I do clear I almost like to think that I am sneaking up on it and using a method I heard called grip it/rip it I believe. For the first coat you just want to get a dusting of clear on it. Not enough to actually get the part wet just enough really to make a glossy coat satin looking. Wait 10-15 mins and then for the 2nd coat your going to put a medium coat on. This one will be wetter looking but still do not do a full coat until the 3rd/4th coats to build it up. This will allow the first 2 coats to start to flash and grip and work to build the thickness of the clear up so you have enough to cut/buff/polish.
 

hondarocks61

Active Member
Joined
Jul 5, 2012
Messages
568
Reaction score
19
Location
MA
when I do clear I almost like to think that I am sneaking up on it and using a method I heard called grip it/rip it I believe. For the first coat you just want to get a dusting of clear on it. Not enough to actually get the part wet just enough really to make a glossy coat satin looking. Wait 10-15 mins and then for the 2nd coat your going to put a medium coat on. This one will be wetter looking but still do not do a full coat until the 3rd/4th coats to build it up. This will allow the first 2 coats to start to flash and grip and work to build the thickness of the clear up so you have enough to cut/buff/polish.
You should be able to spray all your coats of clear wet, did you have problems untill you started doing light coats first? Im just curious, theres no wrong way as long as you get the nice results you want!

Sent from my LGL22C using Tapatalk
 

stingracer

Member
Joined
Feb 8, 2009
Messages
170
Reaction score
8
I'm not sure how much you're willing to spend, but by the sounds of this thread you're trying to keep your costs low. I've noticed that no one has mentioned this on here so I'm throwing it out there for anyone that wasn't aware.

My local body shop supplier sells two part rattle can kits where the paint and activator are separated. You have to tighten something to release the activator into the paint or clear. The paint I inquired about was PPG, but they tell me they can put anything and any color in those cans for you. This means you are spraying durable automotive paint and clear on your car without all the same fussiness of rattle cans.

I planned on doing this for my trunk and door jambs to clean them up some.
 

hondarocks61

Active Member
Joined
Jul 5, 2012
Messages
568
Reaction score
19
Location
MA
I'm not sure how much you're willing to spend, but by the sounds of this thread you're trying to keep your costs low. I've noticed that no one has mentioned this on here so I'm throwing it out there for anyone that wasn't aware.

My local body shop supplier sells two part rattle can kits where the paint and activator are separated. You have to tighten something to release the activator into the paint or clear. The paint I inquired about was PPG, but they tell me they can put anything and any color in those cans for you. This means you are spraying durable automotive paint and clear on your car without all the same fussiness of rattle cans.

I planned on doing this for my trunk and door jambs to clean them up some.
Biggest problem with the custom aerosols being cost... You will need quite a few to spray the whole car. Not sure about pricing in OP's area but around here its something like $25 give or take per can.

Edit: more like $35 per can...

Sent from my LGL22C using Tapatalk
 
OP
OP
96blak54

96blak54

Moderator
Staff
Joined
Feb 21, 2011
Messages
10,025
Reaction score
2,866
Location
In the shop
029a5ebf3bb26e46ab8cea109cd3558f.jpg


e4848f24b9caf2745137dce8926e5ba9.jpg


A few pics. This is where im at now. I noticed a few heavier spots. Not really a run....but almost. So i took a step back to block them down smooth before laying on a bunch more coats. Seems to turn out ok. Its not perfect, nor show quality, ...but I feel good about it. I like it.

Id like to shout out a thanks to hondarocks61 for all the guidance. Even though this process goes against the normal approach to painting a car, paint type and process, this guy still had knowledge for me. Im certain if he was here helping me perfect technique, this situation could turn out a whole lot better!! Thanks mang!
 

hondarocks61

Active Member
Joined
Jul 5, 2012
Messages
568
Reaction score
19
Location
MA
029a5ebf3bb26e46ab8cea109cd3558f.jpg


e4848f24b9caf2745137dce8926e5ba9.jpg


A few pics. This is where im at now. I noticed a few heavier spots. Not really a run....but almost. So i took a step back to block them down smooth before laying on a bunch more coats. Seems to turn out ok. Its not perfect, nor show quality, ...but I feel good about it. I like it.

Id like to shout out a thanks to hondarocks61 for all the guidance. Even though this process goes against the normal approach to painting a car, paint type and process, this guy still had knowledge for me. Im certain if he was here helping me perfect technique, this situation could turn out a whole lot better!! Thanks mang!

I have to say, it turned out much better than I thought actually....

Interesting color too!
 
OP
OP
96blak54

96blak54

Moderator
Staff
Joined
Feb 21, 2011
Messages
10,025
Reaction score
2,866
Location
In the shop
Thanks guys! Ill be honest,...it looks like crap, sort of. Really isnt that bad, but the picture really steps it up!
 

hondarocks61

Active Member
Joined
Jul 5, 2012
Messages
568
Reaction score
19
Location
MA
Thanks guys! Ill be honest,...it looks like crap, sort of. Really isnt that bad, but the picture really steps it up!
When time and lifestyle allows a really sweet paint job (should you choose to do it yourself) let me know! I will be glad to walk you through it!

Sent from my LGL22C using Tapatalk
 
OP
OP
96blak54

96blak54

Moderator
Staff
Joined
Feb 21, 2011
Messages
10,025
Reaction score
2,866
Location
In the shop
I like that idea! Hopefully im in a position to pay someone else with all the mad skillz! Im enjoying this painting project and I can see were having the proper facilities would aide in a better job. I see, find all kind of flaws in the paint. I could let it over run me, but I know my limit and press forward
 
OP
OP
96blak54

96blak54

Moderator
Staff
Joined
Feb 21, 2011
Messages
10,025
Reaction score
2,866
Location
In the shop
So I pretty much have the car painted minus the hood. Paint looks really good in sunlight. Nice color shift along with orangepeel to add texture. I like the matte look, just dont know what to do to protect the paint. Hondarocks61 has given me great ideas and im experimenting with clear acrylic rattle can that's turning out great. Trick to the particular clear acrylic im messin with is, warm the can, shake for 10min, apply 1 thin coat, let dry for 10min, apply another thin coat, let dry 10min. Base paint needs to be completely cure/dry. Over night is good. Also warm weather, no dewfall, no sundown.
The acrylic clear applied properly is super tough!
 

hondarocks61

Active Member
Joined
Jul 5, 2012
Messages
568
Reaction score
19
Location
MA
So I pretty much have the car painted minus the hood. Paint looks really good in sunlight. Nice color shift along with orangepeel to add texture. I like the matte look, just dont know what to do to protect the paint. Hondarocks61 has given me great ideas and im experimenting with clear acrylic rattle can that's turning out great. Trick to the particular clear acrylic im messin with is, warm the can, shake for 10min, apply 1 thin coat, let dry for 10min, apply another thin coat, let dry 10min. Base paint needs to be completely cure/dry. Over night is good. Also warm weather, no dewfall, no sundown.
The acrylic clear applied properly is super tough!
So its a matte clear?

Sent from my LGL22C using Tapatalk
 
OP
OP
96blak54

96blak54

Moderator
Staff
Joined
Feb 21, 2011
Messages
10,025
Reaction score
2,866
Location
In the shop
Says its a flat clear. Their isnt much texture to it. Smooth. I have yet attempt to buff It. I am curious how it will respond.
 

1998cobrasvt

Well-Known Member
Joined
May 4, 2015
Messages
1,531
Reaction score
9
I have to say, it turned out much better than I thought actually....

Interesting color too!

I had/have faith in blak! Hes going to pull it off nicely when its all said and done it will look awesome!


Great job man!
 

hondarocks61

Active Member
Joined
Jul 5, 2012
Messages
568
Reaction score
19
Location
MA
Says its a flat clear. Their isnt much texture to it. Smooth. I have yet attempt to buff It. I am curious how it will respond.
If you try to buff matte clear, it will get shiney! Fair warning! Lol.

Sent from my LGL22C using Tapatalk
 

Latest posts

Forum statistics

Threads
77,487
Messages
1,503,567
Members
14,958
Latest member
Ccrider

Members online

Top