Re: Battery relocation parts list?
Ok....I'll explain it as best I can and I'll sticky this with a diagram as well....
The above mentioned kit is great....to start with. It doesn't have a kill switch or anything though so TECHNICALLY, you're not legal for NHRA. In order to be completely tech legal, you have to have a kill switch clearly labeled ON/ OFF (if its a turn type) or PUSH OFF (if its a push pull style....mine says "WHACK OFF"...get it? Pics to come). You box also has to SEALED and VENTED outside the car (unless you run a dry cell batter like optima.
Tips....
Your cable can never be too big!!! The more length you add, the harder it is for the current to flow. 1/0 is a MINIMUM! Also remember the strand count helps too. Electricity doesn't travel THROUGH the copper strands...it travels on the SURFACE! Therefore, more smaller strands means more over all surface area in the same gauge wire....translating to MORE FLOW! This is why you'll see some people use welding leads. 2 gauge is NOT big enough for a street car in my opinion. It may work for some but I wouldn't trust it.
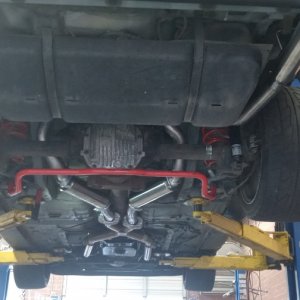
GROUNDS GROUNDS GROUNDS!!! An electrical system is just like a chain...only as strong as the weakest link. If you got HUGE cables for the positive but a weak ground, it all pointless. Again...SURFACE AREA is key! Alot of people like to ground to the quad shock mount. Whatever you ground to, make SURE you clean ALL PAINT AND UNDERCOATING OFF TO
BARE METAL!!! I ground my car to the truck latch....I know it only 3 8mm bolts holding it on right...BUT when you clean the paint off the the ENTIRE BACK of the plate for the catch and the paint on the body itself, you have TONS of surface area. You also need to ground the engine to the front inner fender some how. Again, too many grounds is not possible. From the motor mount to the frame is ideal. You can buy straps at the parts store for cheap. A couple of them on the motor and you're good.
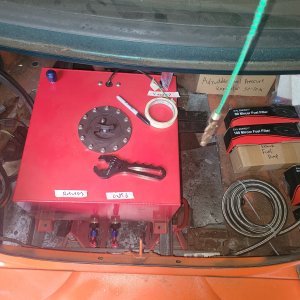
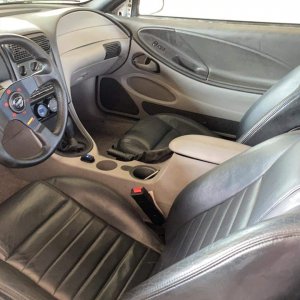
BECAREFUL WHERE YOU DECIDE TO MOUNT YOUR BATTERY! Look under the car before you start punching holes in your trunk. MAKE SURE you can get to the back side. The "J" Hook Hold downs will NOT pass tech! The battery needs to be BOLTED DOWN! So, depending on where you mount it, you might have to drop your gas tank. Mine in mounted in my spare tire well and the trunk liner notched....yes I had to drop my tank.
INSTALL
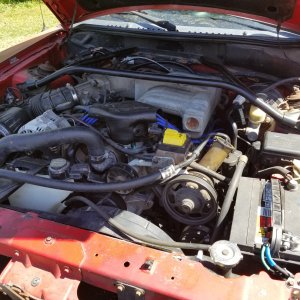
Under the car, through the car, on the roof...doesn't matter where you run the positive cable....just remember to keep it away from excessive heat and move parts. Now the routing isn't going to go to the stock fuse box....this HAS worked for me in the past but I still don't like it. I route mine like this. POSITVE cable from the battery in the trunk to the STARTER POLE...we'll get to the switch later. From the STARTER POLE, run a wire to the POSITVE ON THE FUSE BOX (this wire is already there from the factory so you're good)! Do your grounds and BAM! You're DONE!
NOW this is what summit's kit doesn't give you....
In order to make SURE you're legal, the car has to be able to be COMPLETELY shut down when that switch is hit. In in order to accomplish this, you need to route your alternator wire to the BACK of the car.
REMOVE the wire from the alternator to the starter all together. You need to route 2 gauge (again...at LEAST 2 gauge) from the positive terminal on the alternator all the way to the back of the car to you switch. If you just have the switch kill the battery cable ONLY and NOT the alternator, the car will continue to run. You have to interupt ALL the current.
Here is your wiring diagram.
MOUNTING THE SWTICH
This is a pain. Fox body guys have it easy b/c the back of their trunk isn't attached to the lid so the license plate makes a PERFECT spot. Mount the switch somewhere where it will not bid with anything in or outside the car and the opertation of the switch isn't hindered. AGAIN, pics coming soon but my personal car is a push pull type switch in which the rod can be removed all together easily so noone can get funny and shut me down on the street. I removed the driver's side tail light, removed the reverse bulb and drilled through the lens as well as the trunk "wall." Alignment is KEY so take your time. You only get one shot! Again, pics coming soon so be patient. Put the switch where ever you can! Get creative! You CAN put it on the lid it self and hide it behind your plate if you feel like routing the cables up the trunk arms. Its all up to you!
Hope this helps. Any questions ASK!
I'll update with pics and more advice later.