So I was in the midst of building my engine and I remembered the heart ache I went through when doing the gen 2 cam swap in my gen 1 engine. The gen 1 coyote times just like a 4.6l engine, the gen 2’s had some changes and there is very little documentation on this process, so here we are.
You are using an out of date browser. It may not display this or other websites correctly.
You should upgrade or use an alternative browser.
You should upgrade or use an alternative browser.
How to time a Gen 2 coyote
- Thread starter lwarrior1016
- Start date
OP
OP
So we will start this process with making sure the crankshaft is in position with the crank key at 5 o’clock (timing mark at 12 o’clock), and we are installing the cams. The intake and exhaust cams are specific to location so make sure to check part numbers before install.
You will install the driver side cams first. Make sure to install them with the notches on the cams in this location. This will put the cams in a “neutral” location so you’re not pressing open a bunch of valves when you torque the cams down, it also puts them in the correct location for the phasers to install.
Next will be putting the secondary chains on the phaser. The exhaust phaser is the one with the large sprocket for the primary chain. Make sure to line the secondary chain up as shown. The double link on the intake phaser and the single link on the exhaust. If you orient them like the picture, they will be clocked correctly to go on the cams.
Now we will install the phasers on the cams. This can be kind of tricky because you have to compress the tensioner to get the chains on. If you just barely start the phaser on the cam, you can press the tensioner down and slip the chains over it. It’s easier to have a helper for this.
To get the phaser all the way installed you may have to rotate the cams slightly one way or the other to make sure they lock in to the alignment dowel in the phaser. When they are all the way installed the chains will be lined up as such:

One thing to note, on the tensioner, there is a “ramp” that will help install the chain. Make sure that is facing front. If it’s facing rearward, the chain will not run centered on the plastic guide and it will get chewed up.
After the phasers are installed completely and bolted down, install the primary chain guide.
You will install the driver side cams first. Make sure to install them with the notches on the cams in this location. This will put the cams in a “neutral” location so you’re not pressing open a bunch of valves when you torque the cams down, it also puts them in the correct location for the phasers to install.
Next will be putting the secondary chains on the phaser. The exhaust phaser is the one with the large sprocket for the primary chain. Make sure to line the secondary chain up as shown. The double link on the intake phaser and the single link on the exhaust. If you orient them like the picture, they will be clocked correctly to go on the cams.
Now we will install the phasers on the cams. This can be kind of tricky because you have to compress the tensioner to get the chains on. If you just barely start the phaser on the cam, you can press the tensioner down and slip the chains over it. It’s easier to have a helper for this.
To get the phaser all the way installed you may have to rotate the cams slightly one way or the other to make sure they lock in to the alignment dowel in the phaser. When they are all the way installed the chains will be lined up as such:
One thing to note, on the tensioner, there is a “ramp” that will help install the chain. Make sure that is facing front. If it’s facing rearward, the chain will not run centered on the plastic guide and it will get chewed up.
After the phasers are installed completely and bolted down, install the primary chain guide.
OP
OP
After the guide is on, we will install the primary chain by lining up the colored links with the alignment marks on the cam gear and crank gear. Make note of the L and R on the phaser sprocket. They are not side specific but have to be timed for the side they are on. This being driver is L side. If the cams were installed like shown earlier, the timing mark will be in the correct location. 
Timing on the crank gear

After the chain is installed, you will put the tensioner arm in and the the hydraulic tensioner.
Now the timing for the Left side is complete.
Timing on the crank gear
After the chain is installed, you will put the tensioner arm in and the the hydraulic tensioner.
Now the timing for the Left side is complete.
OP
OP
Now we are living to the Right side, and this is where the new part of the procedure comes in.
THIS IS VERY IMPORTANT!!
The crank key is at 5 o’clock currently. You need to rotate the crank 1 full rotation (clockwise when viewed from the front) so the key way ends up back at 5. Then rotate the keyway to the 12 o’clock location.
DO NOT FORGET THIS PART!!
Your crank will end up in this location
Now install the right side cams, note the location of the alignment slots.
Secondary chain on the phasers, same as before, 2 links on intake, 1 link on exhaust.
Install the phasers on the cams, remember you may have to rotate one or both cams slightly to get the phaser all the way on.
After those are on, we are ready for primary timing chain.
OP
OP
Now install the chain guide and start installing the primary chain. Notice the alignment mark on the cam gear is R, align that with the colored link on the chain. 
The other end, colored link will line up on the crank gear

Now install the tensioner arm and tensioner. This will be the completed timing assembly.
Now rotate the crankshaft a few dozen times and make sure everything moves smoothly and there is no interference between pistons and valves. I always turn the first couple rotations very slow so if there is any piston to valve contact, I can feel it without bending a valve.
Follow this and you’ll successfully time a gen 2 coyote engine.
The other end, colored link will line up on the crank gear
Now install the tensioner arm and tensioner. This will be the completed timing assembly.
Now rotate the crankshaft a few dozen times and make sure everything moves smoothly and there is no interference between pistons and valves. I always turn the first couple rotations very slow so if there is any piston to valve contact, I can feel it without bending a valve.
Follow this and you’ll successfully time a gen 2 coyote engine.
Nice! Well documented and easily understood. Thank you for this
OP
OP
Thank you for the kind words.Nice! Well documented and easily understood. Thank you for this
I hope it’s easy enough to follow. I know it gets difficult to make something easy to read if you already know what you’re supposed to do.
Should we be considering a coyote thread section from the main page? Or add it in along with one of the others, but definitely mention it
cobrajeff96
Well-Known Member
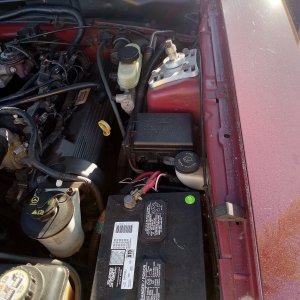
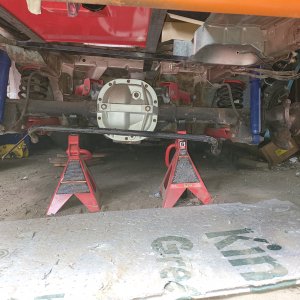
Did you install an oil balance line connecting the back of the heads. Looks to be so. Are those pickup points on the back of the heads 1/4 npt? I might make my own one day.
OP
OP
Yes, I made the oil crossover. I cannot remember if it was 1/4 or 1/8 npt. I’m pretty sure it was 1/4. I’ll try to find the fittings I used in the heads and link them here.Did you install an oil balance line connecting the back of the heads. Looks to be so. Are those pickup points on the back of the heads 1/4 npt? I might make my own one day.
I think it’s the gt350, but one of them crosses over both of the oiling ports on the back of the heads. It’s all made from stainless hard line. I only did one port though.
OP
OP
OP
OP
If I did it again, I would buy this kit.
Cylinder Head Oiling Modification (HOM) 11-17 Coyote 5.0 / 5.2 [455498] - $119.99 : Modular Motorsports, Home of the worlds fastest Fords
Modular Motorsports Cylinder Head Oiling Modification (HOM) 11-17 Coyote 5.0 / 5.2 [455498] - This part may save your engine!! The MMR cylinder head oiling modification ( oil balance lines ) joins the left and right cylinder head together with the MMR Balance tube and fittings and balances bank...
www.modularmotorsportsracing.com
cobrajeff96
Well-Known Member
I think I might just hand make them myself, both rear ports. Easy as hell to do actually.
OP
OP
Definitely easy to do. I did these lines myself and bent plenty of hard tubing. I was worried about getting the port sealed and the 90 at the correct angle.I think I might just hand make them myself, both rear ports. Easy as hell to do actually.
cobrajeff96
Well-Known Member
Yea I wish I would've had the foresight to do this while mine was on the stand, but it being in the car now just makes it more interesting.
I used this information while installing my cams last weekend.So I was in the midst of building my engine and I remembered the heart ache I went through when doing the gen 2 cam swap in my gen 1 engine. The gen 1 coyote times just like a 4.6l engine, the gen 2’s had some changes and there is very little documentation on this process, so here we are.
Thank you for posting this up!
OP
OP
Awesome! I’m really glad someone has found it useful.I used this information while installing my cams last weekend.
Thank you for posting this up!
Similar threads
- Replies
- 15
- Views
- 3K
- Replies
- 28
- Views
- 2K