Forums
New posts
Search forums
What's new
New posts
New media
New media comments
New profile posts
Latest activity
Media
New media
New comments
Search media
Members
Current visitors
New profile posts
Search profile posts
Log in
Register
What's new
Search
Search
Search titles only
By:
New posts
Search forums
Menu
Log in
Register
Install the app
Install
Forums
Multimedia & Entertainment
The Garage
any one here have home made oil catch can ?
JavaScript is disabled. For a better experience, please enable JavaScript in your browser before proceeding.
You are using an out of date browser. It may not display this or other websites correctly.
You should upgrade or use an
alternative browser
.
Reply to thread
Message
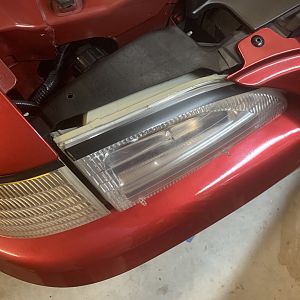
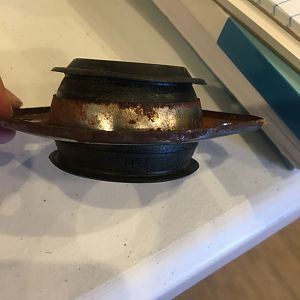
<blockquote data-quote="reivaxtorres" data-source="post: 439844" data-attributes="member: 8890"><p>damn, i thought i had already posted this how-to on this site....guess i didnt. anyways, here it is, i quoted it from another site i posted it on. any questions, just ask.</p><p></p><p></p><p>so i've been feeling a little down because of family situations lately, and usually working on my car always puts me in a happier mood. i have been looking into getting an oil seperator for my car, but at the $70+ that both steeda and MM want, i opted at making my own. </p><p></p><p>all in all, it wasnt too expensive, and it was easy as pie to install. here is a little how-to that i made. im sure its just as easy for the 4v's, but i have a 2v and the pics are from a 2v. </p><p></p><p>parts needed:</p><p></p><p>1) Husky General Purpose Filter, $22.49 + tax at Home Depot. Lowes has a similar one under the Dewalt brand, but the Husky version is black, as compared to the blue of the Dewalt. i didnt take pics of the filter outside of the box and before i installed it, but i took a pic of the label and of it after i installed it. </p><p></p><p><img src="http://i13.photobucket.com/albums/a267/ender03/Oil%20Seperator/OilSeperator009resized.jpg" alt="" class="fr-fic fr-dii fr-draggable " style="" /></p><p></p><p>2) you will need 2 (two) 3/8" NPT x 3/8" MIP adapters, $2.48 each at Lowes. likewise, i didnt take pics of these before i installed them, but i did take pics of the labels. in the post install pics, they are 2 brass fittings on the top of the filter.</p><p></p><p><img src="http://i13.photobucket.com/albums/a267/ender03/Oil%20Seperator/OilSeperator010resized.jpg" alt="" class="fr-fic fr-dii fr-draggable " style="" /></p><p></p><p>3) Thread Seal Tape, $.97 at Lowes. this is that white tape stuff you use to insure you dont get leaks. </p><p></p><p>4) Nylon Zip Ties, 20 pack for $1.74 @ Lowes. im too lazy to make brackets and whatever, so i use zip ties on everything. hahahaha</p><p></p><p>5) 3' or more of 3/8" heater/fuel/emissions hose, $1.70 at autozone. </p><p></p><p></p><p>anyways, this is very easy to install. </p><p></p><p>1) the filter comes assembled, all you have to do is put some of that thread tape on the threaded ends of the adapters, and then screw them into the top of the filter. </p><p></p><p>see the picture below so you can see how the fittings fit. </p><p></p><p>2) next thing you need to do is find a sutable mounting location for your oil seperator. i zip tied it to the strut brace on the passanger side. i like zip ties because i can fasten them to anything, dont have to alter anything, and they will hold. only down side is they arent reusable</p><p></p><p><img src="http://i13.photobucket.com/albums/a267/ender03/Oil%20Seperator/OilSeperator003resized.jpg" alt="" class="fr-fic fr-dii fr-draggable " style="" /></p><p></p><p>3) remove the tube that goes from the PCV to the plennum, including the rubber at the ends. you wont need this tube anymore, but i suggest you dont discard it, instead save it somewhere. </p><p></p><p>4) from the 3/8" hose you bought, cut enough of it so that it reaches from the PCV valve to the inlet of the filter. i pointed the PCV valve towards the back, and routed the hose behind the fuel pressure regulator and into the filter.</p><p></p><p><img src="http://i13.photobucket.com/albums/a267/ender03/Oil%20Seperator/OilSeperator004resized.jpg" alt="" class="fr-fic fr-dii fr-draggable " style="" /></p><p></p><p>5) now, with the rest of the 3/8" hose, plug it into the outlet of the filter and then plug the other end into the plennum. i routed mine similar to how the factory tube was routed, but then i routed it under the intake tube and then up to the outlet. </p><p></p><p>6) if you want to, plug a piece of the hose to the bottom of the filter (drain) so you can have easy access to drain it when the time comes. me, ill prob just unscrew it and then drain it back into the engine. </p><p></p><p></p><p>and the finished product:</p><p></p><p><img src="http://i13.photobucket.com/albums/a267/ender03/Oil%20Seperator/OilSeperator001resized.jpg" alt="" class="fr-fic fr-dii fr-draggable " style="" /></p><p></p><p>now you're done. im not sure how often you have to check it, or drain it, but i will be checking it daily for at least a week or two to see if i can see a pattern going.</p></blockquote><p></p>
[QUOTE="reivaxtorres, post: 439844, member: 8890"] damn, i thought i had already posted this how-to on this site....guess i didnt. anyways, here it is, i quoted it from another site i posted it on. any questions, just ask. so i've been feeling a little down because of family situations lately, and usually working on my car always puts me in a happier mood. i have been looking into getting an oil seperator for my car, but at the $70+ that both steeda and MM want, i opted at making my own. all in all, it wasnt too expensive, and it was easy as pie to install. here is a little how-to that i made. im sure its just as easy for the 4v's, but i have a 2v and the pics are from a 2v. parts needed: 1) Husky General Purpose Filter, $22.49 + tax at Home Depot. Lowes has a similar one under the Dewalt brand, but the Husky version is black, as compared to the blue of the Dewalt. i didnt take pics of the filter outside of the box and before i installed it, but i took a pic of the label and of it after i installed it. [img]http://i13.photobucket.com/albums/a267/ender03/Oil%20Seperator/OilSeperator009resized.jpg[/img] 2) you will need 2 (two) 3/8" NPT x 3/8" MIP adapters, $2.48 each at Lowes. likewise, i didnt take pics of these before i installed them, but i did take pics of the labels. in the post install pics, they are 2 brass fittings on the top of the filter. [img]http://i13.photobucket.com/albums/a267/ender03/Oil%20Seperator/OilSeperator010resized.jpg[/img] 3) Thread Seal Tape, $.97 at Lowes. this is that white tape stuff you use to insure you dont get leaks. 4) Nylon Zip Ties, 20 pack for $1.74 @ Lowes. im too lazy to make brackets and whatever, so i use zip ties on everything. hahahaha 5) 3' or more of 3/8" heater/fuel/emissions hose, $1.70 at autozone. anyways, this is very easy to install. 1) the filter comes assembled, all you have to do is put some of that thread tape on the threaded ends of the adapters, and then screw them into the top of the filter. see the picture below so you can see how the fittings fit. 2) next thing you need to do is find a sutable mounting location for your oil seperator. i zip tied it to the strut brace on the passanger side. i like zip ties because i can fasten them to anything, dont have to alter anything, and they will hold. only down side is they arent reusable [img]http://i13.photobucket.com/albums/a267/ender03/Oil%20Seperator/OilSeperator003resized.jpg[/img] 3) remove the tube that goes from the PCV to the plennum, including the rubber at the ends. you wont need this tube anymore, but i suggest you dont discard it, instead save it somewhere. 4) from the 3/8" hose you bought, cut enough of it so that it reaches from the PCV valve to the inlet of the filter. i pointed the PCV valve towards the back, and routed the hose behind the fuel pressure regulator and into the filter. [img]http://i13.photobucket.com/albums/a267/ender03/Oil%20Seperator/OilSeperator004resized.jpg[/img] 5) now, with the rest of the 3/8" hose, plug it into the outlet of the filter and then plug the other end into the plennum. i routed mine similar to how the factory tube was routed, but then i routed it under the intake tube and then up to the outlet. 6) if you want to, plug a piece of the hose to the bottom of the filter (drain) so you can have easy access to drain it when the time comes. me, ill prob just unscrew it and then drain it back into the engine. and the finished product: [img]http://i13.photobucket.com/albums/a267/ender03/Oil%20Seperator/OilSeperator001resized.jpg[/img] now you're done. im not sure how often you have to check it, or drain it, but i will be checking it daily for at least a week or two to see if i can see a pattern going. [/QUOTE]
Insert quotes…
Verification
Post reply
Random media
Latest posts
Hci or vortech or any other ideas
Latest: 95Five0
47 minutes ago
94-95 5.0 - Specific
96blak54 2001 Cobra
Latest: white95
Today at 12:22 AM
Build Ups & Projects
C
"BlackJack, Nat Loves Dream", my 1999 GT
Latest: chasingomas
Yesterday at 11:38 PM
Build Ups & Projects
New Member 2002 Roush 2 from West Texas
Latest: SsgDoc94
Yesterday at 7:44 PM
New Member Introductions
2001 Cobra clutch recommendation?
Latest: 96blak54
Yesterday at 5:39 PM
96-04 - 4V Specific
Share this page
Reddit
Pinterest
Tumblr
WhatsApp
Email
Share
Link
Forum statistics
Threads
78,554
Messages
1,536,110
Members
16,198
Latest member
Jerry santos
Members online
PinkieT
GTamas
Forums
Multimedia & Entertainment
The Garage
any one here have home made oil catch can ?
Top