sinful rides said:
What would I need to change over to a carb?
Here is a write-up my buddy Ryan did when he swapped his 92 LX to a nasty nitrous 347.
converting a mass air car to carb.
note: this writeup is for a 92, some of the wiring changes are difffrent for earlier cars (fuel pump relay is in a diffrent place and so on)
note2: this is how I did the conversion in my car, there are several options for ignition setups, fuel setups and so on, this is just one way to get to the result.
-unhook battery, drain coolant
-remove the airbox, mass air meter, intake tube
-unhook the efi harness from the engine, including the injector harness and the wiring to the gauge sending units
- remove the upper and lower intake, throttle body and fuel rails, pressure regulator etc
- remove efi harness and ecu, there are 2 8 pin plugs under the passsanger side kick panel, and 1 8 pin near the wiper motor under the hood (in earlier years i belive this is reversed but you get the idea) this step takes some careful pulilng so you dont butcher the harness trying to get the ecu plug through the hole in the firewall, be careful and it comes out with much trouble.
there are also 2 white 4 pin connectors on the passanger frame rail, you will need to leave these in the car, as they are your airbag sensors, and you will have to reconnect them, more on this later.
-drop the gastank, there is 1 4 pin connector that powers the pump/fuel sending unit.
- remove the stock fuel lines and filter (if your car has subframes you will have to cut them to get them out)
at this point you have everything taken out that you need, and its time for stuff to go back together.
parts i used
aeromotive ss series fuel pump,
aeromotive fuel pressure regulator
inline 100 micron fuel filter (mount this BEFORE the pump, not after)
-8 braided feed and return lines
rci fuel cell
msd 6 al ignition box
msd pro billet dist
msd blaster coil
autometer pro comp gauges
victor juinor intake
holley hp/ultra carb
air cleaner
first step would be to decide what you want to do for the fuel tank, a couple diffrent options are either sumping the stock tank, running a specific pickup for an external pump (there are a couple nice peices that have an pickups on the top of the tank) or a fuel cell. i elected to go for a fuel cell for a few reasons, the biggest being the stock tank was starting to rust. if you elect to use the stock tank, weither it be sumped or with the an pickup skip this part.
with a 20 gal fuel cell it fits just snug inside the tire well wich is perfect, bolt it to the bottom of the tire well and/or use straps to hold it down baised on the cells mounting instructions, by far the worst part of this was trimming the hatch carpet/sound deadening to fit around the cell.. the string/dust from the deadening gets EVERYWHERE :biglaugh: what is not shown in the pic is you need to vent the fuel cell, there is a gromet where the factory harness for the fuel pump etc runs, is a perfect place to run your vent hose without having to drill extra holes

after you decide what you have done for a tank, you can mount the fuel pump, now most aftermarket electric pumps push fuel and dont really pull fuel very well, so the problem is the pump must be mounted as low as possible, its supposed to be mounted below the tank, but in all cases that is not possible, i elected to mount the pump and filter hanging below the rear bumper, as this gets them below the floor of the tire well (where my fuel cell is), i put the stock tank cover/straps back in here to show you where the pump would be in relation to that.. so its not completely below the stock tank, but its about as close as you can get without haing it hang so low that it scrapes on shiat (it sits about even with the tailpipes now that they are on)

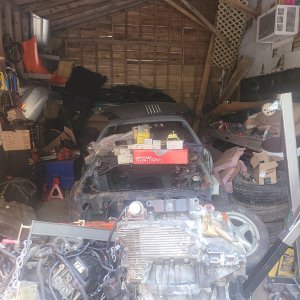
after you have the pump mounted, head up to the front and figure out where you are going to mount the fuel pressure regulator, and you might as well bolt the new intake/carb on at this point too.. in the below pic you can see where i mounted the fuel pressure regulator (pass side framerail by the msd box)
after you get to this point, you can decide what you want to do for fuel lines, the stock lines will not be enough for a motor that makes much more power than stock, because a carb runs at a lower pressure, you need to flow more volume, so you need larger lines, weither they are hard lines, or steel braided, regular hose would technically work too, but if you have more than 12 inches of it, you wont pass tech so you might as well get the right lines now. i HATE HATE HATE working with solid lines, so i elected to go with braided lines front to back, while it is more expensive its alot easier to work with, and an fittings are 2059720533972032x better than the stock ford crap to work with later.
after i mounted the regulator, fuel cell filter and pump, i took a peice of rope and routed it exactly where i wanted the lines to go, then measured it, doubled it (need feed and return) and then added 3 feet just incase, wich worked out very well because braided line does not turn corners sharply so you will eat up an extra little bit here and there. where exactly you run the lines is up to you, i basically ran them exactly where the stock lines were under the car, however i tried to keep things even out back so things looked nice and symmetrical as you can see from the pics.
once you have the lines run and secured, its time to tackle the electrical wich scares alot of people, but it was actually very easy. i tried to use some of the stock wiring wherever possible so i wouldnt have to run new wires for everything.
starting at the rear of the car, there is a 4 pin connector that you unplugged when you dropped the gas tank, 2 of these wires connect to the fuel pump, power and ground, and the other 2 are for the stock gastank sending unit.. a test light or logic probe will show you wich are wich, or you can consult your vehicle wiring diagram, i dont remember the exact wires at this point, if you are running autometer gauges you will also have to replace the sending unit while you have the tank out. if you are running a fuel cell you should also ground the cell to the car with a single wire.
moving foreward under the passanger side kick panel there are a few things you need to do, the first is find the white connector, this is your airbag connector, you need to remove the 3 connectors from the efi harness (2 white 4 pin connectors on one end, that connect to a single 8 pin wire in the passanger kick pannel.. seperate the wire loom fromt he harness, remove these wires and then re install them back in the car (you can see the 2 white pin connectors right below the msd box in the above pic)..
the next is to connect the fuel pump relay, the wire that needs power is in the 8 pin harness that is not plugged in now that the airbags are back hooked up, the wire itself is grey with a green stripe, and is a 10 gauge wire. you can either run a switch, or just have the pump turn on when your cars key turns on.. either way you should DEFINATELY run a relay, and a new power wire from the battery to the drivers side kick panel, there is lots of room in the passanger kick panel now that the ecu is removed so you can tuck the realy in easily.
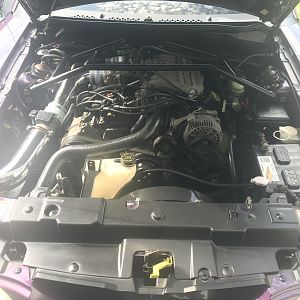
thats it for wiring on the fuel side, the remainder is ignition and gauges.. you can see in my above pic, the coil is left in the stock location, and the msd 6al is mounted across from the battery on the passanger fender.
im not going to go into the specifics of wiring in your ignition box, msd had very good instructions and its quite easy to do, power/ground/ignition. 2 wires from the 6 al to your coil, and then the msd connect cable between the 6 al and the dist.. if you dont use msd stuff follow the instructions for whatever you buy

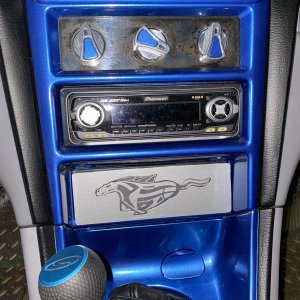
lastly is gauges, if you decide to use the stock cluster/gauges the connections are all on the drivers side fender (remember the plug you disconnected), consult your vehicle wiring diagram on what wires do what, and re connect to the stock sending units. myself i went with autometer gauges, i used the wiring for the stock cluster, and wired the autometer gauges in so they work exactly how the stock stuff does.. below is a pic of how my dash looks. if you hate wiring diagrams a neat note is that the back of the stock cluster is labled +, -, signal for each gauge, so you can easily refrence wich wire is wich without having to use a wiring diagram if you dont want to.

double check everything is bolted down tight, fill the coolant back up, hook the battery back up and lastly, turn the ignition on, and your fuel switch if you wired a switch as well, have someone help you check for leaks, and obviously make sure the fuel pump turns on (the aeromotive is LOUD, so you definately know its on (it sounds like angry bees haha).. if there are no leaks, prime the carb, and fire the car up.. let it warm up and make sure your gauges are working properly, check again for leaks and if there are no problems.. drive and enjoy.