Detailing

Nacho98

Well-Known Member
Joined
May 4, 2011
Messages
1,226
Reaction score
60
I spent around 20 hours detailing my Camaro over these past two days and I finally finished a few hours ago. Figured I'd do a little write-up detailing the processes and products used, along with techniques. I use a lot of stuff from the Chemical Guys line, so unless otherwise noted, the products listed are CG. Microfiber towels are either cheap, throwaway O'Reilly ones (interior/jambs/wheels/tires) or Pak Shak (everything else).


I always start with the interior. I actually did the grunt work on cleaning the plastics a few weeks ago, which took three hours, so that saved me a lot of time these past two days. For a garaged car that only gets driven when clean and which only sees the nicest of weather and the nicest of roads for a couple thousand miles a year, I couldn't believe how filthy the interior was after sitting in an undisturbed garage for the better part of the last four years while I was overseas. I was scrubbing the plastics with diluted all purpose cleaner on an MF and even after 6-7 times, the towel was still turning brown with dirt. Keep in mind my car was stored with the windows up as well.


Wiping all the plastics down with a diluted all purpose cleaner is the first thing I do, so I spent a little time today doing that. I then followed that with some Silk Shine dressing on everything. I then decided to take care of the inside of the glass all around, since I could see a haze on it from the inside. I find that most glass cleaners are a hassle, and usually the best thing to use is just a dry, clean MF towel. After this, I used a Shop-Vac on everything, and then I was ready for a liquid extractor on the seats and carpets.


I have never used an extractor before; the year I bought my car I shampooed the seats by hand, but that was futile, so I never bothered again since the seats seemed pretty clean. After 35k miles with the T-tops off and 13 years, I was wrong. I decided last time I was in there that I should try renting a Rug Doctor from the grocery store, so I got one for about $27. For those considering using one of these, I spent six hours steaming and went through three bottles of Anti-Foam and two bottles of upholstery cleaner (I used this on the carpet as well)--I used the Rug Doctor brand solutions. Total cost was around $50.


The rug doctor has an optional (required) hand tool for an additional $3, and the machine is really easy to use and works quite well. I thought my seats were clean, and I pulled out 7-8 tanks of dark brown or black water. For 13 years I've had a stain on the crushed velvet/velour/whatever it is on the passenger seat bottom. It came right out with the Rug Doctor. The stain is gone now. You'll need about 6 hours for the seats to dry out when you are done.


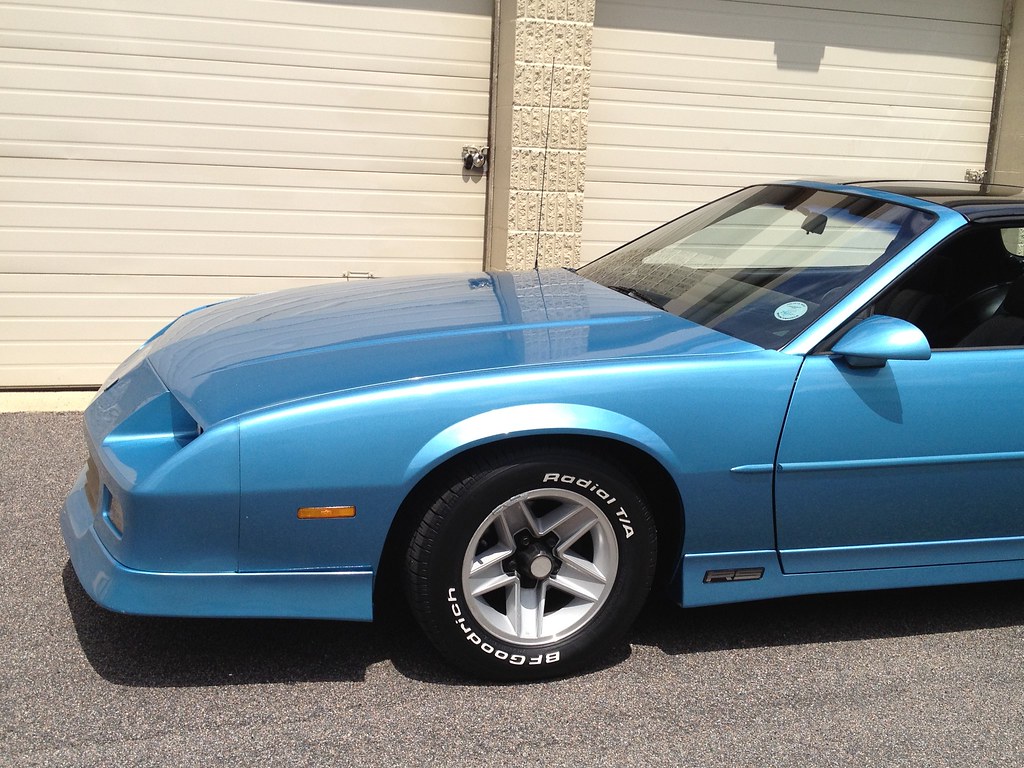
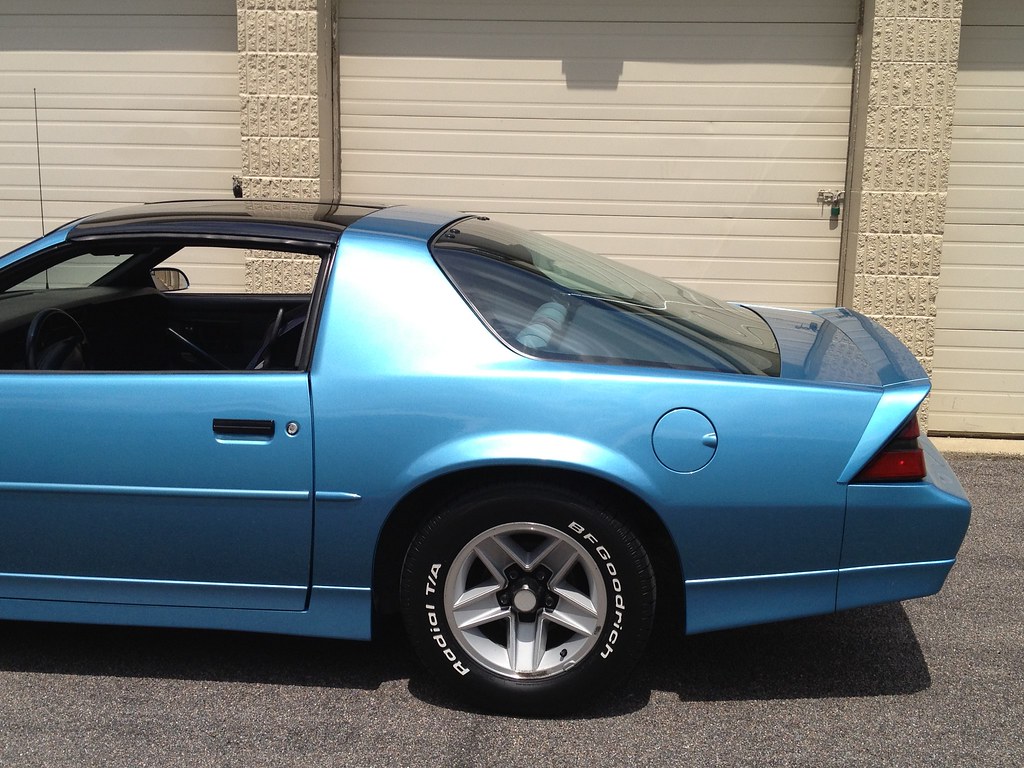
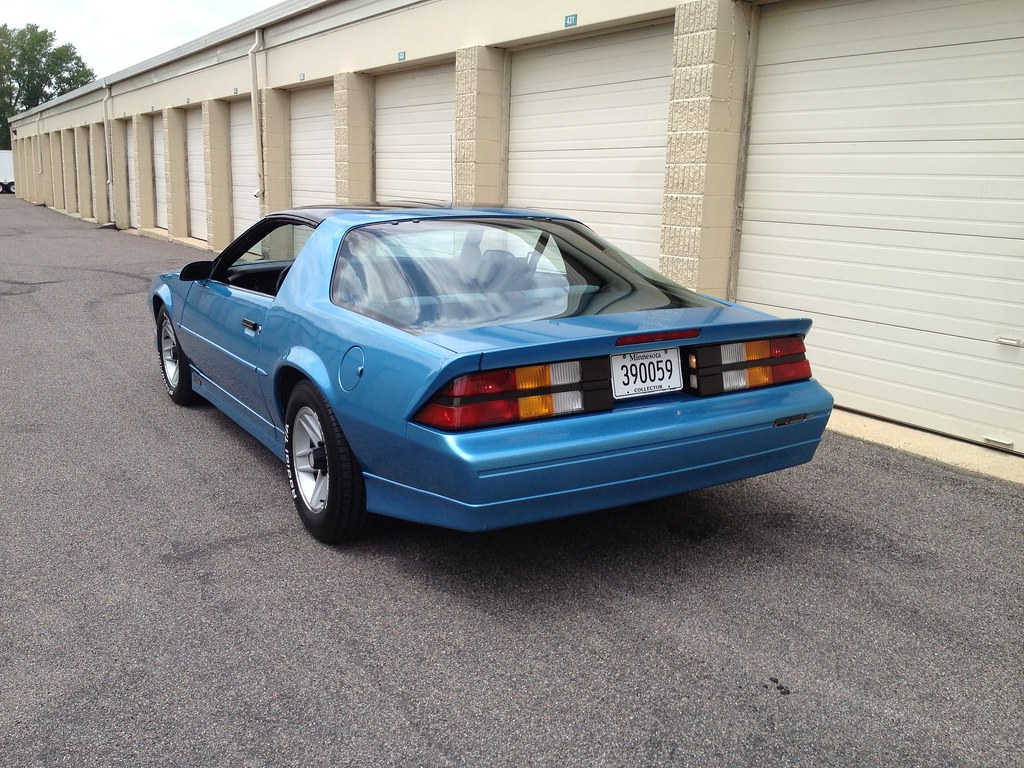
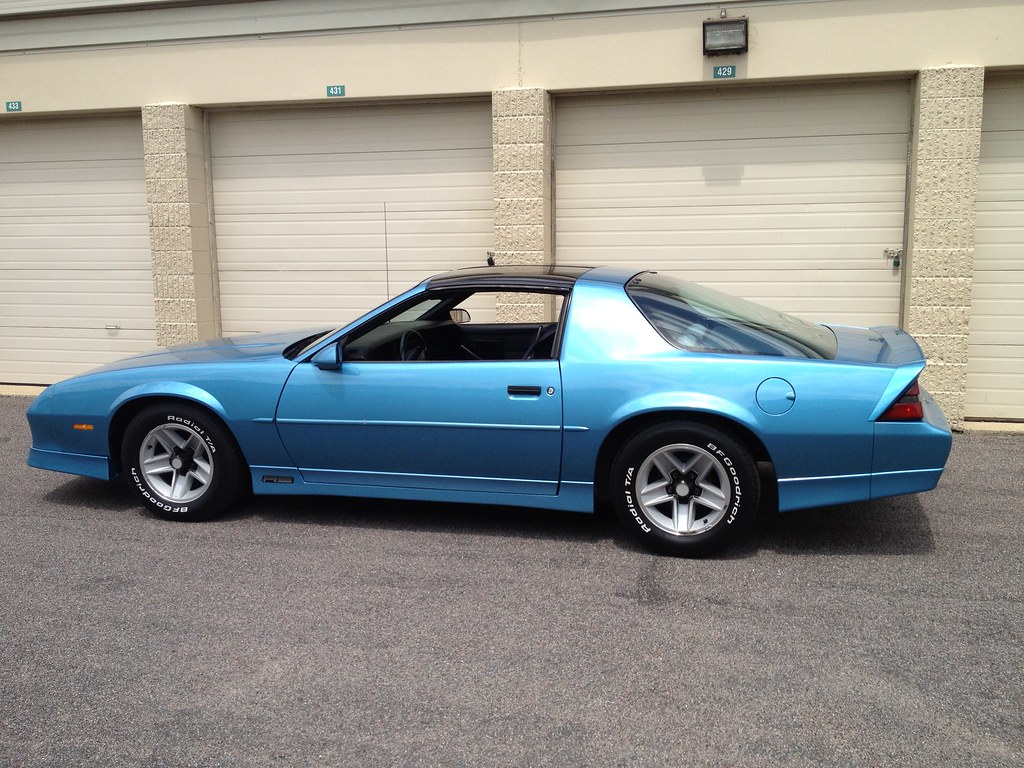
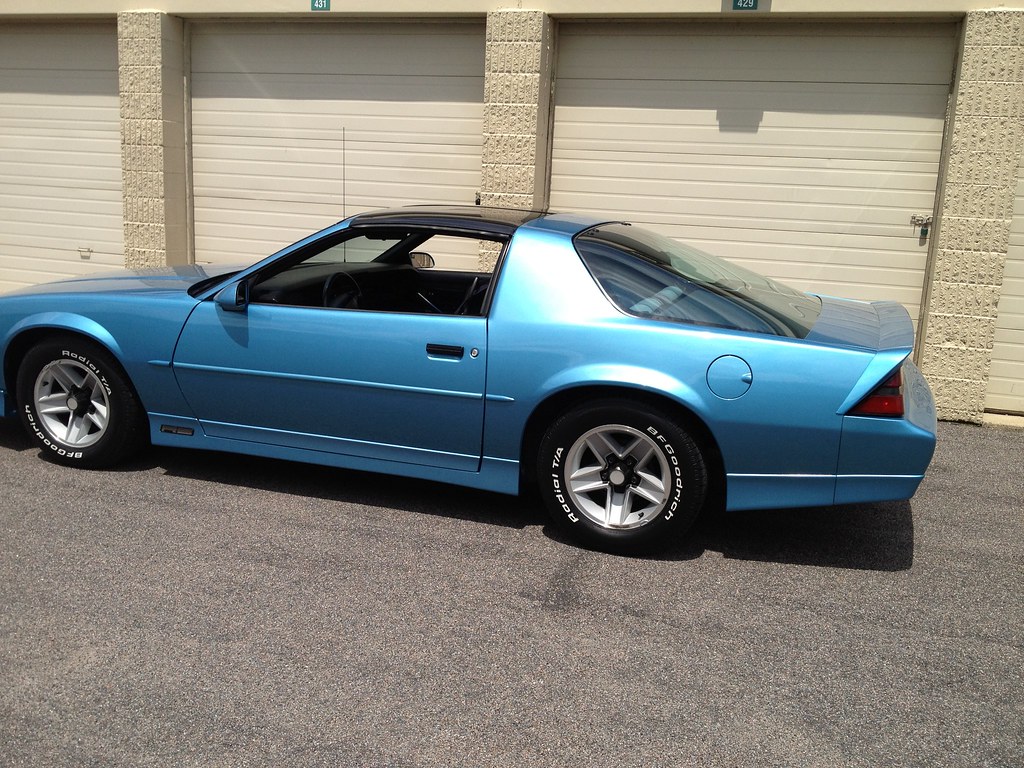
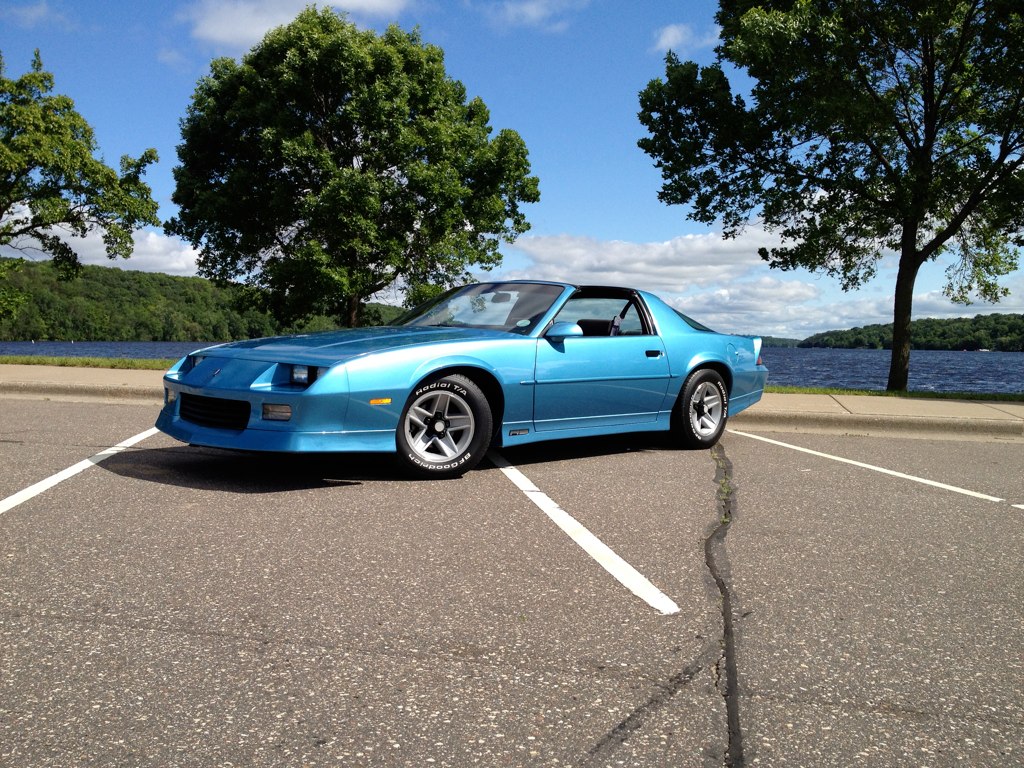
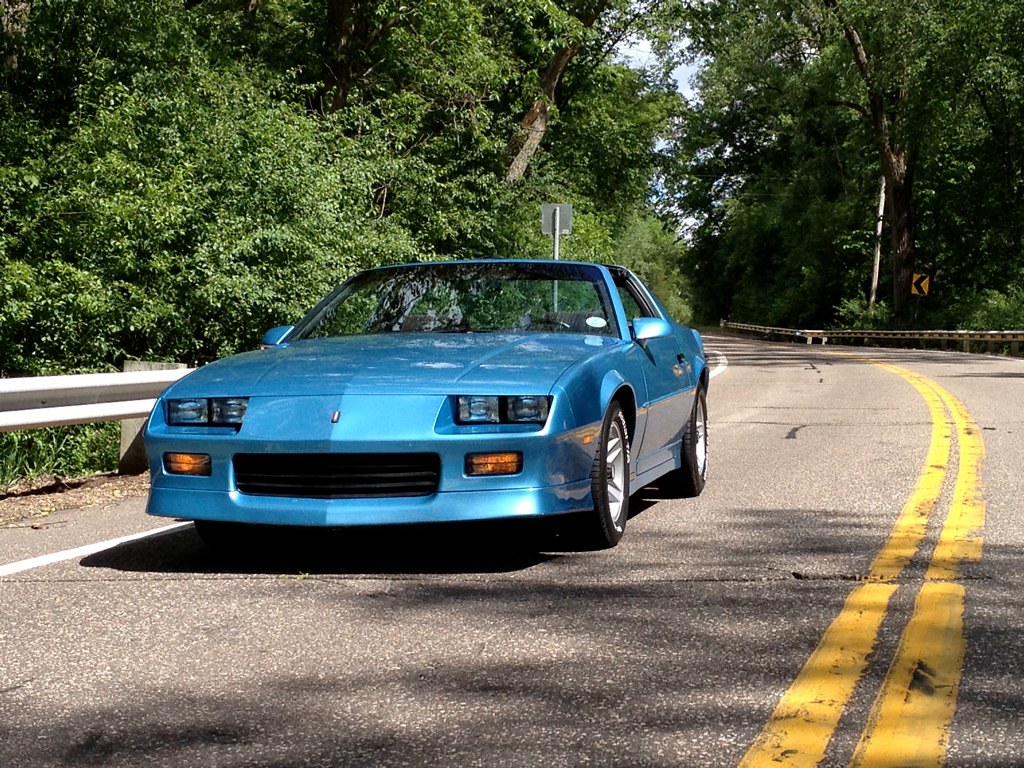
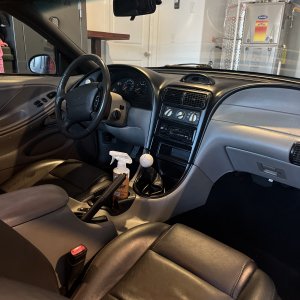
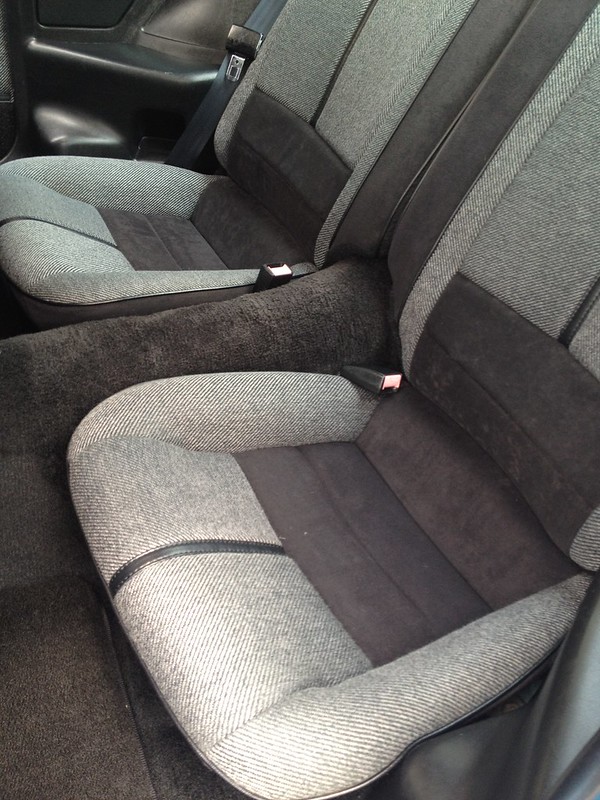
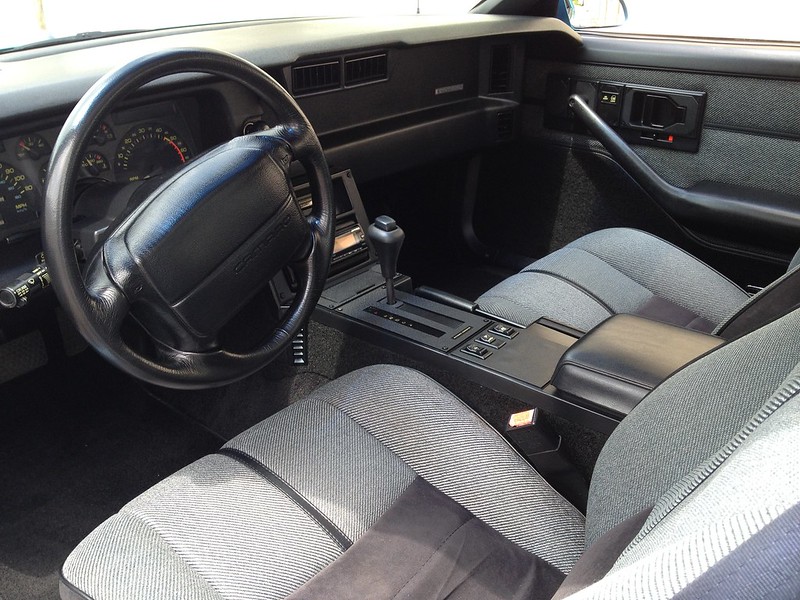
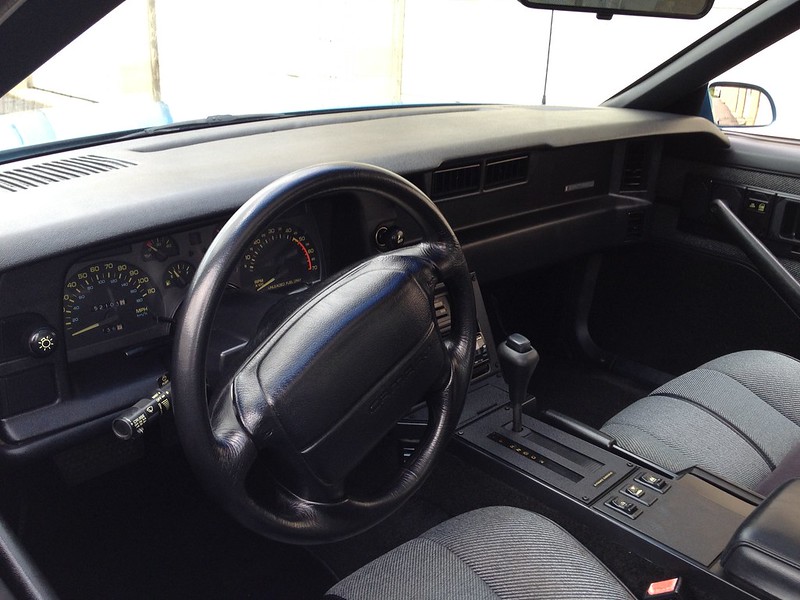
Overall, I was very impressed with the Rug Doctor. The nozzle has a clear portion on the vacuum part of it so you can see what is coming out of your seats, and you can see the liquid being sucked out from behind the fabric--it gets deep down into the fabric and gets sucked back out through; it looked kind of cool. You can't erase 150k miles of seat time, but you can pull a lot of slime out. My seats feel much cleaner to the touch now, and I would highly recommend renting one of these once a year to anyone; I will definitely do this once a year now. One technique tip--keep the nozzle moving quickly across the seat as you are spraying/vacuuming. You need to move it at 1 foot per second, which seems fast, but is necessary. Less than that and you end up with the solution spraying out and foaming badly, and running all over the place. It was a messy first hour trying to dial it in before I realized I was pulling the nozzle back too slowly but after that it worked really well. Here are a few finished interior shots. I wasn't planning on doing a write-up so I didn't take any process pics of this, and these are just quickie washed out iPhone pics with the car next to a row of white storage garages reflecting the sun:


7281695976_7d6de31913_c.jpg


7281678514_966a643c41_c.jpg


7281674986_a75e87d5e5_c.jpg


7281881746_60a3221c7d_c.jpg


7281886926_1f52cf238e_c.jpg
 
OP
OP
N

Nacho98

Well-Known Member
Joined
May 4, 2011
Messages
1,226
Reaction score
60
I then moved to the exterior.


The body of the car was in great shape overall and had minimal marring/swirls; therefore I opted to skip using a cutting polish with an orange cutting pad, and start with a finishing polish on a white pad (slightly less abrasive than an orange). Normally I would cut with orange and speed 6 on my Porter Cable 7424 XP and do the finishing polish with a white pad and speed 5, but this time I decided to do the finishing at speed 6 since it was the only polishing step. The pads I use are Chemical Guys Hexlogic 5.5" foam pads with one of their urethane 5" backing plates.


Before I could start buffing though, I had to strip off any old wax and take care of any bonded contaminants to make sure I was starting with clean paint. For the wash I used CG's Citrus Wash and Gloss, which strips all old wax off (excellent lubricity too). Wheels were cleaned with Diablo wheel gel and a cheap Napa brush. I use two wash mitts--one for wheels, one for the body. I use a Pak Shak MF mitt for the wheels, and a Race Glaze sheepskin mitt for the body.


I got lucky in that the body needed no clay. I clayed the wheels, but couldn't feel any bonded contaminants on the body, so I saved a few hours claying and re-washing, but normally you'd want to get some detailing clay, spray it generously with a lubricant, spray a 2'x2' section of the body with some lubricant, and just run the clay back and forth with no pressure, just the weight of the clay. As you clay you can hear the bonded contaminants rubbing against the clay. When you can't hear it anymore, the paint is clean and you can wipe up the lubricant and do another spot. It's a good idea to wash the car again to get rid of any clay residue.


I then pulled the car into the garage and used 3M blue painters tape to tape off most of the trim, emblems, etc. so they wouldn't get burned by the buffer. I then fired up the 1000W halogen light. This is a MUST for paint correction, and it was only $30. Each bulb is 500W. This is a harsh light that will show everything. Too many n00bs make the mistake of skipping the halogens, this should be #2 on the list behind the polishing machine itself. Sunlight won't work as well, and polishing should be done in the shade.


I started with the aforementioned white pad and V38 finishing polish. I sprayed the pad with some Pad Conditioner, and then I put five "dots" of polish on my pad. I spread it around a 2'x2' area with the PC on speed 1, and then with the PC on the body of the car, increased it to speed six, pressing down with medium to heavy pressure. I like to make 5-6 overlapped passes, in alternating directions. I'll go side to side, then up and down, then side to side, etc. until I see the polish breaking down to the point it's almost dry and just looks like a barely-there wax film. Then I used clean MF towels to wipe the polish off before moving to the next section. Use the halogens to see what kind of paint correction you are getting. I got about 90%-95% correction this weekend:


7281655782_b2f1f0a581_c.jpg


You will see there are no swirls in the above pic. That is pure, clean, polished paint and nothing else. No wax, glaze, sealant--nothing. Just polished paint under 1000W lighting. Another thing to note--this is only the third time I have buffed a car with a DA, which is proof positive that a DA is foolproof and impossible to do damage with. A rotary is another story, and shouldn't be in the hands of a beginner. I won't touch one anytime soon, but I feel completely confident even pressing down hard on speed 6 with my Porter Cable.


A few quick process pics:


7281658282_b726fd3abd_c.jpg


7281671138_5806d22f3e_c.jpg


7281638364_d1ffed4038_c.jpg


After I finished the polishing, I glazed the car to fill in any other slight micro-marring on the car. I used EZ Creme glaze for this, with a blue pad and speed 4, with light hand pressure. Again, I broke it down like polish. Each polish step and the glaze step take about two hours each. When this was done, I used Jetseal 109 to seal the car, on a black pad and speed 4, using only the weight of the machine--let the machine do the work here. I personally find that below speed 4, the PC bogs down too easily, which can be frustrating. The Jetseal was not broken down like the polish and glaze; rather for this particular sealant you have to just apply it and wait 15 minutes, then buff it off with a clean towel and wait 20 minutes before the next coat, so I just applied it to the whole car (door and trunk jambs included) and then buffed it off. Different sealants may work differently.


After two coats of sealant, I finally put the buffer away and I finished the car off with two coats of CG's 50/50 paste wax, applied with a standard foam applicator. This wax is as smooth as butter and does not require hazing; you just buff it on with an applicator in a circular motion, and buff it off with a clean MF towel right afterwards. I personally do a panel at a time, and I do both coats on the panel right after each other to close the panel out before moving to the next.


After this, I do my own QA/QC check, combing over the car carefully to inspect the results. I like to go around the car once more with a new MF towel and just polish the car with the towel to make sure I haven't missed any spots. I take this a panel at a time as well, making sure to open any adjacent panels and tracing around the edges of each panel (i.e. opening the hood to get the top edge of the fender). I take the tape off the car after applying sealant, but it can be left on until after waxing also. I use Q-tips and toothpicks where necessary to get any product out of any tiny cracks and when I've circled the car and then cleaned up the exterior glass and trim (it gets pretty dirty during the buffing process) and I'm satisfied, the lengthy body process is considered finished. Don't forget to seal/wax the door/trunk jambs, as well as the wheel well edges.


I then did the wheels. Same deal--glaze, two coats of sealant, and two coats of wax, but I used Wheel Guard wax for this.


After this, I did hit all the black trim and weatherstripping with a couple coats of G6 Hypercoat, and then wiped the excess off. I also hit the front fender liners with this. After that, I used Westley's Bleche-White on the white letters of the tires (2x), and then dressed the tires three times in G6 for a nice black look.


Finally, I spent an hour using damp towels and Grime Reaper under the hood, trying to clean up what I could. Not a lot to be done with our engine bays, but you can at least spend an hour a couple times a year just wiping as many of the plastic wire looms and hoses down as you can to give it a bit cleaner look.


All in all I spent around 20 hours, noting that I didn't have to clay and rewash, use cutting polish, or spend a lot of time with the interior plastics. All in all I would be closer to 30 hours had I had to do all of that.
 
OP
OP
N

Nacho98

Well-Known Member
Joined
May 4, 2011
Messages
1,226
Reaction score
60
Here are a couple so-so iPhone pics of the finished product from when I took it to put it away. Again not the greatest pics, nor the best time of day. It was also kind of hazy and not really full-on sunny with the sun darting in and out of the clouds, but you can still see how the car gleams:


7281849452_06dd530c95_b.jpg


7281951850_f633ca9d72_b.jpg


7281841800_007f2f6348_b.jpg


7281838508_86d5192818_b.jpg


7281716528_e71abec6de_b.jpg


7281712430_abea9e7a68_b.jpg


7281956272_97a377f783_b.jpg
 

clark98gt

Active Member
Joined
May 26, 2011
Messages
568
Reaction score
60
Location
Pennsylvania
Looks really good, I wish I had the confidence to do all of that to my car. I am just worried I will screw up and end up with a bunch of swirls in my paint.
 

JoshHooten

Well-Known Member
Joined
Mar 7, 2010
Messages
2,068
Reaction score
196
Location
Hiram, GA
VERY VERY NICE job I wish I wasn't so lazy and would take that kind of time to detail my car.
 

Sinned83

Well-Known Member
Joined
Feb 10, 2010
Messages
4,439
Reaction score
56
Location
MA
Your sill plate looks dirty:tongue3:
I was gonna mention the mullet but I was beat to it.
Nice detail
 

JRad405

Active Member
Joined
Dec 1, 2010
Messages
769
Reaction score
15
Location
Central NJ
Here are a couple so-so iPhone pics of the finished product from when I took it to put it away. Again not the greatest pics, nor the best time of day. It was also kind of hazy and not really full-on sunny with the sun darting in and out of the clouds, but you can still see how the car gleams:

Nacho the car looks amazing. I always thought that Camaro was clean. But this is superb. I always do my own polishing but I never thought of that 1000W lamp that you were talking about. But I probably should invest in one.

Looks really good, I wish I had the confidence to do all of that to my car. I am just worried I will screw up and end up with a bunch of swirls in my paint.

I thought the same exact thing and then I said to myself I would just do it and decided to pick a PC and do it myself. Now I don't know why I was wasting all that time doing the work by hand. I ended up getting a porter cable from CG and all the stuff. Honestly I don't know how I could even mess it up using the that thing. If you really need tips on how to do it just look at the video that Handz does and it gives you a good step by step. And your car comes out 100x's better.
 

miss2slocoupe

Well-Known Member
Joined
Jun 28, 2011
Messages
4,314
Reaction score
270
Location
Canton, Georgia
I love the Rug Doctor products, They work wonders! My dad also had a camaro in this body style except it was an iroc. You did a freaking awesome job! to be honest I need to do every thing you did, Wipe down the plastics, shampoo and everything
 
OP
OP
N

Nacho98

Well-Known Member
Joined
May 4, 2011
Messages
1,226
Reaction score
60
Got the car out again this morning. Had a bit more sun, but it was still pretty brisk going 65 mph with the T-tops off and heat on full blast since it was only around 50 degrees...I put about 200 miles on the car today, it's running and driving just beautifully.


By this time I probably should've wiped the brake dust off the wheels and re-dressed the tires, but oh well...I just wanted to get it out and drive it again this morning. iPhone pics, and in case you're wondering what the sticker in the windshield is, it's a Car Craft Summer Nationals 2001 sticker...should be making an appearance there this July for the first time in 11 years:


7303985104_8d342655db_b.jpg


7303966130_09d1110c7b_b.jpg


7303965172_7133a4bd3f_b.jpg


7303982190_0468ef5393_b.jpg


7303988262_30f64bf0ce_b.jpg


7303983062_69fc866b71_b.jpg


7303984028_6f520859e2_b.jpg
 

Dr Fildo

Active Member
Joined
Jul 1, 2008
Messages
303
Reaction score
3
Location
Jersey
Looks Fantastic! I miss my RS. My 88 looked exactly like that, only it was red with a 5 speed and no T-tops. My RS was a V6.
 

Mrstangerbanger

Well-Known Member
Joined
Jan 14, 2011
Messages
1,249
Reaction score
28
Location
CHICO , California, United States
Good job bro ..

You need to get a varable speed buffer that little porter cable will not get deep enough for the paint to be corrected .. But looks great for just a orbital buffer.. The key is products.
 

Latest posts

Forum statistics

Threads
77,440
Messages
1,502,189
Members
14,920
Latest member
marktuck99

Members online

Top