Headlight Restoration - My Take

wnracing

Active Member
Joined
Jun 8, 2006
Messages
827
Reaction score
1
First of all, I want to start with a little disclaimer.

**I highly recommend researching tips on how to properly wet sand, as well as how to properly use your Porter Cable buffer. Use this tutorial as a small guideline as to how to properly restore your headlights, but remember all results will be different. Use this how-to at your own discretion.**

Ok. This is my experience with restoring my headlight housing on my '03 Stratus. I would imagine that these results could be applied to any plastic housing on any car.

*Big thanks to Pcola and others who have posted tips on this same subject!*

I unlike some WOULD NOT do this without my Porter Cable. The amount of polishing needed would take a lengthy amount of time and I honestly don't know that you could get the same results without it.
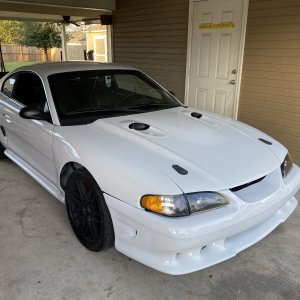
1. Before
headlight1.jpg


headlight2.jpg


As you can clearly see, the headlights had some serious oxidation and hard water staining. Luckily for me, it was not covering the entire headlight. This was more than just a simple yellowed or stained headlight, you could physically FEEL the deformation of the plastic.


2. Preparation
headlight3.jpg


You should always start out with a completely clean surface to work with, especially when you are going to do any sanding. You may want to use a clay bar as well, but I had already recently clayed the car. I did use some dishsoap as well as my sea sponge to scrub and bugs/ road grime off.

**This should also give you an idea of how wet to keep the housing, I used warm water with a decent amount of dishsoap while sanding. KEEP YOUR SURFACE SOAKING WET THE ENTIRE TIME!.**

3. Sanding step 1 - 600 Grit.

sp600.jpg


headlight4.jpg


As you can see, this is where that lump in your throat really starts to form.


4. Sanding step 2 - 1000 Grit
sp1000.jpg


headlight5.jpg


The lump in your throat and heart beat should both be increasing at this point.


5. Sanding step 3 - 2000 Grit
sp2000.jpg


headlight6b.jpg


Now, you're having trouble breathing and you're asking yourself "Why the hell am I doing this?!?"


6. The fun part!
headlight7.jpg


headlight8.jpg


headlight9.jpg


Now, this is the part that you should be getting excited. I started out using Meguiars ScratchX on my PC Orange cutting pad and followed up with my Meguiars PlasticX.


The products that I used.
products.jpg


products2.jpg
 

realitygt

Legend
Joined
Jul 2, 2007
Messages
5,221
Reaction score
1
I think I'm just gonna buy new headlights. :hammer:


GREAT WRITEUP tho!!!I love the detail u went to. I might actually try this except I don't have a buffer. this should be in the howto forum too :thumb:
 
OP
OP
W

wnracing

Active Member
Joined
Jun 8, 2006
Messages
827
Reaction score
1
Thanks bud! If Dal or one of the other Mods want to move this, that's fine with me, just wasn't sure on where to post this.

I honestly would be willing to get new headlights, but they are mighty pricey for the R/T, around $250 each. So, I decided to give this a shot. I'd say spending the $20 for the materials beats $250 anyday! :coolsmiley:
 

realitygt

Legend
Joined
Jul 2, 2007
Messages
5,221
Reaction score
1
wnracing said:
Thanks bud! If Dal or one of the other Mods want to move this, that's fine with me, just wasn't sure on where to post this.

I honestly would be willing to get new headlights, but they are mighty pricey for the R/T, around $250 each. So, I decided to give this a shot. I'd say spending the $20 for the materials beats $250 anyday! :coolsmiley:

yeah, I usually post all my stuff here for people to see because not very many people look in the other ones lol. I got a buddy with a buffer, I might give this a try tomorow actually
 

uncltrvlnmatt

Post Whore
Joined
Apr 8, 2006
Messages
13,634
Reaction score
46
Location
Pa.
I did a headlight clean up on my old lights 3 times. The yellowing just ket coming back a couple weeks later.
 

BlackMachDown

Active Member
Joined
Nov 22, 2007
Messages
309
Reaction score
0
to keep the yellow from coming back instead of polishing the headlight, spray 3 or 4 thick coats of clear then wetsand that and buff and the yellowing will never come back
 

realitygt

Legend
Joined
Jul 2, 2007
Messages
5,221
Reaction score
1
uncltrvlnmatt said:
I did a headlight clean up on my old lights 3 times. The yellowing just ket coming back a couple weeks later.

same thing happened on our truck. thats why i said i'm just gonna buy new lights lol, but that might not be for a while so I might try this.
 

uncltrvlnmatt

Post Whore
Joined
Apr 8, 2006
Messages
13,634
Reaction score
46
Location
Pa.
BlackMachDown said:
to keep the yellow from coming back instead of polishing the headlight, spray 3 or 4 thick coats of clear then wetsand that and buff and the yellowing will never come back

I replaced them with smoked headlights. Now i can't see shit, oh wait I could not see shit before.
 

Petek

Well-Known Member
Joined
Mar 13, 2007
Messages
2,279
Reaction score
4
I did this last month on my stock 96 gt headlights, except i used 800 grit, followed by 2000 grit, and then a polishing wheel. I also sanded off the 3 plastic nubs, and they looked much nicer. the only thing i hated is that they are not clear plastic to start so i didnt get the effect i wanted, so i just bought BOI smoked clears. it is time comsuming though, but worth it.
 

5litrarag

Well-Known Member
Joined
Sep 7, 2007
Messages
1,178
Reaction score
5
I just use some soaked wet-dry 2000 grit paper and sand away while letting water trickle under the paper. You can see the film coming off, you dont put so many scratches and its more difficult to fuck up the lights beyond repair. Takes about 5 min per light, then I dry it and use the plastix polish and just buff it off by hand. Takes like 10 min. total. Then you could seal it up with some good wax and that should keep them clear for a while.
 

Petek

Well-Known Member
Joined
Mar 13, 2007
Messages
2,279
Reaction score
4
5litrarag said:
I just use some soaked wet-dry 2000 grit paper and sand away while letting water trickle under the paper. You can see the film coming off, you dont put so many scratches and its more difficult to f**k up the lights beyond repair. Takes about 5 min per light, then I dry it and use the plastix polish and just buff it off by hand. Takes like 10 min. total. Then you could seal it up with some good wax and that should keep them clear for a while.

i just dont know if 2000 grit would do enough on old and weathered lights. and it would be pretty hard to screw up a lense that bad, i mean i could attack a lense with 120 grit on an orbital sander, and repair it to look fine.
 
OP
OP
W

wnracing

Active Member
Joined
Jun 8, 2006
Messages
827
Reaction score
1
Pete k said:
i mean i could attack a lense with 120 grit on an orbital sander, and repair it to look fine.

lol, I don't know about all that.. Would be alot of work!

I think it all depends on the housings physical properties to begin with.. Mustang housing have been prone to yellow and oxidize for as long as I can remember, you don't typically see that on alot of other cars or aftermarket parts. :dunno:

My problem was more about sun damage and oxidation then any kind of discoloration. You could physically feel the deformation on the lense. I had no alternative other than leaving it alone (not an option) or spending $250 on a new housing. I might eventually clay the lense and wet sand it one more time to get some more fine scratches out and clear it, just didn't have time today.
 

5litrarag

Well-Known Member
Joined
Sep 7, 2007
Messages
1,178
Reaction score
5
Pete k said:
5litrarag said:
I just use some soaked wet-dry 2000 grit paper and sand away while letting water trickle under the paper. You can see the film coming off, you dont put so many scratches and its more difficult to f**k up the lights beyond repair. Takes about 5 min per light, then I dry it and use the plastix polish and just buff it off by hand. Takes like 10 min. total. Then you could seal it up with some good wax and that should keep them clear for a while.

i just dont know if 2000 grit would do enough on old and weathered lights. and it would be pretty hard to screw up a lense that bad, i mean i could attack a lense with 120 grit on an orbital sander, and repair it to look fine.


Really? How weather beaten do you think mine were? The car sat outside for 3+ years before I owned it without being washed and the sun shining on it daily here in So Cal.

Here's the only decent pic I can find right now of the lights.... I'll see if I can find more later. but this gives an idea on how bad they were.
Oh and no, I didn't use the rotary in the picture on anything but the paint. Which should be totally evident since they dont come out like newww...but they are better than before.

BEFORE:


IMG_0988.jpg


IMG_0992.JPG


AFTER:

100_3956-1.jpg
 

94Pro-5.0

Well-Known Member
Joined
Aug 7, 2007
Messages
3,389
Reaction score
1
Location
Little Elm, TX
looks good guys :thumb:

i did mine a few weeks ago. just used my dads buffer and some compound. i dont have a good before pic though

before
11SP_A0559.jpg


after
MustangPartz019.jpg

MustangPartz020.jpg
 

Latest posts

Forum statistics

Threads
78,527
Messages
1,535,649
Members
16,185
Latest member
dmen76

Members online

Top