g36 monkey
Post Whore
Alright, finally got around to doing this. Because I think some people may not look at my build thread, thought it may not be a bad idea to go ahead and post this in here.
So, here's how to do the steering shaft. Quoted from this post of my build thread.
Anyhow, finally got around to installing the Maximum Motorsports steering shaft. I will give a quick "walk through" just so people know what they are getting into.
Instructions say to do the job on jack stands, I personally disagree. You want to limit the movement of the tires as much as possible once steering is disengaged. To do so, I drove up on my ramps. Obviously if you have a drive on lift, life would be easier. I hadn't used these bad boys in a while, so it was nice to break them out.
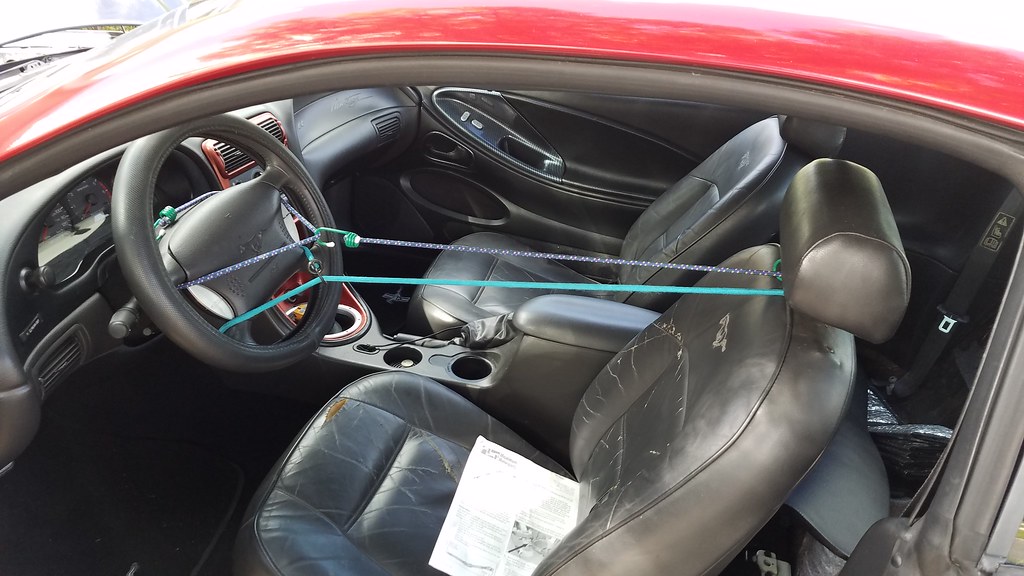
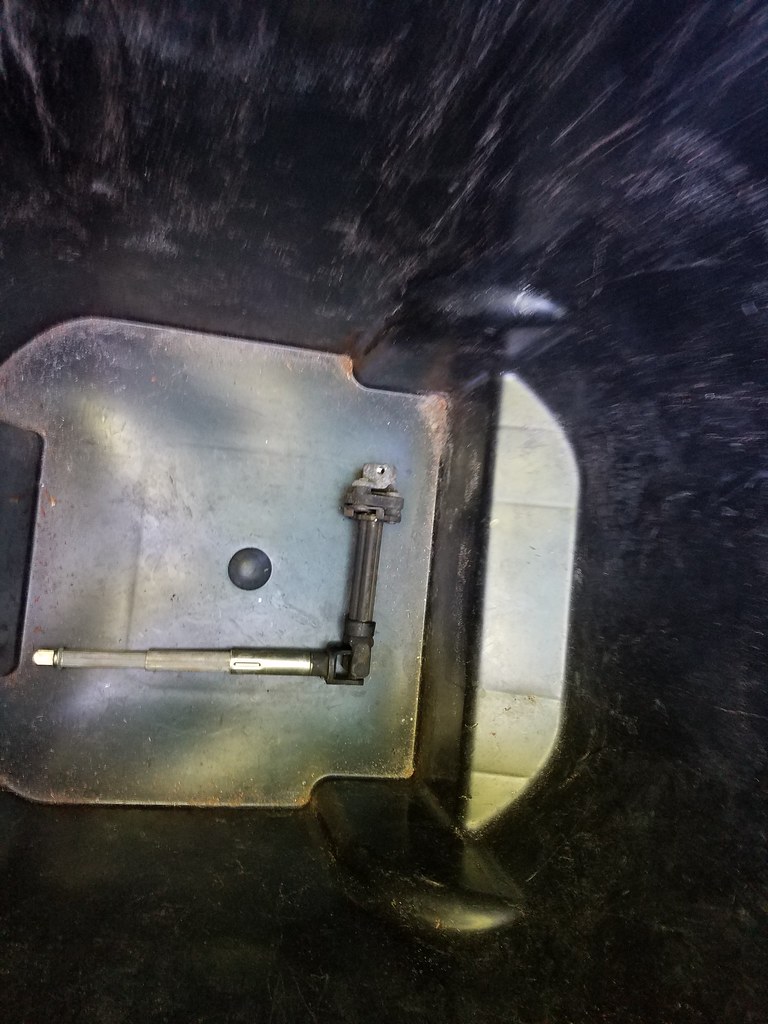
The next step is also pretty important. Stabilize the steering wheel. If you are at a shop you might have one of those fancy tools to do so. If not, I show you how to do it as a normal person with regular garage tools.
Once steering is disengaged, the steering wheel has the ability to spin, if it spins too much, you could sever the wires in the clock spring, which would make for a bad day. Taking 2 minutes to secure the wheel can prevent that. As you can see below I used the very scientific bungee cord method of wrapping bungees around the wheel and around the headrest support. Science.
I do not have pictures of the removal. Instructions are not exactly super useful on this portion either, they basically say: "Remove the shaft."
There is a bolt on the steering rack that pinches the end of the shaft (called a pinch bolt, go figure). Remove this bolt and use your big boy hands to separate the shaft from the rack.
Under the dash, remove the pinch bolt on the steering shaft closest to the firewall. Then remove the shaft from the column, again using your big boy hands. Then you will need to slide the shaft out of the firewall and figure out how to maneuver it out of the car. Luckily, I have tubular front suspension so it glided right out.
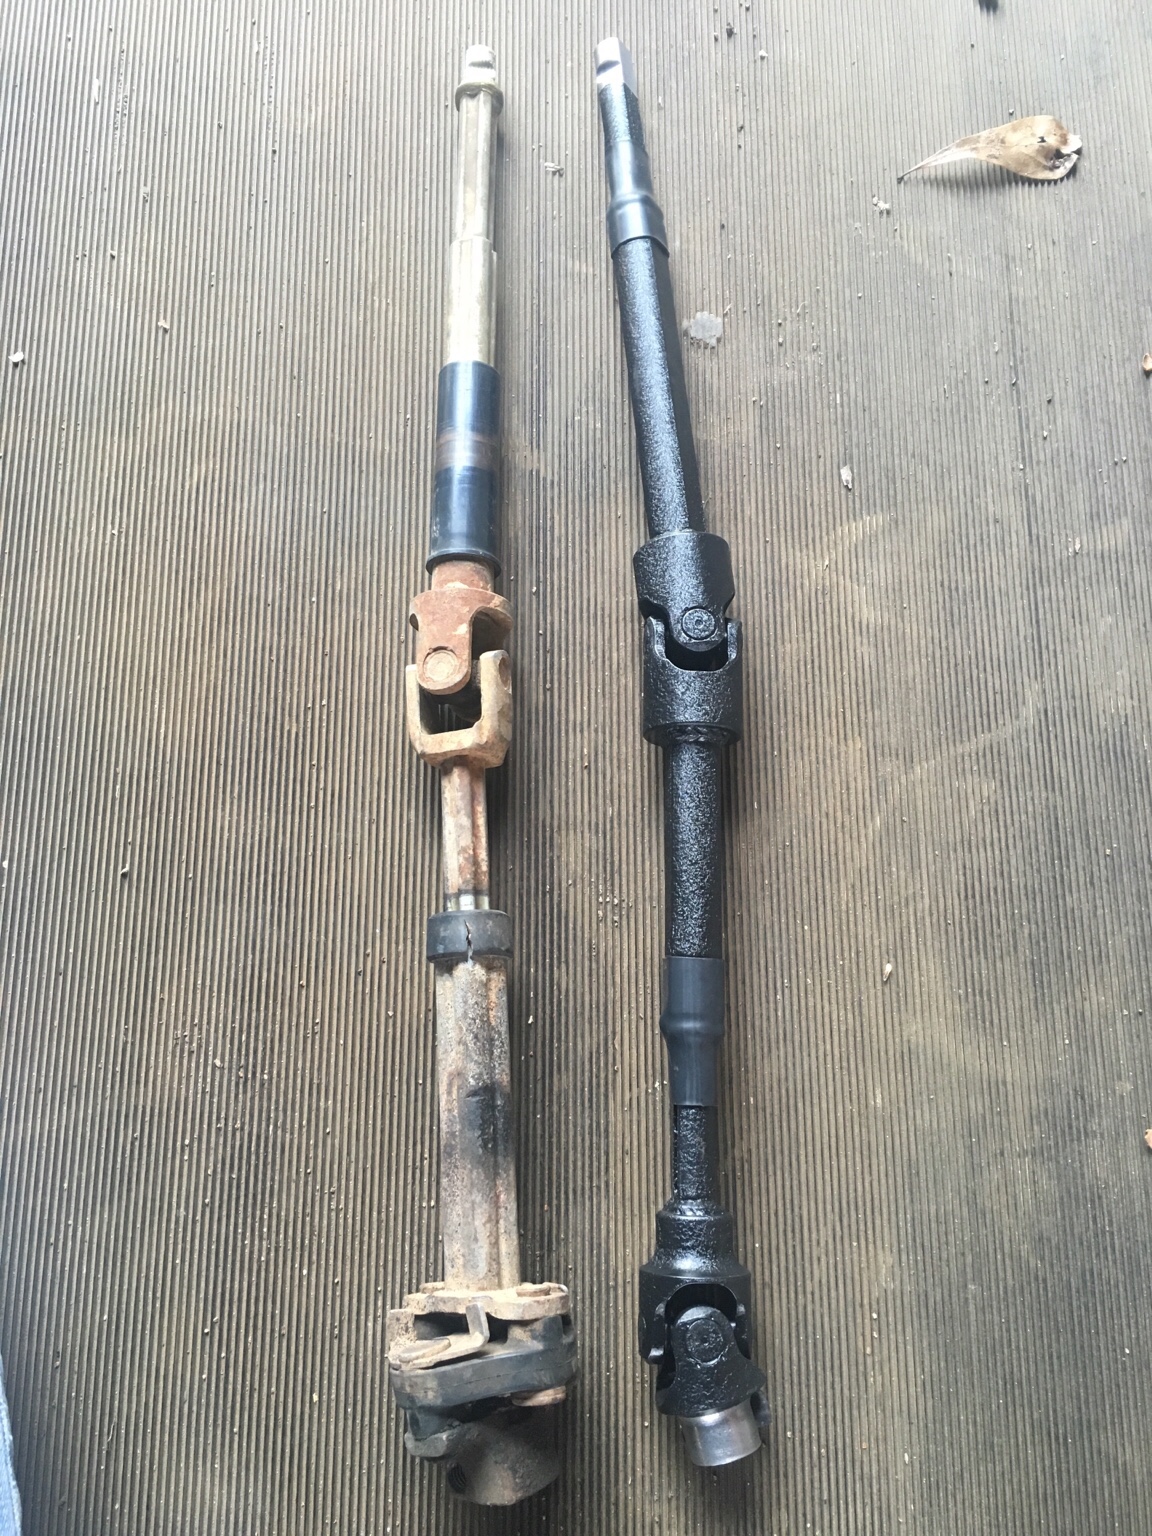
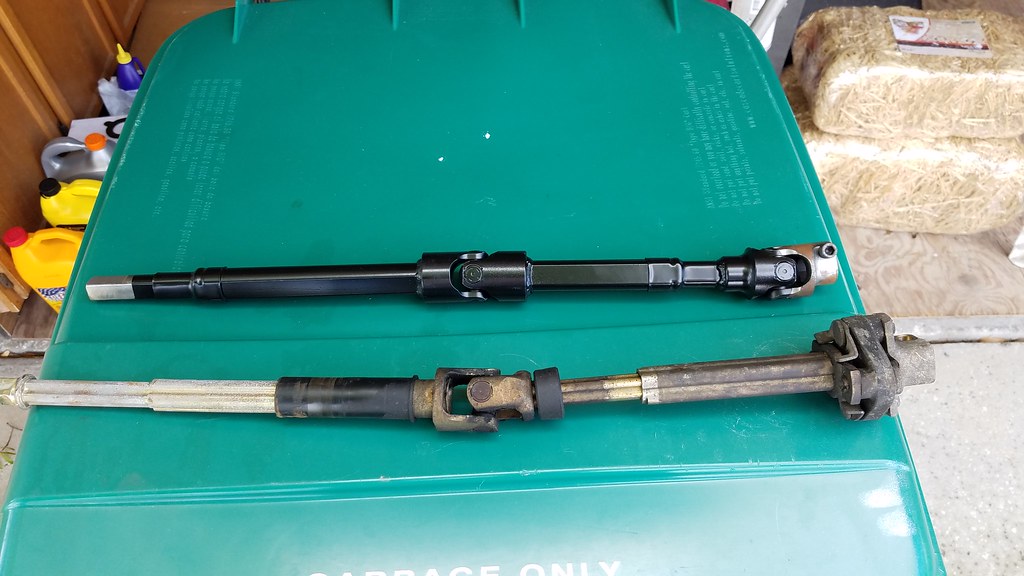
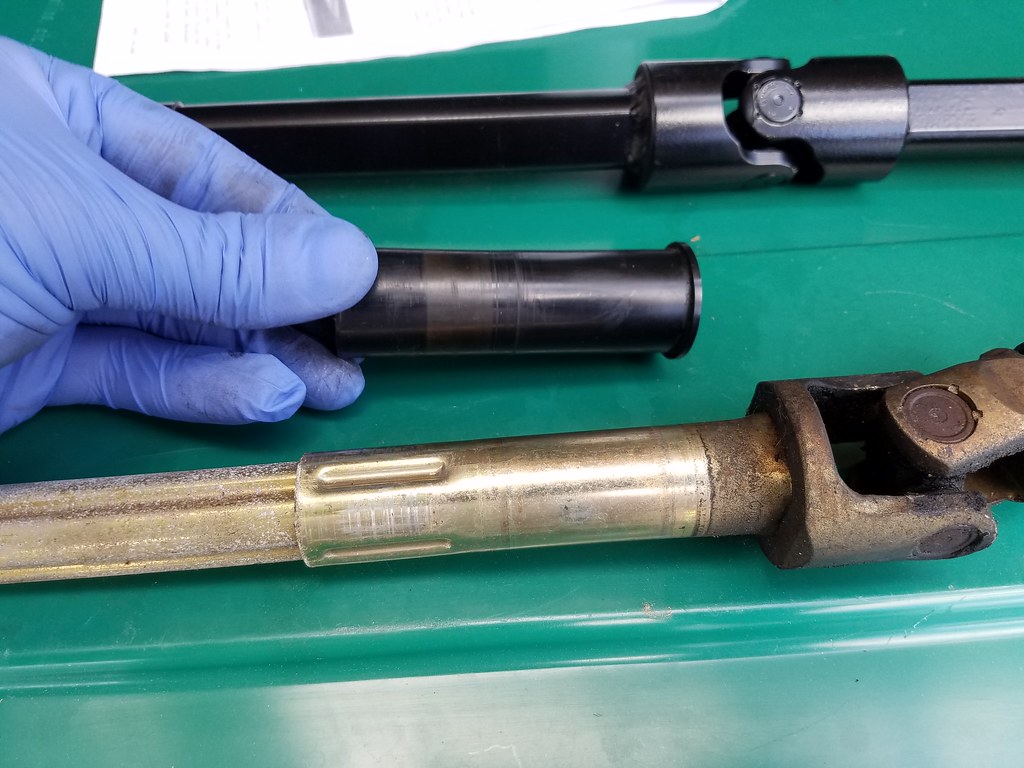
Below I have a pic of the old shaft with the new one side by side. Bear in mind I painted the shaft prior to installation. It is bare metal, without paint it will get a lot of surface rust. Essentially, collapse the ends halfway on either side, and tape the ends approximately 1" from the end then paint.
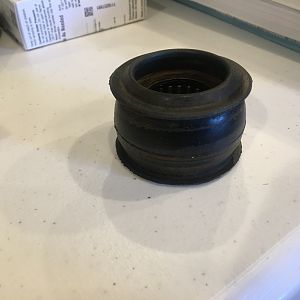
The big problem with this is the rubber.
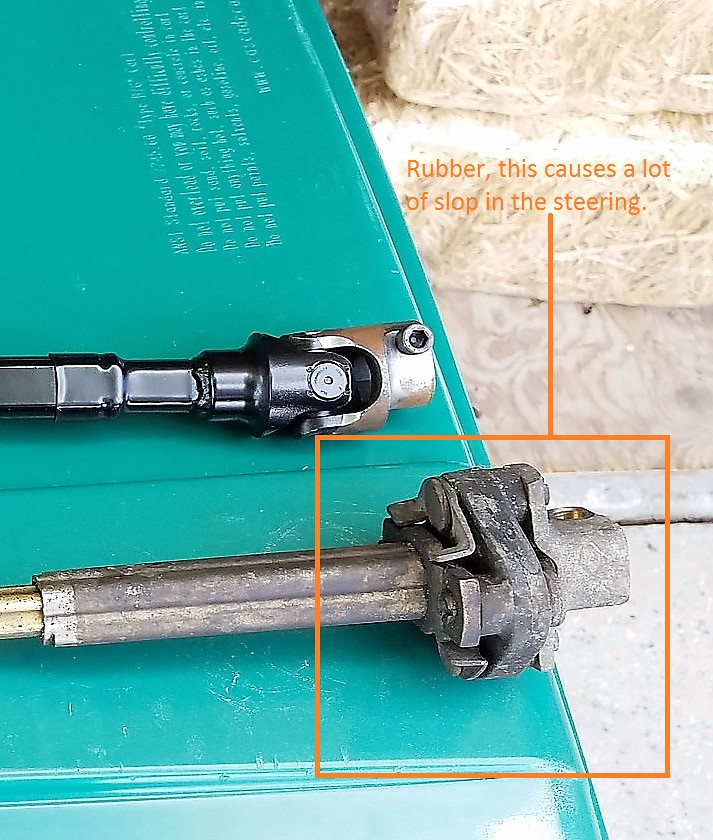
The next step is to slip off this plastic bushing and the rubber dust boot from the
new shaft. Be very careful, the plastic bushing piece is no longer available. If you
damage it, you will have to hit the junk yard. The plastic bushing I found
to come off very easily, while the dust boot took a bit more effort, probably
because it was painted over per the instructions provided.
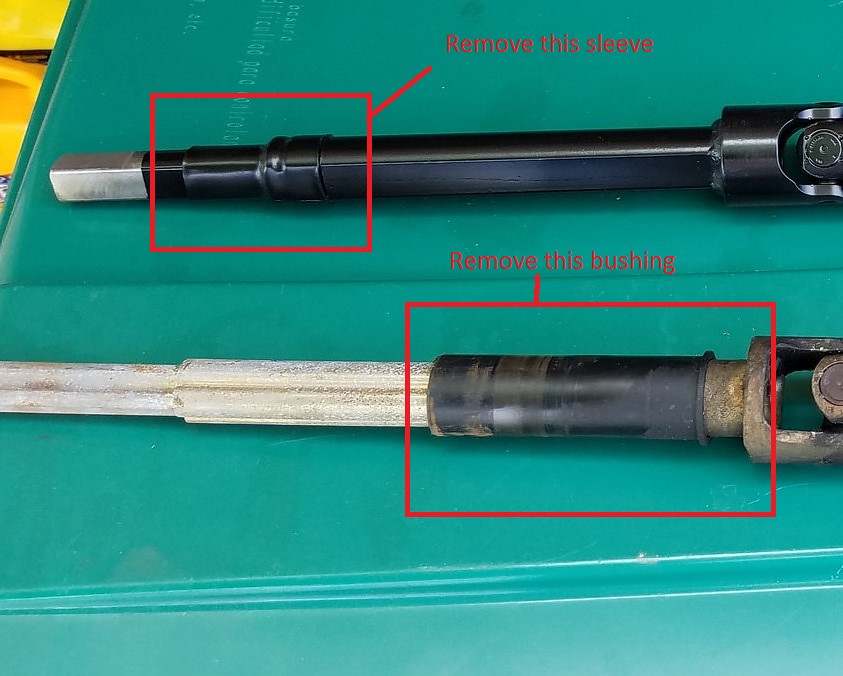
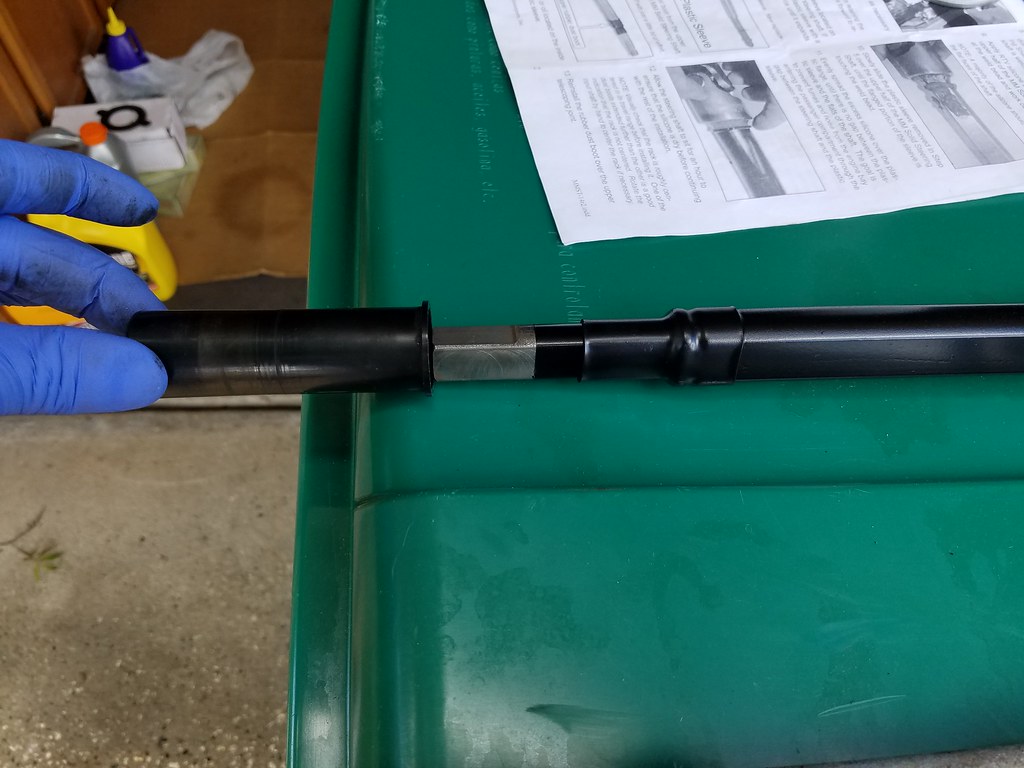
Clean the area on the new shaft where the plastic bushing will slide onto, as well as the plastic bushing itself. I used rubbing alcohol and a paper towel to clean both. I did not want to risk using a more aggressive solvent on the plastic bushing because of its unavailability.
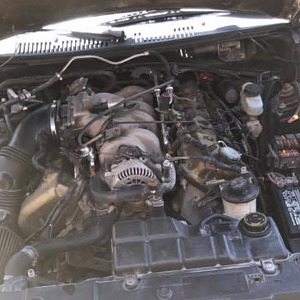
The next picture shows the area where the plastic bushing will slip over. As I mentioned earlier, you need to remove the rubber dust boot before you can put the bushing on the new shaft. In this picture that boot is not removed. Do not follow by example. Do as I say! If you do not remove the boot now, you will have a lot of headache on the next step.
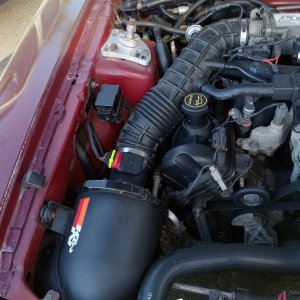
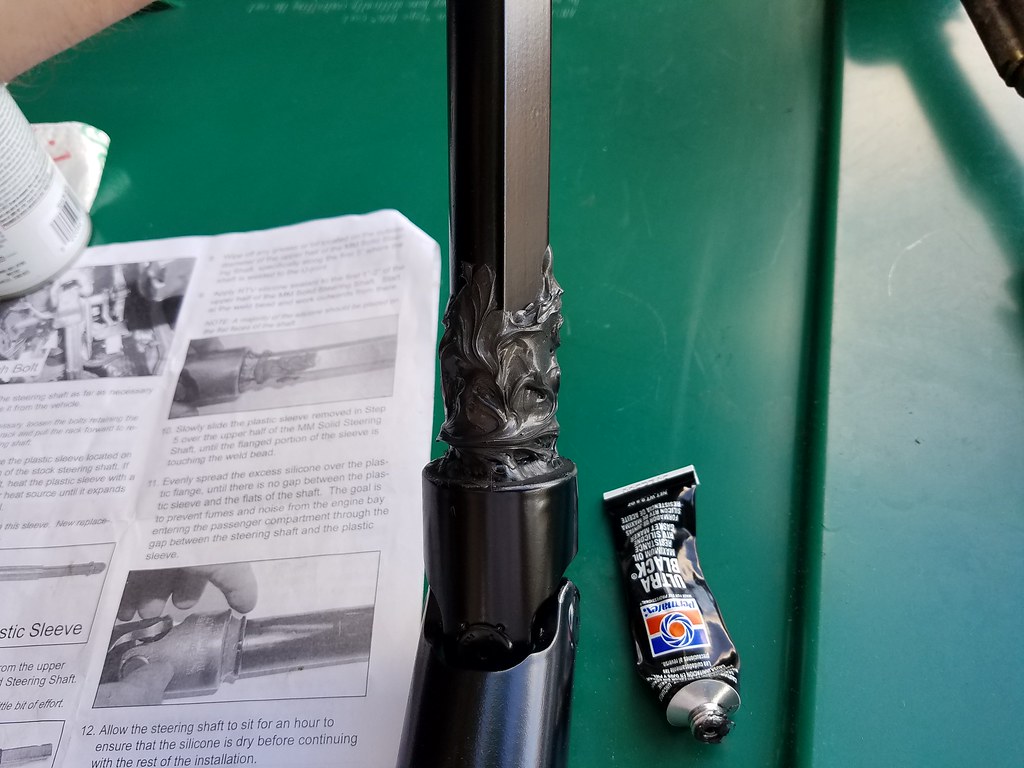
The next step is arguably the most time consuming and messiest part of the install. You will need to cover the shaft where the plastic bushing sits in black RTV silicone. This bushing fits into another bushing in the firewall, by sealing this area you are preventing noise and fumes from entering the cabin.
The area of focus is the welded bead and approximately 2 inches up the shaft. See the picture for an example. I used an entire small tube of silicone. I find it easier to apply more then remove as necessary to get a good seal. The instructions say to focus more on the flat areas of the shaft because the rounded edges seal quite well with the bushing.
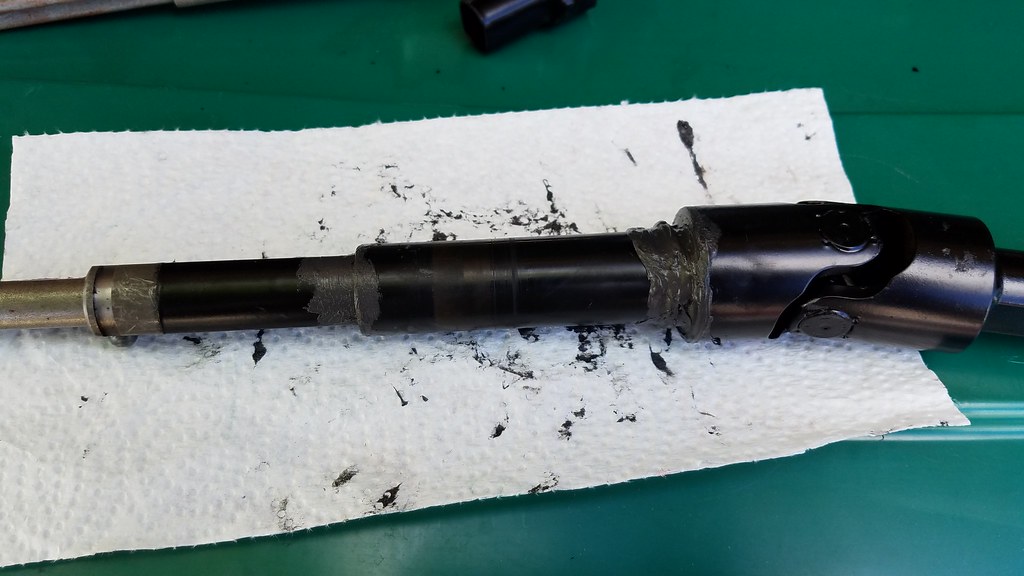
Once you have applied the silicone, go ahead and seat the bushing. Then proceed by smoothing the silicone out, making sure to push into the bushing a bit to seal up any air holes. Make sure to do so at both ends. Do your best to fill all the gaps with silicone. Again you are eliminating potentially harmful gases from entering the cabin by doing this.
If you manage to make it look pretty, my hat is off to you. Mine came out ugly as sin, but I know it is sealed!
Then you just let the shaft sit for about an hour before you start handling it. After an hour has passed, reinstall the dust boot you removed.
The install is fairly simple. Remove the new pinch bolt from the steering rack side of the new shaft. Prior to attempting the install, I recommend collapsing and extending both ends a few times, just in case they got a little bound up from sitting for a while. This will be easier while you are outside of the car rather than underneath.
Go ahead and install the shaft onto the steering rack and slide it into position. Make sure the shaft is inserted into the firewall bushing. If the shaft is not in the proper orientation or if it is not fully slid on, the pinch bolt cannot be installed.
Once the shaft is fully seated, and you are sure the other end is through the firewall, go ahead and install the new pinch bolt and tighten it to 23 foot pounds.
Relocate yourself to under the dash and find the shaft. Extend it to reinstall it to the steering column. Once you seat it in the original location, go ahead and reinstall the original bolt and tighten it to 23 foot pounds.
That’s it!
Now, properly dispose of the old junk:
Of course undo however you held the steering wheel, and then get the car safely on the ground. I noticed an immediate difference in steering response and had a lot less play in the wheel. This is a huge improvement over the stock unit and I highly recommend it.
So, here's how to do the steering shaft. Quoted from this post of my build thread.
Anyhow, finally got around to installing the Maximum Motorsports steering shaft. I will give a quick "walk through" just so people know what they are getting into.
Instructions say to do the job on jack stands, I personally disagree. You want to limit the movement of the tires as much as possible once steering is disengaged. To do so, I drove up on my ramps. Obviously if you have a drive on lift, life would be easier. I hadn't used these bad boys in a while, so it was nice to break them out.
The next step is also pretty important. Stabilize the steering wheel. If you are at a shop you might have one of those fancy tools to do so. If not, I show you how to do it as a normal person with regular garage tools.
Once steering is disengaged, the steering wheel has the ability to spin, if it spins too much, you could sever the wires in the clock spring, which would make for a bad day. Taking 2 minutes to secure the wheel can prevent that. As you can see below I used the very scientific bungee cord method of wrapping bungees around the wheel and around the headrest support. Science.
I do not have pictures of the removal. Instructions are not exactly super useful on this portion either, they basically say: "Remove the shaft."
There is a bolt on the steering rack that pinches the end of the shaft (called a pinch bolt, go figure). Remove this bolt and use your big boy hands to separate the shaft from the rack.
Under the dash, remove the pinch bolt on the steering shaft closest to the firewall. Then remove the shaft from the column, again using your big boy hands. Then you will need to slide the shaft out of the firewall and figure out how to maneuver it out of the car. Luckily, I have tubular front suspension so it glided right out.
Below I have a pic of the old shaft with the new one side by side. Bear in mind I painted the shaft prior to installation. It is bare metal, without paint it will get a lot of surface rust. Essentially, collapse the ends halfway on either side, and tape the ends approximately 1" from the end then paint.
The big problem with this is the rubber.
The next step is to slip off this plastic bushing and the rubber dust boot from the
new shaft. Be very careful, the plastic bushing piece is no longer available. If you
damage it, you will have to hit the junk yard. The plastic bushing I found
to come off very easily, while the dust boot took a bit more effort, probably
because it was painted over per the instructions provided.
Clean the area on the new shaft where the plastic bushing will slide onto, as well as the plastic bushing itself. I used rubbing alcohol and a paper towel to clean both. I did not want to risk using a more aggressive solvent on the plastic bushing because of its unavailability.
The next picture shows the area where the plastic bushing will slip over. As I mentioned earlier, you need to remove the rubber dust boot before you can put the bushing on the new shaft. In this picture that boot is not removed. Do not follow by example. Do as I say! If you do not remove the boot now, you will have a lot of headache on the next step.
The next step is arguably the most time consuming and messiest part of the install. You will need to cover the shaft where the plastic bushing sits in black RTV silicone. This bushing fits into another bushing in the firewall, by sealing this area you are preventing noise and fumes from entering the cabin.
The area of focus is the welded bead and approximately 2 inches up the shaft. See the picture for an example. I used an entire small tube of silicone. I find it easier to apply more then remove as necessary to get a good seal. The instructions say to focus more on the flat areas of the shaft because the rounded edges seal quite well with the bushing.
Once you have applied the silicone, go ahead and seat the bushing. Then proceed by smoothing the silicone out, making sure to push into the bushing a bit to seal up any air holes. Make sure to do so at both ends. Do your best to fill all the gaps with silicone. Again you are eliminating potentially harmful gases from entering the cabin by doing this.
If you manage to make it look pretty, my hat is off to you. Mine came out ugly as sin, but I know it is sealed!
Then you just let the shaft sit for about an hour before you start handling it. After an hour has passed, reinstall the dust boot you removed.
The install is fairly simple. Remove the new pinch bolt from the steering rack side of the new shaft. Prior to attempting the install, I recommend collapsing and extending both ends a few times, just in case they got a little bound up from sitting for a while. This will be easier while you are outside of the car rather than underneath.
Go ahead and install the shaft onto the steering rack and slide it into position. Make sure the shaft is inserted into the firewall bushing. If the shaft is not in the proper orientation or if it is not fully slid on, the pinch bolt cannot be installed.
Once the shaft is fully seated, and you are sure the other end is through the firewall, go ahead and install the new pinch bolt and tighten it to 23 foot pounds.
Relocate yourself to under the dash and find the shaft. Extend it to reinstall it to the steering column. Once you seat it in the original location, go ahead and reinstall the original bolt and tighten it to 23 foot pounds.
That’s it!
Now, properly dispose of the old junk:
Of course undo however you held the steering wheel, and then get the car safely on the ground. I noticed an immediate difference in steering response and had a lot less play in the wheel. This is a huge improvement over the stock unit and I highly recommend it.