shovel
Active Member
- Joined
- Jan 4, 2023
- Messages
- 617
- Reaction score
- 591
I'm sharing this in case it helps someone else in the future.
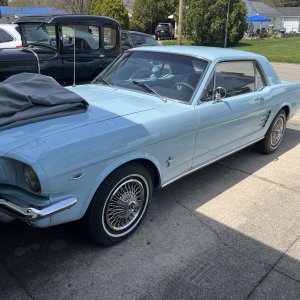
Before we get started I want to get two things out of the way: 1. this Mustang is a high mileage "rescue" so I'm not concerned with preserving its museum or collectible value. Its value is for me smiling while I rack up miles. 2. I am not good at welding, I need more practice and this is practice.
I chose a Volvo S40 power steering pump because these are massively available and it's a swap that's been done hundreds of times on vehicles of every make and model, so I didn't have to invent anything there.
These can be junkyarded or bought new from the usual alphabet soup overseas manufacturers pretty cheap.
I opted to get one that has the bracket included because that takes care of the rubber isolators and the basic shape of a bracket, so all I have to do is grind off paint and weld up random debris to fit my Mustang.

I have already relocated the battery to the trunk, so the area under the previous battery tray in front of the driver side front tire looks like as good a place as anywhere.
After lining up and measuring where I want it to sit I used a 2.75" hole saw to punch a hole in the metal below the battery tray:

Here's the basic look of the bracket, I did end up further modifying it after this photo (spacer on left side, as viewed from this angle) but the idea is about the same, if you're copying my work you'll have to kinda do your own thing anyway. I believe in you.

The left side of the bracket, viewed from this angle is the forward side of it and bolts to a pair of M8 rivnuts in the side of the radiator support loop. The right side of the bracket (vehicle rear) attaches to a single M8 rivnut mounted in the frame rail below the former battery tray. I had planned two but an inconvenient hole was already there from the factory. It feels quite rigid, the forward bolts against the radiator support do a good job of managing the vertical load so it is unlikely to vibrate or suffer under rough roads, pot-holes, etc.

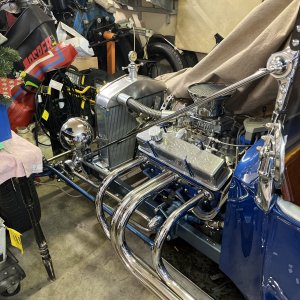
Note that I am in the middle of other work unrelated to the electrical power steering so the engine bay + wiring is very messy for now. I'll post cleaner finished photos when it's finished and cleaner.
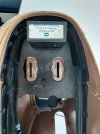
Here is the position of the filler cap while mounted in its final, permanent location.

Before we get started I want to get two things out of the way: 1. this Mustang is a high mileage "rescue" so I'm not concerned with preserving its museum or collectible value. Its value is for me smiling while I rack up miles. 2. I am not good at welding, I need more practice and this is practice.
I chose a Volvo S40 power steering pump because these are massively available and it's a swap that's been done hundreds of times on vehicles of every make and model, so I didn't have to invent anything there.
These can be junkyarded or bought new from the usual alphabet soup overseas manufacturers pretty cheap.
I opted to get one that has the bracket included because that takes care of the rubber isolators and the basic shape of a bracket, so all I have to do is grind off paint and weld up random debris to fit my Mustang.
I have already relocated the battery to the trunk, so the area under the previous battery tray in front of the driver side front tire looks like as good a place as anywhere.
After lining up and measuring where I want it to sit I used a 2.75" hole saw to punch a hole in the metal below the battery tray:
Here's the basic look of the bracket, I did end up further modifying it after this photo (spacer on left side, as viewed from this angle) but the idea is about the same, if you're copying my work you'll have to kinda do your own thing anyway. I believe in you.
The left side of the bracket, viewed from this angle is the forward side of it and bolts to a pair of M8 rivnuts in the side of the radiator support loop. The right side of the bracket (vehicle rear) attaches to a single M8 rivnut mounted in the frame rail below the former battery tray. I had planned two but an inconvenient hole was already there from the factory. It feels quite rigid, the forward bolts against the radiator support do a good job of managing the vertical load so it is unlikely to vibrate or suffer under rough roads, pot-holes, etc.
Note that I am in the middle of other work unrelated to the electrical power steering so the engine bay + wiring is very messy for now. I'll post cleaner finished photos when it's finished and cleaner.
Here is the position of the filler cap while mounted in its final, permanent location.