How to: Replace front control arm bushings

RichV

Well-Known Member
Joined
May 6, 2012
Messages
4,230
Reaction score
252
Location
CO
WHY

Why replace the bushings?

As anything in our cars, stuff wears out. Bushings are among the things that over time will distort and give less then ideal effects in handling, ride, and comfort. Some replace bushings to stiffen the ride and improve handling, some just want the stock quality ride restored. Getting into the front control arms (CA), stock bushings are adequate for street use. They dampen road noise and give a fairly cushy ride. Changing to polyurethane bushings gives you much more response, but the NVH (noise, vibration, harshness) is increased. This needs to be taken into account based on what you enjoy with your Mustang. The next step is delrin/aluminum which has very little deflection making it almost solid. NVH is at max with anything that stiff.

m3075d.jpg


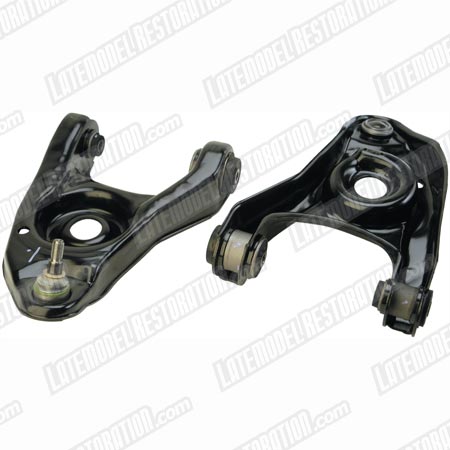
Stock control arms are adequate for everything you may want to do with your car. Aftermarket control arms can be purchased, they typicaly already have poly/delrin bushings installed and will be a direct swap. The aftermarket are usualy lighter, and have some wheel relocation which amounts to better handling charecteristic. The bushings I will be installing on my stock control arms are the Global West DEL-ALUM type that relocate the control arm forward of the stock location to increase front/rear track. If you choose to get an aftermarket CA, you obviously don't need to go through this surgery.

bushing diagram.jpg


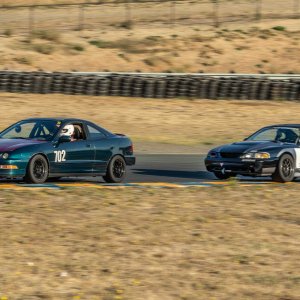
With worn out bushings you will get wheel movement as in the above diagram which is not desired. Specialy on a track car when maximum grip is needed.

bushing1.jpg

bushing2.jpg

bushing3.jpg


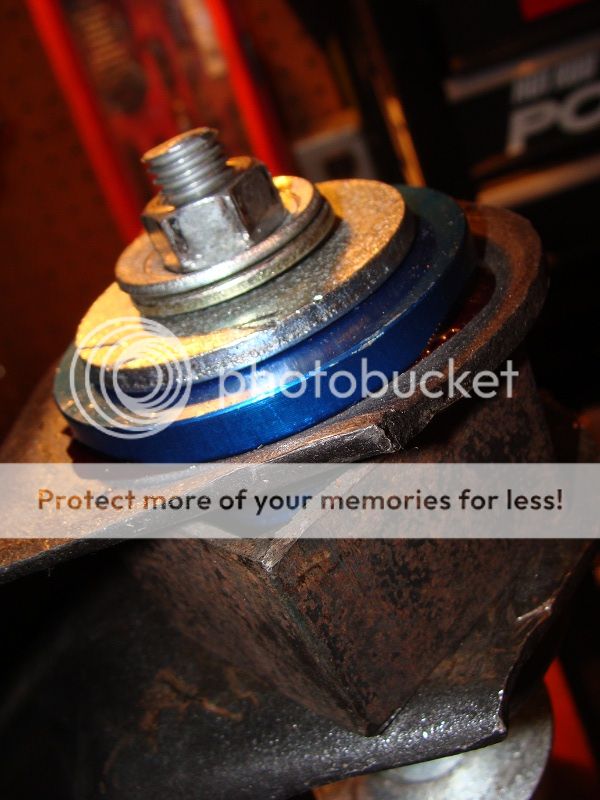
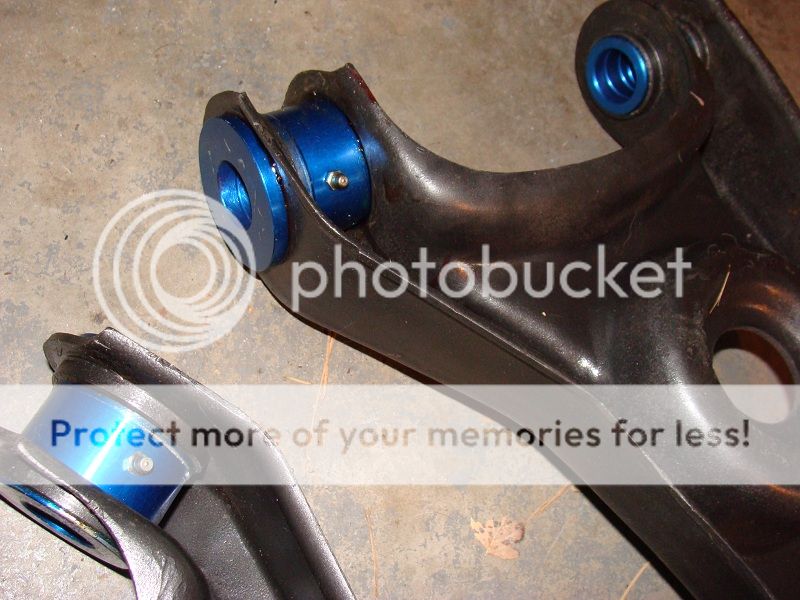
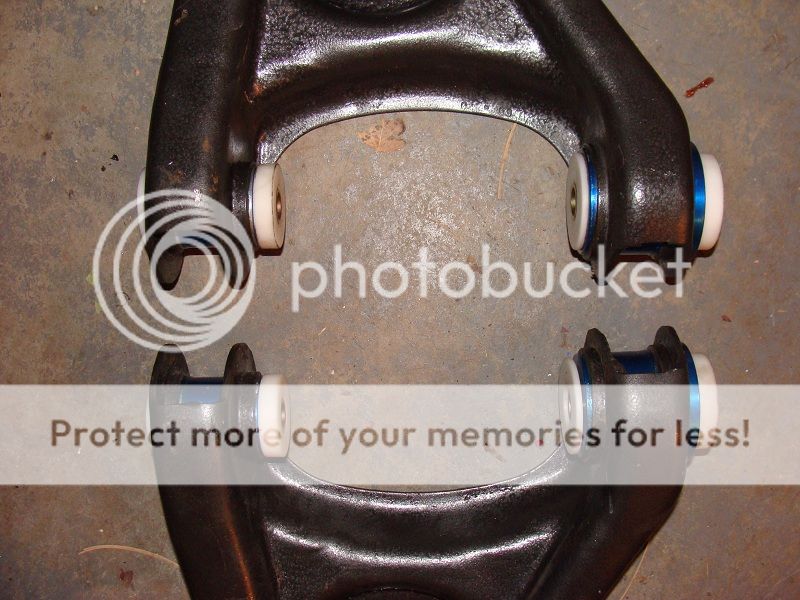
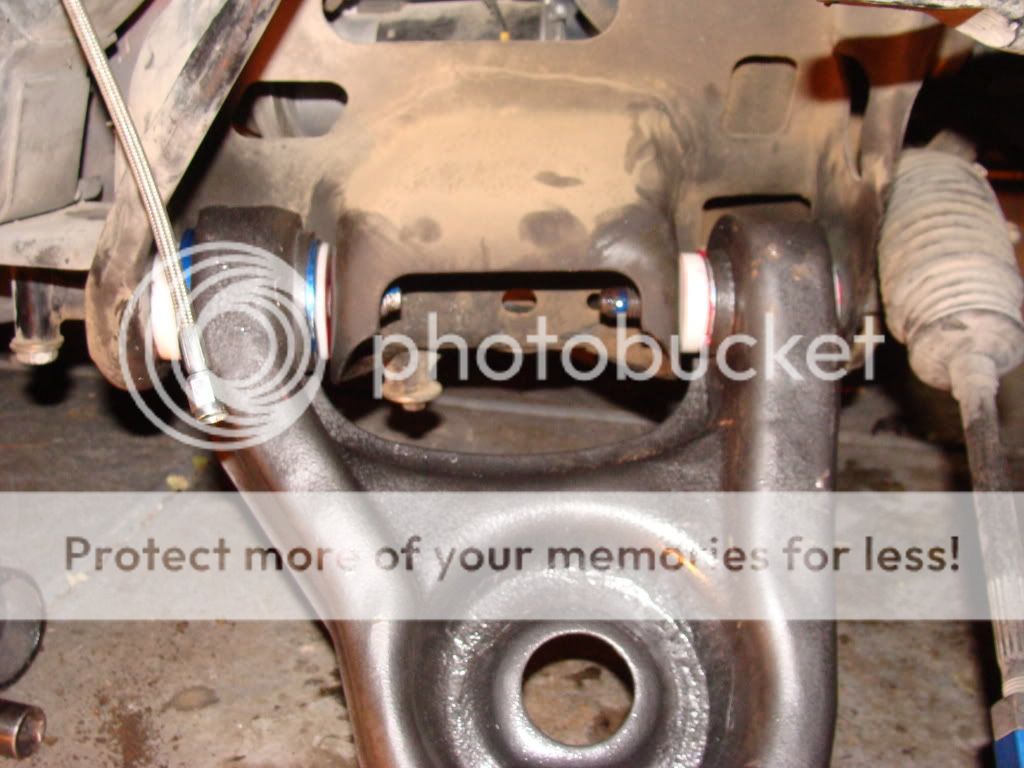
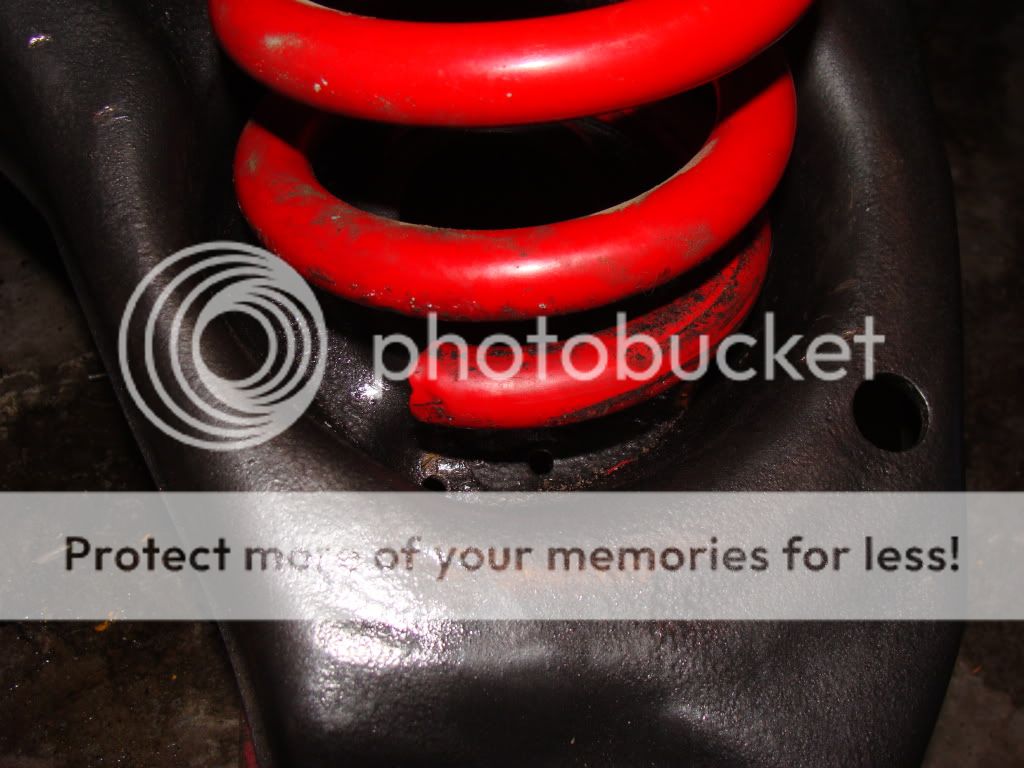
Examples of some worn/distorted bushings and the new del-alum bushings I'm putting in.
 
OP
OP
RichV

RichV

Well-Known Member
Joined
May 6, 2012
Messages
4,230
Reaction score
252
Location
CO
CONTROL ARM REMOVAL

This task is relatively straight forward. Only a few things to remove before your control arm can be fully removed.

You will be removing the sway bar endlink, steering tie rod end, spring/shock, spindle, then control arm.

The first step is to lift the corner you start on, I started on the passenger side. Secure with a jackstand under the frame or K-member. Don't put it close to the rear control arm bolt since you will be removing it. Start off by removing the sway bar endlink and the tie rod end. I like to clamp a vise-grip plier to the center of the endlink and just remove the bolt on top and bottom. The end link will stay in place until you lower the control arm enough to remove it, just leave it until the last step.
DSC06235_zps9c0faf80.jpg

Then loosten the nut for your tie rod end, get it just over the top of the threads, and hit it with a hammer to release it. Then remove and drop the tie rod down. Put a floorjack under the control arm's spring perch and pump it up to support it when you remove the shock.
DSC06236_zps83dcab92.jpg

I disconnected the brake line at the caliper, then removed the 2 shock bolts at the spindle, and the top shock bolt at the CC plate.
DSC06247_zpsd24f23b6.jpg

DSC06237_zps9d6c846e.jpg

Then remove the ball joint nut. I hit the top of the ball joint similar to the sway bar end link, to loosen the grip. Once you break it free, the spindle just pops off and can be removed.
DSC06238_zpse9770753.jpg

Now drop down the control arm with the jack and let the spring release its pressure. Then step on the control arm by the ball joint and force it down, remove spring.
DSC06240_zps4bf72615.jpg

You can now remove the sway bar end link. There are 2 bolts at the fron and rear of the control arm. I used a large vise-grip plier on the nut side (inside) and a impact on the outside. Sometimes these can rust inside and it makes removal a PITA. Spray them with some penetrating lubricant and let it soak.
DSC06241_zps9c24ea2b.jpg


Once the 2 control arm bolts are removed, the control arm just drops down with no effort. When your control arm is out, proceed to the next step to remove bushings.
 
OP
OP
RichV

RichV

Well-Known Member
Joined
May 6, 2012
Messages
4,230
Reaction score
252
Location
CO
BUSHING REMOVAL

This is arguably the crappiest part of the job. Suprisingly it was much easier than the Fox CAs I had done before. And, I didn't even have time to drink one beer. Took me about 30 minutes to do all 4. There are 2 bushings in each CA. I started with the larger of the 2. Gripped the CA in a large vise with the bushing pointing upward.
bushing4.jpg

I wedged a srewdriver between the CA and the bushing collar and gave it some love taps with a mini-sledge. The bushing came up realy easily, working it around all the way.
bushing5.jpg

Once it got high enough, I grabbed it with some larger pliers and worked it out. You can also wedge the loose end in the vise and work the CA up to release the bushing.
bushing7.jpg

bushing8.jpg

bushing9.jpg

The smaller bushing was a little tougher. I used a small floorjack, a bolt, and a socket. Placed the bolt in the bushing hole, socket on the bolt, and extended the floorjack in the center of the CA. This put pressure on the bushing. Then I used a MAPP gas torch to heat the bushing sleeve around the sides, top, and bottom while applying pressure by periodicaly pumping the jack.
bushing10.jpg

bushing11.jpg

Eventualy the bushing just pops out. Remeber it's a little hot, specialy with MAPP gas, it burns a little hotter than Propane.

If you have poly bushings, you will use the OEM sleeves and install them into the CA using the supplied grease. If you choose bushings like mine, there is still the removal of the sleeve to go.

SLEEVE REMOVAL ONLY DO THIS STEP IF YOUR BUSHINGS COME WITH SLEEVES

bushing12.jpg

bushing13.jpg

I grabed the CA in the vise and drilled 2 holes.
bushing14.jpg

Then with a sawzall cut gently through the sleeve. But not all the way through.
bushing15.jpg

Hammer/chisel the sleve down to compress it. Sleeve will break down.
bushing16.jpg

Ten it just comes out with an easy tap.
bushing17.jpg


I cleaned up the CAs and shot them with a little enamel. Next week I will go see a buddy and press the above blue sleeves in the CAs. They are a snug fit and Global West suggests some loctite to lock them in place.
 
OP
OP
RichV

RichV

Well-Known Member
Joined
May 6, 2012
Messages
4,230
Reaction score
252
Location
CO
NEW BUSHING INSTALL

If you're installing some poly bushings it is relatively straight forward. Follow the instruction from your manufacturer and sandwitch the poly bushings in the OEM sleves. Grease them up with the provided grease, or just use some synthetic grease. Pushing them in is easy, use a vice if needed.


Bushings with sleeves require the sleeves to be installed 1st.

I put the sleves in the freezer for 24hrs.
bushing18_zps088b86e4.jpg


Then with a piece of 5/16" thread rod and some washers I was able to compress the sleves in place. I did clean and de-bur the control arm sleve pockets, just to clean out paint and debris. Greased them a little and put in the sleve, fresh out of the freezer. Last 1/4" sealed it with some loctite red.
bushing19_zps2f999aa0.jpg

bushing20_zps7bf9326e.jpg


They went in with some headaches. A little tapping with a cold chisel was necessary to straighten out the units once in a while. The machining was very tight, so was the fit.
bushing21_zps99246bcb.jpg


I made sure the zerk threads were accesible when these are on the car. You can tell that these bushings offset just by looking at the control arm placement. It will be fun to measure just how much.
bushing22_zps57dafcf4.jpg

bushing23_zpse86a4b47.jpg


Glad this is done, next will be installation in the race car, then alignment.
 
OP
OP
RichV

RichV

Well-Known Member
Joined
May 6, 2012
Messages
4,230
Reaction score
252
Location
CO
CONTROL ARM INSTALL

Bushings are installed, all downhill from here. Just reverse of control arm removal.

I added some loctite blue for insurance and cranked down the control arms at 90 foot/lbs per manufacturer instruction. *note, if your installing stock rubber bushings, do not tighten or torque untill there is full weight on the control arm. This can be done with all weight on the wheels, or on a floorjack under the control arm when everything is re-installed.
DSC06244_zps86ef7c56.jpg

DSC06245_zps0c96f1c0.jpg

Make sure you get the springs correctly in the perches. I removed my isolators, but you can see how thei lighn up with the divot in the perch.
DSC06246_zpsa23ef7c5.jpg

Get the sway bar end link back in there, and raise the floorjack and get pressure on the spring. Now just get the spindle back in place, tighten the ball joint nut. Tie rod end and shock back in place the same way it came out.
DSC06247_zpsd24f23b6.jpg


I must do an alignment since the control arm bushings changed my trackwidth a little. I measured with a laser pointer and the spindle moved approximately 1/2-3/4" forward. You may or may not have to, but I guarantee you will feel a huge improvement in handling.
 
OP
OP
RichV

RichV

Well-Known Member
Joined
May 6, 2012
Messages
4,230
Reaction score
252
Location
CO
Reserved for: FINAL PRODUCT/ADJUSTMENTS
 
OP
OP
RichV

RichV

Well-Known Member
Joined
May 6, 2012
Messages
4,230
Reaction score
252
Location
CO
Got the bushing removal all done, including sleeves for my ap. I honestly thought this would be a chore, I had flashbacks of my Fox bushings, hours of pounding, drilling and cutting, etc. Maybe it helped they were newer, they came out of a 99 V6 a dude was parting out on craigs. I bought them so I wouldn't have to have #71 on jackstands for a while. And I'll just sell the ones I remove when I install these.

This is getting me stoked to get on the track!! :)
 
OP
OP
RichV

RichV

Well-Known Member
Joined
May 6, 2012
Messages
4,230
Reaction score
252
Location
CO
Next is the easy job, getting these suckers on the car!! Downhill from here!
 

Magic

Well-Known Member
Joined
May 3, 2007
Messages
1,639
Reaction score
31
Location
Some time zone
Nice! Looks like you went with the Global West bushings. From what I understand they do alter the front geometery a little, giving a forward offset. Quality parts!

I did the Prothane bushings in mine (from Maximum Motorsports). I torched out the old bushings and pressed the Prothane bushings into the original sleeves.
 
OP
OP
RichV

RichV

Well-Known Member
Joined
May 6, 2012
Messages
4,230
Reaction score
252
Location
CO
I got a smoking deal on them and can't wait to try them out. I had the prothanes on my track Fox car and they worked very well. These have zero deflection, so we'll see how well they do.


** Well this thread is done! Except for track testing which I will update in a couple of months the job is done. Got both sides completed today and I was shocked at the fact I could literaly move the stock control arm +/- 1" forward and back extremely easy with just my bodyweight. I can't even imagine what's happening under the car at speed when you enter a turn. The wheels have to be working against each other rather than together. Can't wait to get on the track!!
 

ldmiller281

New Member
Joined
Jan 1, 2013
Messages
38
Reaction score
1
Location
Sand Springs, OK
if you are hard up for tools you can also use a balljoint press with a little bit of enginuity. i rented one from the parts store and had it done in a couple hours from start to finish. nice writeup.
 
OP
OP
RichV

RichV

Well-Known Member
Joined
May 6, 2012
Messages
4,230
Reaction score
252
Location
CO
Yep, those will work well. You can rent them from a part store.

Ug, dead pics.
 

the5.ohh

Legend
Joined
Oct 15, 2012
Messages
9,561
Reaction score
129
Location
Shaolin, NY
Don't shoot me. [MENTION=17007]RichV[/MENTION] think I can remove my control arms with a ratchet? Don't have a powerful enough impact imo. And do you mean don't tighten the control arm until everythings hooked back up the jack it up and tighten to finish? Just looking for some guidance, gonna be doing new control arms (w/ bj's), inner tierods, outer tierods, rack bushings, swaybar bushings etc.
 

Wichers123

Well-Known Member
Joined
Apr 21, 2013
Messages
1,203
Reaction score
0
Location
Covington, louisiana
Pretty much what he's saying is if you tigthen them at droop (down) that when you set the car a ride height the bushings will be in a twisted bind. Urethane bushings don't need this as the center is not bonded to the material as rubber is.
 
OP
OP
RichV

RichV

Well-Known Member
Joined
May 6, 2012
Messages
4,230
Reaction score
252
Location
CO
Yea, you can use a breaker bar. I've done it in Foxbodys.

Wheat you can also do is mark on the K member the top of the arm before you jack it up and use it as a reference, but yes, that's only for stock style bushings with the teeth on them.
 

evilcw311

Most Evil Member!
SN95 Supporter
Joined
May 9, 2010
Messages
7,456
Reaction score
2,136
Location
Louisville, KY
We fought my bushings for a while as to be expected on a 150k+ SC car!!!

Gas and drills became our friend. Stuff stinks to high hell and back burning!!!!! Lol


This message courtesy of crapatalk!
 

Latest posts

Forum statistics

Threads
77,520
Messages
1,504,209
Members
14,987
Latest member
peasant99

Members online

Top