Miscreant

miscreant

New Member
Joined
Dec 25, 2018
Messages
42
Reaction score
18
Social Media/More Info:
Instagram:
https://www.instagram.com/miscreantmustang/?hl=en
@miscreantmustang
Wordpress (blog): https://miscreantstang.wordpress.com/

This Thread:
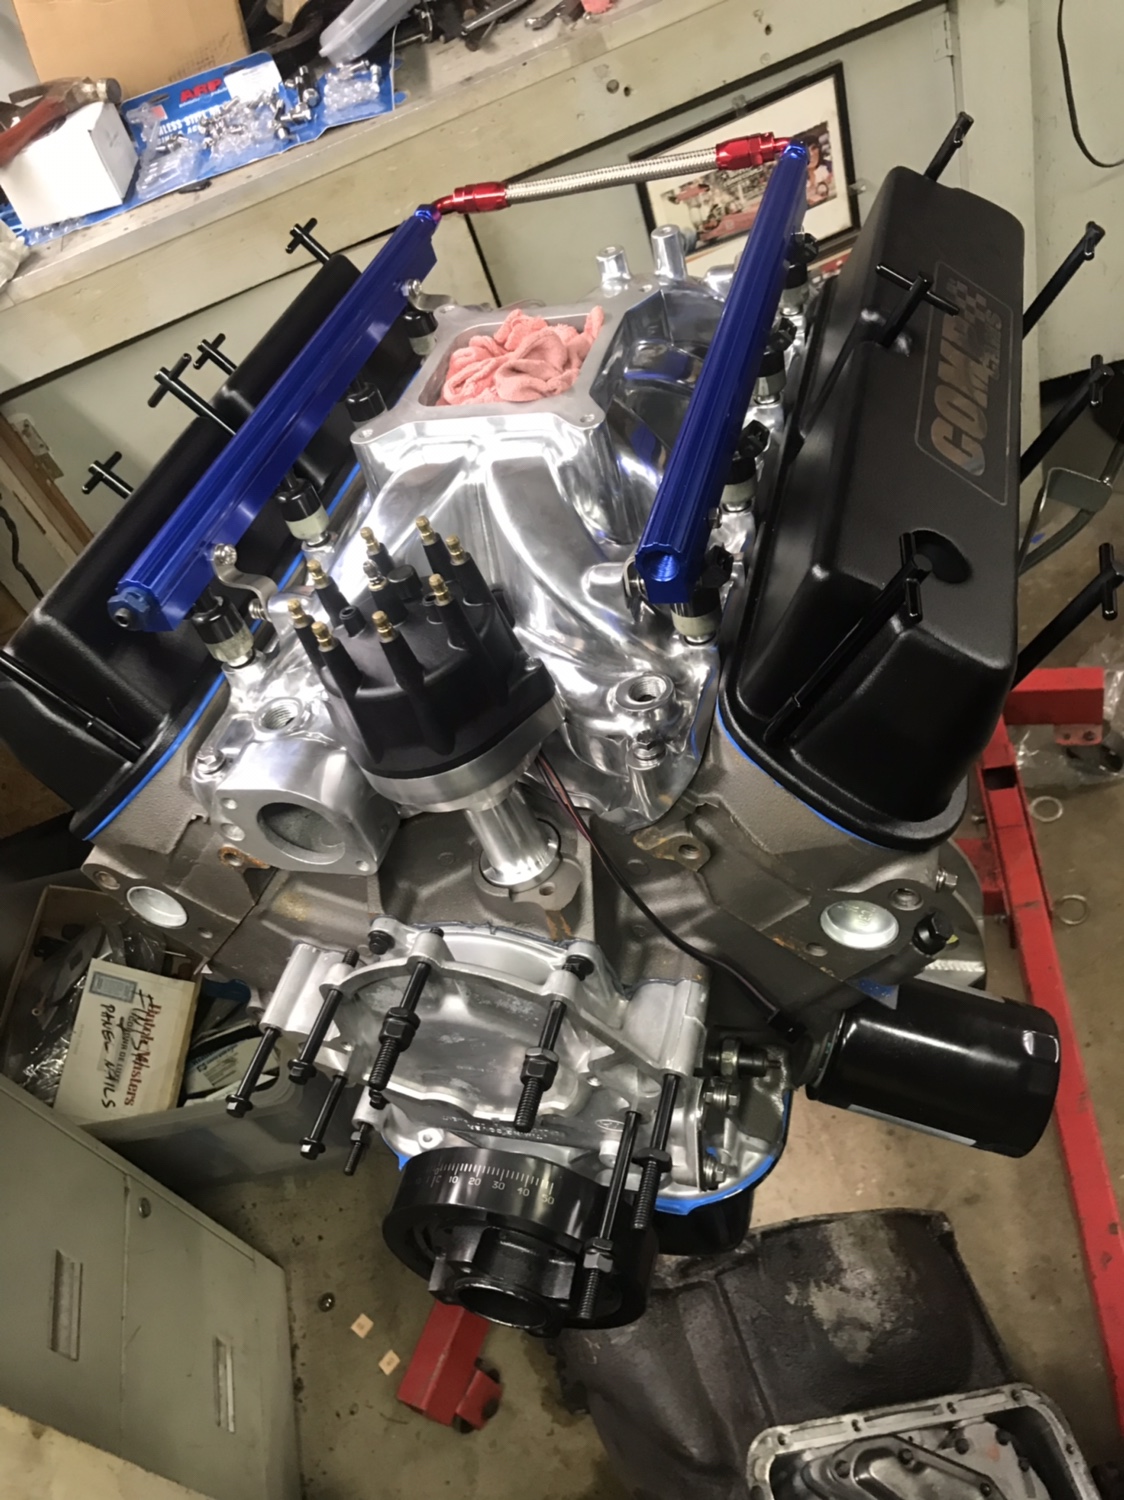
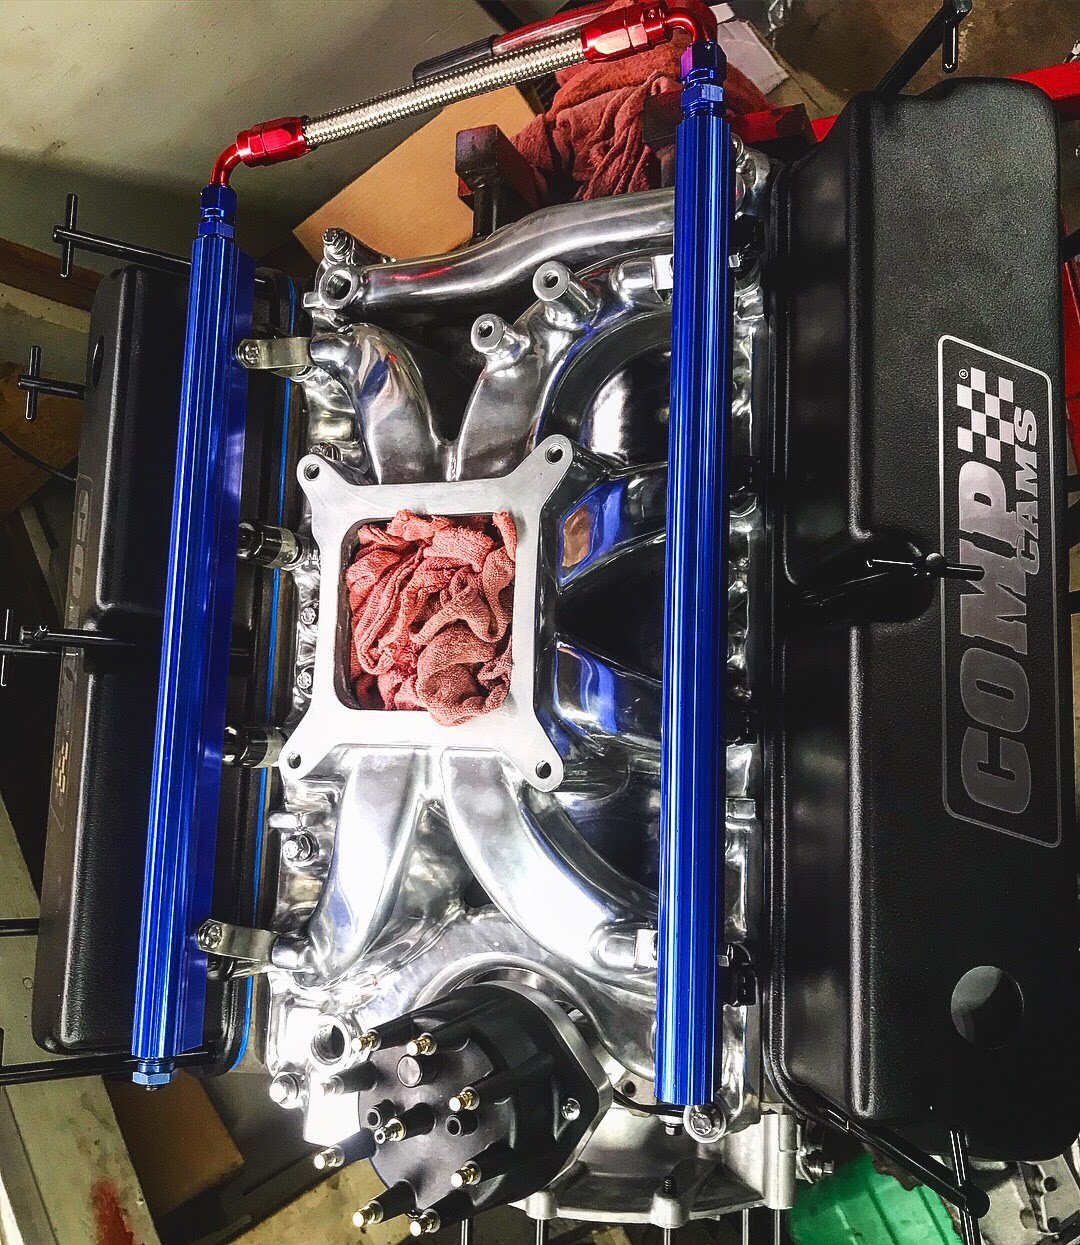
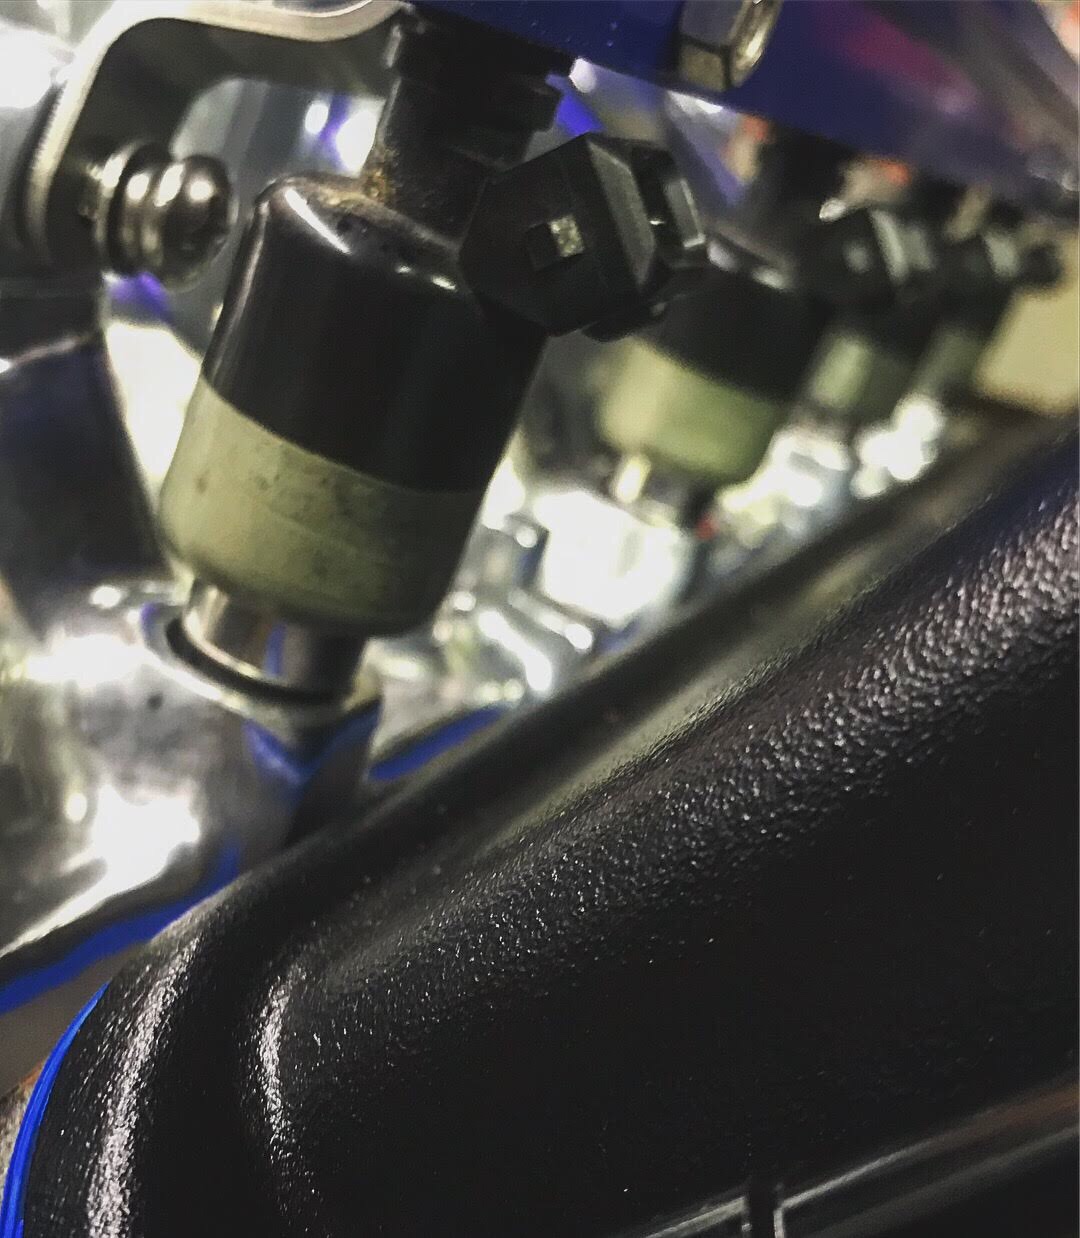
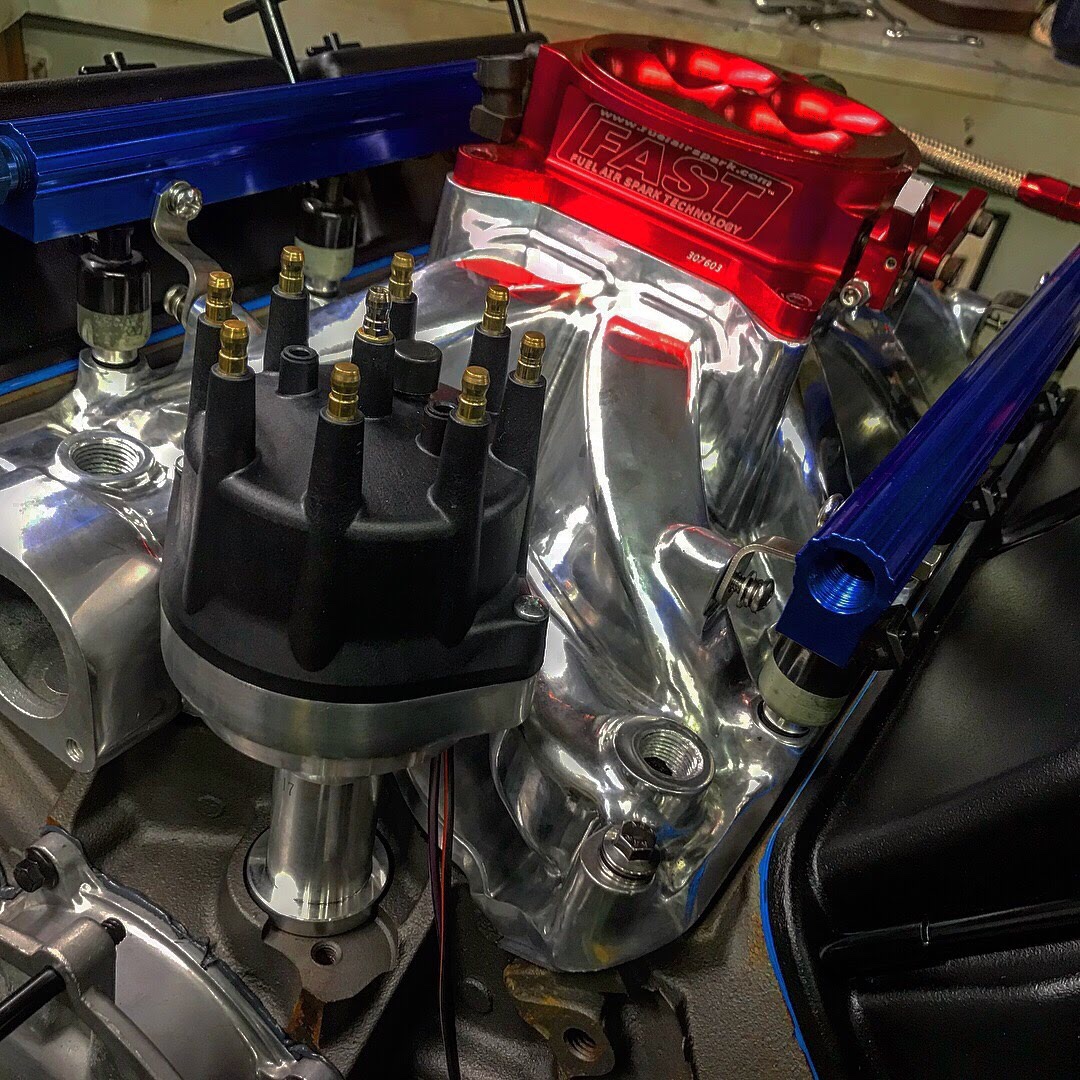
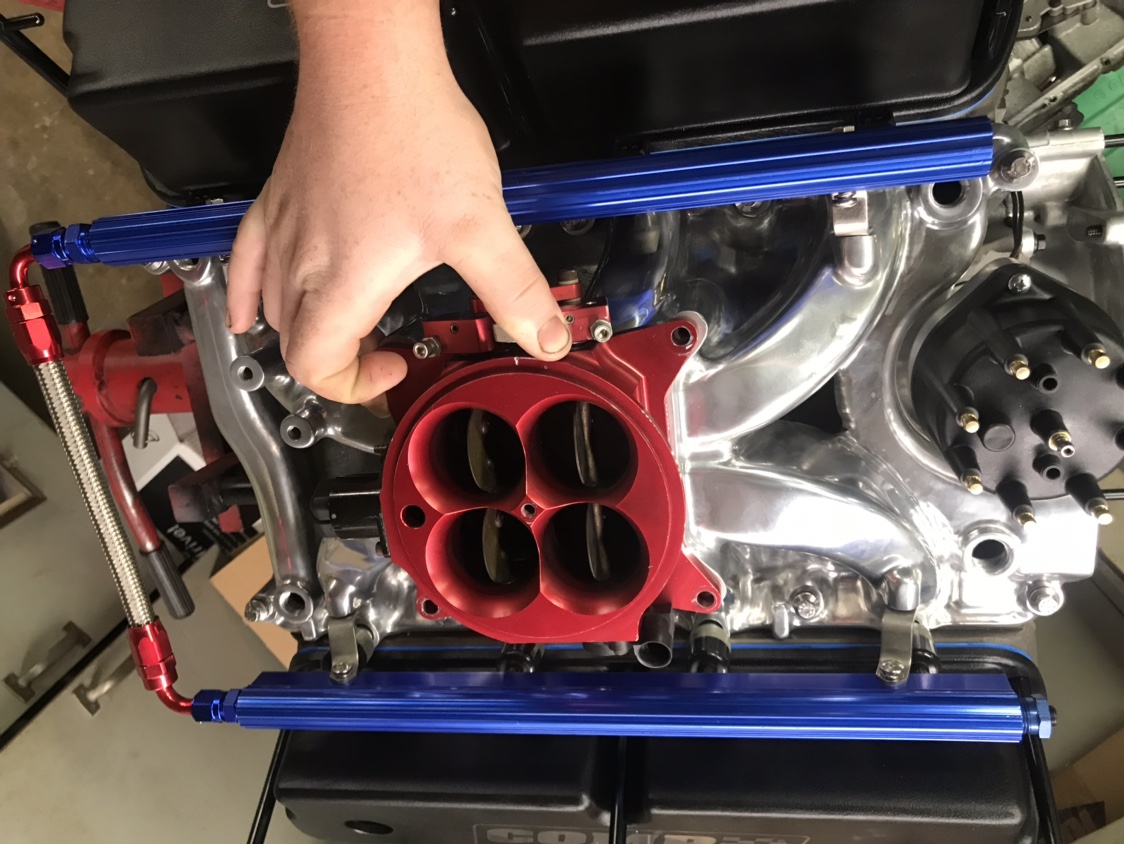
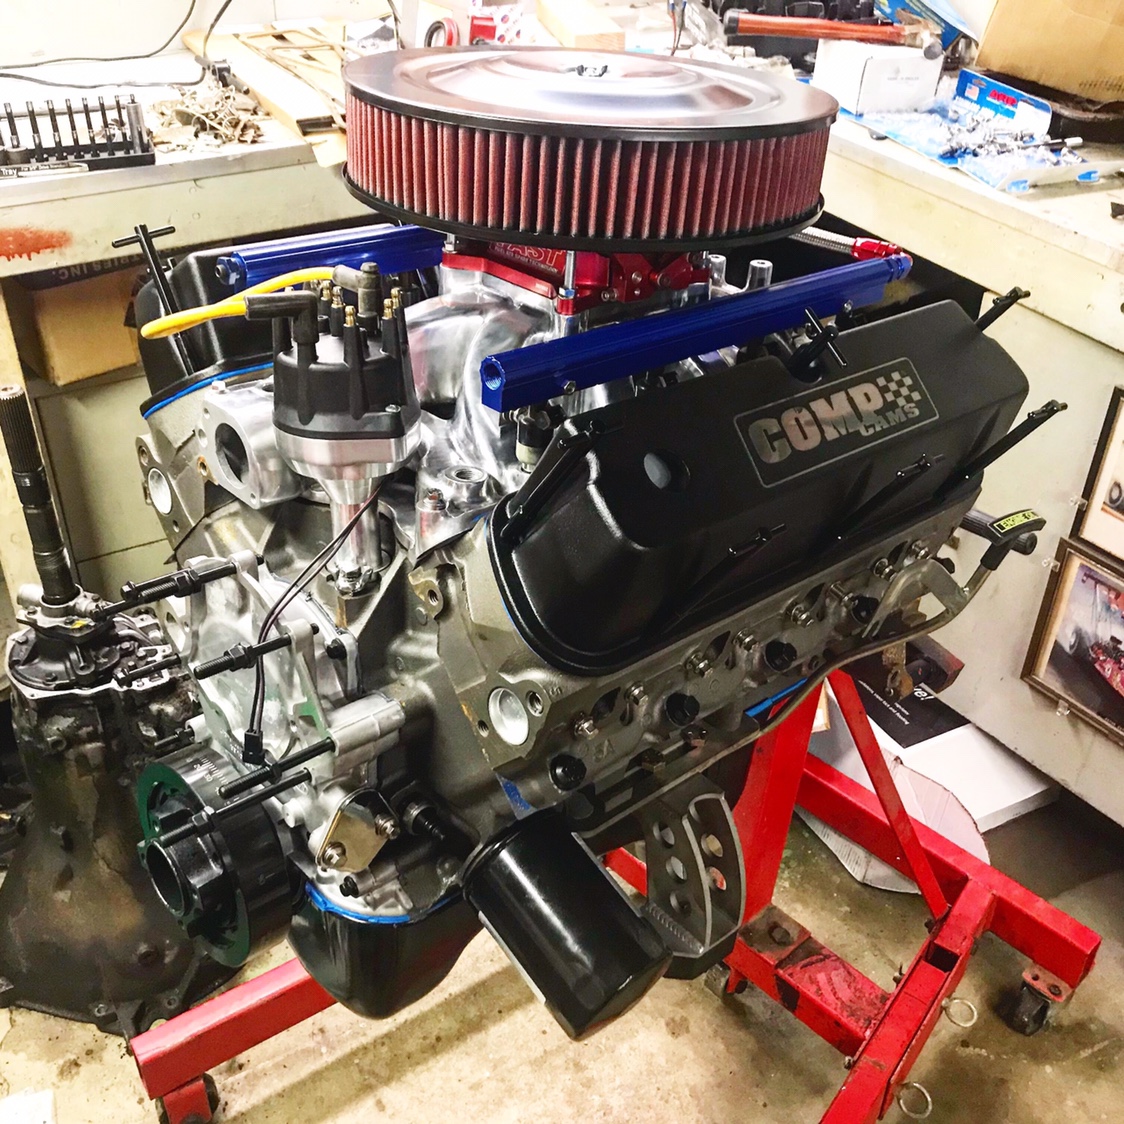
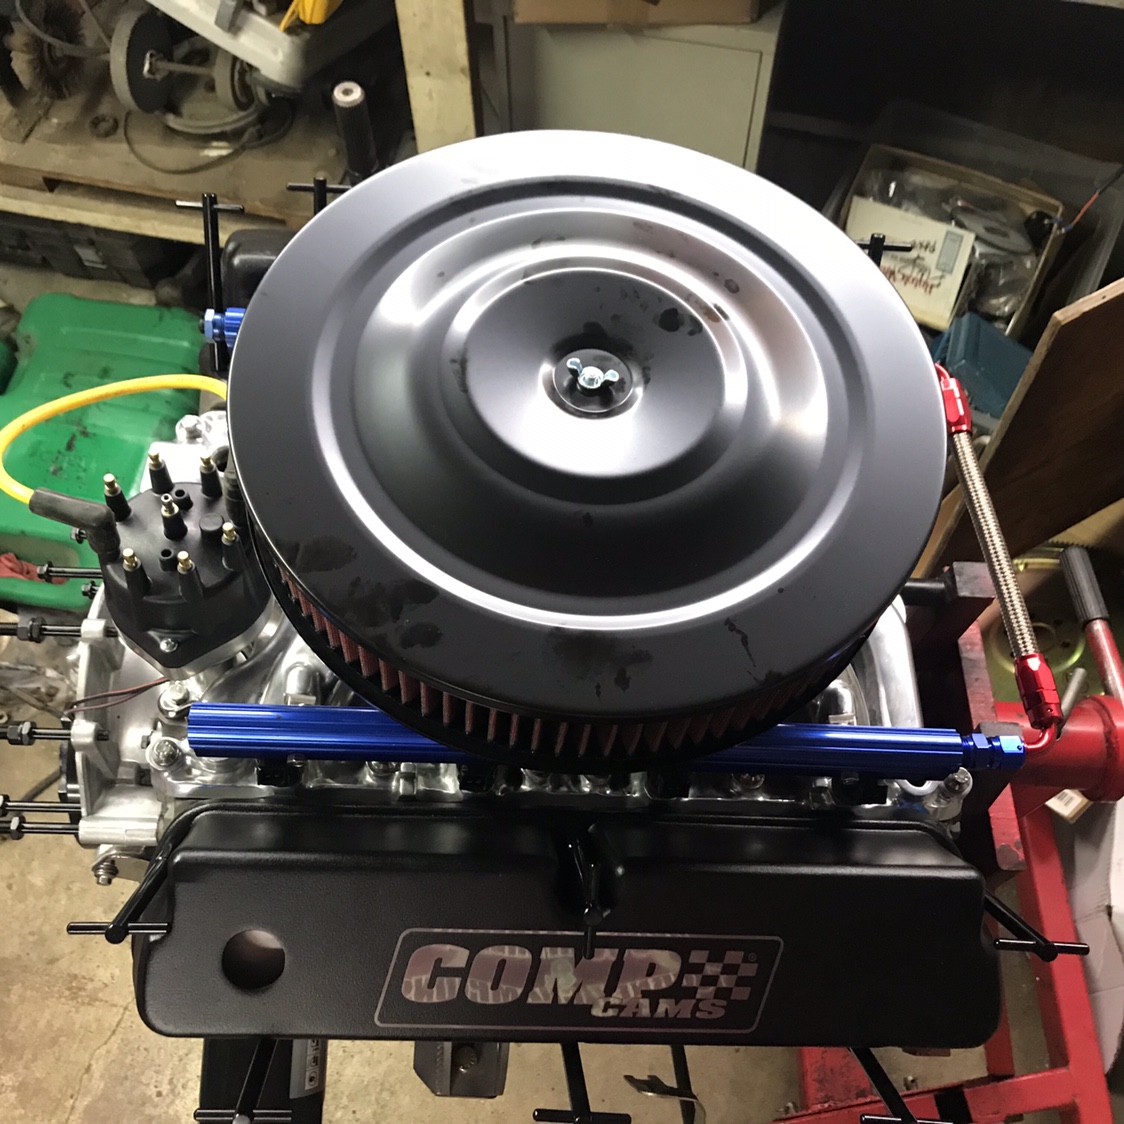
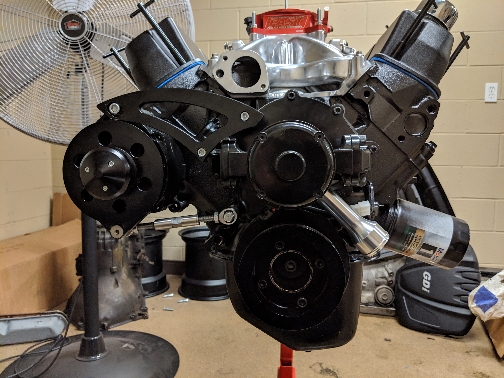
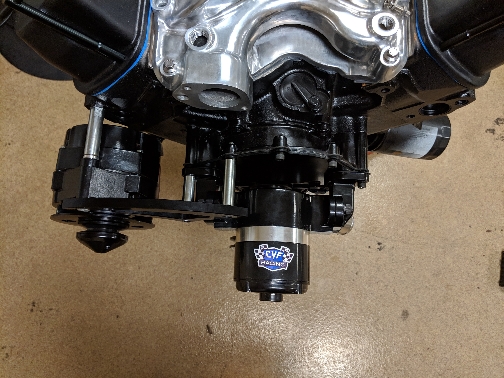
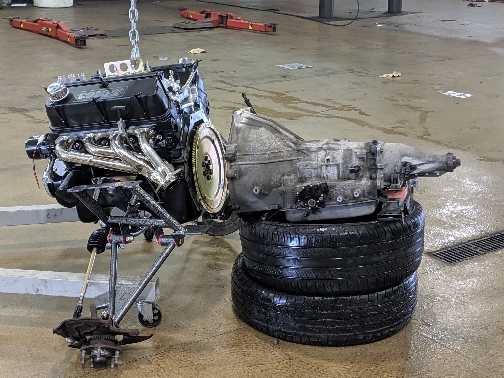
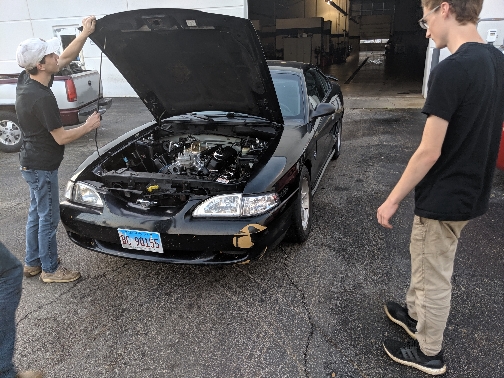
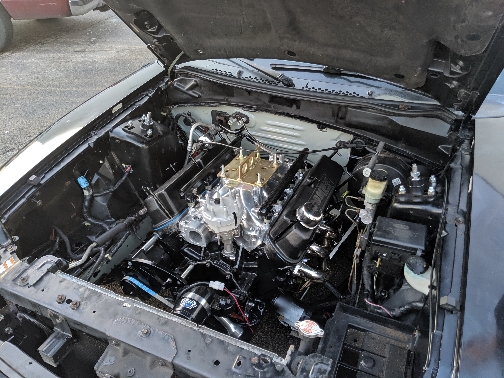
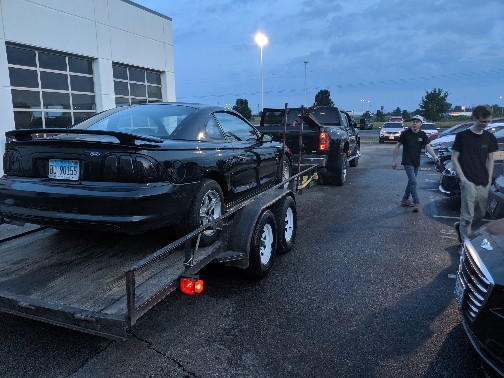
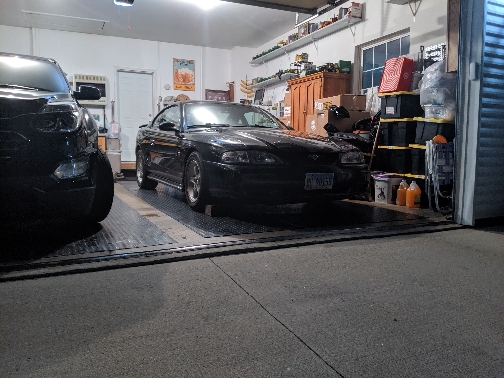
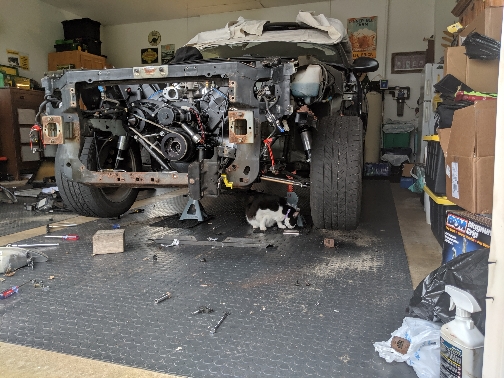
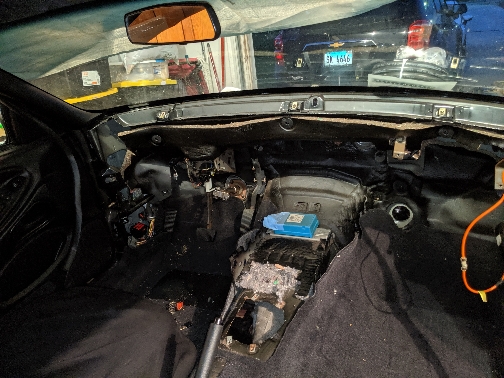
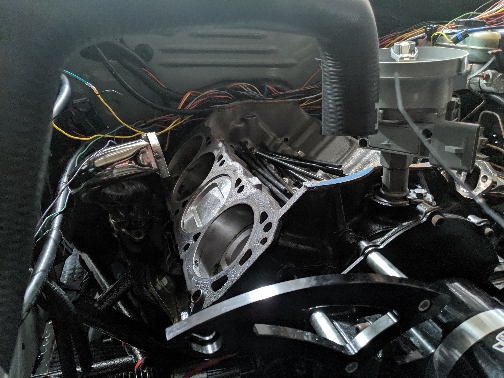
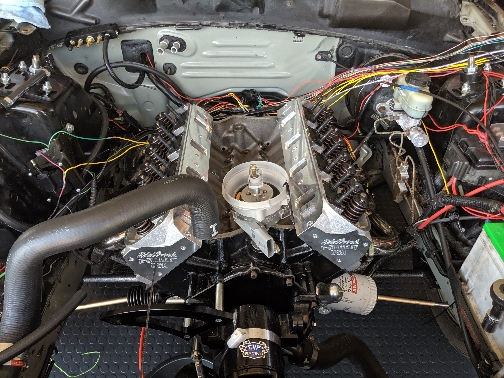
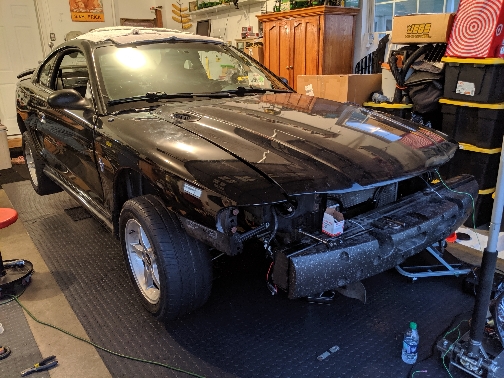
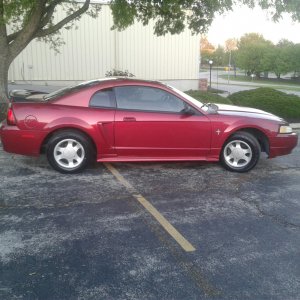
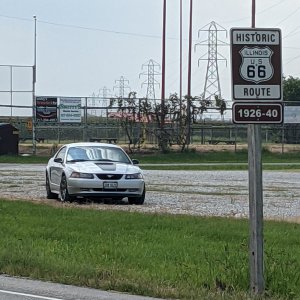
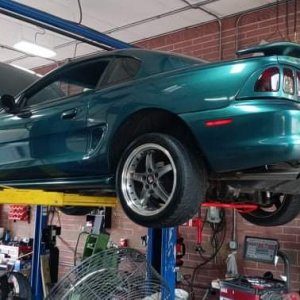
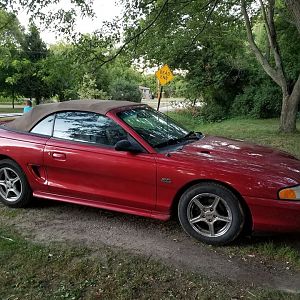
I just want to go over somethings here before we really get into this build because each builder is unique in their own desires and techniques. I think it is good to understand the background of a builder and past builds in order to fully understand the most recent. While I am young (at the time of the post, I am 20) I have a been modifying cars steadily since I was 16. I have progressed from a rather exterior mods only FWD family sedan (my rice phase) to a import sports car (BK1 Hyundai Genesis Coupe 3.8 track edition) to buidling a full out drag project. Ever since I started toying with cars I loved drag racing. While some see it as a sport without much driver skill and boring, I enjoy the build in itself and how you need just the right parts for better a 60' and designing and engine that can be durable and have just the right combination of torque to get off the line and top end horsepower to finish its way down the track. Needless to say this will be a moderate drag car build as I want to compete in brackets at my local track AND maintain a good but pretty wild street car. I've been doing a fair amount of research and think I have found a good combination without sacrificing the ability to drive on the streets. However, if you have a better way of doing something or have a better idea to achieve the same thing I would gladly like some constructive criticism. Another thing about me as you might have noticed from this as well as other threads is that I like to be as thorough and organized as possible with my builds and modifications. That being said this thread will also be used to document all of the minuscule things I do to my car that most will not care about. The reason for this behavior is that I have picked up on a friend that is the same way with his Audi build. I have learned a lot from him and have picked up on some of the things he's done. This build will also follow one of the quotes he shared that is common on most euro car forums, "Buy nice, or buy twice." While I would like to buy the best things possible for the car this will also be pretty budget friendly as I transfer to get my bachelor's degree this coming fall. All this in mind I look forward to the next post in this thread that will go over the 351w that I will be swapping in to the car shortly. For all that have read this post, I sincerely appreciate it.
Thank you
Miscreant
 

RedTwilight

Active Member
Joined
Jun 12, 2011
Messages
635
Reaction score
56
Location
Roxboro, NC
Welcome to the site!
What do you have planned for the suspension?

I run the bracket classes at the local track in my '93 Coupe and drive it a lot on the street. If you're looking for recommendations, I run the full Team Z setup with their K member, tubular control arms, caster / camber plates, and Strange 10 way single adjustable coilovers. For the rear I run Team Z double adjustable lowers and drag springs, with Baseline Outlaw uppers, and soon to have Strange 10 way single shocks.
 
OP
OP
M

miscreant

New Member
Joined
Dec 25, 2018
Messages
42
Reaction score
18
Engine:
1974 351W -
  1. 9.503 deck height
  2. Bored 0.030" over
  3. Decked
1967-1977 D5TE-EB Heads
  1. 60.4 cc Combustion Chamber
  2. 1.840" intake valve
  3. 1.540" exhaust valve
  4. 1.94" x 1.04" intake port
  5. 1.24" x 1.00" exhaust port
  6. Full refresh performed by machine shop
Stock rods
Stock Crank
  1. 0.010" taken off main and rod journals
Clevite Main and Rod Bearings
Speed-Pro Hypereutectic Pistons
  1. Bore: 4.030" (102.362 mm)
  2. Compression Height: 1.765"
  3. Pin Diameter: 0.912"
  4. Piston Ring Thickness: 5/64 in. x 5/64 in. x 3/16 in.
  5. Notes: DurOshield[emoji2400] coated piston skirt. Oblong recessed piston design is 0.190 inch deep.
Hastings Piston Rings
ARP Rocker Studs
Manley guideplates
Lunati Voodoo Roller Rocker Arms
  1. 1.6:1 Rocker Arm Ratio
Isky Racing Cam and Lifter Kit 381270
  1. Duration: Intake/Exhaust - 216 @ 0.050"
  2. Valve Lift: Intake/Exhaust - 0.470"
  3. Lobe Separation Angle: 108*
  4. Operating RPM Range: 2,000 - 6,000
Proform Pushrods
Comp Cams Valve Covers with baffles, grommets and breathers included
Speedmaster (ProComp Electronics) 351W Polished High Rise Shootout Intake Manifolf
Speedmaster Fuel Injector Rail Kit (PCE137.1005)
Precision 65 Lbs. Low Impedance Fuel Injectors
FAST 4150 Throttle Body (307603)
Summit Racing Air Cleaner Kit
Summit Racing Distributor (timing advance locked out)
MSD Adjustable Rotor
NGK UR5 V-Power Spark Plugs
Melling Timing Chain and Sprocket Kit
Allstar Performance Timing COver
Melling Standard Volume Oil Pump
ARP Oil Pump Driveshaft
Ford Racing Performance Parts 351W Swap Fox Body Oil Pan with pickup and dipstick
Pioneer Harmonic Balancer (28 oz. imbalance)
B&M Racing 164 tooth SFI approved Flex Plate (28 oz. imbalance)
CVF Racing Serpentine Pulley Kit
CVF Racing Alternator Bracket
CVF Alternator Fan
CVF Racing Adapter Kit for GM 1 Wire Alternator on Ford Engines
CVF Racing 35 GPM Electric Water Pump
Powermaster 140 Amp 10SI GM 1 Wire Alternator from CVF Racing
ARP Hardware use for all fasteners and hardware (Bolts for Heads/Mains)
Fel-Pro Gasket Set

Calculated Static Compression: ~9.0:1

All machine work performed by Hendrick Precision Engines of Urbana,IL
Assembled by yours truly

Pictures:
0da94fd23ea553dbbc0fcc25ef15da5d.jpg
b5c0e9c77cea1c68a40271374137c600.jpg
f68dd67cfec85f50d8bd6fee59c9990e.jpg
f78e878dfae035cee35808bfb08a58dd.jpg
fe2092ba8b48fd0e87ccdbdb34d23658.jpg
794a1906381593881e5f9fddc214ffee.jpg
fb1151fc3d7062928cca352284251e5c.jpg
 
Last edited:
OP
OP
M

miscreant

New Member
Joined
Dec 25, 2018
Messages
42
Reaction score
18
Welcome to the site!
What do you have planned for the suspension?

I run the bracket classes at the local track in my '93 Coupe and drive it a lot on the street. If you're looking for recommendations, I run the full Team Z setup with their K member, tubular control arms, caster / camber plates, and Strange 10 way single adjustable coilovers. For the rear I run Team Z double adjustable lowers and drag springs, with Baseline Outlaw uppers, and soon to have Strange 10 way single shocks.
How do you like this setup? Personally, I like the depth that Team Z goes to in their quality and workmanship. It seems like David really goes out of the way to help his customers and stand behind his product. Their customer service is pretty good from my experience so far as well. I plan to using mostly Team Z suspension on this build but I'll go into details in the following posts.
 

RedTwilight

Active Member
Joined
Jun 12, 2011
Messages
635
Reaction score
56
Location
Roxboro, NC
How do you like this setup?

I've really liked it so far. The only issue I had was how they offset the steering rack for more header and oil pan clearance. That didn't work out with the headers I have. So I had to clearance the header for the steering shaft some.
Other than that; it's been great.
 

evilcw311

Most Evil Member!
SN95 Supporter
Joined
May 9, 2010
Messages
7,456
Reaction score
2,136
Location
Louisville, KY
I was just texting with someone from up around your neck of the woods about the team z k member I have for sale................. coincidence?!?! Lol

That motor looks awesome!!! The setup sounds pretty badass!!!!!!!!


Sent from my iPhone using Tapatalk
 
OP
OP
M

miscreant

New Member
Joined
Dec 25, 2018
Messages
42
Reaction score
18
As I am currently building/ buying the rear differential and suspension, I thought this would be a great time to update the thread and cover the Rear Drivetrain and Rear Suspension sections of my build. So without further ado here it is:

Rear Drivetrain:
8.8 Rear Axle Assembly from 1987 Ford Thunderbird Turbo Coupe:
  • 3.55:1 gears
  • 4 lug, 28 spline axles
  • Traction - Lok Differential
  • Upon further inspection the ring gear had a runout of +/- 0.0001" so the gears and carrier bearing are in good shape
28 spline Moser Engineering Axles (A882852)
Scott Drake 8.8" Differential Cover/Girdle (LRS-4033AL)
Yukon 8.8" Gear Super Install Kit (LRS-4210A)
Centric Axle Bearings (LRS-64000B)
Centric Axle Seals (LRS-64000)
Ford Performance Mustang Differential Flange (M-4851-C)
Moroso Wheel Studs 3" x 1/2" (MOR-46180)
Moser Engineering 8.8" Bearing Cap Stud Kit (M4034A)
Ford Performance 8.8" Traction - Lok Rebuild Kit w/ Carbon Discs ( M-4700-C)
Ford Mustang Differential Fill Plug (5R3Z-7860108-AA)
Ford Differential Vent Valve (4R3Z4022AA)


Nothing special here just a full rebuild/restoration with some upgrades.

Rear Suspension:

Team Z Motorsports Strip Series #1 Complete Rear End Kit w/ Double Adjustable Lower Control Arms (TZM-SS1)
Team Z Motorsports Heavy Duty Mustang Rear Suspension Bolt Kit (TZM-RBK)
Strange Engineering 10 - Way Adjustable Rear Shocks (S6004LM)
BMR Torque Box Reinforcement Plate Kit (TBR001)

As always advice and constructive criticism is always welcomed! Pictures coming soon!

Currently I have a small dilemma as to which transmission I am going to put in the car. My thinking has been narrowed to three transmissions. A C4, a small block bolt pattern C6 (which I have in my position with a 2000 stall but needs rebuilt - I do, however a Broader Performance rebuild kit for it), and a 4r70w (currently behind the 3.8 in the car which I have read can bolt up to a small block). If I choose to keep the 4r70w I would throw in a higher stall and a JMOD all controlled by a Quick 4 controller. If I choose the C4 route I would like to put a high stall torque converter in it paired with a manual valve body. Keep in mind this car will not be a daily and will be mainly used for local bracket racing and maybe power tour/drag week. I plan on posting this question as a thread and leaving it up for debate. Any ideas for those that read this thread?
 

RedTwilight

Active Member
Joined
Jun 12, 2011
Messages
635
Reaction score
56
Location
Roxboro, NC
Now the time to go ahead and step up to 31 spline axles if you haven't purchased anything yet.
You'll have the piece of mind that comes with it too.
 
OP
OP
M

miscreant

New Member
Joined
Dec 25, 2018
Messages
42
Reaction score
18
Now the time to go ahead and step up to 31 spline axles if you haven't purchased anything yet.
You'll have the piece of mind that comes with it too.
Unfortunately I have everything for the rear end and am currently doing pinion depth as I type. I got the 28 splines locally for a very fair price and while they aren't 31 splines, I don't think my setup will out enough stress on them to twist or break. As the build progresses in power though I will definitely go with beefier axles and possibly a 9 inch depending on my goals.

Sent from my Pixel 3 XL using Tapatalk
 

don grant

New Member
Joined
Sep 10, 2019
Messages
10
Reaction score
5
Who has the hole enlargement on the vb spacer plate for a 94 4r70w , i cant seem to find it anywhere for a 94 , ready to put my trans back together and dont know which holes to drill or how big , i have looked everywhere , im talking about for the jmod
 

white95

Apex Junky
Admin
Joined
Dec 30, 2007
Messages
20,619
Reaction score
8,768
Location
Prairieville, LA
That’s a very detailed description. I’m interested to see this come to fruition. That is going to be a very torquey engine.
 
OP
OP
M

miscreant

New Member
Joined
Dec 25, 2018
Messages
42
Reaction score
18
Who has the hole enlargement on the vb spacer plate for a 94 4r70w , i cant seem to find it anywhere for a 94 , ready to put my trans back together and dont know which holes to drill or how big , i have looked everywhere , im talking about for the jmod
I ordered everything for my transmission through Broader Performance as I have ordered stuff through him before and had very good luck as well as very high quality and documentation. I know the 94's have AOD which I don't know much about unfortunately. I would email Lentech or Broader for questions about though. I have heard good things about both.
That’s a very detailed description. I’m interested to see this come to fruition. That is going to be a very torquey engine.
Thank you! I need to do an update on my build as the car is now running on the Megasquirt 2 electronic fuel injection with the wiring harness I made for it. The transmission is also working correctly and just have to do some small things to get it roadworthy such as an alignment, fuel tuning, and wrapping up the interior.
 

evilcw311

Most Evil Member!
SN95 Supporter
Joined
May 9, 2010
Messages
7,456
Reaction score
2,136
Location
Louisville, KY
I ordered everything for my transmission through Broader Performance as I have ordered stuff through him before and had very good luck as well as very high quality and documentation. I know the 94's have AOD which I don't know much about unfortunately. I would email Lentech or Broader for questions about though. I have heard good things about both.

Thank you! I need to do an update on my build as the car is now running on the Megasquirt 2 electronic fuel injection with the wiring harness I made for it. The transmission is also working correctly and just have to do some small things to get it roadworthy such as an alignment, fuel tuning, and wrapping up the interior.

Less talk, more update and moar videos!!!! [emoji6]


Sent from my iPhone using Tapatalk
 
OP
OP
M

miscreant

New Member
Joined
Dec 25, 2018
Messages
42
Reaction score
18
Where to begin...

Well there's been a lot of work done to the car since February that's for sure! After building the 8.8" rear differential, I installed it along with the Team Z rear suspension in the car at a buddy's garage so he could weld in the torque box reinforcements. After taking the car for a quick test drive, it was obvious something was wrong about the differential. We ended up swapping the 7.5" rear back in so I could drive it home and take a second look at the 8.8" rear. After driving the car with the Team Z rear suspension it was obvious I would need their drag springs as the car was constantly bottoming out on the differential brace and decided to order some Strange Engineering 10-way Adjustable shocks as well. Later that week I tore into the 8.8" rear and was almost sick to my stomach when I pulled the diff cover to find this:


I soon realized that the pre-load had been too much at one point during the rebuild and against my better judgement, I decided to loos the pinion nut some. This caused the crush sleeve to lose its "crush" and allowed the pinion gear to back into the differential carrier on deceleration. All was not lost though as we all make mistake and since nothing was hurt except some bearing, I was able to rebuild it, again, withing a week and install it back into the car.


Note: This rear suspension is amazing, I give Team Z props as this is very sturdy, but I will say this suspension is not for a daily driver. There are NO BUSHINGS whatsoever and every differential whir and groan is transferred directly into the cabin of the car. For me, this is no problem, the suspension does its job and noise is a sacrifice i'm willing to make for the added 60' performance at the track.


In April, I finally found the time to install the accessory drive on the front of the engine, and am very pleased with the components from CVF Racing. The pieces are high quality, the instructions are very informative, and, despite some grinding to the alternator bracket, everything fit like a glove.

95a7f58e488788aa4059b0e8274e731a.jpg
9b1e11682d9af335fee4ce55c83df7cc.jpg
3a6abd9c1717e89a161c099a5c45d8f6.jpg
14fc5dd3663f8f216f0705d8de54065b.jpg
d7774f2808e0ec6ec7b16c79993c3862.jpg
d6f659b115e2651a5bb63d3ad6ca98e5.jpg
e1edf8094ecce88d2c412894e358ac71.jpg


Sent from my Pixel 3 XL using Tapatalk
 
OP
OP
M

miscreant

New Member
Joined
Dec 25, 2018
Messages
42
Reaction score
18
Finally in June, the day had arrived. On June 14, 2019, I pulled the entire engine cradle with all of the front suspension, engine , and transmission as one unit at the shop I had worked in at that time. With the use of a lift and a sub-frame cart, I was able to pull this unit in just under six hours, much less time I thought it would require.

I came back the very next day and separated the transmission from the engine. From here, I installed the rear transmission housing gasket ,as 4r70w's are notorious for leaking at and so was mine, as well as the Broader Performance Full Manual Valve Body. I wheeled my fully dressed 351w out of the storage closet and lowered it on to the Team Z tubular K-member, and bolted the 4r70w directly up to it without any issues. Before installing it into the sn95, my friend took use of the time with an engine-less car to clean the entire engine bay and fire wall, and pointed out something pretty important as you'll see in the pictures. Below each strut tower, there were rust holes in each side of the front frame rail. After some thinking, I wrote it off as I will most likely be going to a tubular front end in the future and chose to knock the rest of the rotten metal and apply some undercoat into the frame rails as further preventative. After removal of the electric radiator fan, the car was lowered onto the new engine and k member with the transmission and ,with some lining up of the k member, fell right into place with room to spare. I took another couple of hours to grind down the Unisteer steering shaft to clear the BBK shorty headers and installed the Team Z coilover kit onto the Strange Engineering 10-way adjustable struts with SVE Caster-Camber Plates. After thirteen hours of work, my friends and I pushed the car outside and onto a buddy's trailer and hauled it home.

Note: The 3.8 V6 starter is the EXACT same as an SVE mini starter and a V6 4r70w bolts directly up to a small block Ford without any issues.

The very next day, I put the car on jack stands and tore the entire front end of the car off for ease of access. Over the course of the week I dropped the fuel tank to install a walbro 255 fuel pump, new fuel filter, coated most of the underside of the car with POR-15, and began to pull the dash out.

With the help of a friend, we pulled the entire dash out to cut out the A/C evaporator core for the HVAC unit and run the wiring for the Megasquirt 2 EFI. During the rest of the month I used Fragola AN push-loc -6 fittings and hose for the fuel system and transmission cooler lines. I used a Vibrant Performance vacuum block to clean up the vacuum lines. I also wired the entire engine up with sensors, flying lead 8' harness, and tools from Eastwood and DIYAutotune. It is a lot of wiring but as long as your organized and patient, it's well worth it.
519fa9ec0e91e614dd5023f522163670.jpg
2a43603d5f1d1b41933e217b9720e844.jpg
7b7fa187898cdac83b928e923dfaa91f.jpg
8e76a85b53651519215b79f9a52757ef.jpg
d368e5eb372bb89171c4c90bbb5823b3.jpg
238c8100c2a16608c881d5536a78cf55.jpg
abb1489dd09e1f00c64eece13f475f38.jpg
b0c5292b2ee56a7e7c83131c9b8345f4.jpg
3219fcc4b28c869e4d5b371d3c73e2c3.jpg
09ae5b2d414a81f3af63bd3ea31bd041.jpg
011c67aed6e3ee7c67f103f5349e0bd7.jpg
bb00db1591fccd5e441f990b379b375b.jpg


Sent from my Pixel 3 XL using Tapatalk
 
OP
OP
M

miscreant

New Member
Joined
Dec 25, 2018
Messages
42
Reaction score
18
When it was time to start the engine we quickly ran into another issue. The motor became incredibly hard to turn over and after looking down the intake manifold we found the problem. The intake was filled with coolant. After that disappointment, I disconnected the fuel system, wiring, and removed the intake manifold. See no major issues, I knocked it up to poor sealing of the rear water crossover and resealed. The next day, I topped off the coolant only to find the same thing. I would repeat this three more times, thinking that it was an array of bad intake manifold gaskets or bad RTV. After becoming very frustrated, and find the intake manifold had no leaks, I poured water straight into the passenger side cylinder head rear coolant port. To my surprise, I watched water rise in the intake port of cylinder #4. The cylinder head, had a crack or leak on the coolant passage this entire time... Reluctantly, I pulled both cylinder heads and chose this time to upgrade them. Due to the massive piston dish and piston-to-deck clearance, I chose Edelbrock E-streets with the 2.02" intake valves. After installation of the new heads and switching to points style ignition (ignition control from the MS2 wasn't working) the car was finally running. I watched the data as my friends controlled throttle and checked for leaks.


Unfortunately, at this time I was leaving for school and installed as much of the body as I could and would come back on weekends occasionally to work on it. So far I've wrapped most of the harness in copper tape (reduce RFI/EMI), Tesa tape (OEM style cloth electrical tape), and finally a braided nylon sleeve. I've also reinstalled the front end including bumper cover and headlights, notched and installed the steering shaft kit, cleaned up the spark plug wires with an old school plug wire loom, installed the coolant expansion tank, taken apart the front suspension to coat the coilovers sleeves in anti-seize, install the throttle bracket and cable, and finished reinstalling the interior with a B&M Magnum Shifter with custom etched plates with dual buttons (TCC and O/D control), new steering wheel, and New Vintage USA gauges.


All in all she is almost ready for the road and expect that to be the next update. I currently don't know what summer will have in store for this car as I have accepted an internship in Jacksonville, FL thanks to the amazing Automotive Technology program at SIUC. But nonetheless, thank you for reading this, being interested in the car, and expect the transformation to continue. What do you think I should work on next?

Idle Video #1 -

Idle Video #2 -
84f8f274775f4a595f6f3a0d7b7bc295.jpg
8c565ed5df4409cbd268dc8b815c0fe5.jpg
1a72e0dfcc113a0f603132f819d7aed4.jpg
225df570d6762449b63ff0b40ed49baf.jpg
610a3776508990fb1059768a6f98f5da.jpg
71a0e0f9fe50dacecc29245bc82e66b8.jpg


Sent from my Pixel 3 XL using Tapatalk
 

50HSN95

Member
Joined
Nov 24, 2018
Messages
234
Reaction score
237
Location
Minnesota
Congrats on the education opportunity! Cool project car, glad you were able to get the cylinder head issue figured out.
 
OP
OP
M

miscreant

New Member
Joined
Dec 25, 2018
Messages
42
Reaction score
18
Wow. I can't believe almost an entire year has passed and trust me when I say a lot has happened in the last year.

After getting the car running and put back together, I made several attempts to get the car running well with the Megasquirt EFI system. After hours of getting the car to run correctly, I realized that it would take me longer than I wanted to properly learn the system. After all, the car was running pig rich and no matter what I did, I couldn't get the MS2 to control timing.

After a couple of emails with Matt Cramer at DIYAutoTune, I found that the motherboard needed some modifications and he gave me a tuner in Antioch, IL that he recommended for the area.

I called the shop and they said they could do it and gave me some modifications to make before the car was dropped off. I made the modifications (smaller fuel injectors for better injector control and a TFI distributor with the correct wiring/module) and rented a U-Haul truck and trailer and made the five-hour trek north. When I arrived, I was told they weren't ready for the car (even though I had confirmed days earlier) and they looked over the car. The owner was nice overall but I noticed he didn't seem to be enthused about the project. I understand that it was perfect (it sat extremely low, was in dire need of an alignment, leaked coming from the transmission pan gasket, and had some wiring issues being that I wired everything myself and it was my first large project). Nonetheless, he agreed to give it a base tune and possibly dyno tune it if he could get around to it.
IMG_20200311_201646.jpg
Unfortunately, COVID hit and I didn't hear from him for a month. When I did finally hear from him it was a very negative experience as he ripped the car to shreds. I told him just to get it running and I would pick the car up and pay him for his labor. I once again rented a U-Haul and picked up the car. The owner came through with his promise and the car did run and drive, just not well. The experience in person was much better as he pointed out things that needed to be worked on. I wasn't happy about the price I paid for the little amount of work that was done. Nonetheless, I was happy to have the car back and out of the shop's possession to the tune of $1,500 not including the U-Haul expenses amongst other things.

I wasn't very happy at this point and called a more local speed shop and asked about the new Holley Terminator X P-n-P kits for Fox Body Mustangs. They happily knocked some off the price and ordered it for me.

While I waited for the kit to come in, I took care of the transmission pan gasket and ripped the MS2 out of the car in preparation for the Holley system. MVIMG_20200619_170923.jpg MVIMG_20200426_162848.jpg

In early July the kit was in and I took my time installing it, making sure to follow the instructions to a T. I called a friend over to help me get the car started and after swapping another TFI module, it fired right up. Of course, it didn't run perfectly, but it was a relief to hear it crank and run almost immediately.

I buttoned up the rest of the car in July and tried to get it ready for a Cars and Coffee event in the coming weeks, but as fate would have it, the car wouldn't make it there. After test driving the car the night prior the car seemed ready. After driving the car for around twenty minutes, the 4R70W began to slip and eventually drop gears. I had to flat-tow the vehicle the remaining three miles back home. I felt crushed yet again, but not out. I contemplated rebuilding the 4R70W with a higher stall converter but didn't like the price it was going to cost.

I soon found a reasonably priced C4 transmission for sale not too far away. I purchased a 3,000 stall converter for it and a performance rebuild kit from Dynamic Racing Transmission. The guys at Dynamic are great. I emailed two other transmission companies that specialize in the C4 and Dynamic called me within minutes of my email. It was a no-brainer who to order from. I rebuild the transmission with a TransGo Manual Valvebody Kit (40-3) in my Auto Tech Automatic Transmission course in September.
IMG_20200924_111625.jpg IMG_20200922_113758.jpg IMG_20200926_142033.jpg
On October 2, around 11:00 PM the car made its maiden voyage around the country. After making sure all was well I invited all my buddies that helped on the car and took them on rides until midnight. I drove it around the next day to get it aligned and put miles on the car. It was a hoot to drive, and I loved every minute of it.

Unfortunately, there were some oil leaks from the engine including the front crankshaft seal, the oil pan gasket, and the back of the intake manifold. I parked the car for the winter after taking it out one more time for a couple of friends and family members. Recently I pulled the motor back out to reseal it as well as patch some corrosion in the frame rails under the strut towers. While I'm in there I plan to smooth some of the engine bay and paint it a satin black to match the interior pieces I'll be using.
PXL_20201129_005911728.jpg
Another area I'll be working on is gutting the HVAC out from behind the dash as well as run the Holley wiring behind it independently rather than through the dash itself. The main wiring harness around the engine bay will also receive some tucking to make it as simple as possible.
PXL_20201129_005923143.jpg
Finally, I have made the decision to go to a manual brake setup for the future of the build and to again make it simpler.

If you have any questions or tips for me feel free to post them here or DM me. Thanks for reading!
 

ttocs

Post Whore
Joined
Oct 9, 2009
Messages
32,663
Reaction score
5,669
Location
Evansville Indiana
I have the HP running in mine now and I am by no means an expert but I might have gone through what your needing to know. Sounds like you have been one heck of a learning adventure like I have on mine.
 

Latest posts

Forum statistics

Threads
77,520
Messages
1,504,173
Members
14,985
Latest member
Suprasuavy

Members online

Top