Forums
New posts
Search forums
What's new
New posts
New media
New media comments
New profile posts
Latest activity
Media
New media
New comments
Search media
Members
Current visitors
New profile posts
Search profile posts
Log in
Register
What's new
Search
Search
Search titles only
By:
New posts
Search forums
Menu
Log in
Register
Install the app
Install
Forums
Multimedia & Entertainment
Build Ups & Projects
rw95gt gts build
JavaScript is disabled. For a better experience, please enable JavaScript in your browser before proceeding.
You are using an out of date browser. It may not display this or other websites correctly.
You should upgrade or use an
alternative browser
.
Reply to thread
Message
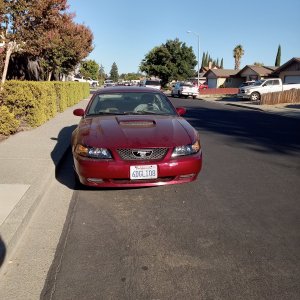
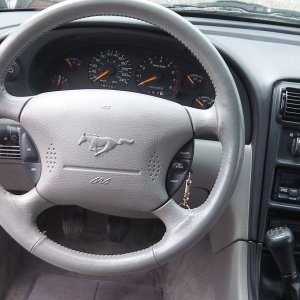
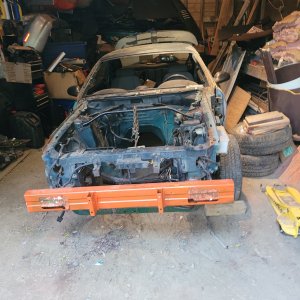
<blockquote data-quote="rw95gt" data-source="post: 1304784" data-attributes="member: 17486"><p>I finished up my battery relocation project today. I wanted it to be functional, safe and easy to access everything if need be. I have no plans to install any trunk interior in the car. It didn't have any when I picked up the car and its just extra crap that does nothing to benefit me. Parts: UPR battery relocation kit, Flaming river cut off switch, 120 amp circuit breaker, fox starter solenoid, 30ft of 6 gauge cable, ignition wire and necessary connectors. I made a diagram of how to run everything and got to work. The main positive battery cable comes off the battery and goes directly to the starter solenoid. On that same lug a cable runs to the circuit breaker and then to the on/off switch. on that same side of the on off switch a cable runs to the alternator. On the other side of the on off switch a cable runs to the fuse box. the on/off switch can kill the power to the fuse box under the hood this kills the car when its running and any rpm. Back to the starter solenoid on the other side of it a cable runs to the starter. I also spliced into the ignition wire and ran it to the fox starter solenoid. This allows both the factory and the fox starter solenoid to be functional. So the 2 gauge starter cable has a 1.5 foot always hot section and the rest of the cable is dead until your turn the key to crank the car. The rest of the 6 gauge cable is protected with the circuit breaker and the on/off switch. Hopefully this makes sense. I tossed my diagram but I might re draw it so its easy to fallow. Anyways here are some pictures of how I ran everything. I will eventually install the on/off rod through the bumper. </p><p>Trunk:</p><p><a href="http://s107.photobucket.com/user/bling250x/media/temporary_zps31f3e61d.jpg.html" target="_blank"><img src="http://i107.photobucket.com/albums/m303/bling250x/temporary_zps31f3e61d.jpg" alt="" class="fr-fic fr-dii fr-draggable " style="" /></a></p><p>Driver side showing the alternator, ignition and fuse box routing. They go under the dash and through the rubber fire wall grommet too the engine bay.</p><p><a href="http://s107.photobucket.com/user/bling250x/media/temporary_zps62344851.jpg.html" target="_blank"><img src="http://i107.photobucket.com/albums/m303/bling250x/temporary_zps62344851.jpg" alt="" class="fr-fic fr-dii fr-draggable " style="" /></a></p><p><a href="http://s107.photobucket.com/user/bling250x/media/temporary_zpscb8fbfa0.jpg.html" target="_blank"><img src="http://i107.photobucket.com/albums/m303/bling250x/temporary_zpscb8fbfa0.jpg" alt="" class="fr-fic fr-dii fr-draggable " style="" /></a></p><p>Passenger side showing the 2 gauge starter cable routing. I used a moroso through fire wall lug to get through to the outside of the car.</p><p><a href="http://s107.photobucket.com/user/bling250x/media/temporary_zps6adcc7b4.jpg.html" target="_blank"><img src="http://i107.photobucket.com/albums/m303/bling250x/temporary_zps6adcc7b4.jpg" alt="" class="fr-fic fr-dii fr-draggable " style="" /></a></p><p><a href="http://s107.photobucket.com/user/bling250x/media/temporary_zps63c33ac4.jpg.html" target="_blank"><img src="http://i107.photobucket.com/albums/m303/bling250x/temporary_zps63c33ac4.jpg" alt="" class="fr-fic fr-dii fr-draggable " style="" /></a></p><p><a href="http://s107.photobucket.com/user/bling250x/media/temporary_zpsae35e4c1.jpg.html" target="_blank"><img src="http://i107.photobucket.com/albums/m303/bling250x/temporary_zpsae35e4c1.jpg" alt="" class="fr-fic fr-dii fr-draggable " style="" /></a></p><p><a href="http://s107.photobucket.com/user/bling250x/media/temporary_zps80fbd5e8.jpg.html" target="_blank"><img src="http://i107.photobucket.com/albums/m303/bling250x/temporary_zps80fbd5e8.jpg" alt="" class="fr-fic fr-dii fr-draggable " style="" /></a></p><p><a href="http://s107.photobucket.com/user/bling250x/media/temporary_zpsbf2060d0.jpg.html" target="_blank"><img src="http://i107.photobucket.com/albums/m303/bling250x/temporary_zpsbf2060d0.jpg" alt="" class="fr-fic fr-dii fr-draggable " style="" /></a></p><p>And a ugly engine bay picture for the fun off it</p><p><a href="http://s107.photobucket.com/user/bling250x/media/temporary_zps52d30615.jpg.html" target="_blank"><img src="http://i107.photobucket.com/albums/m303/bling250x/temporary_zps52d30615.jpg" alt="" class="fr-fic fr-dii fr-draggable " style="" /></a></p><p></p><p>The engine bay will look nice when all this is installed.</p><p><a href="http://s107.photobucket.com/user/bling250x/media/temporary_zpsed3f6851.jpg.html" target="_blank"><img src="http://i107.photobucket.com/albums/m303/bling250x/temporary_zpsed3f6851.jpg" alt="" class="fr-fic fr-dii fr-draggable " style="" /></a></p><p><a href="http://s107.photobucket.com/user/bling250x/media/temporary_zpsb4e152d5.jpg.html" target="_blank"><img src="http://i107.photobucket.com/albums/m303/bling250x/temporary_zpsb4e152d5.jpg" alt="" class="fr-fic fr-dii fr-draggable " style="" /></a></p><p></p><p></p><p>A before and after:</p><p><a href="http://s107.photobucket.com/user/bling250x/media/temporary_zps0c477ac9.jpg.html" target="_blank"><img src="http://i107.photobucket.com/albums/m303/bling250x/temporary_zps0c477ac9.jpg" alt="" class="fr-fic fr-dii fr-draggable " style="" /></a></p><p><a href="http://s107.photobucket.com/user/bling250x/media/temporary_zpsc5b2efa5.jpg.html" target="_blank"><img src="http://i107.photobucket.com/albums/m303/bling250x/temporary_zpsc5b2efa5.jpg" alt="" class="fr-fic fr-dii fr-draggable " style="" /></a></p></blockquote><p></p>
[QUOTE="rw95gt, post: 1304784, member: 17486"] I finished up my battery relocation project today. I wanted it to be functional, safe and easy to access everything if need be. I have no plans to install any trunk interior in the car. It didn't have any when I picked up the car and its just extra crap that does nothing to benefit me. Parts: UPR battery relocation kit, Flaming river cut off switch, 120 amp circuit breaker, fox starter solenoid, 30ft of 6 gauge cable, ignition wire and necessary connectors. I made a diagram of how to run everything and got to work. The main positive battery cable comes off the battery and goes directly to the starter solenoid. On that same lug a cable runs to the circuit breaker and then to the on/off switch. on that same side of the on off switch a cable runs to the alternator. On the other side of the on off switch a cable runs to the fuse box. the on/off switch can kill the power to the fuse box under the hood this kills the car when its running and any rpm. Back to the starter solenoid on the other side of it a cable runs to the starter. I also spliced into the ignition wire and ran it to the fox starter solenoid. This allows both the factory and the fox starter solenoid to be functional. So the 2 gauge starter cable has a 1.5 foot always hot section and the rest of the cable is dead until your turn the key to crank the car. The rest of the 6 gauge cable is protected with the circuit breaker and the on/off switch. Hopefully this makes sense. I tossed my diagram but I might re draw it so its easy to fallow. Anyways here are some pictures of how I ran everything. I will eventually install the on/off rod through the bumper. Trunk: [URL=http://s107.photobucket.com/user/bling250x/media/temporary_zps31f3e61d.jpg.html][IMG]http://i107.photobucket.com/albums/m303/bling250x/temporary_zps31f3e61d.jpg[/IMG][/URL] Driver side showing the alternator, ignition and fuse box routing. They go under the dash and through the rubber fire wall grommet too the engine bay. [URL=http://s107.photobucket.com/user/bling250x/media/temporary_zps62344851.jpg.html][IMG]http://i107.photobucket.com/albums/m303/bling250x/temporary_zps62344851.jpg[/IMG][/URL] [URL=http://s107.photobucket.com/user/bling250x/media/temporary_zpscb8fbfa0.jpg.html][IMG]http://i107.photobucket.com/albums/m303/bling250x/temporary_zpscb8fbfa0.jpg[/IMG][/URL] Passenger side showing the 2 gauge starter cable routing. I used a moroso through fire wall lug to get through to the outside of the car. [URL=http://s107.photobucket.com/user/bling250x/media/temporary_zps6adcc7b4.jpg.html][IMG]http://i107.photobucket.com/albums/m303/bling250x/temporary_zps6adcc7b4.jpg[/IMG][/URL] [URL=http://s107.photobucket.com/user/bling250x/media/temporary_zps63c33ac4.jpg.html][IMG]http://i107.photobucket.com/albums/m303/bling250x/temporary_zps63c33ac4.jpg[/IMG][/URL] [URL=http://s107.photobucket.com/user/bling250x/media/temporary_zpsae35e4c1.jpg.html][IMG]http://i107.photobucket.com/albums/m303/bling250x/temporary_zpsae35e4c1.jpg[/IMG][/URL] [URL=http://s107.photobucket.com/user/bling250x/media/temporary_zps80fbd5e8.jpg.html][IMG]http://i107.photobucket.com/albums/m303/bling250x/temporary_zps80fbd5e8.jpg[/IMG][/URL] [URL=http://s107.photobucket.com/user/bling250x/media/temporary_zpsbf2060d0.jpg.html][IMG]http://i107.photobucket.com/albums/m303/bling250x/temporary_zpsbf2060d0.jpg[/IMG][/URL] And a ugly engine bay picture for the fun off it [URL=http://s107.photobucket.com/user/bling250x/media/temporary_zps52d30615.jpg.html][IMG]http://i107.photobucket.com/albums/m303/bling250x/temporary_zps52d30615.jpg[/IMG][/URL] The engine bay will look nice when all this is installed. [URL=http://s107.photobucket.com/user/bling250x/media/temporary_zpsed3f6851.jpg.html][IMG]http://i107.photobucket.com/albums/m303/bling250x/temporary_zpsed3f6851.jpg[/IMG][/URL] [URL=http://s107.photobucket.com/user/bling250x/media/temporary_zpsb4e152d5.jpg.html][IMG]http://i107.photobucket.com/albums/m303/bling250x/temporary_zpsb4e152d5.jpg[/IMG][/URL] A before and after: [URL=http://s107.photobucket.com/user/bling250x/media/temporary_zps0c477ac9.jpg.html][IMG]http://i107.photobucket.com/albums/m303/bling250x/temporary_zps0c477ac9.jpg[/IMG][/URL] [URL=http://s107.photobucket.com/user/bling250x/media/temporary_zpsc5b2efa5.jpg.html][IMG]http://i107.photobucket.com/albums/m303/bling250x/temporary_zpsc5b2efa5.jpg[/IMG][/URL] [/QUOTE]
Insert quotes…
Verification
Post reply
Random media
Latest posts
Alternator relocation on a 94/95 5.0 - What's the cleanest and simplest?
Latest: shovel
Today at 9:31 PM
94-95 5.0 - Specific
Post A Pic Of Your Latest Purchase Thread...
Latest: RAU03MACH
Today at 2:42 PM
The Garage
What Did You Do To Your Car Today?
Latest: shovel
Today at 1:48 PM
The Garage
M
1994 mustang key turned nothing happens
Latest: MasterDot
Today at 12:03 PM
94-95 5.0 - Specific
New Member from Virginia
Latest: Daryl
Yesterday at 8:55 PM
New Member Introductions
Share this page
Reddit
Pinterest
Tumblr
WhatsApp
Email
Share
Link
Forum statistics
Threads
78,534
Messages
1,535,747
Members
16,186
Latest member
Armand
Members online
duh09
shovel
Forums
Multimedia & Entertainment
Build Ups & Projects
rw95gt gts build
Top