Valve covers, too?

Daryl

Well-Known Member
Joined
Apr 5, 2020
Messages
4,254
Reaction score
2,351
Location
Somis, CA
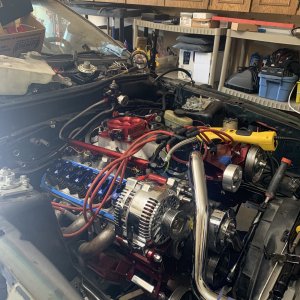
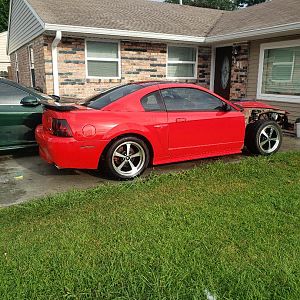
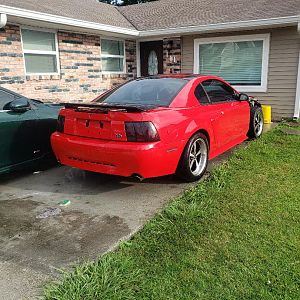
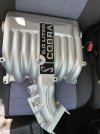
With the EGR, intake and TB off and the latter two getting ceramic coated, seems like a good time to remove the valve covers (OE, stock) and give them some live, too.

With all these off the motor right now, how hard would it be to remove the valve covers?
 

ttocs

Forum's #1 poster
Joined
Oct 9, 2009
Messages
37,641
Reaction score
7,760
Location
Evansville Indiana
did you take the butterfly valve out of the tb before sending it for coating? I remember taking mine apart for it way back when.

The valve covers are held on by a few more bolts. Remove them and they should come right off.
 
OP
OP
Daryl

Daryl

Well-Known Member
Joined
Apr 5, 2020
Messages
4,254
Reaction score
2,351
Location
Somis, CA
did you take the butterfly valve out of the tb before sending it for coating? I remember taking mine apart for it way back when.

The valve covers are held on by a few more bolts. Remove them and they should come right off.
I’m going to pass on sending the TB out for coating. Think I’ll just clean & polish it best I can then hit it with some spray-on clear coat.
 

ttocs

Forum's #1 poster
Joined
Oct 9, 2009
Messages
37,641
Reaction score
7,760
Location
Evansville Indiana
it was not all that hard to take apart but to get the bearings out I had to get a blind hole bearing pull tool from harbor freight. The part of the valve in the TB was held in by screws, and then after they were out when you flipped the butterfly 90 degrees you could pull it out, then the shaft for the tb slid out from the bearings.
 
OP
OP
Daryl

Daryl

Well-Known Member
Joined
Apr 5, 2020
Messages
4,254
Reaction score
2,351
Location
Somis, CA
Having trouble getting the passenger side valve cover off. I’ve removed the alternator bolts and gotten clearance there but it’s not slipping out. These two tubes seem to be preventing it. What do I have to do to free up the valve cover? Thanks!!

image.jpg
 

ttocs

Forum's #1 poster
Joined
Oct 9, 2009
Messages
37,641
Reaction score
7,760
Location
Evansville Indiana
those are the coolant cross over hoses i think they are called. I will warn you to be VERY careful with them as they are specific for 94/95 and the o-rings that are inside the swivel part needed to install it are known to go bad. They can be replaced but that tube itself can be a pain to find if you have to.
 

weendoggy

Well-Known Member
SN95 Supporter
Joined
May 31, 2019
Messages
1,191
Reaction score
1,494
The valve cover should come off even with the water tubes (heater) installed. However, you can remove that at the mainfold (big wrench and probable tight), AND, you can source it from LMR if you damage it. I've had them off before with an issue...but...you never know.
 

RAU03MACH

Legend
Joined
Apr 23, 2019
Messages
9,246
Reaction score
9,693
Location
NEW MEXICO
if you loosen that coolant tube fitting on the bottom where the temp Sencer is enough
you can turn that whole tube left or right
hell loosen it all the way out, that nut at the bottom screws into the intake
 
OP
OP
Daryl

Daryl

Well-Known Member
Joined
Apr 5, 2020
Messages
4,254
Reaction score
2,351
Location
Somis, CA
John, are you talking about this little nut buried between #3 and #4 injectors?

IMG_4938.jpeg
 
OP
OP
Daryl

Daryl

Well-Known Member
Joined
Apr 5, 2020
Messages
4,254
Reaction score
2,351
Location
Somis, CA
Weendoggy,
When you say “big wrench, probably very tight “, Are you talking about this with the brass fitting?

image.jpg
 

RAU03MACH

Legend
Joined
Apr 23, 2019
Messages
9,246
Reaction score
9,693
Location
NEW MEXICO
Those will unbolt that tube
Should be 2 of them each end
Screenshot_20260513_205730_Samsung Browser.jpg
Under that red I circled there is a stem nut that screws into the manifold
Lossen it to remove the whole coolant tube with the 2 little bolts
 

weendoggy

Well-Known Member
SN95 Supporter
Joined
May 31, 2019
Messages
1,191
Reaction score
1,494
Yeah, what he said. To remove, the "swivel" nut is on the bottom under that hex/tube area. The swivel is between the nut and the hex portion. Along with the nuts, remove it all, or, loosen as mentioned and swivel out of the way a bit. I'd disconnect the sensor and/or remove it so you have some room and not damage it. Oh, the nut(s) holding the heater tube also are part of the intake manifold bolt. So, if the whole thing turns....be careful. Sometimes they get rust/welded so you may want to take an open end wrench and try to hold the manifold nut under the tab if you think that'll happen. jmo
 
Last edited:
OP
OP
Daryl

Daryl

Well-Known Member
Joined
Apr 5, 2020
Messages
4,254
Reaction score
2,351
Location
Somis, CA
So the upper intake manifold has been ceramic coated silver.Suggestions for valve cover color??? The coater sent this pic of Cobalt and Tungsten which might be a sharp-looking contrast.
 

Attachments

  • IMG_4930.jpeg
    IMG_4930.jpeg
    216.6 KB · Views: 11
  • 80057824488__9C1AEAC6-7235-4098-931F-4455D1C02B8F.jpeg
    80057824488__9C1AEAC6-7235-4098-931F-4455D1C02B8F.jpeg
    172.5 KB · Views: 11

ttocs

Forum's #1 poster
Joined
Oct 9, 2009
Messages
37,641
Reaction score
7,760
Location
Evansville Indiana
I just went with black on mine. I didn't see any reason to draw attention to them although later when I had them off and thought about it I did a mustang emblem on them with the laser engraver.
 
OP
OP
Daryl

Daryl

Well-Known Member
Joined
Apr 5, 2020
Messages
4,254
Reaction score
2,351
Location
Somis, CA
Little further along. Making some progress as more goodies arrive ;-)

Mahle valve cover gaskets, bolts and correct valve cover stickers
 

Attachments

  • IMG_4953.jpeg
    IMG_4953.jpeg
    254.6 KB · Views: 11
  • IMG_4952.jpeg
    IMG_4952.jpeg
    246.4 KB · Views: 11
Last edited:
OP
OP
Daryl

Daryl

Well-Known Member
Joined
Apr 5, 2020
Messages
4,254
Reaction score
2,351
Location
Somis, CA
Found this rubber hose that I had marked on tape, “goes underneath manifold, drivers side. Is this the correct location for it? And what’s that little doohickey on the end of it?? And does it just hang out or is it supposed to attach somewhere?
Thanks everyone… feels like I’m gettin there thanks to all your help :)image.jpg
 

95opal

Well-Known Member
Joined
Jun 21, 2007
Messages
4,008
Reaction score
3,132
Found this rubber hose that I had marked on tape, “goes underneath manifold, drivers side. Is this the correct location for it? And what’s that little doohickey on the end of it?? And does it just hang out or is it supposed to attach somewhere?
Thanks everyone… feels like I’m gettin there thanks to all your help :)View attachment 49744
Little tip for ya vaccumm doesnt care were you plug it into as ling as its post TBody. Manifold vacumm is manifold vaccumm it doesnt cre if it conne,cts on bottom, top ect.
 
OP
OP
Daryl

Daryl

Well-Known Member
Joined
Apr 5, 2020
Messages
4,254
Reaction score
2,351
Location
Somis, CA
question regarding the last, remaining stray vacuum line:
Does this go on the 1/2 silver-coated nipple in my previous posts photo? I noticed the end of the hose appears to be reemed-out a bit, but it’s still a bitch to get back on the nipple. Almost like the diameter of the hose is too small. Maybe I have to find a way to force that sucker on there?
image.jpgimage.jpg
 
Last edited:

weendoggy

Well-Known Member
SN95 Supporter
Joined
May 31, 2019
Messages
1,191
Reaction score
1,494
Yeah, that hose goes to the long metal tube under the manifold curve. Bitch to get to so put that on prior to the upper plenum. Oopps! Too late, no you have to go fishing. If you forgot and left it wide open, you'll have one hell of a vacuum leak.
 

Latest posts

Forum statistics

Threads
78,527
Messages
1,535,651
Members
16,185
Latest member
dmen76

Members online

No members online now.
Top