Chris's 94MGT Journal

95PGTTech

Well-Known Member
Joined
May 17, 2007
Messages
1,681
Reaction score
0
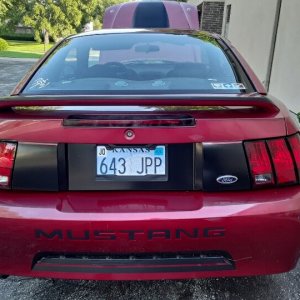
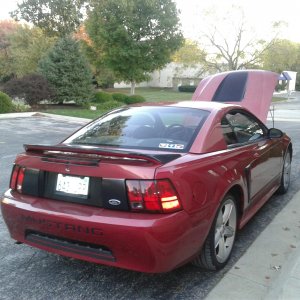
I saw this idea on another forum so I decided to go with it. Before anyone panics, no, our 98 Cobra isn't for sale or being quit on. This car was bought simply to fix/flip and enjoy for a trip to Mustang Week 2010 (I've done a couple dozen cars, this is the first I've made a journal of). Fixing/flipping has often funded vacations and Cobra parts in the past - I want bigger brakes, coilovers, and a LQ9, so this probably won't be the last either. I realize breaking down what I pay for stuff and what a POS I'm starting with will probably eliminate any possibility of selling the car to someone on this forum, but whatever, I've not sold many things on here anyhow. The Cobra is a big project that's located ~45 minutes away so I really only have 2 days a week I could work on it. The idea of this is to keep it smaller maintenance that I can keep under the radar at my apartment complex (I have about 3 hours of light after work, mind as well use them).


May 25

So...

I had the day off yesterday and was nursing a knee I hurt the previous day coaching track instead of working on the Cobra. We've been on the lookout for a Fox or SN95 that needed a little bit of work that we could fix up in time (at least mechanically) for Mustang Week and turn a profit on in the end (or at least not a loss). I tripped across a CraigsList ad for a 1994 Mustang GT stickshift (runs great, 140K, green with tan cloth, all stock, all it needs is paint). He's located two hours away.

I had found over the past week a couple other good leads but they either didn't list a phone number and didn't answer emails, or they listed a number and didn't pick up, or when I got them on the phone the stories were really sketchy (one guy all it needs is a battery but would not let me bring a jump box and drive it onto my trailer...). I called the guy and we talked around noon. I wanted to leave immediately to be back at a decent hour after getting more details, but then he breaks it that he has someone local coming for it at 4:15 that sold his car yesterday to get the money for it and yaddah yaddah yaddah... I told him I'm not coming 2 hours with a trailer if it's not 100% set in stone mine if I want it right then and there cash. We agreed 5PM was a fair time to wait on this guy to see if he shows or not.

5PM I get the call he's not there so do I still want it? I go to work, pick up a few tools in case I want to disconnect the driveshaft (two wheel dolly), go pick up my dolly, then pick up $2500 cash from my bank (I'm 25, and I get looks every time). The trip up is uneventful except for my dog's reaction to the unloaded dolly bouncing around back there. I've towed with the Escape before (midpipe, intake, 93 octane tow tune) and it hardly notices the trailer on the tow tune and pulls a Mustang pretty easy (stopping...not so much fun). When I hooked up the trailer I noticed the lights did not work, but figured out it was the 10A fuse on the trailer wiring harness on the Escape. No biggie, I'll stop at some auto parts store on the way up (still light out).

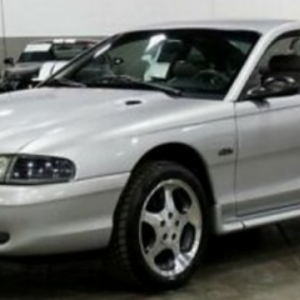
Little did I know the trip was going to be the PA turnpike to the northeast extension to I80. Not a rest stop or auto parts store in sight. Whatever, I figured I'd steal one out of the Mustang when I got there (the Escape uses minis, this was a regular AGM like the Mustang uses). I get there, and this car that just needs paint, is this pile of ****...

IMG_7713.jpg

IMG_7714.jpg

IMG_7715.jpg

IMG_7716.jpg

IMG_7724.jpg

IMG_7706.jpg

IMG_7718.jpg

IMG_7719.jpg

IMG_7720.jpg

IMG_7710.jpg


I was told not a spot of rust. On the exterior panels maybe. The underside is very clean, but not perfect, it's been driven.
IMG_7717.jpg


Pioneer headunit, Mach460, "this system thumps." What a tool.
IMG_7722.jpg


Now I can talk a hard bargain and sell a hard bargain from my experience buying/fixing/selling (sometimes just buying and selling lol), but I am not the kind of stick that shows up and offers less, nickels and dimes things wrong, or has excuses like I left some money at home, I only have this on me does that work, etc. I generally know what I am getting based on make, year, model, and asking price. I didn't expect some 30K mile garage kept showroom clean rocketship. But I'm pissed, real pissed. The drive ended up being $50 for the dolly, $30 in gas up, and still have to return, plus at least 5 hours of driving when I should really be icing this knee for work tomorrow. I finally get the truth out that he bought this thing after it was hit by a deer. The car does run though, no CELs, and the front damage, while needing work, isn't catastrophic. I took 10 bills out of the envelope and said this is what I think it's worth take it or leave it, but if we don't agree on a price, you owe me $150 for my time and expenses today, you flat out lied to me on the phone. You knew this needed a lot more (horrific squeaks and clunks on short test drive, low brake pedal, airbag light on, some lights not working, etc.). He wants $1500, I offer $1300 last chance. He bites.

I load this pile of **** on my trailer, totally forgetting about the lights. No biggie, I usually pull over after about 10 miles of driving or as soon as I hit the big roads to double check the trailer and towed car. Starting towing, this thing feels like a boat behind me. The rear wheels are go-kart skipping on take off, and it feels like the Escape has 10HP. There are 20mph zones on his street up big hills and I'm following fully loaded dump trucks in commanded 1st gear and it will absolutely not keep up with them, I'm losing speed going up hill. The downs are even more fun, roasted clutch smell from the brakes. There was very little traffic on the big roads so I figured if I could get through this crap, I'd be okay. I pull over at a truck stop just before I80 and put a new 10A fuse in, get some food and fuel, and let the Escape cool down. I'm genuinely worried about the trans it has never felt like this pulling anything (even my heavier Cobra).

I get going and within 100 feet the trailer lights are out again. I pull a stupid move and put a 30A in it instead (there were no 20s in the Mustang). They're dead within 100 feet, and I smell something that's either electrical fire or transmission exploding. I'm a very calm person, but I'm pretty anxious at this point thinking I am going to blow up my Escape 2 hours from home with my wife at work until 2AM. Then the Escape starts freaking out - tail lights go dim then out. I lose the d/s turn signal. Cruise no longer works. Dimmer switch turns everything super-low on the console. Right turn signal stays on constantly (as in not flashing). And it's getting dark, quick. Every truck is flashing me, due to no rear lights whatsoever and doing 45mph (full throttle no overdrive on flats is all she could go). I'm down to about 1/16 tank and seeing no rest stops on the way up I just bite the bullet and decide next exit I am paying to get off, getting fuel, and reassessing. I pull into a local gas station and think check Escape fuses, hopefully that's it, and then turn the Mustang on and put its 4 ways on instead of trailer lights.

When I get out to fuel, the front of the Mustang grille is covered in coolant and it's smoking out the hood. Fearing the worst for the Escape, I check the tailpipe and coolant level - nope, not blown up. So WTF, I'm TOWING the Mustang and by this point I haven't turned it on. I get in the Mustang...and realize the sloppy stock shifter is ever so slightly in third gear.

FAIL!

My only guess is that the rear wheels are turning the driveshaft, turning the gears inside the trans. If it was in neutral it would have been fine, but in third both shafts are turning, which is turning the clutch, crank, etc. The oil pump is turning in that situation so I'm not terribly worried. But the water pump should also be turning by the crank pulley, belt, etc. Maybe belt slip? Anyhow, it's overheating at this point so all you can really do is start it and let it idle and let it slowly warm down. It cranks hard and starts, the smoke becomes a billowing cloud, and I have white smoke out the exhaust. This lasts for 30 seconds or so and goes away. It stalled once and had a surging idle but stabilized around 700rpm. I blasted the heat and let it sit for a few minutes. It seemed the temperature had come back from 3/4 hot to right in the middle so I put on the headlights and 4 ways and got back on the road (I unplugged the headlights so I didn't have them shining in my mirrors but still would have tail lights on the Mustang). Not surprisingly, the skipping-on-starts stopped, and it felt like normal towing again. Jeez, the one good thing about this car was that it ran fine. I'm not worried about the trans or rear because they don't have pumps so they were really operating under normal conditions.

I arrive, uneventfully, at home at midnight. I get the look of disapproval from both the wife and my dog. This one, even in the dark, I can tell is going to need a LOT of work.

Costs:
car ($1300)
gas ($30)
toll 1 ($8.10)
toll 2 ($2.60)
gas ($41.22)
toll 3 ($9.10)
dolly ($49.95)

Total Invested to Date:
$1440.97
 
OP
OP
9

95PGTTech

Well-Known Member
Joined
May 17, 2007
Messages
1,681
Reaction score
0
May 26

The tags place was out to lunch on my lunch. I'd like to at least get it temp. plated, registered, and insured so I can go out on a longer test drive, take it to work, inspect it, get it in the air and see really what this thing needs. They are open until 6 but I spend my time after I'm done work (last job I finished around 4:30) diagnosing the Escape. Sure enough, 30A burned out the main 10AUG power wire for the trailer harness and the main relay box, that was the smell. Trans fluid was new and smelled good. Also took out the relay box for the trailer harness. Removed the harness and threw it out, I'll rent a truck when I need to tow in the future. It took out the 15A fuses for tail lights and brake lights in the Escape. And burned up the circuit board inside the multifunction switch. A good hook up, and I had a new switch at no cost and a few fuses out of my tool box. Priority one of getting my reliable daily driver fixed is done.

If you're viewing this thread thinking of picking up something that needs work to fix/flip, you really need to take into consideration where I work and the benefits (tools, parts, discounts, junk parts, connections) that come with it. I mean, that's a $180 multifunction switch that I got for free that you'd need to factor in your budget. The cooling system pressure tester I use in a minute is a $99 tool just in itself. This stuff nickels and dimes you to death, and there are other major hurdles like PA state inspection (we're an inspection shop and I'm an inspector...).

I came home and took a quick test drive around the complex to see if it would overheat, it did not, and generally look it over. I brought some UV dye from work and added it to the coolant and topped to off with water, then let it run to check for leaks. None under pressure that I could see topside, but I did find this one on the low pressure side.

IMG_7725.jpg


I pressurized the cooling system and it held 16psi for 5 minutes, so first test passed. If I popped a head gasket like I feared from the white smoke out the exhaust (which has been gone ever since), 99% of the time it fails this test miserably. Though, I might have to really beat on the car to get it hot enough to start leaking water past the head gasket again. We'll see - a compression and leakdown are still in the future for this motor. It does have a decent tick but no terrible leaks and it does sound like a tiny miss/cam. I do have a backup 95GT motor if necessary.

IMG_7728.jpg

IMG_7729.jpg


So then I started making a list of what it needed just from what I could drive or see here on the ground. We'll see when I bring it in for "inspection" as soon as I have tags and have an opportunity to put it on a lift - steering/suspension/brakes is where I make 99% of my money.

IMG_7705.jpg

IMG_7709.jpg

IMG_7712.jpg

IMG_7711.jpg

IMG_7730.jpg


The plan is a near-stock car with nice paint and interior that can be sold "owned by mechanic, needs nothing". The car will be repainted the factory color as the door jambs and engine bay appear in very good shape, this will save tremendously on cost/effort over a color change. If I find parts aftermarket cheaper than stock, sure, I'll spring for them, but this is no 200mph block-splitter build. The only "planned" modifications are ones we made to the Cobra - DEPO black projectors, DDM tuning HIDs, MGW shifter, Hurst ball, Fore quadrant and cable adjuster. These can be removed easily upon sale if they want to knock down the price a little, but I just can't drive a Mustang without these things. That being said, the current list of known needs:

Drivetrain:
exhaust manifold gaskets
spark plug wires
distributor cap
distributor rotor
diagnose engine tick/miss/surge - put a vac gauge on the car
install oil change
rear axle fluid
install rear main seal
butt splice on coil wiring
install throw out bearing
paint intake
double clamps and rotate to same spot
air filter
coil connector
bump timing
install gears
modify H pipe
p/s exhaust manifold
mufflers?
clutch quadrant and adjuster
battery hold down


Suspension/Steering/Brakes:
C/C plates
change brake fluid, inspect brake hoses under pressure
rear differential bushings
install pinion seal
balance rear wheels
new rear valve stems
install rear shocks
lowering springs
correct front swaybar bushings (30mm)
steering column
steering shaft
power steering cooler

Interior:
install air bag module
replace P/S air bag
d/s door cup
center console/ash tray lid
no power at cigarette lighter
clutch and brake pedal covers
steering wheel
cruise control buttons
trunk carpet and side panels
knee panel
turn signal switch
diagnose rear and door speakers

Exterior:
install inner fender shields (front)
install ABS module bracket
install new headlights
install DDM tuning HIDs
2 front marker lamp connectors
drill out 2 fender bolts
new hood
install d/s door
d/s fog light housing
2 fog light bulbs
nostrils
install d/s mirror
hood prop retainer
bumper inserts
two header panel to radiator support bolts and A-frame clips
push pins for bottom of front bumper
under splash shield and hardware
push pins for inner fender wells
push pins for radiator top shroud
hardware for top of front bumper (was rivets)
hardware square for d/s fender to front bumper screw
PREP AND PAINT

I'm sure that list will grow longer far before it grows shorter. There were no expenses on the day, but I expect some tomorrow and a heavy week or so. I would like to keep this car to small, manageable projects, but stuff is cheaper online, and orders need to be big to save on shipping (RockAuto is a particular favorite of mine, beats my employee discounted parts by almost half cost and they ship FAST and reasonable price).

Total Invested to Date:
$1440.97
 

Adam95GT

Active Member
Joined
Apr 1, 2009
Messages
275
Reaction score
0
Nice Chris! We will have this thing looking mint in no time. or 2 years like my ride :p
 
OP
OP
9

95PGTTech

Well-Known Member
Joined
May 17, 2007
Messages
1,681
Reaction score
0
May 27

Went and got my tag, temporary registration, title transfer, and insurance today. I have to pick up the full registration in 4-6 weeks and get the little sticker for the license plate. The insurance paperwork is in the mail but for now they said it was fine to drive with my copy from my other vehicle.

IMG_7723.jpg

100_4033.jpg


I noticed a few more issues I had not before and updated the list above. I emptied the trunk of the included parts. The mirror is for a Freestar, not a Mustang. The headlight is junk except for one of the hardware pieces, and the headlight knob is equally junk. The fender is new as he said though.

100_4038.jpg

100_4040.jpg

100_4041.jpg

100_4037.jpg

100_4039.jpg

100_4035.jpg


I picked up a box of fuses to replace the ones I had stolen for the trailer wiring harness and a set of Autolite 25s and gapped them at .054". I plan on installing them tomorrow when I do a compression test - on my discount, there was no savings over buying online once you account for shipping and the wait time. I thought I had a lot in my tool box but I guess just MINIs. In retrospect, I probably could have just waited until I go to Princeton next where I have a ton of them, but I didn't know what circuits they were for. My luck, it'd be taillights and I'd get pulled over.
IMG_7707.jpg

100_4034.jpg


I have a 95GT EVTM at Princeton but that's a long ways away. StangNet had a helpful diagram of the underhood and interior fuse box diagrams so I just went through quickly and made sure I had the correct amp fuses in the right spots (I had removed several 10A and two 30A towing).
l_f2605b95ceea46d49287c52b46437147.gif

l_18b9fa4313e74f7f9a4b915f6e947ded.gif


8 miles to work and the coolant gauge never moved. Although rickety at low speeds, it was stable on the highway and an uneventful drive. The engine ran smooth and even the terrible T5 shifted very nice the whole time.
100_4043.jpg


I started getting it on the dyno. It made 30HP at 2000rpm.
100_4044.jpg


Up on the lift, fearing the worst. But was surprised. Stuff to fix, but not terrible. The most important find was that the front radiator support bottom section is straight, so although there is a wrinkle up top I don't think this deer accident was really that bad. I think it's mostly the header panel being busted throwing the alignment of the hood, hood release, headlights, front bumper off. You can see the crash pads from up top and they also do not appear compressed.
100_4052.jpg


I updated the original list with more "need to fix." Nothing terrible. I still need to diagnose some stuff that's not visible (p/s groan, low brake pedal, etc.)
100_4045.jpg

100_4046.jpg

100_4048.jpg

100_4049.jpg

100_4050.jpg

100_4051.jpg


So for the most part, I think I am ready to start ordering parts. If anyone wants to help out on the list, feel free.
It passed, so I threw on the latest stickers I could. I picked up three quarts of ATF on my way out the door.
100_4054.jpg


It started to rain on the way home so I got my first taste of stock Mustang in bad weather. With only 3/32 on one back tire and 4/32 on the other (2/32 is the wear bars and state failure), it got pretty squirrelly in 1, 2, and 3 with anything more than 1/4 throttle. So I just drove like grandma and made it home no problem. I have a clunk in the rear that I can't find (the diff side UCA bushings could use replacement but aren't bad enough to cause it and the rear shocks look new). I really need to empty that spare tire area of all that junk and all the crap in the trunk before I worry about stuff like that any more.

Costs:
fuses ($6.78)
plugs ($12.15)
state fee ($58.50)
sales tax ($78.00)
notary ($5.00)
service ($40.50)
temporary registration ($10)
safety inspection ($21.20)
emissions dyno ($37.05)
PA sticker ($1.70)
3qts ATF ($15.86)

Total Invested to Date:
$1727.71


Tomorrow will be a big day. First real drive in it, compression and leak down test, new plugs, and first modification. Teaser pic:
100_4042.jpg
 
OP
OP
9

95PGTTech

Well-Known Member
Joined
May 17, 2007
Messages
1,681
Reaction score
0
May 28

Just got home, lots of progress in small doses on the car. I brought my compression and leakdown tester to see what's going on inside.
100_4055.jpg

100_4056.jpg


I pulled the coil connector to disable spark and the 20A fuse under the hood to disable fuel and didn't have much issue. That coil connector needs to be replaced.
100_4059.jpg

100_4060.jpg


With the throttle held open on a warm motor, the car made 160-160-160-160-160-150-160-160 rounded to the nearest line (5). A retest of number 6 with a squirt of oil didn't change it. I did not feel a leakdown was necessary and was more than satisfied with the results. I am beginning to believe this slight miss/surge and engine tick are a related valvetrain issue. Plugs looked old, but acceptable. Also it passed the emissions with flying colors. You can really read a lot into how a motor is running from these tests if you have the experience.
100_4058.jpg

100_4057.jpg

100_4082.jpg


I threw the new plugs in and was smart enough to put some dielectric grease in the ends of the plug wires to help them come off next time. We found a pretty easy to follow print out of the cylinder lay out online to make sure they all went back right - even if you label them, you never know who worked on the car before you.
100_4064.jpg

100_4063.jpg

100_4065.jpg

ford-firing-orders.jpg


The inner fender was wrinkled a little in the hit. Whether this car is a fail or a win really rests on how much damage (if any) is hidden under that front bumper. I am hoping after seeing the condition of the rad support that the misalignment of the panels is just due to the busted plastic header panel.
100_4066.jpg


My dog decided she still does not like the Mustang and hides under the Probe.
100_4062.jpg


Cleaned out that ratty trunk, threw away the junk, tossed the bad carpet, and vacuumed it out. Yep, clunk still there right rear under compression. I played around with my prybar on all the bushings when it was in the air so I'm thinking something shock/spring related.
100_4069.jpg


I had to pull the intake to do the compression test, so we put on a used BBK CAI that was laying around and impossible to sell. I didn't like the bottom mounting points so I took the liberty of making it a bit more secure. Adam cleaned the MAF and I filled it today with 93 pump, so between the three and the new plugs something gave it a little better kick in the butt. I'll pull it back out at a future date to put a cone filter on it and paint it all black (as well as fix the clamps...).
100_4067.jpg

100_4068.jpg

100_4070.jpg

100_4071.jpg


Found a stock belt Adam had only run for a few miles - $25 even from the cheapest supplier!
100_4073.jpg


Found that water pump to heater hose I wanted to replace. Every little bit helps ($6).
100_4074.jpg


The breather tube was really beat up but we found this mint one in Adam's piles of stuff. More money saved!
100_4072.jpg


Pulled the center console and vacuumed the junk out!
100_4076.jpg

100_4077.jpg


CobraBob shifter gasket
100_4078.jpg


MGW hotness and boot
100_4075.jpg


Drained the trans fluid and dropped one of the x-member bolts out to give us some room installing the shifter.
100_4079.jpg


The shifter is not centered in the hole...WTF? I put the stock two bolts back in the front (shorter than MGW supplied bolts). And still the front two bolts are tight against the body. Anyone else run into this? Adam thought maybe it's a Fox T5?
100_4080.jpg


We found we had kept his stock coolant overflow tank - $50 saved woot!
100_4085.jpg


I figured out why the right front turn signal doesn't work - there was no bulb or socket in it. We pirated one off Adam's car, I need to find him a replacement and pigtail connectors for both sides of my car (busted).
100_4087.jpg


Adam decided he wanted to sand down my trunk rather than work on his own car. All that white stuff back there wasn't primer, it was a really bad layer of white??? It's gone now, so the trunk is ready for bondo in a few small spots, then some real primer. We removed the wing and shaved the holes, also the ones for the Ford emblem. We elected not to use the grinder at 10:30 at night because that doesn't go over very well with the neighbors. We replaced the license plate bezel with a spare one we had sitting around - easier than getting the white junk off those areas.
100_4088.jpg

100_4089.jpg

100_4090.jpg

100_4094.jpg


Fixed the shifter bezel boot.
100_4096.jpg

100_4097.jpg


All in all, I spent nothing today, which is great, and fixed a lot of things, which is better. I need to diagnose a few more things to get my "needs" list complete to start placing orders but I did knock about $200 off one order today finding stuff or fixing stuff.


Total Invested to Date:
$1727.71
 

Adam95GT

Active Member
Joined
Apr 1, 2009
Messages
275
Reaction score
0
Looking good... i really hated that stupid white on the trunk...
 
OP
OP
9

95PGTTech

Well-Known Member
Joined
May 17, 2007
Messages
1,681
Reaction score
0
May 31

Found a deal on the projector headlights and driver side mirror today - apparently they no longer make the black projector and corner combos and the black projectors alone are $169 + ship.

img1338k.jpg

img1311b.jpg

img1310zk.jpg


I'm really trying this week to track down all the exterior parts I need as both Adam and my wife think that's a far more major selling point than the mechanical stuff. I work all week at my new job this week to make 40 hours my next day off is Sunday but at this job I do have after hours lift access - THANK GOD!

Costs:
headlights ($125)
mirror ($25)

Total Invested To Date:
$1877.71
 
OP
OP
9

95PGTTech

Well-Known Member
Joined
May 17, 2007
Messages
1,681
Reaction score
0
June 1


I had a long first day at my new job today but decided to push through with some wrenching. That fender has been sitting in the trunk and through the rear seat for some time now looking ugly, taking up a lot of space, and making the rear seat useless. I decided to bite the bullet and install it after work. Working in the parking lot with a screw jack and hand tools can be aggravating, but it was somehow very relaxing from the air-tools, hydraulic-lift, rush-rush-rush.

A quick shot of the wingless look now in the light. I am digging it with the horizontal tails.
IMG_0178.jpg


I started with this.
IMG_0179.jpg


Pulled the fender. It can be done with the front bumper, header panel, etc. still on just some patience is needed. You do not need to remove the charcoal canister just pull the top bolt and loosen the bottom bolt. I'm going to need new wheel wells both were torn.
IMG_0186.jpg


Of course one of the bottom fender bolts decided to grenade. I will have fun drilling that out at some later date.
IMG_0185.jpg


The car was clearly hit (or hit something) in the right front near the strut tower. To what extent, who knows? But likely this radiator support is new, and it was professionally straightened. There are some minor brackets I'd like to replace if I can source them cheap enough so I added them to my list.
IMG_0180.jpg

IMG_0182.jpg

IMG_0188.jpg

IMG_0192.jpg

IMG_0193.jpg


As you can see, both strut towers have had the spot rivets drilled and the slots slotted to align the car. Provided the car is straight when I get it on the rack, all this information really isn't a problem - no factory car is dead straight to begin with, and as long as the repairs were made correctly (they seem to be) this will still make a nice car for someone. I still don't know about the springs - they look factory, uncut, and have no visible coloring or part numbers but the car sits a bit lower than a factory car and there is definite negative camber wear on the front tires.
IMG_0194.jpg

IMG_0195.jpg


Randomly I noticed the passenger side H pipe flange loose, and when I looked further, found the passenger side header to NOT have a flange...WTF?
IMG_0183.jpg

IMG_0184.jpg


Done. It still needs a few tweaks when I get the new front bumper, hood, and header panel on.
IMG_0196.jpg

IMG_0201.jpg

IMG_0198.jpg

IMG_0197.jpg

IMG_0196.jpg


My airbag codes are 2 and 4 if anyone knows what they mean.

I spent no cash today on the car, so total invested stays the same. Luckily, this was one of those major days of I could find giant expenses, and there were relatively none.

Total Invested To Date:
$1877.71
 
OP
OP
9

95PGTTech

Well-Known Member
Joined
May 17, 2007
Messages
1,681
Reaction score
0
June 2


Work was long and hot today. I attempted to remove the broken bolt in the fender on the passenger side today with no luck, so I began adjusting the gaps on the front two fenders. If you ever wanted a nice, quiet, relaxing way to spend 3 hours...DON'T DO THIS!

I fooled around with the new p/s first and got it where I was happy with it.
IMG_0204.jpg

IMG_0205.jpg

IMG_0206.jpg


I took some before pictures of the driver side.
IMG_0207.jpg

IMG_0208.jpg

IMG_0209.jpg


The lady at WaWa wonders why my debit card doesn't ever swipe.
IMG_0212.jpg


Another attempt at repairs by the idiot who owned this car before me. He wondered why the fender to door gap was so big, because he installed the A frame nuts and bolts backwards. How the hell did he get a wrench in there?
IMG_0213.jpg


He managed to snap off the bottom fender bolt on this side...great...
IMG_0210.jpg


Yanked the inner fender well from this side. One screw holding it in...
IMG_0215.jpg


Take the two 8's out of the CC bracket and slide it down, you can then get socket/ratchet up to the fender bolts and have a chance at aligning/tightening.
IMG_0214.jpg


Not half bad...
IMG_0216.jpg

IMG_0217.jpg


No expenditures today. Waiting on a call about some Bullitt shocks near where my wife works (who I have to pick up tonight). Really in a waiting on next paycheck status for the rest of the stuff. 90% of the body stuff may come from one part out somewhere around $500. The mechanical stuff from RockAuto totals about $340.

Total Invested To Date:
$1877.71
 

paintslinga2010

New Member
Joined
Aug 3, 2009
Messages
94
Reaction score
0
PLEASE give me some tips on getting those fenders aligned. My car as a cock eyed gap on the drivers side and at one point was even rubbing the door. The middle of it sets higher than the hood too. This thread is awesome btw.
 
OP
OP
9

95PGTTech

Well-Known Member
Joined
May 17, 2007
Messages
1,681
Reaction score
0
Assuming your doors are hung properly (shut with no giant clunk - gap is good from door to body on the back half). Start by loosening everything up. Remove the inner splash shield. Remove the lower side skirt fender cap. Two 8mm bolts on the bottom. Two 8mm bolts on the inside door hinge. Three 8mm bolts across the top. Two 11mm nuts on the inside of the front bumper. It may be necessary to pull the corner lens (one 11mm nut, disconnect bulb) to access the two 8mm bolts that hold the header panel to the fender. I mean loose like 3-4 threads loose, visible gap between the captured washer and the sheet metal.

Check and make sure your hardware is correct like I showed what was wrong with the d/s fender on this one. The fender's two tabs go toward the front of the vehicle. The car's two tabs are more rearward and hold the A-frame nuts. The head of the bolt faces the front of the car.

I would start by doing the gap to the door. Get out a few credit cards or better gift cards or cards that don't have numbers (smooth both sides). Get a setup you like (for mine, it was two gift cards, but thicknesses can vary). It's not necessarily important how wide the gap is, but that it is uniform top to bottom. Put the cards in the bottom half between where the bottom bolts are (underneath) and where the bottom door bolt is. Put another set near the top. Tighten the two bolts underneath the car and the bottom door one paying attention to keep the cards tight but not binding and keep the fender flush with the door (in/out). Keep in mind there is nothing wrong with removing the fender entirely and bending/hitting the body mounts farther back if your gap is too large or putting washers between the body mount and the fender mount if the gap is too small. Snug, but not death tight.

Now move to the top door bolt. Same procedure. Cards. Pay attention to the door to fender gap (left/right) as well as the door to fender flushness (in/out). Now start with the most rearward top bolt (engine bay). Lightly shut the hood and position using cards where you want it to be. Card the top corner and the corner near the headlight. Having some idea, attempt to open the hood and hold the fender in place. Snug up. Close hood, see if cards still hold correctly. Rinse and repeat until it stays where you want it. Keep in mind this bolt and the top door bolt also affect the (on the driver side for example) top right corner of the fender (the corner near the mirror at the base of the A pillar). A poor job with these two will result in a big gap at the bottom of the A pillar. You may need to do preliminary setup, then go back and pull up and out on that top corner with the two bolts slightly loose to get a final fitment. You may even need a little prybar help.

Once the rear bolt is set move to the front one. Again, close hood, card, hold, open, snug, close hood, check. The middle bolt is really just a formality. Once you have all these bolts set, close the hood for good and double check all your gaps - fender to door, fender to hood, fender to A pillar. If all is good, final tighten. Remember you can always use washers between panels or bend tabs to make small adjustments. Remember to tighten the header panel bolts and the nuts to the front bumper. The factory uses these washers stock called shims. Common places are at the bottom of the fender (see my pics, see those two on the passenger side bottom) and under the fender on the engine compartment bolts (they usually look like a U shape here). But regular washers work just fine.

The car really is aligned as a whole. The doors go first aligning to the rocker panels (bottom) and quarter panels. Then the fenders are mounted, then the hood. The front bumper and rear bumper really have little adjustment. The trunk is aligned separately. With your fender too high from the hood issue, you either have a hood that is too low (bump stops) or a fender that is too high (too many U shims). Before you spend a ton of time on the fender, check to make sure the hood latches easily and sits evenly side to side. Once the hood is ballparked, do the fenders. It's a lot easier to do a hood adjustment than the fenders.

For now, I didn't even bother to check that dimension (hood flush to fenders on the top) as the hood is badly warped and cracked. When I get the new hood, I'll check it again. My fenders are both aftermarket and there were no U shims beneath any of the holes (assuming these fenders have been off before). My Cobra had a shim under every one of the bolts (some two).
 

paintslinga2010

New Member
Joined
Aug 3, 2009
Messages
94
Reaction score
0
Thanks man. You not only shed some light on how its done but you also made me realize im going to need more than an evening to do this. haha.
 

Adam95GT

Active Member
Joined
Apr 1, 2009
Messages
275
Reaction score
0
Looking good chris. Ill be around sunday. Sunday good for you???

Also here are the stainless lines they are gonna run us $70 each after shipping and my coupon:
http://www.summitracing.com/parts/RUS-693010/

You sure you want stainless or you want the oem replacement. Whatever you go with im ordering as well. Let me know so i can order them tomorrow. Been busy with work. Give me a call if you need anything man. I have been looking for your parts hard.


Also i did email the guy about the shocks im waiting on a reply with an address and #.

I replied to the guy parting out the car with your updated list.
 
OP
OP
9

95PGTTech

Well-Known Member
Joined
May 17, 2007
Messages
1,681
Reaction score
0
paintslinga2010 said:
Thanks man. You not only shed some light on how its done but you also made me realize im going to need more than an evening to do this. haha.

Even if your car is rust free, I'd spend a day hitting every bolt you plan to move with PB blaster, then coming back the next day.

Adam:
stainless.
yes Sunday afternoon Rich will be there too after 3pm work.
I think the guy parting out is a blue car on corral he and I have been PMing. If so he has really very small of the list. Found another guy on corral in PA willing to let me pull parts $100 for 1/3 of the list and $200 for a black interior, I would assume cloth.
 
OP
OP
9

95PGTTech

Well-Known Member
Joined
May 17, 2007
Messages
1,681
Reaction score
0
June 3


Two hours of my time, $70 cash (thanks Adam talked him down from $100) and $11.75 worth of fuel netted me the following Bullitt shocks. I'm not too concerned about performance upgrading the car, but at $55.99 each for new front shocks, it was well worth the deal, and I'll have one front and two rear replacement shocks for the next car. I was really stoked to finally get in contact with this guy and get these tonight as I have free lift time tomorrow. He had some other stuff available but mostly stock 2V 2001+ stuff.

IMG_0218.jpg

IMG_0219.jpg


Total Invested To Date:
$1959.46
 

JDwhite98gt

Well-Known Member
Joined
Apr 6, 2008
Messages
1,285
Reaction score
0
Really like this build. It cool to see you restoring this thing. So if your going to replace your interior, what are you doing with the seats you have now? I really really need the bottom cushion to one of your seats if you're looking to get rid of them. Let me know what your plans are...PM if you want. I wouldnt mind making a road trip up there, and maybe even turn it into some business for you, maybe you can figure out my surging/bucking problem and I really need a leakdown and or compression test.
 

Latest posts

Forum statistics

Threads
77,514
Messages
1,504,102
Members
14,982
Latest member
chasingomas

Members online

Top