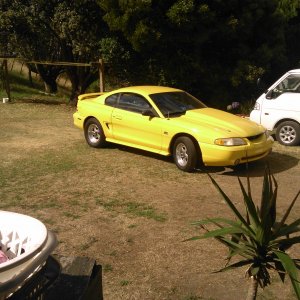
couple under the hood questions

danielson631

Active Member
Joined
Jun 1, 2009
Messages
802
Reaction score
3
IMG_0562.jpg


ugly, i know. i would like to clean this piece up, or if its not to hard, replace it. what would be involved in replacing this?? and what exactly is it called? i want to say coolant crossover but i have NO clue. i also want to paint the alt. black cause thats ugly too.


update** sorry im a little slow i understand that its called the coolant crossover. pretty self explanatory lol


IMG_0564.jpg


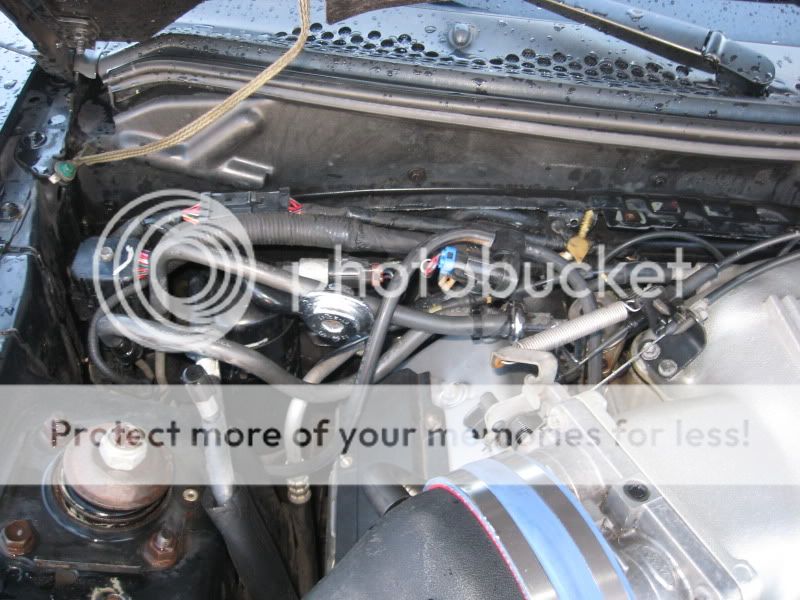
jumbled mess off wires. how do you go about tucking away all these wires? and if i wanted to get it done professionally how much would it cost?? i want to delete the AC since i never use it so that would be out of the way, and also eventually get a battery relocation kit.


IMG_0566.jpg


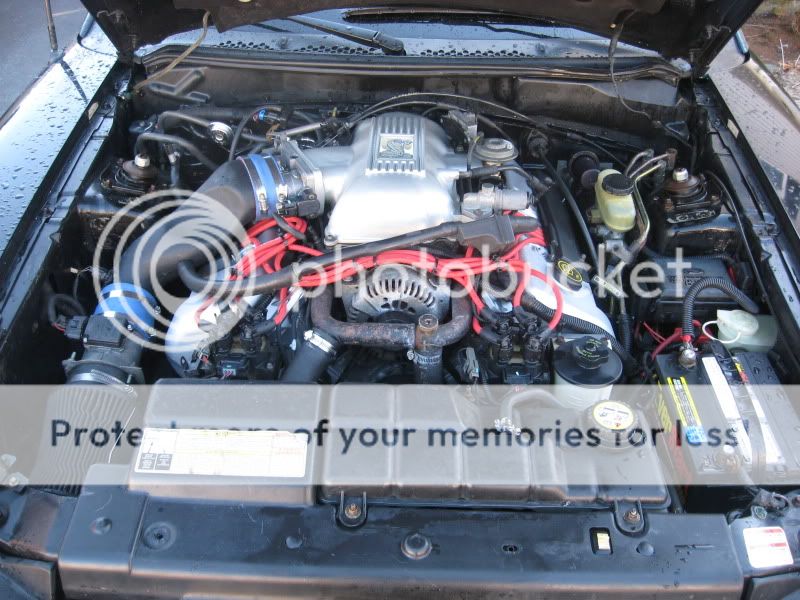
this came with the car when i bought it. it says vortech on it. the guys at mustang magic told me this as orig. from a supercharger kit. does this look familiar to anyone? im going to get a new intake soon, bc this one just seems shabby. and look at the filter it had to be like scrunched up to fit in there.


IMG_0561.jpg


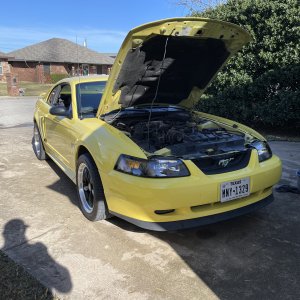
and this is my engine bay after a cleaning. since its winter i didnt go all out, but im pretty impressed. i cant wait to bust out the pressure washer and GUNK
 

joekd

Well-Known Member
Joined
Jan 14, 2009
Messages
3,968
Reaction score
129
Location
Ct
I painted my alt with a metallic dark grey that I also used on my CAI, came out great. Keep in mind you need to open the alt case to do it right.

alt135.JPG
 
OP
OP
D

danielson631

Active Member
Joined
Jun 1, 2009
Messages
802
Reaction score
3
looks great. i dont have much experience with this stuff, is it hard to take off the alt., and then take off the case? any precautions i should take ?

im prob going to do this over the weekend, since we are suppose to get a snowstorm. im also going to remove my taillights, remove the moisture (or at least try) and smoke them out
 

Untame-d

Well-Known Member
Joined
Sep 7, 2009
Messages
1,152
Reaction score
0
^ I would like to know this to. Alt removal = easy. How about the case though? bolts or rivets? are the guts going to all fall apart or is it pretty solid under the case? lol, I've never actually taken an alternator apart.


Edit:

Nevemind. haha

Just took it off in 2 seconds, case is held with bolts. I'll get pics after I paint it if you would like.
 

joekd

Well-Known Member
Joined
Jan 14, 2009
Messages
3,968
Reaction score
129
Location
Ct
Alt is easy to get off car, matter of minutes. Next you need to take off the pulley (use an impact or you will never get it loose) then take off the connectors on the rear and 3 bolts hold the cases together.

The important part is to pay attention when taking it apart so you can get it back together again
 
OP
OP
D

danielson631

Active Member
Joined
Jun 1, 2009
Messages
802
Reaction score
3
ok cool thanks guys im going to get to it this weekend. i was never to picky about under the hood, but now i want it to look nice and clean especially bc i just got the new motor
 
OP
OP
D

danielson631

Active Member
Joined
Jun 1, 2009
Messages
802
Reaction score
3
i took it off, with ease, i couldnt get the pulley off though. i brought it to a shop down the block so they could get it off for me, (my impact gun wasnt strong enough or something)

they got it off and i brought it home, took me a while to pry the case off.

i got the BACK peice off, but how do i take the front of the case off? i cant seem to do it and i dont want to break anything.

i still would like to get it all apart, but would it do any bad spraying the copper coil things, like say you painted without taking the case off, will that cause any damage?
 

joekd

Well-Known Member
Joined
Jan 14, 2009
Messages
3,968
Reaction score
129
Location
Ct
Once you remove the three long case bolts the sides just split open

I wouldn't paint it assembled simply because you can't possibly mark off all the openings and it would end up looking like trash (have seen a couple pop up on ebay like that)

If you really get stuck let me know and I can tear open my spare alt to show you
 

Untame-d

Well-Known Member
Joined
Sep 7, 2009
Messages
1,152
Reaction score
0
I got the front off like nothing to, had to tap it off the bearing, but couldn't get the back off.

I was reading that you have to use a paper clip to hold the brushes up or something when re-assembling it. This is all starting to seem like quite abit of work. lol.. I will figure out way myself I guess.
 
OP
OP
D

danielson631

Active Member
Joined
Jun 1, 2009
Messages
802
Reaction score
3
joekd said:
Once you remove the three long case bolts the sides just split open

I wouldn't paint it assembled simply because you can't possibly mark off all the openings and it would end up looking like trash (have seen a couple pop up on ebay like that)

If you really get stuck let me know and I can tear open my spare alt to show you

i guess since its the orig. alt. its just really on there good. it took me A LOT of effort just to split the case, let alone work the back peice off.

thanks for the advice i appriciate it

Untame-d said:
I got the front off like nothing to, had to tap it off the bearing, but couldn't get the back off.

was the exact opposite for me.the back came off easier and the front well im still stuck there lol. im going to try again when i go home. i did not want to tap the bearing cause thats one of the things i was afraid of damaging but ill give it a few light taps and see what happens
 

Untame-d

Well-Known Member
Joined
Sep 7, 2009
Messages
1,152
Reaction score
0
danielson631 said:
joekd said:
Once you remove the three long case bolts the sides just split open

I wouldn't paint it assembled simply because you can't possibly mark off all the openings and it would end up looking like trash (have seen a couple pop up on ebay like that)

If you really get stuck let me know and I can tear open my spare alt to show you

i guess since its the orig. alt. its just really on there good. it took me A LOT of effort just to split the case, let alone work the back peice off.

thanks for the advice i appriciate it

Untame-d said:
I got the front off like nothing to, had to tap it off the bearing, but couldn't get the back off.

was the exact opposite for me.the back came off easier and the front well im still stuck there lol. im going to try again when i go home. i did not want to tap the bearing cause thats one of the things i was afraid of damaging but ill give it a few light taps and see what happens

I might be confused. I got the easy part off, whether it's the front or back. lol
 

joekd

Well-Known Member
Joined
Jan 14, 2009
Messages
3,968
Reaction score
129
Location
Ct
Front = pulley side, rear = wire connectors
 

Untame-d

Well-Known Member
Joined
Sep 7, 2009
Messages
1,152
Reaction score
0
I just taped off a couple things and painted it whole. I doesn't look to bad and didn't cause any problems with the rotation.

IMG_0525.jpg
 

Dalamar

Post Whore
Joined
Feb 3, 2006
Messages
13,823
Reaction score
133
Location
SLC, UT
Definately repaint your crossover tube, and for the wires you could bundle them together with zip ties.
 

BraMas

New Member
Joined
Jan 18, 2010
Messages
40
Reaction score
0
For some reason the 4V Alt and the 2V Alt are different. The 2V ones come a part with no problem but the insides of the 4v alt are attached to the front casing. I learned this after Powder coating a 2v alt and was happy how easy it comes apart. so I decided to do the one on my 4V and messed up a perfectly good alt. because I assumed they where the same
 

greenscobie86

Well-Known Member
Joined
Dec 5, 2008
Messages
1,803
Reaction score
41
Location
The Big Apple
You should also get the original STB on there as well to hide the unsightly holes in the strut towers.

The new clean motor looks puurrttyy..
 
OP
OP
D

danielson631

Active Member
Joined
Jun 1, 2009
Messages
802
Reaction score
3
greenscobie86 said:
You should also get the original STB on there as well to hide the unsightly holes in the strut towers.

The new clean motor looks puurrttyy..

its back on there now, i had it off in these pictures i think cause this was right after the new engine was put in.

Untame-d said:
I just taped off a couple things and painted it whole. I doesn't look to bad and didn't cause any problems with the rotation.

IMG_0525.jpg

yeah that doesnt look bad at all. im going to give it a shot.

BraMas said:
For some reason the 4V Alt and the 2V Alt are different. The 2V ones come a part with no problem but the insides of the 4v alt are attached to the front casing. I learned this after Powder coating a 2v alt and was happy how easy it comes apart. so I decided to do the one on my 4V and messed up a perfectly good alt. because I assumed they where the same

good info. i gave up and put it back on after realizing it wasnt going to ccome off. i almost ruined mine too lol


another random question, in the pictures, where you can see the hood, theres that one wire on the left that goes from the pad on the underside of the hood and grounds its self to inside the fender, what is that for?? im going to be taking that pad off and painting under there when summer comes, just wondering what its for
 

greenscobie86

Well-Known Member
Joined
Dec 5, 2008
Messages
1,803
Reaction score
41
Location
The Big Apple
I think the ground strap is there for the under hood light.

If you have it then you should keep the strap, if not yank it out.
 

jwyche

New Member
Joined
Feb 26, 2009
Messages
46
Reaction score
0
joekd said:
I painted my alt with a metallic dark grey that I also used on my CAI, came out great. Keep in mind you need to open the alt case to do it right.

alt135.JPG

How about more pictures of your engine. I want to start on mine soon and hope everyone who's detailed theirs would post theirs.

Thanks,
Jim

If you've hidden wires on your 1999-2004 please show and tell!
 

Latest posts

Forum statistics

Threads
78,534
Messages
1,535,741
Members
16,186
Latest member
Armand

Members online

Top