1996mustangGT
Well-Known Member
- Joined
- Sep 21, 2006
- Messages
- 2,534
- Reaction score
- 1
So here is the rundown. No real writeup exsist on the site so im going to go ahed and do one.
So, here we go!
To start off, go ahead and take care of your 3rd brake light. Only thing holding this guy in is a pair of 8mm bolts.

Go ahead and take them out, and pull the 3rd brake light out. When you do this remember there is a weather seal on it, so it will stick a little to the trunk.
Next up go ahead and take your trunk lining out or just move it aside as I did...
Here are the body screws/trunk lining things I'm refering to .

Okay so now you need to get your tailights out. There are 4 13mm nuts that you have to get out. You will have to either use a deep well 13mm or use a pair of pliers as i did. Afterwards, the whole assembly will come out. Take out the bulbs and the set the lights somewhere safe.

So now you can get to dissasembling the tailights. There are three screws on the bottom of the lens. This will loosen the outer lens cover.

afterwards there are three tabs you have to push down towards the bottom of the tailight to pop them out of the lens.


To take apart the 3rd brake light, there are two tabs on the top and one on the bottom that you have to push.


It will seperate the peices into the two shown above.
So now is the nervewracking part. Taking sandpaper to your tailights! Yay!
I went with 600 grit wetsanding. This is THE MOST INPORTANT STEP IN GETTING A GOOD FINISH!
Wet sand until you get a dull finish, should look something like this...


Make sure you wash the lens off after sanding and let it dry...you will then be able to see what spots you missed, they will look shiny and smoooooth.
Now you need to shake the VHT for a minute or so to make sure its mixed nicely. Now I did multiple light coats to get the finish I want.
MAKE SURE TO BE CAREFUL ON THE SIDES! Since they are curved they will want to run.
After a few light coats:

After a few more...

And my final coats..

Since its in the shade (inside, was really windy) you cannot really see how transparent the lights are. However when you do it youself you'll see the finish as you apply it. Just go until you achive the finish you want.
Some poeple will want to apply a clear coat here, however I really liked the finish that the VHT gave, so I left it alone.
Wait a few hours for it to set up well ( I waited about 2 ) And then go ahead and re-assemble your lights.
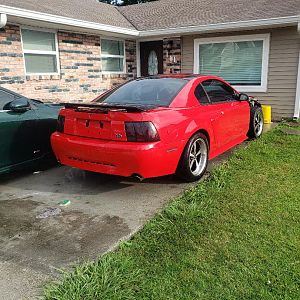
After re-assembly, and installation this is my finished result:


And that night:

Sorry, know its blurry, but had to do it on the night setting.
MY OPIONION: During the day, a little hard to see the brake lights. However not as bad as I thought. At night. Looks bada**!!! And lights up very well.
Let me know if anyone has any questions or comments. :wave:
Maybe a sticky if anyone feels like it.
Also mucho kudos to KingCato since hes the one who gave me a ton of tips on this...
So, here we go!
To start off, go ahead and take care of your 3rd brake light. Only thing holding this guy in is a pair of 8mm bolts.
Go ahead and take them out, and pull the 3rd brake light out. When you do this remember there is a weather seal on it, so it will stick a little to the trunk.
Next up go ahead and take your trunk lining out or just move it aside as I did...
Here are the body screws/trunk lining things I'm refering to .
Okay so now you need to get your tailights out. There are 4 13mm nuts that you have to get out. You will have to either use a deep well 13mm or use a pair of pliers as i did. Afterwards, the whole assembly will come out. Take out the bulbs and the set the lights somewhere safe.
So now you can get to dissasembling the tailights. There are three screws on the bottom of the lens. This will loosen the outer lens cover.
afterwards there are three tabs you have to push down towards the bottom of the tailight to pop them out of the lens.
To take apart the 3rd brake light, there are two tabs on the top and one on the bottom that you have to push.
It will seperate the peices into the two shown above.
So now is the nervewracking part. Taking sandpaper to your tailights! Yay!
I went with 600 grit wetsanding. This is THE MOST INPORTANT STEP IN GETTING A GOOD FINISH!
Wet sand until you get a dull finish, should look something like this...
Make sure you wash the lens off after sanding and let it dry...you will then be able to see what spots you missed, they will look shiny and smoooooth.
Now you need to shake the VHT for a minute or so to make sure its mixed nicely. Now I did multiple light coats to get the finish I want.
MAKE SURE TO BE CAREFUL ON THE SIDES! Since they are curved they will want to run.
After a few light coats:
After a few more...
And my final coats..
Since its in the shade (inside, was really windy) you cannot really see how transparent the lights are. However when you do it youself you'll see the finish as you apply it. Just go until you achive the finish you want.
Some poeple will want to apply a clear coat here, however I really liked the finish that the VHT gave, so I left it alone.
Wait a few hours for it to set up well ( I waited about 2 ) And then go ahead and re-assemble your lights.
After re-assembly, and installation this is my finished result:
And that night:
Sorry, know its blurry, but had to do it on the night setting.
MY OPIONION: During the day, a little hard to see the brake lights. However not as bad as I thought. At night. Looks bada**!!! And lights up very well.
Let me know if anyone has any questions or comments. :wave:
Maybe a sticky if anyone feels like it.
Also mucho kudos to KingCato since hes the one who gave me a ton of tips on this...


")