duff daddy
Legend
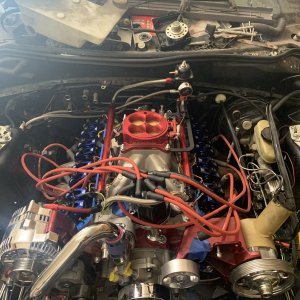
OK, so this is the 2v story. Basically the vehicle is a 96 GT with Pi swapped aftermarket heads and cams and have leaking valve seals ( poor fit of seal to valve due to incorrect valve seal size)
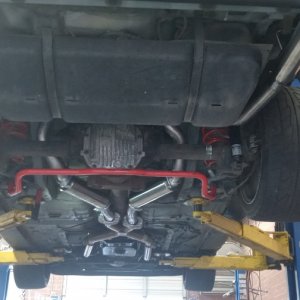
As i learned from all data,ford manual, and common sense, you can not change these seals while the heads are still on the motor, in the car. Cant be done(with the tool I had available) so we dropped the motor. I don't think I need to go over this in depth, but we dropped the motor and trans down with the K-member, suspension and front brakes w/calipers. We took the Exhaust off at the h pipe to the cat-back and then slipped the drive shaft out of the trans ****don't for get to make an index mark on the pinion flange and the d-shaft so it doesn't go out of phase*** Other then that just disconnect the normal electrical, coolant, power steering/hydro-boost, clutch, throttle, disconnect and as you lift the vehicle just make sure everything comes out smooth, no lines or harness that you forgot or anything.
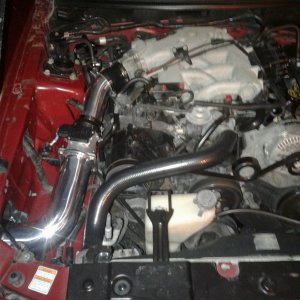
Once you have your engine out, your ready for the actual even of the repair. Start by removing the valve cover bolts. When you take them off put them in the specific order you took them out in, there are two on the passenger side which are on the bottom of the valve cover that are shorter. And on the top they have two bolts that have a stud extending for the spark plug wire clips/retainers. Once you have removed all the bolts slide the cover off the head. Remove and discard the old valve cover gasket. This is the perfect time if you have the availability to put them in the parts washer and get them looking spiffy.

With the valve cover off, depending on what side I start with the forward most cylinder. Bump the motor over until the piston is at the bottom of its compression stroke with both valves closed . This is a lot easier with a degree wheel to see what stroke the motor is on but, doable without. Put the Valve spring 2v compressor tool so the top straddles each side of the cam lobe and the bottom of it sits on the valve spring retainer of the valve you are working on.
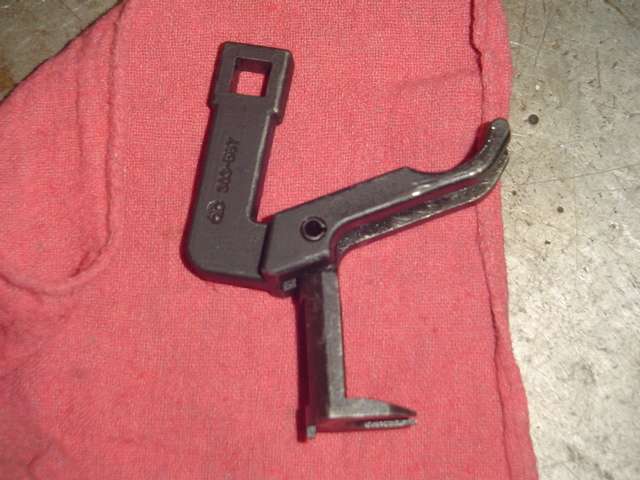
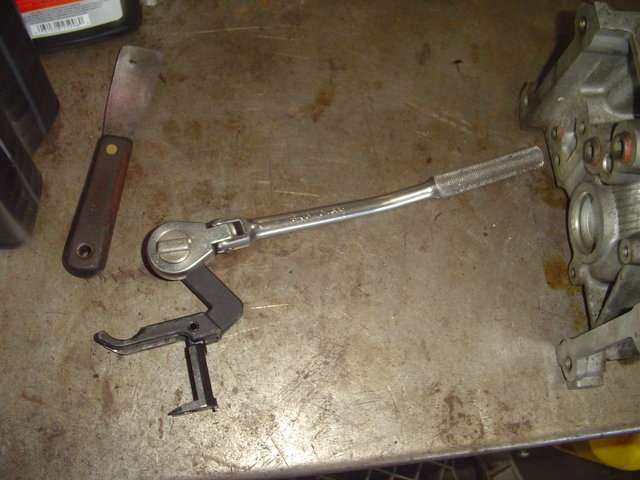

Slowly rotate the tool downward so the valve spring becomes compressed and the follower is lose enough to be slid out (lift up on the front top where it sits on the hydraulic lash adjuster and then move way from the side and slide out).


***this next picture will show you how the top of the tool will straddle the cam lobe and actually cradle the cam shaft

Pictured is the keepers (2) and the follower
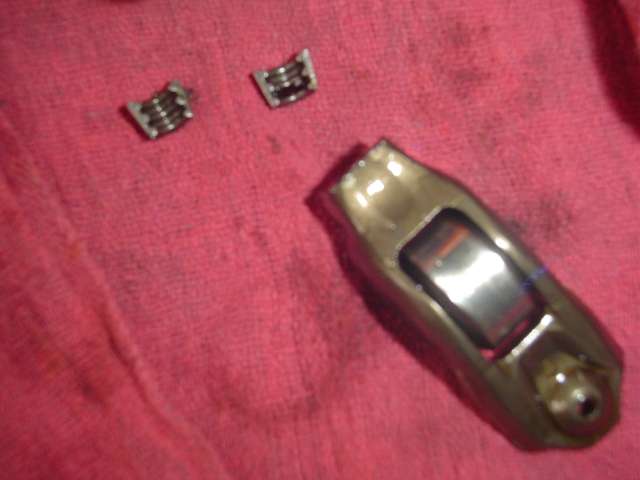
top of the hydraulic lash adjuster.
Now just repeat this process 14 more times and you will be good to go.
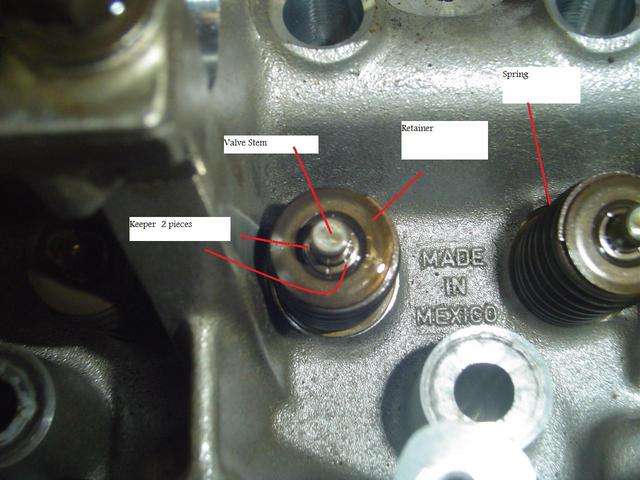
With this step done you need to now remove that particular spark plug, and insert the spark plug adapter. This tool is basically a fitting on the end that can be threaded in to the spark plug hole, with a piece of pipe in the middle and an air hose fitting so it can have shop air to pressurize the cylinder. Why this is important, when the spark plug is removed and no pressure in the cylinder the valve can drop once the valve spring keepers ( some people see them locks) are removed.

With an air hose connected to the adapter, the follower off its not time to remove the keeper. Use the 2v spring compressor tool again same as before, and compress the spring. With a magnet (long on a flexible line and with a retractable magnet works best, guide it in to access the keepers (2 pieces, they come off in halves. With those removed release the pressure on the valve spring and remove the tool, carefully slide the spring and retainer off the valve stem and put on the bench. Get a long pair of 90* needle nose pliers, and slowly, carefully, and firmly slide the valve stem from the guide. You will feel some resistance when sliding it up the stem as you come near where the keepers (or locks) are seated, that is normal, just wiggle it over and you'll be fine.

and this is what it looks like upside down so you know what it looks like top and bottom

That is ONE half of the procedure, now take some fresh engine oil put it on the bottom of the seal and slide back over the stem. With the new seal in place slide the spring and retainer back over the valve stem. Next your going to get your trusty 2v spring compressor tool, and compress the spring again. With it down as far enough the keeper groves on the valve stem are noticeable take a pair of angled needle nose pliers and grab the top of the keeper. Slide it on the stem and into place on the set of grooves. Once its there, rotate it to the lower side of the stem, then just do the same with the next one so it sits on the top half. This will take some time, its not easy but very doable. After this is set, you can get ready and do it for the next valve of that cylinder (intake or exhaust depending on how you started).
After you have completed the second valve of the cylinder, your now ready to reinstall the follower. Re-compress the spring and slide it in to place, be careful you do not over compress, you run the risk of the keeper(s) falling out of position. Slide the back half of the follower over the valve spring then just rotate it up and then on
As i learned from all data,ford manual, and common sense, you can not change these seals while the heads are still on the motor, in the car. Cant be done(with the tool I had available) so we dropped the motor. I don't think I need to go over this in depth, but we dropped the motor and trans down with the K-member, suspension and front brakes w/calipers. We took the Exhaust off at the h pipe to the cat-back and then slipped the drive shaft out of the trans ****don't for get to make an index mark on the pinion flange and the d-shaft so it doesn't go out of phase*** Other then that just disconnect the normal electrical, coolant, power steering/hydro-boost, clutch, throttle, disconnect and as you lift the vehicle just make sure everything comes out smooth, no lines or harness that you forgot or anything.
Once you have your engine out, your ready for the actual even of the repair. Start by removing the valve cover bolts. When you take them off put them in the specific order you took them out in, there are two on the passenger side which are on the bottom of the valve cover that are shorter. And on the top they have two bolts that have a stud extending for the spark plug wire clips/retainers. Once you have removed all the bolts slide the cover off the head. Remove and discard the old valve cover gasket. This is the perfect time if you have the availability to put them in the parts washer and get them looking spiffy.
With the valve cover off, depending on what side I start with the forward most cylinder. Bump the motor over until the piston is at the bottom of its compression stroke with both valves closed . This is a lot easier with a degree wheel to see what stroke the motor is on but, doable without. Put the Valve spring 2v compressor tool so the top straddles each side of the cam lobe and the bottom of it sits on the valve spring retainer of the valve you are working on.
Slowly rotate the tool downward so the valve spring becomes compressed and the follower is lose enough to be slid out (lift up on the front top where it sits on the hydraulic lash adjuster and then move way from the side and slide out).
***this next picture will show you how the top of the tool will straddle the cam lobe and actually cradle the cam shaft
Pictured is the keepers (2) and the follower
top of the hydraulic lash adjuster.
Now just repeat this process 14 more times and you will be good to go.
With this step done you need to now remove that particular spark plug, and insert the spark plug adapter. This tool is basically a fitting on the end that can be threaded in to the spark plug hole, with a piece of pipe in the middle and an air hose fitting so it can have shop air to pressurize the cylinder. Why this is important, when the spark plug is removed and no pressure in the cylinder the valve can drop once the valve spring keepers ( some people see them locks) are removed.
With an air hose connected to the adapter, the follower off its not time to remove the keeper. Use the 2v spring compressor tool again same as before, and compress the spring. With a magnet (long on a flexible line and with a retractable magnet works best, guide it in to access the keepers (2 pieces, they come off in halves. With those removed release the pressure on the valve spring and remove the tool, carefully slide the spring and retainer off the valve stem and put on the bench. Get a long pair of 90* needle nose pliers, and slowly, carefully, and firmly slide the valve stem from the guide. You will feel some resistance when sliding it up the stem as you come near where the keepers (or locks) are seated, that is normal, just wiggle it over and you'll be fine.
and this is what it looks like upside down so you know what it looks like top and bottom
That is ONE half of the procedure, now take some fresh engine oil put it on the bottom of the seal and slide back over the stem. With the new seal in place slide the spring and retainer back over the valve stem. Next your going to get your trusty 2v spring compressor tool, and compress the spring again. With it down as far enough the keeper groves on the valve stem are noticeable take a pair of angled needle nose pliers and grab the top of the keeper. Slide it on the stem and into place on the set of grooves. Once its there, rotate it to the lower side of the stem, then just do the same with the next one so it sits on the top half. This will take some time, its not easy but very doable. After this is set, you can get ready and do it for the next valve of that cylinder (intake or exhaust depending on how you started).
After you have completed the second valve of the cylinder, your now ready to reinstall the follower. Re-compress the spring and slide it in to place, be careful you do not over compress, you run the risk of the keeper(s) falling out of position. Slide the back half of the follower over the valve spring then just rotate it up and then on
")