Paul's Fox Body Restoration Build (Updated 11.29.14 - We Have Fuel Pressure)

Venom351R

Legend
Joined
Mar 8, 2008
Messages
5,236
Reaction score
262
Location
Maine
Re: Paul's '89 Notch Build - Updated 12/01

Paul said:
No, not really. It'll get done when it's done. I'm hoping it runs sometimes 1Q 2008. Paul.


Looks like your running a little behind :tongue3:
 
OP
OP
P

Paul

Legend
Joined
Apr 30, 2007
Messages
9,894
Reaction score
247
Re: Paul's '89 Notch Build - Updated 12/01

Oh, oops. I mean 1Q 2009.
 

Venom351R

Legend
Joined
Mar 8, 2008
Messages
5,236
Reaction score
262
Location
Maine
Re: Paul's '89 Notch Build - Updated 12/01

Thats what I figured.
 

1quk50

Active Member
Joined
May 11, 2008
Messages
344
Reaction score
0
Re: Paul's '89 Notch Build - Updated 12/01

so paul what color is the powder your using... i have my own powder coating set up and my black is more flat then that...
 
OP
OP
P

Paul

Legend
Joined
Apr 30, 2007
Messages
9,894
Reaction score
247
Re: Paul's '89 Notch Build - Updated 12/01

My oil pan and a few of the steel brackets are Matte Black from Columbia Coatings. I like it fine. Most of everything else is Gunmetal Gray.
 

Venom351R

Legend
Joined
Mar 8, 2008
Messages
5,236
Reaction score
262
Location
Maine
Re: Paul's '89 Notch Build - Updated 12/01

That gunmetal gray color kicks ass
 

Dairy King

Well-Known Member
Joined
Oct 10, 2007
Messages
1,487
Reaction score
0
Re: Paul's '89 Notch Build - Updated 12/01

Damn it Paul. Ive read this thread like 5 times and your gonna force me to buy something and build it.
 
OP
OP
P

Paul

Legend
Joined
Apr 30, 2007
Messages
9,894
Reaction score
247
Re: Paul's '89 Notch Build - Updated 12/01

I got my throttle body, EGR delete, fuel rails, and a couple other parts back from the anodizer. I had my friend add some awesome to them with his CNC machines. He's my personal CNC christ. I really wish I was a machinist instead of an auditor. :(

I picked up a spare A/C compressor case from a friend, and got it all blasted and ready to coat. I took my alternator apart and blasted the housing so I can coat it at the same time. For some reason, I can't find my stupid heater hard lines or I would've blasted them at the same time. They're around here somewhere.

Given the way the motor looks now - should I:
a) Have the A/C pump and alternator housing polished
b) Powdercoat them silver
c) Powdercoat them flat black

I'm not sure which way to go. I really like the flat black, but I'm afraid it might be too much - what do you guys think?

Anyway, here are the pics:
ThrottleBodywBolts1.jpg
ThrottleBodywBolts2.jpg

ThrottleBodywBolts.jpg
ACPumpBlasted.jpg
FuelRailsAnodized.jpg

FuelRailsAnodized2.jpg


More to come...

Paul.
 
OP
OP
P

Paul

Legend
Joined
Apr 30, 2007
Messages
9,894
Reaction score
247
Re: Paul's '89 Notch Build - Updated 12/01

I picked up a used tubular K-member and A-arms from a buddy of mine. He was parting a car out and I got 'em for only $250!

Well, as with anything used, sometimes you need to improvise a bit. The bushings were TRASHED and needed to be replaced. However, I have no idea who manufactured these a-arms, or how I would get a set of bushings without going through too much trouble. Thankfully, a good friend of mine is an engineer and CNC machinist. He's got a pair of CNC mills in his garage.

So I went to his place and asked him to make me some bushings. He grabbed some delrin (basically hard plastic) off the shelf that he had laying around, and started measuring things. Before you know it, he was cutting the a-arm bushings. Here's a picture and some video. Sorry for the quality - I took this video with my phone.

The bushings before the backs were machined off - they're square!
AArmBushingsMachined.jpg


...and the video of the CNC mill in action:


He even made me a set of delrin steering rack bushings while he was at it. Everything is flawless and fits perfectly. :)


Tonight, I decided to assemble the a-arms and k-member.

First, I cleaned up a spare set of nuts/bolts that I got from a buddy of mine. They looked pretty bad.
AArmBoltsBefore.jpg
]

...much better.
AArmBoltsAfter.jpg


Here's the sleeves and finished delrin bushings.
AArmsBushingsandSleeves.jpg


Here's the A-arms assembled. If you ever do this - DON'T FORGET THE GREASE!!! They'll squeak like crazy if you don't grease them. :)
AArmsAssembled.jpg

After some "convicing" (read: sledge hammer, pry bars, impact wrench) the A-arms agreed to seat themselves in their new home. It was no picnic getting them to fit, but they work like a champ now. :) I seriously doubt they are from the same manufacturer.

Here's my "negotiating tools":
ToolsofDestruction.jpg


And here's the assembled k-member!
SuspensionAssembled.jpg


So up next, I've got some powdercoating to do... I have a set of brand new SN95 spindles to coat. I plan to assemble an entire new front suspension off the car, and just swap pretty much the whole thing for the stocker. I'll have all new urethane and delrin bushings, bumpteer-adjustable outer tie rod ends, SN95 brakes, coil-overs, flaming river steering shaft - the works! It should make the car handle MUCH better. It was positively scary before. Seriously.

I also need to finish up some stuff on the motor. I'll post pics of my progress as it moves along.

More to come...

Paul.
 
OP
OP
P

Paul

Legend
Joined
Apr 30, 2007
Messages
9,894
Reaction score
247
Re: Paul's '89 Notch Build - Updated 12/01

I got my valve covers all sanded down smooth, and coated them gunmetal gray to match the aluminum accessory brackets. I'm happy with how they turned out. It only took about three hours to sand them down nice and smooth. I think they look great for stock valve covers. :)
ValveCoversSanded1.jpg
ValveCoversSanded2.jpg

ValveCoversCoated.jpg
DriverValveCover.jpg

PassengerValveCover.jpg


I also got the A/C compressor case and the alternator case coated matte black. For some reason the A/C case is a little bit shinier than the rest of the stuff, kind of a sheen black or semi-gloss, but it still looks nice and I'm happy with it. My friend is going to show me how to rebuild it and put all new seals and such in it. I also need to get a 15/16" socket cut down on a lathe so it will fit in my tiny overdrive alternator pulley so I can tighten down the nut. I think I might powdercoat the nut matte black too. We'll see. Anyway, here's what we're up to so far...
ACCompressorPowdered.jpg
ACCompressorTop.jpg


Paul.
 

duh09

Legend
SN95 Supporter
Joined
Apr 23, 2008
Messages
9,562
Reaction score
617
Location
Memphis-ish
Re: Paul's '89 Notch Build - Updated 12/01

I say have the stuff polished or powdercoated silver.

I think the black might be a little much. and I'm leaning towards silver BTW.
 
OP
OP
P

Paul

Legend
Joined
Apr 30, 2007
Messages
9,894
Reaction score
247
Re: Paul's '89 Notch Build - Updated 12/01

Made some progress!!!

Today was part I of the transmission rebuild. As you guys saw earlier in the thread, I powdercoated a spare transmission case and I'm swapping all the "guts" from the old tranny into the coated one. Good news, the tranny in my car is actually a T5-Z, which has slightly different front and rear bearings on the mainshaft and countershaft, and supposedly a slightly higher torque holding capacity. Even better, EVERYTHING was in great shape!!! No broken teeth. No worn syncros. It was fantastic!! :)

I had my friend with me who has rebuilt several T5s, so he just told me what to do while I pulled it apart. It's actually much easier than I thought it would be.

Anyway, on with the build!

First, here's the tranny as it came out of the car:
T5BeforeRebuild.jpg


First, I pulled the shifter:
T5RemoveShifter.jpg


Then after some fiddling with the shifter block thingy and the shaft, you can pull the tailshaft housing:
T5PullTailshaft.jpg


Then it looks like this. You can see fifth gear outside the back of the main case.
T5withoutTailshaft.jpg


Here's what it looks like when you pull the top cover off. It sort of moves "sideways" and then pops off. This looks pretty intimidating, but it's actually very simple. I was very suprised.
T5CaseOpen.jpg


After you pull the main bearing retainer, the input shaft, and fiddle with some stuff, the entire mainshaft comes out as one big piece. Pretty amazing.
T5Mainshaft.jpg


Here's a (blurry) picture of the countershaft sitting in the main case:
T5Countershaft.jpg


Once you've pulled the 5th gear cluster off the countershaft, you can see the OEM countershaft retainer. I'm replacing this thing with a billet unit I bought online. Apparently the OEM one can deflect under heavy loads, and the billet one will reduce this and supposedly increases torque holding capacity a bit more too.
T5CountershaftRetainer.jpg


This is the new case. We were transferring all the drain plugs, sending units, and linkages to the new case here.
T5NewMainCase.jpg


Here's the new countershaft retainer. I put red loctite on those bolts because it would be BAD if they backed out.
T5NewRetainer.jpg


Then there's a tricky part. There's these tiny little metal tab thingys that you have to install back on the fifth gear cluter. They have to be lined up correctly with the syncro ring and stay seated when you put the rear slider into place it it won't work. We used little globs of grease to hold them in place.
T5TinyPiece.jpg


...and onto the fifth gear cluster. The gold ring is the syncro. (also called a blocker ring)
T5FifthGear.jpg


This is what it looks like with 5th gear looks like when it's done.
T5FifthGearBack.jpg
T5FifthGearSide.jpg


So this is where we're at with the new main case and all the big hard parts installed:
T5NewMainCaseOpen.jpg


Then you reassemble the shift fork linkage, put a bead of RTV on the top cover plate, install the shift forks on the sliders, then slide the top plate into place and bolt it down.
T5TopPlateBoltedDown.jpg


After that, a quick bead of RTV around the tailshaft housing. Make sure to go around all the bolt holes. (Hopefully this doesn't leak!!)
T5InsideTailshaftHousing.jpg


Then carefully slide the tailshaft housing into place so as not to jar the rear bearing race loose - they need to fit together. Bolt it down using Red Loc-tite.
T5TailshaftInstalled.jpg
 
OP
OP
P

Paul

Legend
Joined
Apr 30, 2007
Messages
9,894
Reaction score
247
Re: Paul's '89 Notch Build - Updated 12/01

Here's the shifter plate thing with the steel ball on it. The shifter block goes in next. It's a bit tricky to get it in.
T5ShifterPlate.jpg


...and the shifter block installed. You drive the roll pin into place when you're done.
T5ShifterBlockInstalled.jpg


That's pretty much it! I just installed the shifter (loosely since I still have to fill the trans) and all the various electrical connections. I'm done!

T5CompletedRearQuarter.jpg
T5CompletedSideCase.jpg

T5CompletedShifterHousing.jpg


BEFORE:

T5BeforeRebuild.jpg


AFTER:

T5CompletedSide.jpg


Yay! One more small part of the project is done!!


The blazing summer heat here in Phoenix has made it hard to get motivated to do work on the car, but I did manage to make a little progress today...

I had a set of NOS (New Old Stock) 94-95 Mustang spindles that I bought from the Bondurant School when they fire saled a bunch of their Mustang stuff after switching to Corvettes and Cadillacs.
NewOldStockSpindles.jpg


I ordered some new hubs, locknuts, and dustcaps from RockAuto so all I need to do is assemble everything. I'm going to knock out the stock wheel studs and press in some Moroso studs just because I like long wheel studs better and I think they look neato. :)

I powdercoated the spindles gunmetal gray, and the dustcaps flat black.
Spindles.jpg

SpindlesandHubs.jpg


I also managed to find a stock clutch fork cover. Most folks chuck these the first time they come off, so I was excited to actually come across one. I powdercoated it flat black too. This will help with my "sanitary" theme that I doing with this build.
ClutchForkCover.jpg


I also got a couple of small parts done. I flat black coated the distributor hold down and the heater hard lines. I also did my distributor housing, but it didn't get reassembled today. My friend was working on it while I was coating, and he thinks the gear might be messed up. I'll look at it more over the holiday weekend. I hope I can figure something out because I don't really want to buy another distributor.

Anyway, that's all for now. Hopefully this weekend I'll finally get the upper intake done. It looks like some of the valve cover holes need to be heli-coiled as well so there's a bunch of "little stuff" left to do.

Paul.
 
OP
OP
P

Paul

Legend
Joined
Apr 30, 2007
Messages
9,894
Reaction score
247
Re: Paul's '89 Notch Build - Updated 12/01

So this weekend should be a good one for the notch. I will be completing...

[size=20pt]THE SUPER NOTCH EL-CHEAPO FRONT SUSPENSION SWAP!!!

So because I don't have tons of money and I'm somewhat of a cheap bastard when it comes to this build, I've been trying to assemble the nicest front suspension I can without breaking the bank. Since this build has been going since November of '07, I've had some time to scour the internet for good deals on parts. The front suspension on this car was literally SCARY when I bought it. There was so much slop in the front end that the car switched lanes on me once and scared the **** outta me. It was then I decided that not one part would remain. Everything will basically be thrown in the trash and new stuff put on.

Thus far, here's what I've got:

Maximum Motorsports Caster Camber Plates - New - got 'em for $80
CasterCamberPlates.jpg


Mystery coil-overs with mystery springs - Used - got 'em from a friend. Haven't given him any money yet, he hasn't told me what he wants. These will work until I can afford some Maximum Motorsports coilovers with probably Bilsteins.
CoilOvers.jpg


Steeda Bumpsteer-Adjustable Outer Tie Rod Ends - Basically New - got 'em for $70 shipped on the Corral
OuterTieRodEnds.jpg


Stock Fox Steering Rack - Used - Free! A buddy gave it to me. :)
SteeringRack.jpg


Delrin Steering Rack Bushings - New - Free! My friend made them for me on his CNC machine. :)
SteeringRackBushings.jpg


Flaming River Steering Shaft - Used - Got it for $60 shipped. It was all surface rusted and looked terrible which is why I got it so cheap. Luckily, I have a blast cabinet so it's good as new!
SteeringShaft.jpg


PA Performance Tubular K-Member and Mystery A-Arms - Used - $250. That includes the Delrin A-arms bushings that my friend made for me for free.
KMemberAssembled.jpg


OEM Ford NOS (New Old Stock) 1994-1995 Spindles - New - Picked these up for $80 from the Bondurant School here in Phoenix when they sold all their Ford stuff.
NewOldStockSpindles.jpg


Moroso Wheels Studs - New - Got them from a place local to here for about $20
WheelsStuds.jpg


Timken Hubs - New - Got 'em for about $100 from Rock Auto if I remember right.
Hubs.jpg


I'm going to re-use the struts that are on the car for now - they work fine. I think they're Tokico blues... Don't remember. This should allow me to get the car on the road and drive it and enjoy it a bit. Once everything is sorted out, I fully intend to both road race and drag race the **** outta this car. I've got some stock '94 brakes I could rebuild and put on this, but if I find a really great deal on Cobra brakes I'll go that way.

So I've assembled all this stuff for less than $700!! :)

Paul.
 
OP
OP
P

Paul

Legend
Joined
Apr 30, 2007
Messages
9,894
Reaction score
247
Re: Paul's '89 Notch Build - Updated 12/01

More progress on the suspension build!!! As with all my projects, this didn't go as smoothly as I had hoped.

I bought a the tubular K-member and A-arms from a friend. At first I thought it was the bushing's fault the steering rack wouldn't fit, but upon further inspection and purchasing every rack bushing known to man it was discovered that the posts for the rack are actually located improperly. Basically, they are welded about 1/8" too far apart, and the dowels are pointed "inward" so the rack will 'start' just fine, but becomes difficult to seat against the k-member. The bushings were "modified" to make it work. (read: large rat-tail file)

Also, after measuring and comparison to the stock front end, I found out the a-arms were for a SN95, so they were too wide. I bought a new set of Fox arms with SN95 balljoints from PA Racing. $300 and two weeks later they were at my house.

Finally, the steering rack I got for free ended up having a small leak. While I could use it or try to identify and repair the leak, I just don't want to chance it. I was going to re-use the rack that was on there, but it turns out there is a LOT of play in the inner tie rods. That probably explains the scary steering. So I needed a new rack too. Dang!

Ah well, that's what happens when you build cars I guess.

Here's the stock heavy front suspension stuffs:
EmptyEngineBay.jpg


It had a budget Lincoln 5-lug swap and stopped reasonably well, but I hate fox suspension stuff.
NotchBrakes.jpg


So for the millionth time the car went up in the air for work...
NotchNoseinAir.jpg


...and out came the stock stuff. Man I hate stock K-members.
StockKmemberonGround.jpg


My friend has a press at his house and made a nifty little tool out of block of aluminum to expedite pressing in the new studs. He also pressed off the ABS ring since obviously the notch will never have ABS.
SpindleDisassembled.jpg


I finally got to use my giant spindle nut impact socket that I've owned for five or six years. It's a 36mm monster.
SpindleAssembled.jpg


Sadly, the dustcaps I ordered from RockAuto and subsequently powdercoated are the wrong size. :(
DustcapNotFit.jpg


After a trip to the hardware store for a few assorted fasteners, the suspension was assembled.
SuspensionAssembled.jpg

SuspensionLeft.jpg

SuspensionRight.jpg


According to my bathroom scale, the entire front suspension (without brakes) weighs only 125 pounds. And voila! Installed!!
CasterCamberPlate.jpg

SuspensionInstalled.jpg

PassengerSideSuspension.jpg


I still need to remove the caster/camber plates again and paint underneath them. I don't know why the struts tops weren't removed when the car was painted. Plus the firewall is black, not the color of the car, and the core support is white. It's weird. I need to set ride height, get the alignment close enough to drive it to the alignment shop, set bumpsteer, and install all of my brake stuff. Then the engine goes in!

Paul.
 

BruhBrahBrad

Well-Known Member
Joined
Jul 29, 2008
Messages
3,789
Reaction score
11
Re: Paul's '89 Notch Build - Updated 12/01

damn this thread is nice
 

ram360

Well-Known Member
Joined
Jul 21, 2008
Messages
1,773
Reaction score
21
Re: Paul's '89 Notch Build - Updated 12/01

nice work, looks awesome...I need to get out and turn some wrenches on my fox.
 
OP
OP
P

Paul

Legend
Joined
Apr 30, 2007
Messages
9,894
Reaction score
247
Re: Paul's '89 Notch Build - Updated 01/19/09

I've been doing a bunch of work to the interior lately. I'm going to replace the old beat up porno red interior with black. First things first, I needed to get the old interior out... and so it began.

Here's the old center cluster from when I bought the car.
Center%20Cluster.JPG


A local stereo guy volunteered to come remove all the "mystery wires" from under the dash since I suck at electrical. This is what he pulled out. None of it did anything.
Removed%20Wiring.JPG


This last weekend I started tearing the interior out wholesale.
Interior%20Removal%201.JPG

Interior%20Removal%202.JPG

Interior%20Removal%203.JPG

Interior%20Removal%204.JPG

Interior%20Removal%205.JPG

Interior%20Removal%206.JPG

Interior%20Removal%207.JPG

Interior%20Removal%208.JPG

Interior%20Removal%209.JPG

Interior%20Removal%2010.JPG

Interior%20Removal%2011.JPG

Interior%20Removal%2012.JPG

Interior%20Removal%2013.JPG

Interior%20Removal%2014.JPG

Interior%20Removal%2016.JPG


I had to get the steering wheel off, but once you get the cruise switches and trim off, it's just one bolt.
Steering%20Wheel%20Removal.JPG


Then a few quick turns of the steering wheel puller and it pops right off.
Steering%20Wheel%20Removal%202.JPG


The cruise control switches and clockspring thingy were set aside for another project that I'll show you guys later. It will be pretty cool and you guys will like it. :grin:
Clockspring%20and%20Cruise.JPG


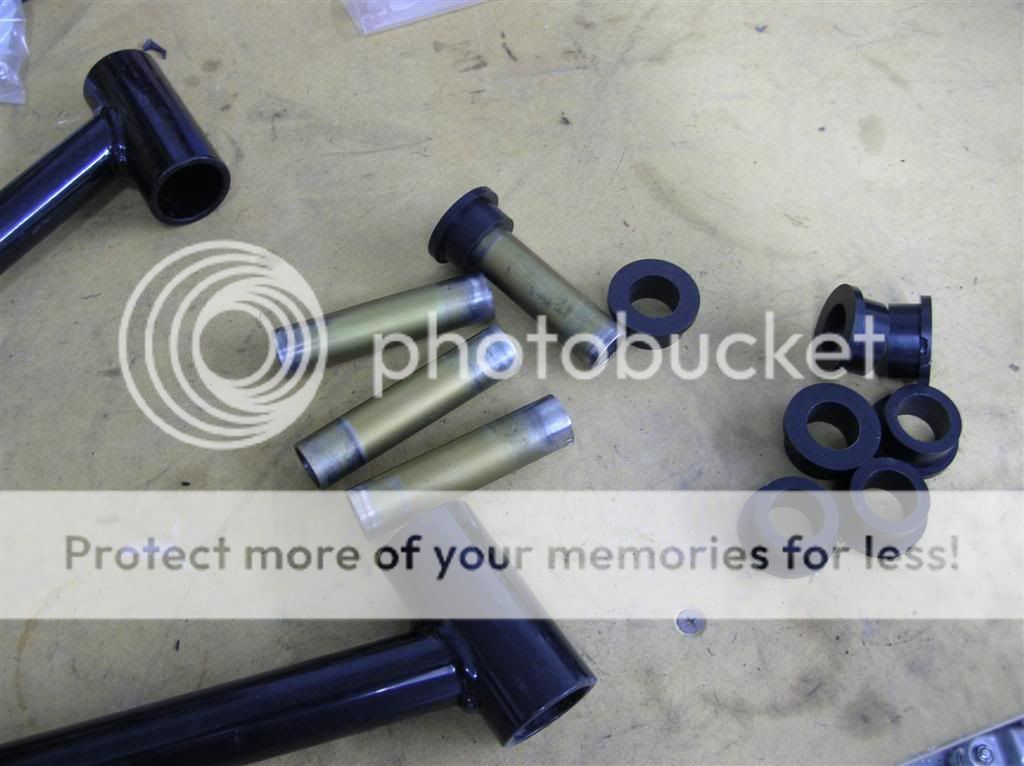
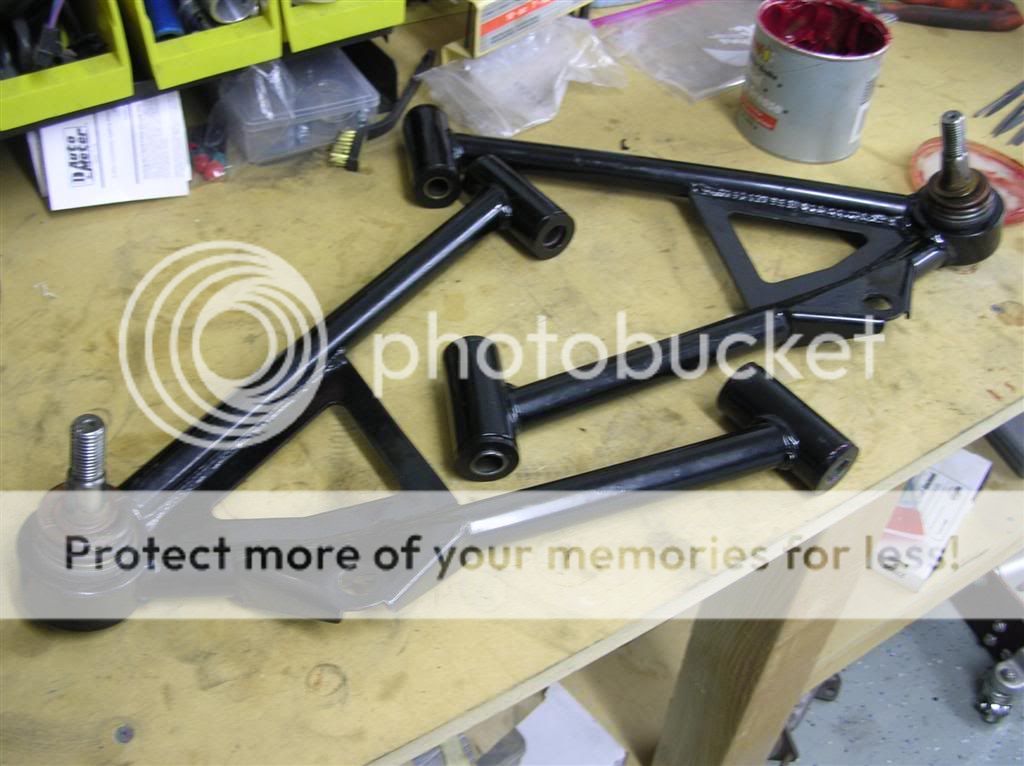
Another friend of mine gave me a good working '87-'89 tilt column too. The tilt mechanism in my old one was screwed up, and it would "tilt" without pulling the tilt lever. It was annoying at best, and dangerous at worst. Another buddy actually gave me a '90-'93 non-tilt airbag column too, but since I was able to source a tilt column I didn't use it. I gave it away to another friend of mine. The one on the left is non-tilt from 90-93, and the two on the right are 87-89 non-airbag tilt columns.
Steering%20Columns.JPG


After quite a bit of work, I got the old column and dash completely out of the car.
Dash%20Removed.JPG


I figured I would replace the heater core while I was at it since I was this far into it anyway. When I dropped the A/C box down to access the heater core, I found this giant crack in the box. A friend of mine works at a Ford dealership, and showed it to one of their techs. Apparently if the dealer needs to replace the A/C condenser, they just slice the top of the box open, pull out the old condenser, stick a new one in, and glue it back up. Well you can see how well it held up. :BangHead:
AC%20Box%20Cracked.JPG


I hate half-assed jobs, so I decided to completely remove the entire A/C box and rebuild it... Out came the box.
AC%20Box%20Removed.JPG


A friend of mine is really knowledgable about this stuff, so he offered to come over and show me what's involved. Another friend of mine gave me a complete spare A/C box out of another '89, which we used for parts. We took the whole box apart.

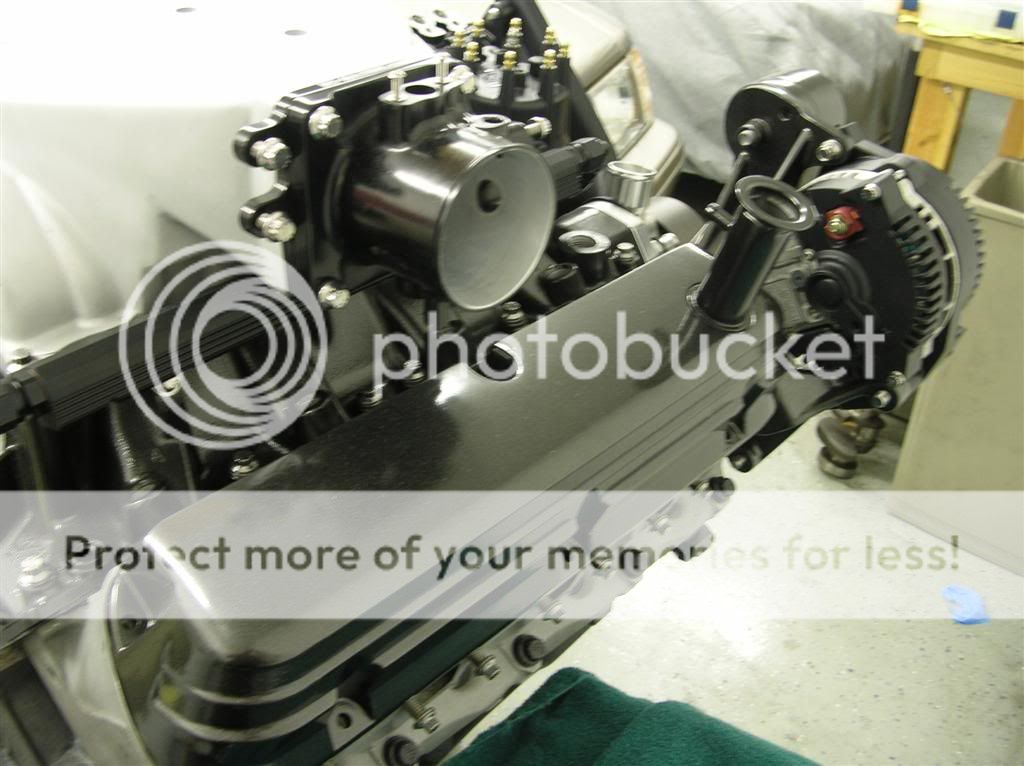
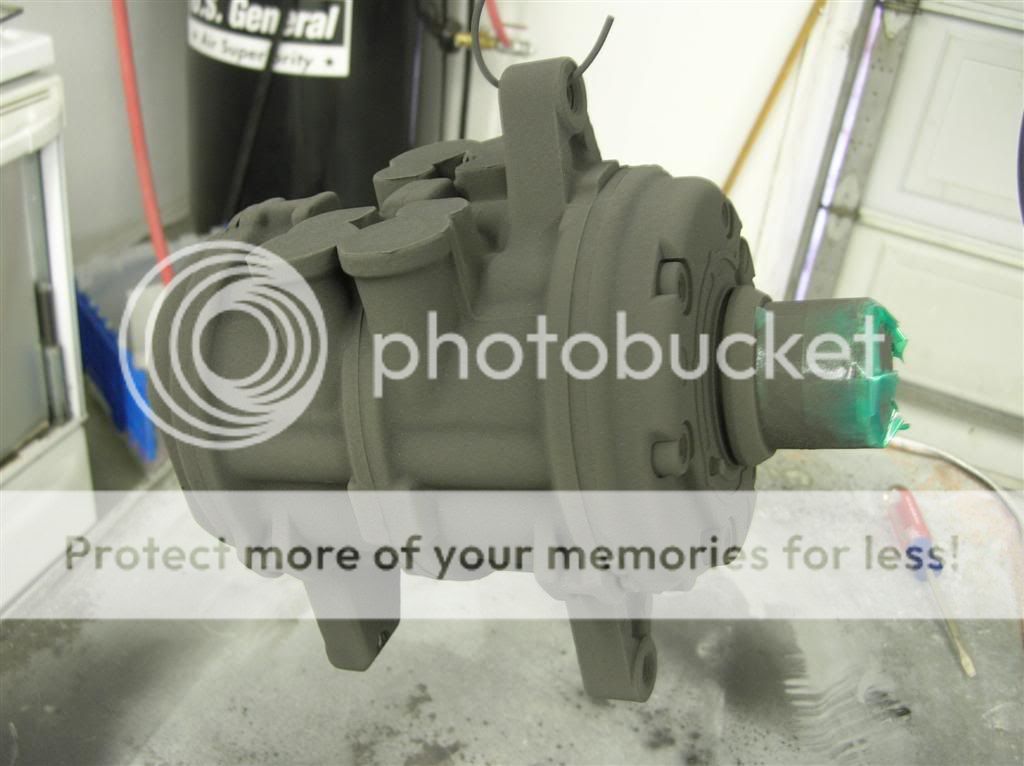
This is the blower motor:
AC%20Rebuild%201.JPG


In the foreground of this picture you can see the condenser core. We cleaned it all out and tested for leaks. There was a ton of leaves and gunk in it. Gross.
AC%20Rebuild%202.JPG


Here you can see my friend Richard putting silicone on top of box where the lid for the heater core goes. You'll also notice the new box doesn't have a giant crack in it. :tongue3:
AC%20Rebuild%203.JPG


ABS cement was used to fuse the various parts of the box back together. You can see some vicegrips holding the parts together while the cement bonded. We also put screws in a couple places where it didn't quite go back together perfectly.
AC%20Rebuild%204.JPG


The new heater core was dropped into place, and he's about to put the lid back on.
AC%20Rebuild%205.JPG


And tah dah! One brand-new-20-year-old A/C box. :tongue3:
AC%20Box%20Finished%201.JPG

AC%20Box%20Finished%202.JPG

AC%20Box%20Finished%203.JPG


I actually had an original (and very hard to find) black dash that my friend Rob gave to me. Unfortunately, I can't use it because it's for a 90-93 car. They have a slightly different fuse box setup and other small differences. Here's a pic of my red and black dashes.
DSCN2042.JPG


Luckily I also had an old grey dash that has been sitting in my side yard in the sun for 1.5 years. Amazingly, it cleaned up pretty well with some soap and water, and a bit of scrubbing. This dash was prepped and painted black later that day.
Grey%20Dash.JPG


I disassembled all the A/C vents, cleaned, and painted them.
Painting%20Vents.JPG

Painting%20Vents%202.JPG

Painting%20Vents%203.JPG

Painting%20Vents%204.JPG


I actually reinstalled the A/C box and new black dash last Saturday, but for some reason I didn't take any pictures. I think it was because it was late, I was tired, and probably grumpy. I'll get some pics up soon hopefully.

More to come...

Paul.
 

Latest posts

Forum statistics

Threads
77,542
Messages
1,504,621
Members
15,005
Latest member
Canaryonvskf’s

Members online

Top