Dusstbuster
New Member
- Joined
- May 4, 2007
- Messages
- 28
- Reaction score
- 0
I just realized that none of the links transfered over when you copied it DTP, several of the words should be linked to a corresponding picture.
Here is the original "source code"
Before I even start I must give credit where credit is due. First, the install would have been much more time consuming and a PITA if Chris (MisterCMK) hadn't come over and helped/done a large portion of the teardown on the car. He also lended tons of help during the cam swap as well as the additional ford nut brainpower. Also, though he probably won't read this I want to also thank my dad especially...I definitely wouldn't have even attempted this had he not helped me, coolest guy ever.period. Next, much of what I learned/tried was because of what I read from (dodularmepot)Modular Depot’s writeup, Casper98GT’s writeup on Moddedmustangs, as well as Hotmustang’s. Anything I might not have covered can probably be found in either of those. It is important to note that Hotmustang’s guide is more similar to mine in the sense that we both left our front timing covers on the engine, whereas the Modular Depot writeup involves taking the timing chain cover off the engine. Depending on how much of an issue time is for you, decide which writeup will best suit your needs.
Also here are some other important sites…(These don't work since whoever runs Stangnet hates modular depot so replace the ****** in the URL with "mo du lar de pot" with no spaces or quotation marks...SN95Forums EDIT: The links should work now unless SN95forums blocks ModularDepots website too :dunno:
Cam Torque Specs
Intake Manifold Torque Specs
Spark Plug Torque Specs
Valve Cover Torque Specs
Now with all that being said, here is what I’m considering my attempt at a HOW TO install guide for all the NPI guys who want to do a PI Cam/Manifold swap but still plan on using their NPI heads due to future plans of boost or for labor/time/money reasons. Now on to parts, I dealt with the local dealership quite a bit since time was an issue, if it hadn't been an issue I would have done all my dealings with Steve @ Tousley Ford in Minnesota. Steve is by far the coolest person and was AWESOME to deal with, much thanks to him and I'd recommend him to anyone who needs OEM ford parts at a HUGELY DISCOUNTED price compared to a regular dealership (he had a normally $6.85 or so bolt for $2.98) You can find a link to contact Steve below. If you don't use Tousley to get your parts, you HAVE to talk to Randy on these boards, he'll hook you up with discounted parts as well (Plus he knows what he's talking about, unlike many dealership employees it seems). Either way…let me start off with a list of things you’ll need:
-A helper or 2
-Haynes/Chilton manual
-Locktite
-New Oil & Filter($30)
-New Coolant
-Spark Plugs($44) (optional but a great time to do them) including anti seize lube for both the plugs and the boots
-Penetrating Oil…THIS WILL BE YOUR BEST FRIEND
-New Thermostat, also a great time to get either a replacement 192degree thermostat or put in a cooler 180 degree stat, include o-ring
-Engine Assembly Lube for the cams
-Line Lock removal tools for the gas lines…if they are too small you can ghetto rig some hard pvc piping or something in a sort of circular shape that will fit into the lines in your engine bay
-Various wrenches/sockets
-NPI intake manifold gaskets ($20)
-Plastic bags & permanent marker
-New heater hose/adapter as well as PI cam gear bolt ($85), the NPI cam gear bolt will NOT fit into the PI cam (Ordered from Touley Ford in Minnesota, refer to thread in svtperformance.com)
Refer to this picture for everything we used (not shown were vice grips, c clamp, and all 3 colors of RTV gasket material)
Total for me on this was around $200…it adds up fast!!
A day before you even start the install I’d recommend you give all the various intake manifold bolts and such a good dose of penetrating oil and let that soak overnight. Snapped bolts are a PITA to deal with, believe me. If you do happen to snap a bolt, DO NOT use a torch or any heating method to try remove it, heating aluminum will just make it grab the bolt tighter.
Now with that being said…The first thing is to pull the fuel pump fuse in the engine compartment, then turn the car on until it dies. Try to start it once or twice more really quick just to be sure all the fuel is purged from the lines. Then disconnect your batteries positive and negative terminals and reinsert the fuel pump fuse.
Next thing to do is jack the car up so the drivers side is slightly higher than the passenger side, then crawl under and open up the petcock on the radiator to drain out coolant. After the coolant has sufficiently drained, close the petcock, lower the car back down, then jack it up in the center again and drain the oil. After the oil has drained, re-lower the car.
…BEFORE YOU START THE NEXT STEP, TAKE A BUNCH OF PICTURES OF YOUR ENGINE BAY TO REFER BACK TO FOR REASSEMBLY…
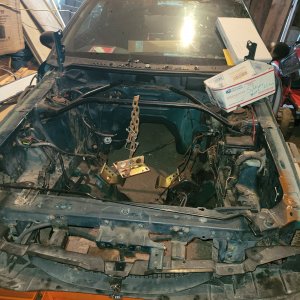
Next, start by removing the strut tower brace, intake piping and assorted vacuum lines and other misc. hoses/lines on the upper intake manifold and plenum region. After all the tubes and pipes are removed and out of the way, unbolt the plenum and set it aside. What started out looking something like this should end up looking like this. It is important to note that when removing bolts from various places you should either place all the bolts in labeled plastic bags or else replace them in the exact hole they were pulled from if possible. After all that is done use your fuel line disconnect tools to disconnect the fuel lines. They are close to the firewall on the passenger side of the engine bay, pictured here. That picture also shows a very bad yellow drawing of what the tool looks like and the direction it should face to remove the fuel lines. You push in with the disconnect tool and while pushing in pull the other part of the line away from the tool. Our tools were too small for some reason, the largest tool only got the smallest fuel line disconnected, my dad then used some black tubing that he cut a slit in and used that to disconnect the larger fuel line. Make sure when doing this that you have a rag underneath as fuel will still drip out. If you are unsure as to whether or not there is still pressure in the fuel system, use a small screw driver and a rag on this bleeder screw to ease your mind that there is no pressure left in the system, just push down a little while covering with a rag and if gas doesn’t spray out you’re good to go. After that is disconnected, disconnect all the radiator hoses leading to the thermostat housing as well as the coolant hose in the rear passenger side of the manifold near the fuel lines. At this point every line/hose/tube should be disconnected from the manifold and alls that remains is removing the manifold bolts and pulling the manifold off. The EGR line doesn’t have much give so just work around it to get the manifold out, we did it just by pulling forward on the manifold and then lifting it out once it had decent clearance under the EGR tube. Now you should have an engine bay that looks like this. Put rags/paper towels in the Intake Ports so nothing drops down those. Now is also a good time to clean out your spark plug wells. If you have an air compressor then use that to spray the hell out of the holes, I also had a shop vac running right next to the holes so some of the crap that flew out got caught by that, but tons more still went all over the engine/in my eyes/etc. After the plug wells are cleaned out decently then use a razor blade and or a rag with detergent of some sort to clean up the area, as it will more than likely be very dirty.
Next you have the valve covers. Unfortunatly my dad pulled the covers off while I was at work so I wasn’t able to get any pictures of that nor was I there to experience it but I will tell you what I read in Hotmustangs guide. First off, it’s going to be a tight fit…What you want to do is make sure everything around the covers is pretty clean because you don’t want anything falling down into the head and possibly into the oil galleys leading down to the pan/crank. Crack all the bolts and then if possible remove as many of the rubber spacers from them as well so they won’t fall down into the head. Try your hardest to keep the valve cover gasket in tact as it can be reused, I unfortunately didn’t pass that word on to my dad and he kinda demolished them…the local dealership charged me around $40 for new gaskets…rape. Once the covers are off one of the first things you should probably do is stick rags/paper towels down into the 3 galley holes in each head to prevent any stray materials from falling down into them. Tampons would probably work too . Now is also a good time to change your plugs, I torqued mine down to 11 ft/lbs.
Now comes the fun part. Get out an 18mm socket and a ½†drive ratchet and start turning the crankshaft until you find TDC (NOTE: Car has to be in neutral to spin the crankshaft). There are markings on the timing cover and a notch in the rear of the crank pulley that will line up when you are on TDC, it looks like this. Just to double check, pull the plug out of cylinder #1 (Cylinder #1 is on the passenger side bank of cylinders closest to the front of your car) and get something long and skinny to fit down the plug hole and check. Once you’re sure you’re TDC mark a line on the chain/gear so you can be sure they match up, and it is also a good idea to use a straight edge to mark a line parallel to the head, just for another reference to see that you’re TDC, it’ll look something like this. Now you can get out your vice grips and/or c clamps out and fasten them good and tight like this. Make sure if you use a vice grip that it’s not applying pressure to the chain itself but just the gear. If you put too much pressure on the chain you can damage it and or weaken it which could eventually lead to a break or a jump and in turn destroy your engine. Before going on to the changing of the cams, make sure your new cams are lubed up well with the engine assembly lube. All the lobes and and contact points need to be lubed up well, but I just did the whole cam to be safe. It is also a good idea to make sure you have the correct cam. You should be able to see the notch on the cam in your car that the gear slides in to, put your new cam with the notch facing the same direction and spot check the lobes just to make sure they’re all pointing in the same direction.
Now take a socket and a hammer and put that on the cam gear bolt. If you try to just turn the bolt it will just turn the engine so you’re going to want to tap the wrench with the hammer in order to loosen the bolt. After it has been loosened, remove the bolt and set it somewhere, you can’t reuse it being as it won’t fit into the new cam. Next loosen all the bolts on the rear cam guide, but don’t full unbolt them. After they are loosened you can start on the front guide. Once you start loosening the bolts on the front guide you’ll want your helper to start applying light upward pressure on the gear just to be safe. After they are all loosened, take a hammer wrapped in a cloth and lightly tap the gear off the cam as far as you can, it might not go all the way, when you do this BE CAREFUL as there is a spacer between the gear and the cam, do NOT let that fall down into the engine. Some guides tell you to apply upward pressure with the clamps/grips, the way I did it was I used the grips as a failsafe. I actually grabbed the gear by hand and held two fingers in the hole where the cam sat to apply pressure up, and had the clamps there just in case I sneezed or something so the gear wouldn’t fall or loosen slack on the chain. Then when you have tapped the gear out as far as you can, remove all the bolts from the cam guides and remove the guides. Set the guides to the side and pick the cam up out from the holder, it should just pop right out. We ran into a problem of when we tapped the gear off the cam, the cam sorta slid forward and got a lobe semi-lodged into a cam guide, if something like that happens just rebolt down the rear cam guide and after it’s bolted down far enough the cam should just pop up, then re-remove the guide and the cam should just pop right out. Put the new cam in and line up the notch on the cam with the notch on the gear, then turn the cam about 1degree counterclockwise and set it in. The reason for that is as you tighten the caps up it will spin clockwise somewhat. Now that the cam is seated into the holders take the front cam camp and tighten only the 4 frontmost bolts closest to the gear. After they are tightened down fairly snugly, the gear still probably won’t fit onto the cam. Take a screwdriver and a hammer and use them to both pry the gear up and tap it into the cam. Here is where we pried up with a standard screwdriver. After the cam gear is back on the cam, tap it in lightly the rest of the way until it is fully seated on the cam. Check to make sure you didn’t knock any rockers off, if you did just set them back on. You can then torque down the cam caps according to the torque spec and sequence listed above (89inch/lbs). Once all the bolts are fairly snugged down the helper can stop applying pressure on the gear. After both caps are torqued down to spec, you can put in the new cam gear bolt and torque that down as well. Repeat the process for the 2nd cam. As of the writing of this guide I haven’t used the Anderson Ford Motorsports tool, but we will be using that today on the 2nd cam and I will update as to how to use that when we finish the 2nd cam. After you finish swapping out both cams, spin the crankshaft at least two times. If you hear any odd noises or it won’t let you spin it all the way, your timing is off and you have valve to piston contact. If that happens you will have to figure out what went wrong and re-seat the cam so your timing is correct. (NOTE: once again, car has to be in neutral to spin the crankshaft). If you can spin it freely all the way around several times, you should be good to go. Clean out your valve covers, dab a small amount of black RTV in the gasket valley of the cover and then put the gasket in and let that cure for maybe 30 minutes to an hour. Make sure all the surfaces that will have a gasket on them are free from contaminents and also make sure you don’t have a bunch of dirt and crud sitting in your heads as that will get picked up by the oil. Don’t quote me on this but I’m sure if there are a few small small small little things in there that it shouldn’t damage your car and will just get picked up in the filter, like I said though, don’t quote me on that. Now is also a good time to again double check that you didn’t bump any rockers off their seats as you did the swap, also remove the paper towels from the oil feed galleys. If all is good, put the valve covers back on and torque them down to spec.
Now is a good time to change out your heater tubing, there are two or three bolts at the rear of the engine that need to be unbolted to allow the old tubing to come off. Then install the new tubing/fitting and rebolt it back up. Then vacuum up the engine one last time and remove the paper towels/rags from the intake ports and vacuum the ports as well. Then set the intake manifold gaskets back on the head and apply RTV to the points that need some extra reinforcing. A good way to see that is to set the gaskets on the new manifold and see where some gaps are that the gasket doesn’t fully cover the manifold’s seating area up. Mostly around the intake ports, but it’s also a good idea to reinforce the coolant passage areas with RTV as we don’t like coolant spewing out of our cars. Once the RTV has been applied set the manifold onto the heads and torque them down to spec as well. Remove the two coolant sensors from the NPI manifold, apply Teflon tape to the threads, and screw them into the new manifold. If you didn’t get your manifold tapped you’ll only have a hole for 1 sensor unless you bought a pre-tapped PI manifold. If you didn’t buy a pre-tapped manifold and didn’t get your new one tapped, you’ll throw a CEL when you go to start your car. Then reinstall everything you uninstalled during the teardown and let the car sit overnight (around 12 hours is probably a good minimum) Refill your coolant and oil/oil filter. Then start the car up and make sure there are no leaks. If nothing leaks right away, let it warm up to operating temp and see if any leaks occur. If not, take the car out for a short drive and watch your oil pressure and engine temps to make sure nothing is wrong. If the short drive goes well, take the car out and do some interstate driving. If all the “tests†get you back home without any leaks you should be good to go! If you want to milk a few more ponies out of the swap you could get the car dynotuned, which should also correct any idling problems and such that might occur due to the increased breathability your engine has.
I will amend and correct this as I find errors in it, but as of right now this is an almost step by step explanation of how we did the install. Also I will put up more pictures of the re-assembly portion of the install, we just currently aren’t at that point in ours yet!
All of the pictures I took of the install can be found here as well, there are tons that I didn't refer to in this guide that may be of use.
http://s88.photobucket.com/albums/k166/RaceVids88/
Had to fix all the links...Anyways yeah that should be everything.
Here is the original "source code"
Before I even start I must give credit where credit is due. First, the install would have been much more time consuming and a PITA if Chris (MisterCMK) hadn't come over and helped/done a large portion of the teardown on the car. He also lended tons of help during the cam swap as well as the additional ford nut brainpower. Also, though he probably won't read this I want to also thank my dad especially...I definitely wouldn't have even attempted this had he not helped me, coolest guy ever.period. Next, much of what I learned/tried was because of what I read from (dodularmepot)Modular Depot’s writeup, Casper98GT’s writeup on Moddedmustangs, as well as Hotmustang’s. Anything I might not have covered can probably be found in either of those. It is important to note that Hotmustang’s guide is more similar to mine in the sense that we both left our front timing covers on the engine, whereas the Modular Depot writeup involves taking the timing chain cover off the engine. Depending on how much of an issue time is for you, decide which writeup will best suit your needs.
Also here are some other important sites…(These don't work since whoever runs Stangnet hates modular depot so replace the ****** in the URL with "mo du lar de pot" with no spaces or quotation marks...SN95Forums EDIT: The links should work now unless SN95forums blocks ModularDepots website too :dunno:
Cam Torque Specs
Intake Manifold Torque Specs
Spark Plug Torque Specs
Valve Cover Torque Specs
Now with all that being said, here is what I’m considering my attempt at a HOW TO install guide for all the NPI guys who want to do a PI Cam/Manifold swap but still plan on using their NPI heads due to future plans of boost or for labor/time/money reasons. Now on to parts, I dealt with the local dealership quite a bit since time was an issue, if it hadn't been an issue I would have done all my dealings with Steve @ Tousley Ford in Minnesota. Steve is by far the coolest person and was AWESOME to deal with, much thanks to him and I'd recommend him to anyone who needs OEM ford parts at a HUGELY DISCOUNTED price compared to a regular dealership (he had a normally $6.85 or so bolt for $2.98) You can find a link to contact Steve below. If you don't use Tousley to get your parts, you HAVE to talk to Randy on these boards, he'll hook you up with discounted parts as well (Plus he knows what he's talking about, unlike many dealership employees it seems). Either way…let me start off with a list of things you’ll need:
-A helper or 2
-Haynes/Chilton manual
-Locktite
-New Oil & Filter($30)
-New Coolant
-Spark Plugs($44) (optional but a great time to do them) including anti seize lube for both the plugs and the boots
-Penetrating Oil…THIS WILL BE YOUR BEST FRIEND
-New Thermostat, also a great time to get either a replacement 192degree thermostat or put in a cooler 180 degree stat, include o-ring
-Engine Assembly Lube for the cams
-Line Lock removal tools for the gas lines…if they are too small you can ghetto rig some hard pvc piping or something in a sort of circular shape that will fit into the lines in your engine bay
-Various wrenches/sockets
-NPI intake manifold gaskets ($20)
-Plastic bags & permanent marker
-New heater hose/adapter as well as PI cam gear bolt ($85), the NPI cam gear bolt will NOT fit into the PI cam (Ordered from Touley Ford in Minnesota, refer to thread in svtperformance.com)
Refer to this picture for everything we used (not shown were vice grips, c clamp, and all 3 colors of RTV gasket material)
Total for me on this was around $200…it adds up fast!!
A day before you even start the install I’d recommend you give all the various intake manifold bolts and such a good dose of penetrating oil and let that soak overnight. Snapped bolts are a PITA to deal with, believe me. If you do happen to snap a bolt, DO NOT use a torch or any heating method to try remove it, heating aluminum will just make it grab the bolt tighter.
Now with that being said…The first thing is to pull the fuel pump fuse in the engine compartment, then turn the car on until it dies. Try to start it once or twice more really quick just to be sure all the fuel is purged from the lines. Then disconnect your batteries positive and negative terminals and reinsert the fuel pump fuse.
Next thing to do is jack the car up so the drivers side is slightly higher than the passenger side, then crawl under and open up the petcock on the radiator to drain out coolant. After the coolant has sufficiently drained, close the petcock, lower the car back down, then jack it up in the center again and drain the oil. After the oil has drained, re-lower the car.
…BEFORE YOU START THE NEXT STEP, TAKE A BUNCH OF PICTURES OF YOUR ENGINE BAY TO REFER BACK TO FOR REASSEMBLY…
Next, start by removing the strut tower brace, intake piping and assorted vacuum lines and other misc. hoses/lines on the upper intake manifold and plenum region. After all the tubes and pipes are removed and out of the way, unbolt the plenum and set it aside. What started out looking something like this should end up looking like this. It is important to note that when removing bolts from various places you should either place all the bolts in labeled plastic bags or else replace them in the exact hole they were pulled from if possible. After all that is done use your fuel line disconnect tools to disconnect the fuel lines. They are close to the firewall on the passenger side of the engine bay, pictured here. That picture also shows a very bad yellow drawing of what the tool looks like and the direction it should face to remove the fuel lines. You push in with the disconnect tool and while pushing in pull the other part of the line away from the tool. Our tools were too small for some reason, the largest tool only got the smallest fuel line disconnected, my dad then used some black tubing that he cut a slit in and used that to disconnect the larger fuel line. Make sure when doing this that you have a rag underneath as fuel will still drip out. If you are unsure as to whether or not there is still pressure in the fuel system, use a small screw driver and a rag on this bleeder screw to ease your mind that there is no pressure left in the system, just push down a little while covering with a rag and if gas doesn’t spray out you’re good to go. After that is disconnected, disconnect all the radiator hoses leading to the thermostat housing as well as the coolant hose in the rear passenger side of the manifold near the fuel lines. At this point every line/hose/tube should be disconnected from the manifold and alls that remains is removing the manifold bolts and pulling the manifold off. The EGR line doesn’t have much give so just work around it to get the manifold out, we did it just by pulling forward on the manifold and then lifting it out once it had decent clearance under the EGR tube. Now you should have an engine bay that looks like this. Put rags/paper towels in the Intake Ports so nothing drops down those. Now is also a good time to clean out your spark plug wells. If you have an air compressor then use that to spray the hell out of the holes, I also had a shop vac running right next to the holes so some of the crap that flew out got caught by that, but tons more still went all over the engine/in my eyes/etc. After the plug wells are cleaned out decently then use a razor blade and or a rag with detergent of some sort to clean up the area, as it will more than likely be very dirty.
Next you have the valve covers. Unfortunatly my dad pulled the covers off while I was at work so I wasn’t able to get any pictures of that nor was I there to experience it but I will tell you what I read in Hotmustangs guide. First off, it’s going to be a tight fit…What you want to do is make sure everything around the covers is pretty clean because you don’t want anything falling down into the head and possibly into the oil galleys leading down to the pan/crank. Crack all the bolts and then if possible remove as many of the rubber spacers from them as well so they won’t fall down into the head. Try your hardest to keep the valve cover gasket in tact as it can be reused, I unfortunately didn’t pass that word on to my dad and he kinda demolished them…the local dealership charged me around $40 for new gaskets…rape. Once the covers are off one of the first things you should probably do is stick rags/paper towels down into the 3 galley holes in each head to prevent any stray materials from falling down into them. Tampons would probably work too
Now comes the fun part. Get out an 18mm socket and a ½†drive ratchet and start turning the crankshaft until you find TDC (NOTE: Car has to be in neutral to spin the crankshaft). There are markings on the timing cover and a notch in the rear of the crank pulley that will line up when you are on TDC, it looks like this. Just to double check, pull the plug out of cylinder #1 (Cylinder #1 is on the passenger side bank of cylinders closest to the front of your car) and get something long and skinny to fit down the plug hole and check. Once you’re sure you’re TDC mark a line on the chain/gear so you can be sure they match up, and it is also a good idea to use a straight edge to mark a line parallel to the head, just for another reference to see that you’re TDC, it’ll look something like this. Now you can get out your vice grips and/or c clamps out and fasten them good and tight like this. Make sure if you use a vice grip that it’s not applying pressure to the chain itself but just the gear. If you put too much pressure on the chain you can damage it and or weaken it which could eventually lead to a break or a jump and in turn destroy your engine. Before going on to the changing of the cams, make sure your new cams are lubed up well with the engine assembly lube. All the lobes and and contact points need to be lubed up well, but I just did the whole cam to be safe. It is also a good idea to make sure you have the correct cam. You should be able to see the notch on the cam in your car that the gear slides in to, put your new cam with the notch facing the same direction and spot check the lobes just to make sure they’re all pointing in the same direction.
Now take a socket and a hammer and put that on the cam gear bolt. If you try to just turn the bolt it will just turn the engine so you’re going to want to tap the wrench with the hammer in order to loosen the bolt. After it has been loosened, remove the bolt and set it somewhere, you can’t reuse it being as it won’t fit into the new cam. Next loosen all the bolts on the rear cam guide, but don’t full unbolt them. After they are loosened you can start on the front guide. Once you start loosening the bolts on the front guide you’ll want your helper to start applying light upward pressure on the gear just to be safe. After they are all loosened, take a hammer wrapped in a cloth and lightly tap the gear off the cam as far as you can, it might not go all the way, when you do this BE CAREFUL as there is a spacer between the gear and the cam, do NOT let that fall down into the engine. Some guides tell you to apply upward pressure with the clamps/grips, the way I did it was I used the grips as a failsafe. I actually grabbed the gear by hand and held two fingers in the hole where the cam sat to apply pressure up, and had the clamps there just in case I sneezed or something so the gear wouldn’t fall or loosen slack on the chain. Then when you have tapped the gear out as far as you can, remove all the bolts from the cam guides and remove the guides. Set the guides to the side and pick the cam up out from the holder, it should just pop right out. We ran into a problem of when we tapped the gear off the cam, the cam sorta slid forward and got a lobe semi-lodged into a cam guide, if something like that happens just rebolt down the rear cam guide and after it’s bolted down far enough the cam should just pop up, then re-remove the guide and the cam should just pop right out. Put the new cam in and line up the notch on the cam with the notch on the gear, then turn the cam about 1degree counterclockwise and set it in. The reason for that is as you tighten the caps up it will spin clockwise somewhat. Now that the cam is seated into the holders take the front cam camp and tighten only the 4 frontmost bolts closest to the gear. After they are tightened down fairly snugly, the gear still probably won’t fit onto the cam. Take a screwdriver and a hammer and use them to both pry the gear up and tap it into the cam. Here is where we pried up with a standard screwdriver. After the cam gear is back on the cam, tap it in lightly the rest of the way until it is fully seated on the cam. Check to make sure you didn’t knock any rockers off, if you did just set them back on. You can then torque down the cam caps according to the torque spec and sequence listed above (89inch/lbs). Once all the bolts are fairly snugged down the helper can stop applying pressure on the gear. After both caps are torqued down to spec, you can put in the new cam gear bolt and torque that down as well. Repeat the process for the 2nd cam. As of the writing of this guide I haven’t used the Anderson Ford Motorsports tool, but we will be using that today on the 2nd cam and I will update as to how to use that when we finish the 2nd cam. After you finish swapping out both cams, spin the crankshaft at least two times. If you hear any odd noises or it won’t let you spin it all the way, your timing is off and you have valve to piston contact. If that happens you will have to figure out what went wrong and re-seat the cam so your timing is correct. (NOTE: once again, car has to be in neutral to spin the crankshaft). If you can spin it freely all the way around several times, you should be good to go. Clean out your valve covers, dab a small amount of black RTV in the gasket valley of the cover and then put the gasket in and let that cure for maybe 30 minutes to an hour. Make sure all the surfaces that will have a gasket on them are free from contaminents and also make sure you don’t have a bunch of dirt and crud sitting in your heads as that will get picked up by the oil. Don’t quote me on this but I’m sure if there are a few small small small little things in there that it shouldn’t damage your car and will just get picked up in the filter, like I said though, don’t quote me on that. Now is also a good time to again double check that you didn’t bump any rockers off their seats as you did the swap, also remove the paper towels from the oil feed galleys. If all is good, put the valve covers back on and torque them down to spec.
Now is a good time to change out your heater tubing, there are two or three bolts at the rear of the engine that need to be unbolted to allow the old tubing to come off. Then install the new tubing/fitting and rebolt it back up. Then vacuum up the engine one last time and remove the paper towels/rags from the intake ports and vacuum the ports as well. Then set the intake manifold gaskets back on the head and apply RTV to the points that need some extra reinforcing. A good way to see that is to set the gaskets on the new manifold and see where some gaps are that the gasket doesn’t fully cover the manifold’s seating area up. Mostly around the intake ports, but it’s also a good idea to reinforce the coolant passage areas with RTV as we don’t like coolant spewing out of our cars. Once the RTV has been applied set the manifold onto the heads and torque them down to spec as well. Remove the two coolant sensors from the NPI manifold, apply Teflon tape to the threads, and screw them into the new manifold. If you didn’t get your manifold tapped you’ll only have a hole for 1 sensor unless you bought a pre-tapped PI manifold. If you didn’t buy a pre-tapped manifold and didn’t get your new one tapped, you’ll throw a CEL when you go to start your car. Then reinstall everything you uninstalled during the teardown and let the car sit overnight (around 12 hours is probably a good minimum) Refill your coolant and oil/oil filter. Then start the car up and make sure there are no leaks. If nothing leaks right away, let it warm up to operating temp and see if any leaks occur. If not, take the car out for a short drive and watch your oil pressure and engine temps to make sure nothing is wrong. If the short drive goes well, take the car out and do some interstate driving. If all the “tests†get you back home without any leaks you should be good to go! If you want to milk a few more ponies out of the swap you could get the car dynotuned, which should also correct any idling problems and such that might occur due to the increased breathability your engine has.
I will amend and correct this as I find errors in it, but as of right now this is an almost step by step explanation of how we did the install. Also I will put up more pictures of the re-assembly portion of the install, we just currently aren’t at that point in ours yet!
All of the pictures I took of the install can be found here as well, there are tons that I didn't refer to in this guide that may be of use.
http://s88.photobucket.com/albums/k166/RaceVids88/
Had to fix all the links...Anyways yeah that should be everything.

