MustangMatt96GT
Well-Known Member
- Joined
- May 29, 2007
- Messages
- 1,295
- Reaction score
- 6
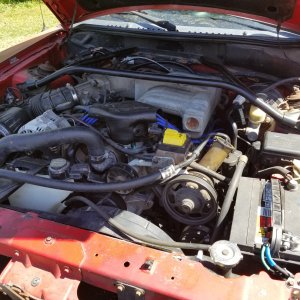
Well here it is. I finally got sick of waiting and I installed it. I took plenty of pictures and im writing up a "do-it-youreself" for anyone who wants a REAL guide to doing this mod. Here goes : usa
First open youre hood, drain the coolant and take the positive terminal off. You will be removing youre alternator and i dont think you wanna be welding with youre terminals. lmao

While the coolant is draining you can remove youre serp belt. Some 96-98 GT's have a protector over the tensioner. Remove it with the 3 13mm nuts. Once removed, use a 1/2 ratchet and move the tensioner. Pull the belt off just the alternator. Easy installation if you leave it on other pulleys.
Next i removed my Cold Air pipe. Disconnected MAF and ATS. ( Air temp sens.) Next i disconnected all sensors from the plenum. You can leave the throttle body connected and IAC because you can remove all at once. I did remove my IAC valve because i put in a homemade IAC restrictor plate. Goes behind the IAC and makes it so youre RPM's dont hang up. Idles much better as well.
If you are looking to delete youre EGR, now is a good time. I decided not to. You can either climb under youre car and disconnect the EGR tube from the manifold, or you can just remove the 2 10mm bolts holding it to youre plenum. DONT loose the gasket. I reused mine, and you dont need a new one. If youre one of those people who needs everything perfect.... well than go right ahead and buy a new one. And last remove all vaccum hoses to the plenum.
Once thats off, remove all connectors on the Injectors and plug boots can come out as well. I didnt remove them from the coil packs, just let them hang over the front of the engine. Also disconnect the vaccum hoses from the EGR and the useless pump behind it. Dont forget the DPFE sensor on the same bracket. Now i removed the Alternator bracket and connections to the alternator. Next is the alternator itself. 2 10mm bolts and the alternator is cut on the bottom of the holes so you DONT need to take the bolts all the way out. Just enough to loosen them up.


Im sure the coolant is drained by now, so go close the pet-cock ( Yes i just typed cock ) and remove the thermostat housing, gasket, and thermostat. I installed a 180 degree at this time also.
Next is the fuel rails, i am a technician so i have all tools in my hands. But if you dont have fuel line disconnects, you can go to youre local Auto parts store and buy some. Cheap too. Disconnect the 2 fuel lines. And then remove the 4 8mm bolts holding the fuel rail to the manifold. Keep in mind these injector o-rings are old and i replaced all 16 ( 2 per injector, and 8 cylinders ) of mine.


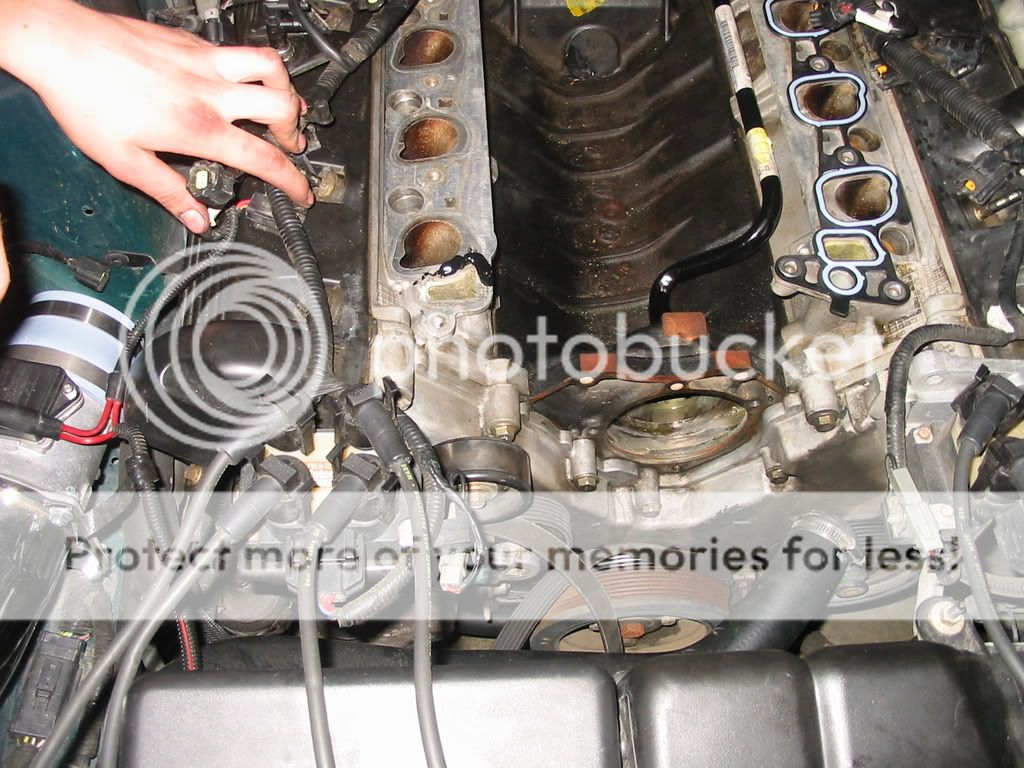
Time to remove the intake, remove all the 10mm bolts holding it down. And dont forget to remove the coolant hose at the passengers side rear. Once off, you can yank the intake.


Now that the intake is off and out of the way remove both NPI gaskets and put rags of youre choice in the cylinder holes. This will make sure you dont get anything in there and cause a problem. Clean up the heads so they are ready for the new intake. Once they are clean remove the rags. And wipe off what ever happends to get on the head.
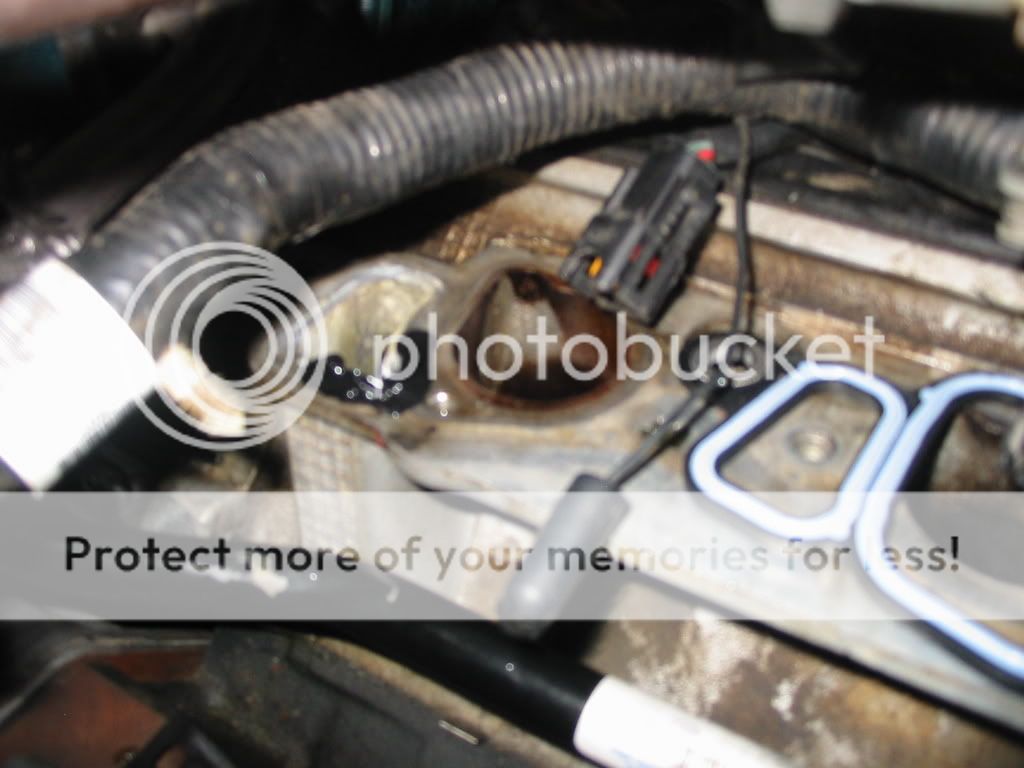
Next is the NPI to PI Coolant tube. Everyone tells you you need a new tube and water pump nipple.... Wrong. The water pump nipple is the same part number from 96-04 ( 1992 for the Crown vics) So its not needed. I did however put 2 new o-rings on the nipple. In the back of the drivers side head there is a 13mm bolt and back further is a 10mm bolt. Remove both and then take the clamp off the hose. Now you can shimmy it back and fourth so that it comes off. I put a rag under so it didnt get on my nice pretty motor. Then do the reverse to put the PI tube on. Reason for the tube: The PI intake is MUCH taller than the NPI intake. The NPI tube is in the way.


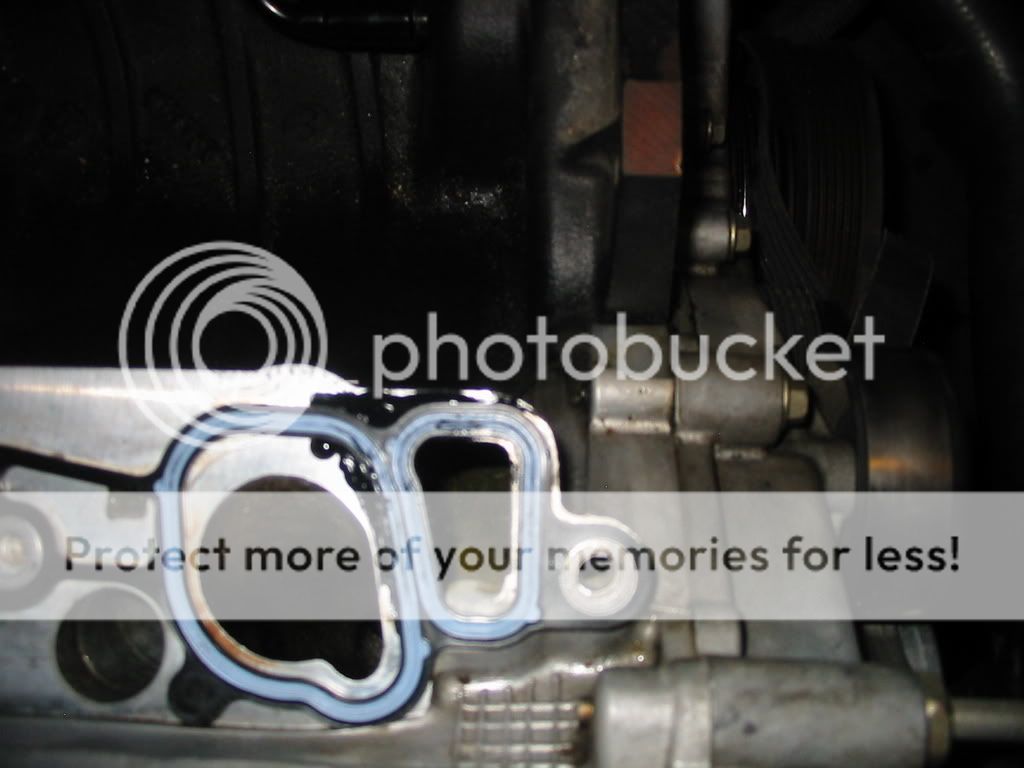
Next you will need (2) PI intake gaskets. The aligning holes on the heads are NOT correct for the PI gaskets. I used a pair of dykes and cut them off and used a razor blade so the tabs were not sticking out. As you can see from the pic the PI gasket DOESNT align with the coolant passage from the NPI head.


Two choice.... First if you can weld just weld a bead or 2 to the head and then grind and WHAM. Perfect. Or.... you can use 2 small dabs of silicone. Can i weld, yes. DO i find it fun... Yes. BUT i was at home and not at work. No welding equipment. So i used silicone.
Apply some silicone to the coolant passage passengers side front and drivers side rear. Place the gaskets on the head and make sure the bolt holes line up. I let mine sit for 30 minutes or so and let it get tacky. Then put the new intake on. Torque values are 15-22ft. lbs. I used 22 ft. lbs.

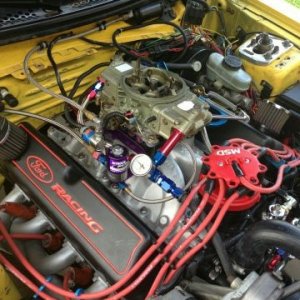
Now you can pretty much reverse everything you just did. The PI intake also has a new gasket for the plenum, so dont worry about it. Also is a good time to put on a Aftermarket plenum and TB and/or CAI.
Once everything is back on and looking good.... Just give it a once over. And make sure everything is ok. When installing the alternator bracket i only used 1 bolt. Do you even really need it ? NOPE. But my aftermarket plug wires are on it. I zip tied them to the bracket. If you want everything to be perfect, just go buy a PI bracket.
Put coolant in it and LET IT SIT overnight. If you have big balls, then fire it right up!! I do not i would recommend letting it sit for at least 24 hours.
Day 2: I gave it ONE last check over. Thought everything looked good and i proceeded to start it up. Idles great, no check engine light, and no leaks. It take a lil bit of time for it to warm-up and burp itself. Air pockets will always be a problem in the mod motors. Once all the air is out top it off and put the radiator cap back on.
Next i took it out for a "Block run" brought it back and checked everything again.... Next a longer drive. 30 minutes and i came back.... No leaks. Let it sit and cool off. started back up and put a little more coolant in it. No leaks still. Test drove up highway... came back and let cool down and checked for leaks. Still none.
Next i took up the highway and showed her who was boss. The pull in the upper RPM's is great. Exactly what the NPI cars needed. It keeps pulling all the way to 6k and she still wants more. Also i noticed my exhaust isnt so loud down low in the RPM's like it used to be. Im not stock, but not fully modded and it feels great. Next time PI cams.

Image
CASPER
NOTE: If you buy a PI intake with a aluminum cross over.... you will need to have it drilled and tapped for the second coolant temp sensor. I bought the tap and did it myself. 3/8 x 18 pipe thread.
EDIT BY MUSTANG MATT 96 GT
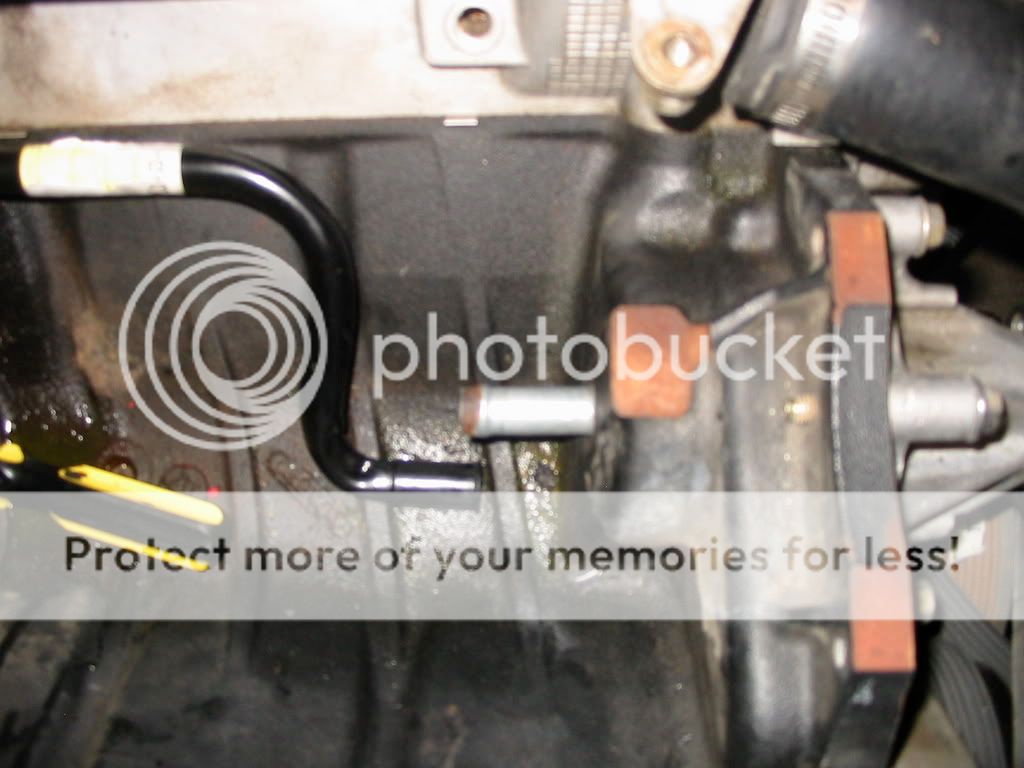
When I did my coolant tube, I had a terrible time with the water pump nipple. I did not relize I needed a new one until I took it apart. From what I have heard, the 96-early 98s require a switch in the water pump nipple. To remove the nipple take the water pump off and then take a socket that will go around the nipple and tap it or hammer it out. Then slide the new nipple in there.
Old set up of nipple
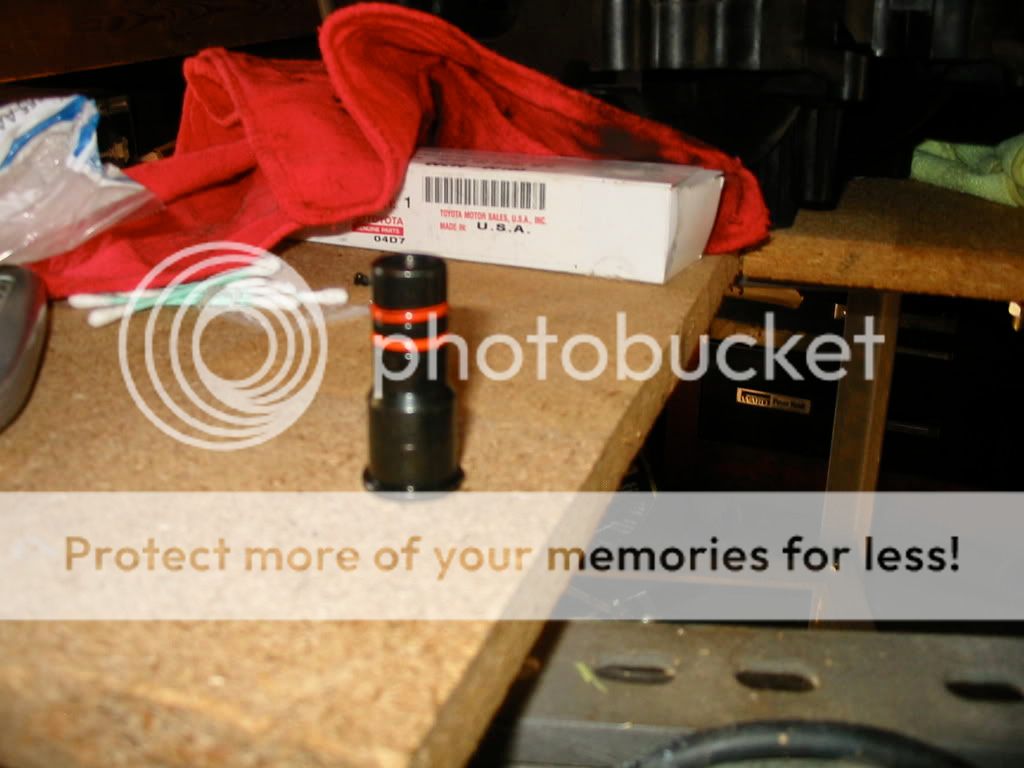
New nipple that needs to be put in.
Casper98GT did the whole write up on this and did a great job! The only part that I added was the final part about the nipple and the silicon pictures. Great job!
First open youre hood, drain the coolant and take the positive terminal off. You will be removing youre alternator and i dont think you wanna be welding with youre terminals. lmao
While the coolant is draining you can remove youre serp belt. Some 96-98 GT's have a protector over the tensioner. Remove it with the 3 13mm nuts. Once removed, use a 1/2 ratchet and move the tensioner. Pull the belt off just the alternator. Easy installation if you leave it on other pulleys.
Next i removed my Cold Air pipe. Disconnected MAF and ATS. ( Air temp sens.) Next i disconnected all sensors from the plenum. You can leave the throttle body connected and IAC because you can remove all at once. I did remove my IAC valve because i put in a homemade IAC restrictor plate. Goes behind the IAC and makes it so youre RPM's dont hang up. Idles much better as well.
If you are looking to delete youre EGR, now is a good time. I decided not to. You can either climb under youre car and disconnect the EGR tube from the manifold, or you can just remove the 2 10mm bolts holding it to youre plenum. DONT loose the gasket. I reused mine, and you dont need a new one. If youre one of those people who needs everything perfect.... well than go right ahead and buy a new one. And last remove all vaccum hoses to the plenum.
Once thats off, remove all connectors on the Injectors and plug boots can come out as well. I didnt remove them from the coil packs, just let them hang over the front of the engine. Also disconnect the vaccum hoses from the EGR and the useless pump behind it. Dont forget the DPFE sensor on the same bracket. Now i removed the Alternator bracket and connections to the alternator. Next is the alternator itself. 2 10mm bolts and the alternator is cut on the bottom of the holes so you DONT need to take the bolts all the way out. Just enough to loosen them up.
Im sure the coolant is drained by now, so go close the pet-cock ( Yes i just typed cock ) and remove the thermostat housing, gasket, and thermostat. I installed a 180 degree at this time also.
Next is the fuel rails, i am a technician so i have all tools in my hands. But if you dont have fuel line disconnects, you can go to youre local Auto parts store and buy some. Cheap too. Disconnect the 2 fuel lines. And then remove the 4 8mm bolts holding the fuel rail to the manifold. Keep in mind these injector o-rings are old and i replaced all 16 ( 2 per injector, and 8 cylinders ) of mine.
Time to remove the intake, remove all the 10mm bolts holding it down. And dont forget to remove the coolant hose at the passengers side rear. Once off, you can yank the intake.
Now that the intake is off and out of the way remove both NPI gaskets and put rags of youre choice in the cylinder holes. This will make sure you dont get anything in there and cause a problem. Clean up the heads so they are ready for the new intake. Once they are clean remove the rags. And wipe off what ever happends to get on the head.
Next is the NPI to PI Coolant tube. Everyone tells you you need a new tube and water pump nipple.... Wrong. The water pump nipple is the same part number from 96-04 ( 1992 for the Crown vics) So its not needed. I did however put 2 new o-rings on the nipple. In the back of the drivers side head there is a 13mm bolt and back further is a 10mm bolt. Remove both and then take the clamp off the hose. Now you can shimmy it back and fourth so that it comes off. I put a rag under so it didnt get on my nice pretty motor. Then do the reverse to put the PI tube on. Reason for the tube: The PI intake is MUCH taller than the NPI intake. The NPI tube is in the way.
Next you will need (2) PI intake gaskets. The aligning holes on the heads are NOT correct for the PI gaskets. I used a pair of dykes and cut them off and used a razor blade so the tabs were not sticking out. As you can see from the pic the PI gasket DOESNT align with the coolant passage from the NPI head.
Two choice.... First if you can weld just weld a bead or 2 to the head and then grind and WHAM. Perfect. Or.... you can use 2 small dabs of silicone. Can i weld, yes. DO i find it fun... Yes. BUT i was at home and not at work. No welding equipment. So i used silicone.
Apply some silicone to the coolant passage passengers side front and drivers side rear. Place the gaskets on the head and make sure the bolt holes line up. I let mine sit for 30 minutes or so and let it get tacky. Then put the new intake on. Torque values are 15-22ft. lbs. I used 22 ft. lbs.
Now you can pretty much reverse everything you just did. The PI intake also has a new gasket for the plenum, so dont worry about it. Also is a good time to put on a Aftermarket plenum and TB and/or CAI.
Once everything is back on and looking good.... Just give it a once over. And make sure everything is ok. When installing the alternator bracket i only used 1 bolt. Do you even really need it ? NOPE. But my aftermarket plug wires are on it. I zip tied them to the bracket. If you want everything to be perfect, just go buy a PI bracket.
Put coolant in it and LET IT SIT overnight. If you have big balls, then fire it right up!! I do not i would recommend letting it sit for at least 24 hours.
Day 2: I gave it ONE last check over. Thought everything looked good and i proceeded to start it up. Idles great, no check engine light, and no leaks. It take a lil bit of time for it to warm-up and burp itself. Air pockets will always be a problem in the mod motors. Once all the air is out top it off and put the radiator cap back on.
Next i took it out for a "Block run" brought it back and checked everything again.... Next a longer drive. 30 minutes and i came back.... No leaks. Let it sit and cool off. started back up and put a little more coolant in it. No leaks still. Test drove up highway... came back and let cool down and checked for leaks. Still none.
Next i took up the highway and showed her who was boss. The pull in the upper RPM's is great. Exactly what the NPI cars needed. It keeps pulling all the way to 6k and she still wants more. Also i noticed my exhaust isnt so loud down low in the RPM's like it used to be. Im not stock, but not fully modded and it feels great. Next time PI cams.
Image
CASPER
NOTE: If you buy a PI intake with a aluminum cross over.... you will need to have it drilled and tapped for the second coolant temp sensor. I bought the tap and did it myself. 3/8 x 18 pipe thread.
EDIT BY MUSTANG MATT 96 GT
When I did my coolant tube, I had a terrible time with the water pump nipple. I did not relize I needed a new one until I took it apart. From what I have heard, the 96-early 98s require a switch in the water pump nipple. To remove the nipple take the water pump off and then take a socket that will go around the nipple and tap it or hammer it out. Then slide the new nipple in there.
Old set up of nipple
New nipple that needs to be put in.
Casper98GT did the whole write up on this and did a great job! The only part that I added was the final part about the nipple and the silicon pictures. Great job!