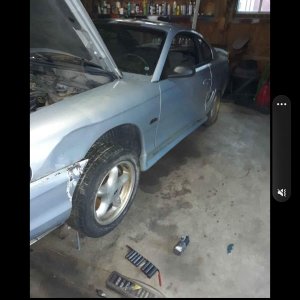
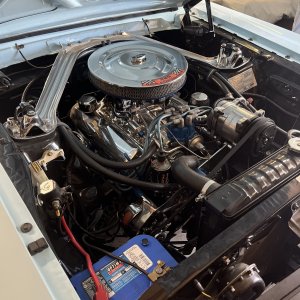
First of all, this is not a how to install thread. It is my thoughts and experiences while installing a Prothane Bushing Kit in the rear end of my 95 mustang gt 5.0 with automatic trans. I installed the bushings in the rear end of my car on my garage floor, with the car on 22" jack stands. With a Walmart brand floor jack, it took me about three jackings at each end of the car, adding wood between the jack and car, to get the car that high off of the ground. My car already has sport springs installed, so the floor jack barley fits underneath the stock K member. I needed two jacks, one to lower the control arms and one to manipulate the pinion angle on the differential. I also needed a ratcheting strap to pull pieces together, like the last lower control arm attaching point. Without the strap I couldn?t get the bolt holes anywhere close to lining up. I had to cut a piece of pipe to fit over my wrenches for extra leverage to break loose some of the bolts and used lots of Liquid Wrench. The pipe I cut could only be about 20? long, remember my car was only 22? off of the ground, and the ground would limit the range of motion of the wrenches. The car itself already limits the range of motion enough. I would say that after getting the car up on jacks stand the next step would be to start soaking the nuts at all the attaching points for the control arms and where the mufflers attach to the H-pipe, is the next priority. The exhaust has to be disconnected but not totally removed. The bolts and nuts for the control arms were all in good condition except for the bolts that hold the lower control arms to the rear end. Apparently those bolts, in their location, are more susceptible to corrosion. You might want to replace them. I worked one side at a time. I was trying to keep the rear end as close as I could to its original location. You don?t have to worry about the rear end falling out of the car because the shocks hold the rear end up to the bottom of the car. No spring compression tool is needed because the springs sit on top of the lower control arms and the spring tension can easily be released with a floor jack. I removed the lower control arm and then the upper control arm. Then it was time to get the old bushings out of the control arms. I was told by a friend and I think that I read it somewhere that you can drill some holes in them and pry them out. Well, I couldn?t and I broke five drill bits in the process. I was able to get some of the bushing pieces out but no were close to the whole bushing. I like burning them out better. Especially after I figured out how to do it. I have a metal barrel in my yard that sets on a piece of tin. The control arms will sit on the top edge of the barrel were both bushings can be worked on at the same time. Burning rubber makes a mess, so keep that in mind when picking a location to work. I already knew how to set something on fire, not the problem. The problem was that I was trying to burn them with just a propane torch. I would light them on fire and they would burn for a little bit and go out. I thought that I had to hold the torch on them constantly, not so. When you start burning them and they build up a little burnt residue you have to scrape it off. Then the bushings will take off. Ever so often scrape some more burnt residue off and you will keep it going. Keep an eye on what is burning and what is not, you may have to manipulate the control arm so that all the bushing gets burnt. When the rubber is hot it is easy to remove, cold? good luck. The stock bushings were installed to stay. Also, when rubber burns it snaps and pops and when it does the liquid rubber is shot from the bushing onto anything within about three feet. And when the metal part of the bushing shoots out they can travel as far as ten feet in the air and are hot enough to set any yard debris on fire. You?ll want to pick them up with some pliers right after they shoot out. Make sure you are not in the line of fire. The tin that my barrel was sitting on or a metal pan catches the dripping rubber so that you don?t catch the ground on fire. After the bushings go out you can use the torch and a knife, one that the wife want fuss about, and remove any remaining bushing out of the control arms. The bushings in the differential housing were a little bit different. I did use drill bits to get most of the bushings out but still had to burn some about 1/6 of it out. Before I started burning, I studied my surroundings. I had brake lines really close, fuel lines and filter closer than I would have liked, and of course the gas tank. I rapped the brake and fuel lines with tinfoil. I lit the torch and carefully climbed from the rear of the car in and only burn from back to front. Obviously, the gas tank is in the back of the car. Getting the bushings back in, in all locations was a learning experience as well. First of all, I didn?t think the supplied instructions were all that great. The written part was ok, but didn?t tell you exactly were ever bushing went. The individual bushings have part numbers but are only used for kitting purposes. The two pictures are pretty much generic to all locations, but does indicate where the spacers go. You pretty much have to size them up and remember that the shoulder of the bushing goes on the side of the differential housing/control arm that has the flange. Bushings are lube and inserted from the flange side of the item that they are going into. Bushings don?t just slide right in either, you have to press them in. And they need to be inserted almost straight on. I had a bench vise that I used on the control arm bushings. You press the bushing in as far as you can with the vise, back off the vise a little, stick something metal between the control arm and the vise in order to create some space between them so that the bushing can be pressed in the rest of the way. I used some 5 lbs. Plate weights that I had in the garage. Press the bushing in until the shoulder of the bushing is flush with flange on the control arm. I had to really think about how to press the bushings into the differential housing. I started them with a big c clamp like you would use to compress calipers during a brake job. The big c clamp, at a point, want push them in all the way because it will cock the bushing. Bushing is not exactly straight. So, I found a piece of metal that was almost as wide as the bushing and two small clamps. I was able to place the clamps on the differential housing and on the piece of metal and evenly press the bushings in. Now with the bushings installed, everything could be reassembled. The new bushings and spacers have a whole lot more surface area to force into the control arm attaching points. They just don?t slide right in. The upper control arms had to be tapped in with a mallet and a block of wood. I got the control arm started into the housing in the bottom of the car and then used my floor jack to hold a 4 X 4 block of wood at the right angle (approximately 45 degrees off of the ground) to tap the control arm forward and up. I lined the bushing up with Phillips screw driver and installed the bolt. Attaching the upper control arms to the differential housing was just a matter of rolling the pinion up or down with the second jack. Attaching the last lower control arm to the rear end was the hardest. I had to monitor the pinion height and use the ratcheting strap to pull the rear end forward. There are several holes underneath the car to attach the strap to. In the frame where the control arms attach to the car, there was a piece of metal from the factory that stuck out to far and I had to grind it off. Luckily I had a grinder or I would have had to buy one, that far into the job. Like I said earlier, the prothane bushings are a whole lot bigger than the stock ones. They really stiffen up the rear end. I use to have to wait for the rear end to set in the corner before felling comfortable enough to get on it. Know I can?t detect any movement, the car feels really stable in corners and surprisingly helped a lot on body roll while cornering. With experienced help and a lift, this job could have been done a lot faster than what I did it in (evenings for about a week). I am glad that I did this mod and I am happy with the results. When you are learning as you go it is best to have a POS to drive like I do. If I didn?t have a POS to drive I would have never attempted to do this by myself. I hope that I haven?t board you but wanted to contribute something. I have found a lot of valuable info on forums like this one. :headbang:
You are using an out of date browser. It may not display this or other websites correctly.
You should upgrade or use an alternative browser.
You should upgrade or use an alternative browser.
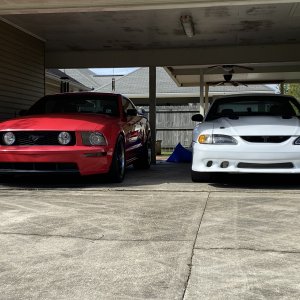
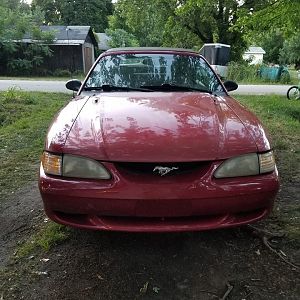
Prothane bushing kit installed in 95 5.0
- Thread starter Thaxter
- Start date
MustangChris
Mythic Level
did anyone read this??? i read every third sentence... i think the winning lotto numbers are 9, 7, and 982. ... ..
Win
Legend
OK FIRST OFF IM NOT READING THIS CRAP!!!!!!!! IT MADE MY EYES HURT FROM THE FIRST SECOND I OPENED IT. I SUCK AT GRAMMER BUT DAMN DUDE!!!!
MustangChris
Mythic Level
Win said:OK FIRST OFF IM NOT READING THIS CRAP!!!!!!!! IT MADE MY EYES HURT FROM THE FIRST SECOND I OPENED IT. I SUCK AT GRAMMER BUT DAMN DUDE!!!!
its tough love.... . lol.
dont take offence.
Win
Legend
The Snowflakes combined with that just looked like a blur to me ")
MustangChris
Mythic Level
lol. youre almost to double digits! :-D
at least you read every 3rd chris... I only seen this and gave up
Thaxter said:it took me about three jackings
MustangChris
Mythic Level
lol. this thread is going to be an epic one... i can tell. HAHAHA
MustangChris
Mythic Level
11,990 more and youll be in the big-boy club.
Why not, its 3 Am in Korea and I can't sleep...re-done with paragraphing: Much love...
-Undead
-----------------------------------
First of all, this is not a how to install thread. It is my thoughts and experiences while installing a Prothane Bushing Kit in the rear end of my 95 mustang gt 5.0 with automatic trans. I installed the bushings in the rear end of my car on my garage floor, with the car on 22" jack stands. With a Walmart brand floor jack, it took me about three jackings at each end of the car, adding wood between the jack and car, to get the car that high off of the ground.
My car already has sport springs installed, so the floor jack barley fits underneath the stock K member. I needed two jacks, one to lower the control arms and one to manipulate the pinion angle on the differential. I also needed a ratcheting strap to pull pieces together, like the last lower control arm attaching point. Without the strap I couldn?t get the bolt holes anywhere close to lining up. I had to cut a piece of pipe to fit over my wrenches for extra leverage to break loose some of the bolts and used lots of Liquid Wrench.
The pipe I cut could only be about 20? long, remember my car was only 22? off of the ground, and the ground would limit the range of motion of the wrenches. The car itself already limits the range of motion enough. I would say that after getting the car up on jacks stand the next step would be to start soaking the nuts at all the attaching points for the control arms and where the mufflers attach to the H-pipe, is the next priority. The exhaust has to be disconnected but not totally removed.
The bolts and nuts for the control arms were all in good condition except for the bolts that held the lower control arms to the rear end. Apparently those bolts, in their location, are more susceptible to corrosion. You might want to replace them. I worked one side at a time. I was trying to keep the rear end as close as I could to its original location. You don't have to worry about the rear end falling out of the car because the shocks hold the rear end up to the bottom of the car. No spring compression tool is needed because the springs sit on top of the lower control arms and the spring tension can easily be released with a floor jack.
I removed the lower control arm and then the upper control arm. Then it was time to get the old bushings out of the control arms. I was told by a friend and I think that I read it somewhere that you can drill some holes in them and pry them out. Well, I couldn?t and I broke five drill bits in the process. I was able to get some of the bushing pieces out but no were close to the whole bushing. I like burning them out better. Especially after I figured out how to do it. I have a metal barrel in my yard that sets on a piece of tin. The control arms will sit on the top edge of the barrel were both bushings can be worked on at the same time. Burning rubber makes a mess, so keep that in mind when picking a location to work. I already knew how to set something on fire, not the problem.
The problem was that I was trying to burn them with just a propane torch. I would light them on fire and they would burn for a little bit and go out. I thought that I had to hold the torch on them constantly, not so. When you start burning them and they build up a little burnt residue you have to scrape it off. Then the bushings will take off. Ever so often scrape some more burnt residue off and you will keep it going. Keep an eye on what is burning and what is not, you may have to manipulate the control arm so that all the bushing gets burnt. When the rubber is hot it is easy to remove, cold? good luck. The stock bushings were installed to stay. Also, when rubber burns it snaps and pops and when it does the liquid rubber is shot from the bushing onto anything within about three feet. And when the metal part of the bushing shoots out they can travel as far as ten feet in the air and are hot enough to set any yard debris on fire. You?ll want to pick them up with some pliers right after they shoot out. Make sure you are not in the line of fire. The tin that my barrel was sitting on or a metal pan catches the dripping rubber so that you don?t catch the ground on fire. After the bushings go out you can use the torch and a knife, one that the wife want fuss about, and remove any remaining bushing out of the control arms. The bushings in the differential housing were a little bit different. I did use drill bits to get most of the bushings out but still had to burn some about 1/6 of it out. Before I started burning, I studied my surroundings. I had brake lines really close, fuel lines and filter closer than I would have liked, and of course the gas tank. I rapped the brake and fuel lines with tinfoil. I lit the torch and carefully climbed from the rear of the car in and only burn from back to front. Obviously, the gas tank is in the back of the car.
Getting the bushings back in, in all locations was a learning experience as well. First of all, I didn?t think the supplied instructions were all that great. The written part was ok, but didn?t tell you exactly were ever bushing went. The individual bushings have part numbers but are only used for kitting purposes. The two pictures are pretty much generic to all locations, but does indicate where the spacers go. You pretty much have to size them up and remember that the shoulder of the bushing goes on the side of the differential housing/control arm that has the flange. Bushings are lube and inserted from the flange side of the item that they are going into. Bushings don?t just slide right in either, you have to press them in. And they need to be inserted almost straight on. I had a bench vise that I used on the control arm bushings. You press the bushing in as far as you can with the vise, back off the vise a little, stick something metal between the control arm and the vise in order to create some space between them so that the bushing can be pressed in the rest of the way. I used some 5 lbs. Plate weights that I had in the garage. Press the bushing in until the shoulder of the bushing is flush with flange on the control arm.
I had to really think about how to press the bushings into the differential housing. I started them with a big c clamp like you would use to compress calipers during a brake job. The big c clamp, at a point, want push them in all the way because it will C*ck the bushing. Bushing is not exactly straight. So, I found a piece of metal that was almost as wide as the bushing and two small clamps. I was able to place the clamps on the differential housing and on the piece of metal and evenly press the bushings in. Now with the bushings installed, everything could be reassembled. The new bushings and spacers have a whole lot more surface area to force into the control arm attaching points. They just don?t slide right in. The upper control arms had to be tapped in with a mallet and a block of wood. I got the control arm started into the housing in the bottom of the car and then used my floor jack to hold a 4 X 4 block of wood at the right angle (approximately 45 degrees off of the ground) to tap the control arm forward and up. I lined the bushing up with Phillips screw driver and installed the bolt. Attaching the upper control arms to the differential housing was just a matter of rolling the pinion up or down with the second jack. Attaching the last lower control arm to the rear end was the hardest. I had to monitor the pinion height and use the ratcheting strap to pull the rear end forward. There are several holes underneath the car to attach the strap to. In the frame where the control arms attach to the car, there was a piece of metal from the factory that stuck out to far and I had to grind it off. Luckily I had a grinder or I would have had to buy one, that far into the job.
Like I said earlier, the prothane bushings are a whole lot bigger than the stock ones. They really stiffen up the rear end. I use to have to wait for the rear end to set in the corner before felling comfortable enough to get on it. Know I can?t detect any movement, the car feels really stable in corners and surprisingly helped a lot on body roll while cornering. With experienced help and a lift, this job could have been done a lot faster than what I did it in (evenings for about a week). I am glad that I did this mod and I am happy with the results. When you are learning as you go it is best to have a POS to drive like I do. If I didn?t have a POS to drive I would have never attempted to do this by myself. I hope that I haven?t board you but wanted to contribute something. I have found a lot of valuable info on forums like this one
-------------------------
it probably aint perfect, but hey, like i said, im bored and i can't sleep. for your reading and fun poking pleasure.
MustangChris
Mythic Level
ohhhhhh..... why didnt you say it like that the first time?
Great videos. If I would have seen them before I did my car I may have replaced the metal bushing sleeves also, assuming that you can do the samething on a ford 8.8. Also, Prothane doesn't send the metal bushing sleeves in their kit so I didn't even consider them. Still learning as I go.
OnyxCobra
Post Whore
That is possibly one of the largest all text posts I've ever seen. So do you like the kit, not like it, had trouble installing it, what?
It was copied and pasted from Word 2007, that is where most of the "?" came from. I have tried to post something like that before while typing it on line and lost everything I had typed. I like the kit. It tightened the rear end of my car up alot. It came with just about every bushing on the car. Rack and pinion, sway bar end links in the front of the car (not sway bar bushings), all of the control arm and A arm bushings front and rear and I believe that I had to order my trans mount separate. Everything except the front A arm bushings are installed now. I just haven't wanted to mess with the front springs again, yet. It wasn't that hard to do but there was a little messaging that had to be done, pulling and forcing, etc. And I was learning as I went, proceeding with caution. No one to hold my hand. I described a lot of the difficulties in the post.
piperpilotduane
New Member
- Joined
- Jun 16, 2010
- Messages
- 50
- Reaction score
- 0
WHEW!
Similar threads
- Replies
- 9
- Views
- 987
- Replies
- 30
- Views
- 3K
- Replies
- 6
- Views
- 1K