OP
OP
seijirou
New Member
- Joined
- Nov 1, 2010
- Messages
- 46
- Reaction score
- 52
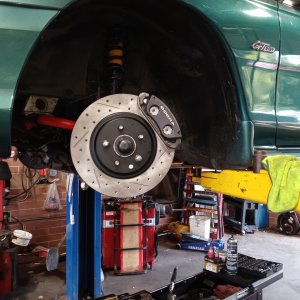
Found a little bit of time in the shop this afternoon. New water pump will allegedly move more volume than the original design. The impeller is pretty anyway. A dry fit on the engine shows that the bottom most bolt stands proud of the harmonic balancer. That won't work because then the trigger wheel will hit. Fortunately it looks like there's plenty of material on the boss so I can take it down on the mill. On the original pump that boss wasn't so tall, and the low profile bolt I used would just barely clear. On this pump the boss is basically already even with the balancer.
This is why we dry fit new !
!


This is why we dry fit new