ttocs
Forum's #1 poster
twist and tape. T-taps are easy
Attachments
-
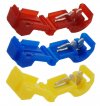 t-taps.jpg88 KB · Views: 20
 -
 s-l225.jpg1.3 KB · Views: 20
 -
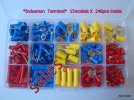 -Mixed-Electrical-Crimp-Connector-Assorted-Kit-Set.jpg259.6 KB · Views: 20
 -
![Full-Insulated-Spade6_3mmMF[2].jpg](/data/attachments/16/16094-0f478fd20633b79a8335ce3d4620a0bb.jpg) Full-Insulated-Spade6_3mmMF[2].jpg33 KB · Views: 21
Full-Insulated-Spade6_3mmMF[2].jpg33 KB · Views: 21 -
 s-l1600.jpg1.3 KB · Views: 21
 -
 s-l500.jpg1.3 KB · Views: 20
 -
 s-l500.jpg14.2 KB · Views: 21
 -
 post-54309-13264039658639.gif15.3 KB · Views: 21
 -
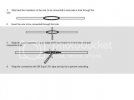 militarysplice.jpg20.9 KB · Views: 21
Last edited: