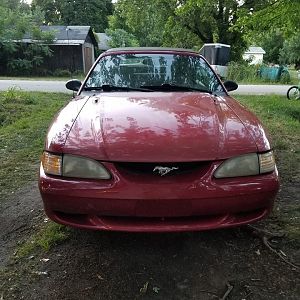
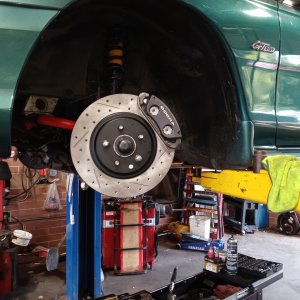
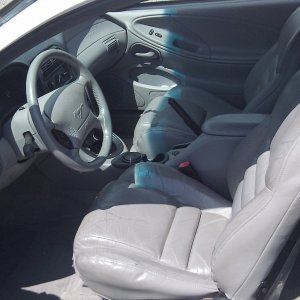
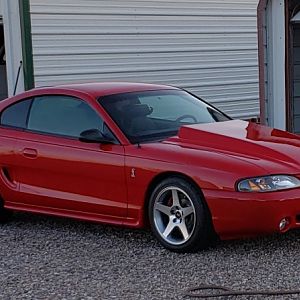
A Slow Build: College Kid's 1994 Mustang

OP
OP
BrettNorton

BrettNorton

New Member
Joined
May 1, 2015
Messages
28
Reaction score
0
I would grind most of it away and try it again. Do one section at a time.

Right. Thank you for pointing all of this out to me. I had a feeling that the welds weren't deep enough, but dumb kids like myself tend to rush the many important jobs of making a car perform nicely lol. Plus, this project is my first time doing nearly all of the things I will be doing to this car.

Anyway, when I get the car rolled into the shop, then I will work on getting my subframe connectors all straightened out. With the car in the shop, I will have 24/7 access to the MIG welder, no inclement weather to slow me down, and plenty plenty of time to do the job right.


Big_T

Member
Joined
Apr 19, 2012
Messages
246
Reaction score
4
Location
Connecticut
wow man, i love the cleanup and painting under the car and the bay. I wish i had time to do that on mine. You sand blasted under the car to get all that rust off then just rattle canned with underliner?
 
OP
OP
BrettNorton

BrettNorton

New Member
Joined
May 1, 2015
Messages
28
Reaction score
0
You sand blasted under the car to get all that rust off then just rattle canned with underliner?

I used a wire wheel underneath since the sandblaster I have here would need constant refilling and adjustments to work right. I also didn't want to get a bunch of sand in all of the car's little crevices.

As for paint, I didn't use the rattle can type undercoating either. I read many horror stories about how rattle can undercoating can crack, trap moisture, and cause even worse rust than what was cleaned up.

I just used a hell of a lot of Rustoleum rattle can paint. Gray primer and flat black paint.
21e1bhl.jpg


The way I went about cleaning and painting underneath the car was probably not the best way to go, but hey, at least it looks better than it did before.
 

Big_T

Member
Joined
Apr 19, 2012
Messages
246
Reaction score
4
Location
Connecticut
Yeah, like you said better than the previous rust before it. I need to do this to mine but i just wanted my car running and being under the car while grinding rust away wasn't exactly my idea of a fun time hahahaha ill get it done eventually. but still looks good man.
 

Pirate Bman

New Member
Joined
Nov 30, 2012
Messages
5
Reaction score
0
Location
Moose Jaw Sk.
I'll be following this thread closely, as I want to do the same project. But before I get into it I do need to ask, since you had replaced the one fender due to damage, have you ever noticed any gaps in the rest of the body? Just thinking with that in mind like you I would like to clean and straighten everything as best I can just for good measure.
 

Firefighter181

Active Member
Joined
Jun 15, 2013
Messages
426
Reaction score
4
That is a fair amount of work! I would love to have a shop like that down the road some day.
 
OP
OP
BrettNorton

BrettNorton

New Member
Joined
May 1, 2015
Messages
28
Reaction score
0
Thank you for the kind words everybody. I wouldn't be able to accomplish any of this if it weren't for my good grandpa letting me use his shop and many of his specialty tools.:slowclap: He's retired now and doesn't use that stuff very much anymore.

I'll be following this thread closely, as I want to do the same project. But before I get into it I do need to ask, since you had replaced the one fender due to damage, have you ever noticed any gaps in the rest of the body? Just thinking with that in mind like you I would like to clean and straighten everything as best I can just for good measure.

Compared to the door gaps on the passenger's side, the driver's side door gaps are larger by maybe a few thousandths of an inch? Considering the speed and cheapness that these cars were built with back in the 90's, I wouldn't be surprised if some of said body gaps are off ever so slightly. The average person wouldn't really notice any major body gaps until they actually get up close and physically measure them out. The whole body of the car seems straight enough to me.

What kind of project are you getting into? Don't worry, I don't mind my thread being hijacked. I won't be making any progress on my car for a while.
 

kb1982

Active Member
Joined
Aug 10, 2013
Messages
591
Reaction score
4
Location
Kentucky
Now would be a good time to install some battleboxes where the control arms bolt to the chassis.
 
OP
OP
BrettNorton

BrettNorton

New Member
Joined
May 1, 2015
Messages
28
Reaction score
0
Now would be a good time to install some battleboxes where the control arms bolt to the chassis.

I would love to install some battle boxes in my car. Now is the best time to do it while the car is a bare body shell. However...

2mxl7ra.jpg


THEY ARE ALREADY INSTALLED.....:grd: (It's on the first page along with the horribly welded subframe connectors)
 

kb1982

Active Member
Joined
Aug 10, 2013
Messages
591
Reaction score
4
Location
Kentucky
Guess i went straight from subframe connectors to the rusthole pic.
 

Justang

Active Member
Joined
May 4, 2010
Messages
847
Reaction score
19
Location
1001110111
I must say, the underbody of my car is a sad sight right now. Seeing the difference you made with yours is inspiring. Hope I can make the same progress.

Just a wire wheel and some Rustoleum? And some wicked tall jackstands...I am jealous of those.
 
OP
OP
BrettNorton

BrettNorton

New Member
Joined
May 1, 2015
Messages
28
Reaction score
0
I must say, the underbody of my car is a sad sight right now. Seeing the difference you made with yours is inspiring. Hope I can make the same progress.

Just a wire wheel and some Rustoleum? And some wicked tall jackstands...I am jealous of those.

Just wire wheel and lots of rustoleum primer and paint. It's not the best stuff to use for an actual restoration or show car, but I'm just trying to get the underside all cleaned up while it's completely bare.

Being that my car has 230,000 miles on it, which are mostly highway, the worst rustiness was underneath the trunk. There is a spot on the driver's side kind of where the wheel well and trunk pan join together that has rusted through the trunk floor. Hopefully, the rust doesn't get bad enough to where it eats through the quarter panel.
 
OP
OP
BrettNorton

BrettNorton

New Member
Joined
May 1, 2015
Messages
28
Reaction score
0
It's been nearly 2 months since my last update of this project, but I've finally received the first round of suspension parts for the Mustang! I bought everything here from Rock Auto and it was all at my door less than a week after I placed the order.


KYB GR-2 shocks and struts. These are simple OEM replacement units that were at a good price for me. I also like that they came with all necessary hardware for installation.
jb03m8.jpg


16m69ax.jpg


MOOG steering parts (ball joints, inner / outer tie rods, tie rod boots). A good compromise in price between cheap and expensive. Plus, I've always good things about MOOG parts being used in roughly-driven trucks and in NASCAR. They should hold up in my street-driven Mustang just fine.
2lng0mf.jpg


j6ikba.jpg


2gw729g.jpg


2ypf3vm.jpg


ACDelco rear upper control arm bushings. I'll explain why I got these rubber bushings when I get the rear control arms.
25gf4fq.jpg


Centric brake rotors. These are, once again, OEM replacement parts at a good price. Figured I might as well buy them now.
ioznl5.jpg


Dorman parking brake cables. Without the transmission or the entire braking system in the car, there is nothing to stop it from rolling the wrong way during the moving process. These new cables will provide me a sense of security while moving the car.
maazh0.jpg


Also, not really a part of the build, but something important nonetheless. After 225,000 miles, my little Volvo has a pinhole in the radiator. I tried to seal the leak up with gasket sealer, but after driving through town on a hot day, I opened the hood up to find the radiator pissing coolant everywhere. I think I'll feel better if I just replace the leaking radiator with a new one.
2hygvh5.jpg


Also got new radiator hoses and a new radiator cap.
2s8ny13.jpg


More Mustang suspension parts should be arriving over the next month.
 
OP
OP
BrettNorton

BrettNorton

New Member
Joined
May 1, 2015
Messages
28
Reaction score
0
I've decided to change the name of this thread from "1994 Mustang Budget 302 Build" to "A Slow Build: College Kid's 1994 Mustang." The reason being that after much planning and calculation, this build of mine isn't going to be on as much of a budget as I thought it would be. I will be spending a pretty large chunk of money to get this car back on the road, and it's going to take me a long time to do so.
 

Burninriverdiver

Well-Known Member
Joined
Jan 1, 2014
Messages
2,770
Reaction score
234
Nothing wrong with taking your time man, I work a lot in the summer and save up for winter build time. I understand the broke college thing... Even though I'm done and out of school, the $400 a month student loans keep me humble with my car! Keep on chipping away at it, make it reliable first and then the fun stuff comes along. Good work so far!
 

Tony

Legend
Joined
May 23, 2012
Messages
9,396
Reaction score
978
Location
ohio
putting in serious work here...good stuff man.
 
OP
OP
BrettNorton

BrettNorton

New Member
Joined
May 1, 2015
Messages
28
Reaction score
0
A little spoiler of something that's happening at the end of the summer...

2ce5ddy.jpg


290vhvn.jpg
 

Royal96

Active Member
Joined
May 30, 2015
Messages
316
Reaction score
0
Location
Cincinnati, OH
Donor car, eh? Not a bad idea when it comes to these v6 -> v8 swaps.
I too am a broke college kid so I wish you the best of luck.
 
OP
OP
BrettNorton

BrettNorton

New Member
Joined
May 1, 2015
Messages
28
Reaction score
0
Volvo radiator repair = Success!
b4gill.jpg


25s5pja.jpg


More Mustang parts are on the way, so stay tuned...
2d7v4ol.jpg
 

Latest posts

Forum statistics

Threads
77,517
Messages
1,504,131
Members
14,984
Latest member
senior001
Top