I didn't see a how to on this and the question comes up quite a bit about the difficulty and tools required. Feel free to repost this on other sites, but give credit where credit is due, this took a long time to type up.
On a scale of 1-10 with 1 being an air filter swap and 10 being an engine swap or auto to manual conversion this is about a 5. I only rate it that high because of the use of the jack and the ability to hurt yourself if you don't pay attention.
I did this after my son went to sleep so I couldn't run the compressor. It still only took me 2.5 hrs including a run to Autozone and break time for 4 tasty beverages. I normally clean everything when I pull it apart but I'll be doing caster/camber plates soon as well as shocks and struts so it'll get a thorough scrubbing then, that and it was 40* outside.
Tools Required, forgive me if I forgot something, I put everything away before doing an exact inventory.
2x 18mm sockets
19mm socket(my bolt didn't look stock so you might do w/o this one)
15mm Socket
15mm wrench(recommended, not required)
18mm wrench(recommended, not required)
9/16 socket
2 ratchets
Flat blade screw driver
Jack
2x Jack Stands (4 would be nice but 2 works fine)
Pry bar
Spring compressor(for those w/ stock springs)
1 2x6x12 (you'll get the jack stuck under the car after swapping springs if you don't have this)
-Set the parking brake and chock the front wheels, safety first, etc.
-I recommend doing the front and then moving to the rear. Do only 1 spring at a time don't jump back and forth from side to side.
-Loosen the front wheel 1/4 turn.
-Jack the car up and support it w/ a jack stand under the subframe, use caution around the fuel and brake lines under the passenger floor board.
-Remove the front wheel.
-Remove the mounting bolts for the caliper bracket. Move the caliper to the side, you can use an existing hole in the frame to zip tie it up if you feel like it.
-Remove the brake disc.
-Place the jack under the A arm and raise it 2-3" just enough to take the stress off of the strut.
-I had cut stock springs on my car so I didn't need a spring compressor. If you have stock springs I would suggest a spring compressor for your own safety, i have never used one though.
-Remove the nut holding the ABS sensor wire to the strut bolt.
-Remove the nut holding the sway bar on to its mount on the A arm. you might need to place a wrench below the arm, I did not need to. *use WD40
-Remove the 2 bolts holding the strut to the spindle.
-Lower the A arm.
-Take note of the orientation of the botton coil on the spring, which direction is it pointing? most point to the drivers side.
-Push down on the A arm w/ your foot slightly and the spring should free itself enough to reach in and grab it. *Use caution if you have stock or drag springs in here, you might want to follow the spring compressor instructions at this point if you are using them.
-Remove the spring and then wet the lower isolator(iso) w/ WD40 and twist it off. Install it on your new spring.
-The upper iso probably stayed in place, if not place it on the top of your new spring.
-Install the new spring top first then the bottom will slide into place.
-Slowly Jack up the A arm while guiding the sway bar bolt back into the bar. (you'll only forget this once") ) once its through go ahead and reinstall the nut.
) once its through go ahead and reinstall the nut.
-Guide the strut back onto the spindle while slowing raising the arm. Reinstall the strut bolts, don't forget the ABS wire mount.
-Reinstall the brake caliper. Now would be a good time to inspect the pads, I had a cracked one so I ran to autozone and picked up a replacement set.
-Remove the jack, reinstall the front tire, place the board under the tire before you lower the car so you can get the jack out, remember the car now sits up to 2" lower.
Thats it for the front.
-For the rear I installed lowers and springs at the same time. Springs alone are easy, the lowers are what took so long. I'll put a # next to steps not needed for springs only.
-Jack up the rear, i used the center of the diff so I could get both sides up at 1 time.
-Place a jackstand under the car on each side just in front of the LCA(lower control arm). There is a large thick plate right there, don't put them anywhere else, that will probably put a huge dent in your floor board.
-Remove the rear wheel for the side you want to work on.
-Lower the rear a few inches.
-Loosen the lower shock bolt 18mm & 15mm and remove the shock from the axle.
-Loosen and remove the upper Quad shock nut from its stud and remove the quad.
-Loosen and remove the 2 bolts holding the sway bar to the LCA 15mm. You can pull it down and out of the way, I went to the other side and removed those 2 bolts at the same time and just took the entire bar out of the way.
-Slowly lower the Jack the rest of the way.
-The rear will hang down and you can remove the spring. I needed about 1/2" more drop so I used a pry bar to slip the spring over the cup. Had I removed the shocks and quads on both sides I should have gotten enough room for the spring to fall right out.
-Remove the spring and then wet the lower isolator(iso) w/ WD40 and twist it off. Install it on your new spring.
#Raise the rear back up until the LCA is level w/ the car.
#Remove the 18mm bolt from both ends of the LCA, the front inner 1 is tough to get to. I needed a stubby extension and shallow socket. DO NOT DROP YOUR SOCKET IN THERE you probably won't get it back. This is a good time to have a small magnetic screwdriver on hand if you do.
#if you have a 2nd set of jack stands now is the time to secure the rear axle. Mine tried to rotate on me about 1/2"
#Remove the LCA
#Lube the inner surface of the mounts w/ either the poly lube supplied w/ your LCAs or some WD40.
#Install the LCA front 1st, bolt it in, then move to the rear, like I said it might rotate so don't get frustrated, the uppers are still holding the axle in place so lower the jack and move it forward(towards the driveshaft) on the rear if needed, and slowly jack from there until it lines up.
#Install bolts for the rear LCA
#I had to loosen the passenger side flow tube where it mated to my H pipe (9/16" & WD40) because I've got aftermarket mufflers that didn't give me the clearance I needed for the front passenger LCA bolt.
#before reinstalling the sway bar i needed to flip the mounting clips that the bolts thread in to since the bolt was now coming in from the other side. wait to get the springs in before bolting the bar back up.
-The upper iso probably stayed in place, if not place it on the top of your new spring.
-Install the new spring top first then the bottom will slide into place, if you go on the inboard side of the LCA its easier to get to.
-Slowly raise the rear to reattach the shock and quad.
-Repeat for other side.
-Reinstall sway bar
REMEMBER TO DOUBLE CHECK YOUR TIGHTNESS and TORQUE YOUR WHEELS
When you set the car back down, don't be upset if its not as low as the kit said it would be. The springs will settle after a few mins of driving, so go around the block and then check it again. Listen for any popping or abnormal sounds. If you opted not to put the iso's back in you will have increased road vibration and w/ some LCA's it will be even worse.
front cut stock spring vs. Eibach Road Race Spring

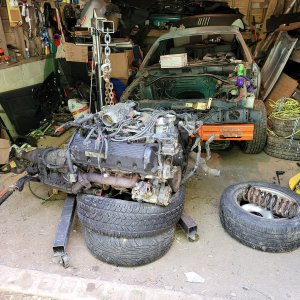
Front passenger side disassembly

Front driver side assembly

Rear cut stock spring vs. Eibach Road Race Spring

Summit LCA vs Stock LCA

Rear driver side assembly

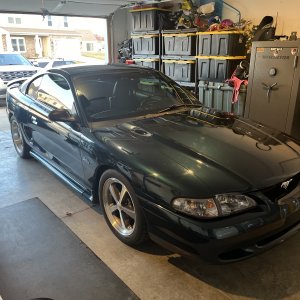
Does this look level to you?

On a scale of 1-10 with 1 being an air filter swap and 10 being an engine swap or auto to manual conversion this is about a 5. I only rate it that high because of the use of the jack and the ability to hurt yourself if you don't pay attention.
I did this after my son went to sleep so I couldn't run the compressor. It still only took me 2.5 hrs including a run to Autozone and break time for 4 tasty beverages. I normally clean everything when I pull it apart but I'll be doing caster/camber plates soon as well as shocks and struts so it'll get a thorough scrubbing then, that and it was 40* outside.
Tools Required, forgive me if I forgot something, I put everything away before doing an exact inventory.
2x 18mm sockets
19mm socket(my bolt didn't look stock so you might do w/o this one)
15mm Socket
15mm wrench(recommended, not required)
18mm wrench(recommended, not required)
9/16 socket
2 ratchets
Flat blade screw driver
Jack
2x Jack Stands (4 would be nice but 2 works fine)
Pry bar
Spring compressor(for those w/ stock springs)
1 2x6x12 (you'll get the jack stuck under the car after swapping springs if you don't have this)
-Set the parking brake and chock the front wheels, safety first, etc.
-I recommend doing the front and then moving to the rear. Do only 1 spring at a time don't jump back and forth from side to side.
-Loosen the front wheel 1/4 turn.
-Jack the car up and support it w/ a jack stand under the subframe, use caution around the fuel and brake lines under the passenger floor board.
-Remove the front wheel.
-Remove the mounting bolts for the caliper bracket. Move the caliper to the side, you can use an existing hole in the frame to zip tie it up if you feel like it.
-Remove the brake disc.
-Place the jack under the A arm and raise it 2-3" just enough to take the stress off of the strut.
-I had cut stock springs on my car so I didn't need a spring compressor. If you have stock springs I would suggest a spring compressor for your own safety, i have never used one though.
-Remove the nut holding the ABS sensor wire to the strut bolt.
-Remove the nut holding the sway bar on to its mount on the A arm. you might need to place a wrench below the arm, I did not need to. *use WD40
-Remove the 2 bolts holding the strut to the spindle.
-Lower the A arm.
-Take note of the orientation of the botton coil on the spring, which direction is it pointing? most point to the drivers side.
-Push down on the A arm w/ your foot slightly and the spring should free itself enough to reach in and grab it. *Use caution if you have stock or drag springs in here, you might want to follow the spring compressor instructions at this point if you are using them.
-Remove the spring and then wet the lower isolator(iso) w/ WD40 and twist it off. Install it on your new spring.
-The upper iso probably stayed in place, if not place it on the top of your new spring.
-Install the new spring top first then the bottom will slide into place.
-Slowly Jack up the A arm while guiding the sway bar bolt back into the bar. (you'll only forget this once
) once its through go ahead and reinstall the nut.-Guide the strut back onto the spindle while slowing raising the arm. Reinstall the strut bolts, don't forget the ABS wire mount.
-Reinstall the brake caliper. Now would be a good time to inspect the pads, I had a cracked one so I ran to autozone and picked up a replacement set.
-Remove the jack, reinstall the front tire, place the board under the tire before you lower the car so you can get the jack out, remember the car now sits up to 2" lower.
Thats it for the front.
-For the rear I installed lowers and springs at the same time. Springs alone are easy, the lowers are what took so long. I'll put a # next to steps not needed for springs only.
-Jack up the rear, i used the center of the diff so I could get both sides up at 1 time.
-Place a jackstand under the car on each side just in front of the LCA(lower control arm). There is a large thick plate right there, don't put them anywhere else, that will probably put a huge dent in your floor board.
-Remove the rear wheel for the side you want to work on.
-Lower the rear a few inches.
-Loosen the lower shock bolt 18mm & 15mm and remove the shock from the axle.
-Loosen and remove the upper Quad shock nut from its stud and remove the quad.
-Loosen and remove the 2 bolts holding the sway bar to the LCA 15mm. You can pull it down and out of the way, I went to the other side and removed those 2 bolts at the same time and just took the entire bar out of the way.
-Slowly lower the Jack the rest of the way.
-The rear will hang down and you can remove the spring. I needed about 1/2" more drop so I used a pry bar to slip the spring over the cup. Had I removed the shocks and quads on both sides I should have gotten enough room for the spring to fall right out.
-Remove the spring and then wet the lower isolator(iso) w/ WD40 and twist it off. Install it on your new spring.
#Raise the rear back up until the LCA is level w/ the car.
#Remove the 18mm bolt from both ends of the LCA, the front inner 1 is tough to get to. I needed a stubby extension and shallow socket. DO NOT DROP YOUR SOCKET IN THERE you probably won't get it back. This is a good time to have a small magnetic screwdriver on hand if you do.
#if you have a 2nd set of jack stands now is the time to secure the rear axle. Mine tried to rotate on me about 1/2"
#Remove the LCA
#Lube the inner surface of the mounts w/ either the poly lube supplied w/ your LCAs or some WD40.
#Install the LCA front 1st, bolt it in, then move to the rear, like I said it might rotate so don't get frustrated, the uppers are still holding the axle in place so lower the jack and move it forward(towards the driveshaft) on the rear if needed, and slowly jack from there until it lines up.
#Install bolts for the rear LCA
#I had to loosen the passenger side flow tube where it mated to my H pipe (9/16" & WD40) because I've got aftermarket mufflers that didn't give me the clearance I needed for the front passenger LCA bolt.
#before reinstalling the sway bar i needed to flip the mounting clips that the bolts thread in to since the bolt was now coming in from the other side. wait to get the springs in before bolting the bar back up.
-The upper iso probably stayed in place, if not place it on the top of your new spring.
-Install the new spring top first then the bottom will slide into place, if you go on the inboard side of the LCA its easier to get to.
-Slowly raise the rear to reattach the shock and quad.
-Repeat for other side.
-Reinstall sway bar
REMEMBER TO DOUBLE CHECK YOUR TIGHTNESS and TORQUE YOUR WHEELS
When you set the car back down, don't be upset if its not as low as the kit said it would be. The springs will settle after a few mins of driving, so go around the block and then check it again. Listen for any popping or abnormal sounds. If you opted not to put the iso's back in you will have increased road vibration and w/ some LCA's it will be even worse.
front cut stock spring vs. Eibach Road Race Spring
Front passenger side disassembly
Front driver side assembly
Rear cut stock spring vs. Eibach Road Race Spring
Summit LCA vs Stock LCA
Rear driver side assembly
Does this look level to you?