Patientzero 2002 Roush LS3 build

OP
OP
Patientzero

Patientzero

Member
Joined
Feb 1, 2019
Messages
161
Reaction score
42
Location
Kansas City
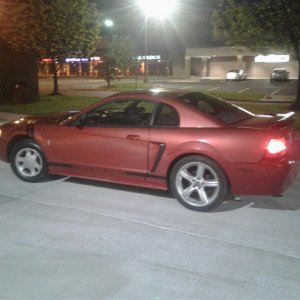
Now that the car was back together it was finally time to get back on the track. It had been almost a year since the last time I ran the car. But, sometimes no matter how ready you think you are, the universe has other plans.

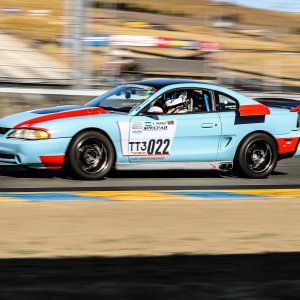
I was signed up to run SCCA autocross but the week before the car starts running like crap and I notice the O2 sensor had stopped working. I ordered a new sensor that arrived just in time for the event. It didn't work either. Not wanting to risk hurting the car and not wanting to waste the money I had already paid, I ran my brand new Ford Fusion that had just gone over 1000miles.
20190728_074818.jpg

It didn't do too bad either!
Screenshot_20190728-134719_Textgram.jpg

I started talking to Holley about the issue I was having with my HP. They sent me another new oxygen sensor that also did not help. Holley ended up sending me a loaner ECU to take that out of the equation. With the loaner ECU the problem was fixed immediately. All the "bad" 02 sensors worked too. The problem was in the ECU. I sent it in so they could test it. After bench testing they claim that it worked fine and the 02 sensor read correctly. I got it back and tried it in the car, same shit. After going back and forth with Holley for the next couple weeks they tell me that there is nothing they can(are willing) to do because my HP was out of warranty but they offered me a small discount on a new one. A $1300 dollar ecu isn't something I expected to have to replace after 2 years.
20190727_084424.jpg

My ECU still worked completely fine other than the O2 sensor driver had failed. This meant I couldn't use closed loop, something the Holley is very good at. I didn't feel like dishing out another grand for a new ecu so I decided to improvise. At this point I still had the loaner ecu so I put a secondary wideband in the car and fed the signal into the Holley so I could at least monitor my AFR's. I had this older AEM wideband that I was using in my '79 C10 that was just sitting around.
20190803_105311.jpg
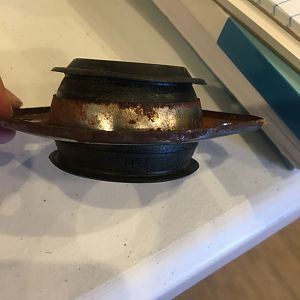
At some point I lost the backing plate. Not a problem, I have a 3d printer so I drew a new one up in Fusion 360 and hit print. VOILE!
20190803_104705.jpg
20190803_105101.jpg
20190803_120340.jpg
 
OP
OP
Patientzero

Patientzero

Member
Joined
Feb 1, 2019
Messages
161
Reaction score
42
Location
Kansas City
Now that I can monitor AFR's and be sure I'm not going to hurt the car, I double checked my tune and got the car ready for the next event.

I had pre-ordered one of these rear spoilers from Carter's Customs and it showed up just in time to go on the car before loading it up.
20190806_193618.jpg
20190806_193627.jpg
20190806_193643.jpg
20190806_193700.jpg

Now I got the car loaded on my new trailer for the first time and was ready to hurt some feelings. While the car is street legal, the place we run at is 1hr 30min away. The car will make it there just fine, but like last time when the slave cylinder resigned, getting home can be an issue. Plus it saves my tires.
20190816_193729.jpg
20190816_193656.jpg
 
OP
OP
Patientzero

Patientzero

Member
Joined
Feb 1, 2019
Messages
161
Reaction score
42
Location
Kansas City
Here is some of my local competition. The guy that drives the Sticky Motorsports Camaro is the current CAM-T national champion.
20190818_090715.jpg
20190818_090653.jpg
20190818_090639.jpg
20190818_090733.jpg
20190818_090630.jpg
20190818_090621.jpg

The car performed great! I took 2nd place in CAM-C behind the current CAM-T national champion and placed #15 overall out of 117 cars. Had to shake a little rust out after not driving the car for over a year at this point but it has alot more left in it.
Screenshot_20190818-141115_Samsung Internet.jpg
Screen Shot 2019-08-24 at 9.09.46 PM.png

 
OP
OP
Patientzero

Patientzero

Member
Joined
Feb 1, 2019
Messages
161
Reaction score
42
Location
Kansas City
Over the next couple months I basically went to every event I could find just to shake the cobwebs out and give the car a thorough shakedown.

This is from an event with Ozark Region SCCA
20190901_100351.jpg
20190901_100359.jpg
69445429_2939697869379730_5544038055913979904_o (1).jpg

Ready for battle.
20190901_094902.jpg

This surface was SLICK and dusty. The car did not do too hot down here.
70145832_2939697442713106_3398532781519667200_o (1).jpg
69561255_2939696429379874_2053660413836394496_o (1).jpg
 
OP
OP
Patientzero

Patientzero

Member
Joined
Feb 1, 2019
Messages
161
Reaction score
42
Location
Kansas City
Here are a few random pictures from events and some in car video. I don't remember which events these were from but they were all Kansas City Region SCCA.
20190915_111043.jpg
20190915_101234.jpg
20190915_101207.jpg

This event I placed 2nd in CAM-C and 10th overall out of 104 cars.

This one was 1st in CAM-C and 13th out of 98 cars.

This event I remember pretty well. There was a big jump right in the middle of the long straight and after the jump I kept hearing a loud "tink" sound. Like metal to metal. The first time it happened I just stopped on track because I was sure I broke something. I couldn't figure it out and eventually came to the conclusion it was one of the coilovers springs popping back into place after becoming unseated over the jump. I ended up DNF'ing on 3 of my 5 runs and never really recovered. Ended up in 3rd for CAM-C and 13 of 98 overall.
 
OP
OP
Patientzero

Patientzero

Member
Joined
Feb 1, 2019
Messages
161
Reaction score
42
Location
Kansas City
I took a trip out to Kansas for an event called the Lake Garnett Grand Prix Revival. This is a pretty cool event. They have a ton of vintage race cars and shut down public streets to have exhibition races around the lake. I didn't enter for any of the track events this time but I did enter the autocross.
Screenshot_20190918-171744_Facebook.jpg
FB_IMG_1571413498423.jpg
FB_IMG_1571413489486.jpg

I ended up in 2nd in my class and 2nd overall. I was the fastest car there that ran on gasoline... I got beat by a Tesla :(
20191018_133324.jpg

 
OP
OP
Patientzero

Patientzero

Member
Joined
Feb 1, 2019
Messages
161
Reaction score
42
Location
Kansas City
If you've noticed, in my newer videos it shows a small map of the track, speed, G-force, split times, etc embedded in my video. This is from an app called "RaceChrono Pro". This uses a Garmin GPS receiver and lets you compare laps against each other and set markers for split times. Very happy with this app.
I didn't want to just velcro or take the GPS receiver to the dash like some people do so I 3d printed a mount to use a standard camera suction cup and put it on the windshield. I went through a couple iterations of this to refine it and make it look more visually appealing. I eventually reprinted it out of black ABS, I just don't have a picture of that at the moment.
20190908_162544.jpg
20190908_162453.jpg
20190908_162511.jpg
20190908_184351.jpg
20190908_184406.jpg

Finished version.
20190909_193447.jpg
 
OP
OP
Patientzero

Patientzero

Member
Joined
Feb 1, 2019
Messages
161
Reaction score
42
Location
Kansas City
With the season coming to an end it was time to start thinking about what I needed to do for the offseason and getting ready for next year. First on the agenda was getting my C10 pulled out of the basement to make room for the Mustang. I'm not a fan of working outside, I'm soft.
20191006_093604.jpg

So much room for activities now!
20191006_123613.jpg
20191006_123605.jpg

I had to pull the bumper off the Mustang because the entrance ramp to the basement is so steep but I got it down there.
20191010_141507.jpg
20191010_142133.jpg

I wanted to redo some things on the front of the car to help cut weight and so I could box in the radiator so to help with that I ordered a tubular bumper support from MAF Racing.
20191023_125521.jpg

I was also never really happy with how flimsy the rear spoiler was. The 3d printed brackets that it came with were nice but started to warp after being out in the sun and I had to constantly retighten them because the material would compress and they would loosen up again. I make some new brackets out of aluminum that were better braced and also added a 3rd bracket in the middle of the trunk to get rid of the flex. This setup is pretty dang solid. With the car in neutral I could push it by the spoiler now.
20191026_181126.jpg
20191026_181142.jpg
20191026_181230.jpg
 
OP
OP
Patientzero

Patientzero

Member
Joined
Feb 1, 2019
Messages
161
Reaction score
42
Location
Kansas City
Last event of the season. We had 11 cars show up for CAM-C. Weather was beautiful. I was back in 3rd place until my last run. Last event of the year and last run of the day, just had to send it.

I got the win in CAM-C and 9th fastest out of 136 cars.
Screenshot_20191101-001037_Facebook.jpg

Now it was time to start the offseason upgrades. After running the car 6 times in 3 months plus a day-long Solo School I had a pretty good idea of the direction I needed to go with the car.

My main goals for this winter were:
1. More camber on the front and front end grip. Possibly higher spring rate.
2. Clean up the front end of the car. Simplify and drop weight.

I started by weighing the car. This is how it pulled off the trailer after the last race. Basically full tank of gas. 3057lbs. I was honestly surprised the car was this light. The last time I had it on scales it was 3191lbs with the 6 speed and old wheels plus a few more things.
20191029_140617.jpg

Next I started disassembly. I wanted to simplify the front end and remove weight. This is what I started with.
20191031_112107.jpg
20191031_111534.jpg 20191031_112133.jpg
 
Last edited:
OP
OP
Patientzero

Patientzero

Member
Joined
Feb 1, 2019
Messages
161
Reaction score
42
Location
Kansas City
First on the agenda was some new control arms. The car had an AJE K-member and controls arms on it when I bought it. I felt that was good enough up until now and decided on some of MM forward offset control arms to try and help with the camber situation. The AJE control arms came off along with the STOCK rear control arms. I should have upgraded these long ago and just never got to it.
20191103_123208.jpg

The new control arms from MM seriously look fantastic.
20191018_115837.jpg
20191018_115830.jpg
20191018_115818.jpg
20191018_115807.jpg
20191106_104615.jpg
20191106_104736.jpg
 
OP
OP
Patientzero

Patientzero

Member
Joined
Feb 1, 2019
Messages
161
Reaction score
42
Location
Kansas City
After several emails back and forth with Jack from Maximum Motorsports, he recommended I change sway bars. The Steeda bars came off and I ordered an Eibach to replace it. I will wait to order the rear bar once I get the car back on the ground and have my final weights and get those numbers to Jack.
20191102_173128.jpg
20191112_083246.jpg

Keeping with my mission to simplify, I pulled all the brake lines off the front of the car. The ABS had been deleted long ago but now it was time to do something about all these extra brake lines.
20191117_102546.jpg
20191117_102559.jpg

During teardown I found one of my soft lines had come into contact with the wheel and chewed up the outside plastic cover so I got an order in for some new longer lines so I could route them away from the wheels better.
20191118_113934.jpg

With the factory lines out of the way I got to work bending up some new lines and mounted my Baer proportioning valve that's been sitting on the shelf for 2 years.
20191117_192926.jpg
20191118_111348.jpg
20191118_111415.jpg
 
OP
OP
Patientzero

Patientzero

Member
Joined
Feb 1, 2019
Messages
161
Reaction score
42
Location
Kansas City
Factory bumper support removed and replaced with the MAF Racing piece.
20191108_124058.jpg

Another goal that I hadn't really mentioned yet is to improve cooling. The car never runs hot but it gets up to temp and the fan runs constantly, it doesn't cycle. Even in 90+ degree weather, the highest I've seen it is 208ish. I want to start doing more track events with this car and eventually Time Trials so I want to make sure the cooling never becomes an issue. To help this I'm laying the radiator down and adding some more vents in the hood along with boxing the radiator in to the bumper to prevent air from going around it.

To be able to get the top of the radiator tucked under the core support I had to start out by cutting off the filler neck and filling the hole. I will relocate this later.
20191120_093811.jpg
20191120_093943.jpg
20191120_095008.jpg
20191120_100137.jpg
20191120_100811.jpg
20191120_103741.jpg
 
OP
OP
Patientzero

Patientzero

Member
Joined
Feb 1, 2019
Messages
161
Reaction score
42
Location
Kansas City
I made an aluminum frame inside the core support to make it easier to transition the aluminum sheeting into the bumper and to serve as a base to mount the radiator.
20191124_134211.jpg
20191124_133632.jpg
20191124_133520.jpg

On the bottom side I made this little L brackets out of steel that bolt to the frame rails. Brackets got welded onto the end tanks and the whole radiator is supported on rubber isolators to help prevent stress cracks from vibration.
20191120_120554.jpg
20191120_134614.jpg
20191120_134637.jpg
20191122_134652.jpg
20191124_134228.jpg
 
OP
OP
Patientzero

Patientzero

Member
Joined
Feb 1, 2019
Messages
161
Reaction score
42
Location
Kansas City
The final angle on the radiator is 20 degrees. This should help the air make the turn and get out the hood.
20191122_134105.jpg
20191122_134634.jpg

Now I needed to put a new filler neck on. It basically ended up in the stock location.
20191123_130420.jpg
20191123_134507.jpg
20191123_130406.jpg
 
OP
OP
Patientzero

Patientzero

Member
Joined
Feb 1, 2019
Messages
161
Reaction score
42
Location
Kansas City
With the radiator mounted I needed to get the oil cooler and power steering cooler mounted.
20191205_100540.jpg
20191203_120915.jpg
20191202_130739.jpg
20191202_130839.jpg
20191205_134721.jpg
20191205_134527.jpg

Then I started making templates for the sheet aluminum to box this all in. I'm still waiting for the aluminum to show up. I was told it will be here Tuesday.
20191206_130645.jpg
20191206_130638.jpg
 
OP
OP
Patientzero

Patientzero

Member
Joined
Feb 1, 2019
Messages
161
Reaction score
42
Location
Kansas City
Then templates for the front half that channels down to the bumper opening. This will be removable with 4 bolts.
20191129_173235.jpg
20191129_173249.jpg
20191129_173135.jpg

I ordered some brake cooling ducts from Full Tilt Boogie. These will get hooked up to the factory fog light holes.
20191207_105838.jpg
20191207_105826.jpg

The new rules for CAM came out and my car got moved to CAM-T. I get a 300lb weight break now along with the ability to have a front splitter up to 6".

I had to get supplies.
20191127_131617.jpg

I basically traced the shape of the bumper onto the 1/2" Birch plywood and squared up all the lines. Then I came FORWARD 5 1/2" to make sure I'm within the rules.
20191207_122012.jpg
20191207_133851.jpg

This is how the car is sitting as of 9:30 Sunday night. This thread is completely up to date other than some minor boring details. Feel free to check out my Instagram if you want more. The next step is getting the splitter mounted to the car and then water-proofing it and wrapping or painting it.
20191207_150229.jpg
20191207_150245.jpg
 

Burninrock24

Active Member
Joined
Mar 19, 2013
Messages
644
Reaction score
71
Location
Minneapolis, MN
Just stumbled across this build thread. Great build, great content, and great tech! Shame it didn't get more attention.
 

Latest posts

Forum statistics

Threads
77,505
Messages
1,503,967
Members
14,977
Latest member
Vallybell

Staff online

Top