White95’s ‘23 F-150 “Abominable”

Musturd

Post Whore
Joined
Feb 12, 2011
Messages
10,642
Reaction score
2,512
The intake manifold should be good for a few tenths . I see 11’s in the future
 

96blak54

Moderator
Staff
Joined
Feb 21, 2011
Messages
10,423
Reaction score
3,639
Location
Lawrenceburg Kentucky
I know for a fact aluminum accessory drive pulleys will knock off a tenth. Let me see what i can dig up for you, cause my coyote stock buddies might have some pulleys laying around. The coyote stock class doesnt require accessories to be driven now
 

RAU03MACH

Legend
Joined
Apr 23, 2019
Messages
7,212
Reaction score
7,254
Location
NEW MEXICO
View attachment 30455

As it turns out, the oil filter was leaking. The tech stated the seal was bad and it was only noticeable with the engine running. Duh. They rectified it and cleaned it up. Not a perfect job but that’s ok.
did you get a chance to look at the filter
just asking some mechanics will use any excuses to CTA
and blame a part not themselves
 
OP
OP
white95

white95

Apex Junky
Admin
Joined
Dec 30, 2007
Messages
20,727
Reaction score
9,147
Location
Prairieville, LA
did you get a chance to look at the filter
just asking some mechanics will use any excuses to CTA
and blame a part not themselves

No but if I had to guess, the other guy didn’t oil the gasket prior to installation.
 
OP
OP
white95

white95

Apex Junky
Admin
Joined
Dec 30, 2007
Messages
20,727
Reaction score
9,147
Location
Prairieville, LA
GT350 install process:

1. Disconnect fuel pump relay connector above the fuel tank.

IMG_2578.jpeg

IMG_2581.jpeg

2. Second step was to start the truck and let it stall. This was the easiest way to relief fuel system pressure. It obviously ran pretty rough and I couldn’t resist a video. Afterwards, I cranked the engine for about 10 seconds to ensure the pressure was relieved.


3. Disconnected the battery.


IMG_2583.jpeg

4. Removed the CAI, evap purge solenoid, disconnected both (high/low pressure) fuel lines, disconnected the fuel injector harness and pulled the PCV hose.

IMG_2588.jpegIMG_2589.jpegIMG_2590.jpegIMG_2592.jpeg

IMG_2594.jpegIMG_2594.jpeg
 
OP
OP
white95

white95

Apex Junky
Admin
Joined
Dec 30, 2007
Messages
20,727
Reaction score
9,147
Location
Prairieville, LA
5. Disconnected the fuel rail pressure sensor.

IMG_2600.jpeg

6. Disconnected the MAP sensor.

IMG_2602.jpeg

It was more awkward than this picture suggests.

IMG_2603.jpeg

Figured out putting a floor mat over the hood latch made things more tolerable. What you don’t see is the 6’ ladder I was using for access.

IMG_2609.jpeg

7. Removed the fuel rails.

IMG_2604.jpeg

8. Removed the stock intake.

IMG_2606.jpeg

IMG_2607.jpeg
 
OP
OP
white95

white95

Apex Junky
Admin
Joined
Dec 30, 2007
Messages
20,727
Reaction score
9,147
Location
Prairieville, LA
9. Preparing the GT350 intake for installation. First was drilling the upper left throttle body hole to alleviate a misalignment issue.

IMG_2597.jpeg

Here is a good comparison of the two intakes. The truck intake has much longer runners than the GT350 and is testament to the great low end torque it offered. This era of truck doesn’t use IMRC’s and was quite rowdy down low. I’ll inevitably lose low end torque but the top end will be excellent. Given the fact I have a 10-speed, low end only matters for a moment.

IMG_2610.jpeg

Here you can see some of the modifications needed to fit the Gen 4 fuel rails to a previous generation intake.

IMG_2613.jpeg

Notice the stock intake has built in spacers.

IMG_2614.jpeg

Thats where these copper spacers come into play.

IMG_2612.jpeg

IMG_2615.jpeg

IMG_2616.jpeg
 
OP
OP
white95

white95

Apex Junky
Admin
Joined
Dec 30, 2007
Messages
20,727
Reaction score
9,147
Location
Prairieville, LA
Next was drilling a hole on the back of the intake to mount the MAP sensor. I gave it a small bead of blue RTV to ensure a proper seal.

IMG_2619.jpeg

IMG_2620.jpeg

IMG_2621.jpegIMG_2622.jpeg

10. Dropped the GT350 intake in place, installed the fuel rails and torqued everything down.

IMG_2628.jpeg

IMG_2632.jpeg

11. Cut the evap purge solenoid hose and replaced the front section with rubber hose. You can see the previously installed evap block off plate.

IMG_2639.jpeg

12. Made then installed a new PCV line from rubber hose. Connected the battery, primed the fuel system to leak check and fired it up! No leaks and no CELs.

IMG_2642.jpeg

13. Got everything set up to datalog and hit the road.

IMG_2650.jpeg

IMG_2643.jpeg

More to come!
 

d.garza18

Active Member
Joined
Jun 23, 2017
Messages
691
Reaction score
148
Location
TEXAS
5. Disconnected the fuel rail pressure sensor.

View attachment 30487

6. Disconnected the MAP sensor.

View attachment 30489

It was more awkward than this picture suggests.

View attachment 30490

Figured out putting a floor mat over the hood latch made things more tolerable. What you don’t see is the 6’ ladder I was using for access.

View attachment 30494

7. Removed the fuel rails.

View attachment 30491

8. Removed the stock intake.

View attachment 30492

View attachment 30493
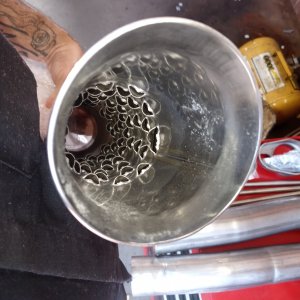
Looks like fun! I found that an old or cheap pillow is very easy on the chest! Haha
 

Latest posts

Forum statistics

Threads
77,730
Messages
1,509,045
Members
15,154
Latest member
lndabrkes01

Members online

Top