2002 Trans Am Collector Edition

96blak54

Moderator
Staff
Joined
Feb 21, 2011
Messages
9,981
Reaction score
2,812
Location
In the shop
Hmmm...a beach bash sounds like fun! Can i ask a favor for you to think of me while you guys are there?

Sweet ride! Keep doin what ya do cause its comin around lookin good!
 

ReplicaR

Well-Known Member
Joined
Mar 2, 2007
Messages
3,452
Reaction score
428
They are just regular WS6 wheels with painted centers. Don't get too attached to finding actual wheels, you might have better luck finding a polished set of WS6 wheels, and getting the center blacked out.
 

01yellercobra

Active Member
Joined
Feb 23, 2018
Messages
628
Reaction score
193
They are just tough to find in any sort of condition, and EVERYTHING breaks on them so it's kind of a pain. Definitely a lot of fun though. We were going to check out a Pewter one but bought this one first instead.

I had a 94 T/A for a little while. Even the LT1 moved out pretty good. But as for the rest of the car...not so much. I remember the head liner was falling apart, I couldn't use the high beams because they'd get stuck on, and the foam for the steering wheel was separating from the metal frame.
 

evilcw311

Most Evil Member!
SN95 Supporter
Joined
May 9, 2010
Messages
7,456
Reaction score
2,134
Location
Louisville, KY
F-bodies have had garbage interiors forever. It’s unfortunate as the ws6’s looked awesome and had great motors.


Sent from my iPhone using Tapatalk
 

ReplicaR

Well-Known Member
Joined
Mar 2, 2007
Messages
3,452
Reaction score
428
I had a 94 T/A for a little while. Even the LT1 moved out pretty good. But as for the rest of the car...not so much. I remember the head liner was falling apart, I couldn't use the high beams because they'd get stuck on, and the foam for the steering wheel was separating from the metal frame.

Sounds roughly familiar. My second car was a 1993 Trans Am. It was a fully loaded car minus the t-tops, and I've had virtually all the same issues. The turn signal stalk actually broke off completely on mine, the headliner sagged as well (I used sewing pins soaked in super glue to hold it up), and the infamous Opti-Spark distributor went out on the second day I've had the car. Other than that, it was pretty fun though, good power, looked cool, but terrible in every other respect. Oh and mine was super rare color called Grey Purple Metallic. Looked just like this, not my picture, because I don't have any handy.

80-img_0209_65473f06376cc66839d86d85638dde942e1b7833.jpg
 

01yellercobra

Active Member
Joined
Feb 23, 2018
Messages
628
Reaction score
193
I do miss the T tops. The looks I'd get when I'd pull over on the shoulder of the freeway to pop them off was funny. Mine was a dark green color. And I had those same rims.
 
OP
OP
g36 monkey

g36 monkey

Post Whore
SN95 Supporter
Joined
Nov 15, 2008
Messages
14,081
Reaction score
596
Location
Orlando, Fl
Hmmm...a beach bash sounds like fun! Can i ask a favor for you to think of me while you guys are there?

Sweet ride! Keep doin what ya do cause its comin around lookin good!

Haha Thanks!

They are just regular WS6 wheels with painted centers. Don't get too attached to finding actual wheels, you might have better luck finding a polished set of WS6 wheels, and getting the center blacked out.

That's probably true lol. For now we are just trying to make sure it runs with no issues, wheels will come after.

I had a 94 T/A for a little while. Even the LT1 moved out pretty good. But as for the rest of the car...not so much. I remember the head liner was falling apart, I couldn't use the high beams because they'd get stuck on, and the foam for the steering wheel was separating from the metal frame.

Yea, they cheaped out on EVERYTHING inside. I think the steering wheel for this one is nicer because it's a special edition. I've driven a few others and they were not this bad.

F-bodies have had garbage interiors forever. It’s unfortunate as the ws6’s looked awesome and had great motors.

Seriously!

Sounds roughly familiar. My second car was a 1993 Trans Am. It was a fully loaded car minus the t-tops, and I've had virtually all the same issues. The turn signal stalk actually broke off completely on mine, the headliner sagged as well (I used sewing pins soaked in super glue to hold it up), and the infamous Opti-Spark distributor went out on the second day I've had the car. Other than that, it was pretty fun though, good power, looked cool, but terrible in every other respect. Oh and mine was super rare color called Grey Purple Metallic. Looked just like this, not my picture, because I don't have any handy.

I wondered how you knew so much about them!

This weekend I pulled the plug for the headlight motor and found that it was corroded, which is a very common issue. I ordered a couple new plugs to sort it out this week hopefully. While investigating I found that the driver side motor has been replaced with an aftermarket one. The Dorman ones have screws in them, the factory ones have covers that just glue in. This should help with longevity of the motor.
 
OP
OP
g36 monkey

g36 monkey

Post Whore
SN95 Supporter
Joined
Nov 15, 2008
Messages
14,081
Reaction score
596
Location
Orlando, Fl
Quick update on the CETA:

In this update I will cover how to remove the front bumper since I could not find any good guides.

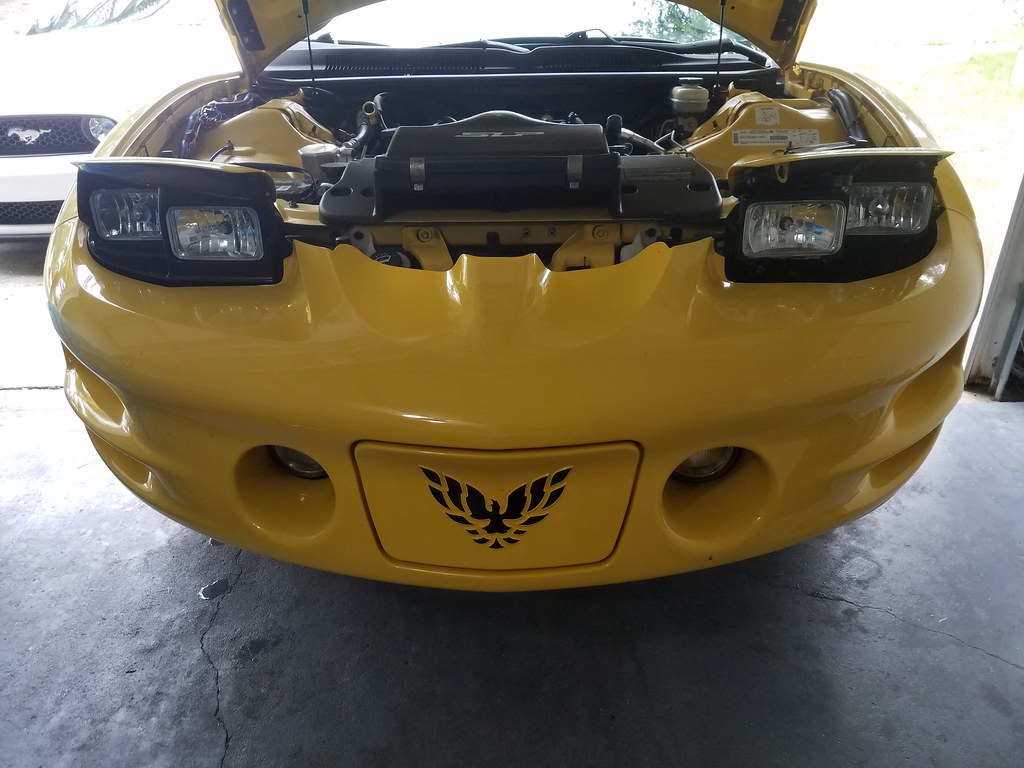
The other day I swapped the headlights because the first round from LMC had some issues. Put the new ones in and then the lights stopped popping up, but the bulbs would work.

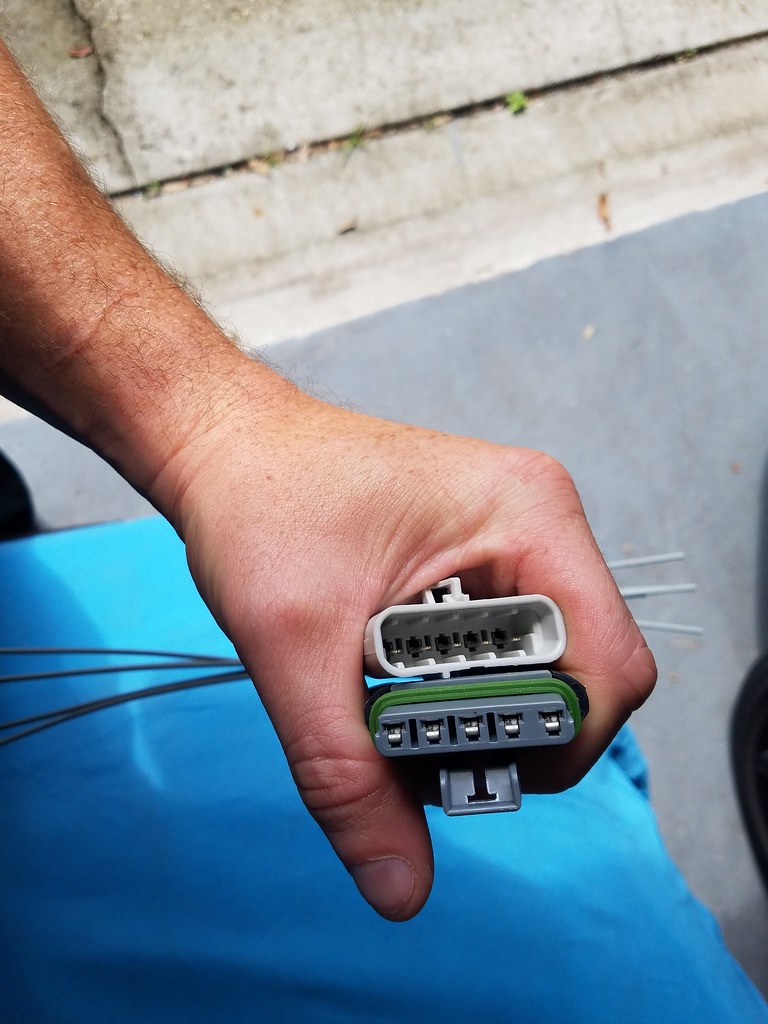
I did some research and found that the plugs for the headlight motors commonly get corroded which causes a number of issues. So I pulled the plugs apart and found:


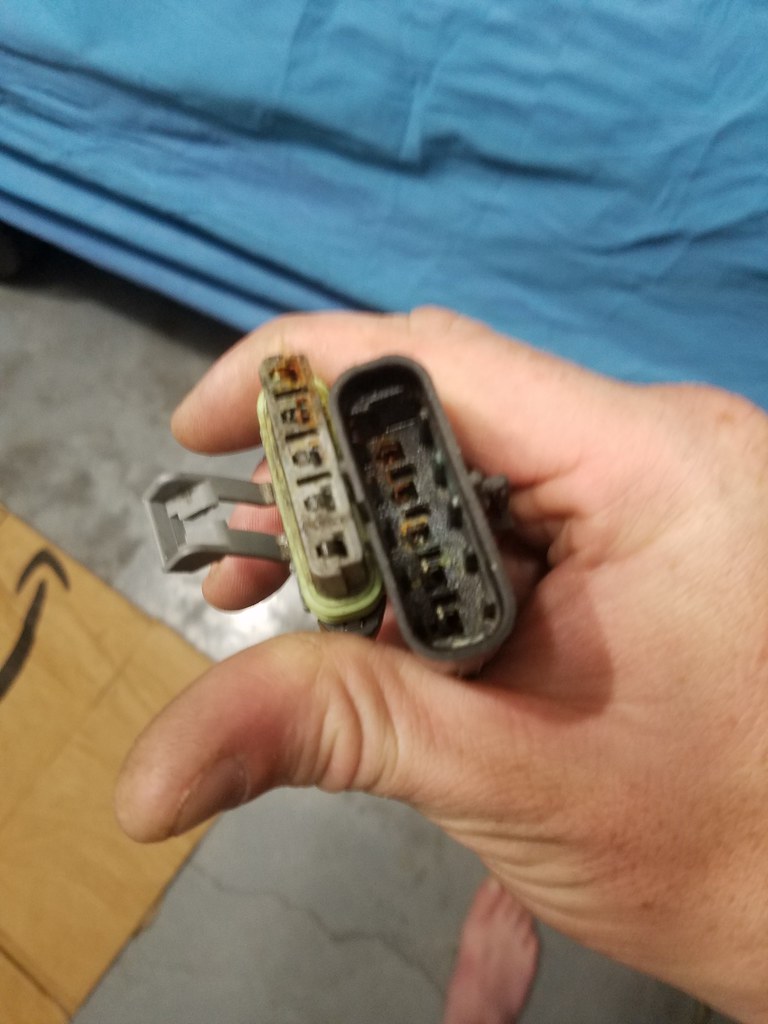
As you can see, the plugs are toast. Hard to see in the picture but three of the five “males” are missing entirely (because they ended up “stuck” in the female side….for eternity….maybe I shouldn’t have fixed this, not a bad life).

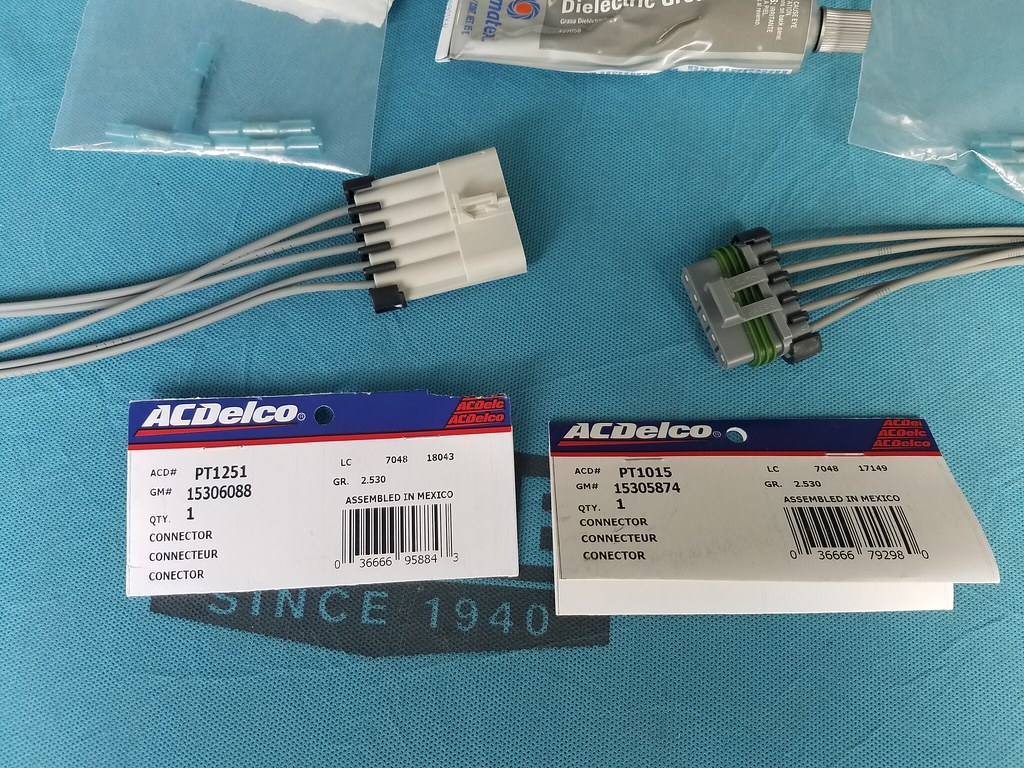
If you are super ultra-observant, you recognize that I am way away from the car in this picture, so, you guessed it, I have already replaced these bits. So here is that:

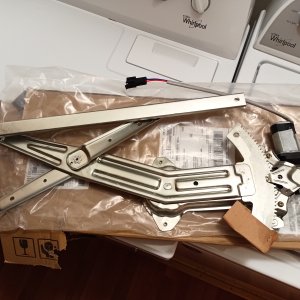
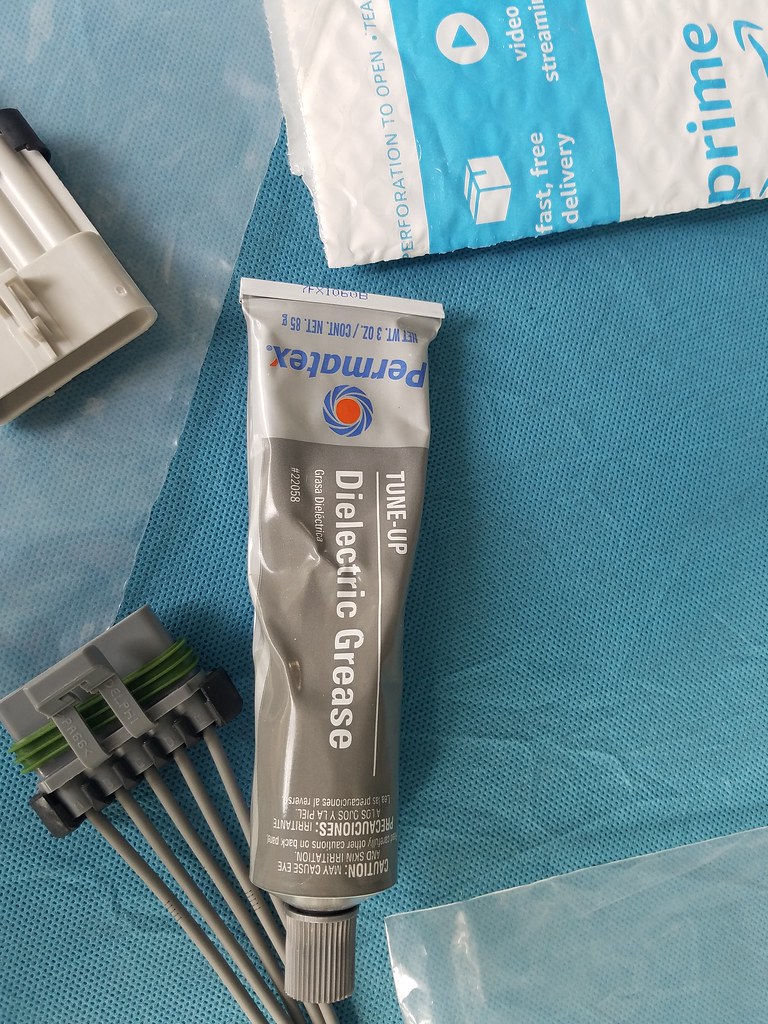
First step, order some new plugs. Big disclaimer here – I did not test to see if the new plugs would work with the old ones before I threw the old ones away. Sorry. I figure if your plugs are in that sort of condition, you may as well replace both.

AC DELCO PT1251 and AC DELCO PT1015 are five lead connectors, and they plug into one another, and are more than up for this task. Though I did not attempt to plug into the old ones, they look identical.


When I put these together I used copious amounts of Dielectric grease to further aid in corrosion prevention. Honestly, probably used too much. Most of it came out when I plugged them in. Don’t be dumb like me, use a reasonable amount.


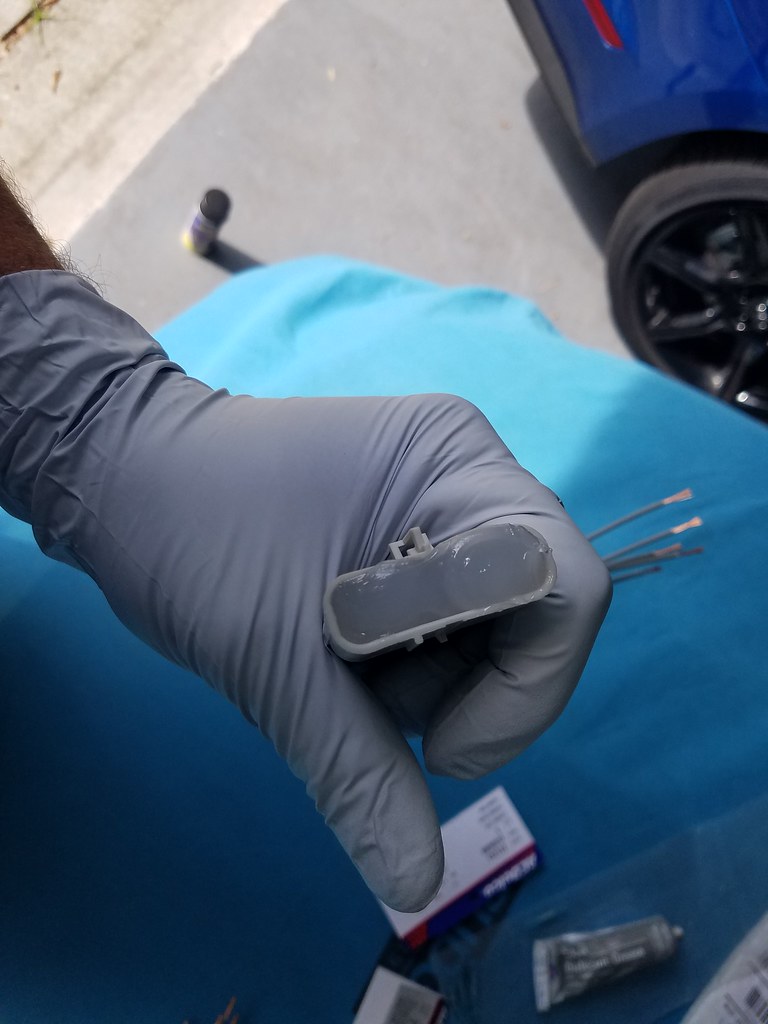
I also found this stuff at a store. It claims to be liquid electrical tape. I imagine it won’t hurt to further seal this unit.


This is after a coat with that liquid tape. It has a Plastidip sort of consistency. I did two coats. Take note, none of the wires were color coded anyhow. I imagine having some black on them won’t make any difference down the line. I also ran a zip tie (not tied) through the plug connection. GM typically has those little plastic pieces to “lock” plugs together. If there was supposed to be one, it was gone. So, I made my own.

So, in the midst of doing this project, I decided there was no way I was going to effectively splice these new units in while the bumper was still in place. I could not find a good write up on how to remove the front bumper from a 97-02 Trans Am. So, I decided to make one, after much cursing, here you go:


Manually raise the headlights (I had to because, well, you know, broken. But, you could use the method of letting the motors raise the lights then unhooking the battery.)

Remove the headlight bezels. Not ultimately necessary but 6 little screws that are easy to get to can make your life much easier.

Go ahead and raise the car and put it on jack stands.

Apparently this bolt is a Firebird thing, and is not found on the Camaro. It is beside each headlight and needs a 7mm socket or nut driver to remove. I would do it first so you don’t forget. This is much easier without the plastic around the lights:


Use a trim tool or screwdriver to remove the three tabs on top and the three on the bottom.


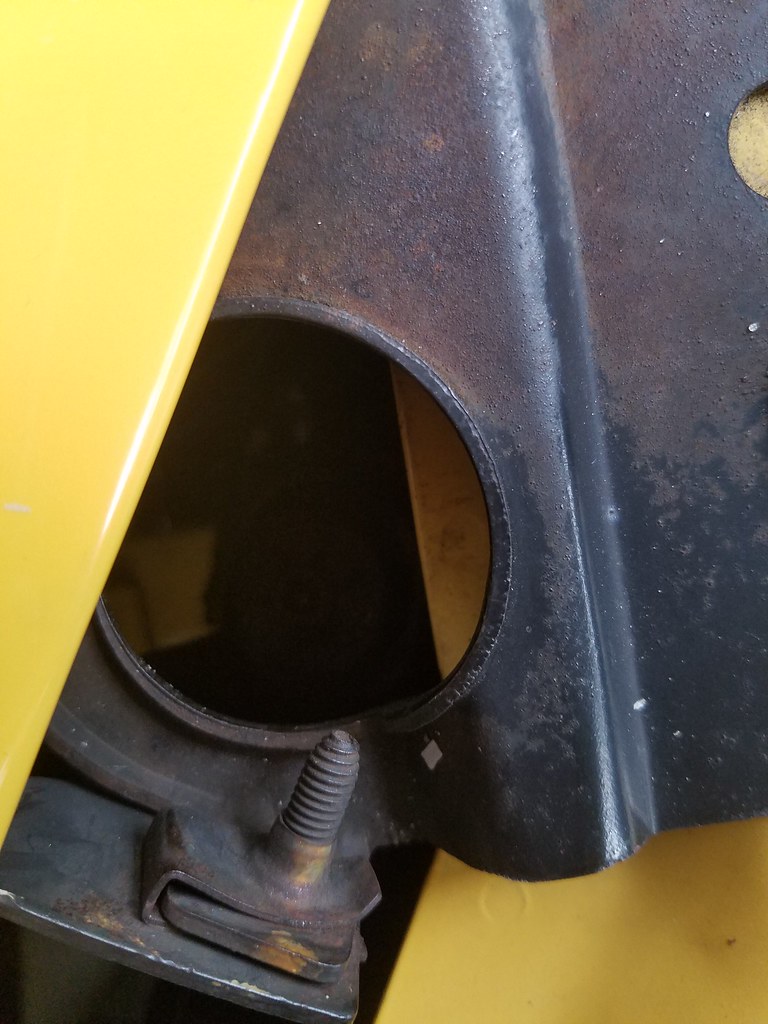
Remove the bolts for the “Air Deflectors” on the underside. I believe it is five bolts on each side that need to be removed. 10mm socket on an electric impact works great here. But, you can do it by hand.

Using the space from the deflector to see through, locate these two nuts on either side. I needed a ¼” drive universal joint, 10mm deep-well socket, and some extensions to effectively get to them. You might not. A swivel deep-well may have done the trick.

At this time, I removed the bulb from the turn signal and driving lights.


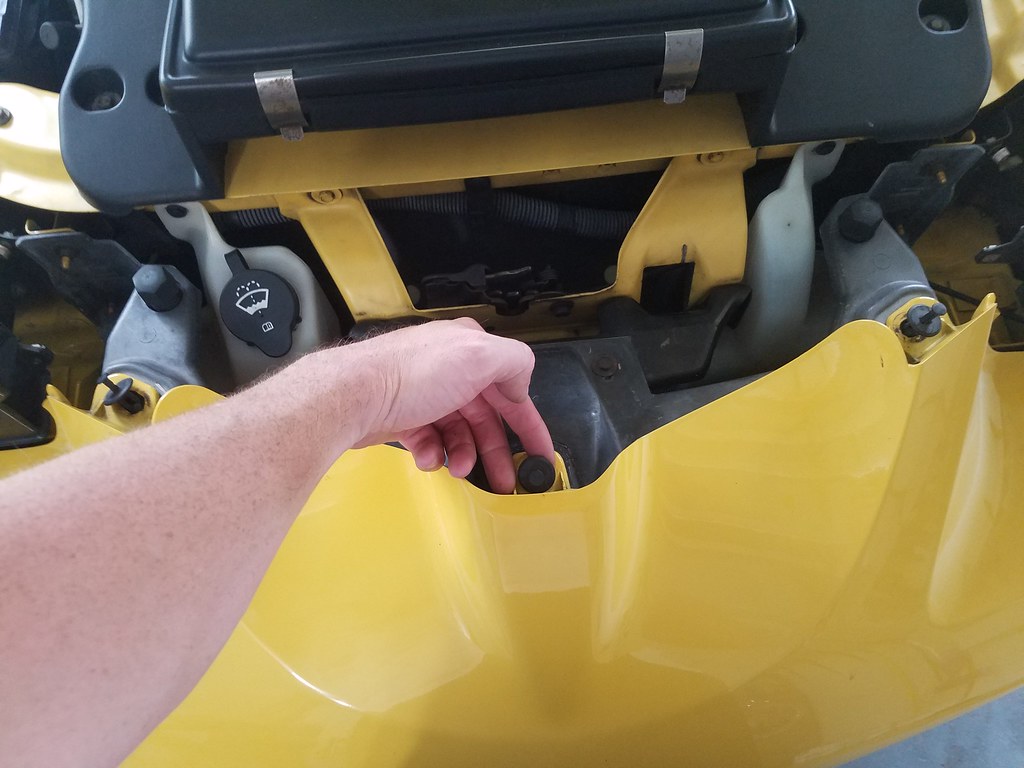
Next, you will need to remove the forward facing bolt from either side. Don’t be like me and forget this bolt, pulling on the bumper wondering why it won’t come off. It is a pain to get to. It would probably be easier if you removed the front wheels and peeled the liner back a bit. I of course fought with it with the wheel in place.

You may find yourself looking under the headlights wondering what the “stud” facing forward is for. That is this bolt.


A gentle pull and the bumper should come right off. Install is the reverse of the removal. Of course, if you’re like me (again) you should have a friend help you, because the body lines will probably not be right after you do this, so you may need some help adjusting.

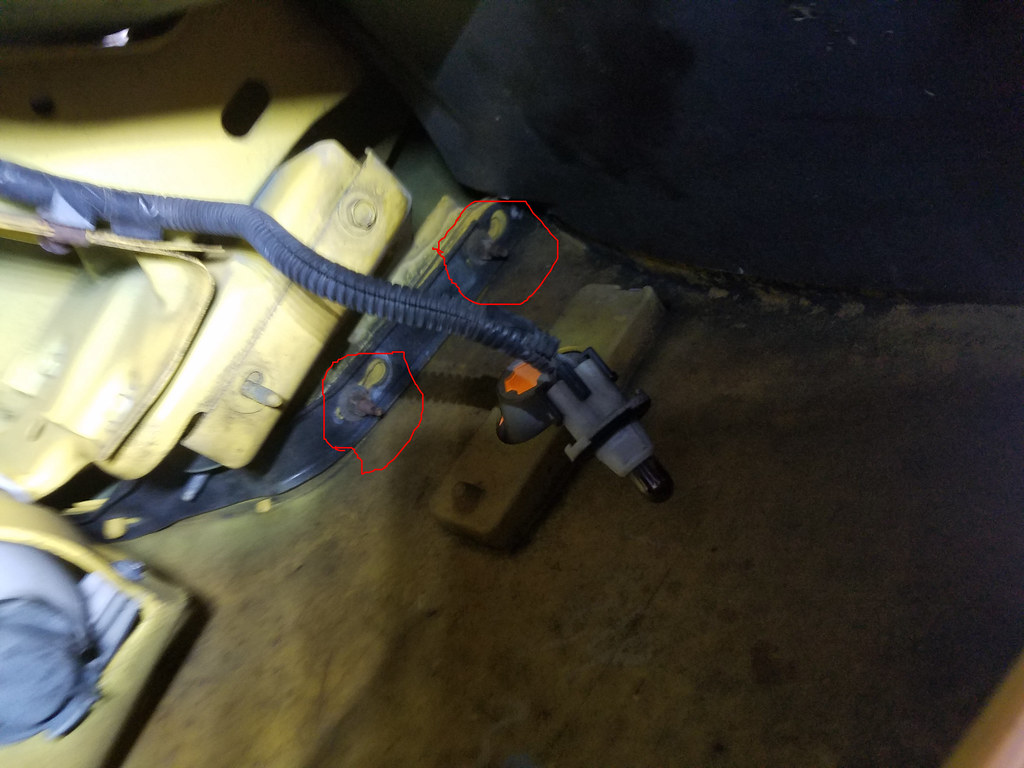
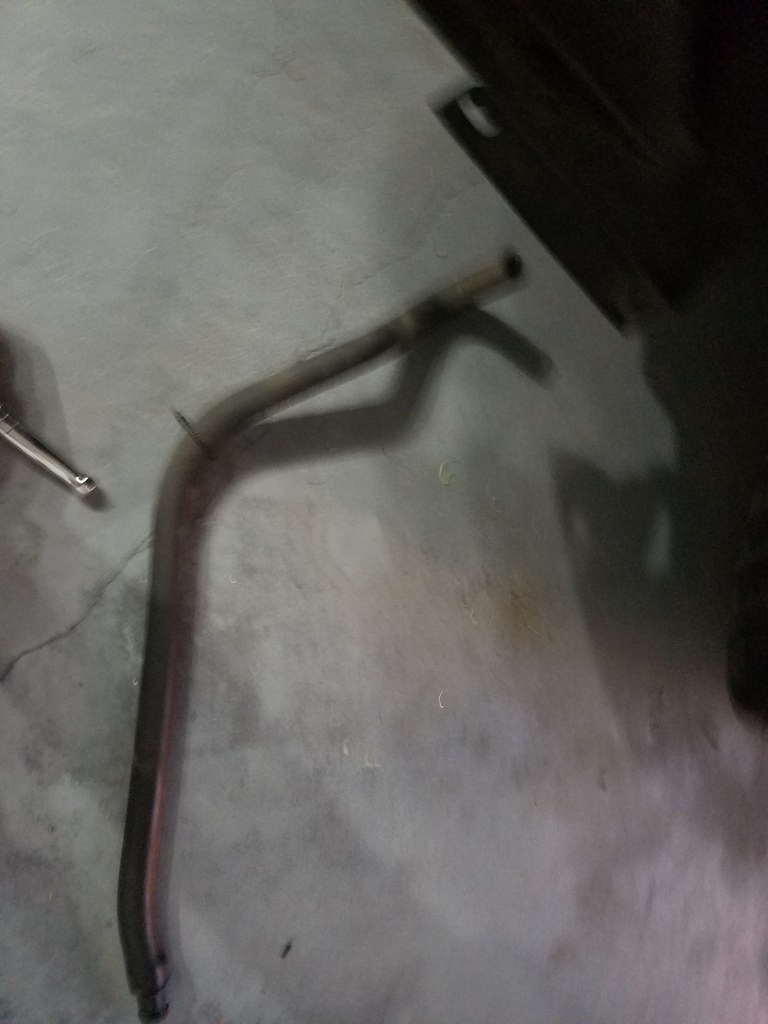
As you can see in the next photo, there is ample room to work to do some splicing in this area now. You can even see the corrosion in the plugs from this distance.

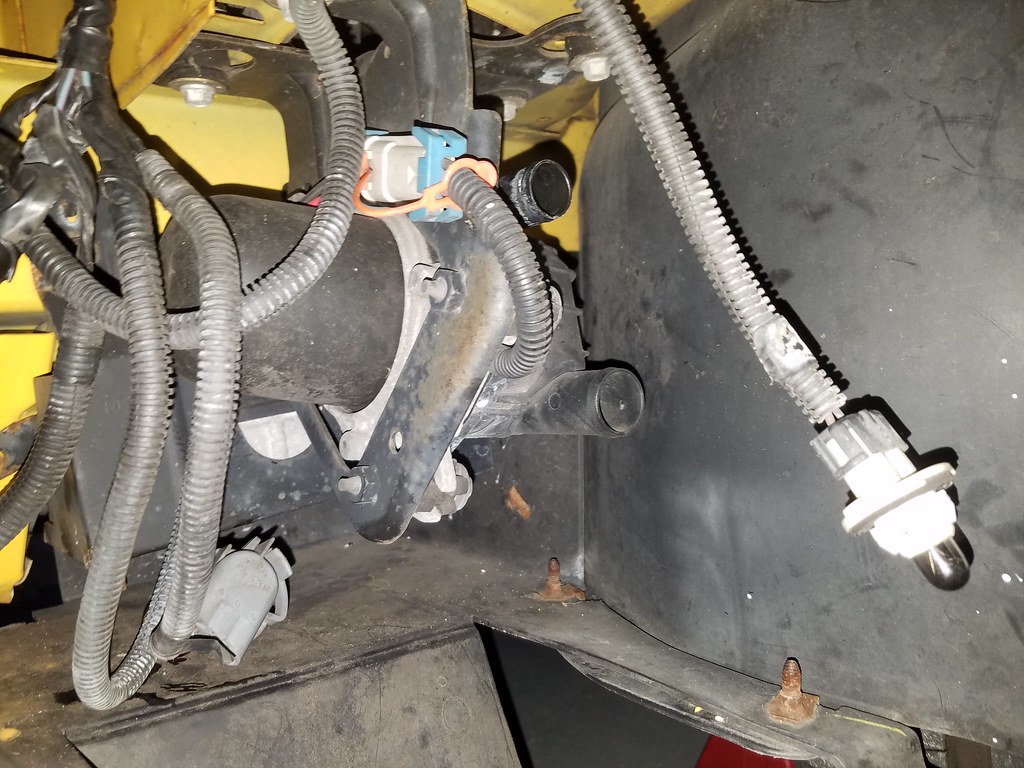
Some of you recall removing the AIR system. I thought now would be a good time to finish the removal. Shed some weight, gain some room, and get rid of this large unsightly hose:


Added blur for effect. (I was in a hurry!)


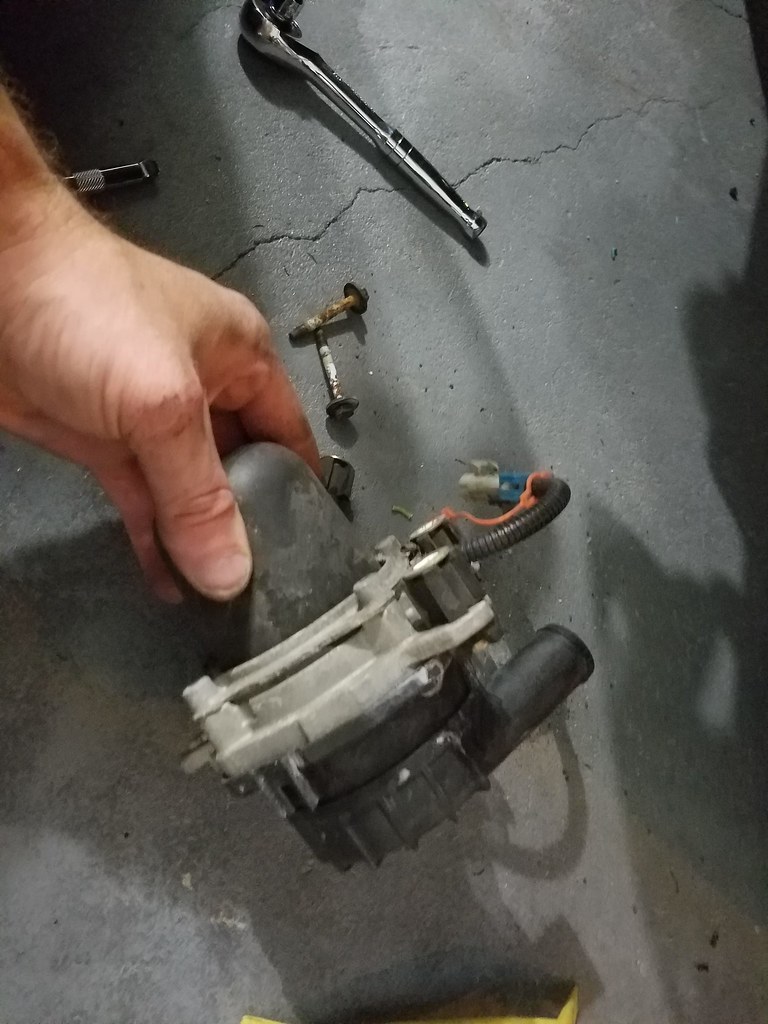
I removed the three bolts holding it into the bracket, and then removed the bracket. I replaced the bolts for the bracket back into the holes because who knows, maybe one day that will be a great spot for an oil cooler or something.


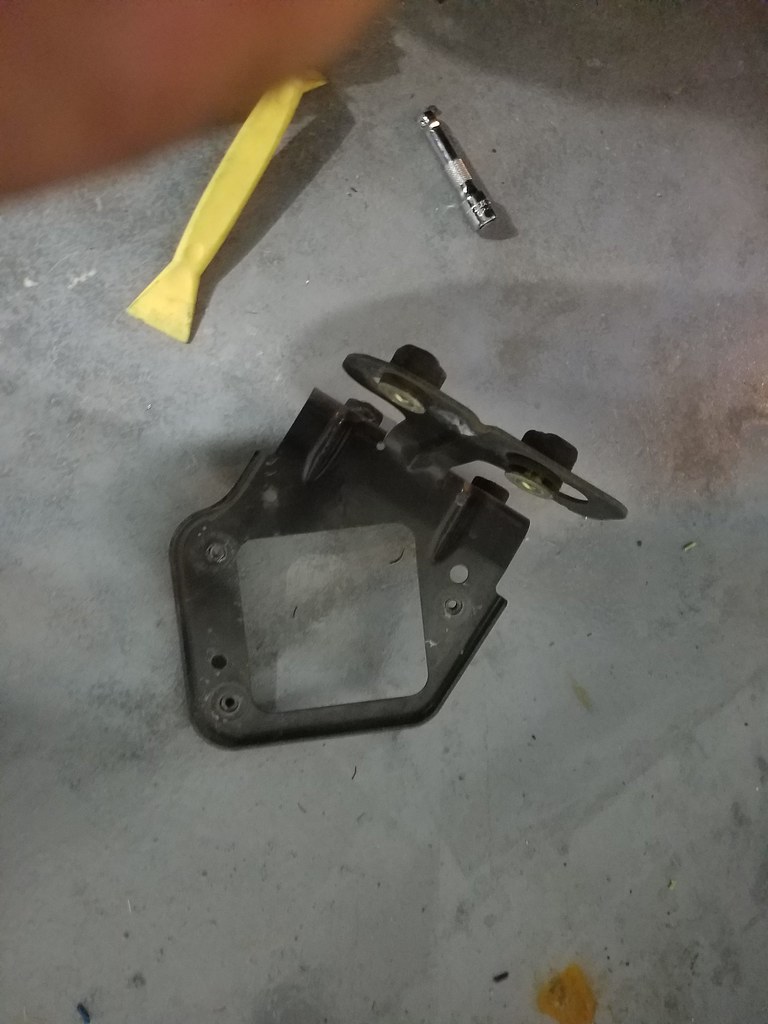
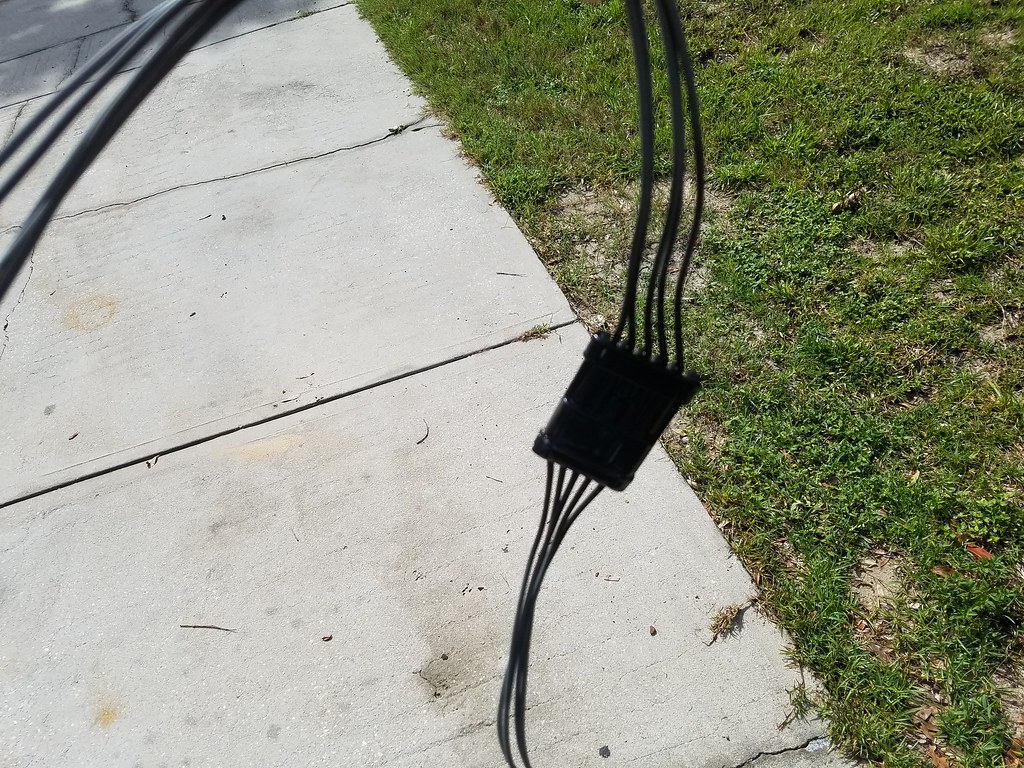
Looks like I did not get a finished picture. Either way, with the added length for the new plugs, I was able to move the plug further into the vehicle, near where the AIR system was. This should help keep it out of the elements. I also wrapped up and tied the existing air plug, because I am always one of those “just in case” people.

The connections were made with the weather seal kind of butt connectors with heat shrink, then taped over. If I could solder well I might have, but I am terrible. I will say, with the bumper off there is enough room for a skilled person to solder. I would have caught the car on fire.

Whilst performing this repair, I found that the headlight motors have been replaced. They have the door that is bolted on instead of glued. That is good peace of mind, since it is a much better design.

Thanks for looking!

Should have some stuff coming up soon in preparation for the F-Body beach bash!
 

ttocs

Post Whore
Joined
Oct 9, 2009
Messages
32,393
Reaction score
5,560
Location
Evansville Indiana
in one of the pics of the harnesses you have some crimp connectors next to them. Did you use these for the harness connections? If so next time then fail check those connectors first. I give them 3-4 yrs max outside in florida. Outside the vehicle the only really solid connection is to solder.
 

SnakeBit!

Active Member
Joined
Mar 6, 2014
Messages
869
Reaction score
113
Location
Florida
just saw you got this!!!! I like it!!! Always liked this body style and the hood arrangement on these cars. nice find!!!!!!!!!!!!
 
OP
OP
g36 monkey

g36 monkey

Post Whore
SN95 Supporter
Joined
Nov 15, 2008
Messages
14,081
Reaction score
596
Location
Orlando, Fl
in one of the pics of the harnesses you have some crimp connectors next to them. Did you use these for the harness connections? If so next time then fail check those connectors first. I give them 3-4 yrs max outside in florida. Outside the vehicle the only really solid connection is to solder.


I used the butt connectors with the heat shrink. I am not skilled enough to solder there, even with the bumper off. But, I anticipate what comes. However, we should be good for quite some time since it is garage kept and not daily driven.

just saw you got this!!!! I like it!!! Always liked this body style and the hood arrangement on these cars. nice find!!!!!!!!!!!!

Thanks bud! She loves it!
 

97stanger

Legend
Joined
Mar 22, 2006
Messages
5,880
Reaction score
100
I always like checking in on this. Keep up the good work!
 

97stanger

Legend
Joined
Mar 22, 2006
Messages
5,880
Reaction score
100
I just wish you would come visit and help us wire tuck or something!

haha, after this time around I think I'm about done with builds like these. This has easily added 12 years to my life with all the stress/money
 
OP
OP
g36 monkey

g36 monkey

Post Whore
SN95 Supporter
Joined
Nov 15, 2008
Messages
14,081
Reaction score
596
Location
Orlando, Fl
haha, after this time around I think I'm about done with builds like these. This has easily added 12 years to my life with all the stress/money

By that logic, if you did these continuously you could live forever ;)
 
OP
OP
g36 monkey

g36 monkey

Post Whore
SN95 Supporter
Joined
Nov 15, 2008
Messages
14,081
Reaction score
596
Location
Orlando, Fl
Installed the catch can last night. Will try to get some pics up soon.

We went with Mightymouse solutions. They are expensive, but product appears to be top notch, and it has a viewing window and such.
 

Latest posts

Forum statistics

Threads
77,440
Messages
1,502,162
Members
14,920
Latest member
marktuck99

Members online

Top