lutter94
Well-Known Member
This is on a 1994 GT, I would assume 94-04 are all exactly the same; if not, someone please correct me.
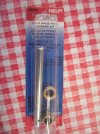
I ordered the LMR 94-04 Ford Mustang Master Door Hinge Repair Kit (LRS-BP7SN-K). After removing the original pins, I found LMR bushings are too small. They fall right in the door hinge hole (0.4255"). See the dimensions below in the table. Knowing the new bushings had 0.006" of play, this wasn't going to work. One of the reviews on LMR did say they were too small, but the rest were positive. I ended up buying the Doorman 38395 door pin kit from Advance Auto. These pins were slightly thicker, with much thicker bushings. Only problem was the pins are much longer than LMR, they would need to be cut down. Since I already had the LMR pins, I just used those. Doormans did not come with clips to secure the pin.
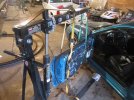
I attempted to disconnect the door wires, but could not find a connector inside the kick panel. No big deal the cherry picker worked flawlessly. I'm sure you could leave the door panel on, but I already had it off messing with the glue on window clips, so I left it off.
I then took the bolts out from the hinge, door side, size 13mm. The door hung by the ratchet straps very well.
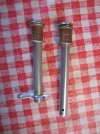
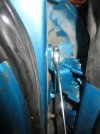
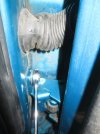
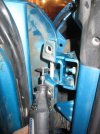
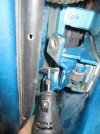
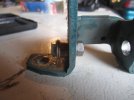
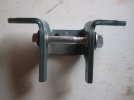
With the hinges free from the door, rotate them in and cut the pins out from the center. I used a dremel and cut off wheel, worked well, lots of control. I'm sure there are other tools that would also work well for this. Pictures are shown with new pins installed already, but gets the point across.
Once the pins are cut in two, use a chisel, screwdriver, etc. to separate them. The top seemed to go easier for me, and I had to use a punch to get the bottom half of each out.
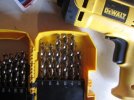
Since my door hinge bushing holes are 0.4255", and the Doorman bushings are 0.4805", the holes had to be drilled out. I started with 7/16", then a 29/64", and finally a 15/32". It was a tight fit and had to be pressed in, the next size would have been oversized.
To press the bushings in, I used a bolt to suck it in, see below. Since the bushing will bottom out on the washer before being fully seated, I then used a long bolt to pull both bushings the rest of the way thru. Ideally I would have used a medium length bolt with a bigger spacer, so it would be complete in one step, but could not find one the right size at home. Also note, if you use one bolt for both bushings, you risk the chance of bending the hinge (I did this and had to bend it back). I ended up using a vice and a box end wrench as a spacer to pull them thru on the bottom hinge.
After getting the bushings installed, the ID shrunk from 0.3435" down to 0.334". This makes it very tight for the pin. This is a good thing, put the hinge back together, and use a hammer to install the pin. It's as tight as anyone could ever hope for. Perfect in my book. Just sucks I had to buy two kits.... I'll contact LMR about it, see if they have any input on the wrong sized bushings.
With the new pins in, bolt the hinges back to the door. I used the paint marks on the door to line it back up, door alignment seems to be just as good as it was before the project.
Now to fix the window glass/glue on clip issue.....
Last edited:


