You are using an out of date browser. It may not display this or other websites correctly.
You should upgrade or use an alternative browser.
You should upgrade or use an alternative browser.
In for a penny, in for a pound - '98 Cobra Build Thread
- Thread starter Lanter
- Start date


That's awesome!
I just did a google search for that company, do you mind putting up a link to their website?
I just did a google search for that company, do you mind putting up a link to their website?
That's awesome!
I just did a google search for that company, do you mind putting up a link to their website?
http://www.weldcraftwheels.com/ They do top notch work and pricing is really pretty fair when you compare them to other shops.
That's really cool, thanks for the link. How does the inside of the wheel look?
That's really cool, thanks for the link. How does the inside of the wheel look?
It looks the same as the outside. There is the line where it was sanded down to prep for welding and the welding beads. For an extra fee I believe they will sand the welds smooth. I actually don't mind the look.
Sent from my iPhone using Tapatalk
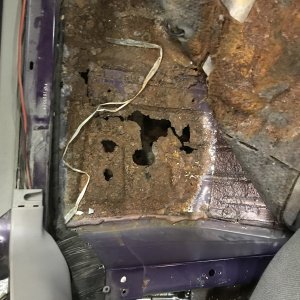
Inching closer to first start up! Spend way to long last night wiring up my MAF, would have been done in like 10 minutes if I would have just used slip loom instead of the techflex. The stuff I has was to small to fit around the plug so I had to put in on the wiring before I soldered it and then pull it up and heat shrink it in place... what a pain.


Also finished up mounting my oil relocation filter housing. Still may need to trim the housing a bit to get the filter to swing up and sit closer to the car. But for now it sits ok and looks to have enough ground clearance. The roads I drive on are way to rough to slam the car to much so I should be able to leave it how it is.

Last bit of progress was getting the MAF flange welded on so it's ready to be re-installed for what is hopefully the last time.
Also finished up mounting my oil relocation filter housing. Still may need to trim the housing a bit to get the filter to swing up and sit closer to the car. But for now it sits ok and looks to have enough ground clearance. The roads I drive on are way to rough to slam the car to much so I should be able to leave it how it is.
Last bit of progress was getting the MAF flange welded on so it's ready to be re-installed for what is hopefully the last time.
jpruitt
New Member
I've been on the hunt for exports for years.... damn it. I always miss them or get outbid.
Sent from my iPhone using Tapatalk
Sent from my SAMSUNG-SM-N920A using Tapatalk
I've been on the hunt for exports for years.... damn it. I always miss them or get outbid.
Sent from my SAMSUNG-SM-N920A using Tapatalk
I can relate... it took me about 2 years to find a good set that I was able to afford. Not just the exports either I spent around three years trying to get a good set of chrome lemans... the struggle for rare parts is real.
jpruitt
New Member
Yeah man it kills me trying to find parts that I want. I generally won't settle for reproduction either. But sometimes you just have to. I restored a numbers matching 73' Dart in high school 15 or 20 years ago that was one of 74 made with the sunroof and fold down back seat combo. Talk about a PITA lol.
Sent from my SAMSUNG-SM-N920A using Tapatalk
Sent from my SAMSUNG-SM-N920A using Tapatalk
I was able to wrap up a couple projects over the weekend. I have been working on them off and on for a couple weeks now but can finally say they are done. First was the battery relocation, which turned into the battery relocation/fuel pump relay mount since the relay board was just to big to place behind the trunk trim panels. To start I ran the main power wire from the starter back to where the battery box would sit.


The wire is wrapped in tech flex and tied to either factory wiring loom where I can or riveted to the car with the supplied clamps. Mounting the box was simple enough, though this box is huge. It easily accommodates my battery and the relay panel for the fuel pumps.

Next was cutting the factory battery cable ends off and grounding the ground, then running the factory power that would have went from the battery up front to the starter/power distribution box. Now that wire runs solely to the power distribution box.


Lastely the box was filled with the battery and relay board as well as connections for my battery tender. You can see the tender is plugged in, I ran the wiring to the back side of the box so in the future I can plug it in without removing the lid.

The next project was installing my aerocatch hood pins. Talk about a nerve racking project, the adage measure twice cut once could not be more true. I used a piece of cardboard to make the cut on the drivers side. I used a large enough piece to allow me to cut the outline of the hood so that when it came time to cut the passenger side I was able to simple flip the cardboard template and know that the two sides mirrored one another.


After the two sides were cut I cut the backing plates for each latch in half and taped them into the holes. Doing it this way allows you to not cut the bottom of the hood to put the backing plates in. Only issue is getting the latches in without pushing the backing plates out. Turned into a very tedious job but the results were exactly what I wanted, now with the hood open the bottom side only has holes big enough for the studs to go through.

After some adjustment to get the stud height correct I locked down the studs and cut the rubber bits. So now I have a hood with a little extra security for track days.

The last project worth mentioning was making an air intake for the turbo. I didn't want to run an open turbo or even a mesh as this will be a 95% street car made for cruising and just weekend enjoyment. So my issue was the lack of room between the turbo and ABS block. Only two solutions that I would think of was running a small filter (which I wanted to avoid) and using a 45 degree silicone coupler then a two inch long 4" diameter pipe with a K&N filter attached to the end. I actually really like the look of it and the idea of having a filter that won't create to much restriction for the turbo.


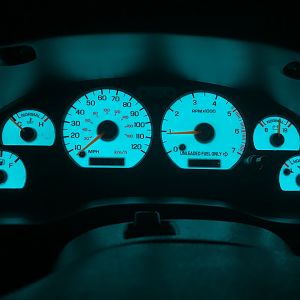
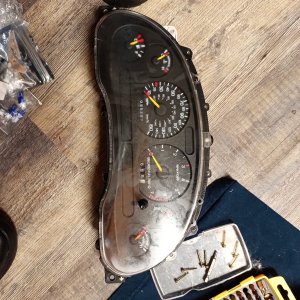
The next bit I worked on was tackling the wiring for the gauges, I was able to mount the relay panel into the glovebox using rivnuts so that it is easily removable but I stopped at that point. So that's the next project to finish then test all the wiring to make sure all is ok. After that it's fluids and startup tune then time to fire it up and hopefully have a smooth break-in period before tearing it apart for trans/clutch/rear end and final tune next spring.
The wire is wrapped in tech flex and tied to either factory wiring loom where I can or riveted to the car with the supplied clamps. Mounting the box was simple enough, though this box is huge. It easily accommodates my battery and the relay panel for the fuel pumps.
Next was cutting the factory battery cable ends off and grounding the ground, then running the factory power that would have went from the battery up front to the starter/power distribution box. Now that wire runs solely to the power distribution box.
Lastely the box was filled with the battery and relay board as well as connections for my battery tender. You can see the tender is plugged in, I ran the wiring to the back side of the box so in the future I can plug it in without removing the lid.
The next project was installing my aerocatch hood pins. Talk about a nerve racking project, the adage measure twice cut once could not be more true. I used a piece of cardboard to make the cut on the drivers side. I used a large enough piece to allow me to cut the outline of the hood so that when it came time to cut the passenger side I was able to simple flip the cardboard template and know that the two sides mirrored one another.
After the two sides were cut I cut the backing plates for each latch in half and taped them into the holes. Doing it this way allows you to not cut the bottom of the hood to put the backing plates in. Only issue is getting the latches in without pushing the backing plates out. Turned into a very tedious job but the results were exactly what I wanted, now with the hood open the bottom side only has holes big enough for the studs to go through.
After some adjustment to get the stud height correct I locked down the studs and cut the rubber bits. So now I have a hood with a little extra security for track days.
The last project worth mentioning was making an air intake for the turbo. I didn't want to run an open turbo or even a mesh as this will be a 95% street car made for cruising and just weekend enjoyment. So my issue was the lack of room between the turbo and ABS block. Only two solutions that I would think of was running a small filter (which I wanted to avoid) and using a 45 degree silicone coupler then a two inch long 4" diameter pipe with a K&N filter attached to the end. I actually really like the look of it and the idea of having a filter that won't create to much restriction for the turbo.
The next bit I worked on was tackling the wiring for the gauges, I was able to mount the relay panel into the glovebox using rivnuts so that it is easily removable but I stopped at that point. So that's the next project to finish then test all the wiring to make sure all is ok. After that it's fluids and startup tune then time to fire it up and hopefully have a smooth break-in period before tearing it apart for trans/clutch/rear end and final tune next spring.
Small update, went ahead over the weekend and helped get my brother's car back on the road. First startup and break in before he stores it for winter and tunes in the spring. Car is a 2000 SS camaro that now has a pretty nasty 408 stroker in it.


Was still able to get some things sorted out on my car. First I put 5 gallons of e85 in the tank in preparation for start up and leak checks. Then started sorting through the gauge wiring. Pulled the relay board back out of the glovebox to start building the wiring harness. It turned out ok and gives me the option of unplugging the board without the chance of mixing up wires.

Then of course the obligatory tech flex!

Mounted back to the glove box with riv-nuts and ready to go back into the car to join the harness that will be inside the car.

Only remaining work is running the pressure sensors out to the engine bay and running the wiring to the boost solenoid for the controller. Then check ground straps for the engine fill the thing with fluids. Oh I also need to mount the AC condenser and power steering cooler.
Was still able to get some things sorted out on my car. First I put 5 gallons of e85 in the tank in preparation for start up and leak checks. Then started sorting through the gauge wiring. Pulled the relay board back out of the glovebox to start building the wiring harness. It turned out ok and gives me the option of unplugging the board without the chance of mixing up wires.
Then of course the obligatory tech flex!
Mounted back to the glove box with riv-nuts and ready to go back into the car to join the harness that will be inside the car.
Only remaining work is running the pressure sensors out to the engine bay and running the wiring to the boost solenoid for the controller. Then check ground straps for the engine fill the thing with fluids. Oh I also need to mount the AC condenser and power steering cooler.
Well we have liftoff. Car fired up but runs a little on the rough side unless you modulate the throttle. Still a big relief to hear it for the first time in 3 years.
https://youtu.be/lND62zieSM4
Sent from my iPhone using Tapatalk
https://youtu.be/lND62zieSM4
Sent from my iPhone using Tapatalk
Congratulations!
ElrodKTPQ_89
Legend
Just read thru this...nice build dude!
Just read thru this...nice build dude!
Thanks man. It's been a lot of time and work but it's getting there.
Congratulations!
Thanks!!!
Sent from my iPhone using Tapatalk
Ineedav8
Active Member
This is a sick build man! Do you have any pics with the cobra hood and aerocatch hoodpins? I want to do the same with this flimsy aftermarket hood seeing it move while driving scares the crap out of me lol
This is a sick build man! Do you have any pics with the cobra hood and aerocatch hoodpins? I want to do the same with this flimsy aftermarket hood seeing it move while driving scares the crap out of me lol
I have a couple pictures but with the car being black it is hard to see everything clearly. Is there any certain pictures you'd like to see?
Bottom of the hood, it just has a hole large enough for the pin to go through the hood and be latched.
http://s26.postimg.org/ghjff0ux5/image.jpg
[IMG]http://s26.postimg.org/lwh4j0byh/IMG_0327.jpg
Over the weekend I tried my hand at a paint correction on the car. Followed a 5 step process that yielded great results in my opinion.
1. Washed the entire car
2. Clay bar
3. Cut with meguiars 105 using a harbor freight polisher
4. Polish with meguiars 205 using the same polisher
5. Carnauba wax to seal everything up
Rear bumper before:

After:

Also polished and sealed my LeMan's


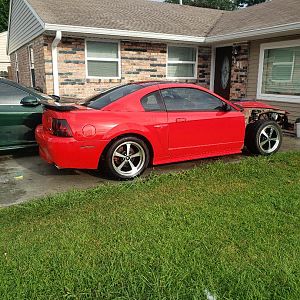
A couple of weeks ago I took the car for it's maiden voyage. I was lucky to get it in before winter sets in. Next spring I should finish the trans, clutch, rear end, and get the car tuned. Hopefully I can still get it finished and all the quirks worked out before MW2016.
[video=youtube;mhlw9xBTdcU]https://www.youtube.com/watch?v=mhlw9xBTdcU[/video]
Last real update is on my 2009 BMW 335i that got some new wheels!


Good looking wheels - both cars!
nice work man.
Thanks man!
Sent from my iPhone using Tapatalk
Out with the old....

Picked up an '03 IRS to take the SRAs place.


'03 IRS has poly bushings throughout as well as drilled and slotted rotors and a differential cover brace and tokico shocks. Also came with the soft brake hoses and ABS sensors.
Picked up an '03 IRS to take the SRAs place.
'03 IRS has poly bushings throughout as well as drilled and slotted rotors and a differential cover brace and tokico shocks. Also came with the soft brake hoses and ABS sensors.
Similar threads
- Replies
- 29
- Views
- 3K
- Replies
- 6
- Views
- 636