b1pig
Active Member
- Joined
- Jul 15, 2022
- Messages
- 318
- Reaction score
- 344
All sign point to "yes"... but that's a topic for another day.
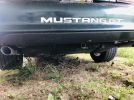
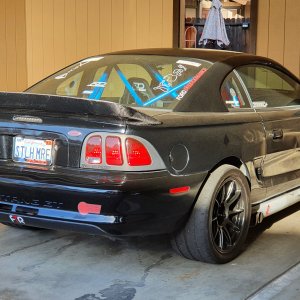
A few days ago, I introduced myself and our recent purchase of a 1994 GT Convertible. There will be no beauty shots here, so let me go ahead and set the standard here. For context, yes. I'm getting old. I'm pushing 50.... and it seems strange to say that, because I don't feel it. Not a pity party, but long story short, I've never had a fair chance to own a V8 coupe of any sort. My life has been taken up with Jeeps, kids and motorcycles. Recently, we sold an old Harley. With some spare cash I had burning a hole in my pocket, the wife once again indulged me. I've been wanting to get my hands on a decent fox body car. A couple of years ago, we both nearly went all-in on a 7-UP edition.... but the timing wasn't right. Wife needed a daily driver. So we passed it up.
Rewind to just a couple of weeks ago....
I had been on the hunt every night (and days while at work). I'd seen numerous cars come up and sell as can happen on FB. One really got me, though and I broke my silence and told the wife. She looked at the ad, and told me to go get it. Too late. But then.... sitting on the back end of a local dealership lot, was this gem.

I caught a glimpse of it as I was riding with a coworker. I like Deep Forest Green. Good color. Couple of days later, I was in town with the wife. We went by to have a look at it and I immediately walked away. But, I came back. It was still there. So I skipped lunch and test drove it.


On the test drive... Lets cover what was obviously WRONG....
-Torn drivers seat
-Drivers seat won't function
-Top won't function
-Rear view mirror is now a floor-view mirror
-Power steering isn't...
-The brakes have more shake in them than a Brazilian dancer
-The white "racing stripes" are in horrible shape
-Broken left corner marker
-Right fog light inop
-Only ONE window will function at all
-Top has an obvious cut/tear in it on right rear (but theres practically no water in the car)
-Its an auto, not a 5spd which is what I was after
-It needs an exhaust. As in.. there isn't one. Not past the cats at least
-Door panel trim is starting to peel off door
-Dash clock doesn't work at all
-No antenna for stereo
So... what was RIGHT?
-5.0 car
-All the major parts are there
-Someone (dispite miles) had truly taken car of the car
-not a spec of rust anywhere... at all. Trunk, deep quarters, rockers, floor, K-member, strut towers.. all solid
-4 nearly new tires.... although two different brands.... Same size, though.
-The engine fires up willingly. No noise (from internals)
-Body is straight other than parking lot rash here and there
-The paint is in decent shape except for the upper face of the right rear bumper
-Transmission shifts are crisp
-For an old high mile car, it scoots down the road pretty well
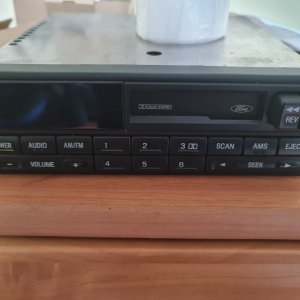
-Stereo works pretty well... but OEM speakers suck
After discussing it with the wife for a couple of days.... we worked out a deal with the dealership and took it home.
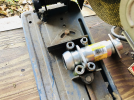
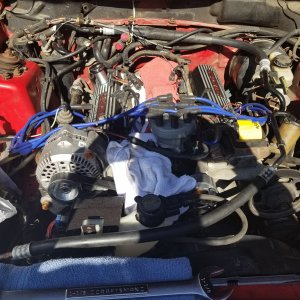
The first weekend, I fixed ALL of the windows. Figured out how to work the top (which doesn't leak hydraulic, but apparently had at one time), Remounted the rear view mirror, replaced some fuses. Verified the drivers seat "could" work, but part of a seat cover strap is apparently wrapped up in the seat track.... so I still need to remove the seat to get it sorted out. The power steering is fixed. While crawling around under the car replacing the power steering line, I found a smog pump delete block/pulley in place. That might require a little more investigation, and probably explains the CEL.
Over the course of the week, I had been working on removing the decals. I got the eraser wheel on it Friday and it was working like a champ.... but 4 hours on....


BLEH.... Long story short I ran out of time Friday.
I won't get into family stuff, but Saturday and Sunday were shot.
Today..... I had to stay home with the kids. And I had a package sitting in the corner.
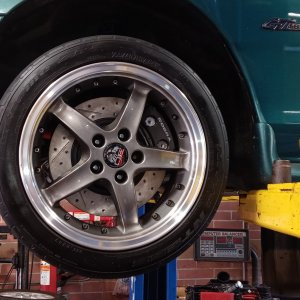
Off came the disco discs....

(someone got a little excited with the gold paint)
On go the Power Stops! Got the set of 4 on my Jeep. Love them. Can't go wrong here I think.

I also toned down that gold paint a little.
They are now bedded in. Silky smooth. Now, all I need is to get an exhaust on the car. One step at a time. One step at a time.
I think there was an original owner in Florida (found some papers in car from FL) who kept it for a long time, cared for it and stored it indoors or under a shelter.... then someone else got it and just drove the snot out of it until it ended up at this dealership. Whoever had it second didn't care for it. I'm only partly done removing the decals, but I'll get it done in the days (or weeks) to come. Seems true that the SN95 is an overlooked gem of a car. It has the "right" engine and makes all the right noises. No way I'll be doing any form of restoration on this car, nor will it turn into a race car. It WILL progress towards being a reliable GT. I suspect that it will see some mild performance upgrades, but nothing too brash. I'm not a died in the wool Ford fanatic, but I like older Mustangs and Rangers. Ironically, both have managed to find roots in my yard now. I'll update this post as I move along.
A few days ago, I introduced myself and our recent purchase of a 1994 GT Convertible. There will be no beauty shots here, so let me go ahead and set the standard here. For context, yes. I'm getting old. I'm pushing 50.... and it seems strange to say that, because I don't feel it. Not a pity party, but long story short, I've never had a fair chance to own a V8 coupe of any sort. My life has been taken up with Jeeps, kids and motorcycles. Recently, we sold an old Harley. With some spare cash I had burning a hole in my pocket, the wife once again indulged me. I've been wanting to get my hands on a decent fox body car. A couple of years ago, we both nearly went all-in on a 7-UP edition.... but the timing wasn't right. Wife needed a daily driver. So we passed it up.
Rewind to just a couple of weeks ago....
I had been on the hunt every night (and days while at work). I'd seen numerous cars come up and sell as can happen on FB. One really got me, though and I broke my silence and told the wife. She looked at the ad, and told me to go get it. Too late. But then.... sitting on the back end of a local dealership lot, was this gem.
I caught a glimpse of it as I was riding with a coworker. I like Deep Forest Green. Good color. Couple of days later, I was in town with the wife. We went by to have a look at it and I immediately walked away. But, I came back. It was still there. So I skipped lunch and test drove it.
On the test drive... Lets cover what was obviously WRONG....
-Torn drivers seat
-Drivers seat won't function
-Top won't function
-Rear view mirror is now a floor-view mirror
-Power steering isn't...
-The brakes have more shake in them than a Brazilian dancer
-The white "racing stripes" are in horrible shape
-Broken left corner marker
-Right fog light inop
-Only ONE window will function at all
-Top has an obvious cut/tear in it on right rear (but theres practically no water in the car)
-Its an auto, not a 5spd which is what I was after
-It needs an exhaust. As in.. there isn't one. Not past the cats at least
-Door panel trim is starting to peel off door
-Dash clock doesn't work at all
-No antenna for stereo
So... what was RIGHT?
-5.0 car
-All the major parts are there
-Someone (dispite miles) had truly taken car of the car
-not a spec of rust anywhere... at all. Trunk, deep quarters, rockers, floor, K-member, strut towers.. all solid
-4 nearly new tires.... although two different brands.... Same size, though.
-The engine fires up willingly. No noise (from internals)
-Body is straight other than parking lot rash here and there
-The paint is in decent shape except for the upper face of the right rear bumper
-Transmission shifts are crisp
-For an old high mile car, it scoots down the road pretty well
-Stereo works pretty well... but OEM speakers suck
After discussing it with the wife for a couple of days.... we worked out a deal with the dealership and took it home.
The first weekend, I fixed ALL of the windows. Figured out how to work the top (which doesn't leak hydraulic, but apparently had at one time), Remounted the rear view mirror, replaced some fuses. Verified the drivers seat "could" work, but part of a seat cover strap is apparently wrapped up in the seat track.... so I still need to remove the seat to get it sorted out. The power steering is fixed. While crawling around under the car replacing the power steering line, I found a smog pump delete block/pulley in place. That might require a little more investigation, and probably explains the CEL.
Over the course of the week, I had been working on removing the decals. I got the eraser wheel on it Friday and it was working like a champ.... but 4 hours on....
BLEH.... Long story short I ran out of time Friday.
I won't get into family stuff, but Saturday and Sunday were shot.
Today..... I had to stay home with the kids. And I had a package sitting in the corner.
Off came the disco discs....
(someone got a little excited with the gold paint)
On go the Power Stops! Got the set of 4 on my Jeep. Love them. Can't go wrong here I think.
I also toned down that gold paint a little.
They are now bedded in. Silky smooth. Now, all I need is to get an exhaust on the car. One step at a time. One step at a time.
I think there was an original owner in Florida (found some papers in car from FL) who kept it for a long time, cared for it and stored it indoors or under a shelter.... then someone else got it and just drove the snot out of it until it ended up at this dealership. Whoever had it second didn't care for it. I'm only partly done removing the decals, but I'll get it done in the days (or weeks) to come. Seems true that the SN95 is an overlooked gem of a car. It has the "right" engine and makes all the right noises. No way I'll be doing any form of restoration on this car, nor will it turn into a race car. It WILL progress towards being a reliable GT. I suspect that it will see some mild performance upgrades, but nothing too brash. I'm not a died in the wool Ford fanatic, but I like older Mustangs and Rangers. Ironically, both have managed to find roots in my yard now. I'll update this post as I move along.
Last edited: