2slo95fiveOhs 1994 GT rebuild...UPDATE 5-2! Forged shortblock, fuel upgrades!

miss2slocoupe

Well-Known Member
Joined
Jun 28, 2011
Messages
4,314
Reaction score
273
Location
Canton, Georgia
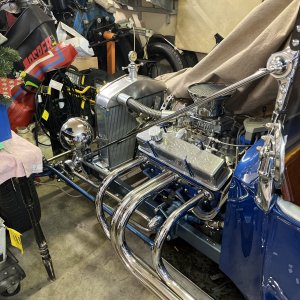
Likewise.. I hope that all my time and effort pays off so that my car becomes a fun quick street car, that can still pop the hood and get some attention at local car shows...
Unfortunately all the people I know in the automotive industry instead of giving much advice just give me sh*t.. "whens that car gonna be done" "you ever gonna drive that thing again?"

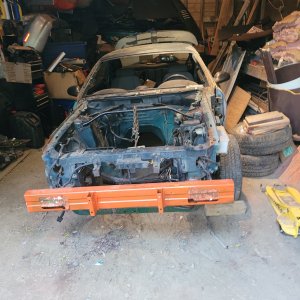
yeah what those people dont understand is.... building a car takes money!!!! even though my car isnt as built as yours and alot of these other people, i added up all the parts and i have well over 8000k in mine, and alot more to come!!! i love my car and love spending money on it but i have other things i need to buy and i need to live LOL they always get on my ass about if mine are done and blah blah blah, just ignore them and just run their asses in the ground with your car when its done LOL thats what i do!
 
OP
OP
2

2slo95fiveoh

Well-Known Member
Joined
Dec 31, 2006
Messages
2,559
Reaction score
4
Location
Lawrence, Kansas
Made some progress tonight... The inner fender of the quarter panel had some slight surface rust that spread from the major rust on the quarter panel. Although at the top of the fenderwell there was a little more extensive rust that I wanted to replace before I attach the rust-free quarter back on.
The cut out portion:
004-2.jpg

The replacement piece (off the same portion of another mustang)
005-2.jpg


A buddy of mine is borrowing my welder so that patch will have to wait for another day

Moving on to the trunk. I previously mentioned that I applied POR-15 to the undercarriage, as well as most of the floorpan.. the trunk and drivers front portion of the floorpan were the only ones I hadnt gotten to.
A while back I purchased a trunk mount battery kit..
006-2.jpg


So I drilled the holes in the trunk... With the tank still in place... AHHHH I'm a crazy person! or just that good...
002-2.jpg
 
OP
OP
2

2slo95fiveoh

Well-Known Member
Joined
Dec 31, 2006
Messages
2,559
Reaction score
4
Location
Lawrence, Kansas
Then sanded down the trunk in preparation for POR-15...
003-2.jpg

001-3.jpg


POR-15 applied:
009-3.jpg

008-1.jpg


Battery box mocked up:
011-2.jpg

010-3.jpg


Questions/Comments/ Suggestions welcome.
 
OP
OP
2

2slo95fiveoh

Well-Known Member
Joined
Dec 31, 2006
Messages
2,559
Reaction score
4
Location
Lawrence, Kansas
Finally had a little extra time. Between being a full time student and working full time, extra time is very hard to come by. I finally got my welder back from
my buddy, so I went ahead to welding in the two patch panels underneath where the quarter panel attaches to.
Where I left off:
001-4.jpg


fender panel welded in:
002-3.jpg


a reminder how bad the rear fender portion was:
009-2.jpg


and the replacement welded in:
003-3.jpg
 
OP
OP
2

2slo95fiveoh

Well-Known Member
Joined
Dec 31, 2006
Messages
2,559
Reaction score
4
Location
Lawrence, Kansas
After talking to my painter and doing my own research, I decided to attach the replacement panel with 3Ms panel bonding adhesive (and some minor welding) as opposed to all welding... I already got the cartridge through a buddy for his cost, so that was a good deal. The 3m applicator gun, not so much.
This is what the applicator gun looks like:
3mgun.jpg


The cheapest I have found it is $320....... So after looking at the cartridge, and realizing it was basically a large version of JB weld, without
the depressor.. So I made one.... for $22.
005-3.jpg

006-3.jpg

004-3.jpg
 
OP
OP
2

2slo95fiveoh

Well-Known Member
Joined
Dec 31, 2006
Messages
2,559
Reaction score
4
Location
Lawrence, Kansas
Some more work done... Finally!
Decided to clean up some of the mating surfaces and existing welds:
002-4.jpg

003-4.jpg

004-4.jpg


Then it was time for the exciting part, mocking up the new quarter panel for fitment:
005-4.jpg
 
OP
OP
2

2slo95fiveoh

Well-Known Member
Joined
Dec 31, 2006
Messages
2,559
Reaction score
4
Location
Lawrence, Kansas
006-4.jpg

007-2.jpg


For fitting it for the first time, the fitment was actually pretty close.
Comparing the door to quarter panel gaps (Red/White is drivers side, Red/Red is pass side)

008-2.jpg

009-4.jpg


And the rear of the quarter panel gaps to tailights:

011-3.jpg

010-4.jpg
 
OP
OP
2

2slo95fiveoh

Well-Known Member
Joined
Dec 31, 2006
Messages
2,559
Reaction score
4
Location
Lawrence, Kansas
Did a little more work today.. I figured out that I had more metal missing/ infected than I thought...
These are 2 pics of someone elses car (happens to be the same color) of the passenger side to compare the lower portion (under the filler neck
on the pass side) and the portion that should be on my car (the drivers side).
So, what is was, and what it should be (if mine was passenger side, but you get the idea)

004-2.jpg

002-4.jpg


Someone else's passenger side:

passquarter.jpg

passquarter1.jpg
 
OP
OP
2

2slo95fiveoh

Well-Known Member
Joined
Dec 31, 2006
Messages
2,559
Reaction score
4
Location
Lawrence, Kansas
Notice the (example) inner fenderwell extends a lot further down then the remnants of mine. So I did some research and made my own:


002-4.jpg

001-6.jpg

002-5.jpg

003-5.jpg


That was about it for today.. My sh*tty ass welder (and my sh*tty ass welding skills) make for some nasty welds, so I will be using my
buddies grinder to clean them up before I do more mocking up/fitment of the quarter panel..
 
OP
OP
2

2slo95fiveoh

Well-Known Member
Joined
Dec 31, 2006
Messages
2,559
Reaction score
4
Location
Lawrence, Kansas
Well I got more work done today.
I started off by cleaning up the work area.. I had dust, debris, rusted metal and various tools laying around.. So I figured a little
organization wouldn't be too bad of a way to start out.
002-6.jpg


Its sad that all of this came out of my car, mostly behind the LR wheel, where all the rust and problem areas were/are:
001-7.jpg


After that was all done, I remembered my painter suggested I remove the master cylinder/booster since I am having the
entire engine bay painted and cleared the same color as the body, so where I started:
003-6.jpg


Four nuts on the back side removed, and the two brake lines disconnected and it was out:
006-5.jpg


As it is now:
005-5.jpg
 
OP
OP
2

2slo95fiveoh

Well-Known Member
Joined
Dec 31, 2006
Messages
2,559
Reaction score
4
Location
Lawrence, Kansas
Onto the rear bumper. I believe the car was in a collision in the rear right corner, because the passenger quarter panel looks to be in terrific shape compared to the drivers quarter panel, and because of the damage done to the rear bumper (which they did not fix unlike the quarter pane)

008-3.jpg


007-3.jpg


I have the other piece of the foam bumper, so I will probably just epoxy that back together. The metal bumper on the other hand, no so much, so I grabbed the metal bumper off the same white car I got the quarter panel from. So I started by drilling out the rivets on the foam:

009-5.jpg


And its off:
010-5.jpg


Up close damage of the passenger side of the bumper:
011-4.jpg
 

JerZeyStangz

Well-Known Member
Joined
Jan 13, 2006
Messages
3,615
Reaction score
45
Location
Northern NJ
Cool build up! You've been through a long road, but when its done you'll get to enjoy it to the fullest. I'm also a DFG guy, and I love love love sonic blue, my favorite mustang color on a terminator. I wonder why some parts of your second car looks blue in it? Reminds of the rare color sapphire blue on sn95's which I also like very much.
 
OP
OP
2

2slo95fiveoh

Well-Known Member
Joined
Dec 31, 2006
Messages
2,559
Reaction score
4
Location
Lawrence, Kansas
Then the 6 bolts that hold the bumper to the body. All of them came out rough and I thought all of them were going to break, but only had one snap off while removing, and it was one of the easiest bolts to access, so it could have been much worse.

012-1.jpg


Comparing old and new:
014-1.jpg


Oh great, more rust issues... This Drivers rear area is a nightmare on this car, but there's no turning back now.
013-1.jpg


Passenger side isn't nearly as bad:
018-1.jpg


Then I was curious to see how far it had been affected, so I just started chipping at it and soon enough:
015-1.jpg
 
OP
OP
2

2slo95fiveoh

Well-Known Member
Joined
Dec 31, 2006
Messages
2,559
Reaction score
4
Location
Lawrence, Kansas
But I'm not going to fret over this one too much. It is mostly the sheet metal for the rear of the trunk, so I just welded a patch panel in there:

016-1.jpg

017-1.jpg


That was it for today. I am still waiting on my buddy to bring by his grinder. Then I will grind down the welds for the quarter panel, and the rear bumper.
Por-15 will be applied over all of the sheet metal that will be hidden, then the replacement metal bumper bolted in, and more mocking up of the quarter panel.
 
OP
OP
2

2slo95fiveoh

Well-Known Member
Joined
Dec 31, 2006
Messages
2,559
Reaction score
4
Location
Lawrence, Kansas
Cool build up! You've been through a long road, but when its done you'll get to enjoy it to the fullest. I'm also a DFG guy, and I love love love sonic blue, my favorite mustang color on a terminator. I wonder why some parts of your second car looks blue in it? Reminds of the rare color sapphire blue on sn95's which I also like very much.

When I originally stripped the interior of this one, I knew I was painting the car Sonic blue, so I bought spray paint sonic blue and painted the floor pans..
Then I realized that I painted over the factory sound deadner and I didn't want to keep it, so i stripped it all off, took all the sound deadner off and have some fatmat sound deadner that will go on after the vehicle goes to paint.
 

Gallows

Well-Known Member
Joined
May 18, 2007
Messages
1,438
Reaction score
13
Location
Summerside, PE, Canada
Nice work bringing the body back to the land of the living. Do you apply the Por15 directly over the rust or do you have to scuff it down then apply the product? Another question regarding the bonding of the quarter panel. Is it as strong and long lasting as welding?
 

Forum statistics

Threads
78,555
Messages
1,536,137
Members
16,201
Latest member
jgib8795

Members online

Top