2slo95fiveOhs 1994 GT rebuild...UPDATE 5-2! Forged shortblock, fuel upgrades!

OP
OP
2

2slo95fiveoh

Well-Known Member
Joined
Dec 31, 2006
Messages
2,559
Reaction score
4
Location
Lawrence, Kansas
The back of the sail panel. 5 studs and one "pin" in the bottom corner:

009-8.jpg


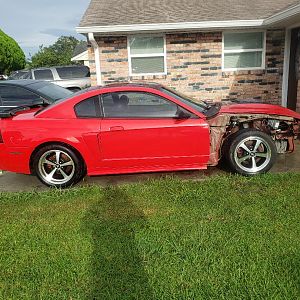
The drivers side body:

010-8.jpg


The passenger side. The only difference is in the bottom corner the passenger side has a rubber gromet in the body in the pictures. (I can't find the grommet that goes in the drivers side)

011-7.jpg


The grommet up close:

012-4.jpg


The "pin" on the sail panel that goes in the grommet up close:

013-2.jpg


Does that help?
 

Slykin

Well-Known Member
Joined
Jul 11, 2009
Messages
3,538
Reaction score
118
Location
Tyler, Texas
011-7-1.jpg


This is the one that I think is stripped or broken. I guess I just need to know if that is a screw or what. Thanks for the pics so far though! Gives a pretty good idea of what i'm dealing with.
 
OP
OP
2

2slo95fiveoh

Well-Known Member
Joined
Dec 31, 2006
Messages
2,559
Reaction score
4
Location
Lawrence, Kansas
that's another stud built into the sail panel that you install a nut on the other side once it's on the vehicle.. When I pulled off the drivers side one of the other studs stayed with the car.. It didn't make any kind of noise or have any resistance coming off, so I think mine was broken for a while, although mine was the very top/foward stud, but yours could be something similar too.
 

Slykin

Well-Known Member
Joined
Jul 11, 2009
Messages
3,538
Reaction score
118
Location
Tyler, Texas
So basically you have to get a completely new sail panel to fix that?

Thanks for the help man, I really appreciate it. I think I finally have my answer.
 
OP
OP
2

2slo95fiveoh

Well-Known Member
Joined
Dec 31, 2006
Messages
2,559
Reaction score
4
Location
Lawrence, Kansas
Just a quick update without pictures (for now)

-Hood is on its way from Cervinis.. Should be here thurs/fri
-A guy I know from work is letting me borrow his Eastwood fender roller for free so I can do my rear fender lips before paint.
-The windshield in the mustang is scheduled to get pulled out next Tuesday.
-I ordered some new ground effects fasteners from ford.

And my parts list for the mustang is actually begining to look relatively small. New gauges are probably the biggest expenses. Still on the lookout for tubular A arms though..
 
OP
OP
2

2slo95fiveoh

Well-Known Member
Joined
Dec 31, 2006
Messages
2,559
Reaction score
4
Location
Lawrence, Kansas
School and work schedule together don't allow a whole lot of time to work on the car, but I got some stuff done today..
When I bought the car 2 years ago the windshield was cracked all the way across it, so i decided when I knew the car was getting repainted that I would have the windshield pulled before paint, then a new one installed after.

Windshield before:
001-12.jpg


One hour later (thanks to the safelite auto glass tech)
002-11.jpg


What a f*cking suprise... gees I swear "rust" is going to join the other four letter words you aren't supposed to say....
004-9.jpg


But, optimistically, better the windshield is out and I can take care of it now, versus have the rust spread to new paint...
Onto the prep. Sanding down the rust:
005-10.jpg
 
OP
OP
2

2slo95fiveoh

Well-Known Member
Joined
Dec 31, 2006
Messages
2,559
Reaction score
4
Location
Lawrence, Kansas
Looks a lot better than it was:
006-10.jpg


Also I removed the front bumper foam (no before pics), and noticed some slight surface rust. So I scuffed it down:
007-8.jpg


Then, onto my go-to problem solver with this project... POR-15..

Coated the windshield chanel:
008-7.jpg


And the front bumper:
009-9.jpg
 
OP
OP
2

2slo95fiveoh

Well-Known Member
Joined
Dec 31, 2006
Messages
2,559
Reaction score
4
Location
Lawrence, Kansas
Also, very exciting, my hood arrived.. I'm way too anxious to see this thing on and painted.
1327465744.jpg


1327465897.jpg


I need to roll the rear fender lips, and remove the outer door locks, outer door handles, and door glass. Then it's all small finishing preperations before it goes to paint in a little less than a month.
 
OP
OP
2

2slo95fiveoh

Well-Known Member
Joined
Dec 31, 2006
Messages
2,559
Reaction score
4
Location
Lawrence, Kansas
Small update today. semi-local craigslist find came in today (Didn't have the free time to drive 2 hours to pick them up)

1327541858.jpg


FINALLY my front suspension is complete.. I've had a tubular K-member on my old car for 2.5 years now, and the coilovers/struts/camber caster plates (all new) have just been sitting, waiting to be installed. I will probably wait until after paint though.
 
OP
OP
2

2slo95fiveoh

Well-Known Member
Joined
Dec 31, 2006
Messages
2,559
Reaction score
4
Location
Lawrence, Kansas
Small update on progress:

It seems like the only free time I have to work on the mustang lately is tuesday afternoons, so I made the most of it..

Started by drilling out the rivets for the weather stripping channel? Not sure what it's called.
Before:
002-12.jpg


After:
003-11.jpg


Then I moved onto the doors. I "Killed multiple birds with one stone" in this process. My drivers side window wouldn't roll down, so I was going to investigate that, originally the drivers door wouldn't unlock using the key from the outside, eventually neither door would. I wanted the door handles removed before paint, and while I was in there I figured I would just take the door glass out to avoid any overspray on them..

The collection of pieces I removed (You can see the broken tab on the pass door lock cylinder)
004-10.jpg
 
OP
OP
2

2slo95fiveoh

Well-Known Member
Joined
Dec 31, 2006
Messages
2,559
Reaction score
4
Location
Lawrence, Kansas
Picture of the disassembled door:
001-13.jpg


And the glass out (I need to strip off the rest of the purple-ish window tint)
005-11.jpg


Not pictured are the window motors, which both had damaged bushings (The drivers side consisted of "pieces of bushing", passenger side most of them were still intact somewhat..

All of the lock cylinders on the vehicle will be getting replaced, I am currently working on finding/pricing components to a lock set (since Ford decided to discontinue making them a few years back) Since the trunk is off of a different car, the only cylinder the key works in is the ignition, and it is very sloppy at best (I can pull the key out while running)...

I still have to roll the rear fender lips, and possibly work on fabbing up some different engine bay wiring designs.. As of now, the car will go to paint in the middle/end of this month..
Questions/Comments welcome
 
OP
OP
2

2slo95fiveoh

Well-Known Member
Joined
Dec 31, 2006
Messages
2,559
Reaction score
4
Location
Lawrence, Kansas
Some more progress as it gets closer and closer to being ready for paint..

I bought a manual seat track (both motors in my power one are shot) and a wiper cowl (mines cracked) from a buddy for $30..
(cowl not pictured) the seat track:
001-14.jpg


I also decided to buy some new fastners for the ground effects.
003-12.jpg


The aformentioned fender roller a buddy let me borrow:
002-13.jpg


So while I had the (rare) free time, I went ahead and roller the rear fender lips (the sidewalls of my 315/30/18s on the green car were eaten up by the fender lip. I don't want a repeat..

Drivers side before:
005-12.jpg
 
OP
OP
2

2slo95fiveoh

Well-Known Member
Joined
Dec 31, 2006
Messages
2,559
Reaction score
4
Location
Lawrence, Kansas
Drivers side after:
007-9.jpg


Passenger side before:
008-8.jpg


Passenger side after:
009-10.jpg


Over all I am happy with the way the fender lips turned out. I may even go slightly smaller on my next pair of rear tires, possibly 295/35/18, just to give a hair more clearance, especially on the inside of the wheelwell toward the center of the car.

Questions/Comments welcome
 
OP
OP
2

2slo95fiveoh

Well-Known Member
Joined
Dec 31, 2006
Messages
2,559
Reaction score
4
Location
Lawrence, Kansas
Well no pictures to report as of now. But the mustang is finally at the painters! I dropped it off Tuesday night, along with the new hood, bumpers, ground effects, and all the other body parts... Except the drivers side hood hinge, so I will have to run that to him here in the next few days.
In other news I finally bit the bullet and went ahead and ordered my gauges for the car. Electrical oil press, water temp, and fuel pressure, , as well as a mechanical boost gauge, all in AutoMeters cobalt series (should match the blue exterior, black interior theme). I also bought an AEM wideband gauge setup, so I should have a pretty good grasp on how the important functions of the engine are doing. I plan on putting two gauges in the instrument cluster bezel, and 3 in a plate where the a/c controls usually mount. hopefully I will have some pictures of the car and gauges around the middle of next week.
 
OP
OP
2

2slo95fiveoh

Well-Known Member
Joined
Dec 31, 2006
Messages
2,559
Reaction score
4
Location
Lawrence, Kansas
Well school has been taking up more and more of my time, so less and less gets put towards the project. But I did manage to order some new parts, as well as make some progress labor wise while the car is still at the painters.
My gauges finally showed up:
006-11.jpg


As well as my oil inlet hose and nozzle for the blower (nozzle was damaged and hose was missing when I bought the kit used)
1333483874.jpg


When i bought the car it was equiped with an aftermarket car alarm, that apparantly wasn't hooked up, because with no fob, code or anything, the car would function normally. And judging by the wiring hackjob, I wouldn't be suprised if it ever worked:
007-10.jpg

008-9.jpg
 
OP
OP
2

2slo95fiveoh

Well-Known Member
Joined
Dec 31, 2006
Messages
2,559
Reaction score
4
Location
Lawrence, Kansas
Some of the handywork, I'm not sure if this qualifies as soldering.. I would say it's the equivelant of "spot welding" if that...
013-3.jpg


The alarm harness out:
014-2.jpg


The dash wiring in much better shape with actual soldering, heat shrink, and electrical tape:
016-2.jpg
 

Forum statistics

Threads
78,555
Messages
1,536,137
Members
16,201
Latest member
jgib8795

Members online

Top