FivepointSlow's 4.6 Build

OP
OP
FivepointSlow

FivepointSlow

Well-Known Member
Joined
Oct 22, 2013
Messages
2,646
Reaction score
60
Location
Enfield, CT, USA
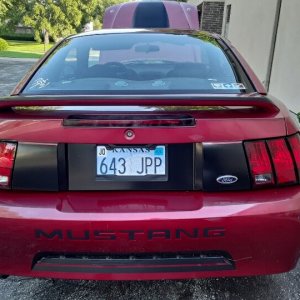
Ordered up some odds and ends that had been really bugging me. This build is going to consist of alot of "the little things"
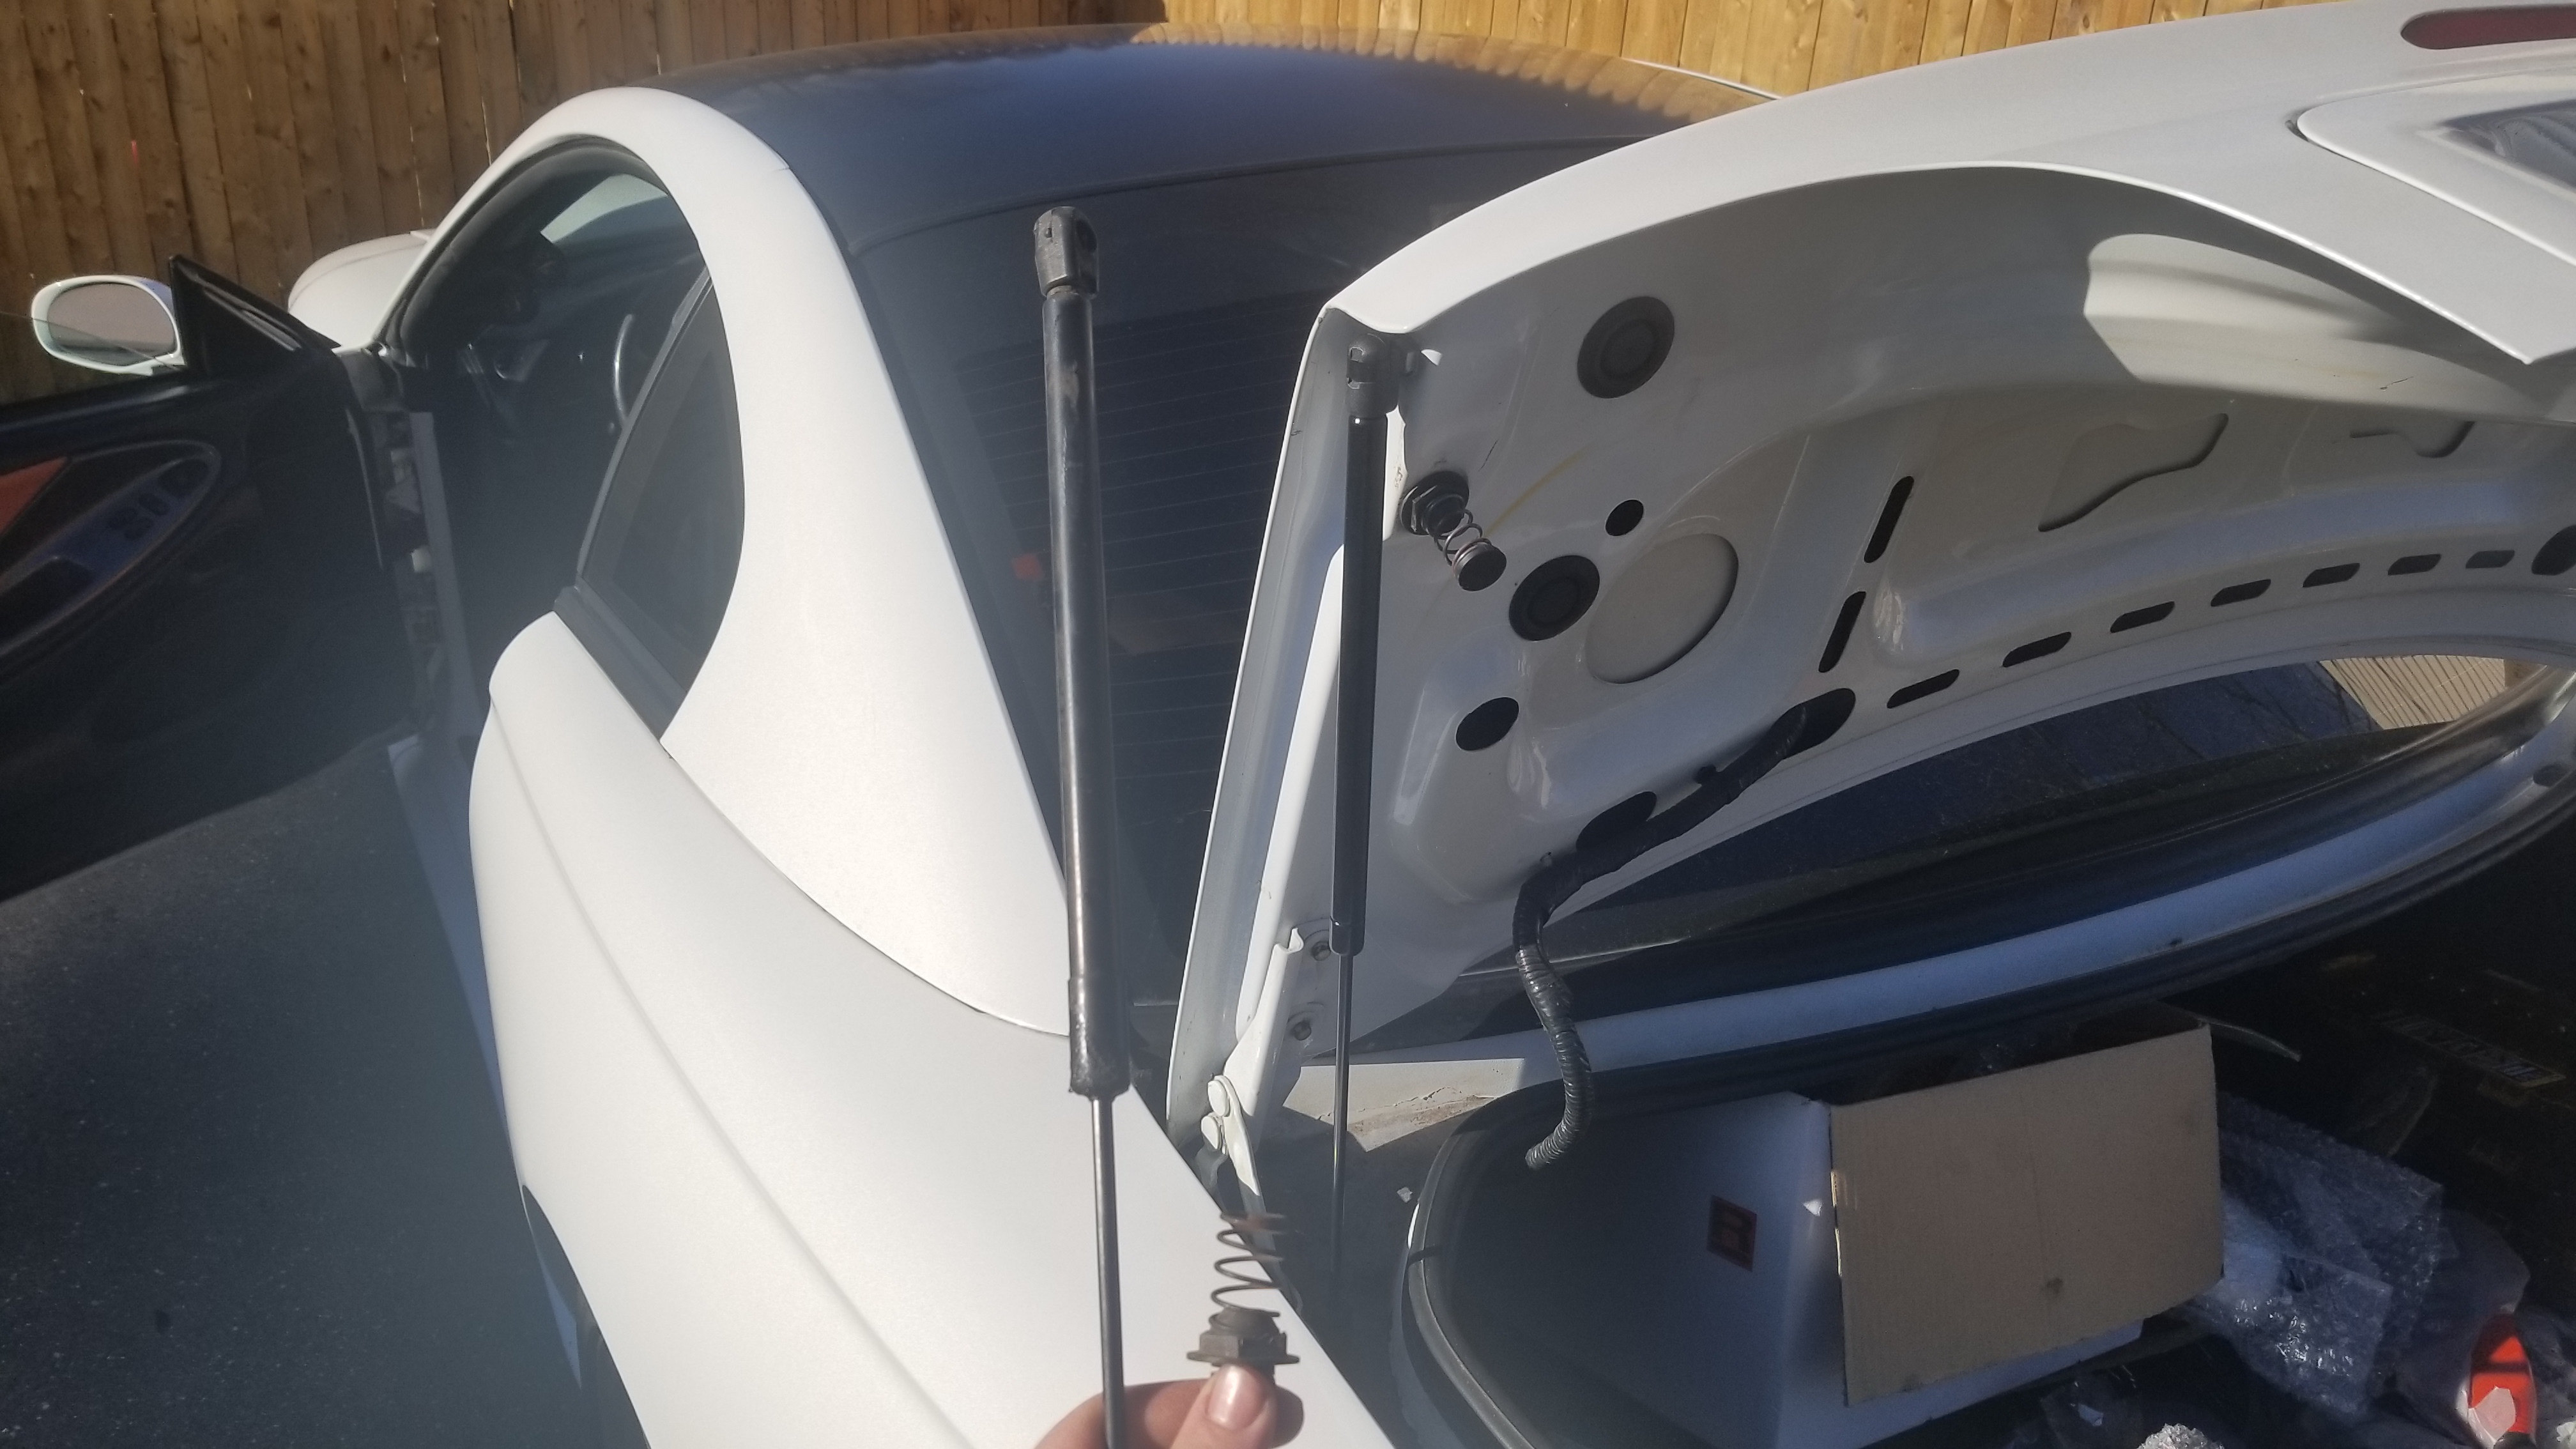
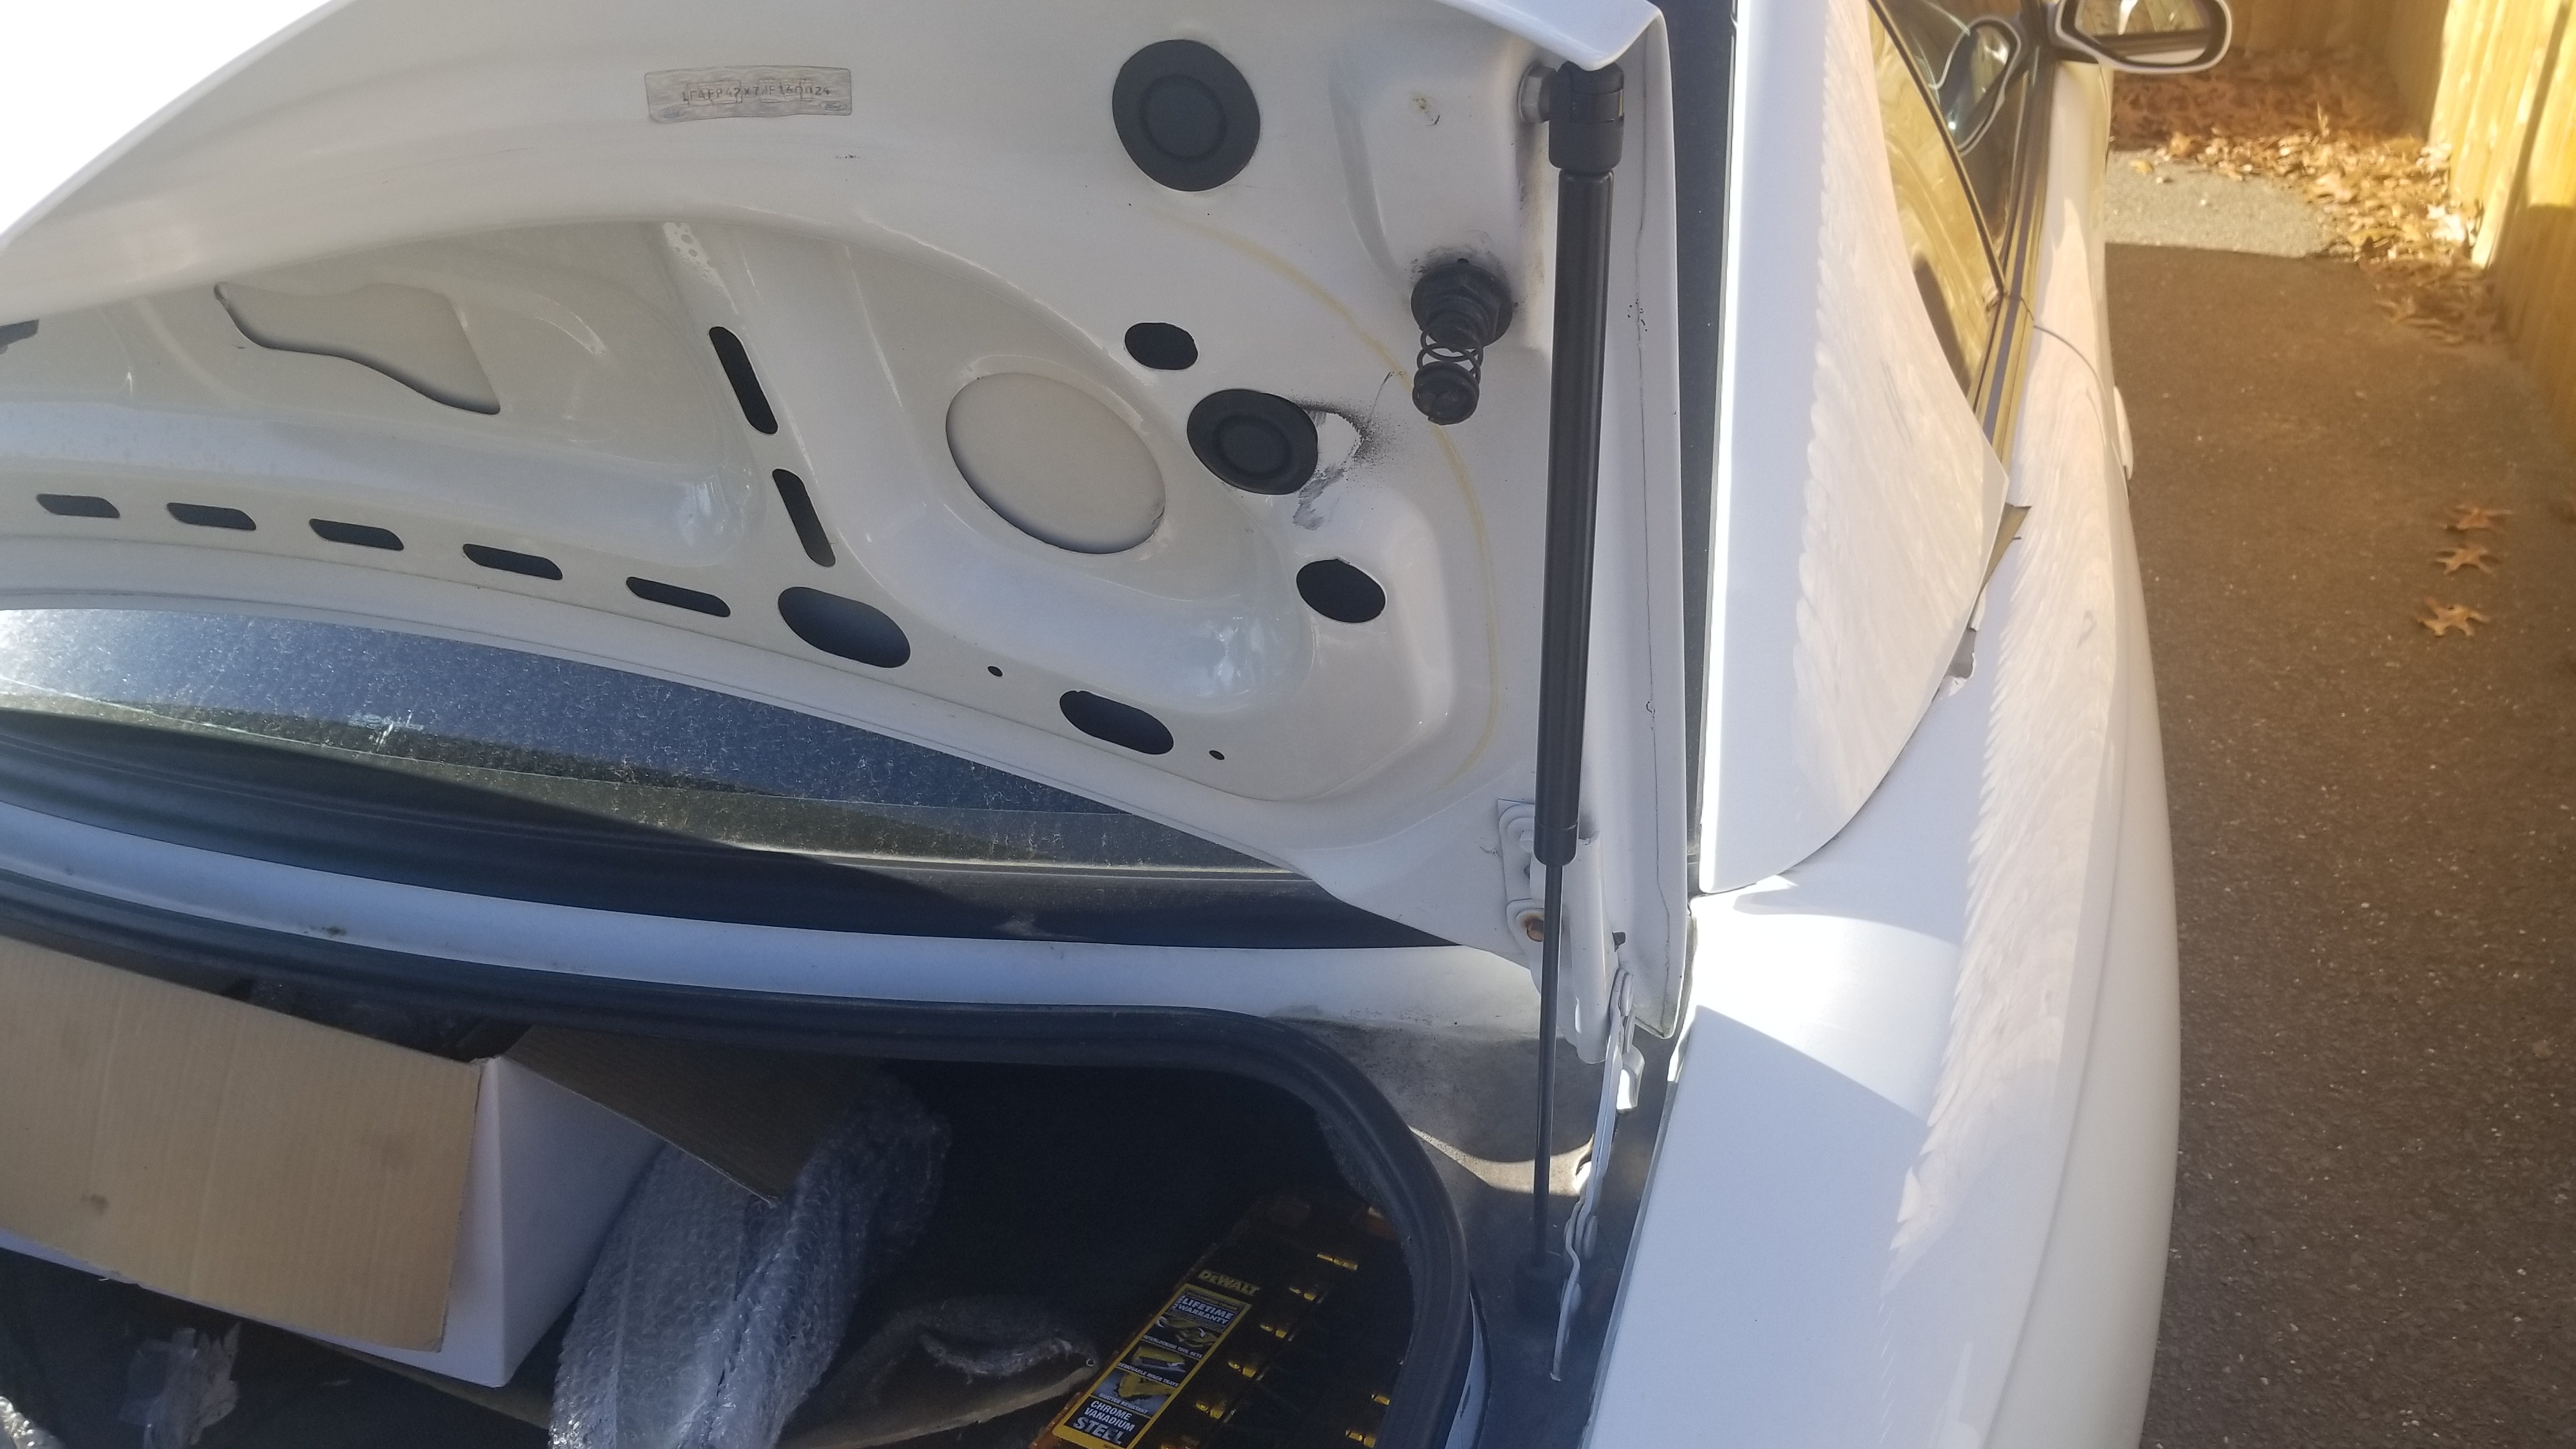
Replaced the leaking trunk struts that barely would hold the trunk up, but definitely wouldn't open the trunk on their own... Also replaced one trunk spring, meant to order 2 but I guess I only ordered one ):
Y7OiYvn.jpg

76H6dtU.jpg


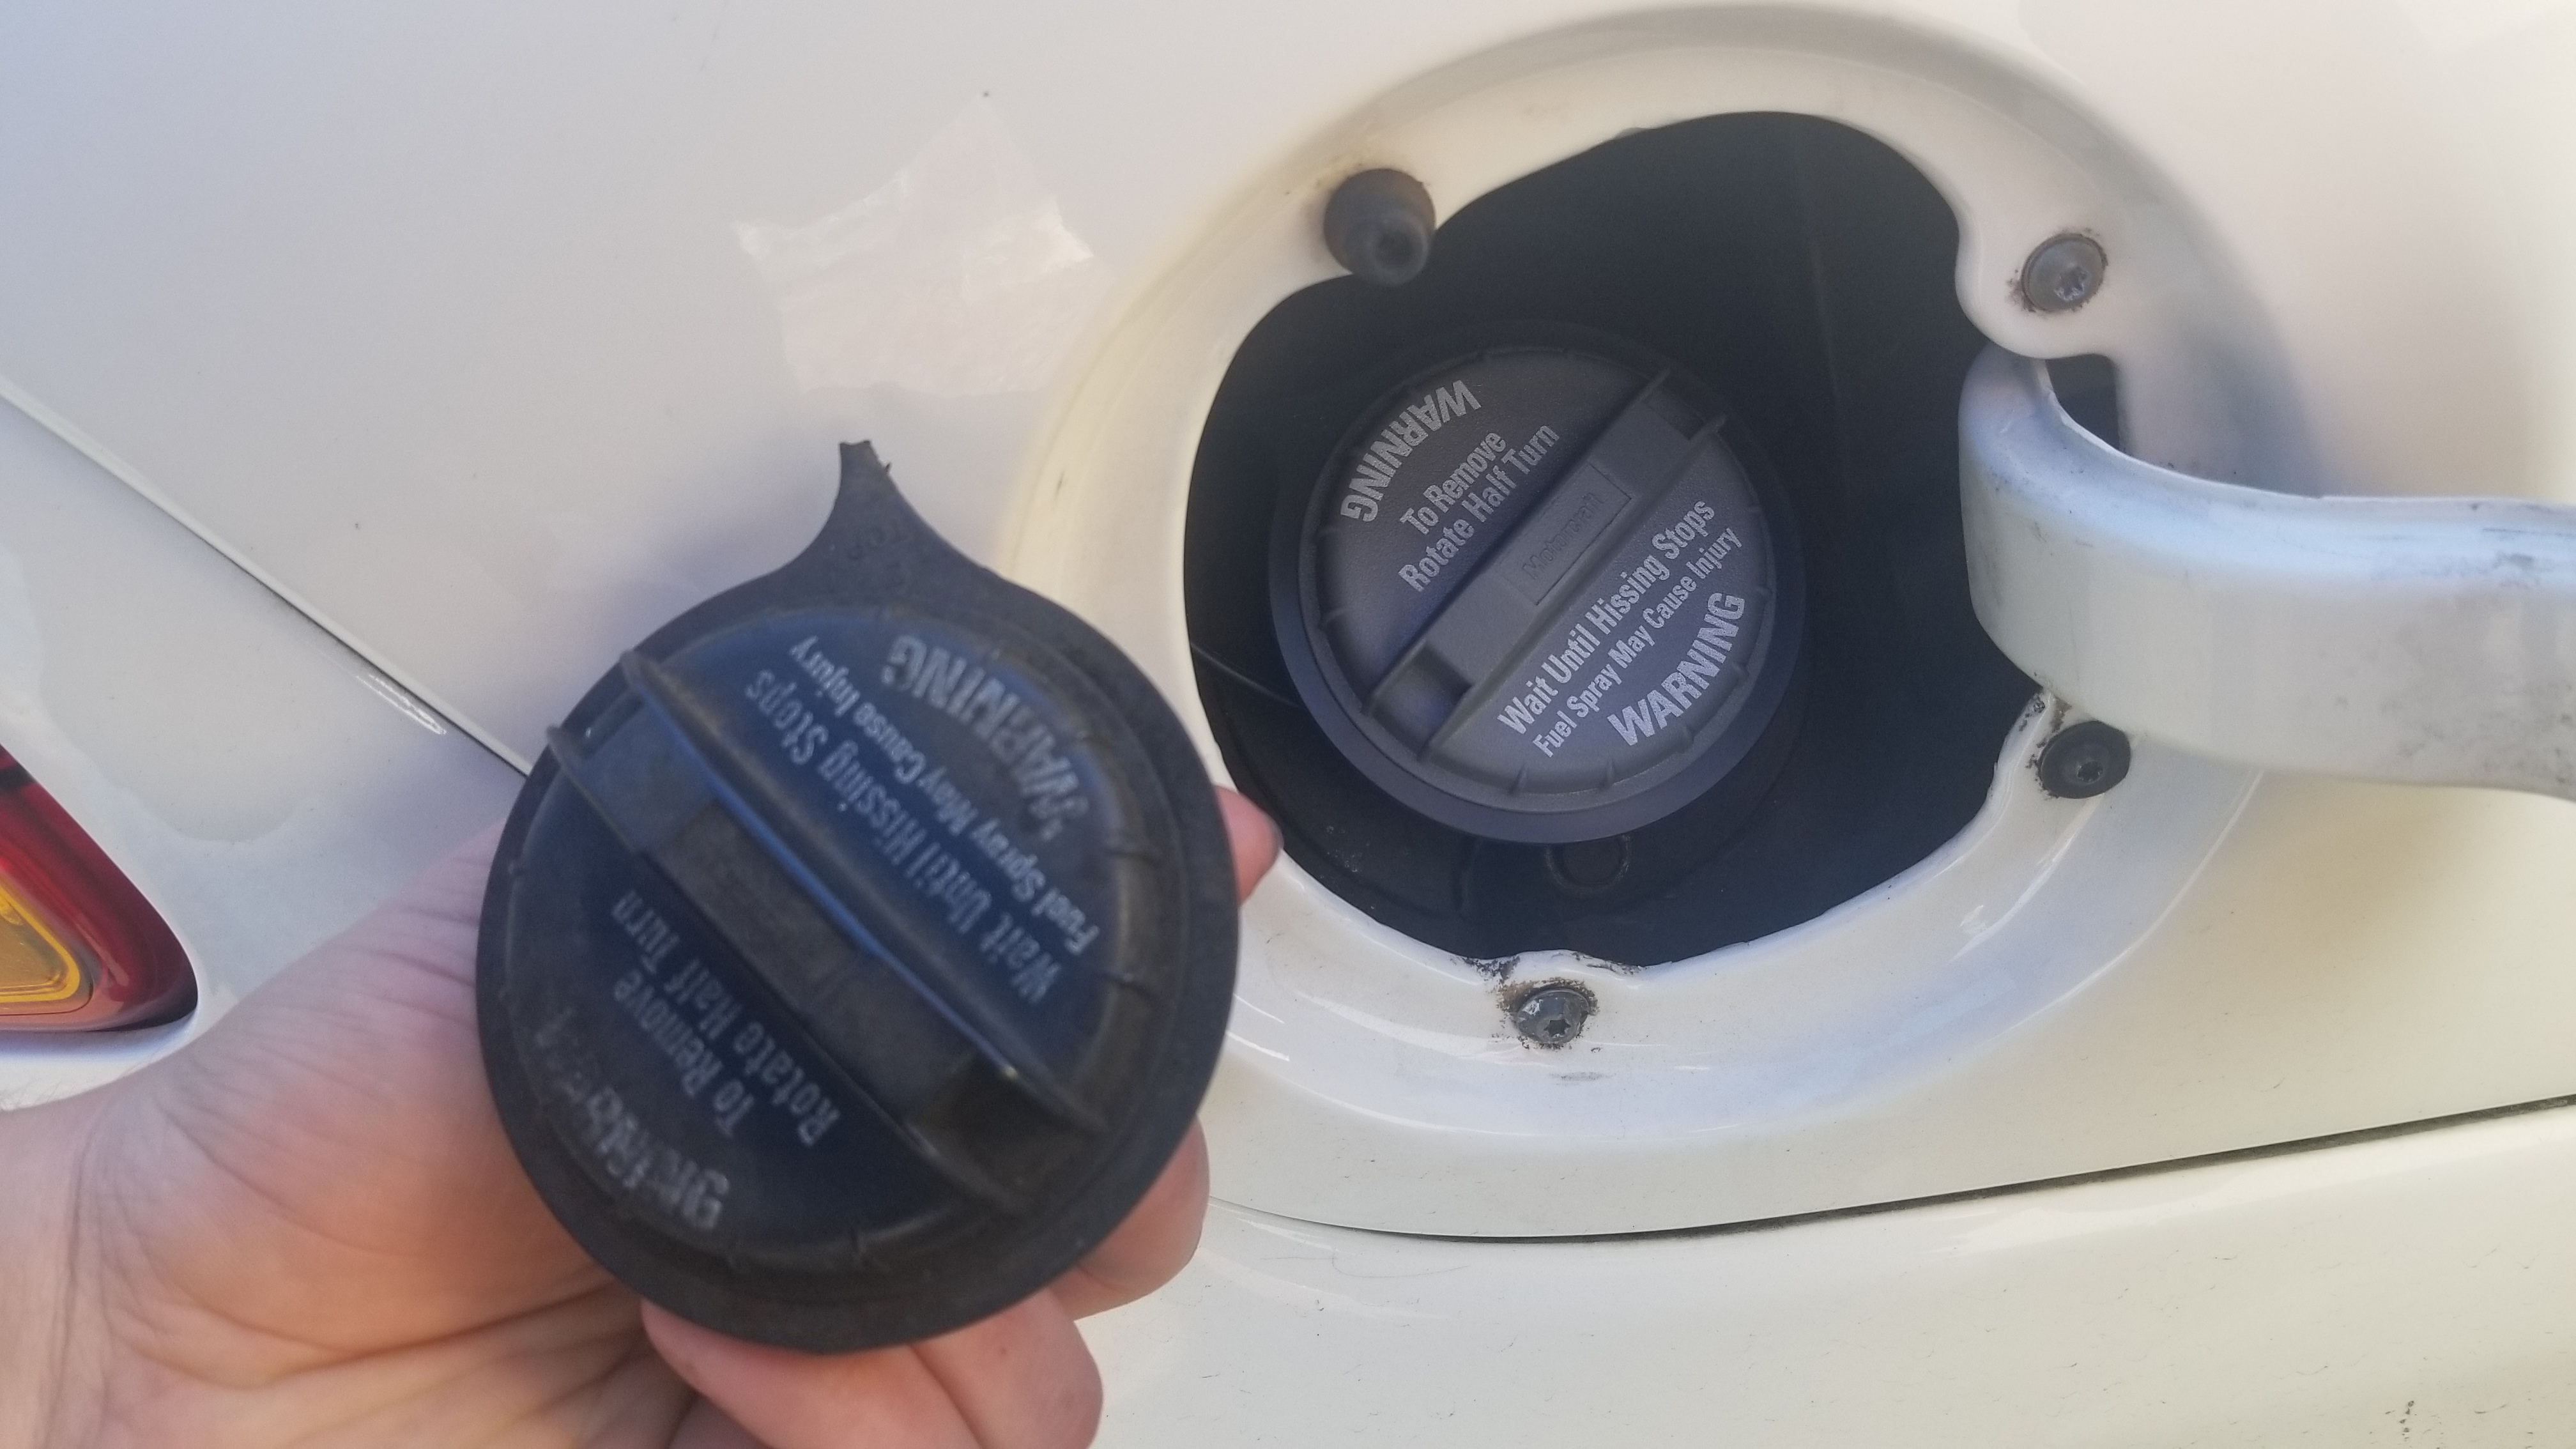
New gas cap because I can't stand having a broken tether..
1kMYbgn.jpg


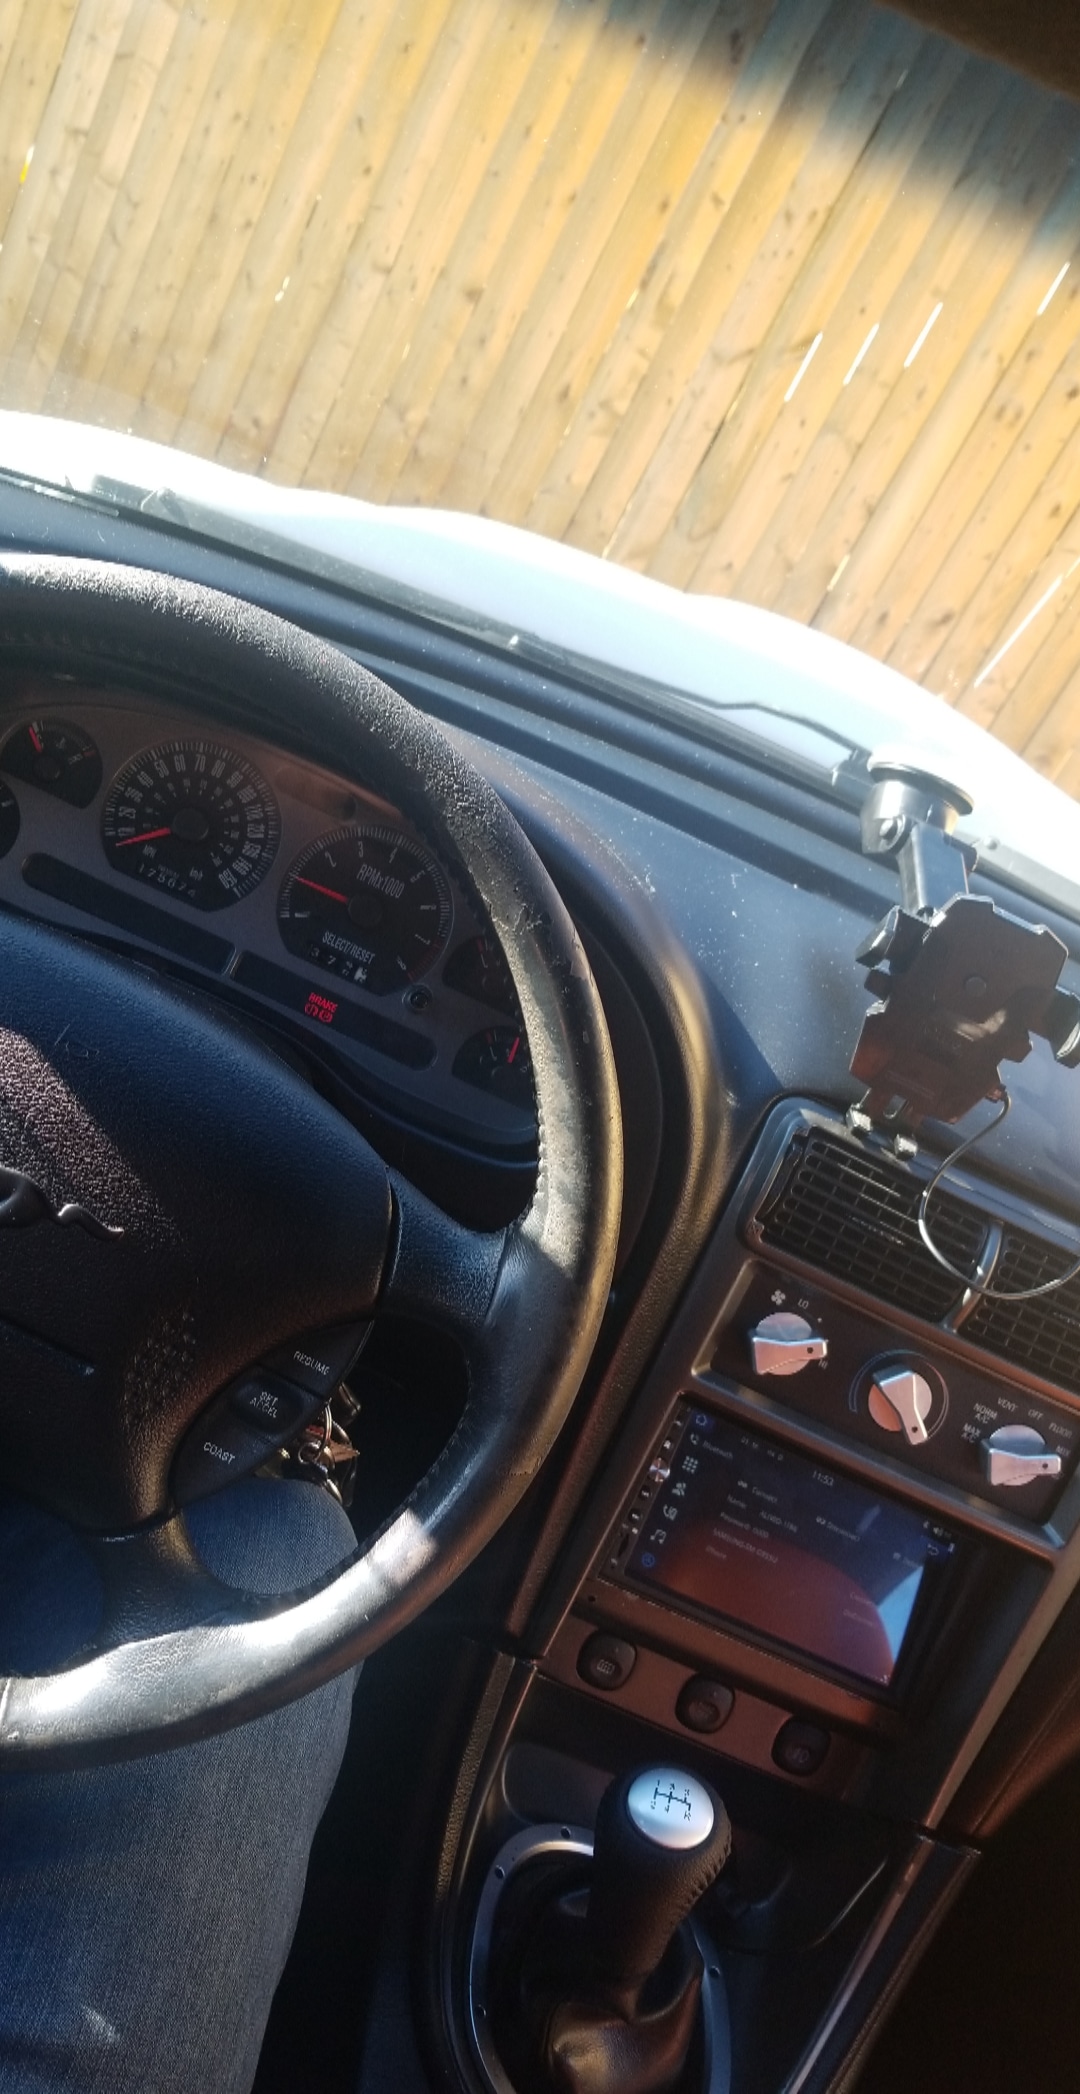
And finally a new shift knob because the old on bothered me everytime I got in and it was the coldest part of the interior. It was also tightened down crooked. I love the feel of this one alot better though. It also looks way better imo
I have plans to switch up the shift boot, ebrake boot, and fix that ugly steering wheel aswell
1MQ7j4W.jpg


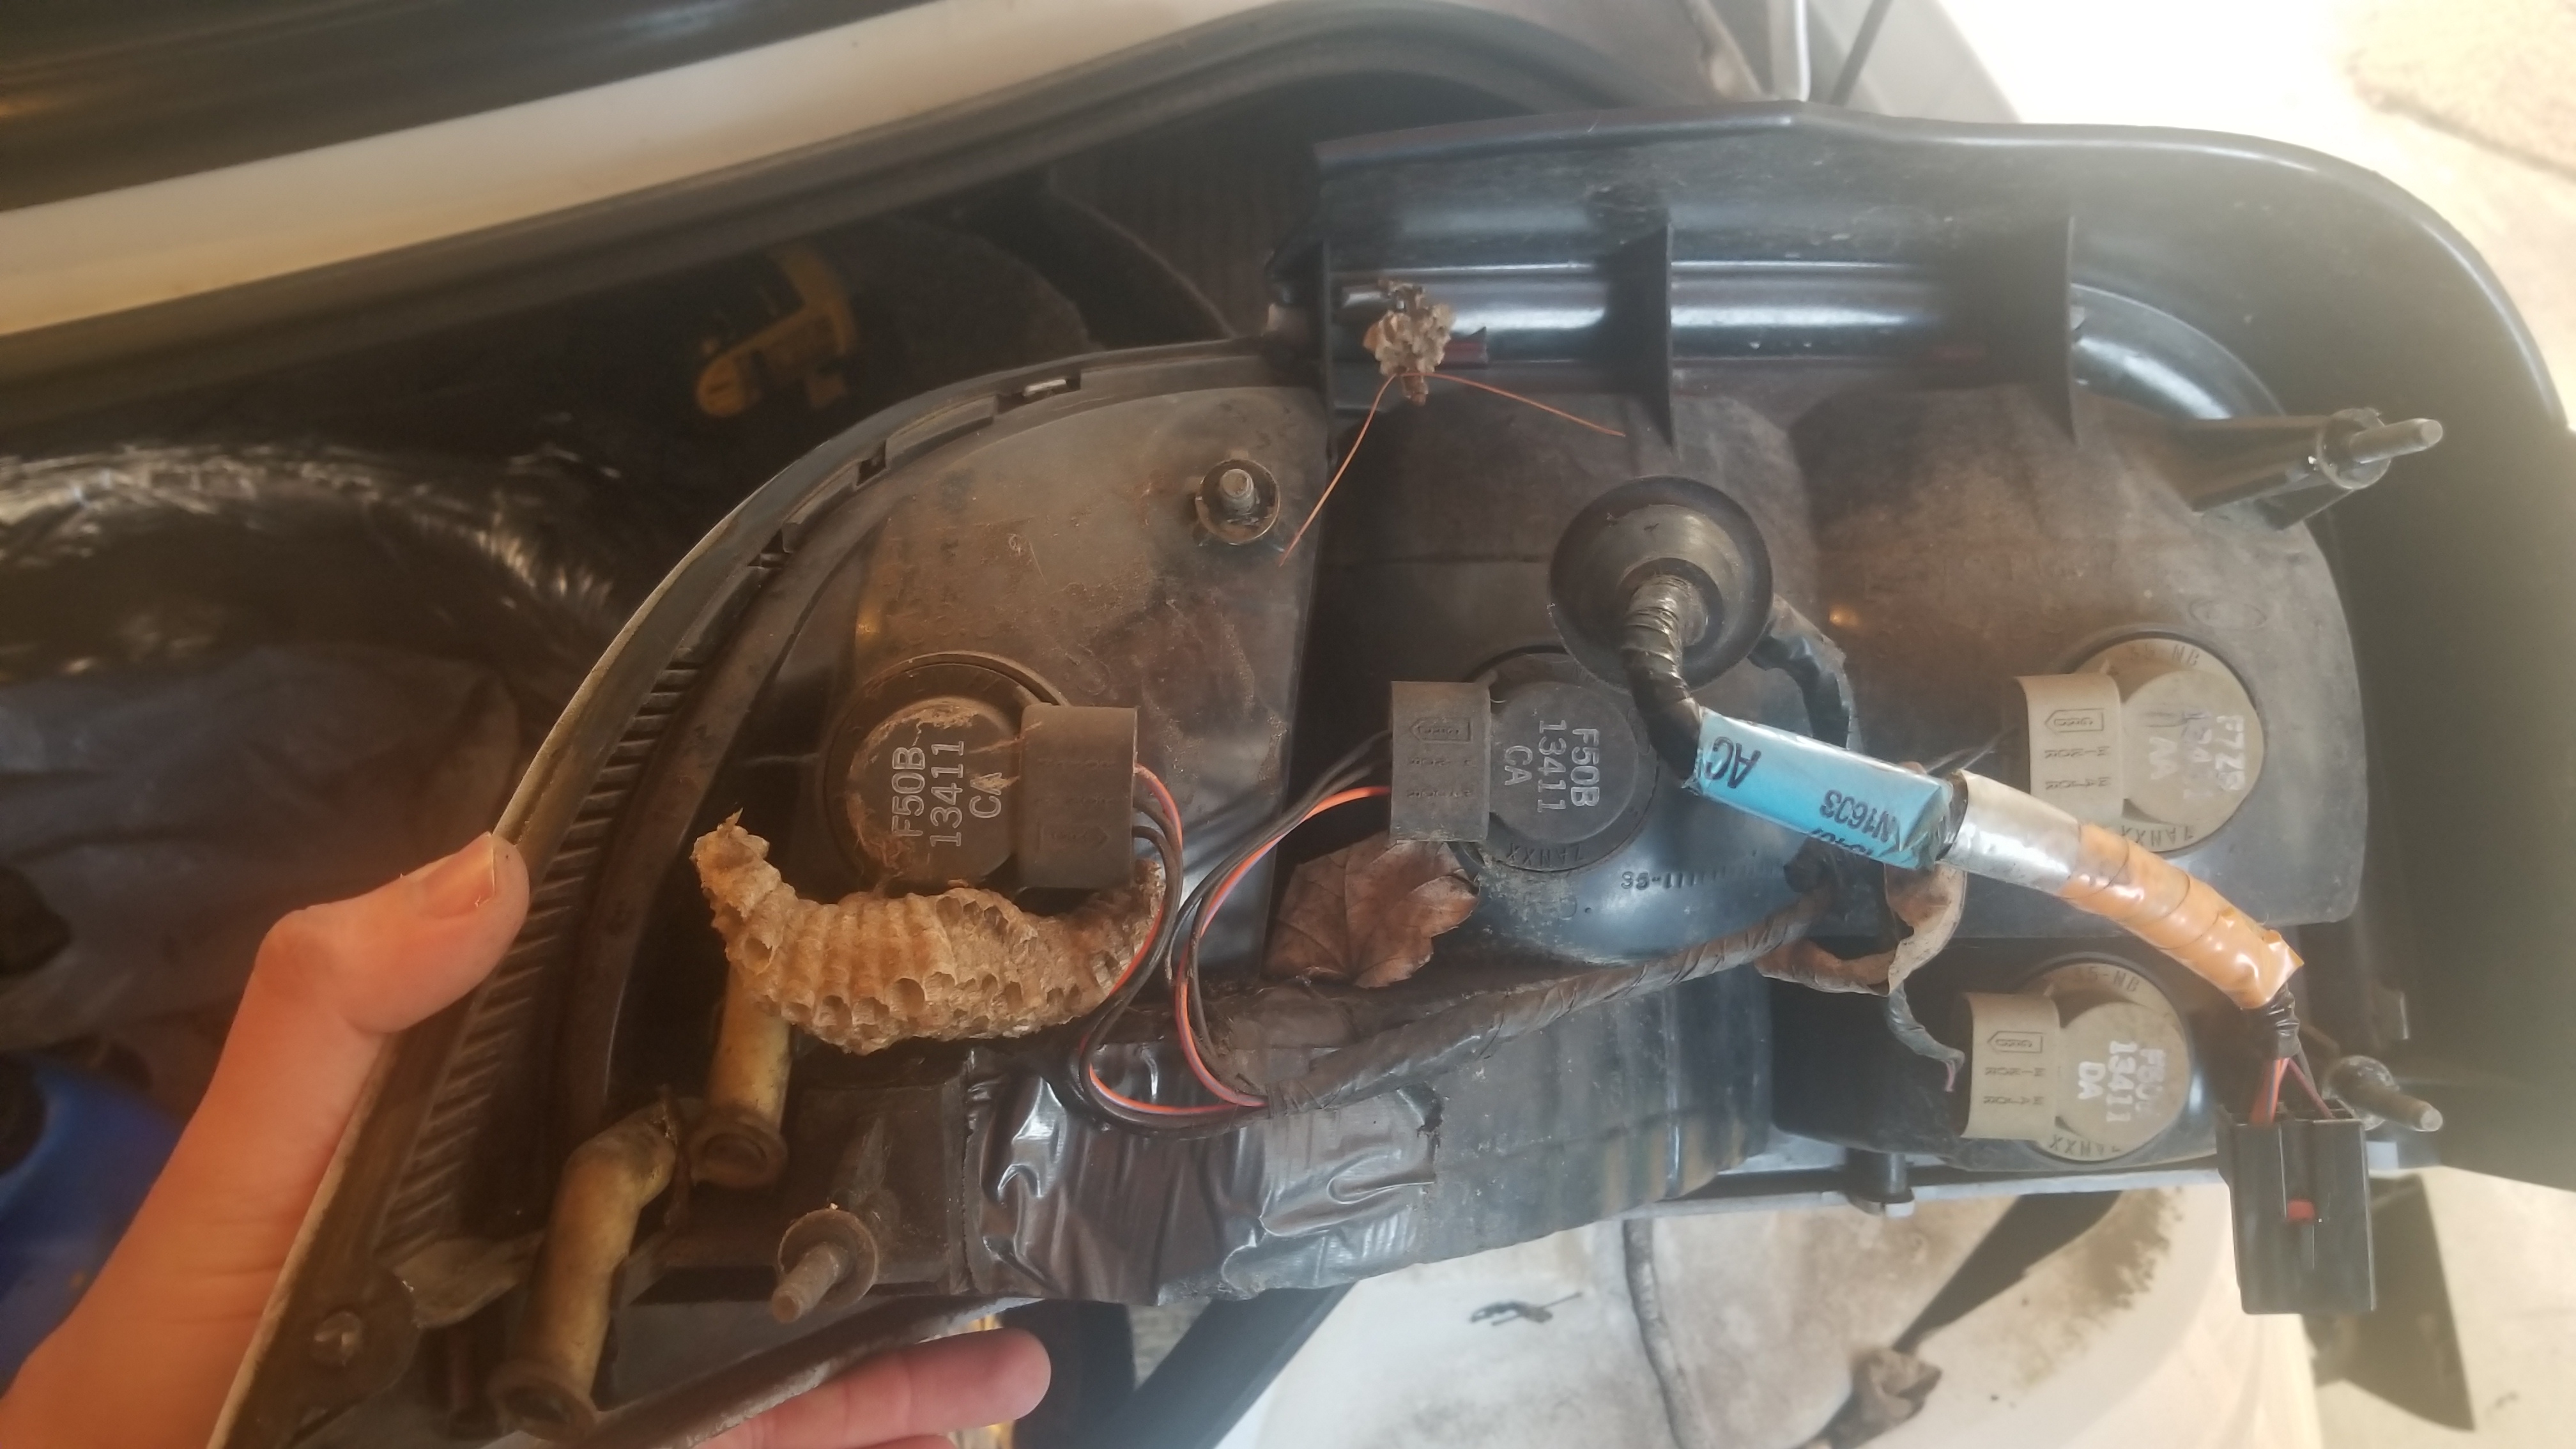
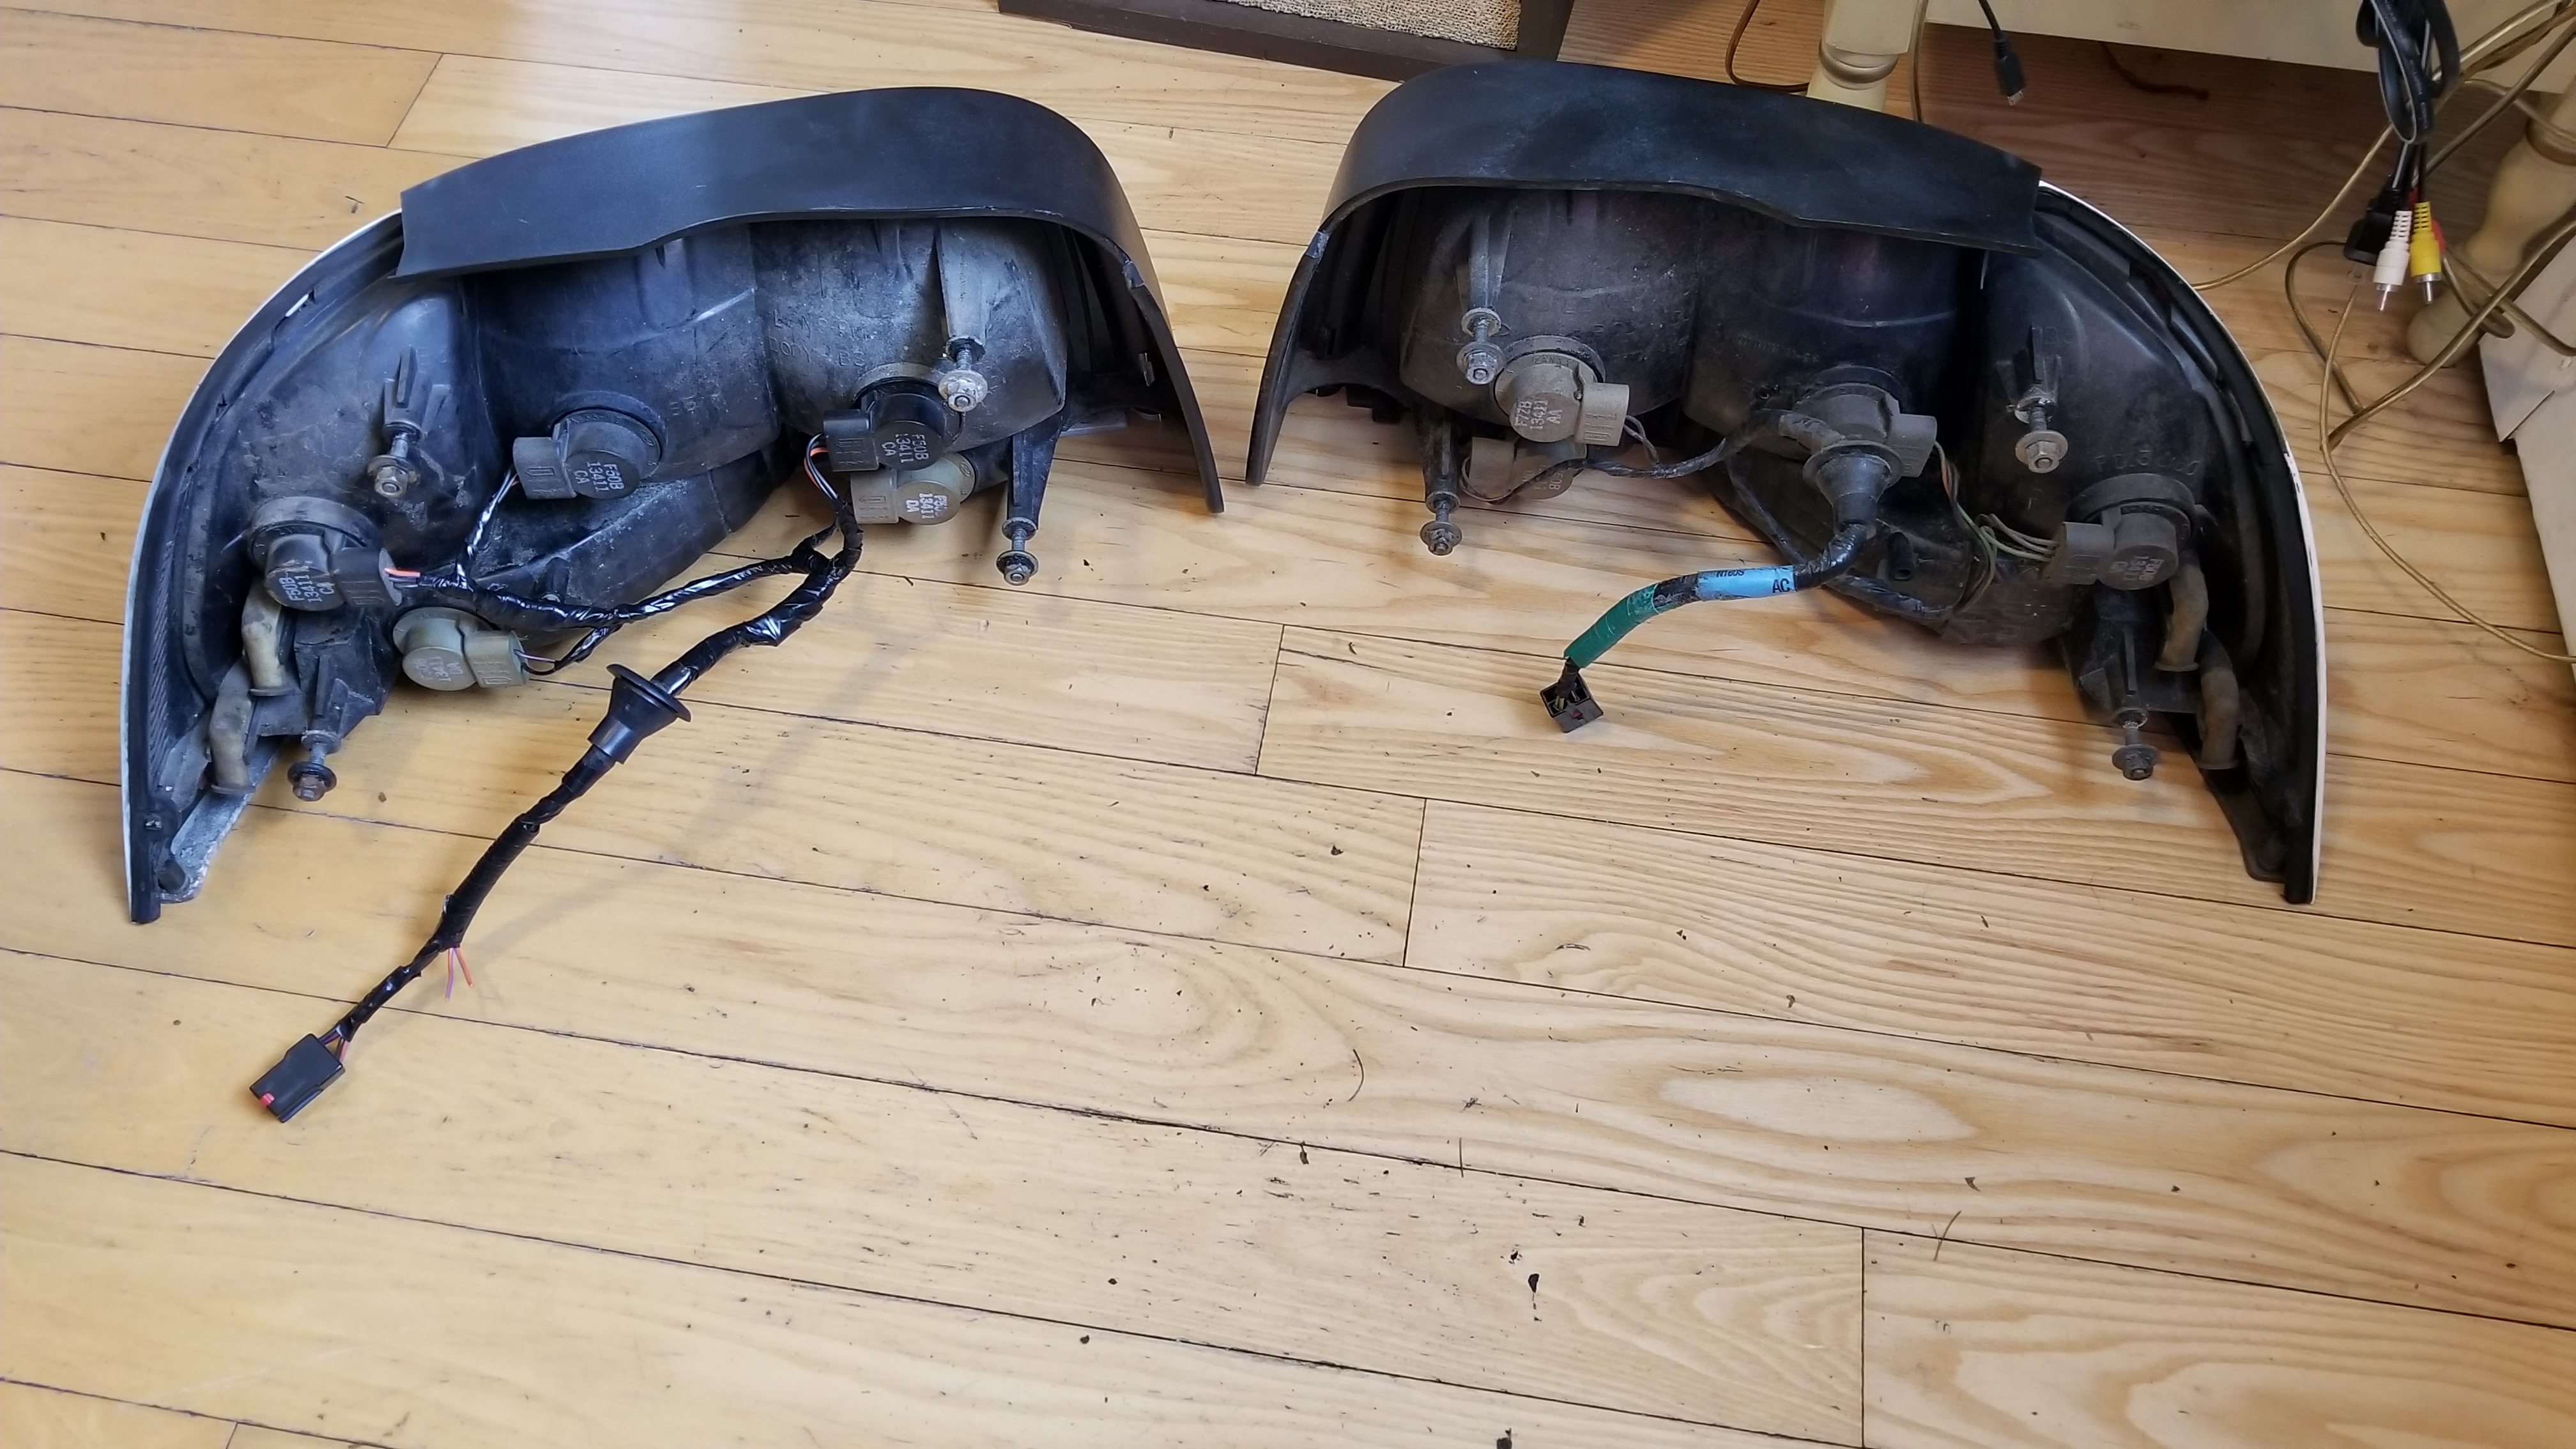
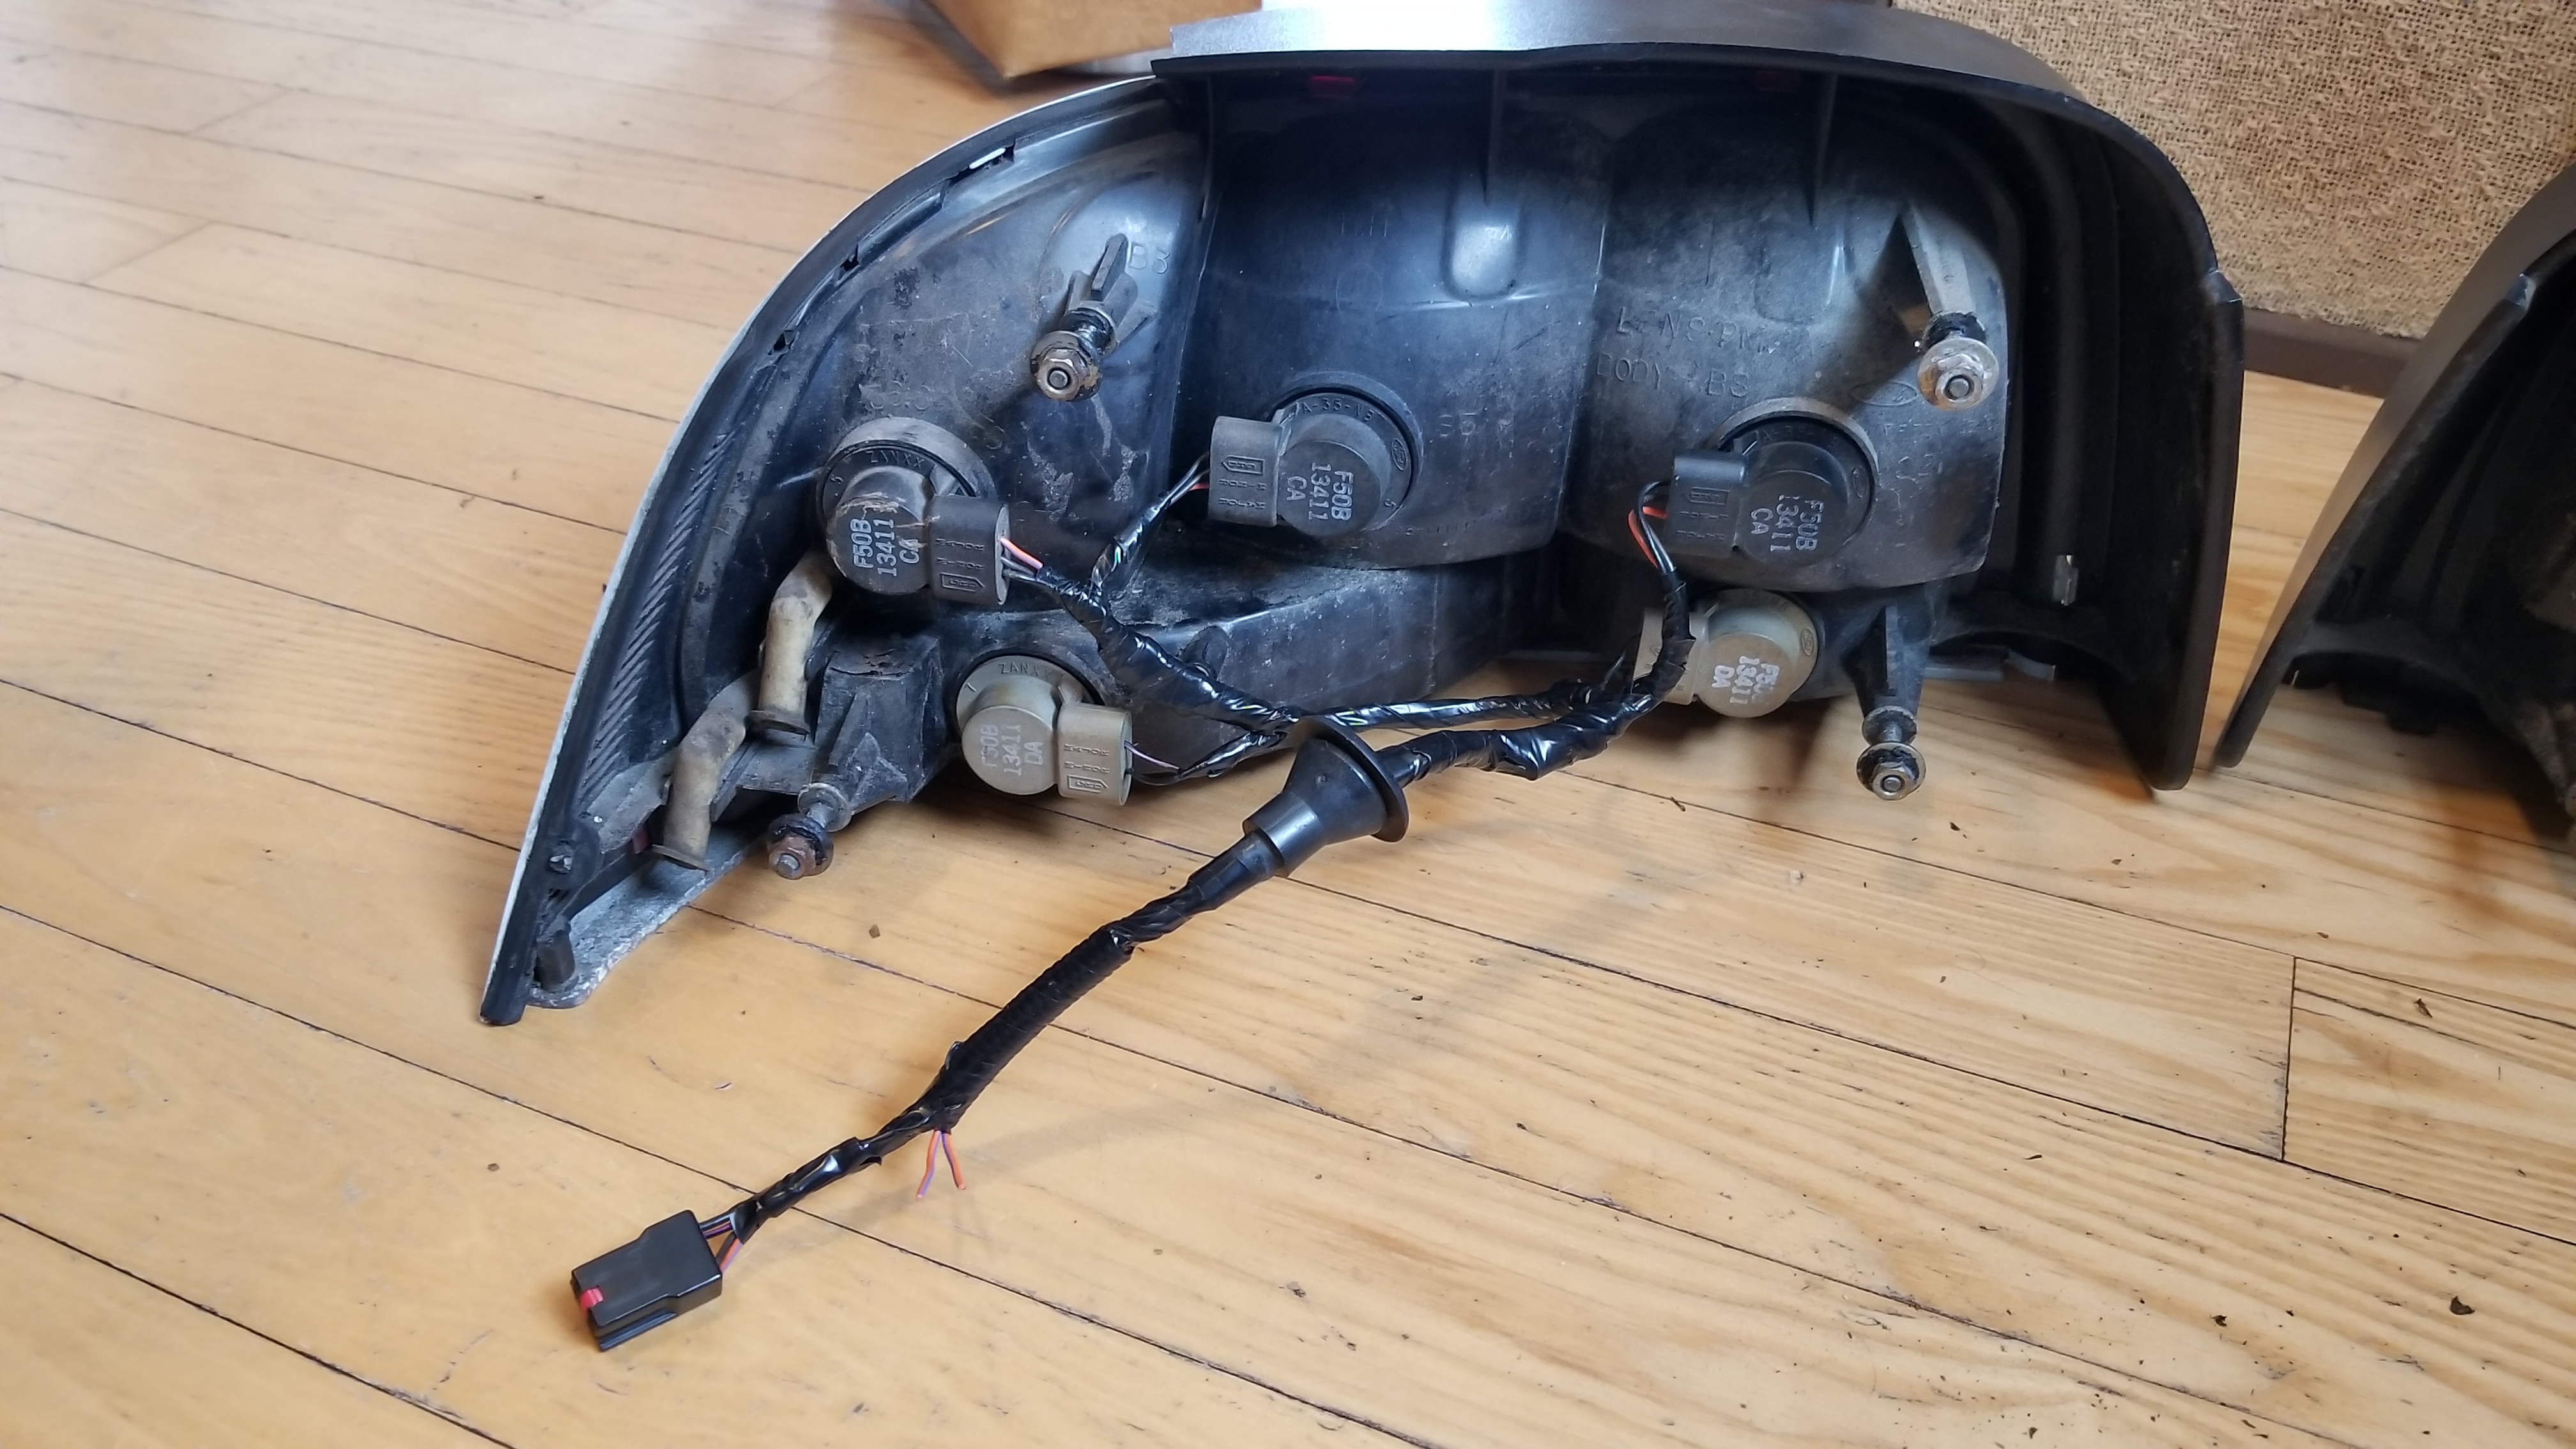
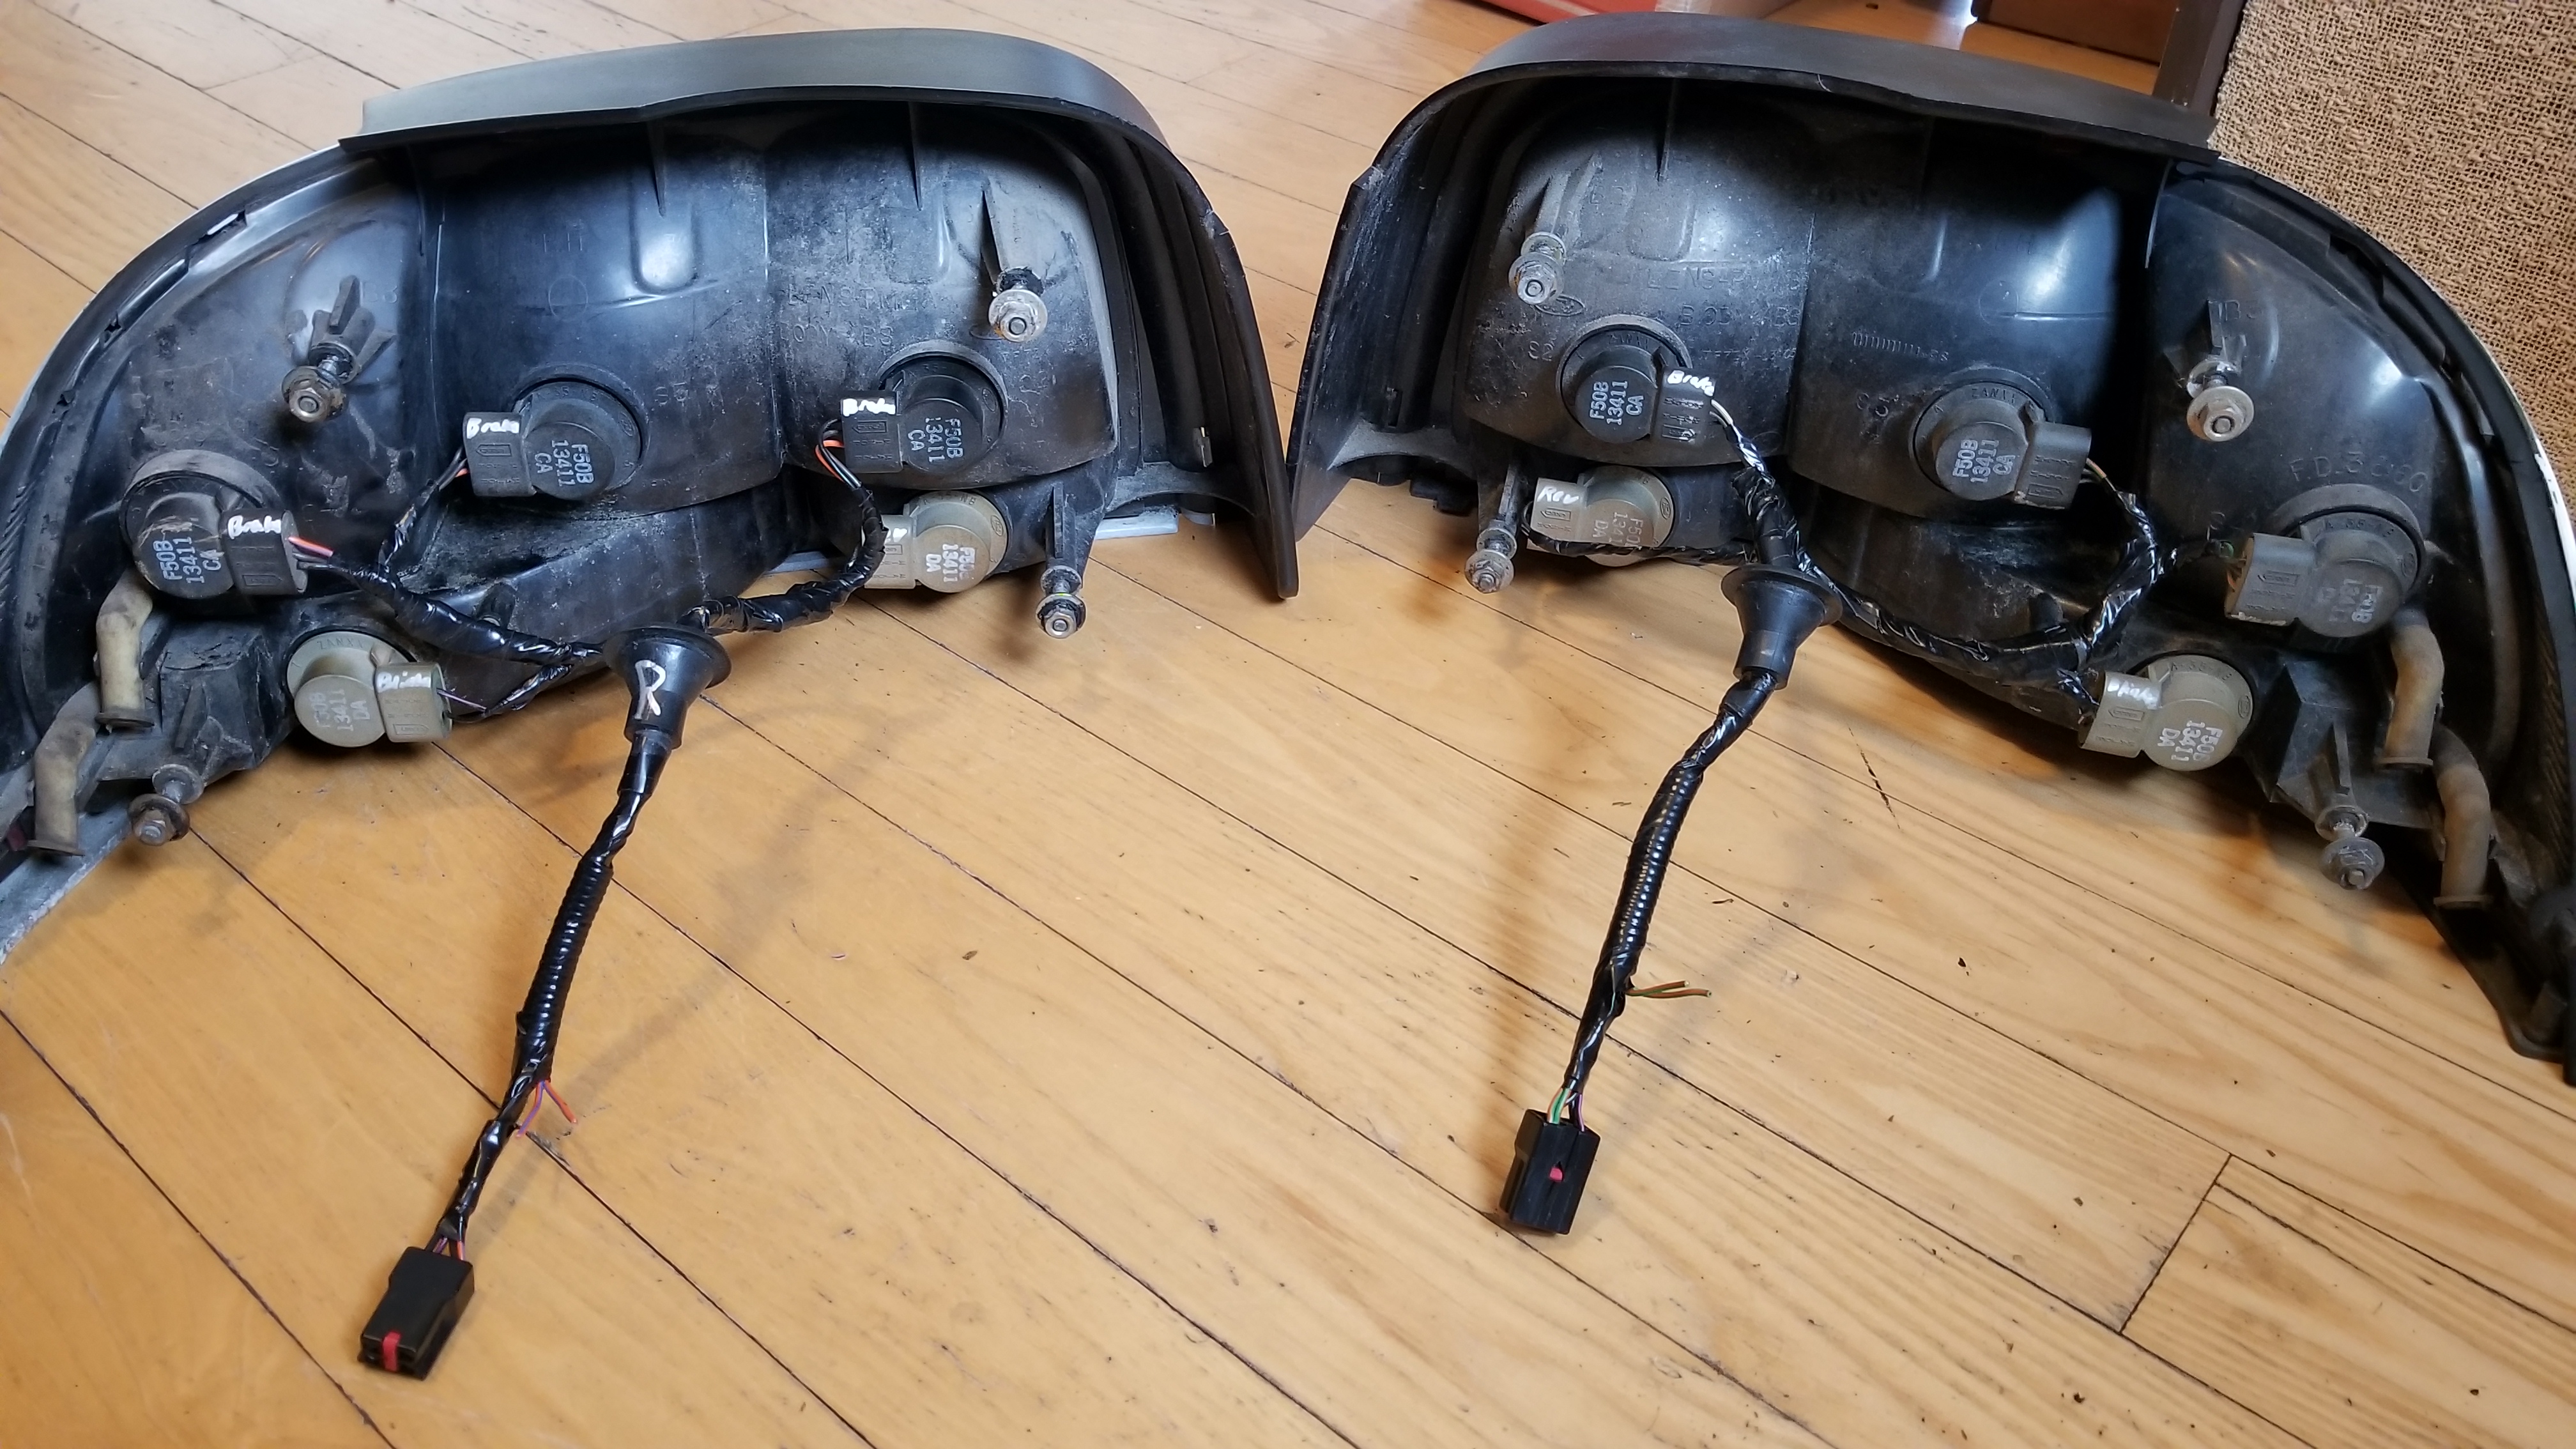
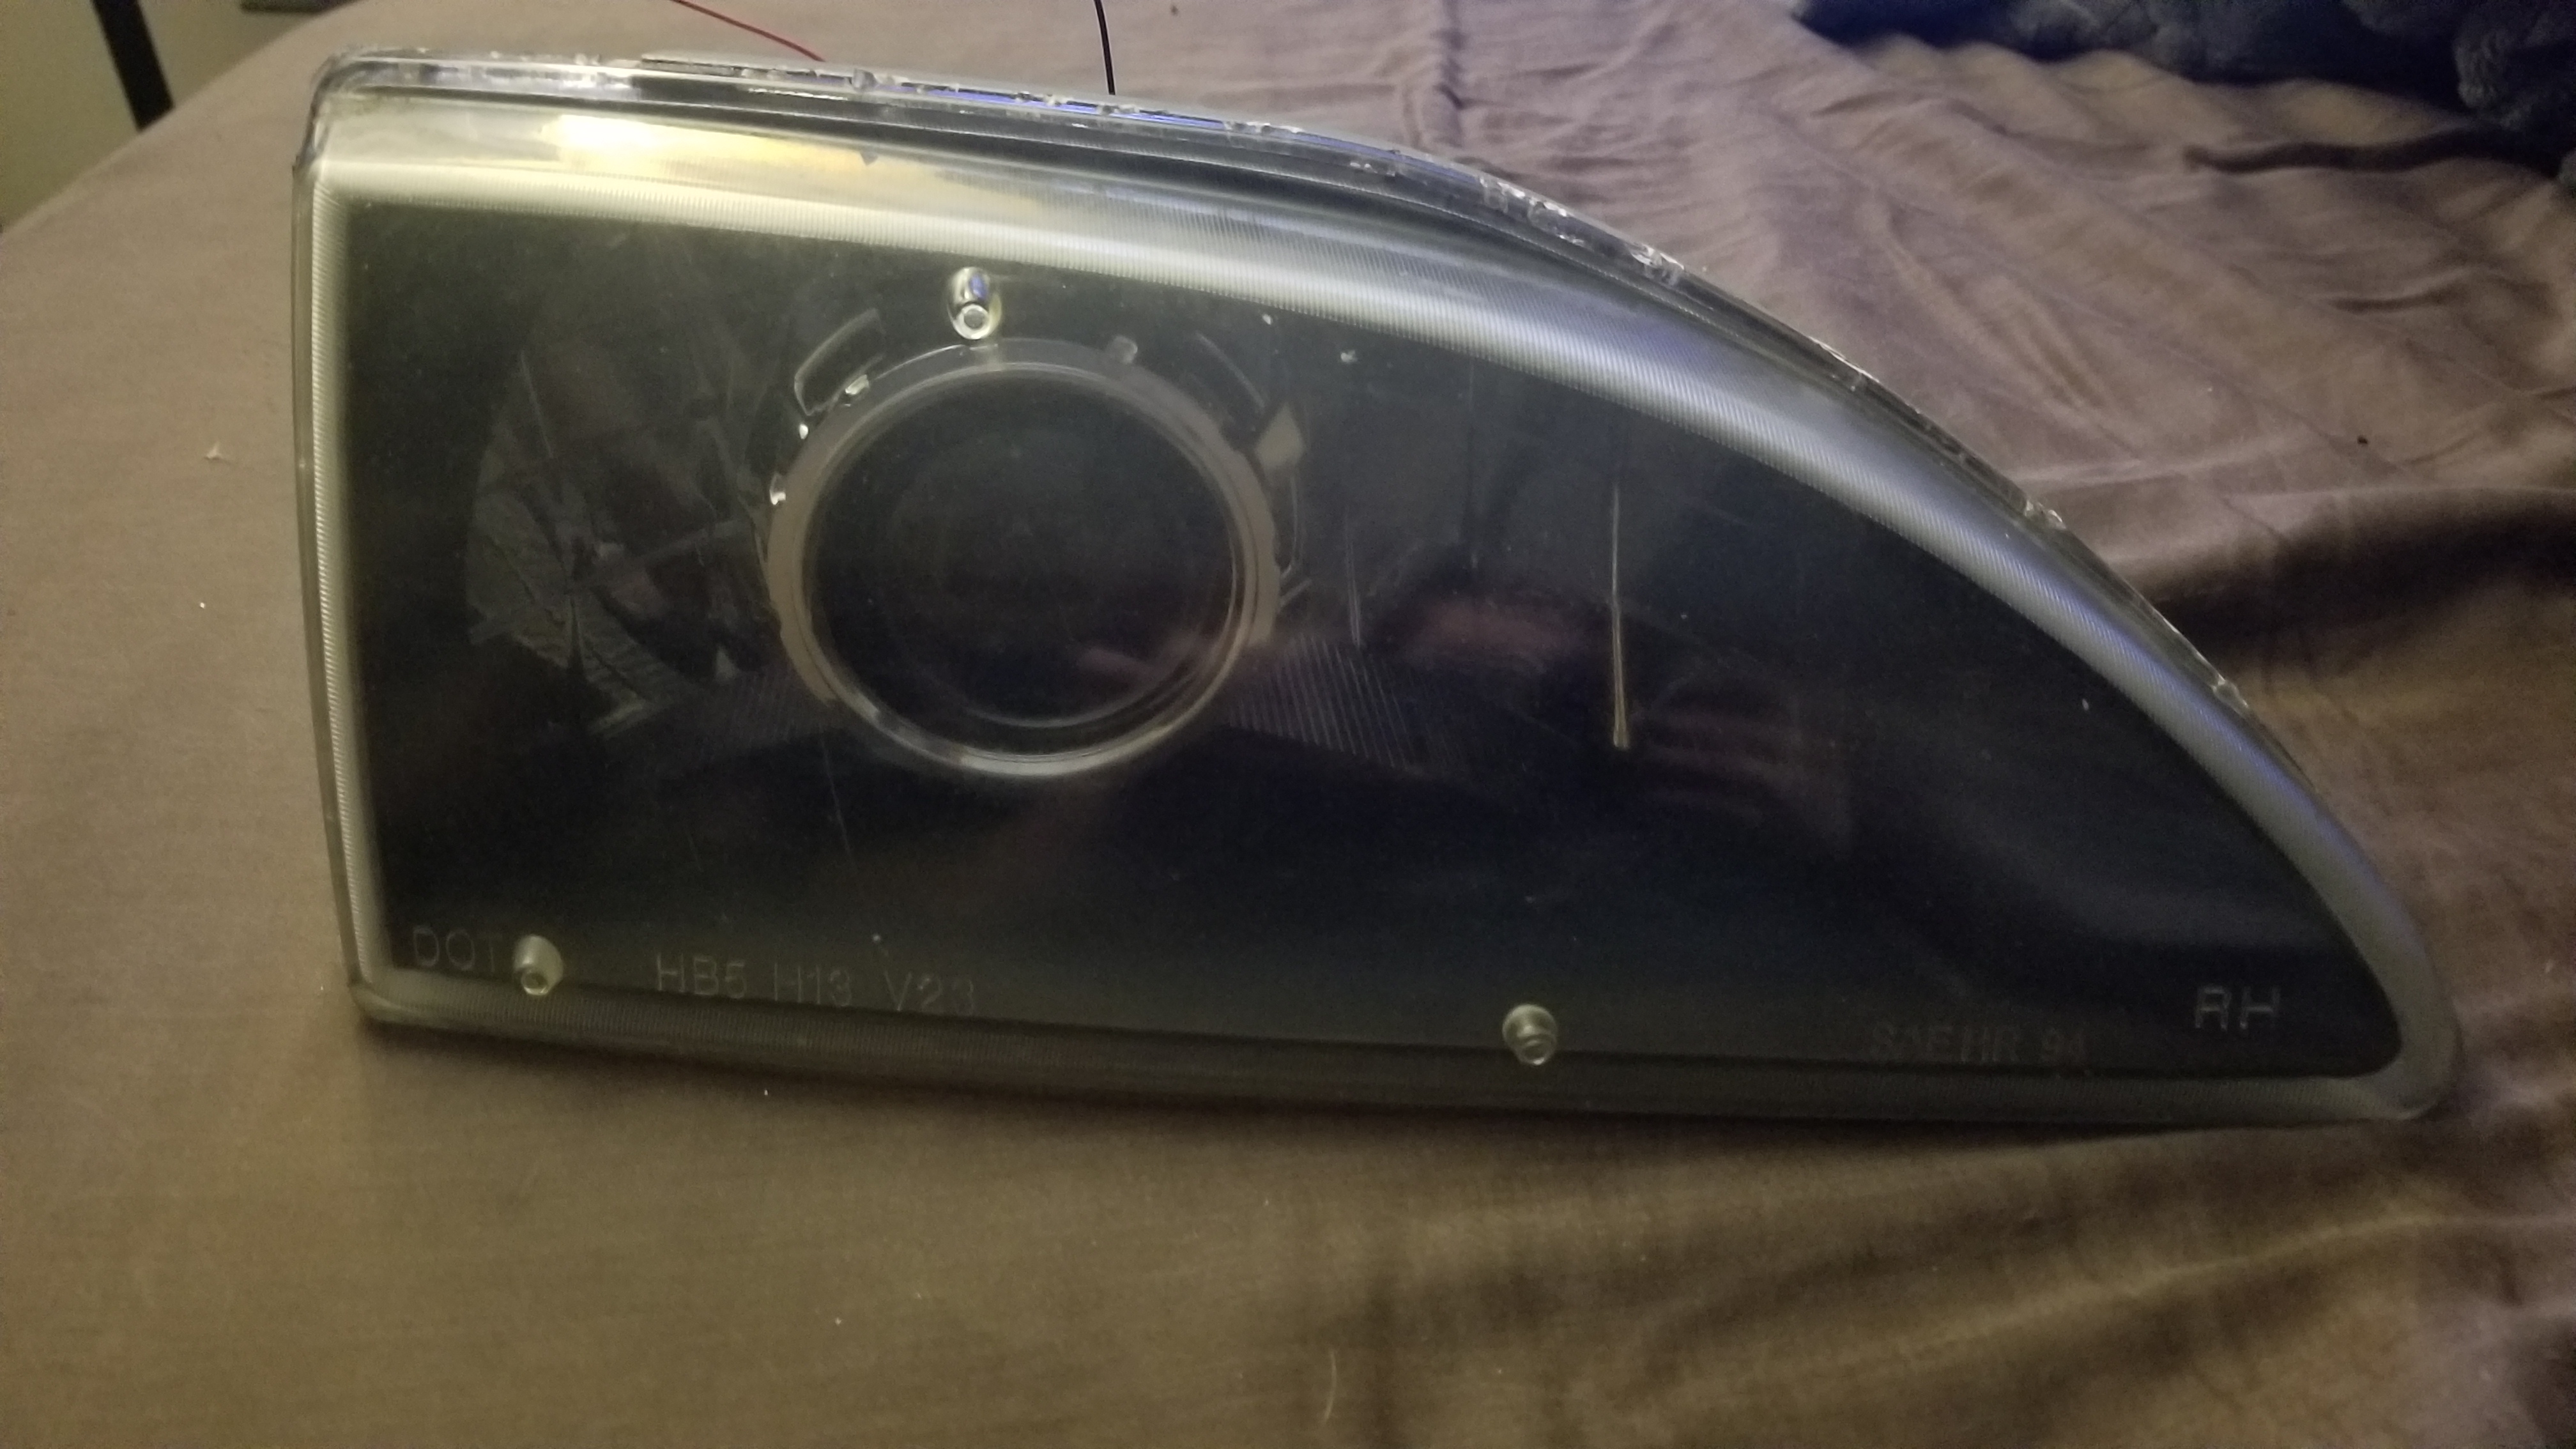
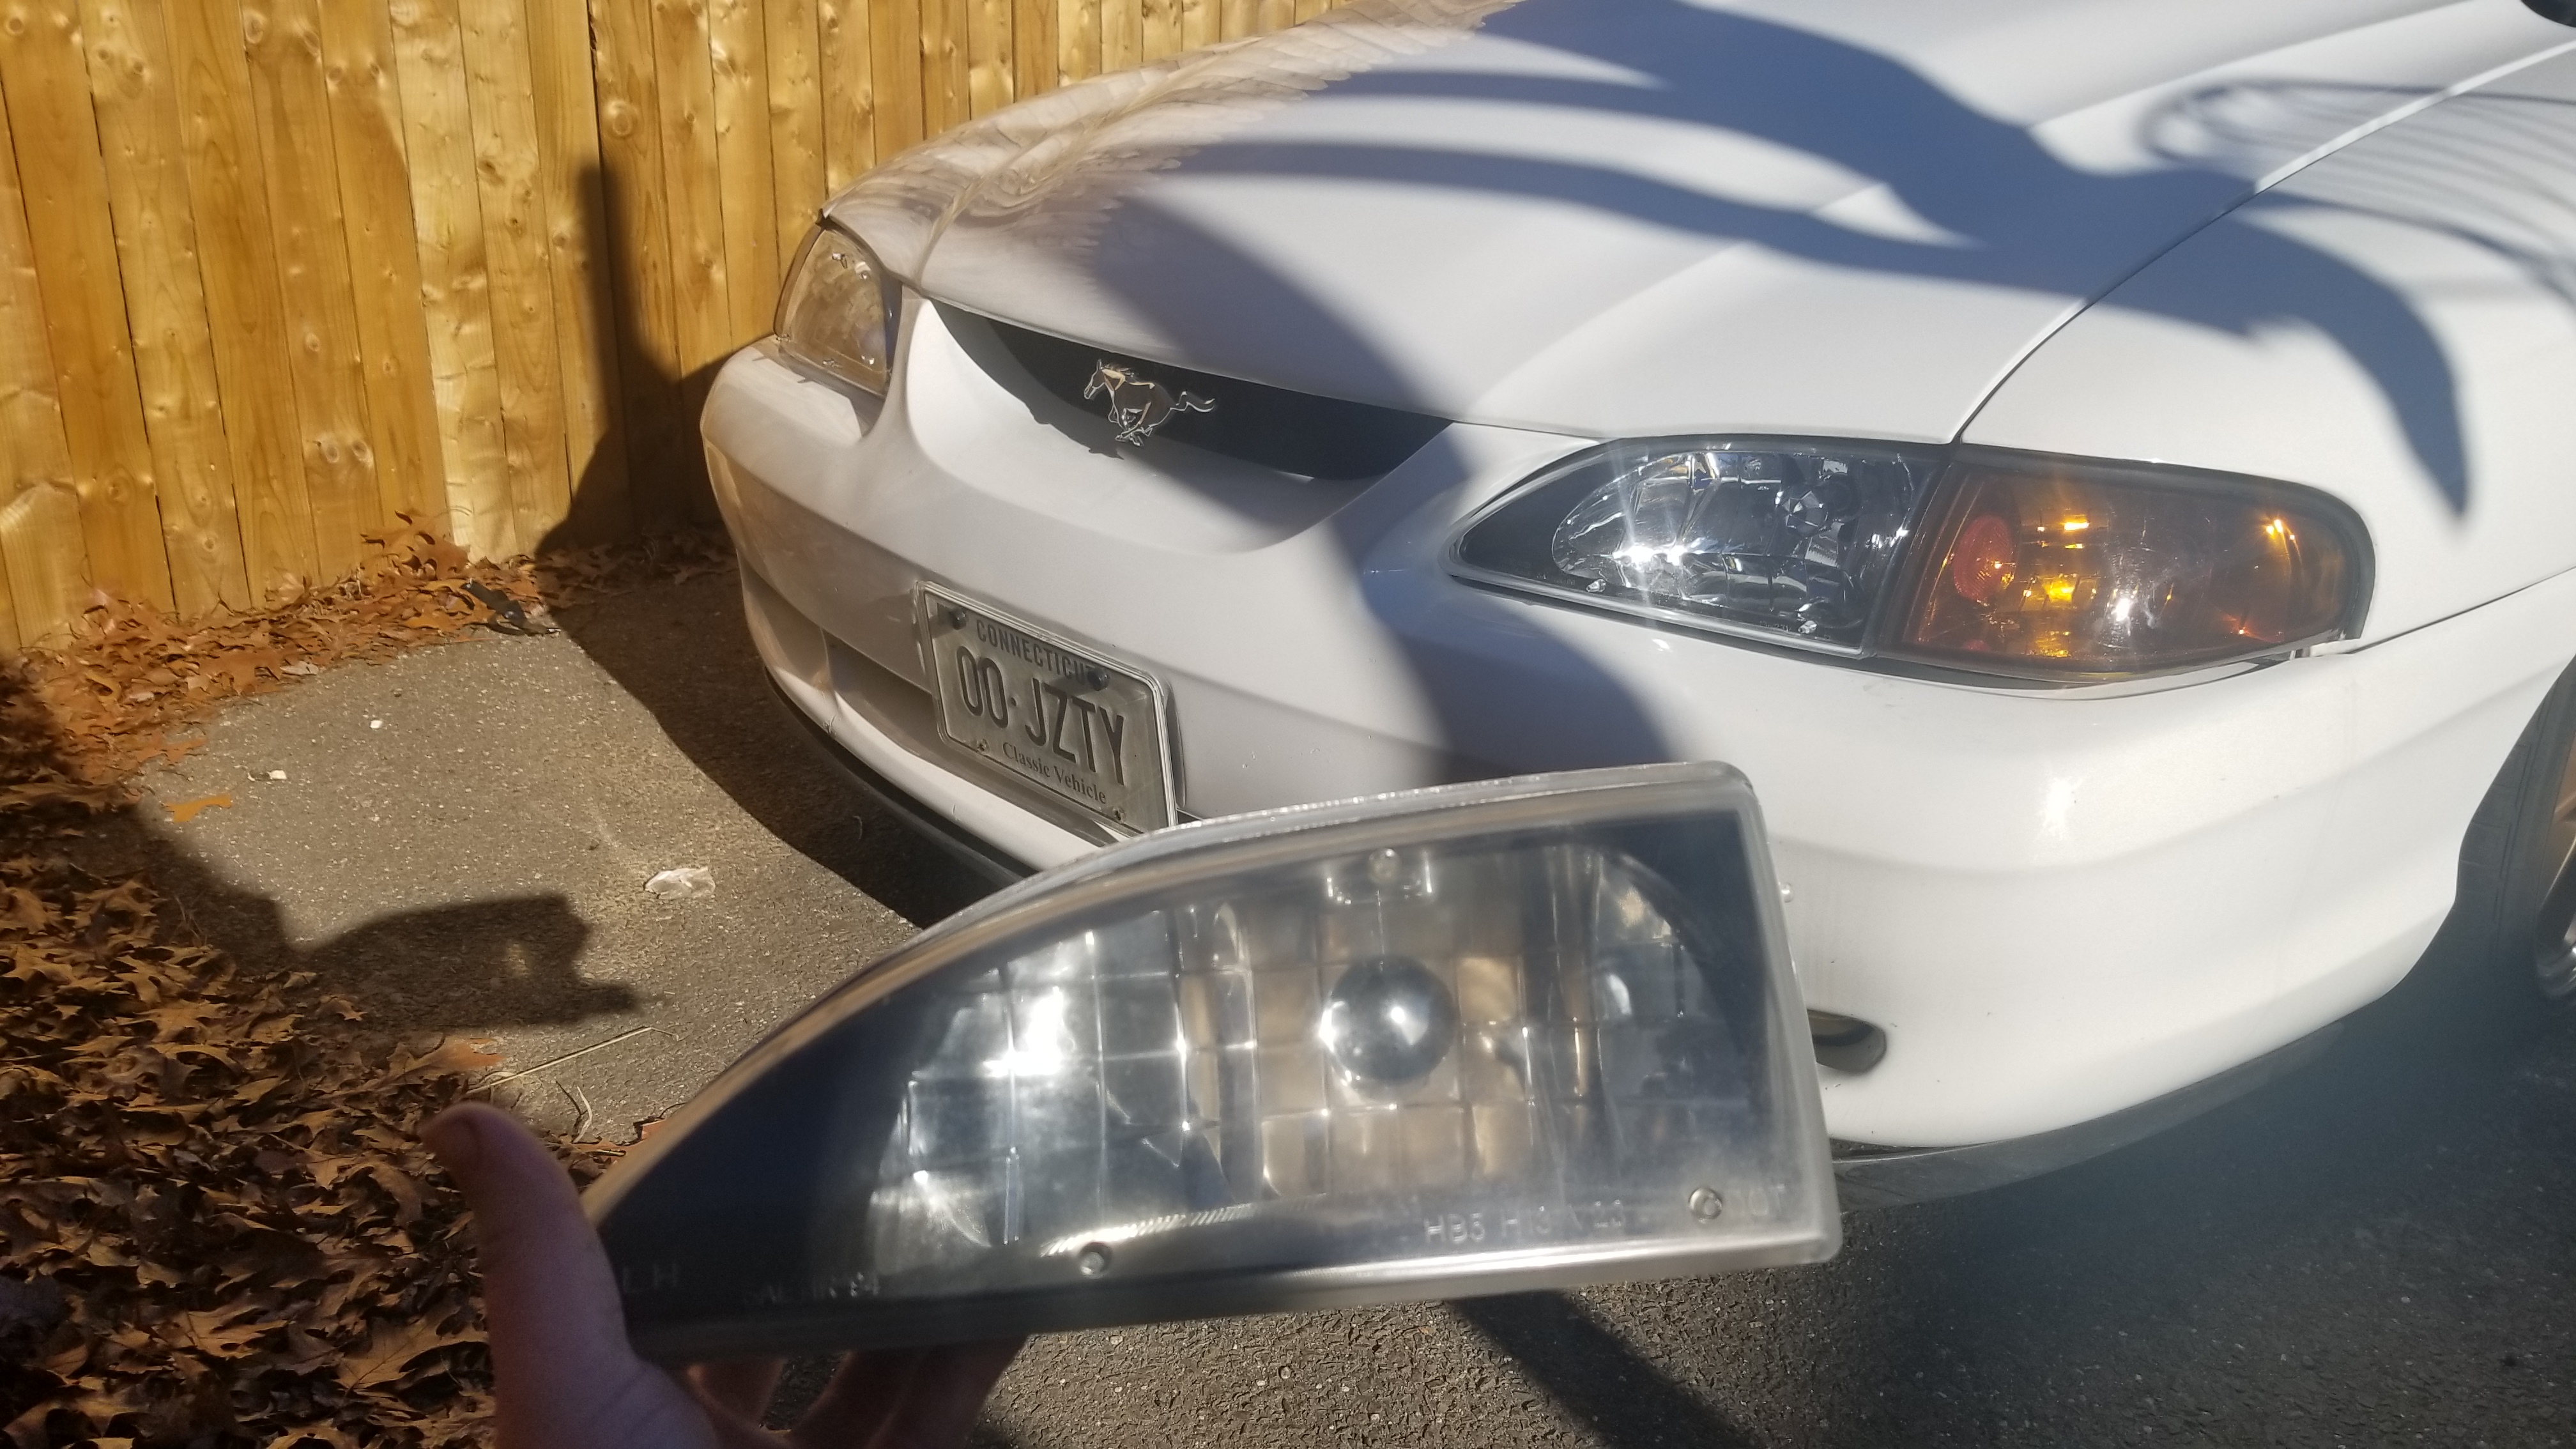
Browsing craigslist and came across a set of never used aftermarket headlights. Currently can't see for shit at night and the adjusters are broken and the headlights are facing straight down which doesnt help. These are just to hold me over til I park the car, which is pending freeing up some space in my grandma garage. I have plans for the black beauties over the winter and they'll be back on >:)
3wnR386.jpg

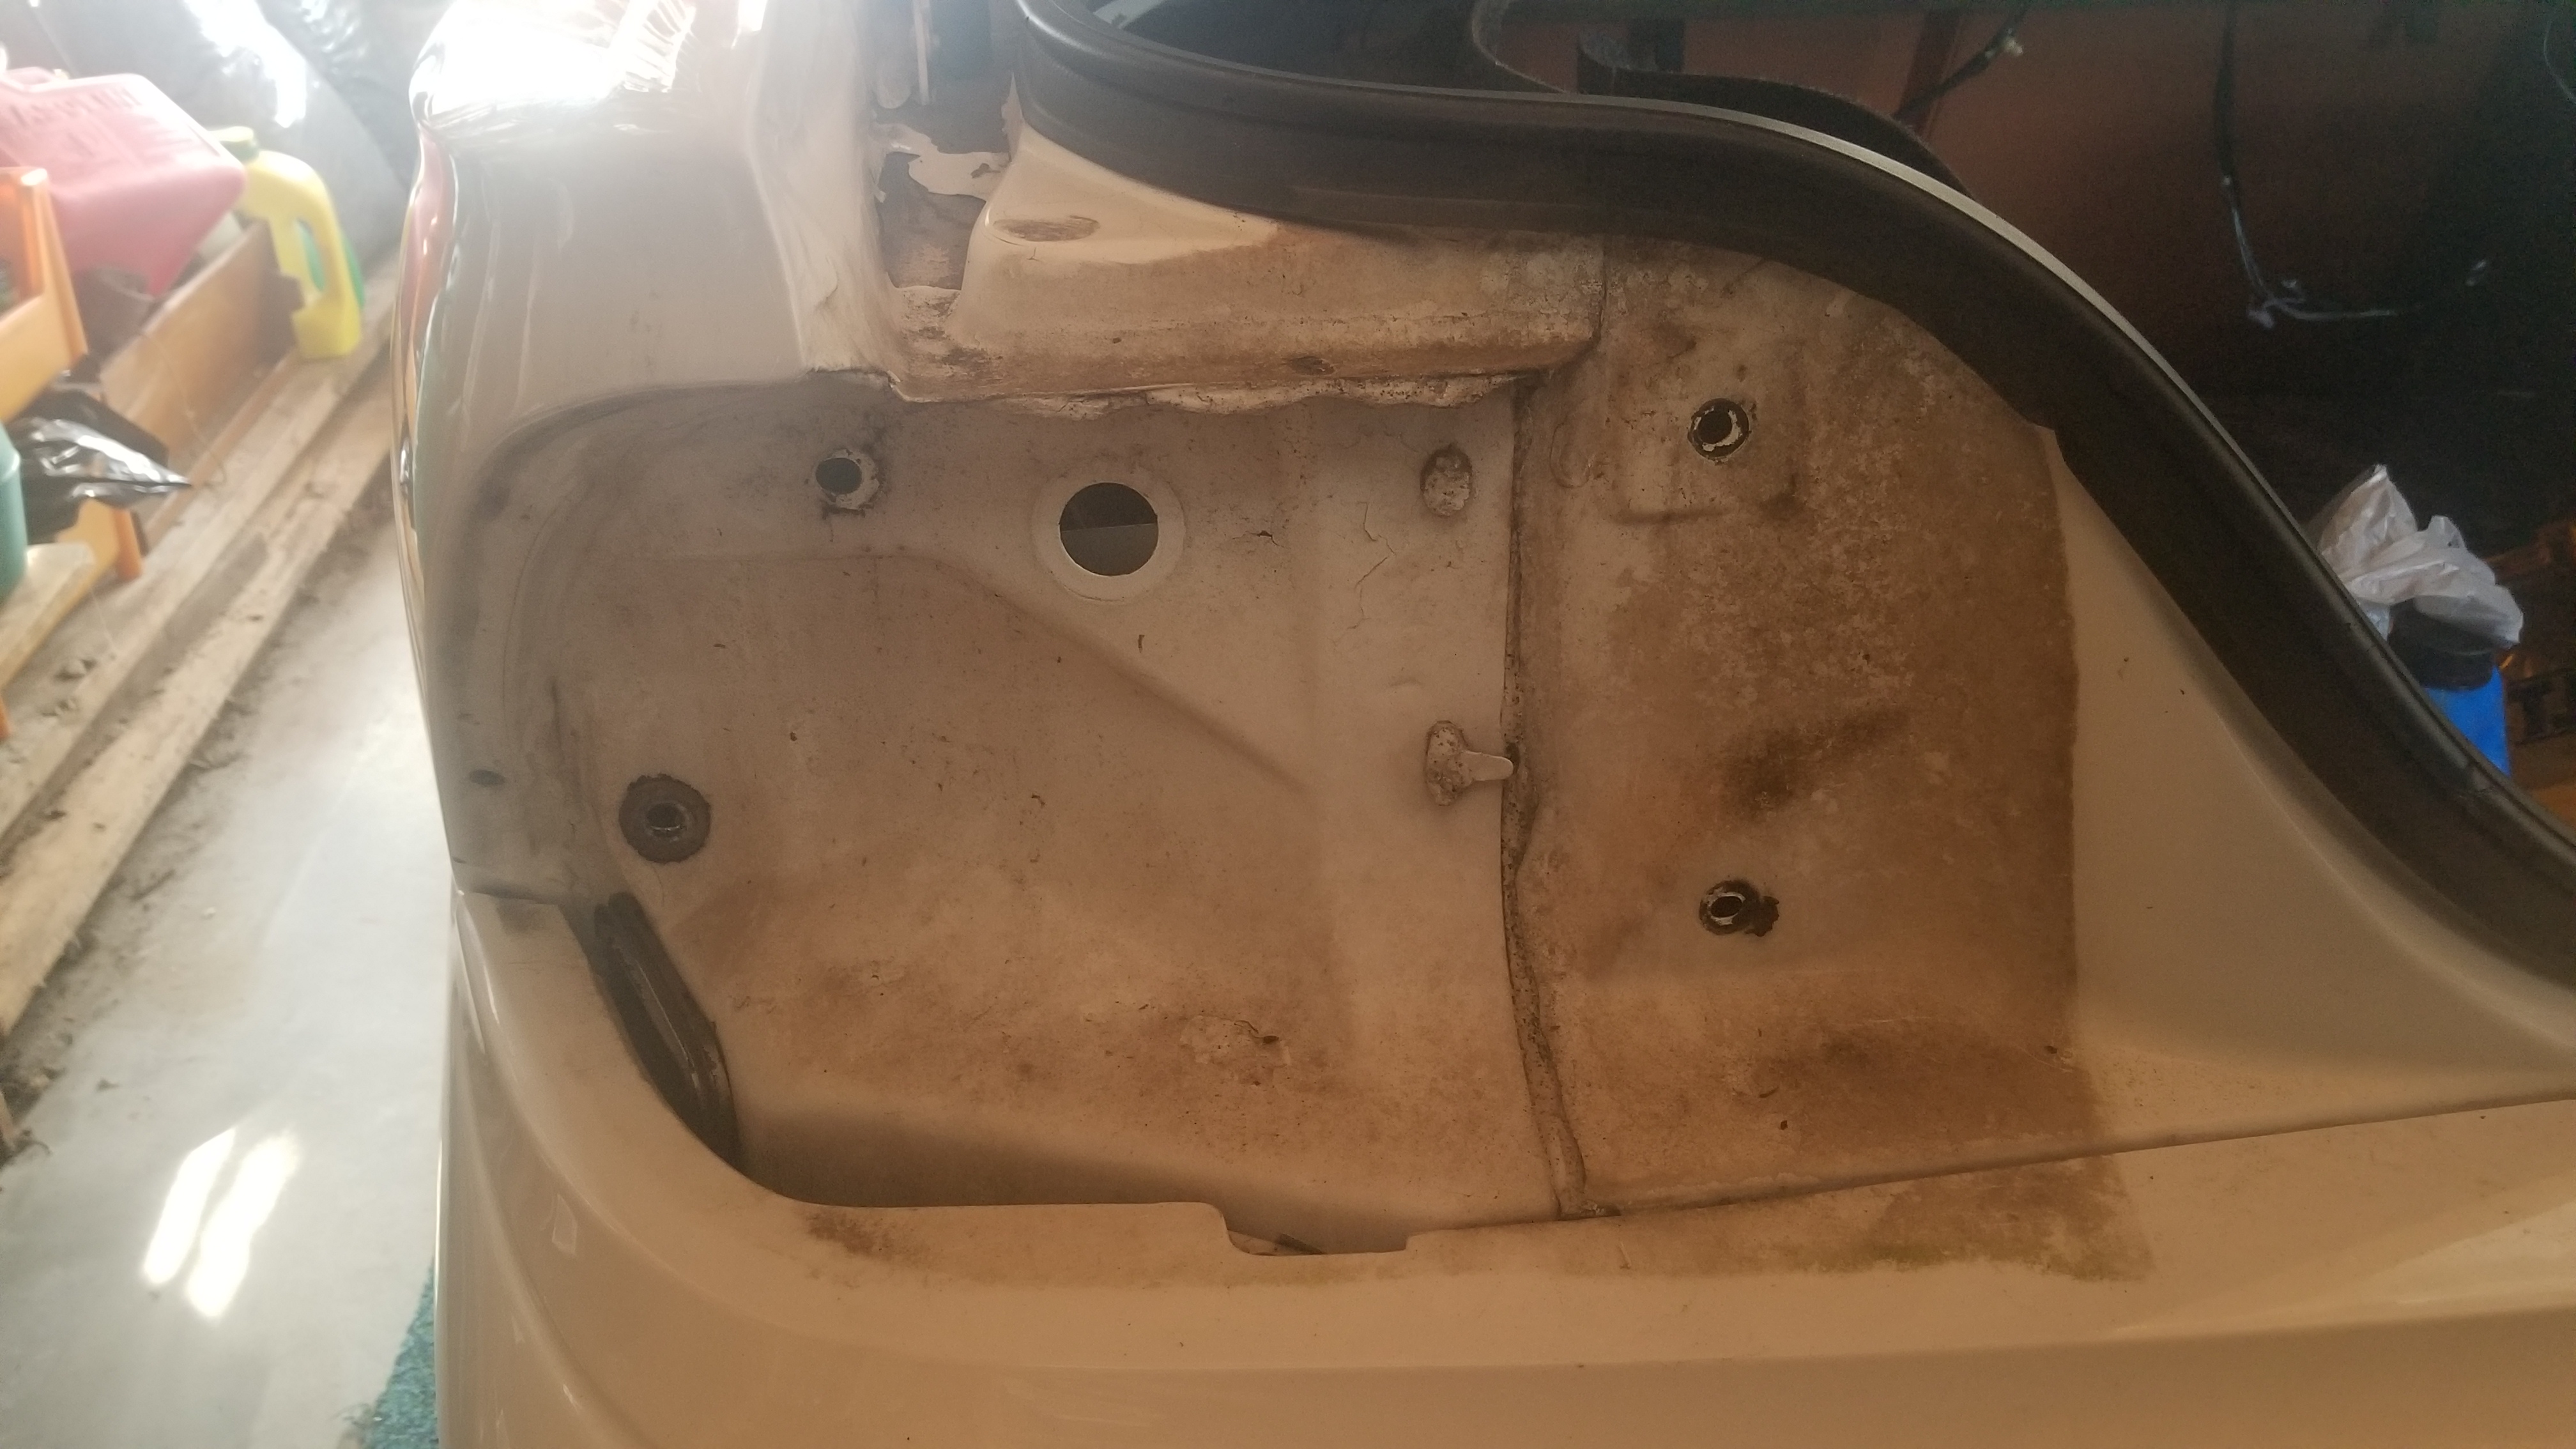
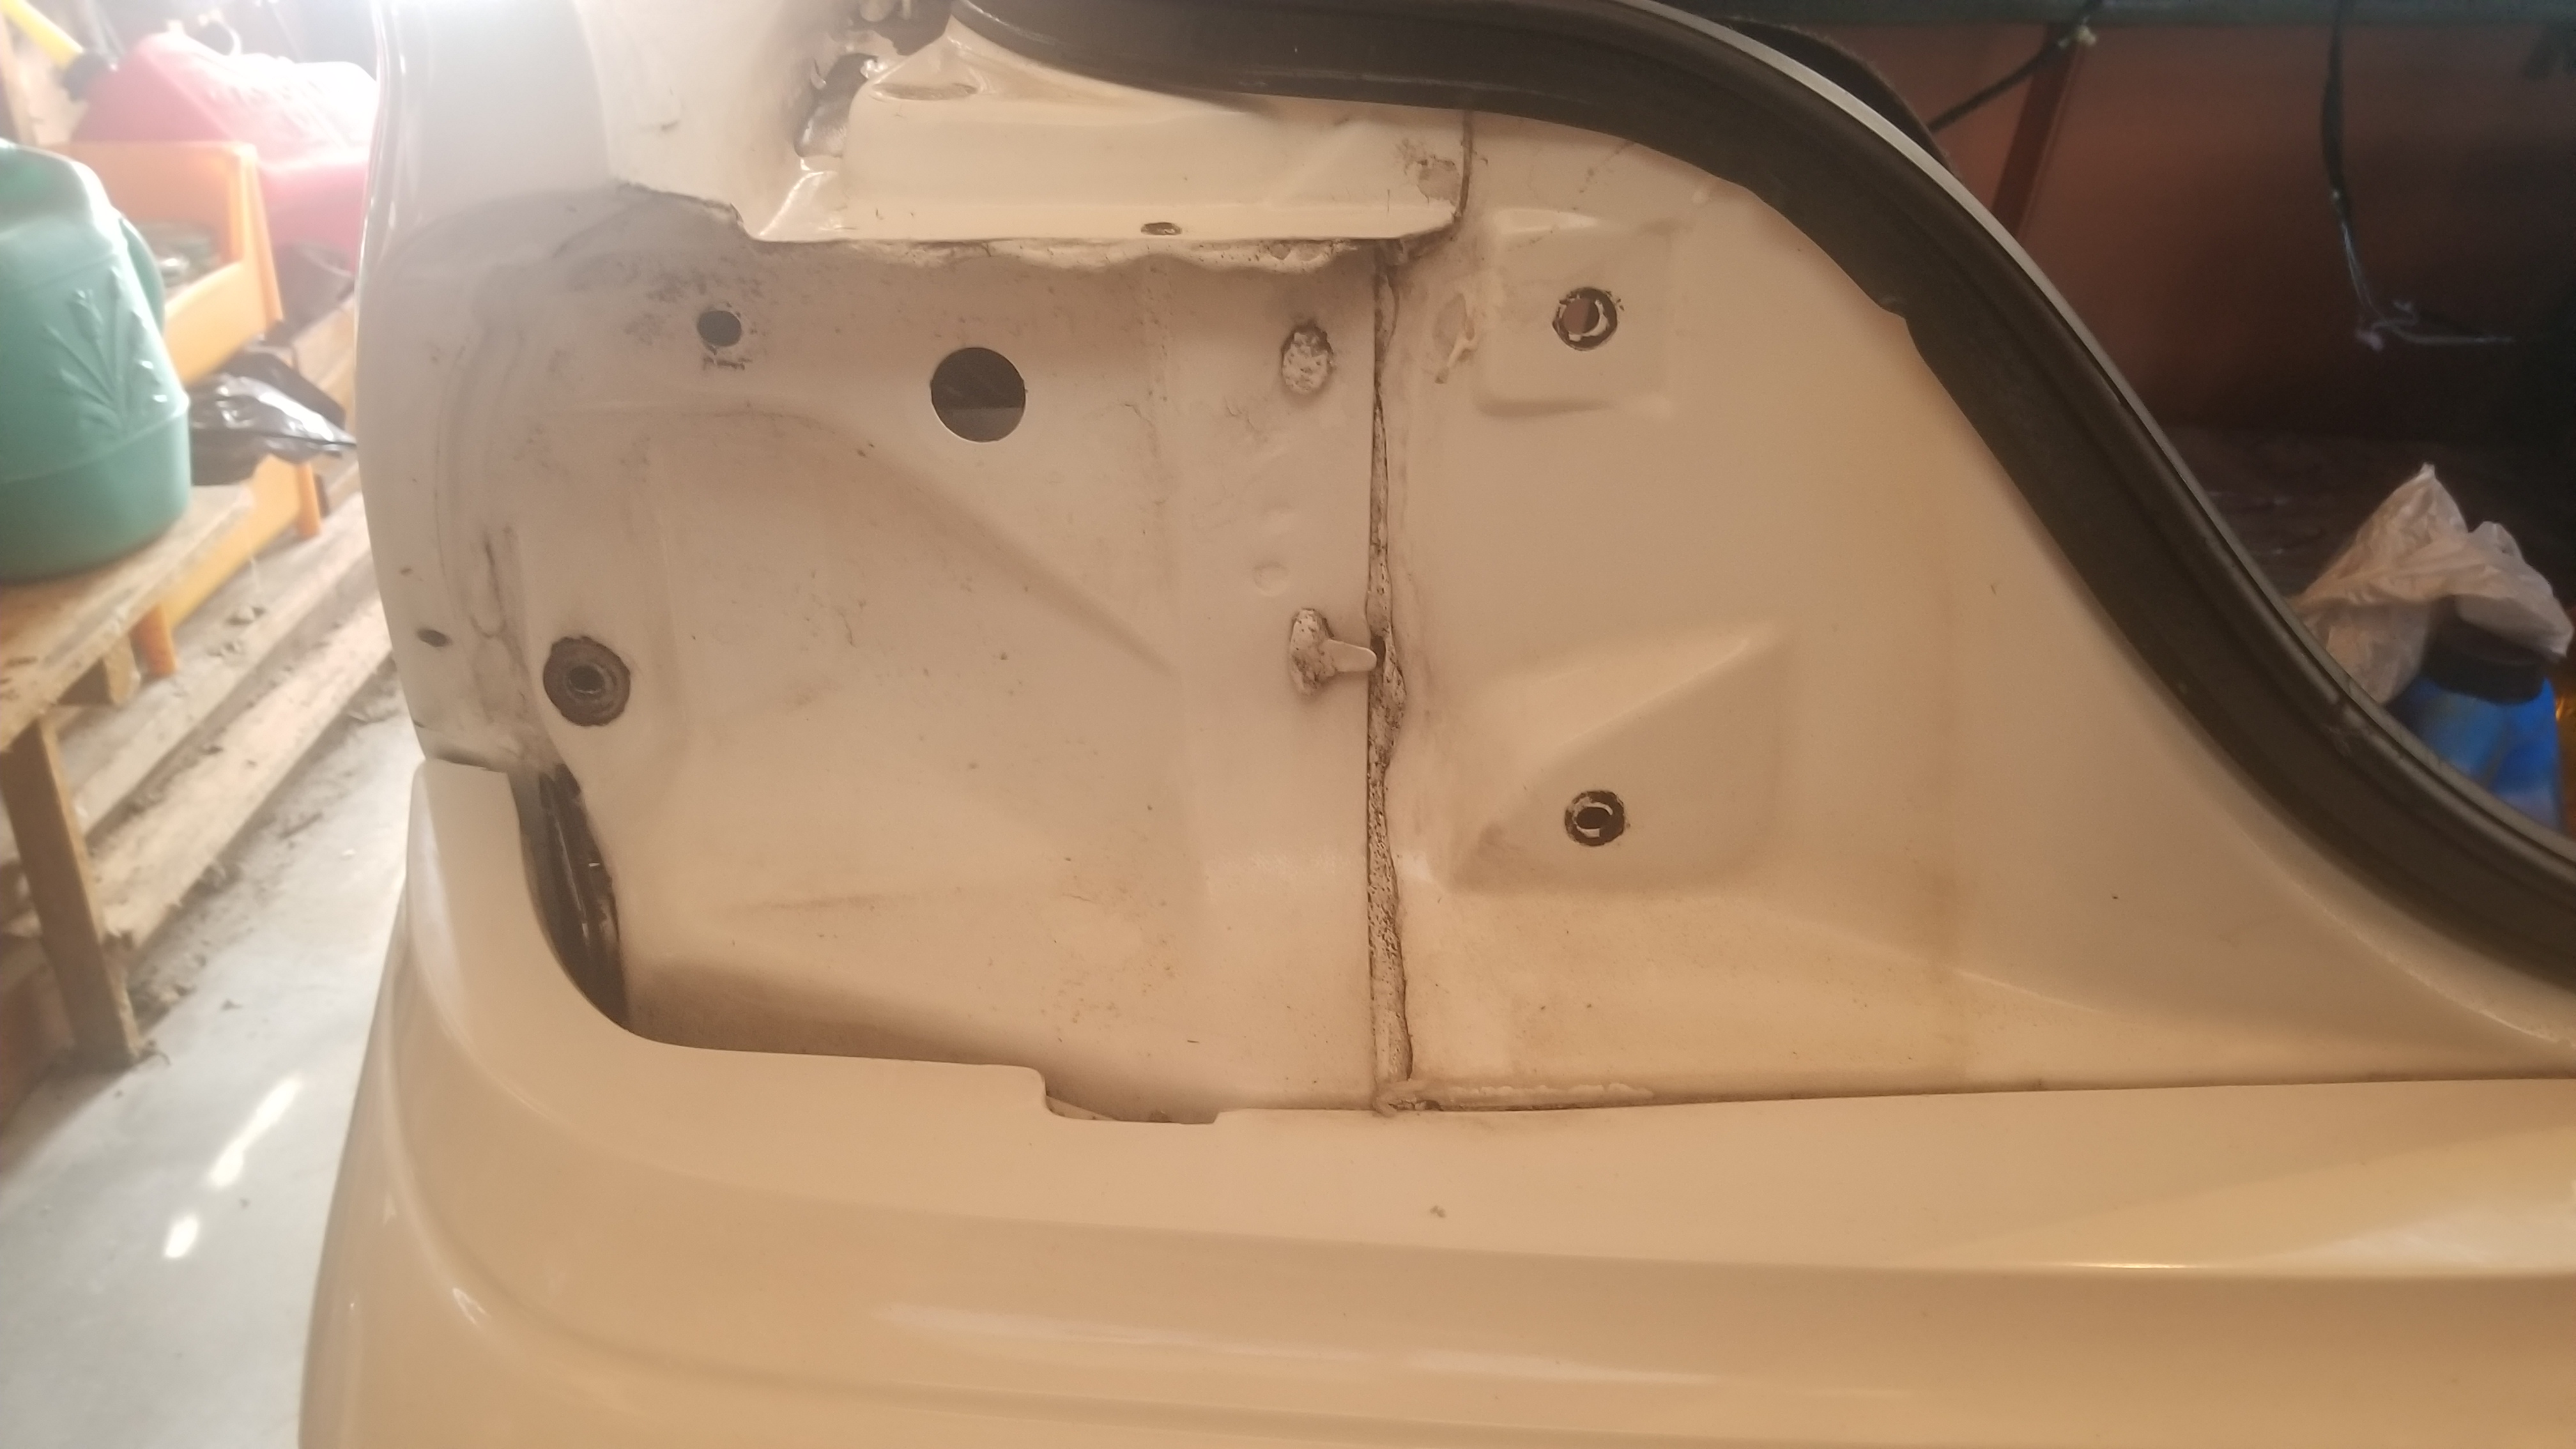
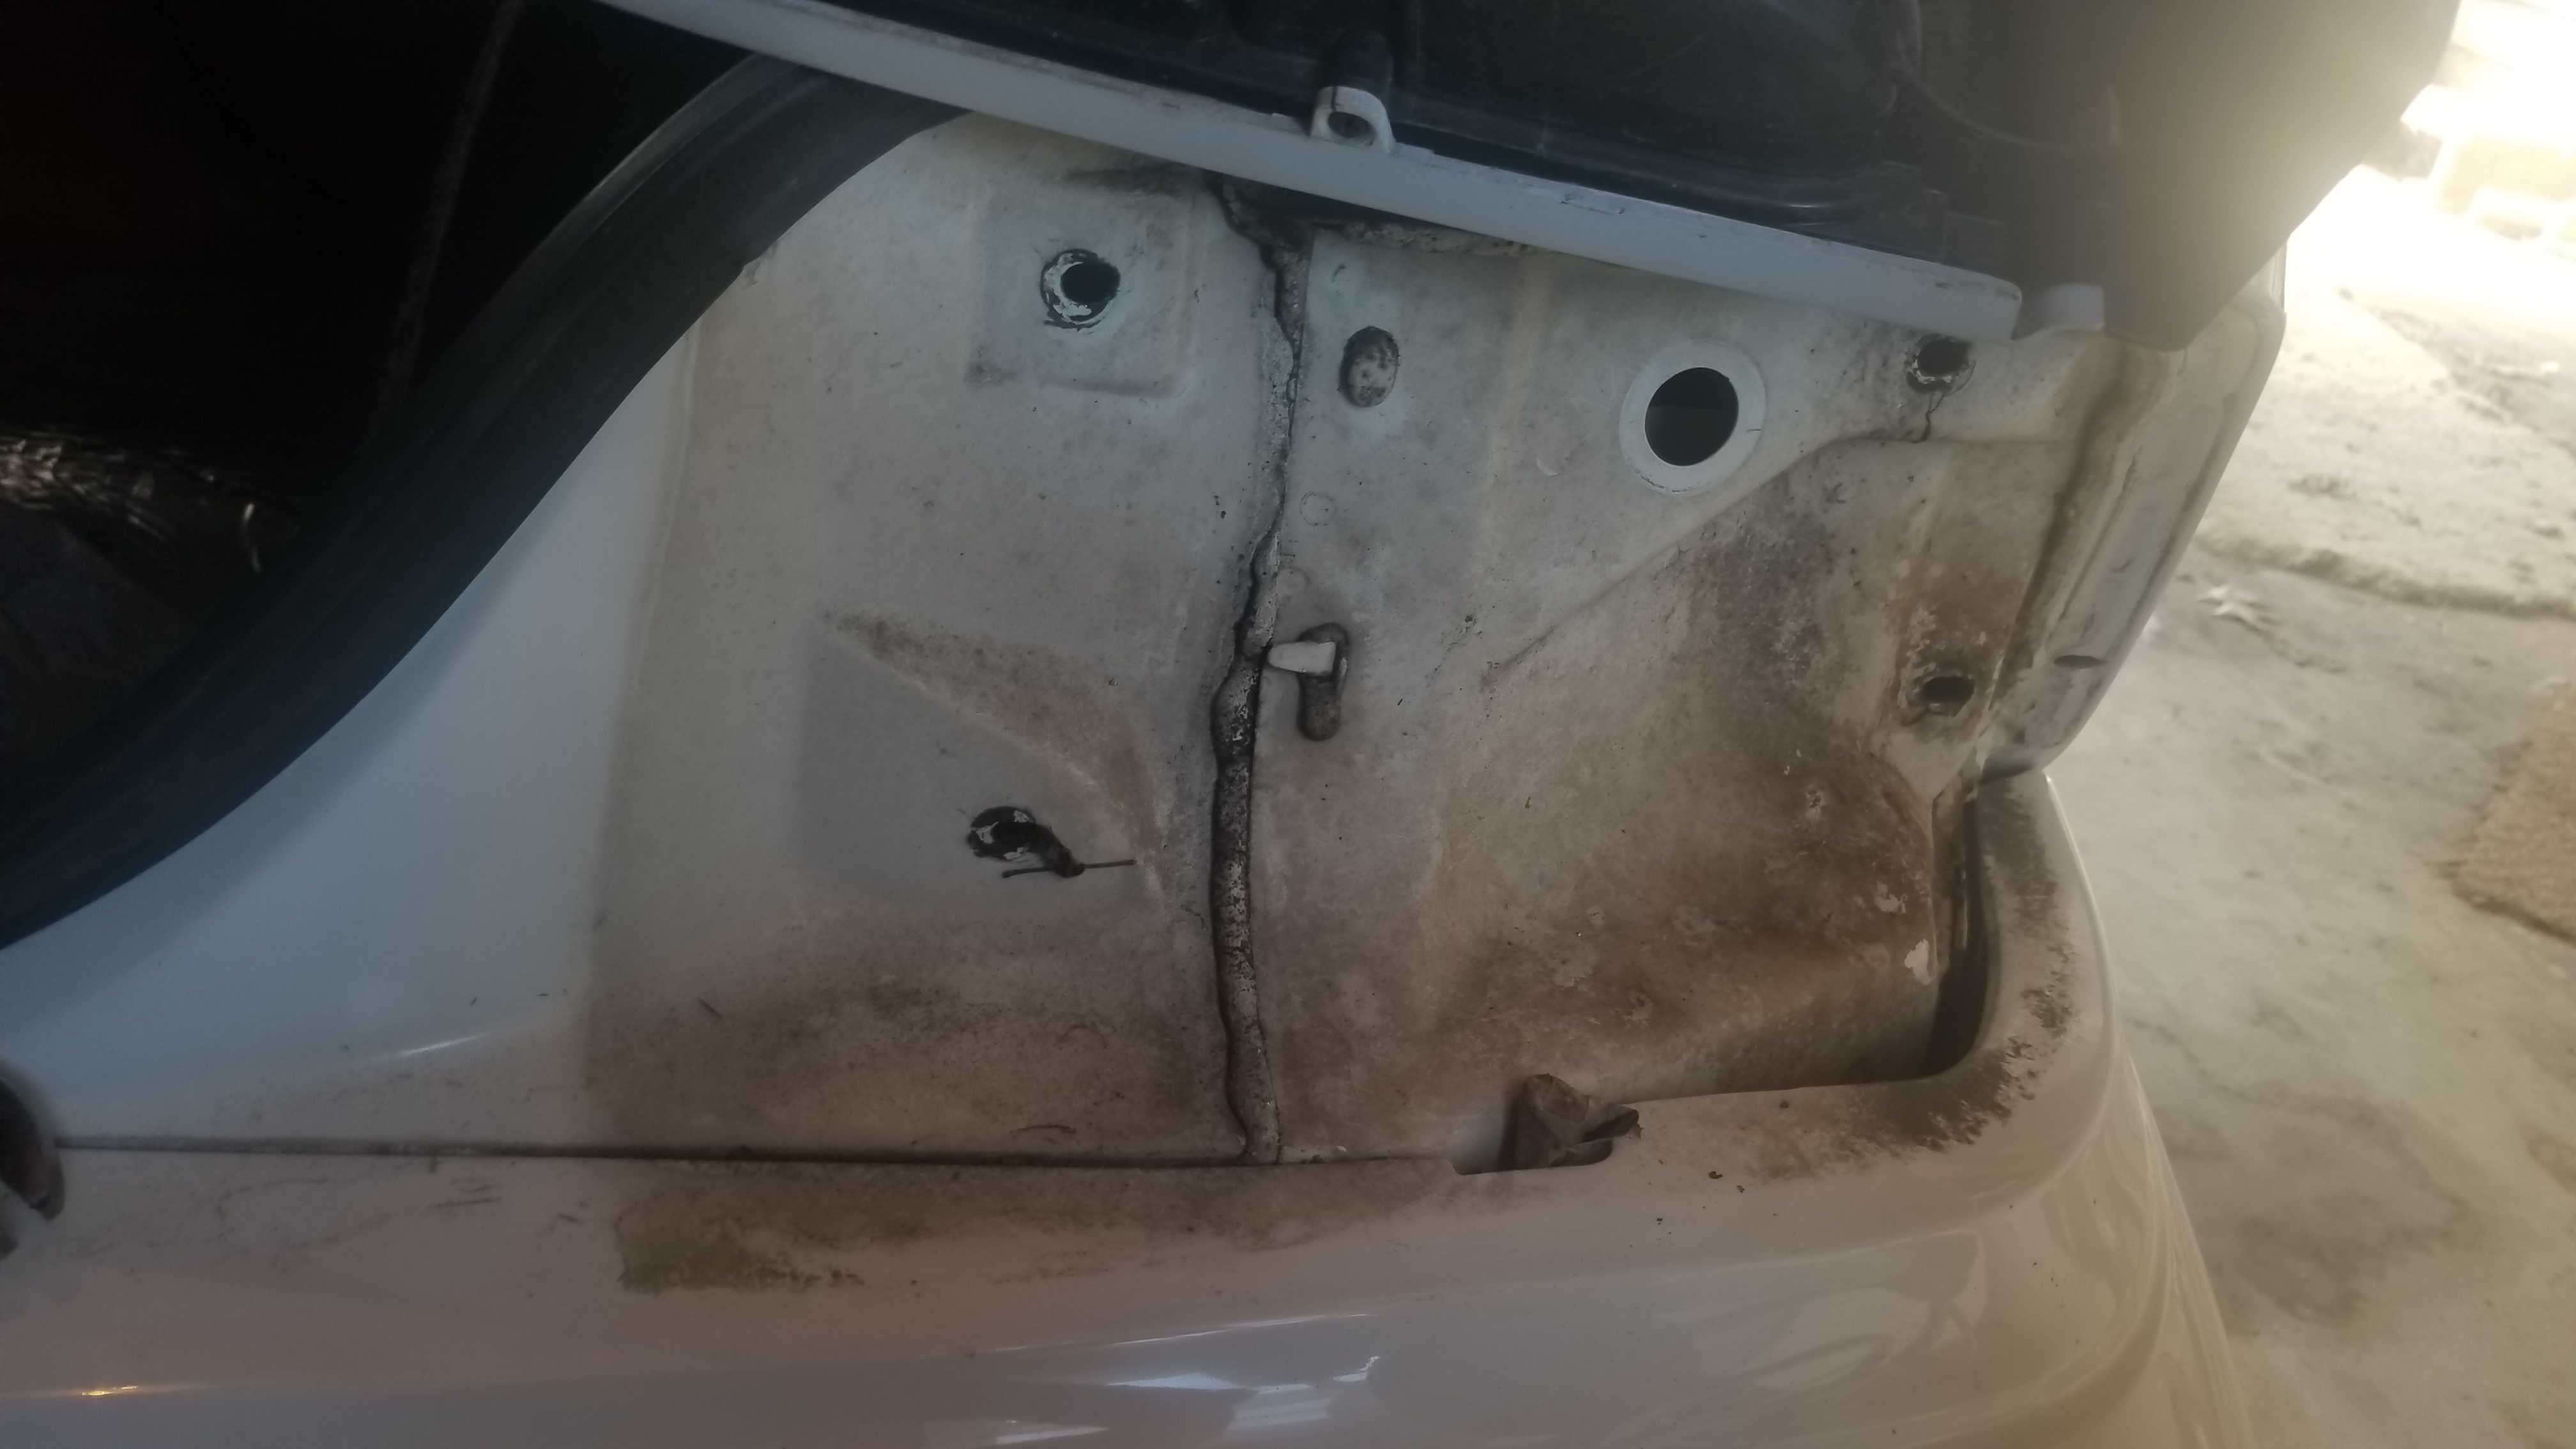
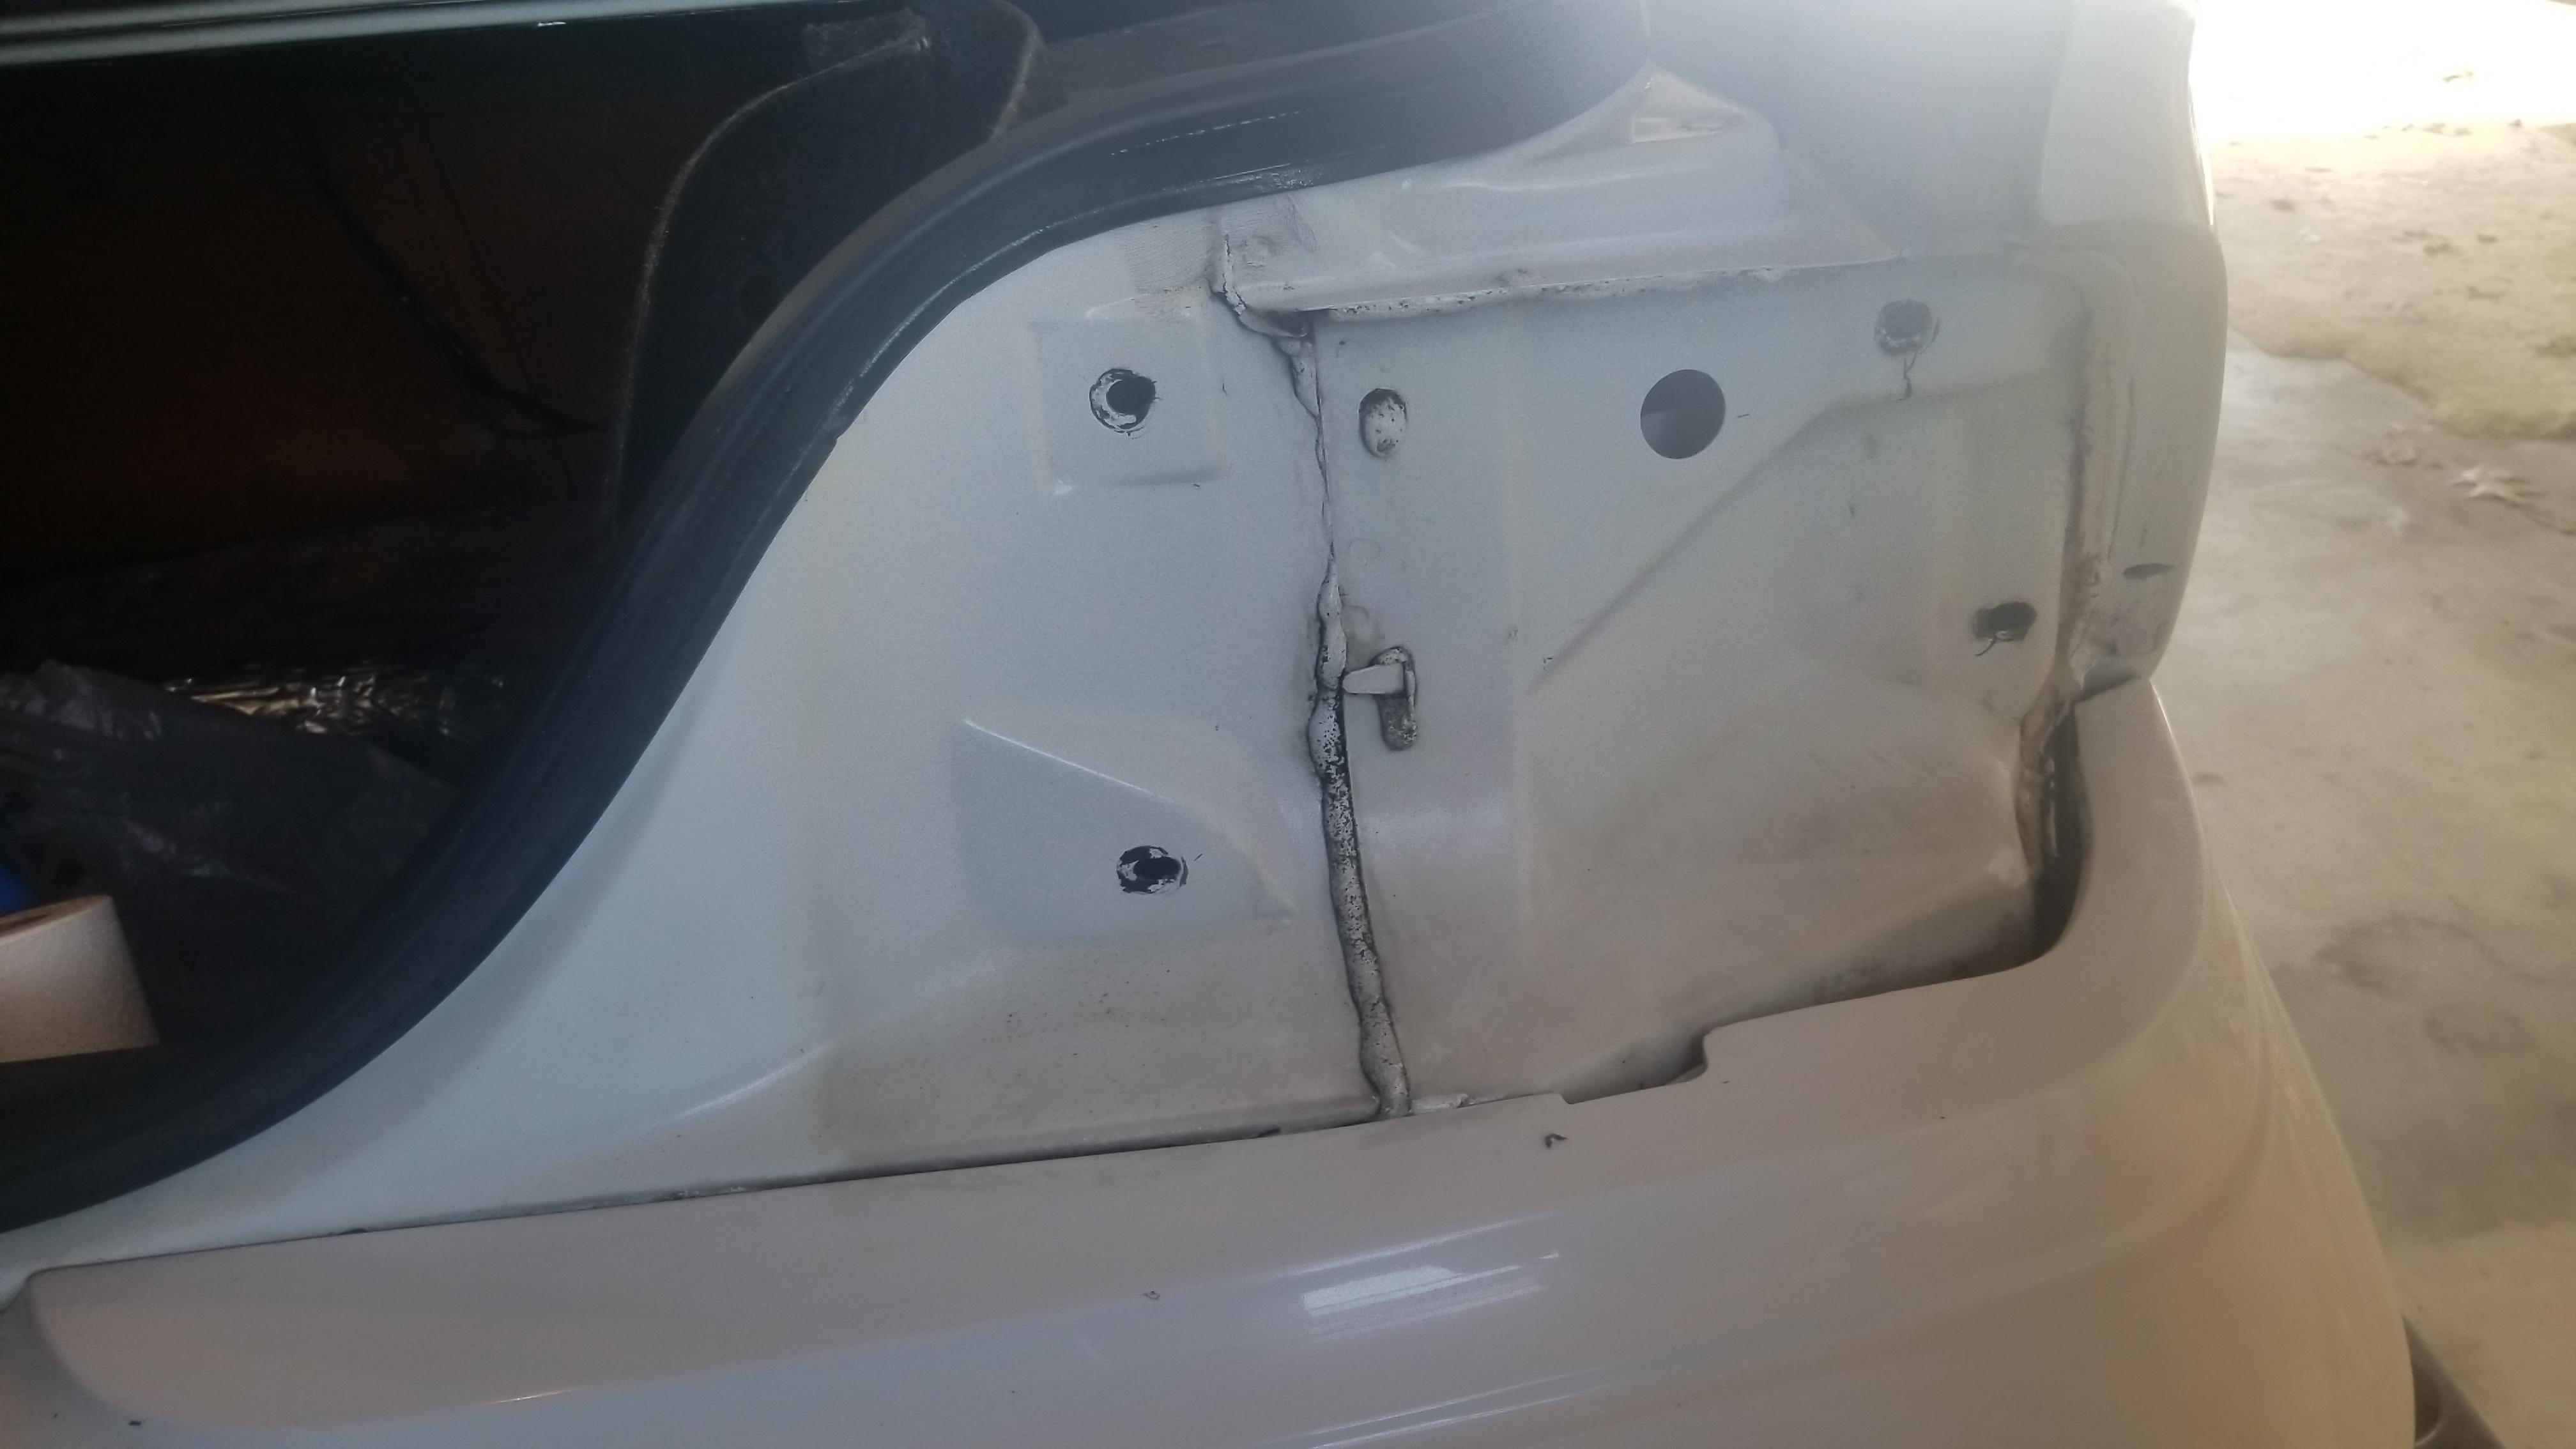
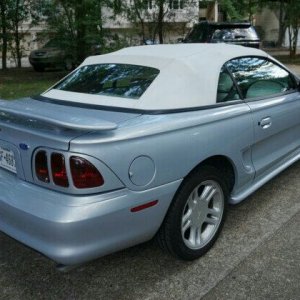
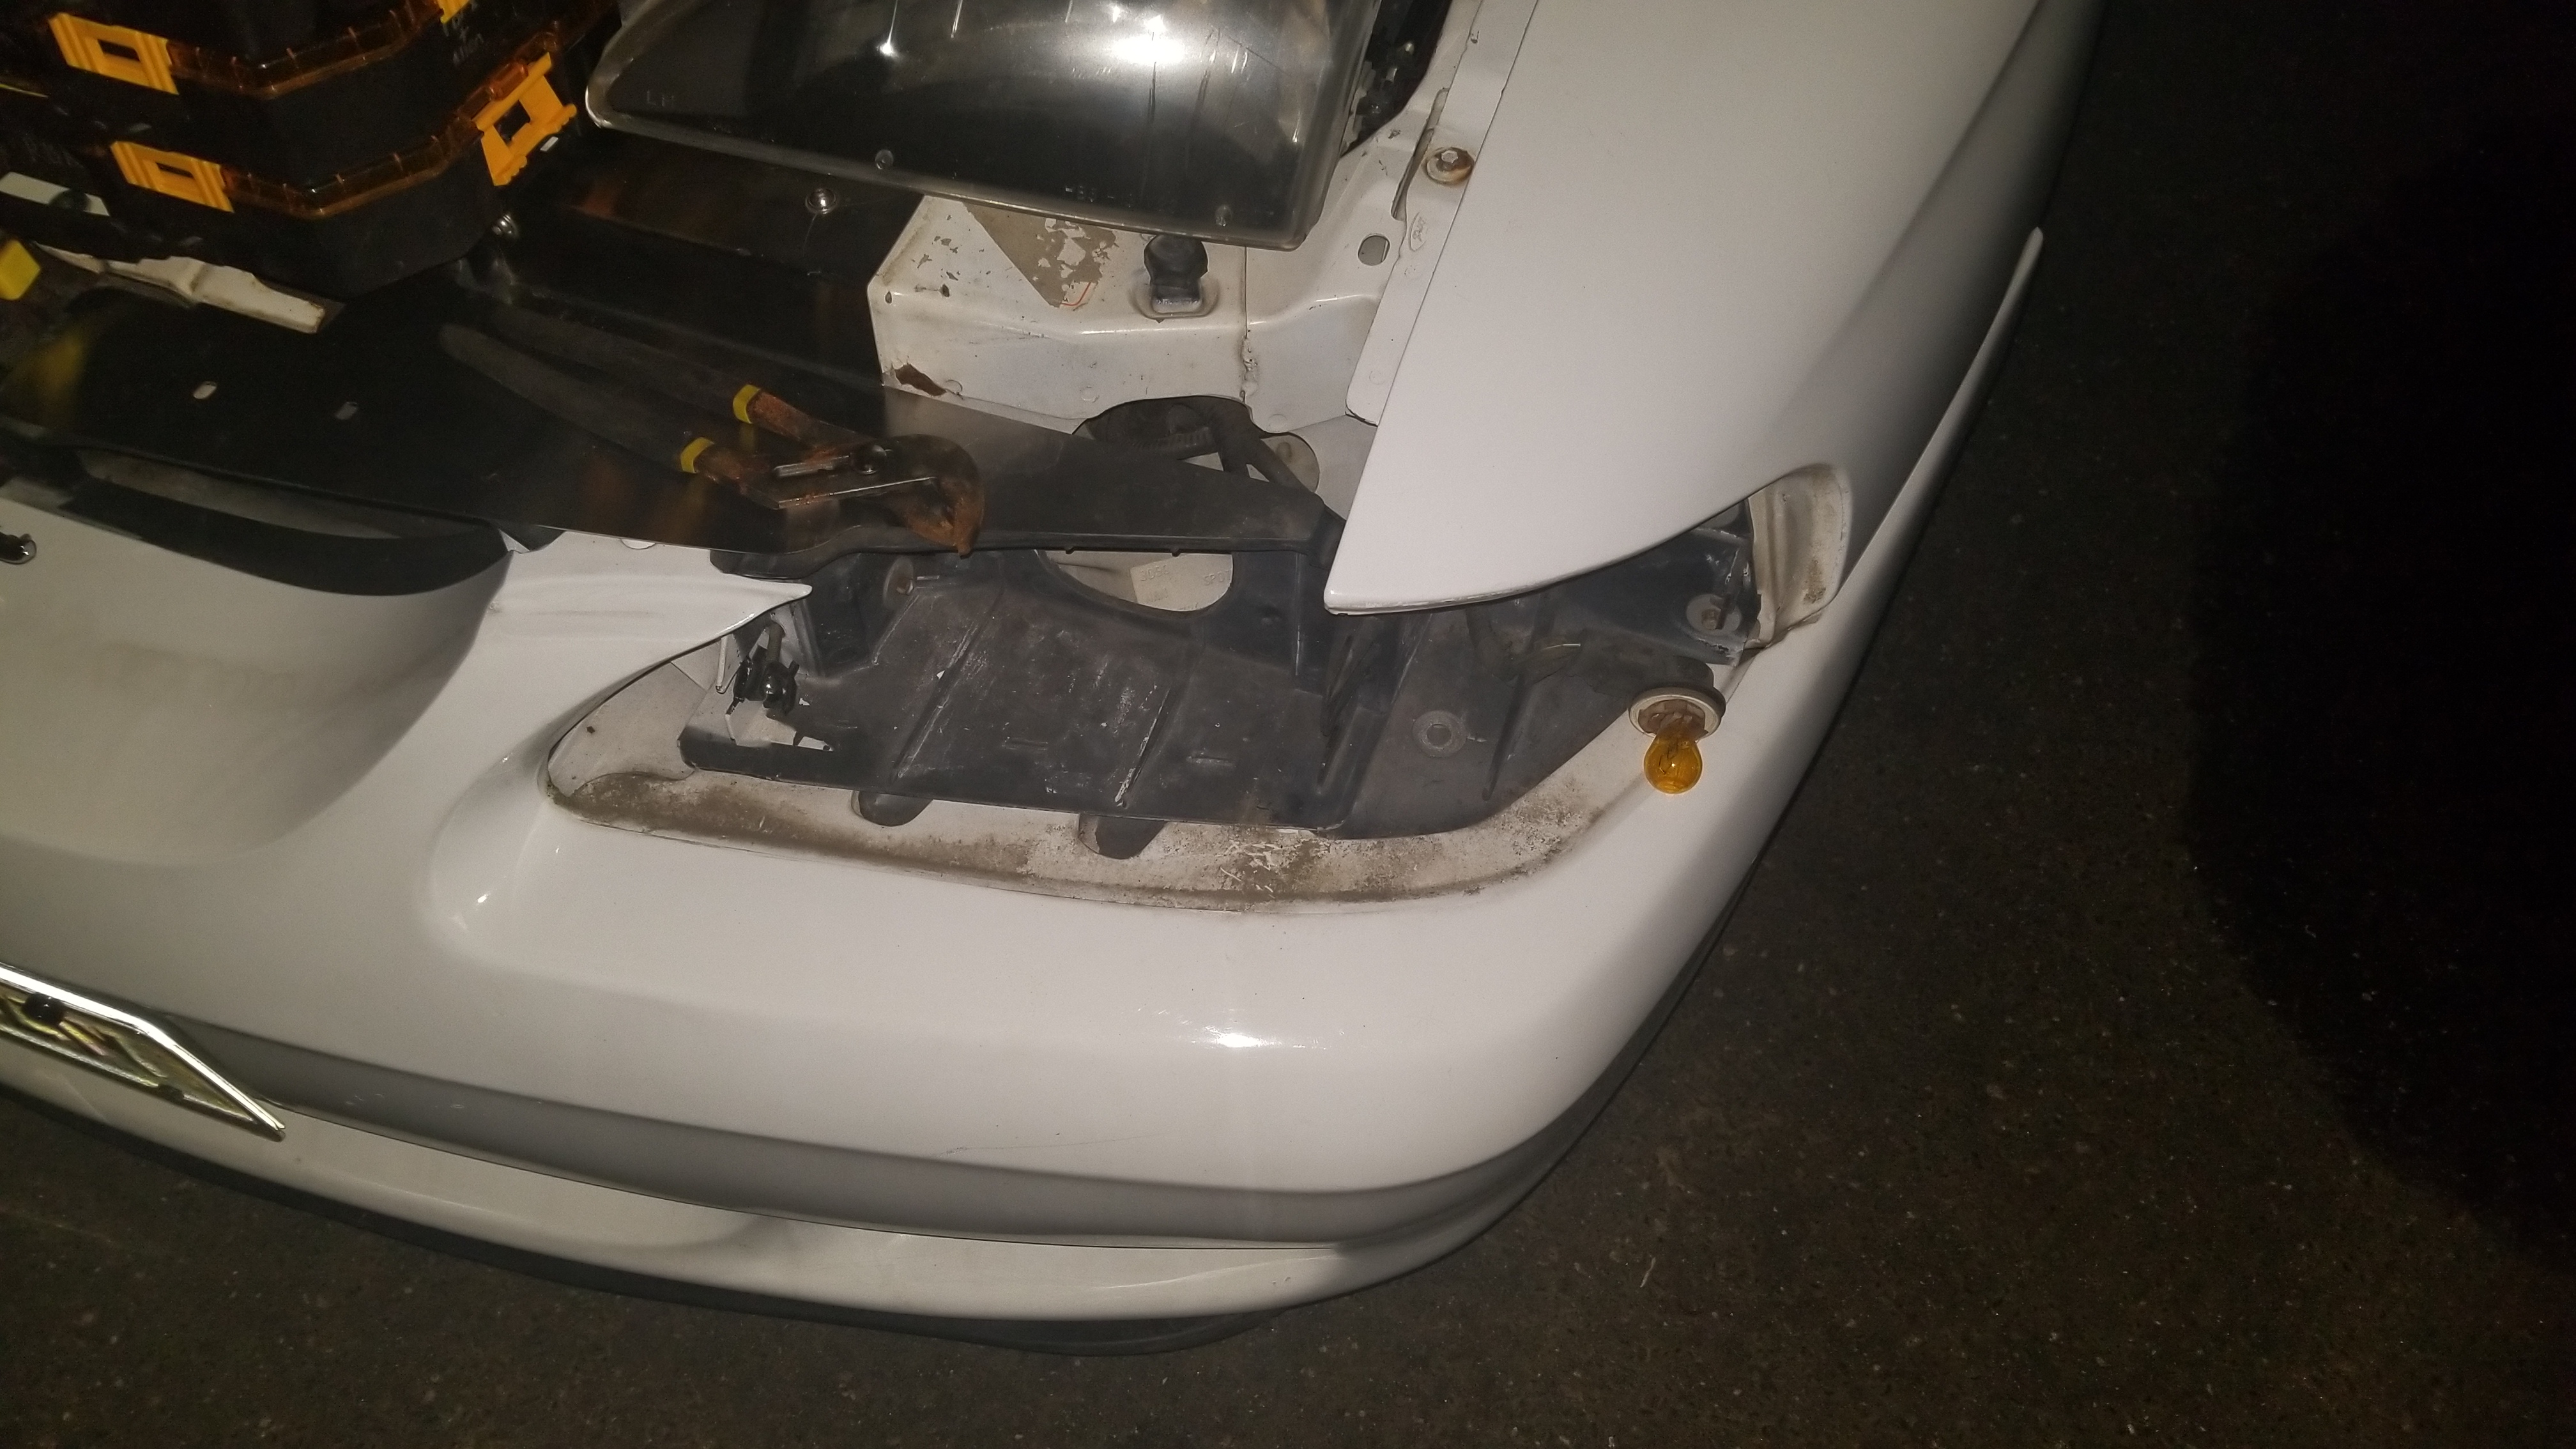
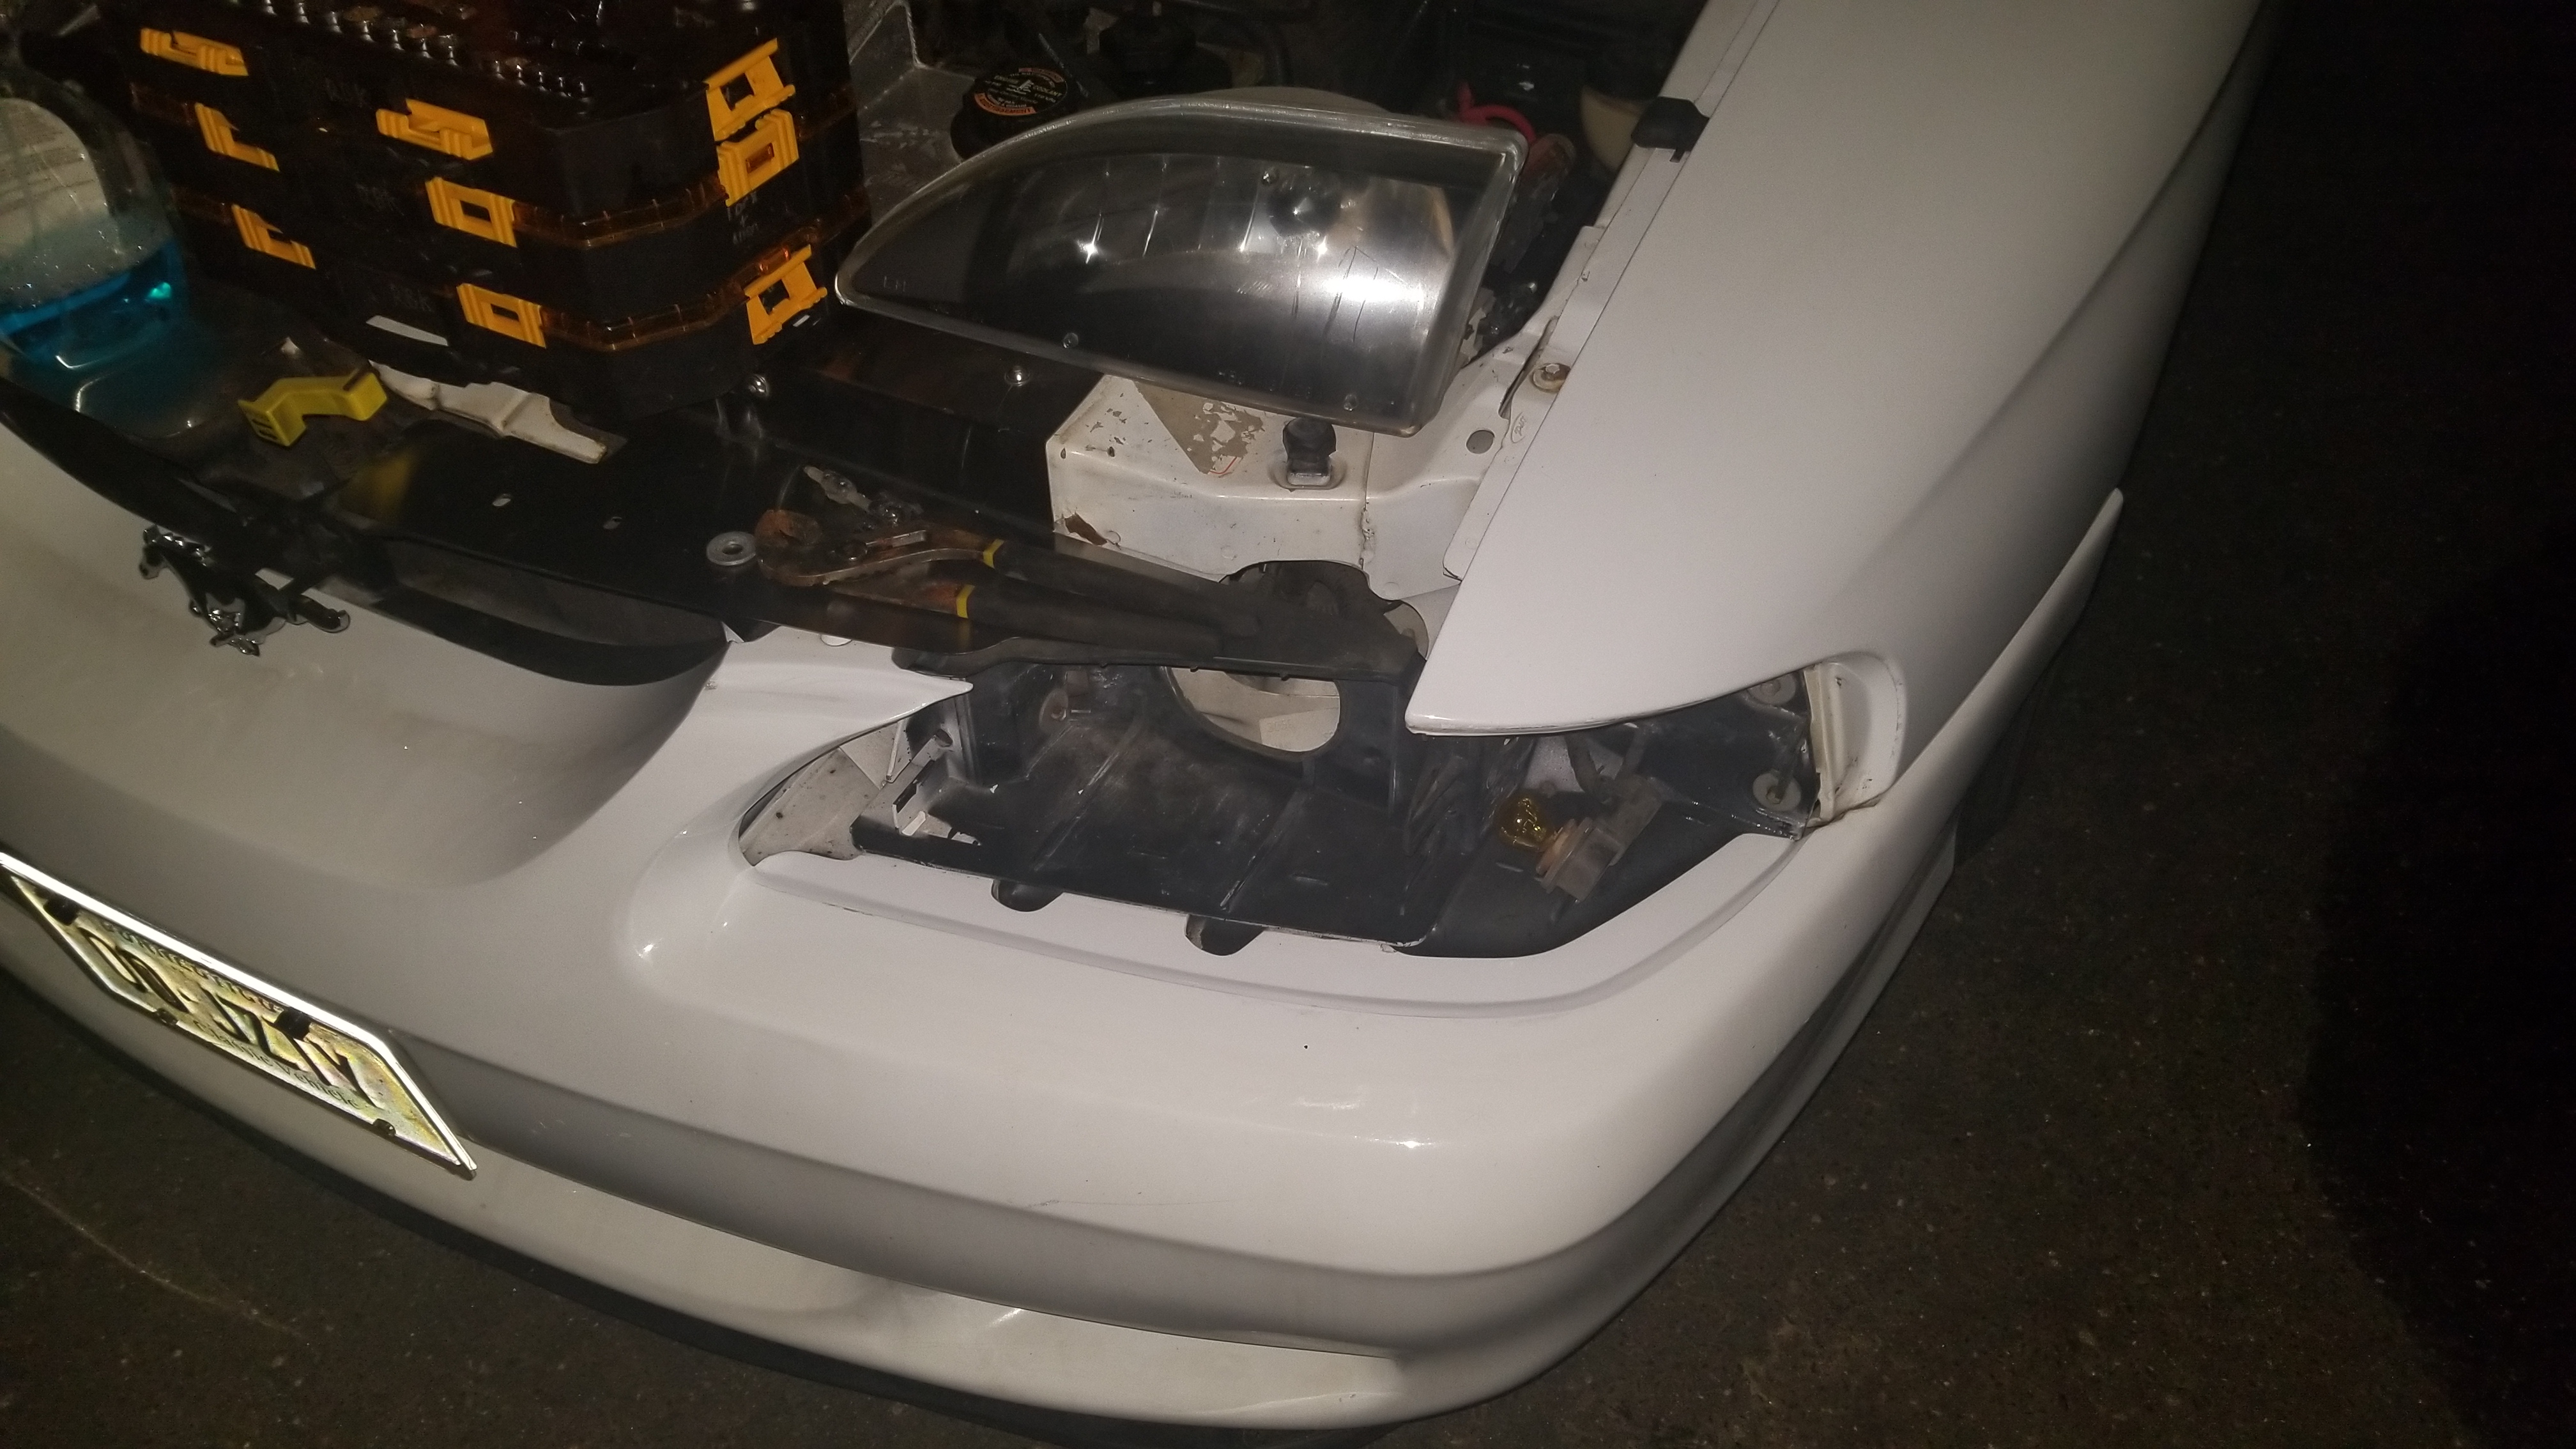
While I was in there I cleaned up the paint around the headlights, every inch of this car is like this, door jams, taillights, even on the underside of the bumpers. Pure grime...
PsRzEDG.jpg

qjD2WAR.jpg


And a quick highway on ramp pull, barely getting on it and just stretching her legs as I become more comfortable in the car as I am not used to driving standard everyday. She sounds super healthy! Also demonstrated in this video is how terrible the old headlights are.
https://imgur.com/PHJZLJ8
gSKqYvE.mp4
 
Last edited:

07GtS197

Well-Known Member
Joined
Mar 16, 2015
Messages
2,635
Reaction score
996
Location
Fort Myers, Fl
I really like that shift knob but I hate how small the shift pattern is on it.

Overall lookin good!
 

96blak54

Moderator
Staff
Joined
Feb 21, 2011
Messages
10,033
Reaction score
2,876
Location
In the shop
This build thread is off to a good start! Hey, its the sma things that add up to big improvements.
 
OP
OP
FivepointSlow

FivepointSlow

Well-Known Member
Joined
Oct 22, 2013
Messages
2,646
Reaction score
60
Location
Enfield, CT, USA
Got my eyes on a used complete airlift kit that has next to no mileage on it. But unfortunately first the F150 is in need of new tires due to a convenient screw in my sidewall, and while I am at it I picked up new wheels, the smallest leveling kit I could find (want to clear 33" tires and still tow without the truck squatting and sensors aswell. Gotta give the truck some love too.
I have had enough of the tiny stock 17" wheels that my neighbor (previous owner) ordered the truck with :(
SX1KtPk.jpg

yDWsDpm.jpg
 

Burninriverdiver

Well-Known Member
Joined
Jan 1, 2014
Messages
2,770
Reaction score
234
Your truck looks just like my company work truck. Overall a great vehicle, I put over 204k miles on the 4.6 3v and minimal maintenance has been performed. My only regret is not spraying fluid film on the panels under the front doors since they're starting to rust.
 

Attachments

  • IMG_4952.JPG
    IMG_4952.JPG
    3.3 MB · Views: 10
OP
OP
FivepointSlow

FivepointSlow

Well-Known Member
Joined
Oct 22, 2013
Messages
2,646
Reaction score
60
Location
Enfield, CT, USA
Your truck looks just like my company work truck. Overall a great vehicle, I put over 204k miles on the 4.6 3v and minimal maintenance has been performed. My only regret is not spraying fluid film on the panels under the front doors since they're starting to rust.
Funny you say that the only rust on the whole truck is right under the drivers door. And it was pretty far gone by the time I noticed it... my truck just created 75,000 miles.

Wheels came yesterday. They stick out about what I was expecting but I've got 33x12.5 tires coming to put on so it'll stick out even further... oh well just gonna send it lol should look pretty stuffed in there
iWq3okB.jpg

68WkggU.jpg

SmNzafi.jpg

sqy15br.jpg
 

Burninriverdiver

Well-Known Member
Joined
Jan 1, 2014
Messages
2,770
Reaction score
234
That'll look good with those wheels and 33s, might want some mud flaps or fx4 flares to keep the rocks off the paint.

I'm sure there's replacement panels out there for under the doors, seems like a common problem. Luckily you don't see it unless you're looking for it
 
OP
OP
FivepointSlow

FivepointSlow

Well-Known Member
Joined
Oct 22, 2013
Messages
2,646
Reaction score
60
Location
Enfield, CT, USA
That'll look good with those wheels and 33s, might want some mud flaps or fx4 flares to keep the rocks off the paint.

I'm sure there's replacement panels out there for under the doors, seems like a common problem. Luckily you don't see it unless you're looking for it
I have mud flaps front and rear, I think they're weathertech but I don't remember. They're kinda small though but hopefully enough to keep rocks off my fenders lol. I don't think I am ever gonna put flares on the truck. Maybe the fx4 flares because they're small but I dig the wide wheel no flare look.
I would be surprised if they had replacement panels for that, I believe its part of the main shell of the cab. I definitely need to take care of it before it creeps up into the door jam.
 
OP
OP
FivepointSlow

FivepointSlow

Well-Known Member
Joined
Oct 22, 2013
Messages
2,646
Reaction score
60
Location
Enfield, CT, USA
Wheels and tires mounted balance and installed
Having an issue reprogramming the sensors but otherwise the trucks winter ready and the mustang is being parked to go under the knife
vEwfv22.jpg

PVqh92i.jpg

yz9vMZU.jpg

NcfG6eH.jpg

BETN5hE.jpg

UsZK3dn.jpg

QAbrK9h.jpg

X9P1pBI.jpg

We now resume our regularly scheduled mustang build...
 

evilcw311

Most Evil Member!
SN95 Supporter
Joined
May 9, 2010
Messages
7,456
Reaction score
2,136
Location
Louisville, KY
What is Winter?

Don’t make me drive down there with a cooler full of snowballs to throw at you and your cars

I will do it!!!!!

Just try me!!!!!


No, really!!! Give me a reason to get the fawk out of this place!!!!!!! [emoji1787]


Sent from my iPhone using Tapatalk
 
OP
OP
FivepointSlow

FivepointSlow

Well-Known Member
Joined
Oct 22, 2013
Messages
2,646
Reaction score
60
Location
Enfield, CT, USA
Today I finally had a day off so I decided to tackle the wiring for the export taillights, as I am waiting on a bunch of parts to come in.

When I bought this car the amber turn signal sockets had been poorly duct taped shut, and not only did that bother me even though it wasn't super noticeable, but it gave me a damn good excuse to rewire them to function as actual export taillights.

Purchased a set of harness' from my friend who had his old set laying around as he had bought the Raxiom harness off me from the 94 build, funny how parts keep cycling around like that.

Basically I took the spare harness and destroyed it for the greater good of my home made export harness.

I took the 3156 reverse socket from each harness and added it to my harness for the amber turn signal. It had to be the reverse socket because the reverse sockets share the same 2 tab design as the amber export turn signal socket, as oppose to the 3 tab red brake/US turn signal sockets. Which is fine because the amber only needs to serve as on or off, and doesn't require a second filament.

I also robbed a 3 tab 3157 off each harness and used those to replace the 3 tab 3156 sockets that are fixed to the inner most red light. I did this because I want all 3 red bulbs to act as both parking lights aswell as brake lights, as oppose to the stock 1 inner parking light and 2 outer parking/brake lights. I believe the inner most red light on basically all mustangs is not wired as a brake light to allow provisions for a rear fog light for overseas use. I was tempted to wire it like this, but without a clean way to mount a switch for that, and short of running a rear fog all the time, I opted to wire it as an additional brake light.

On both sets I wired the 2 outer brake light bulbs together to 1 set of parking/brake wires, and used the now extra set to wire in the inner brake bulb.

After the rubber boot on the harness I cut the 2 brake light signal wires, and connected the 2 leads from the connector to the 1 wire for the amber turn signal, as once I disconnect the brake light interrupt signal in the car those wires will only act as turn signals. I left the 2 now loose brake light wires sticking out of the harness as they will receive bullet connectors and run to a brake signal, I haven't decided if I am going to tap the 3rd brake light or run it up front.

I rewrapped the harness and its all set to be reinstalled.

You can see in the pictures the 3 tab 3156 socket on the top of the taillights is grey and the new 3 tab 3157 socket is black.

I still have to confirm which wire up front is the brake signal interrupt aswell as pickup a flasher relay to prevent the inevitable hyper flash. But atleast the time consuming part of rewiring the taillights is done.

Also found an expected amount of grime which I have found on every other inch of the car, aswell as a little present from nature!

yVLoZJA.jpg

Wa7SAD2.jpg

4Scc6PU.jpg

OeJeWMp.jpg

Surprise!
4oIn2oQ.jpg


New wiring vs stock wiring
QwQO1um.jpg


I have a weird love for wiring...
xjCI953.jpg

cs93cNT.jpg


The next thing I am expecting to arrive in the next couple of days is a set of projectors... I am beyond excited for this retrofit to get started!
 

Latest posts

Forum statistics

Threads
77,505
Messages
1,503,934
Members
14,977
Latest member
Vallybell

Members online

Top