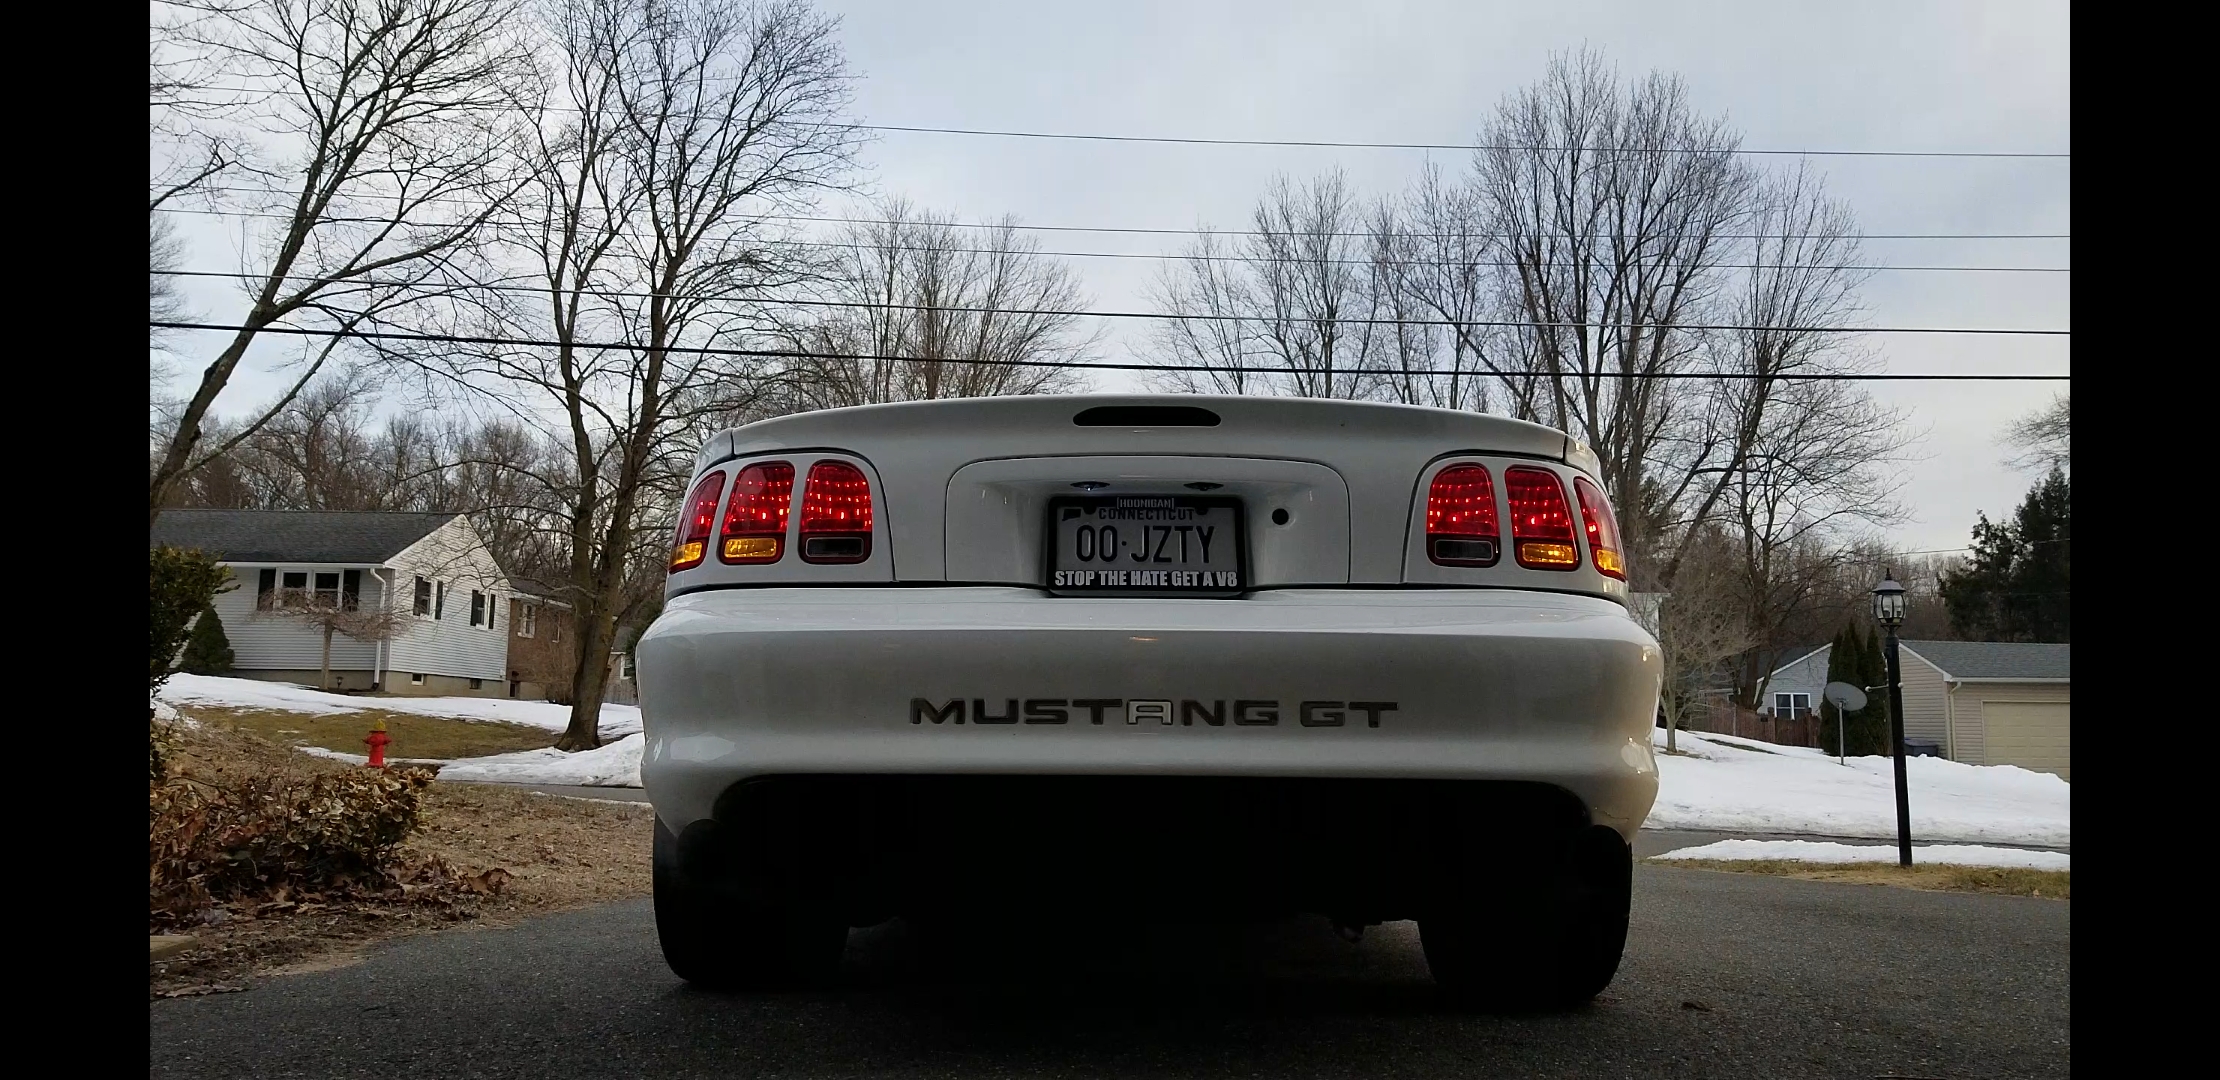
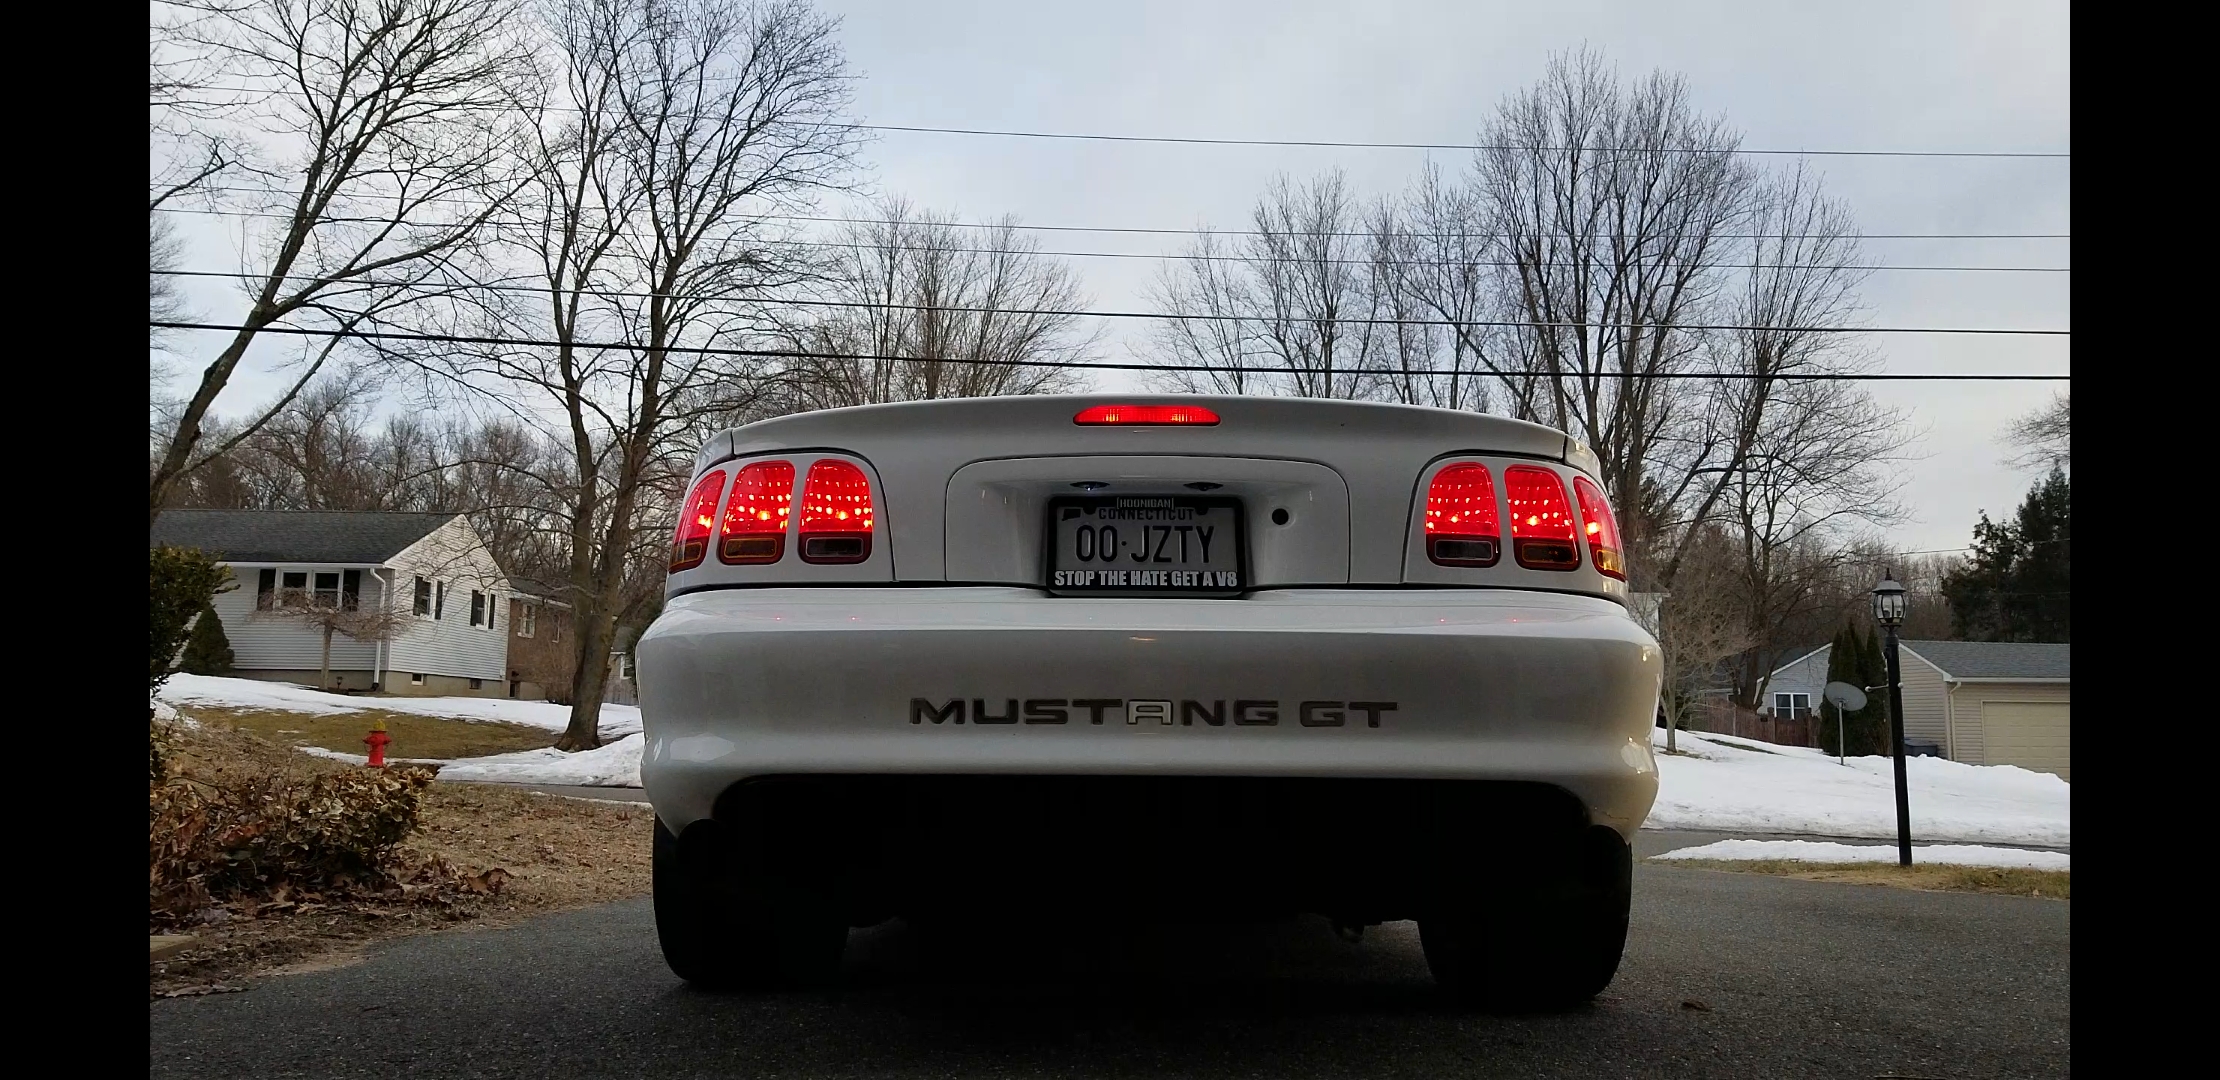
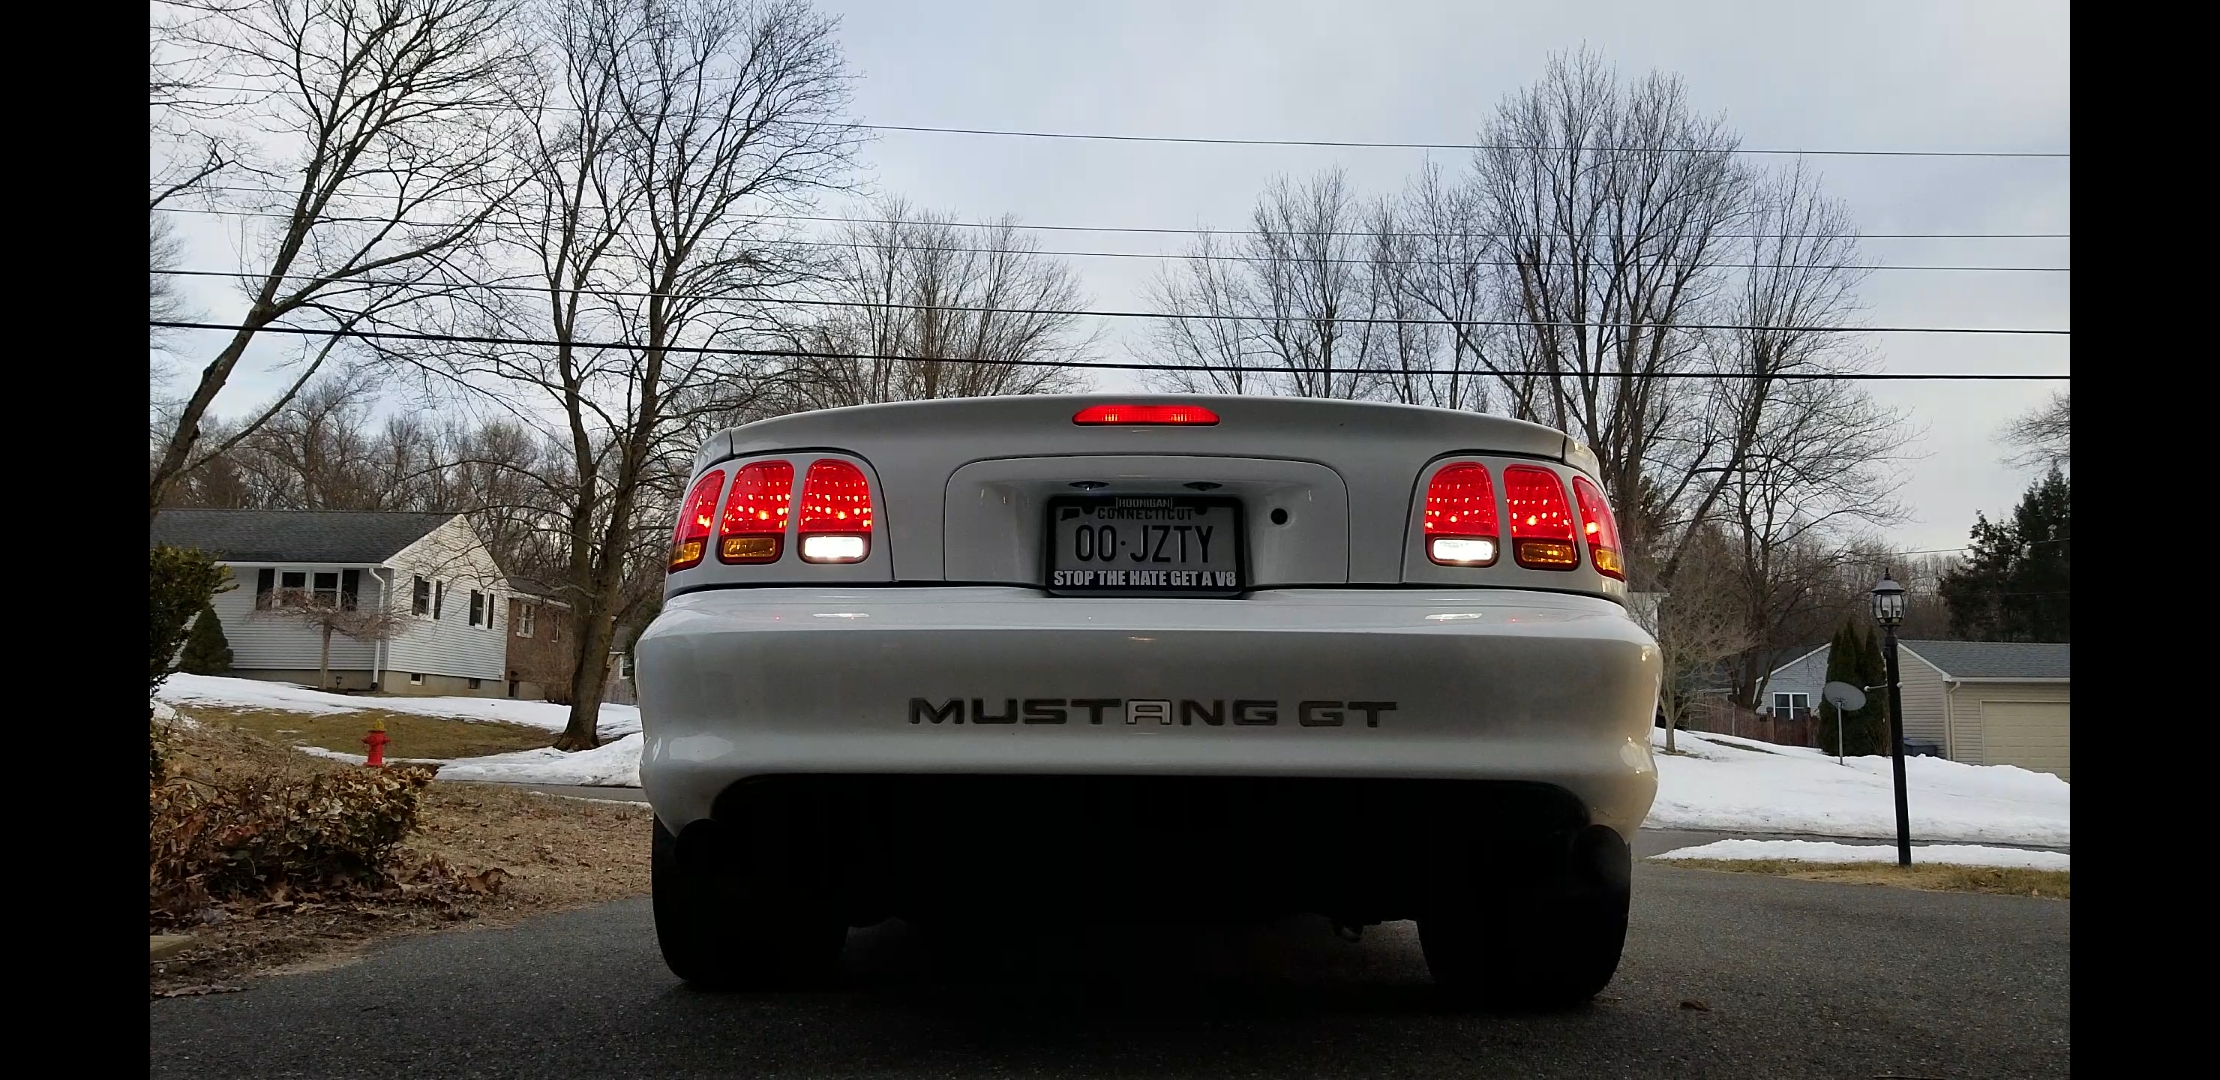
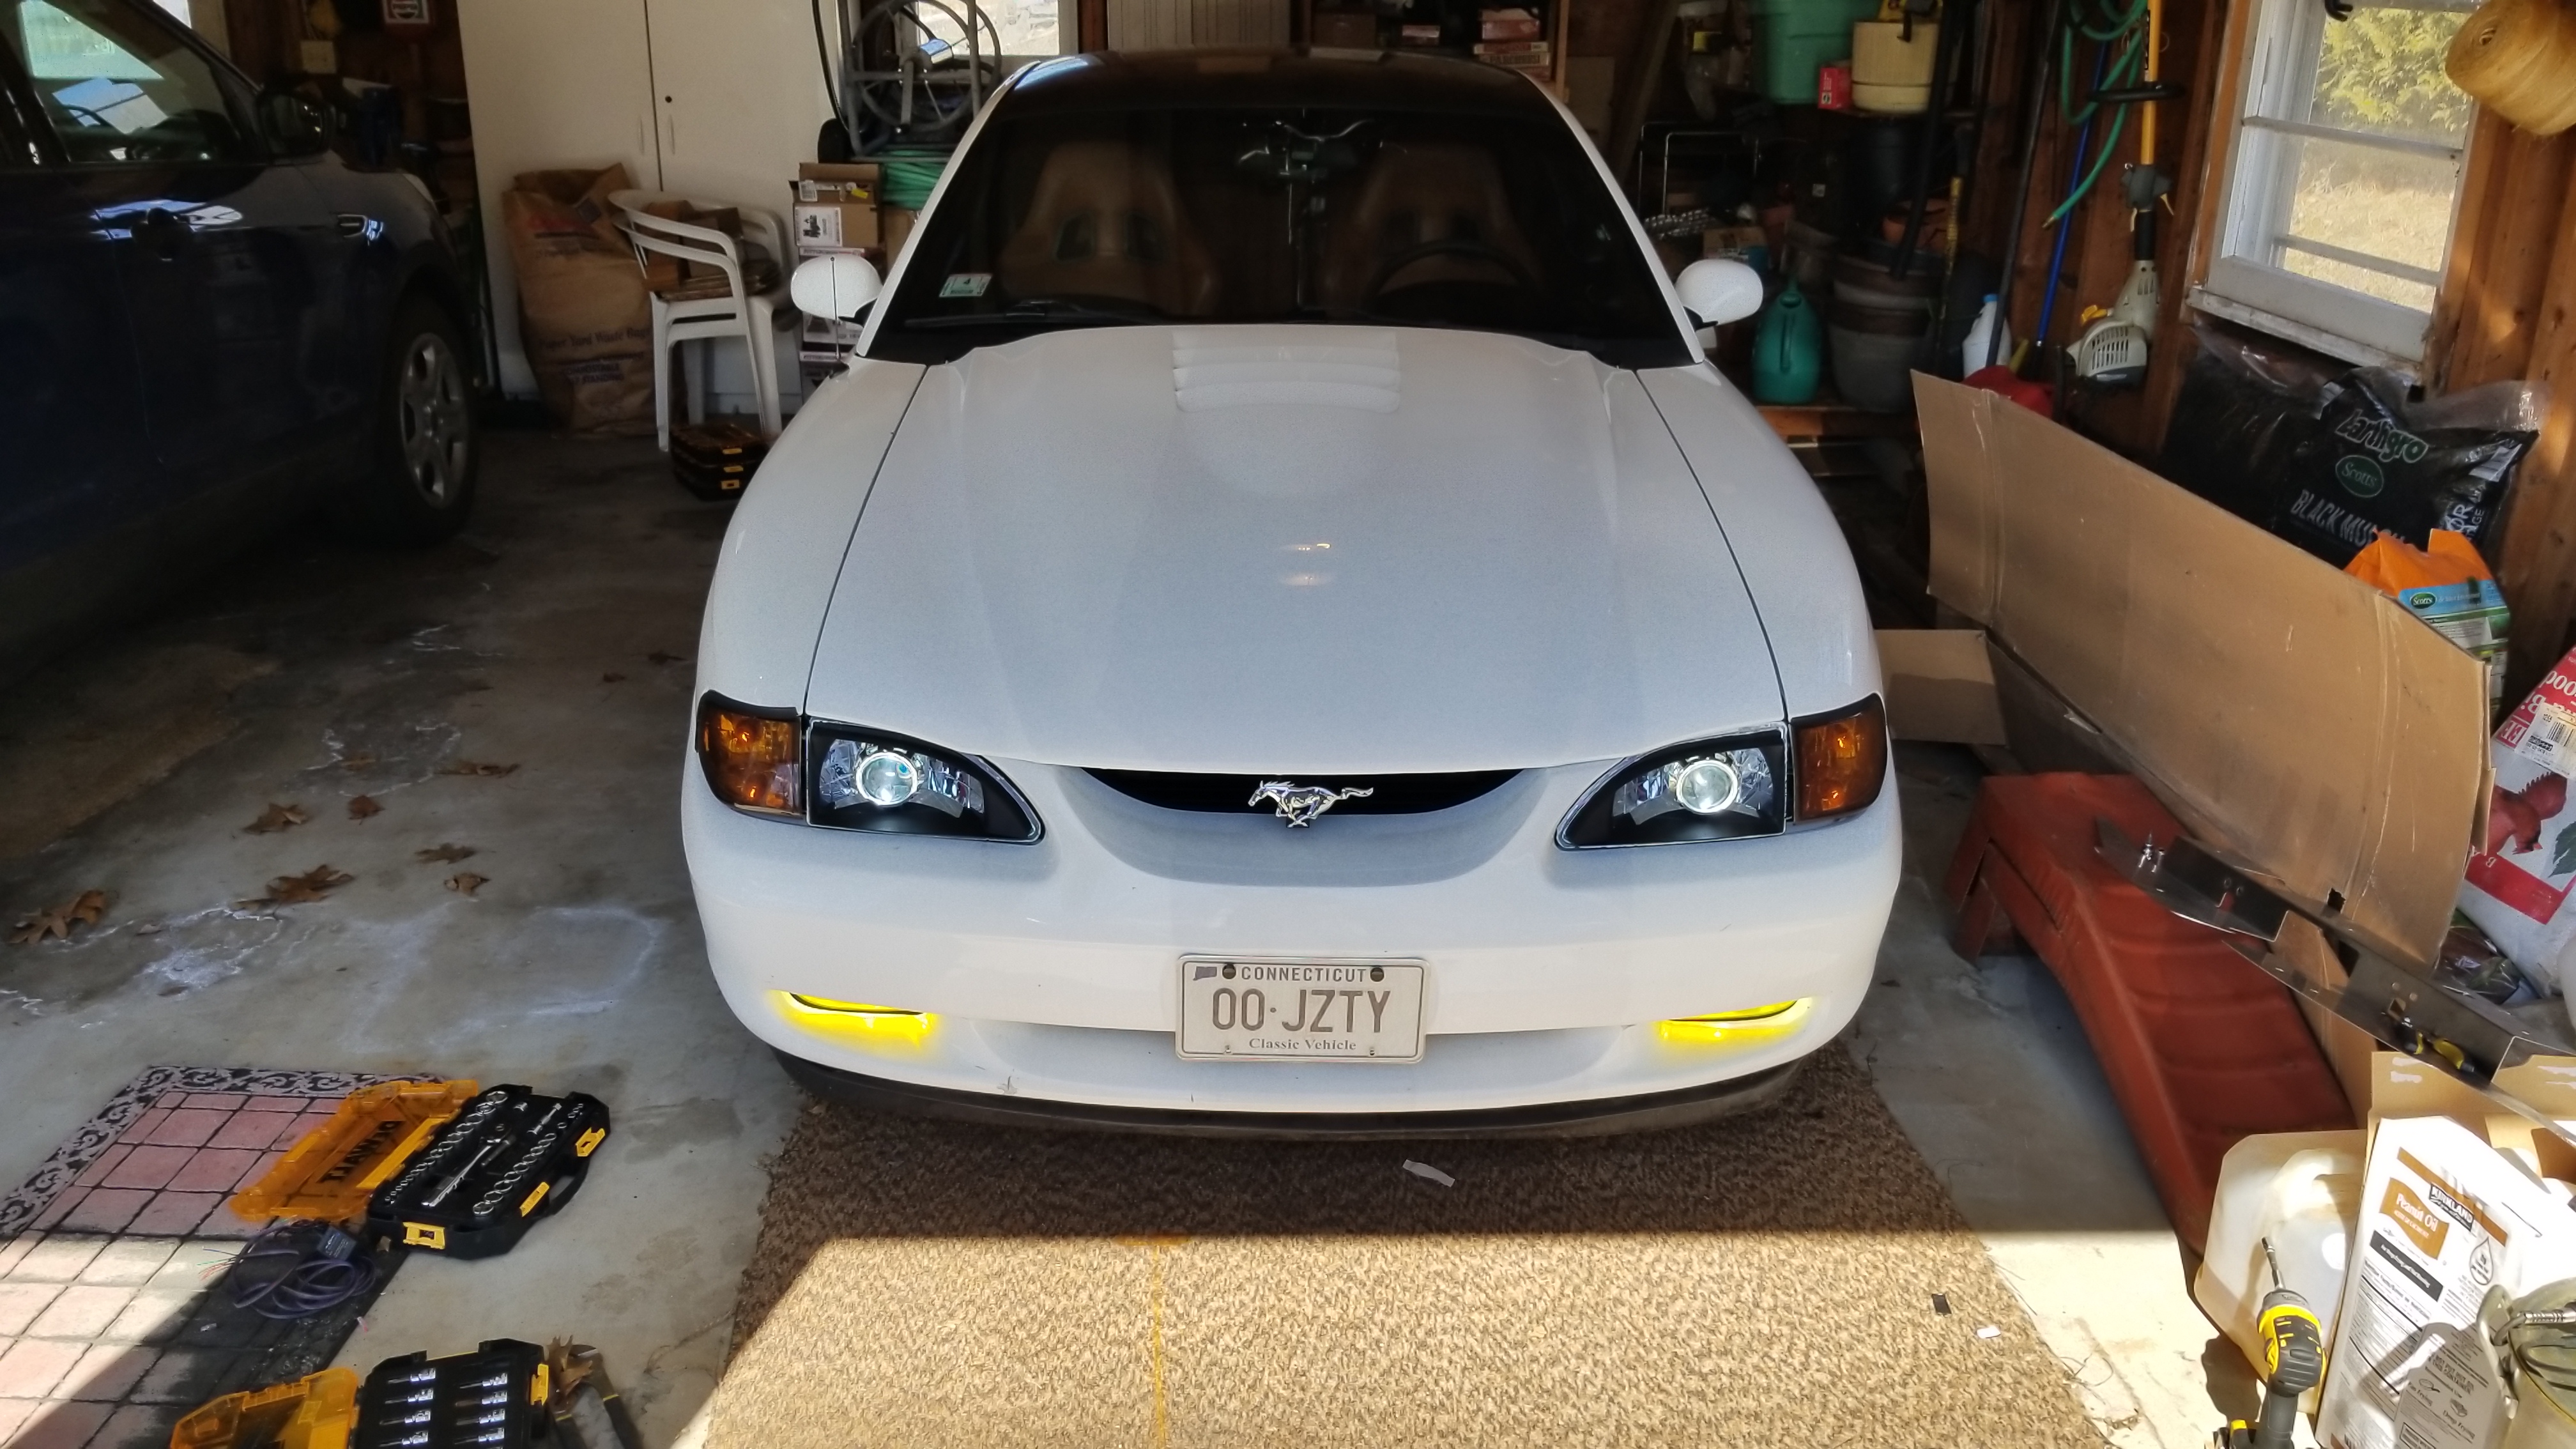
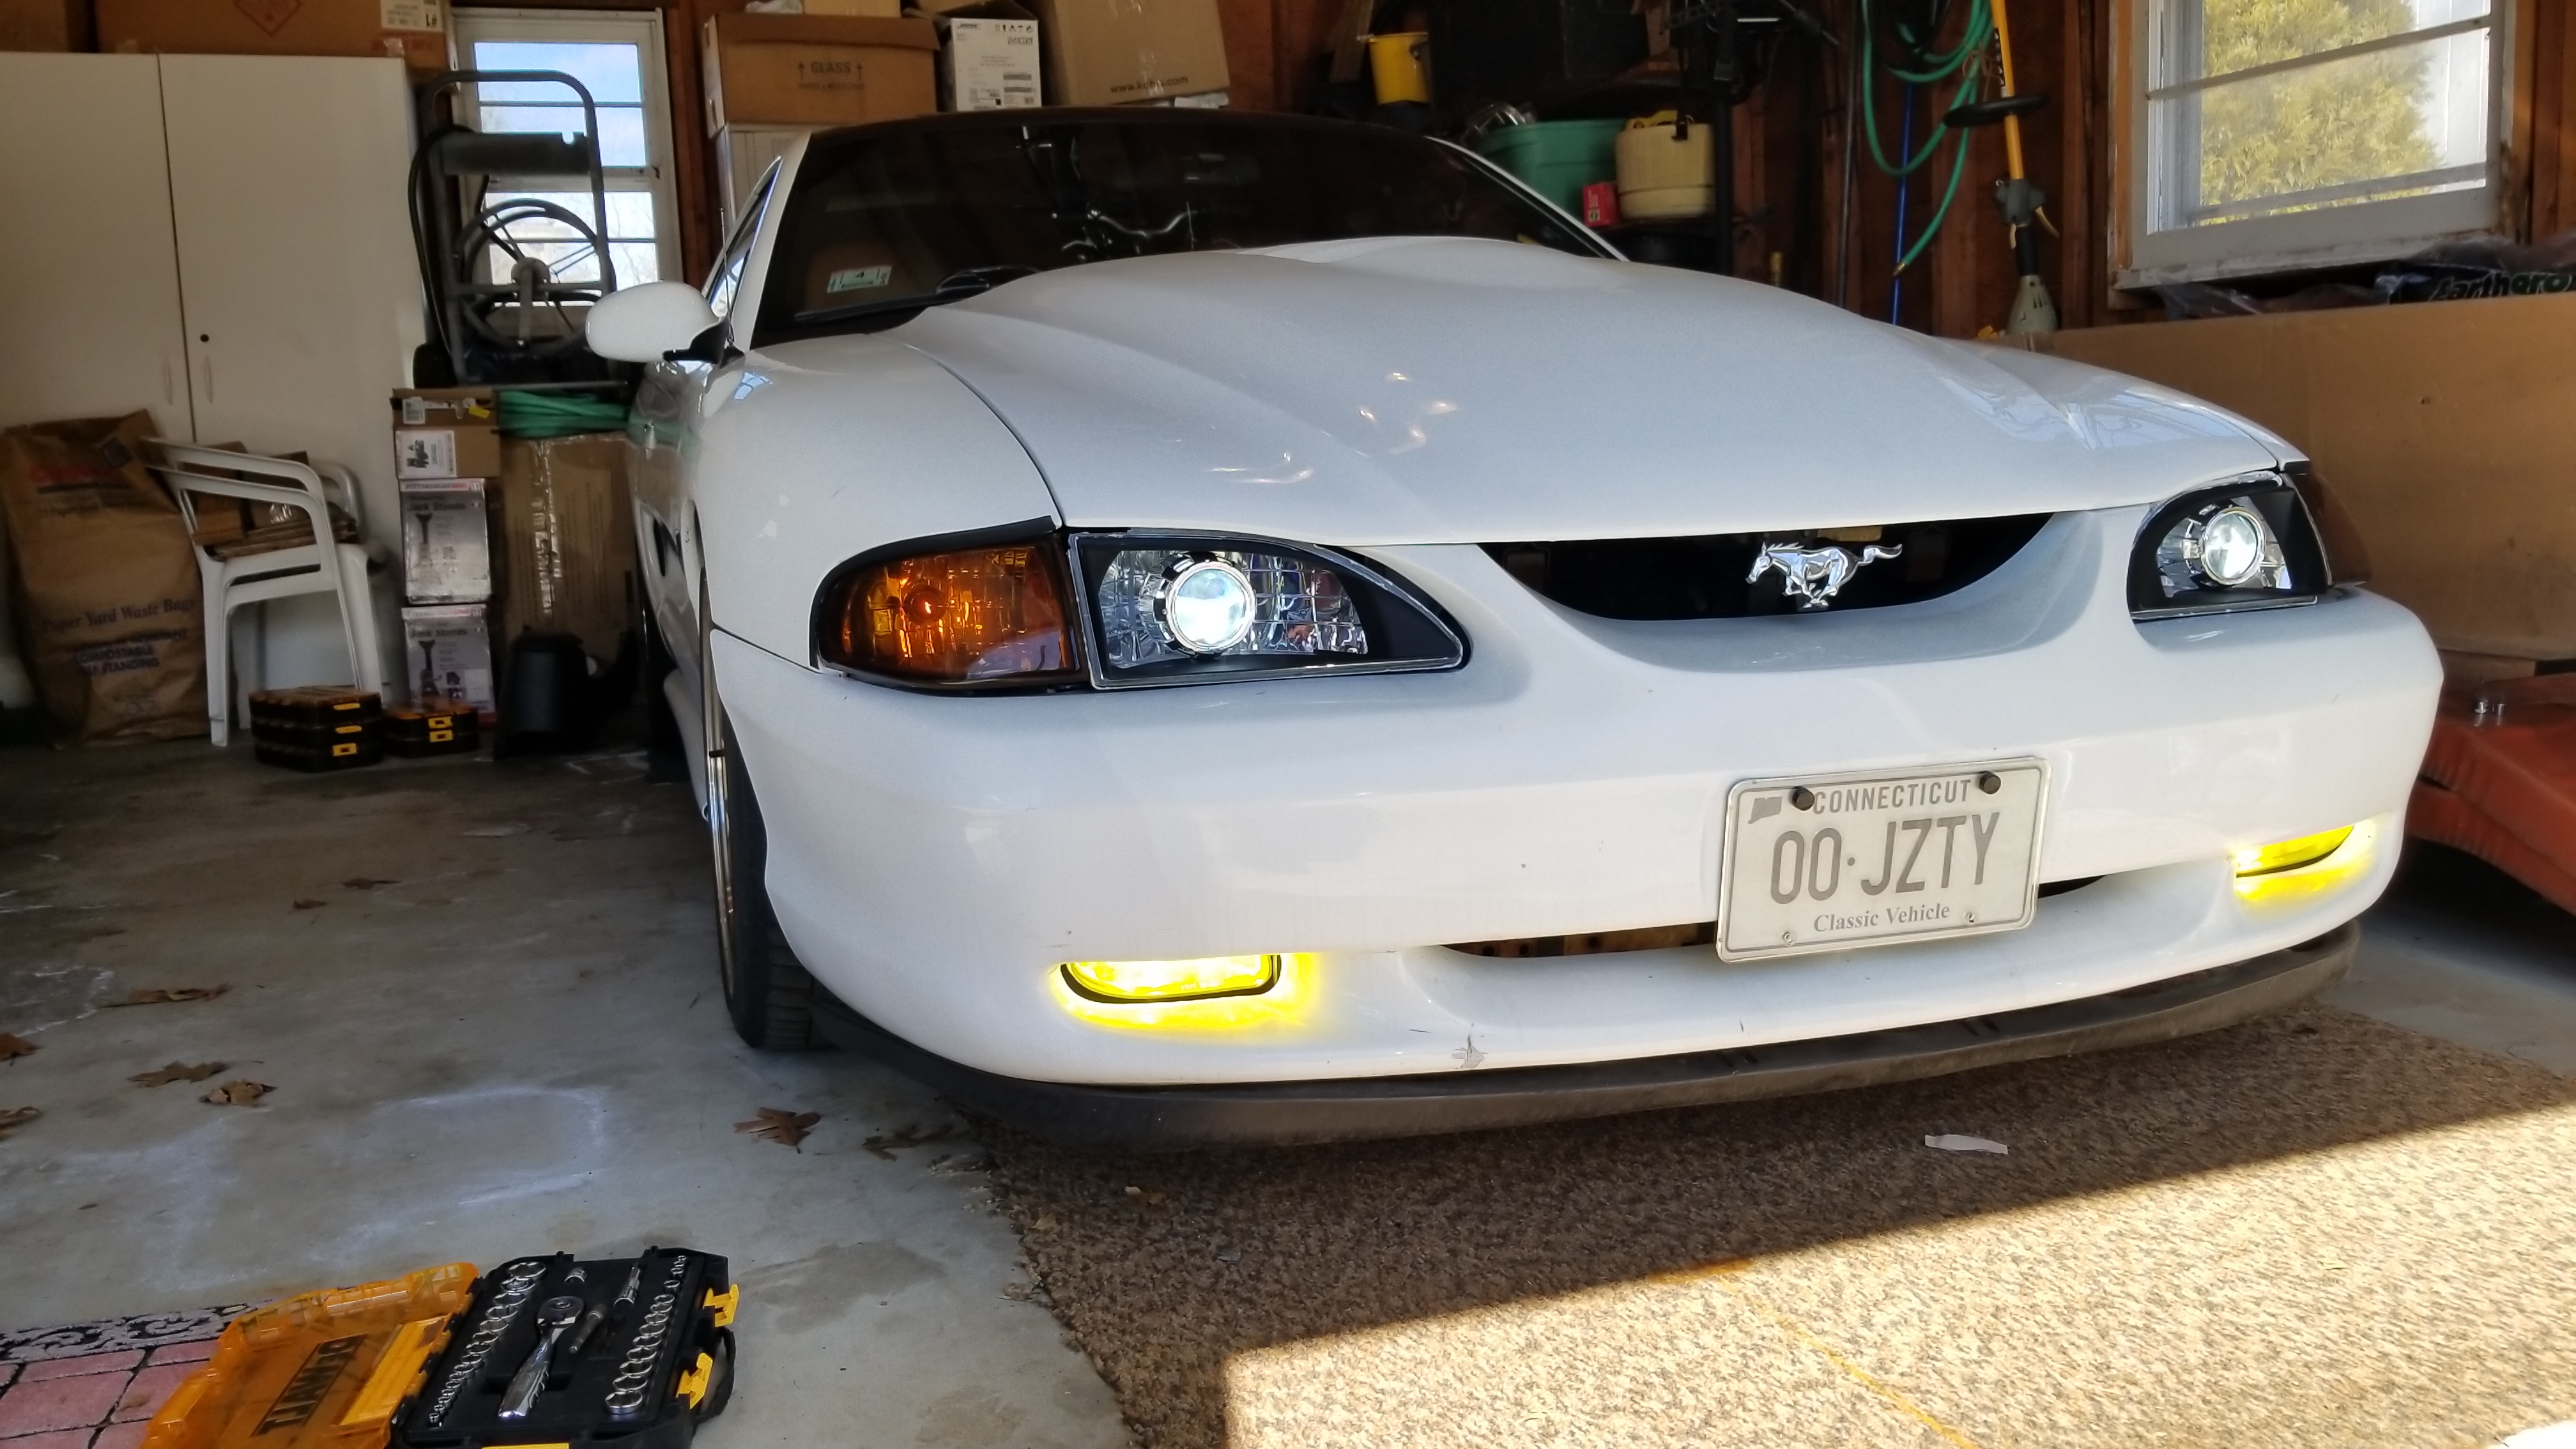
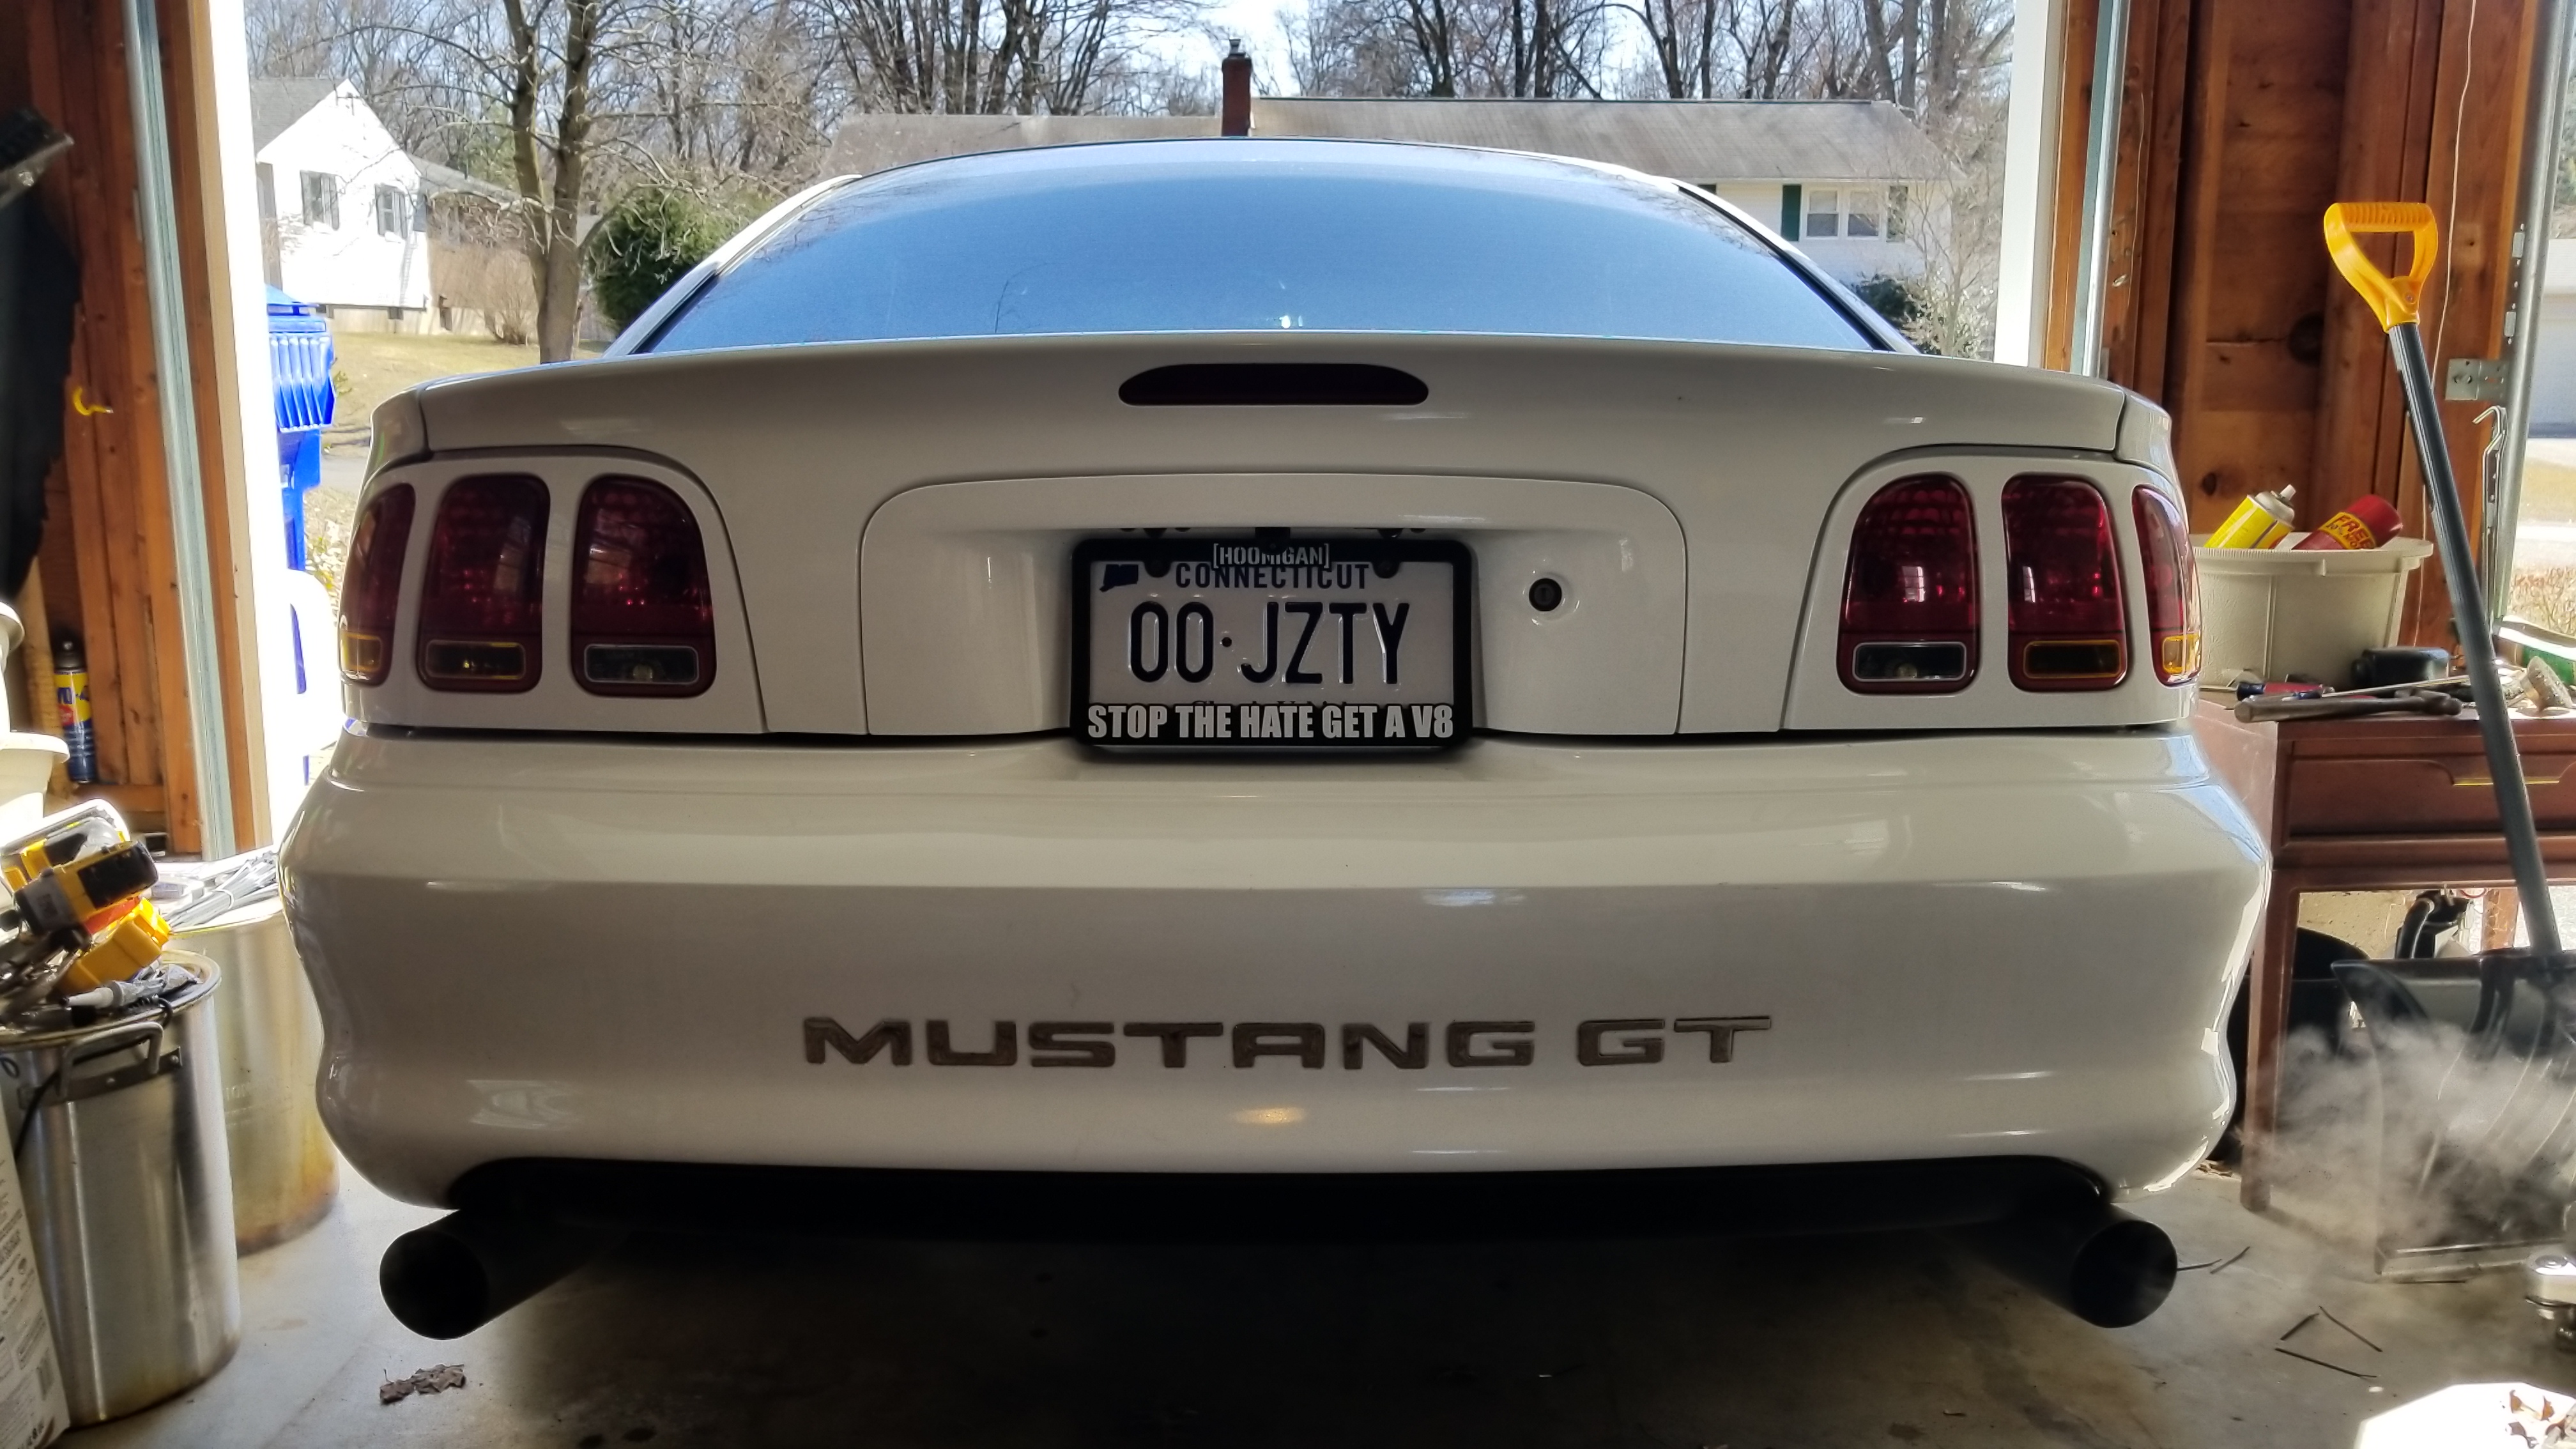
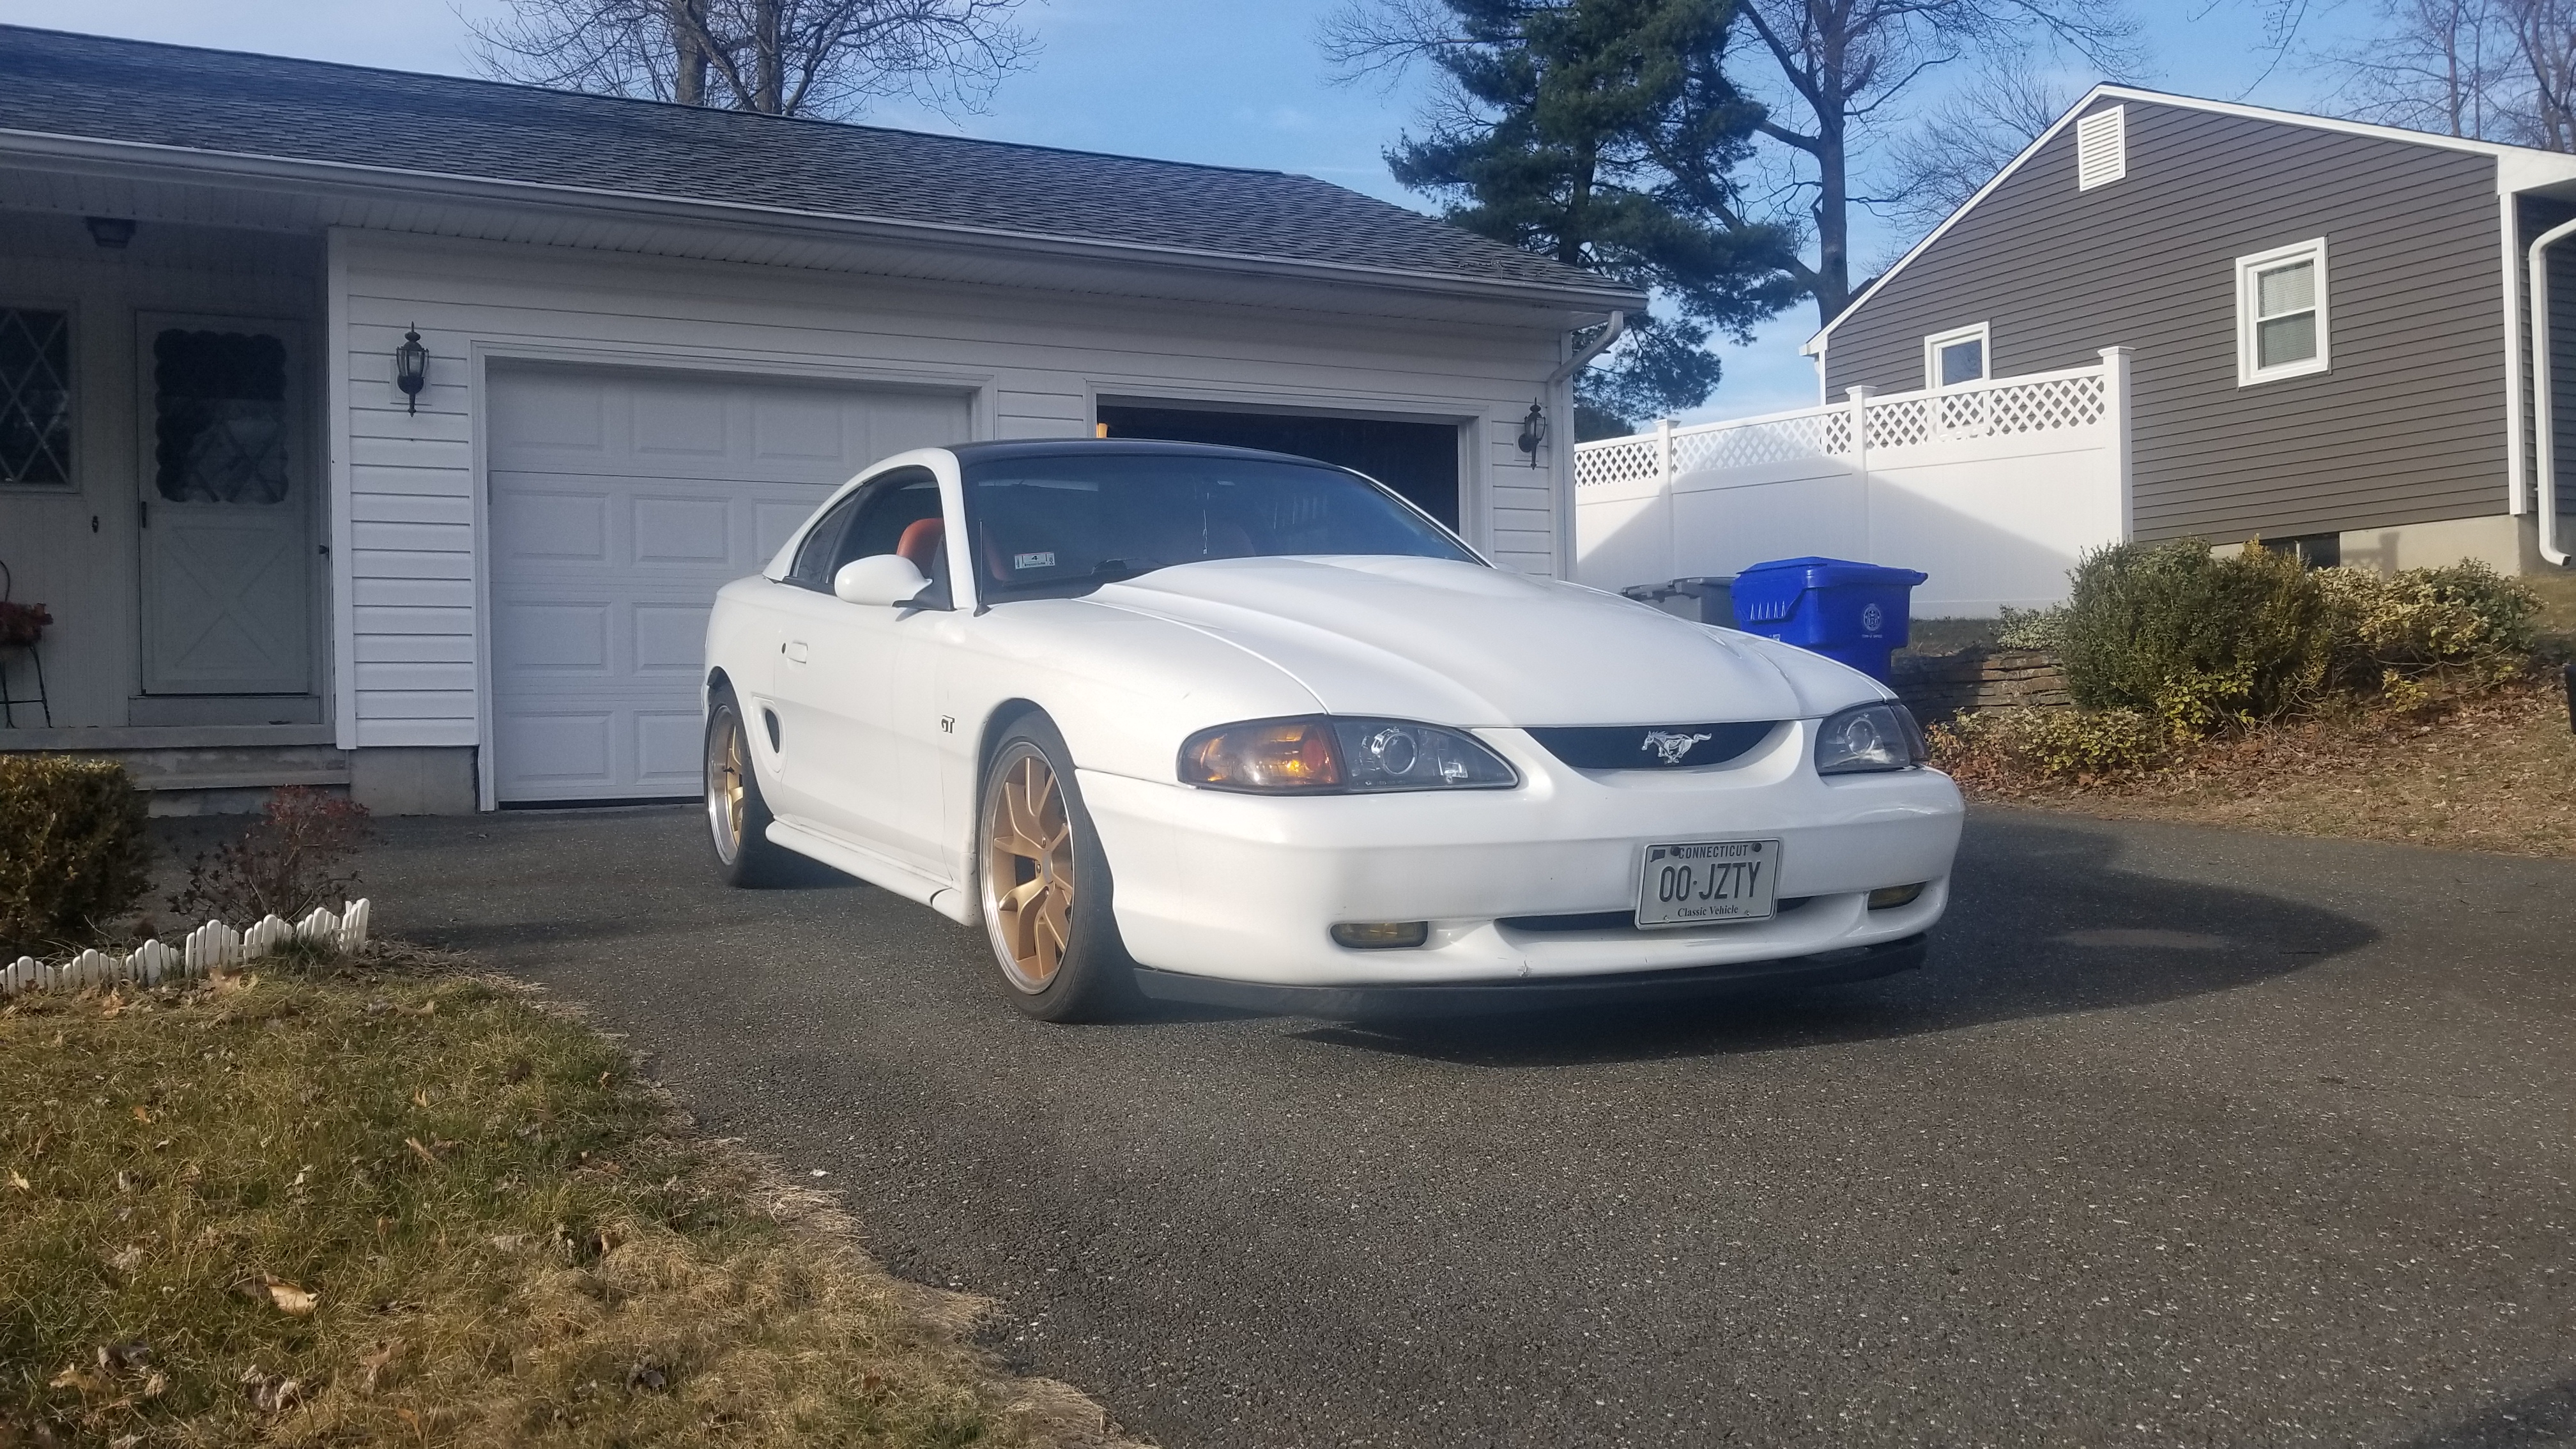
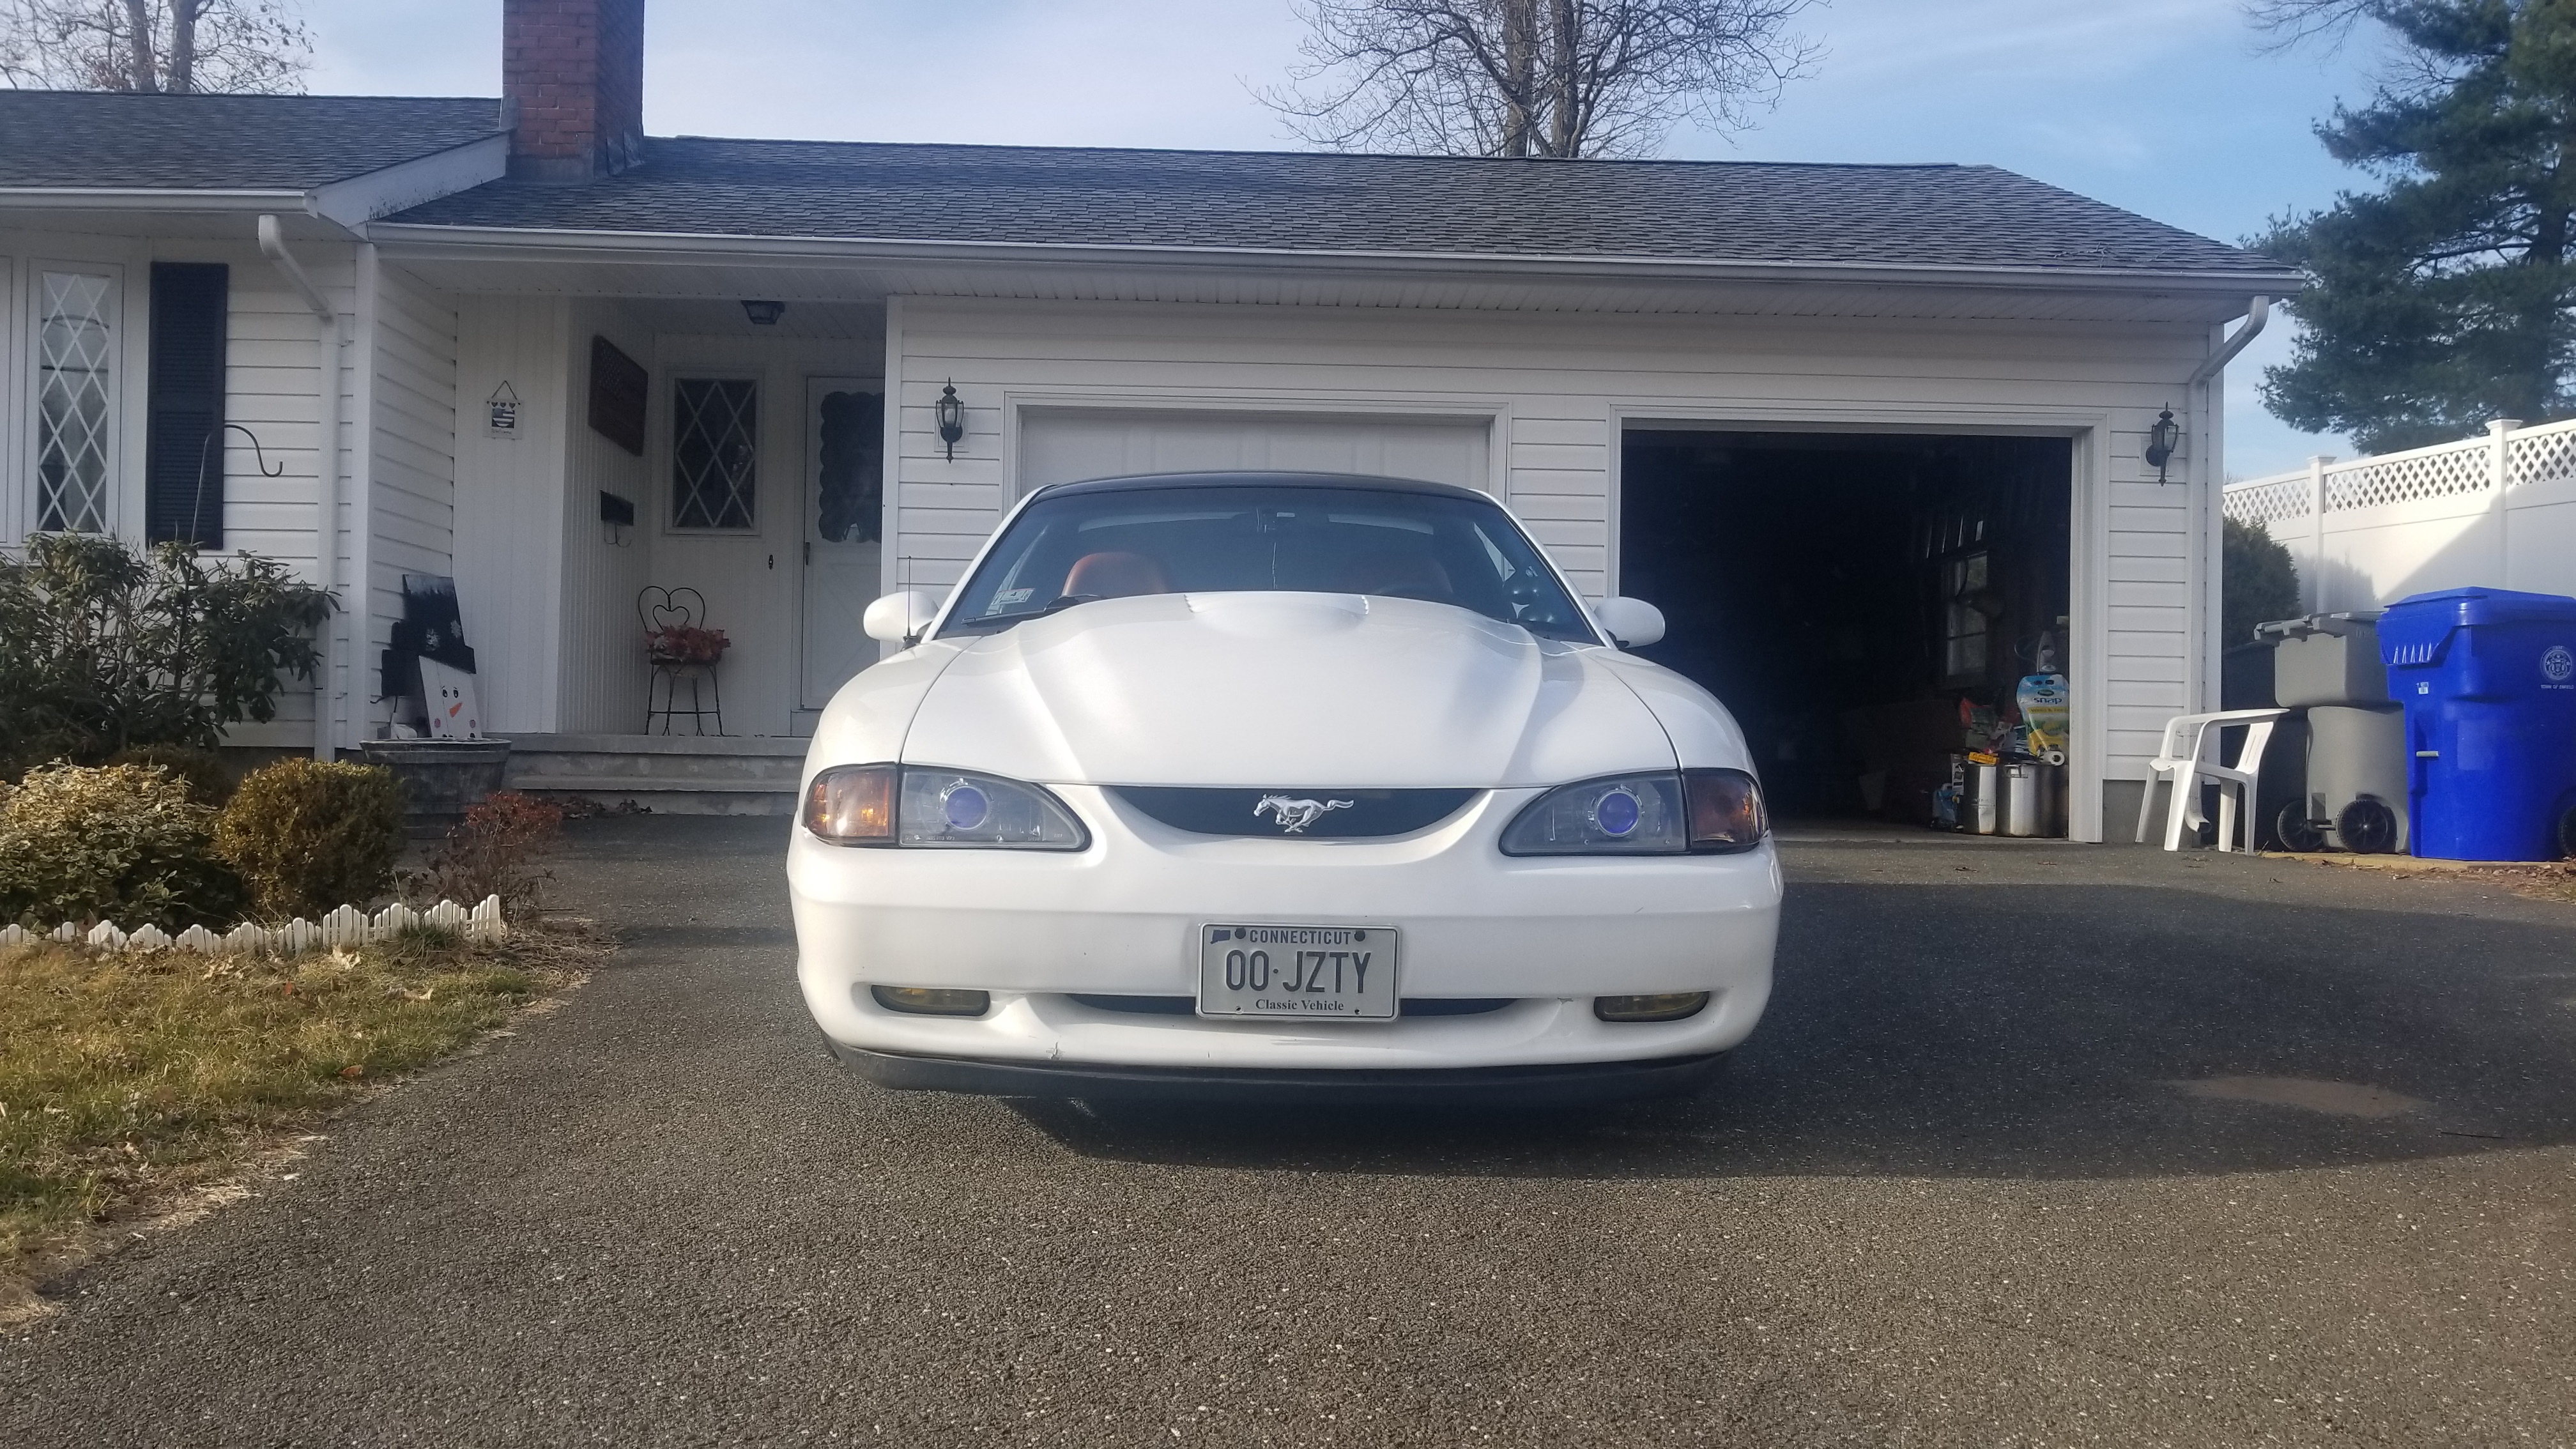
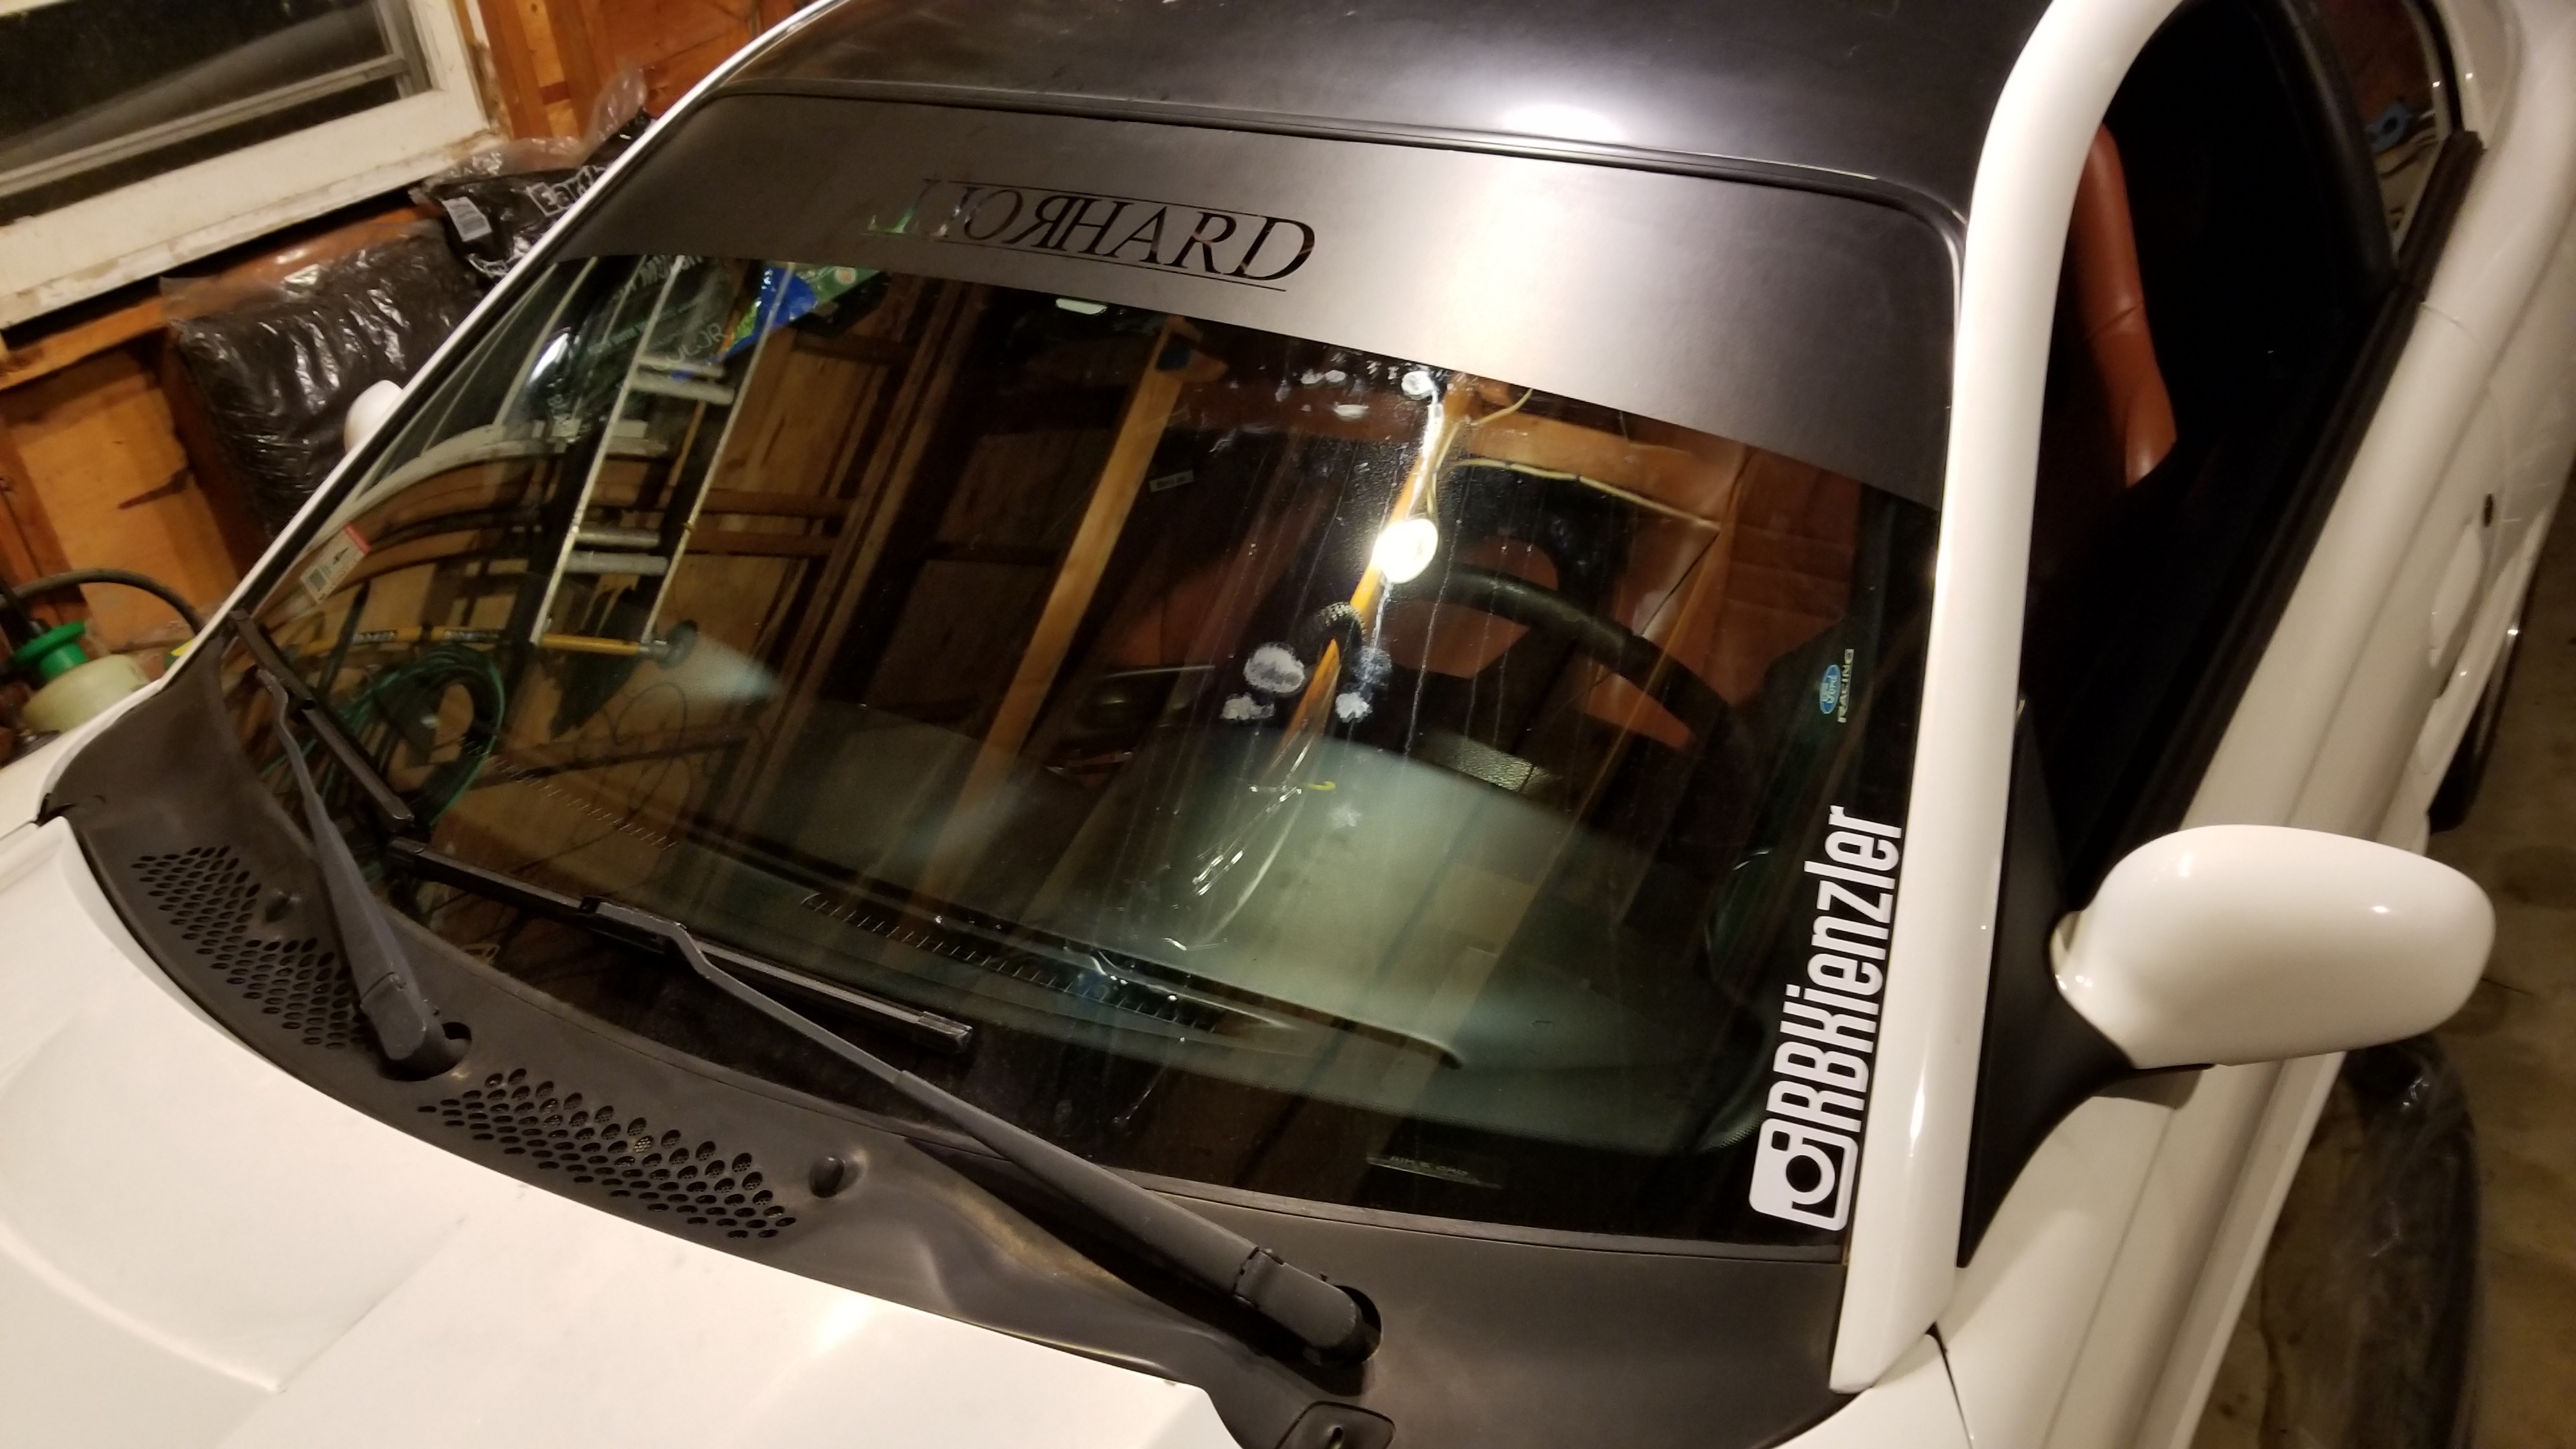
FivepointSlow's 4.6 Build

OP
OP
FivepointSlow

FivepointSlow

Well-Known Member
Joined
Oct 22, 2013
Messages
2,646
Reaction score
60
Location
Enfield, CT, USA
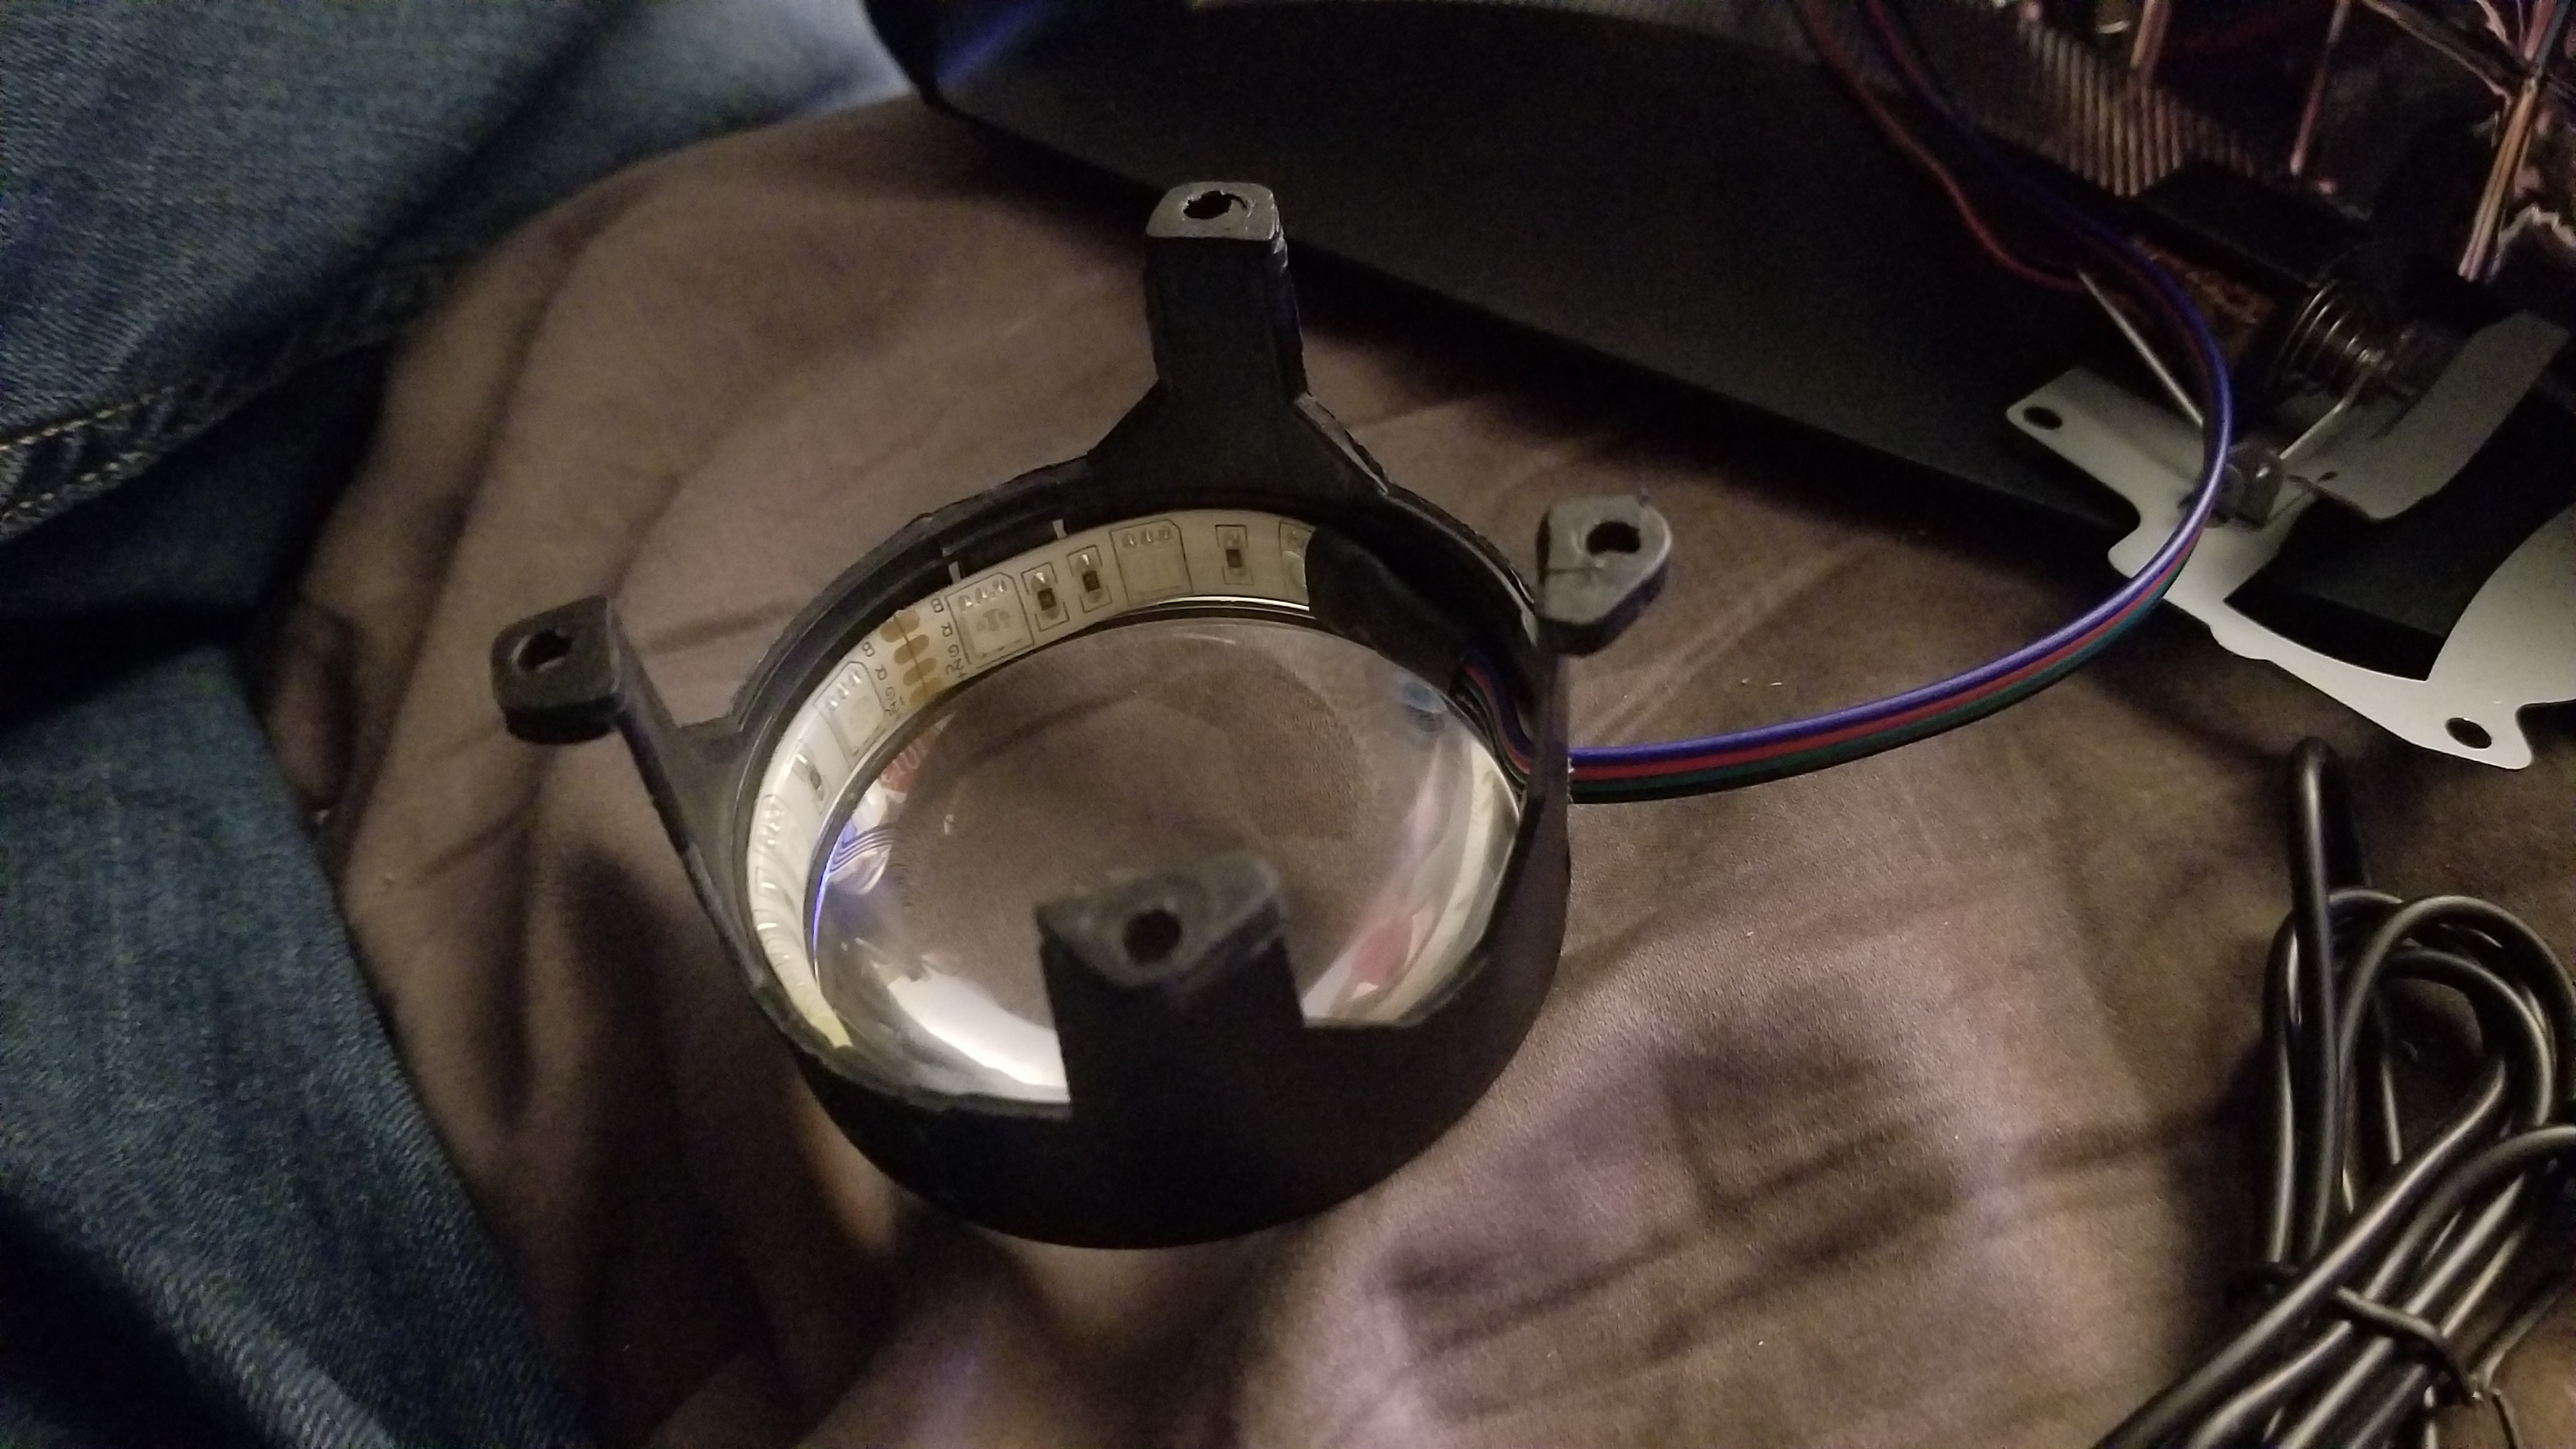
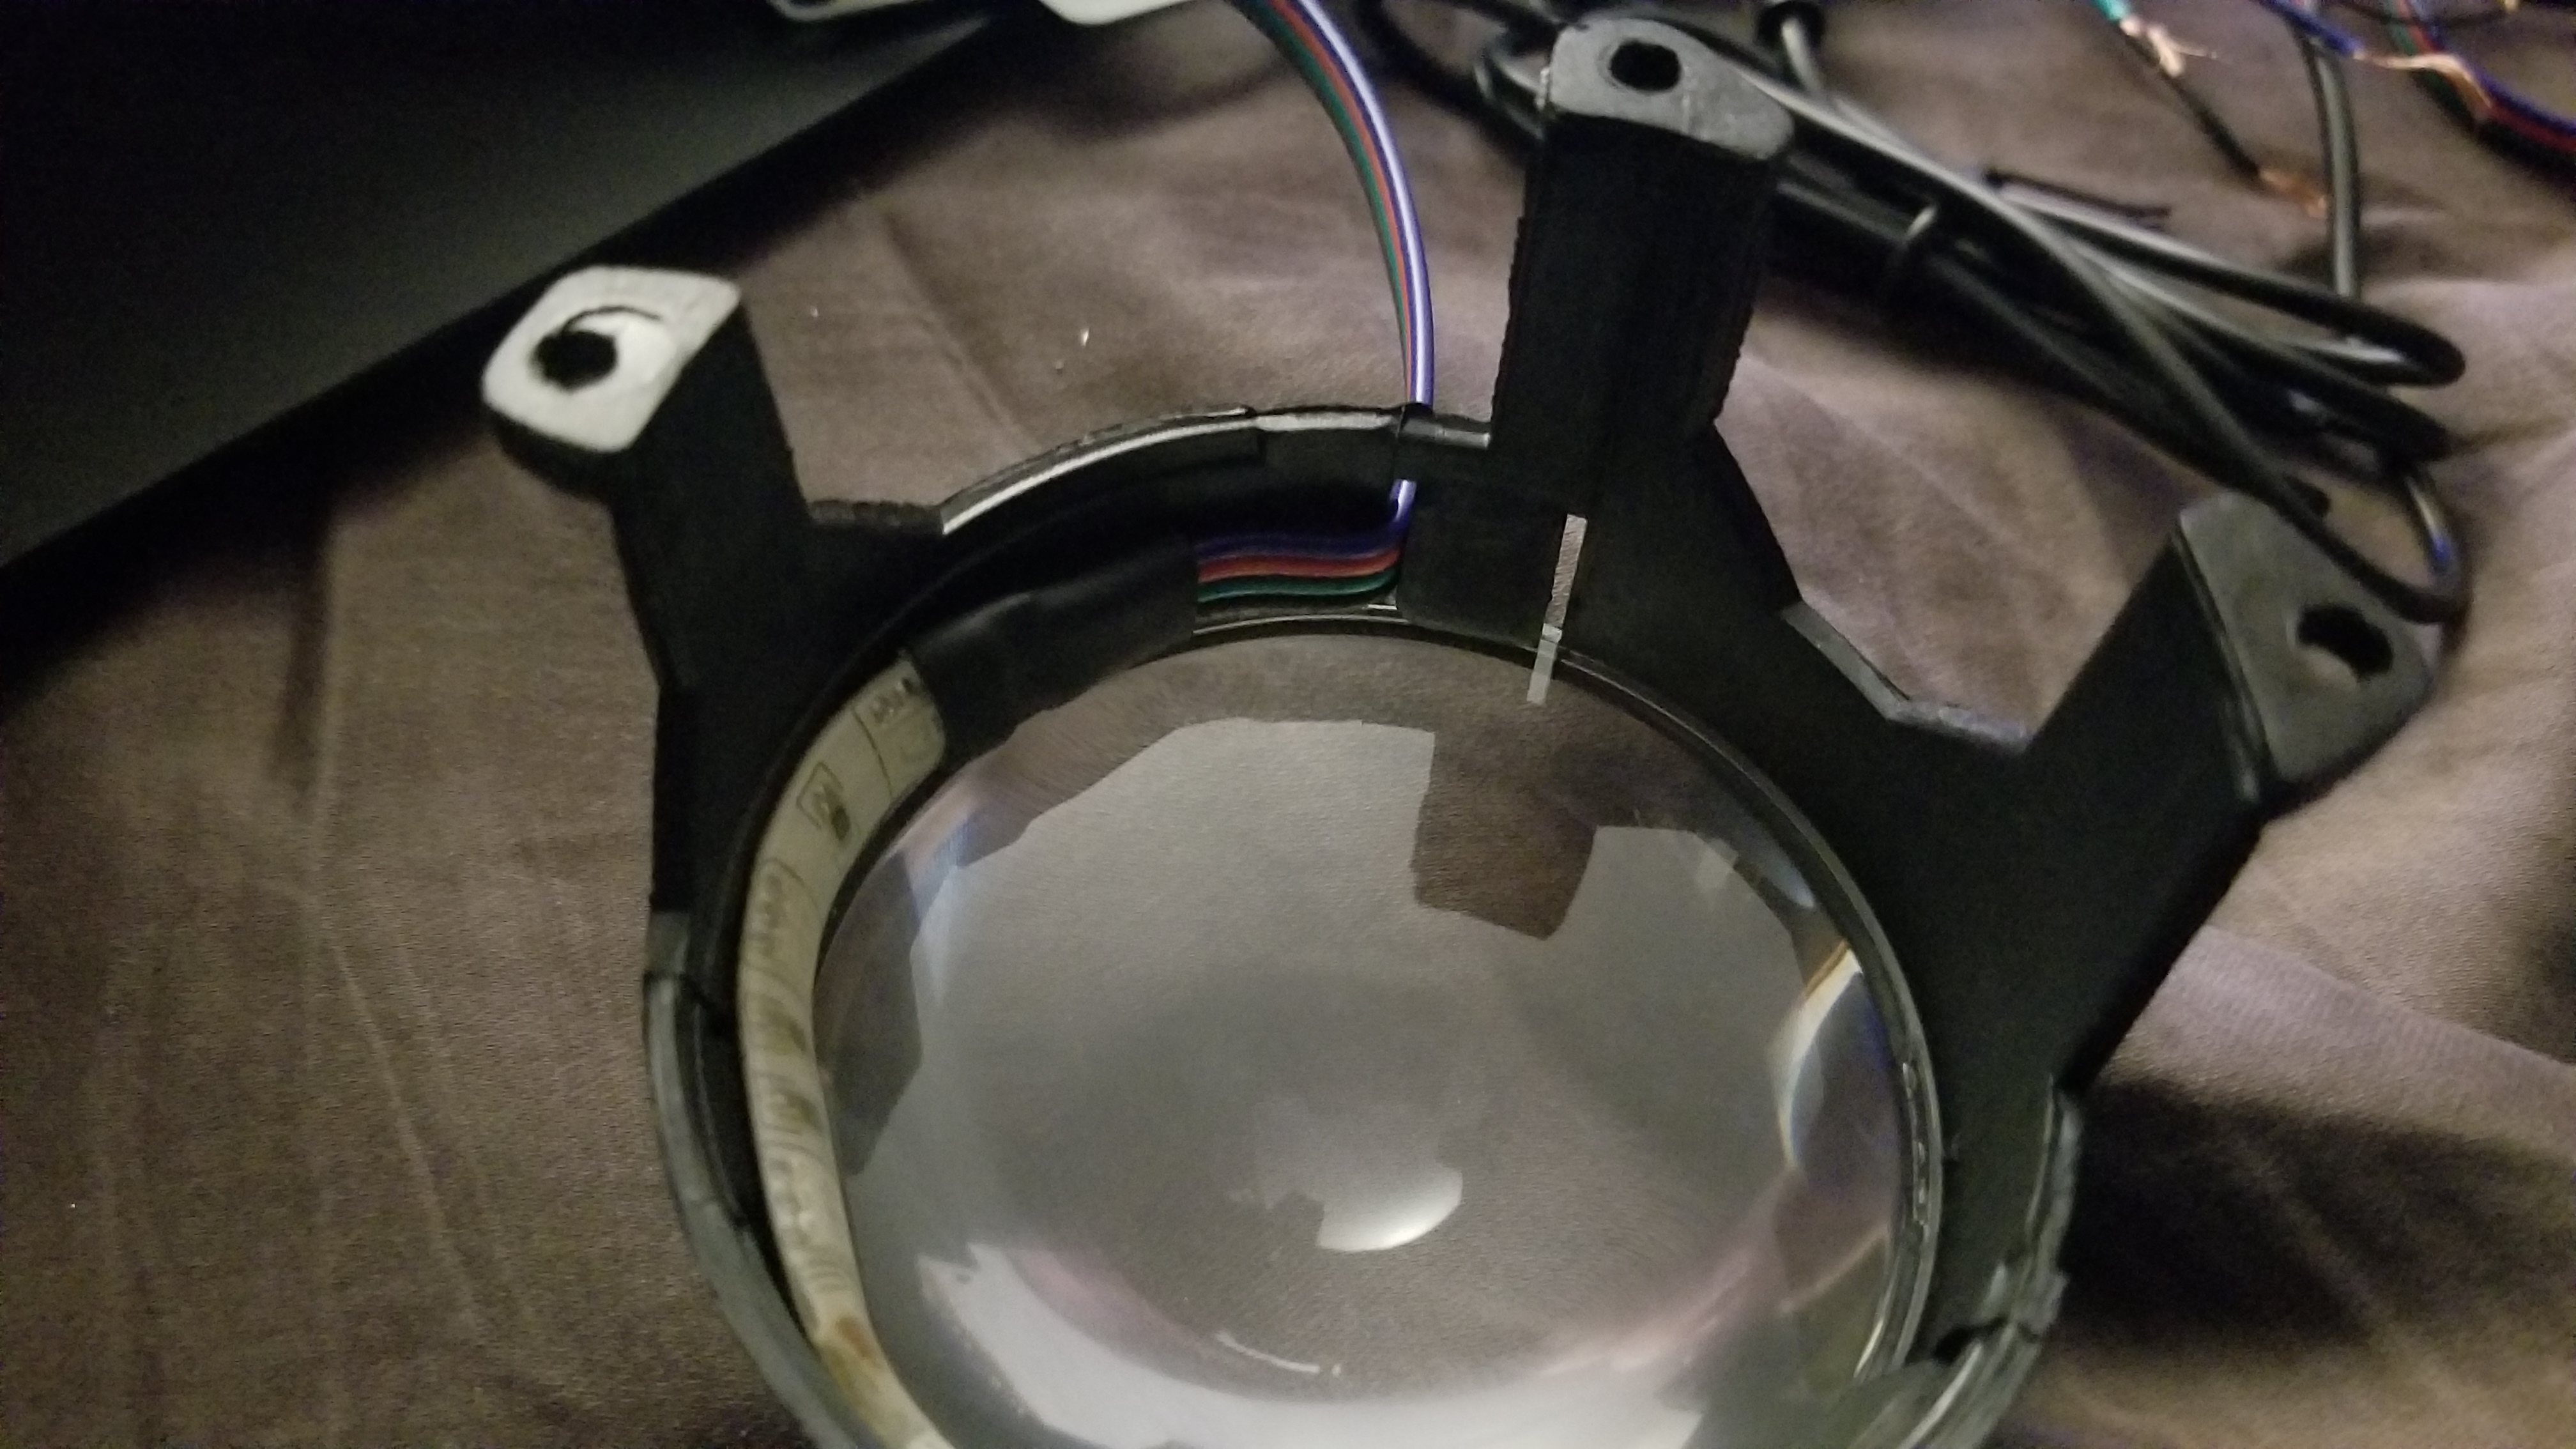
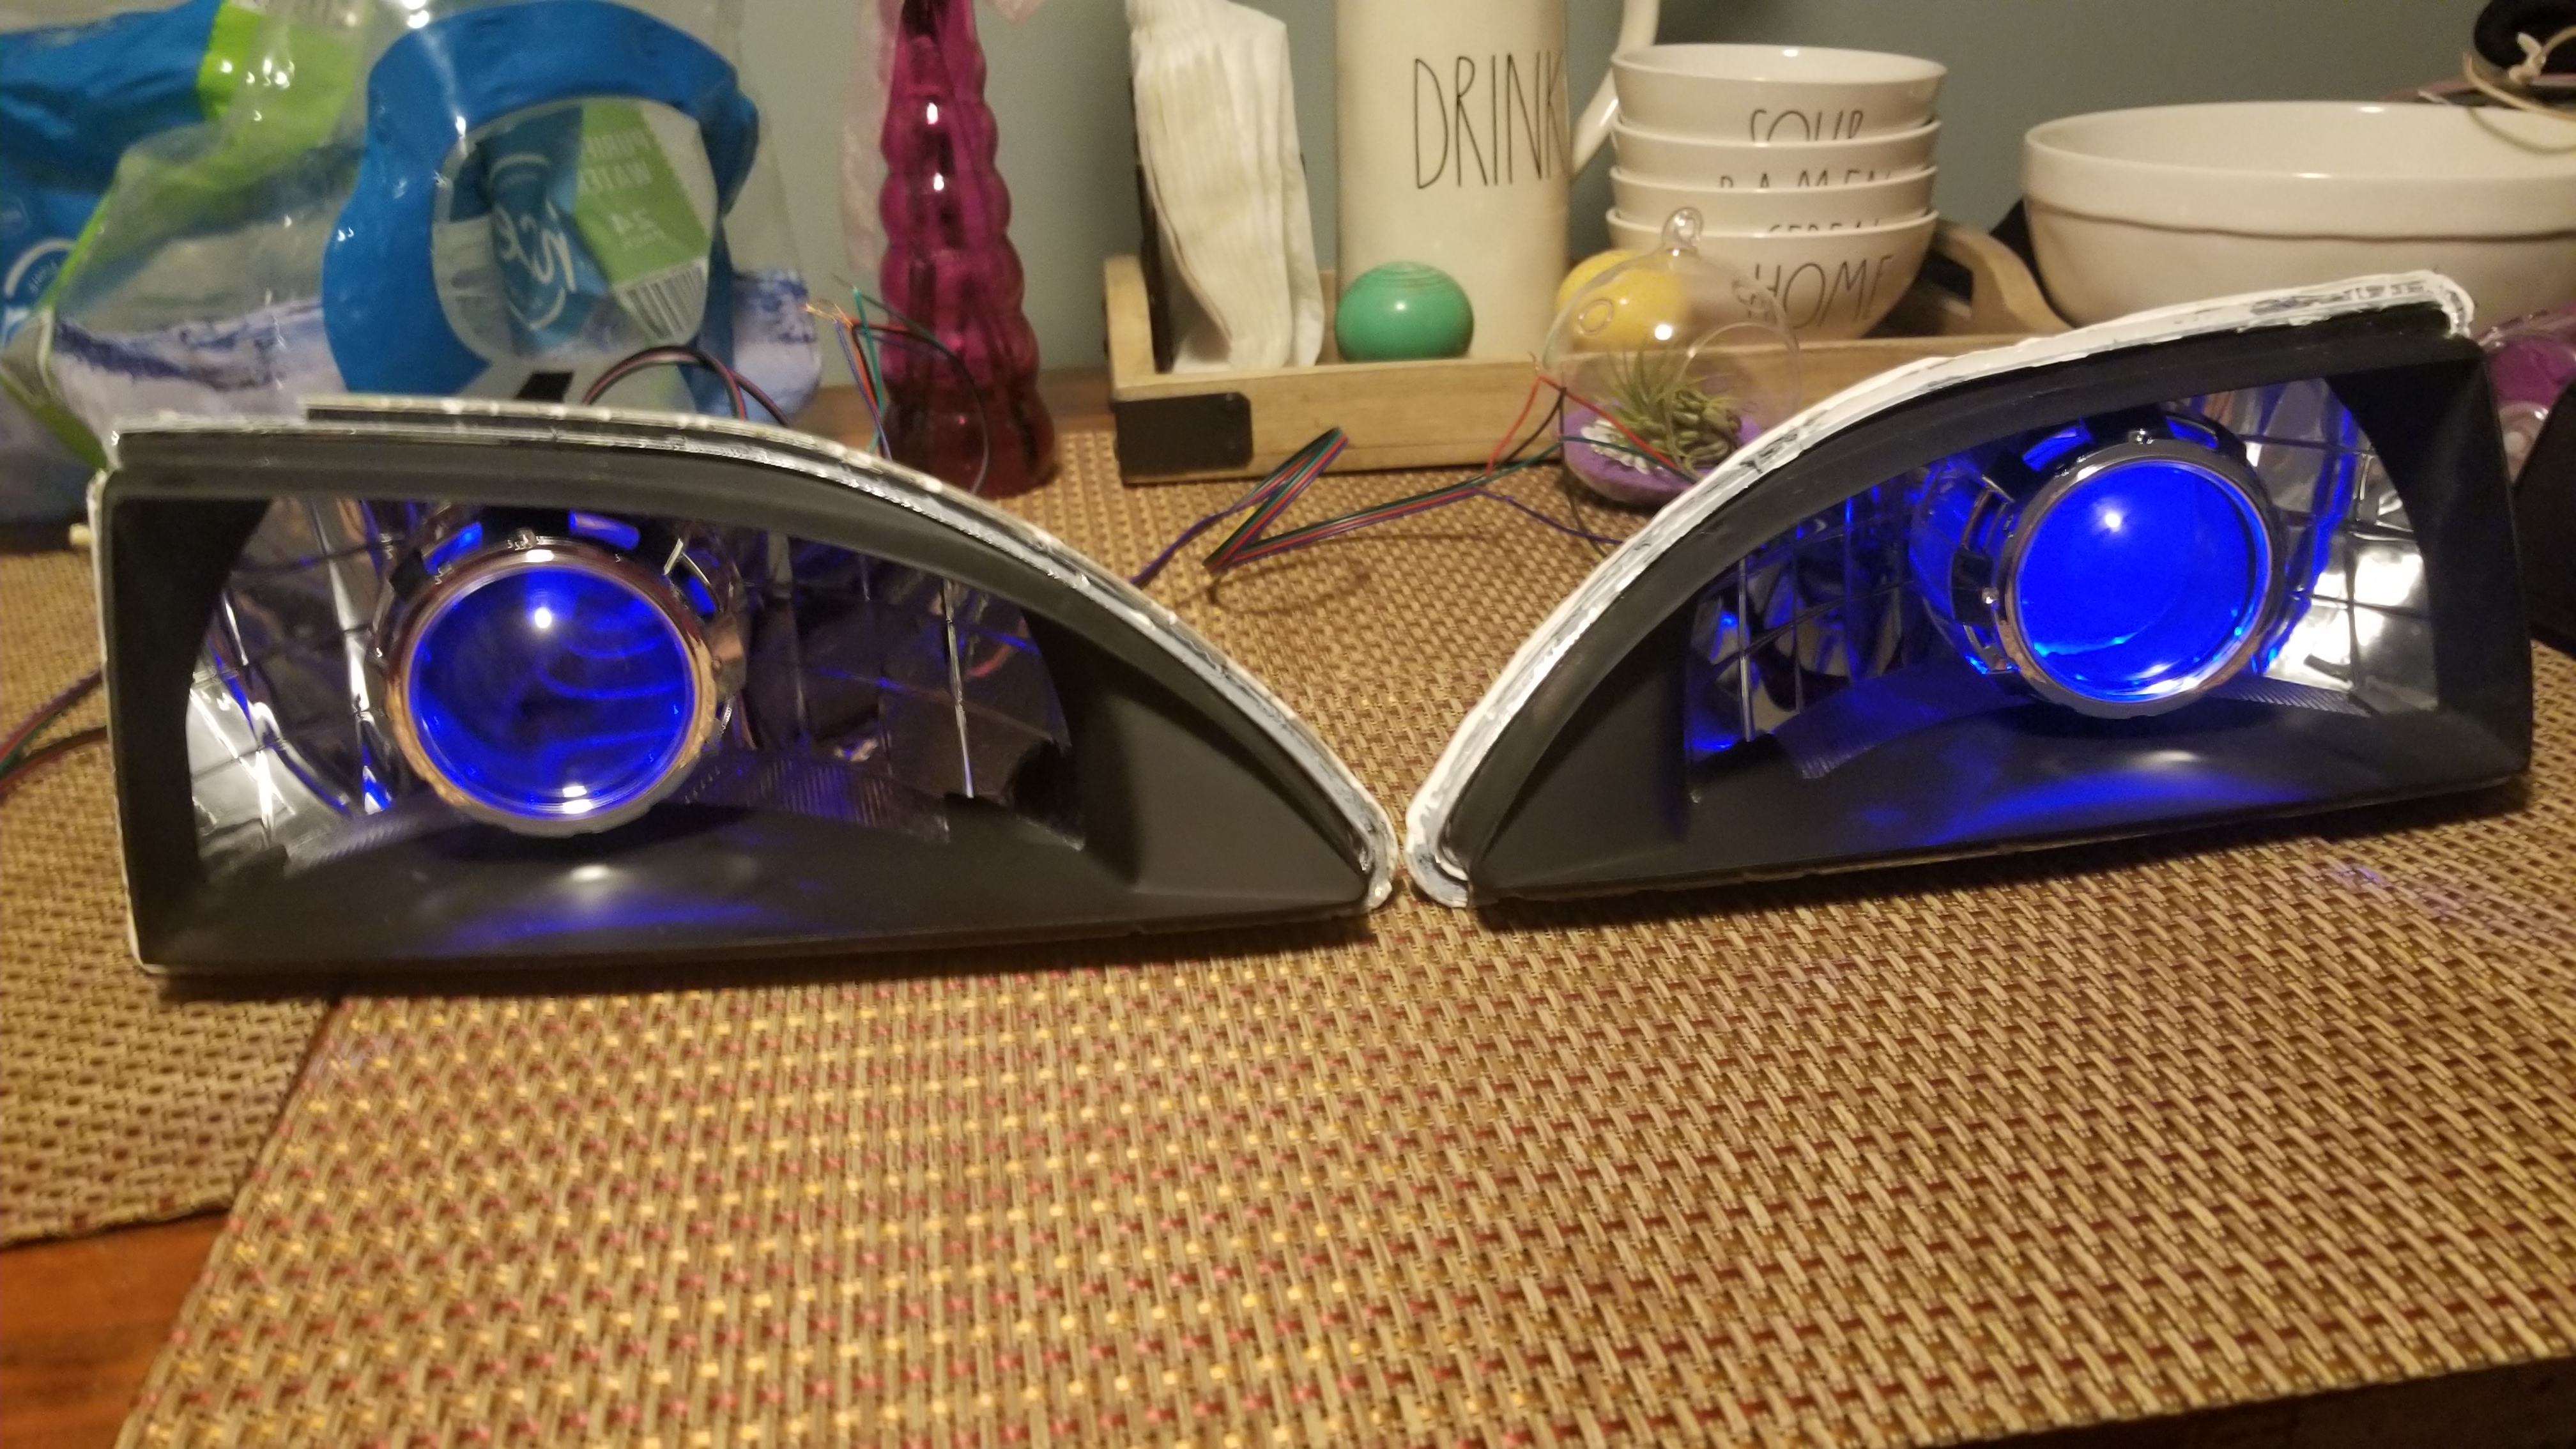
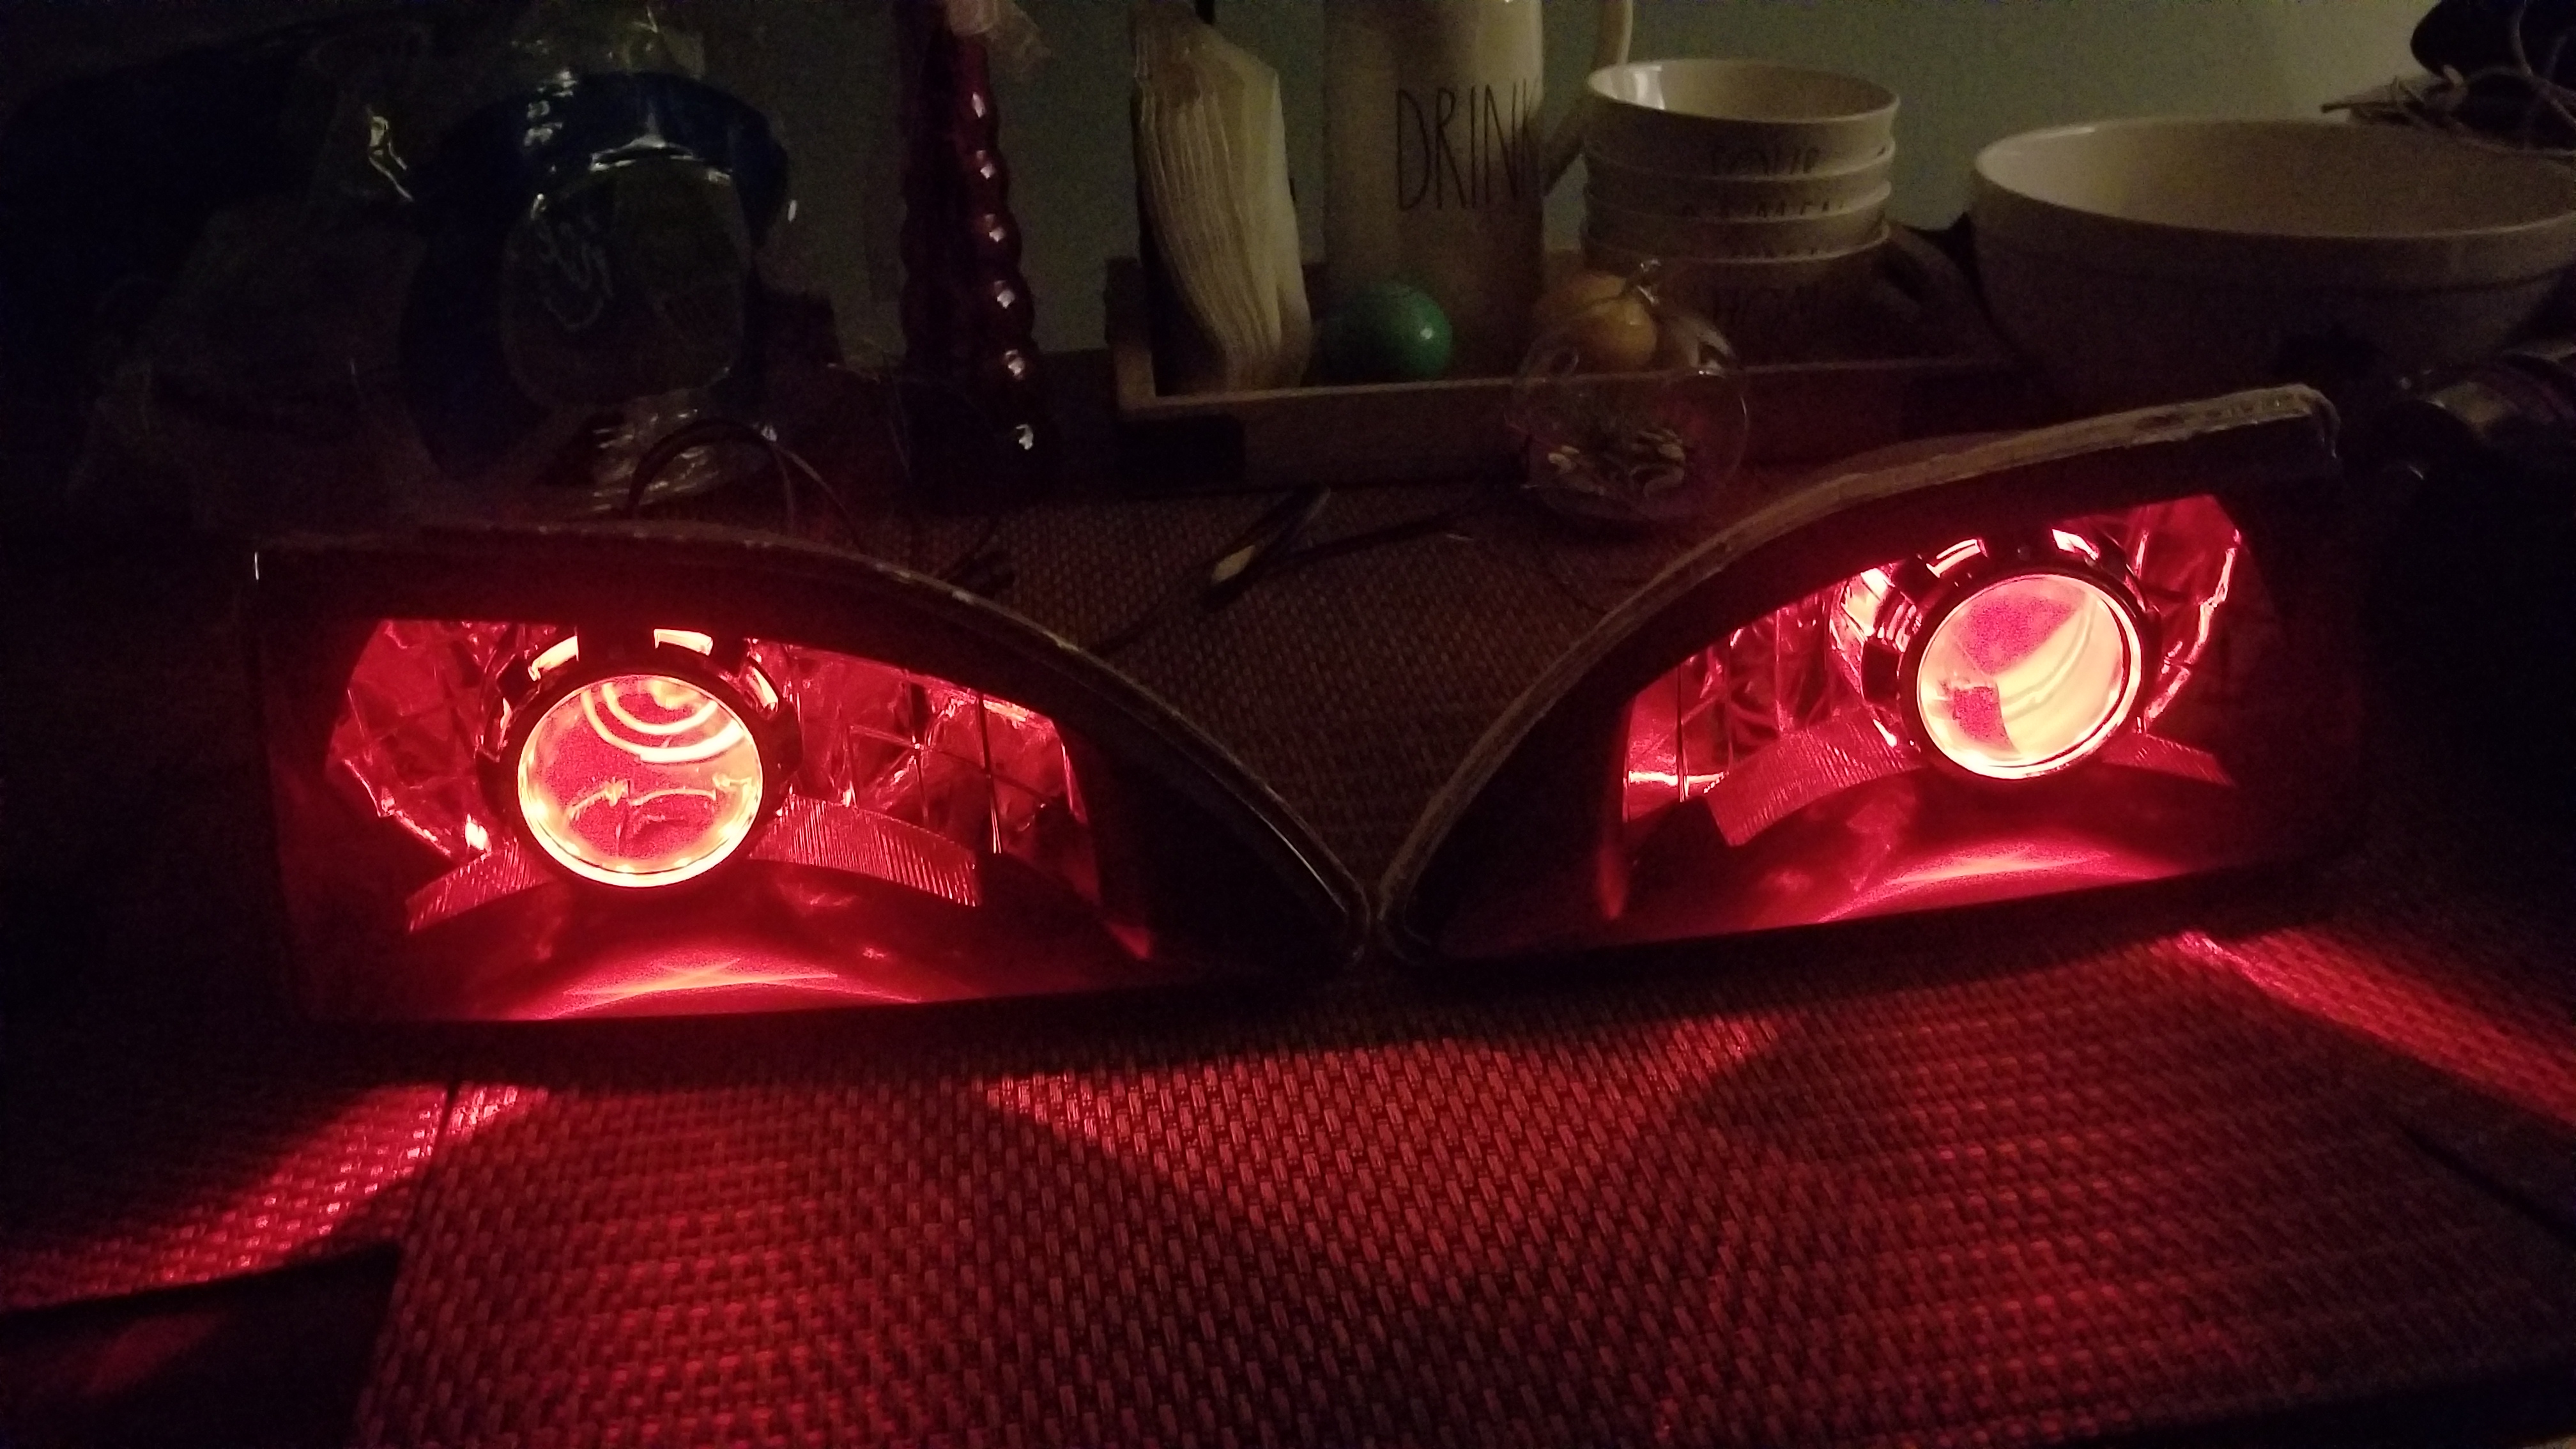
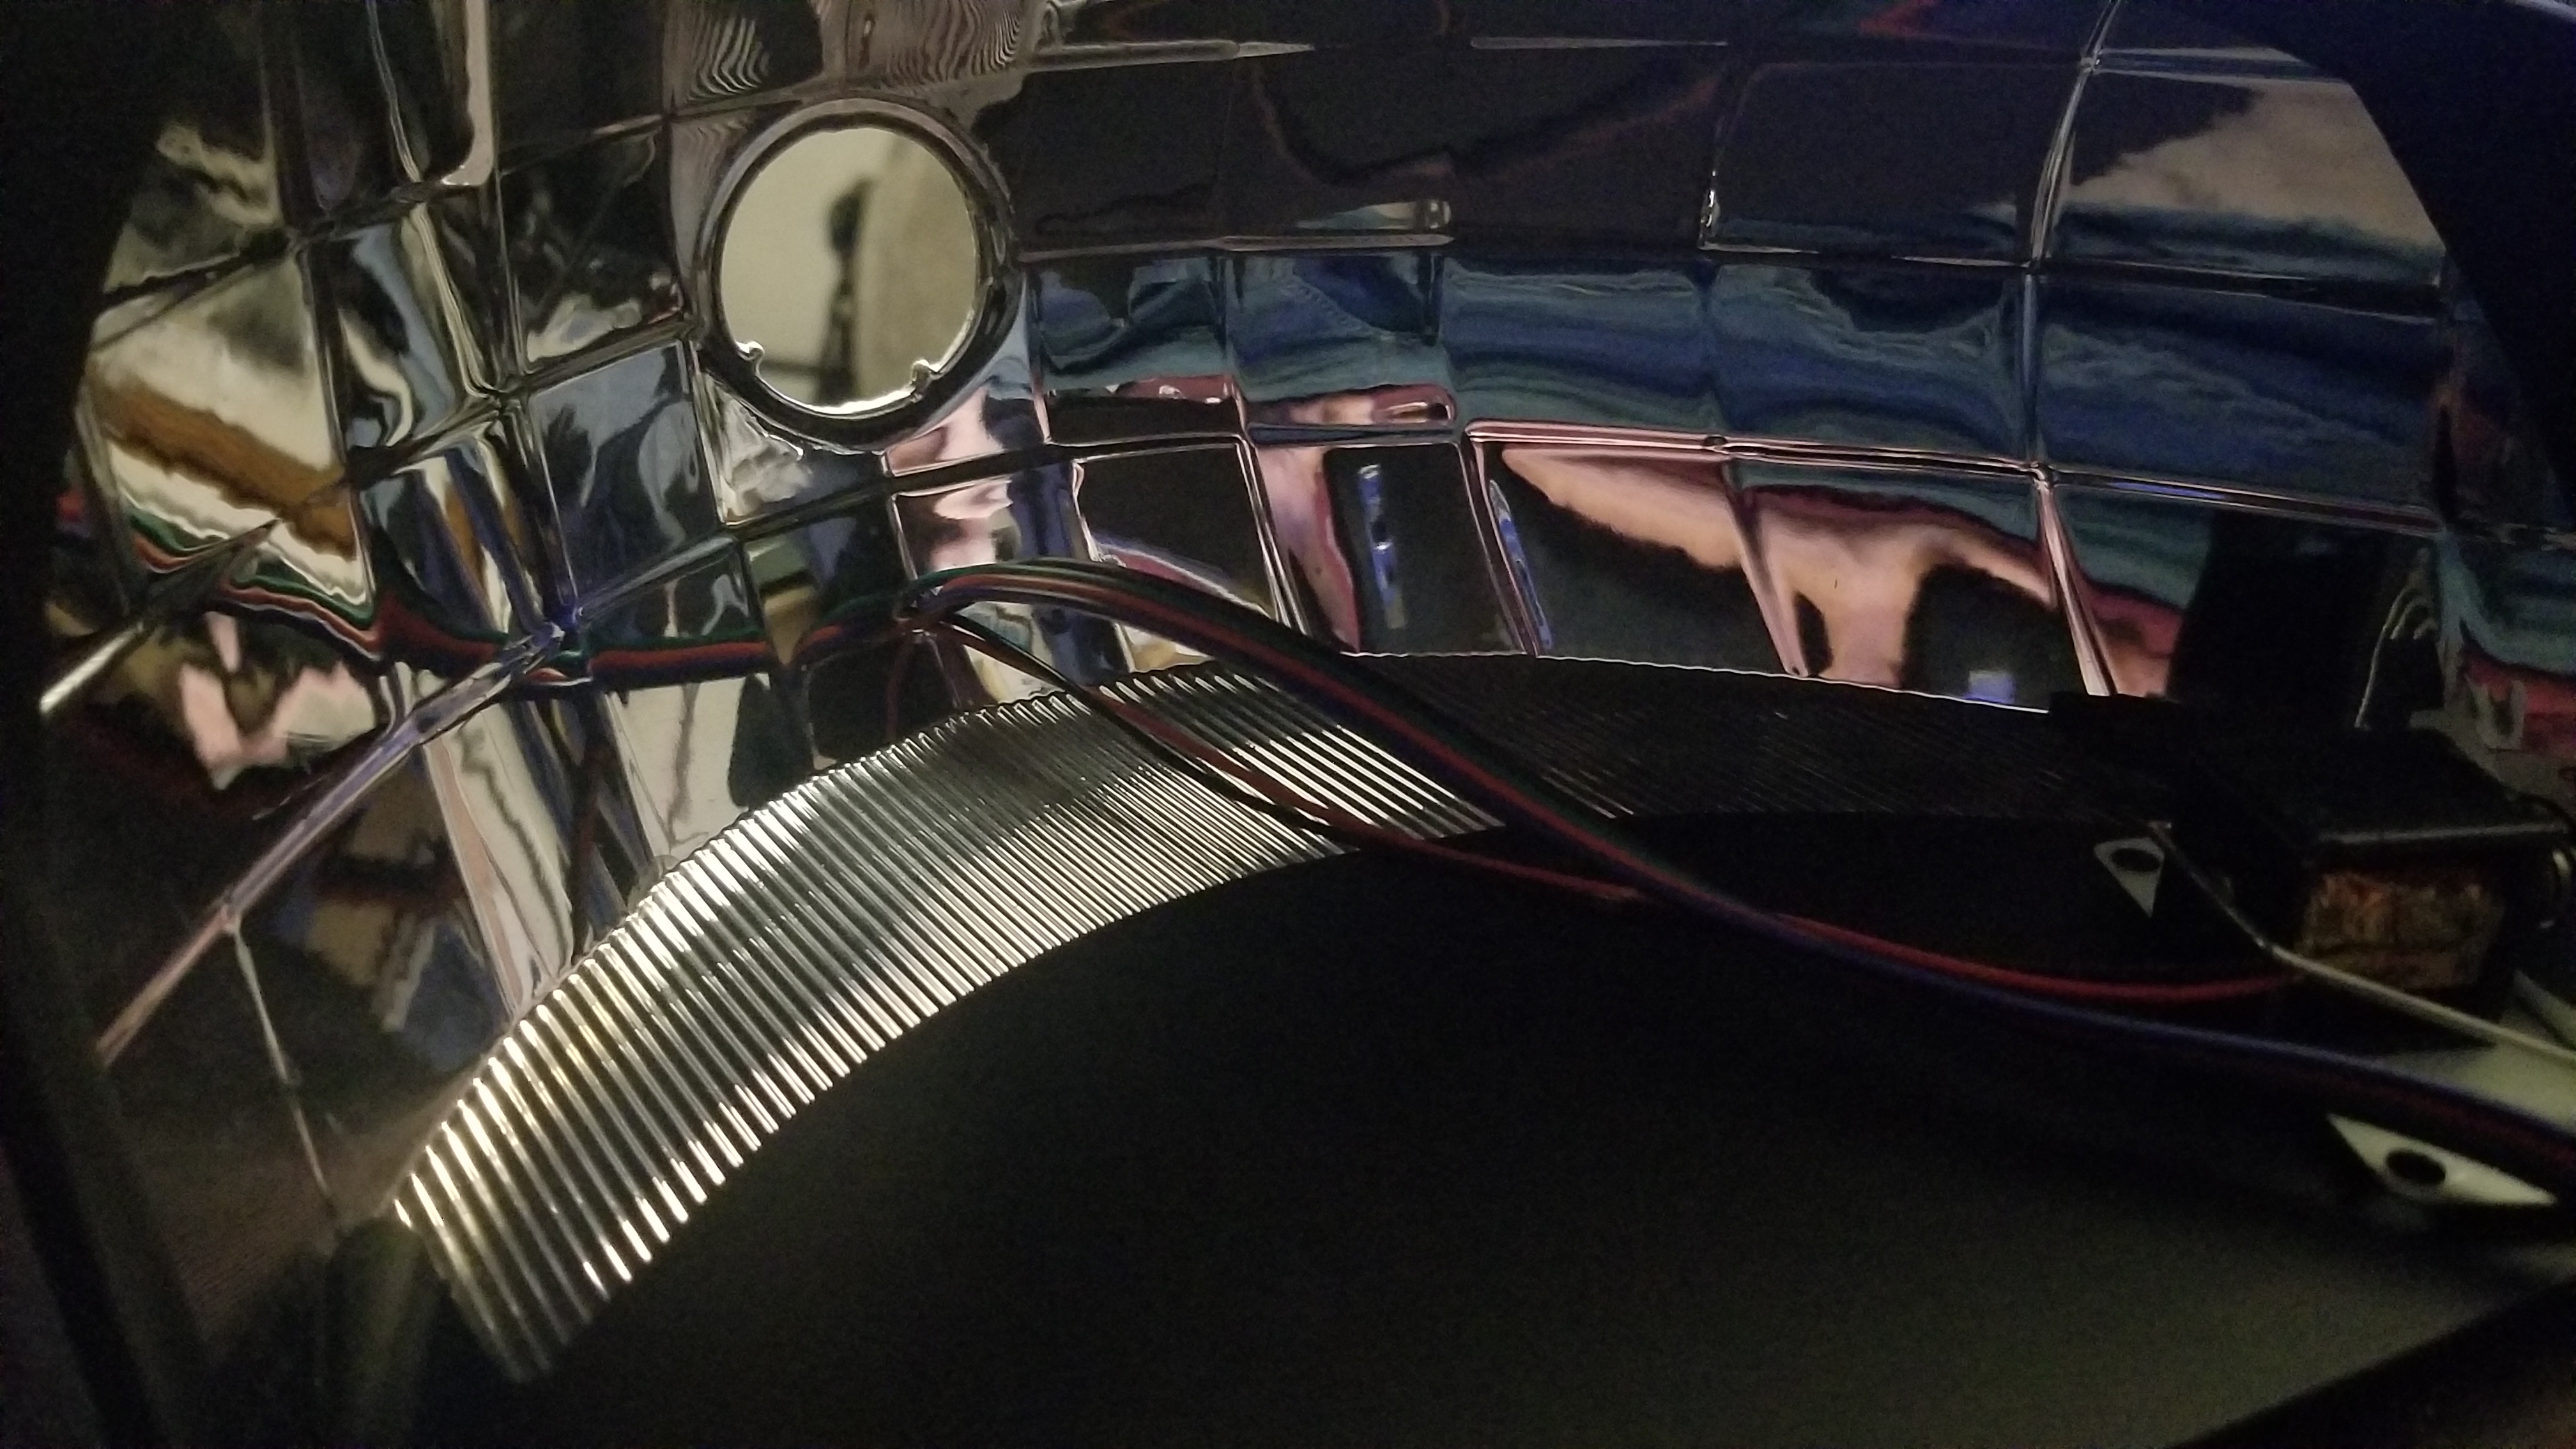
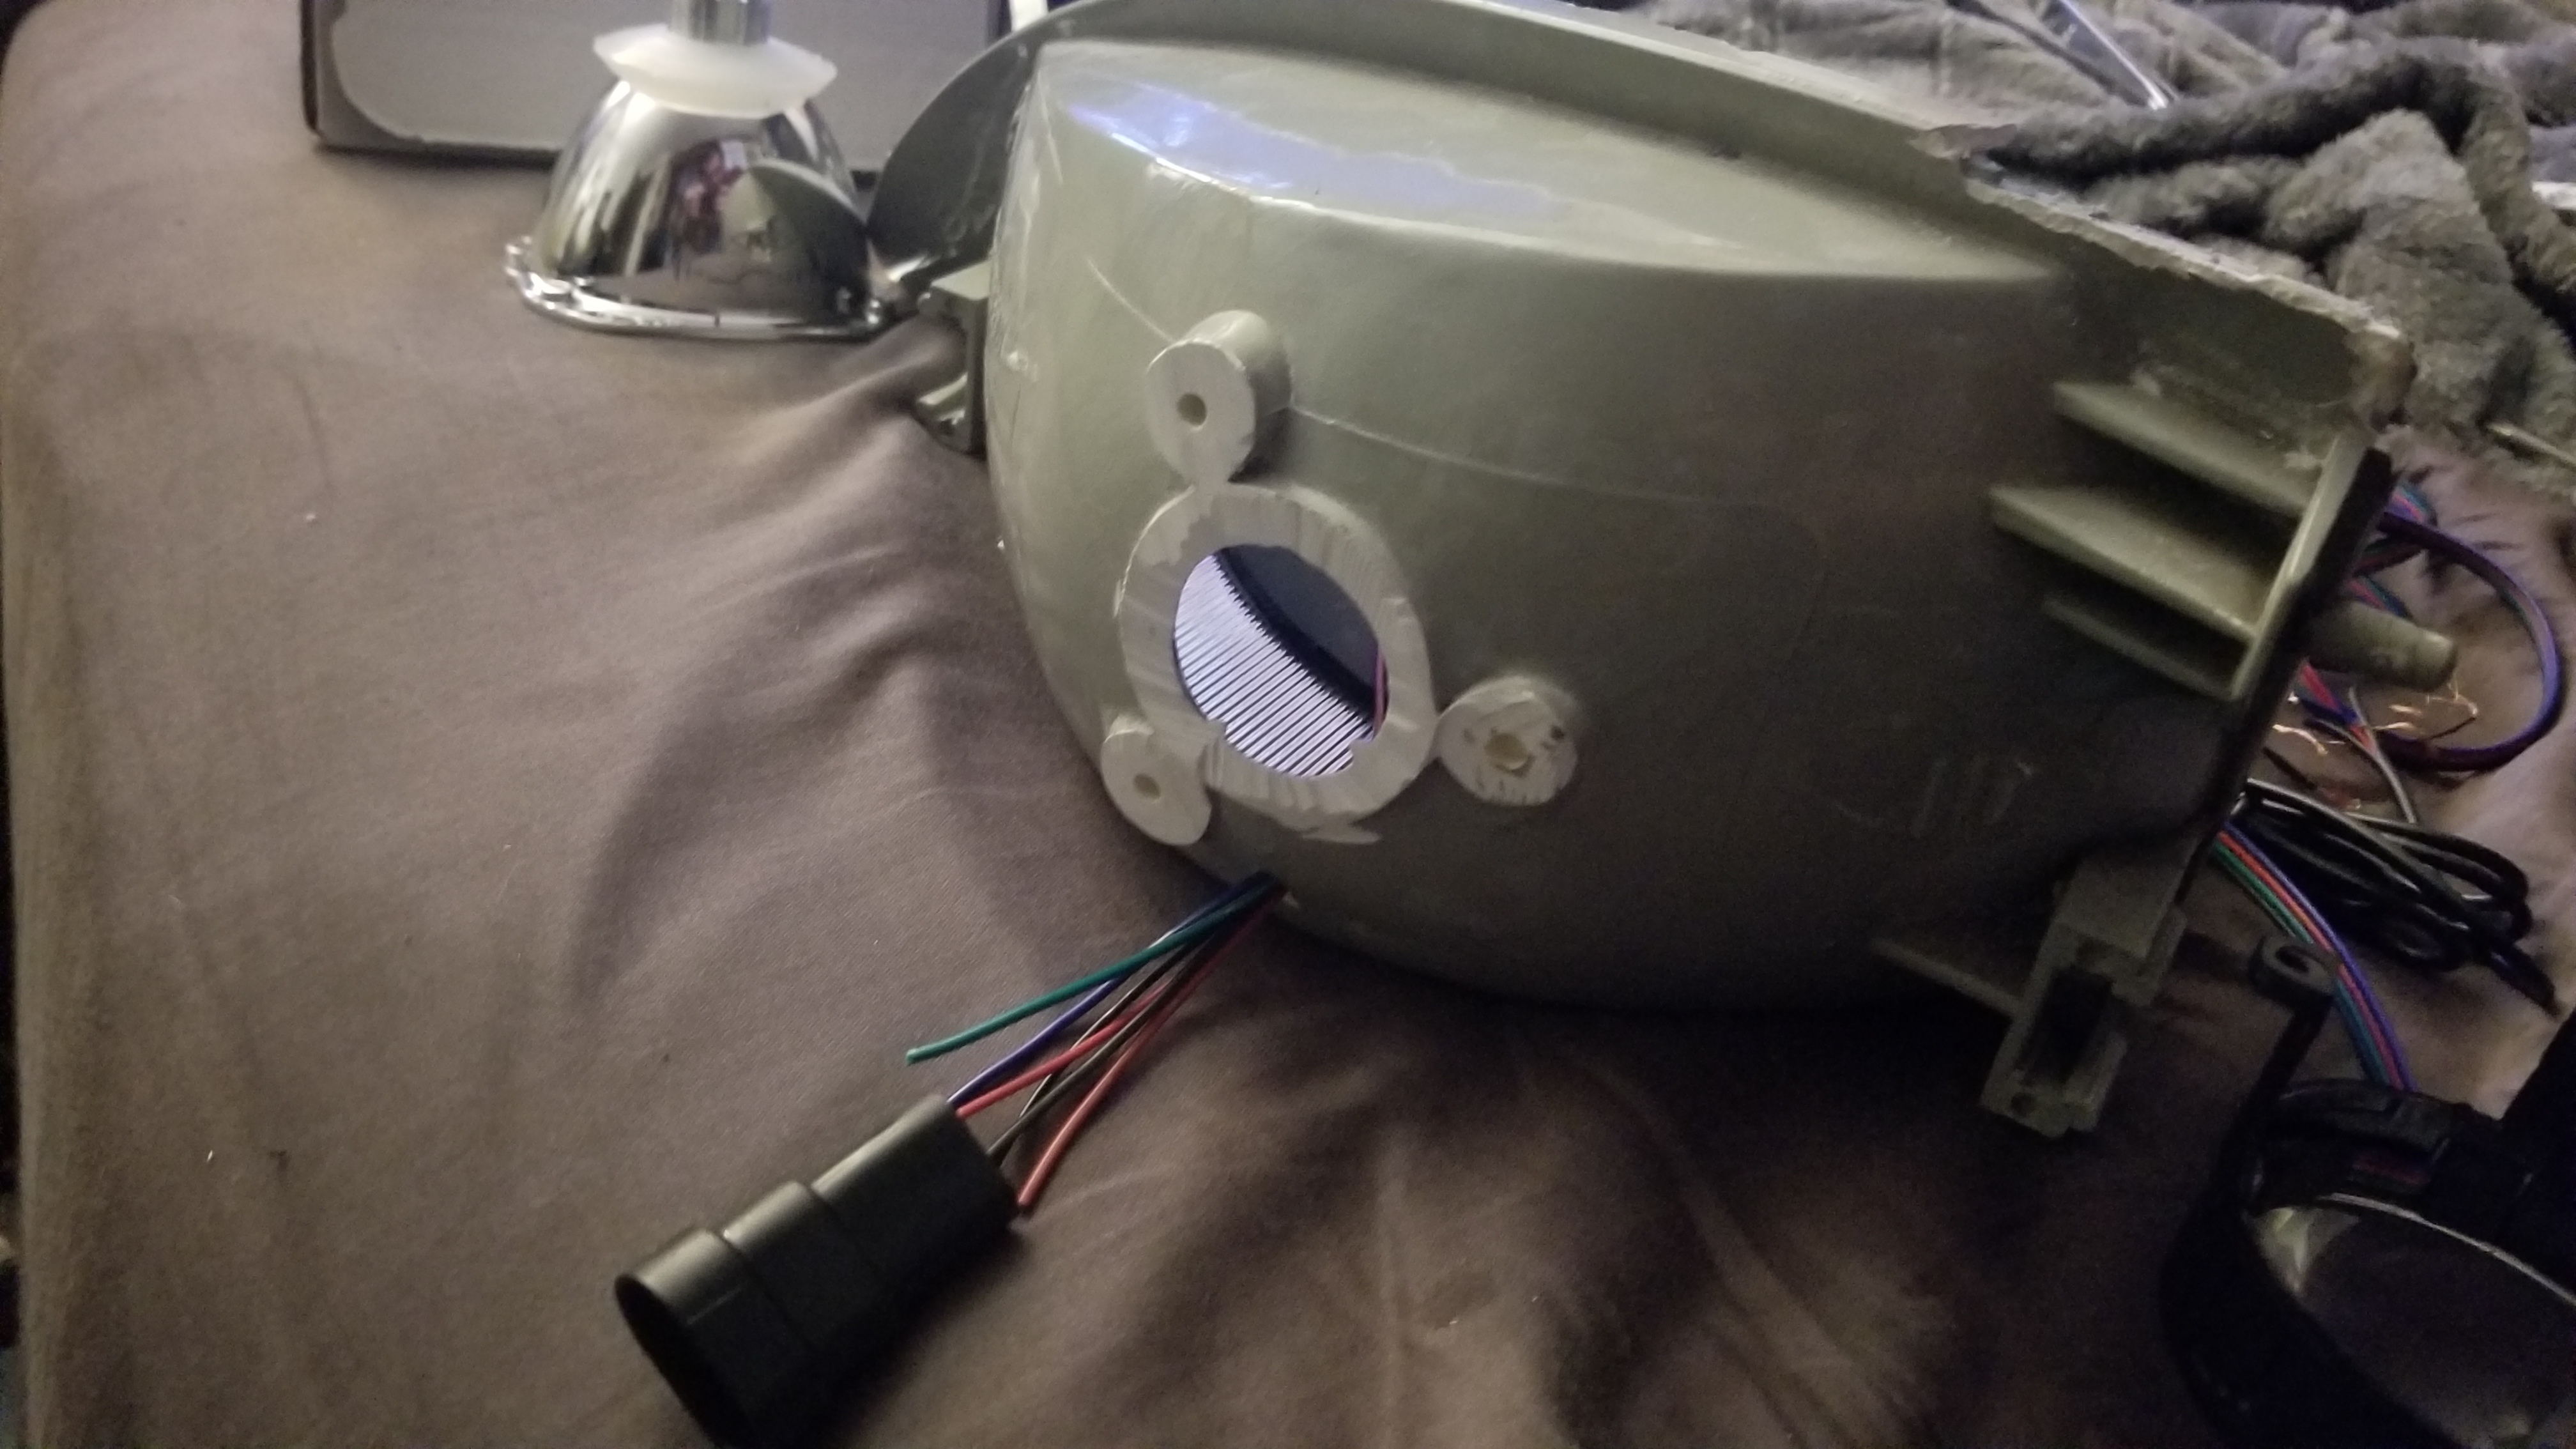
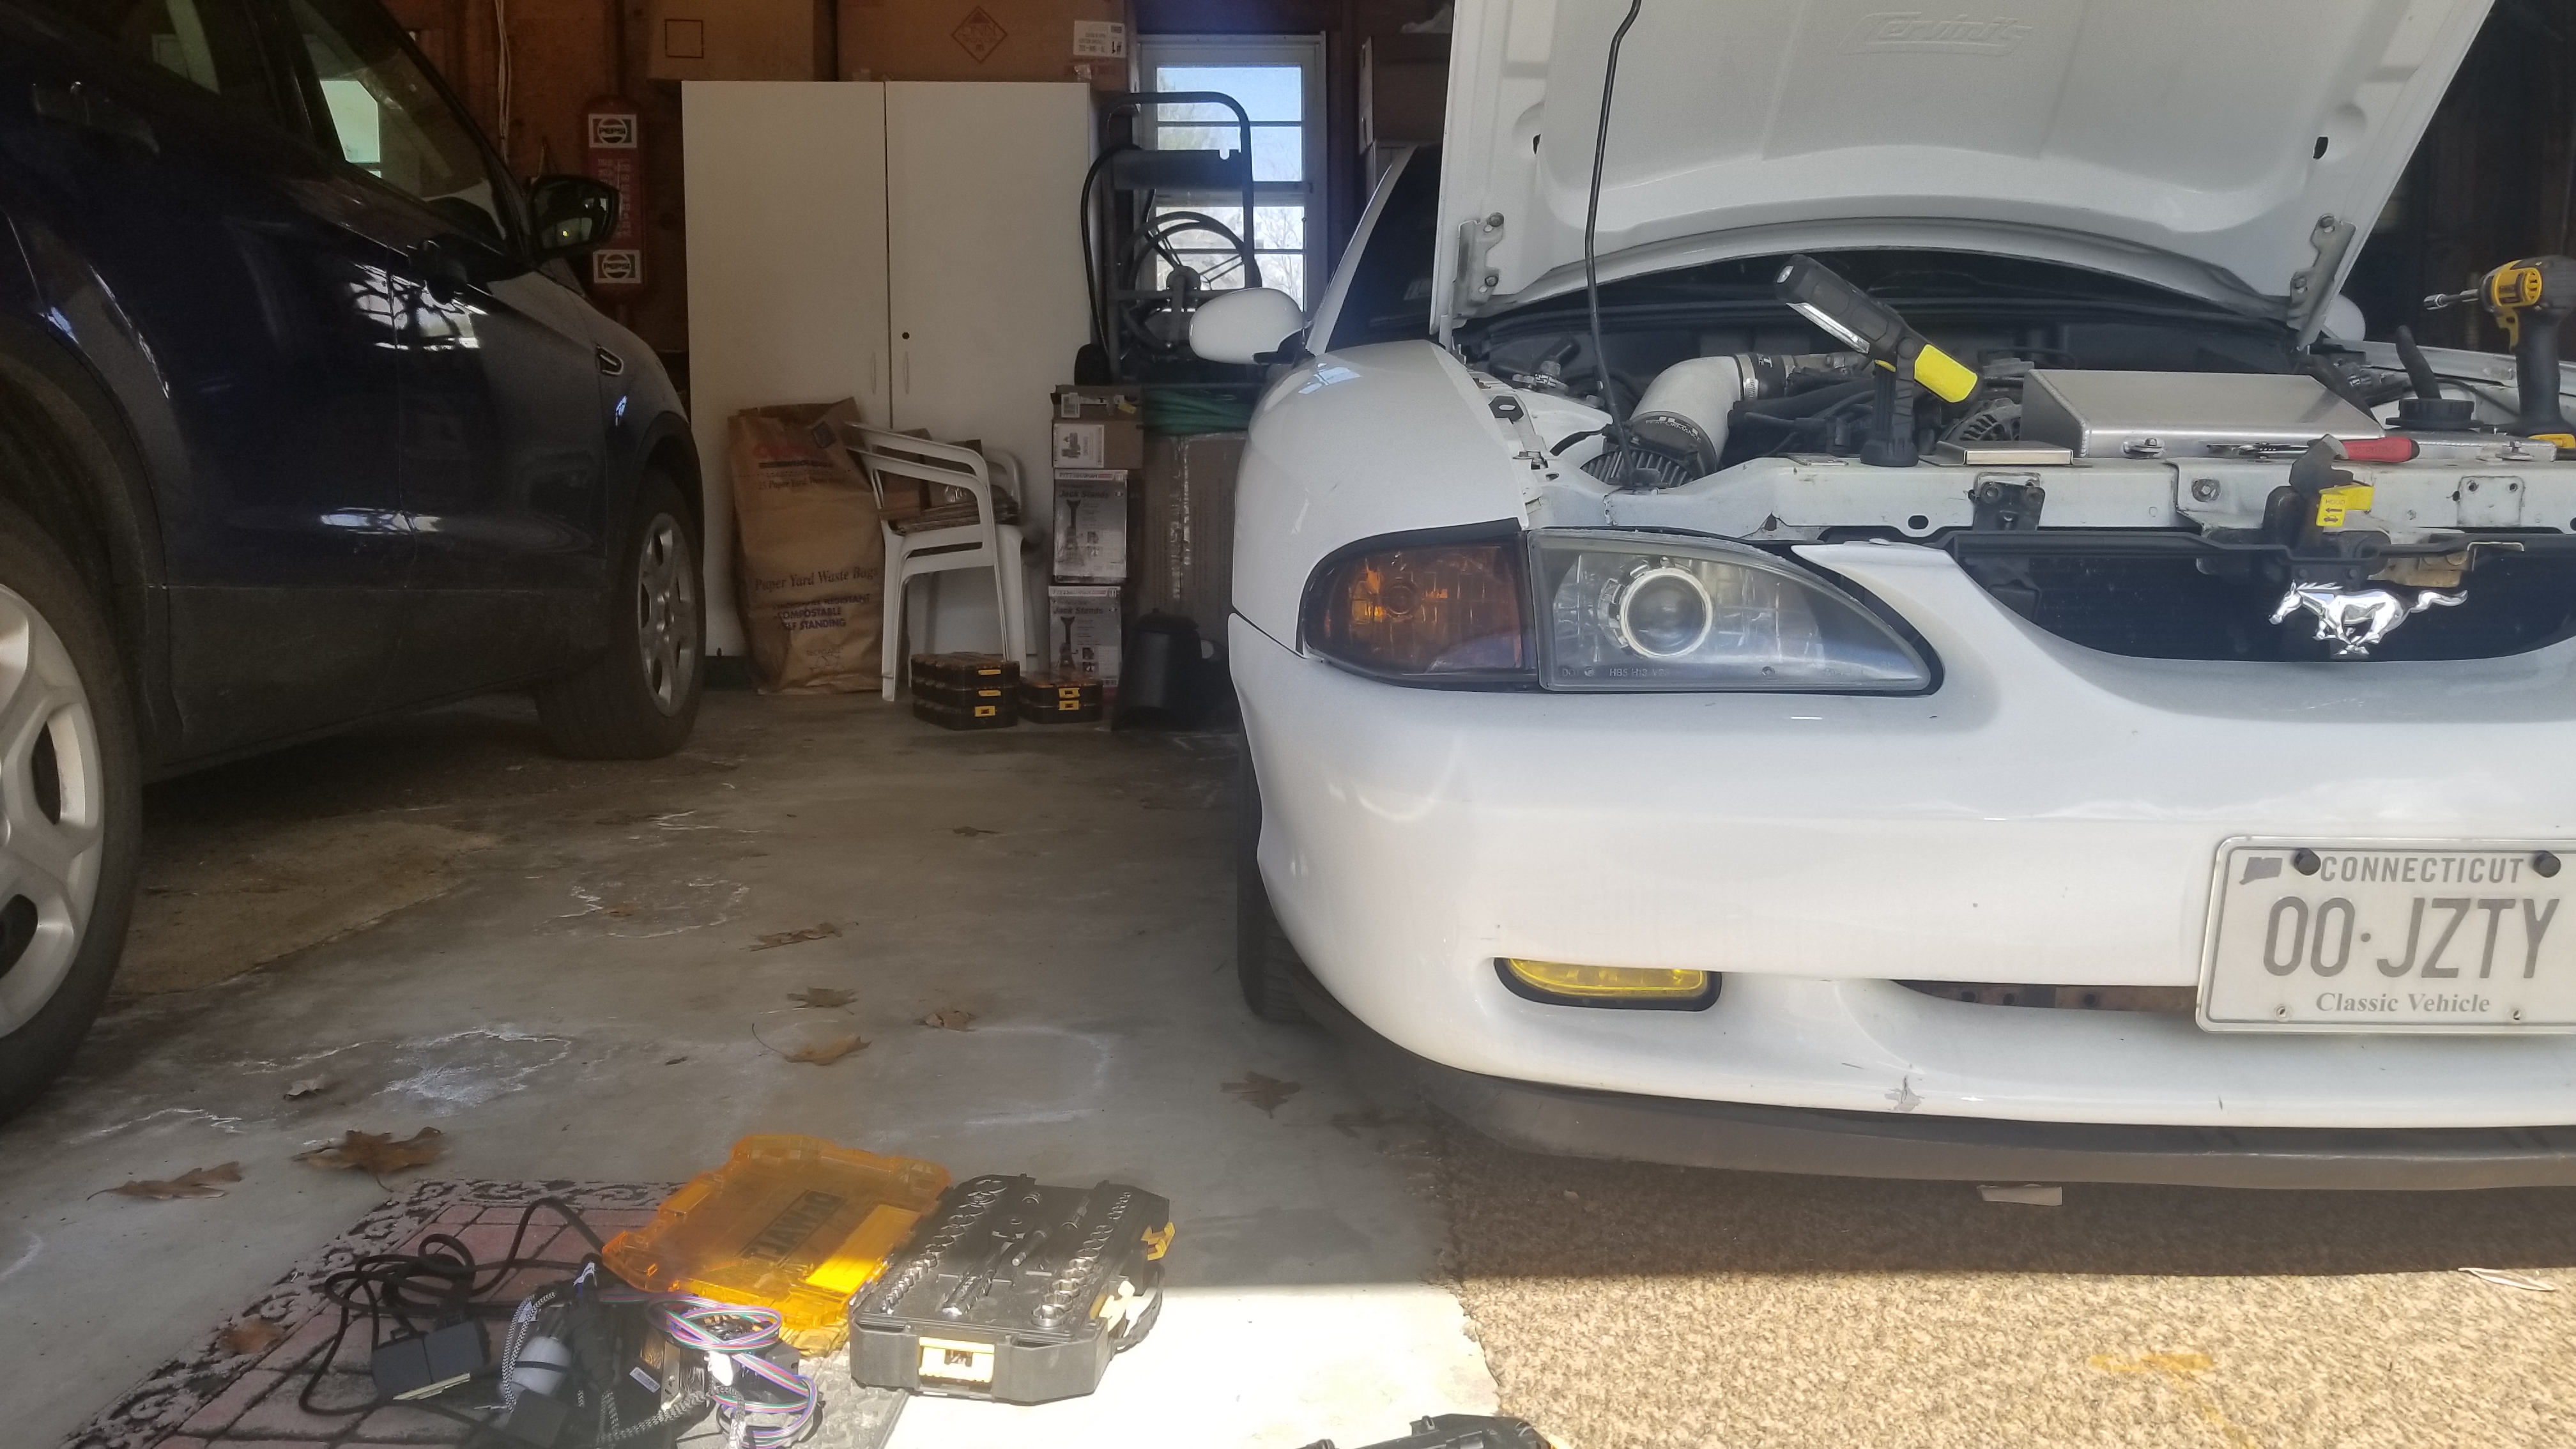
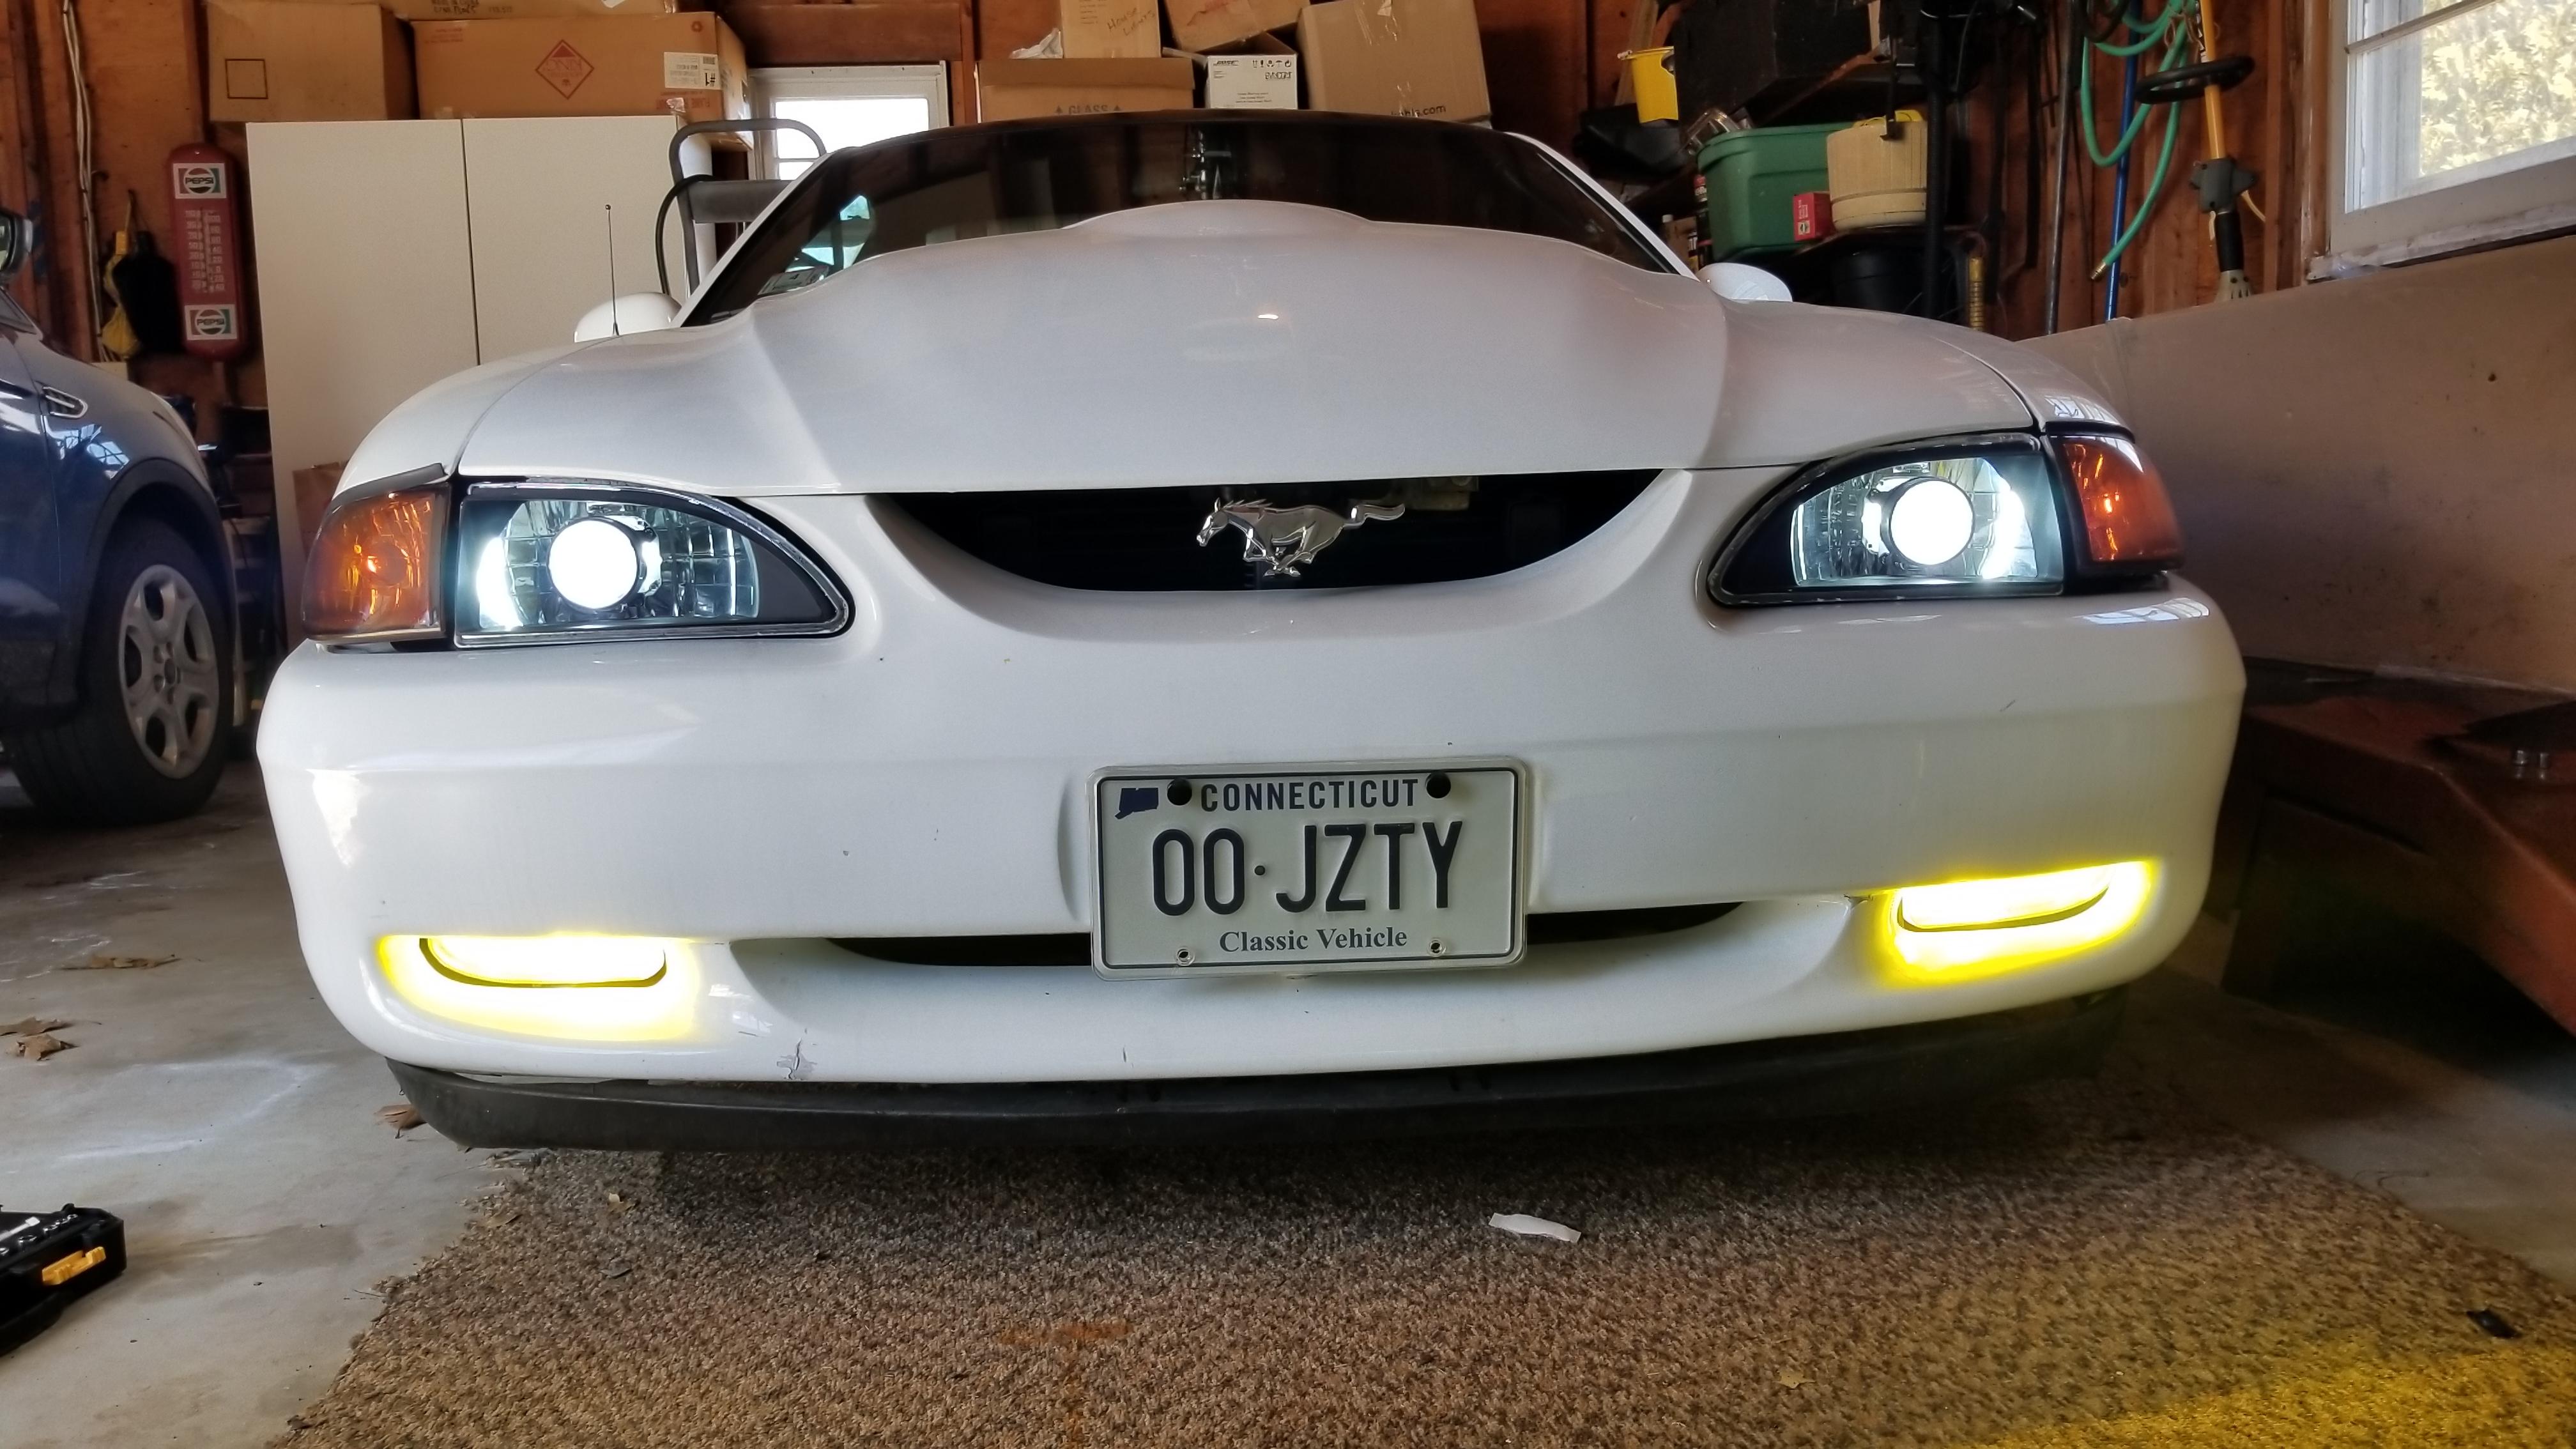
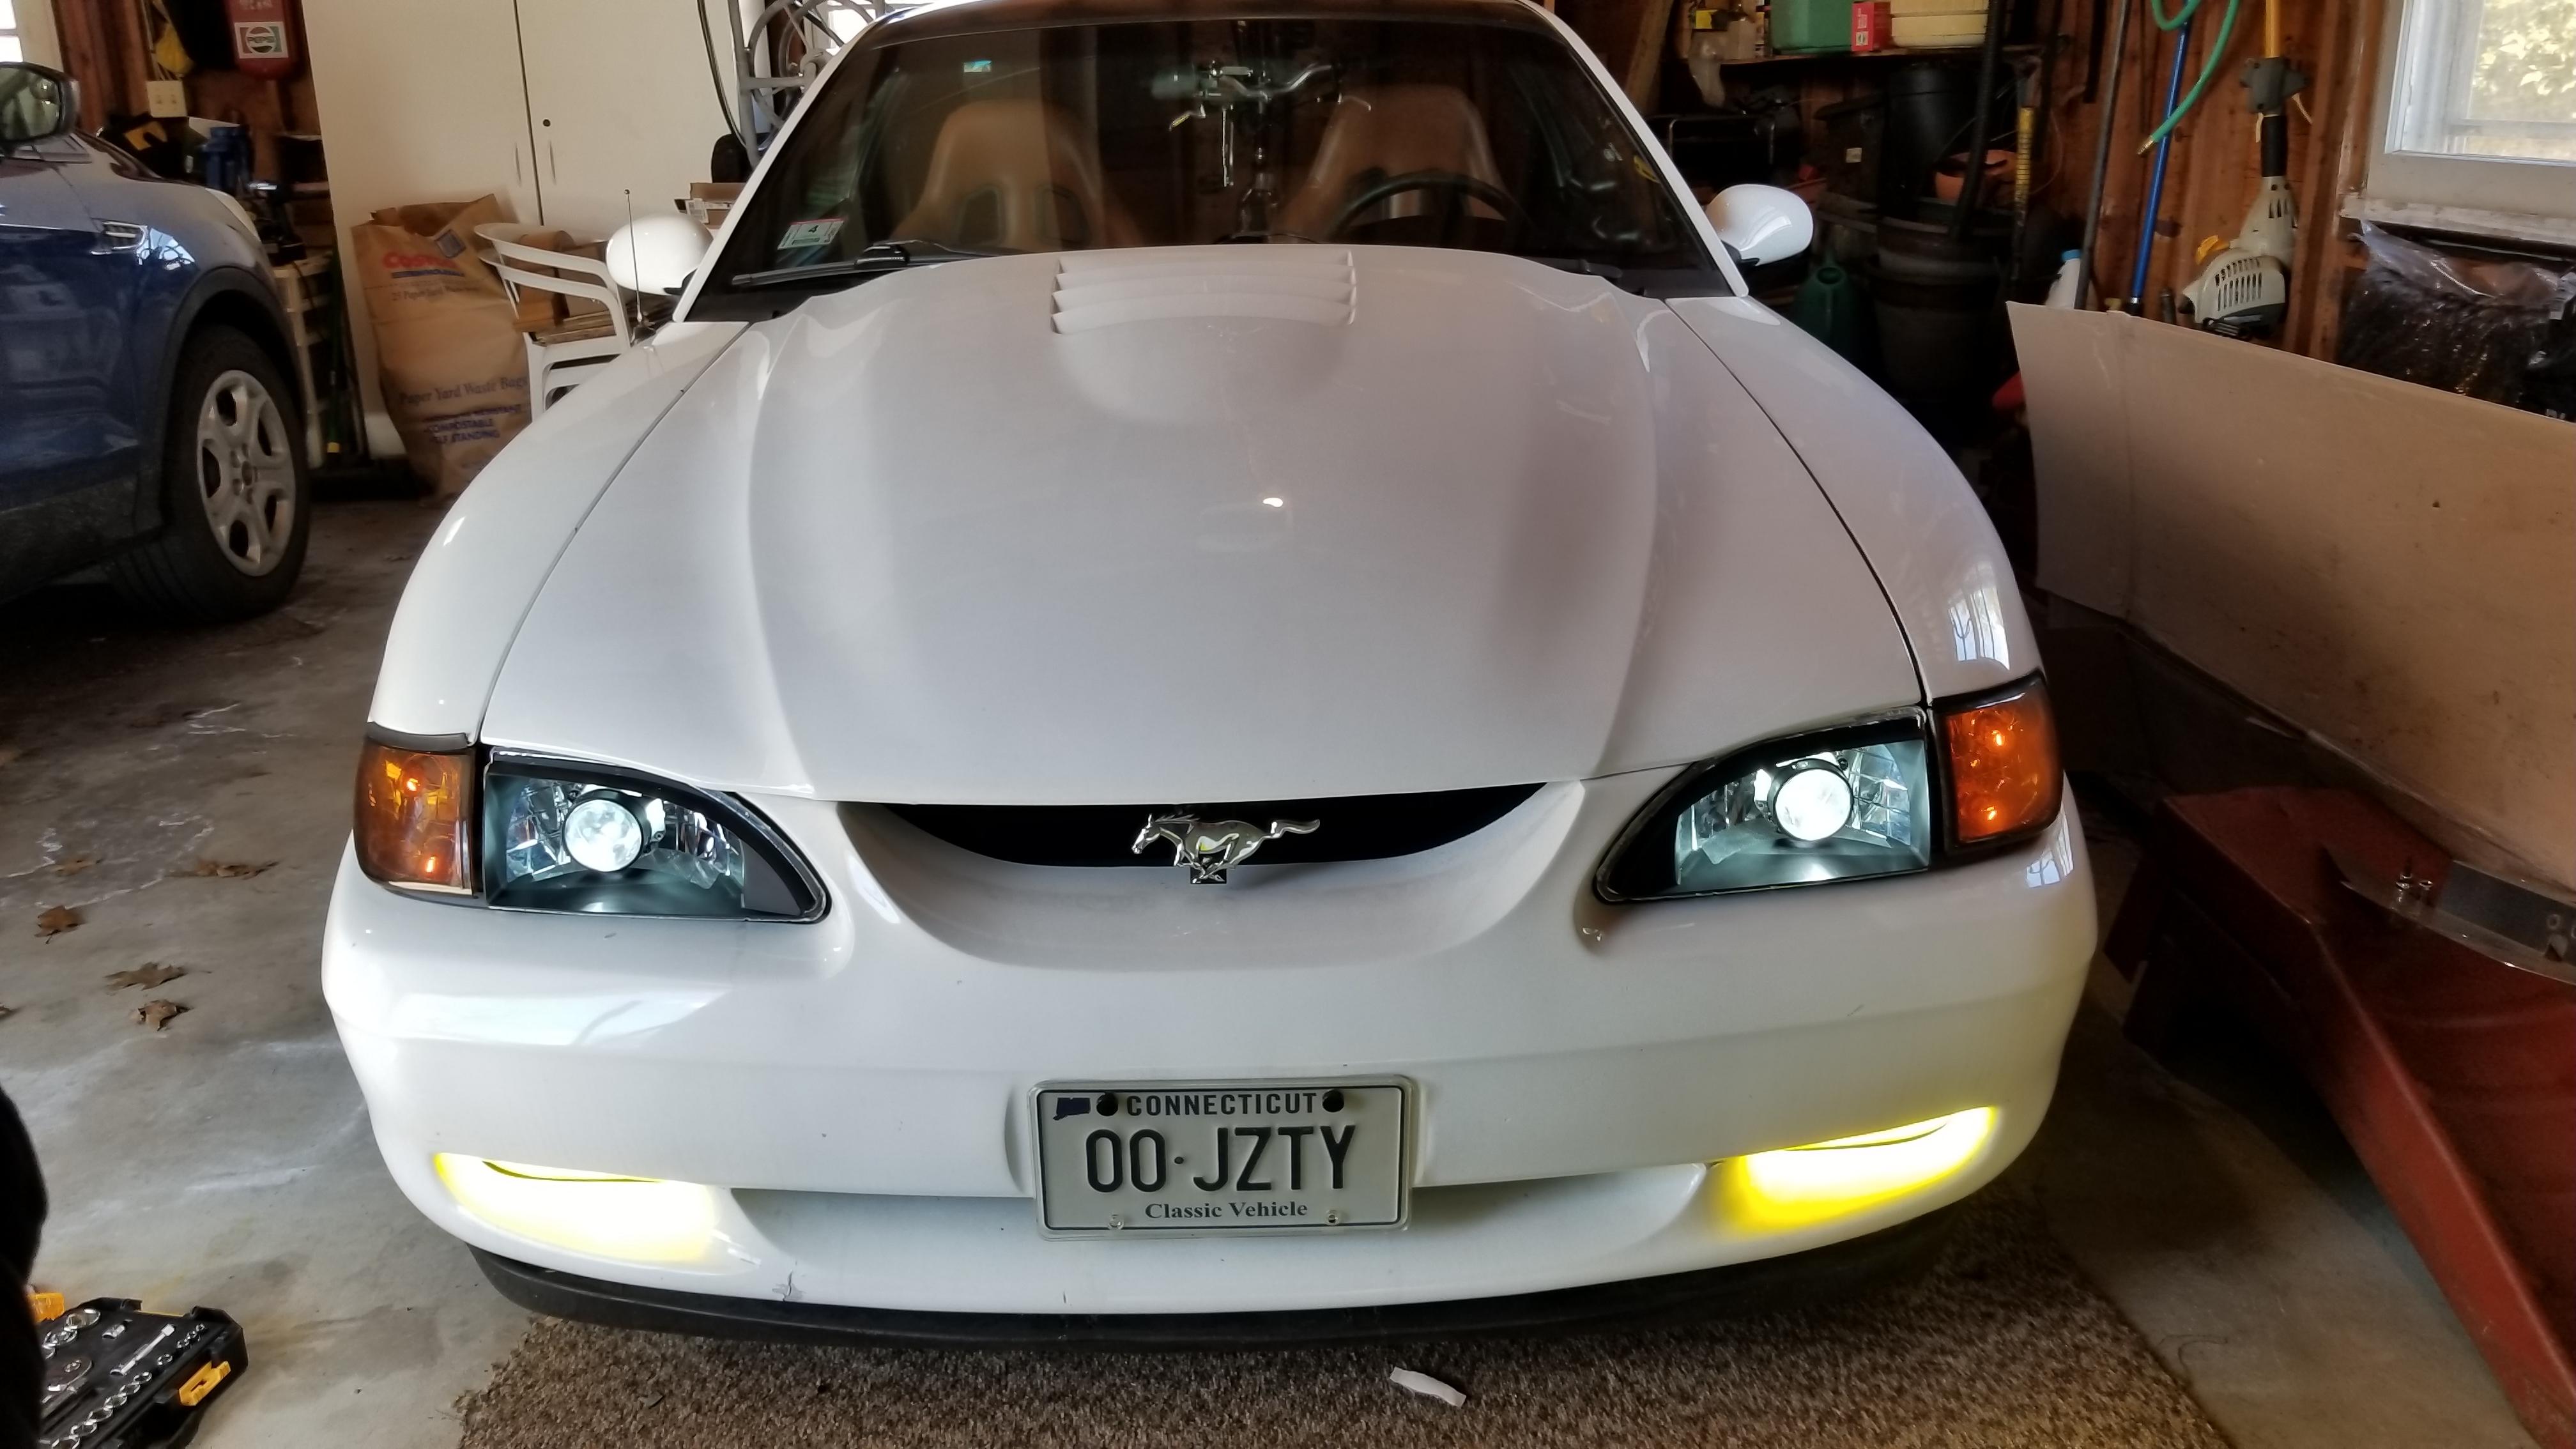
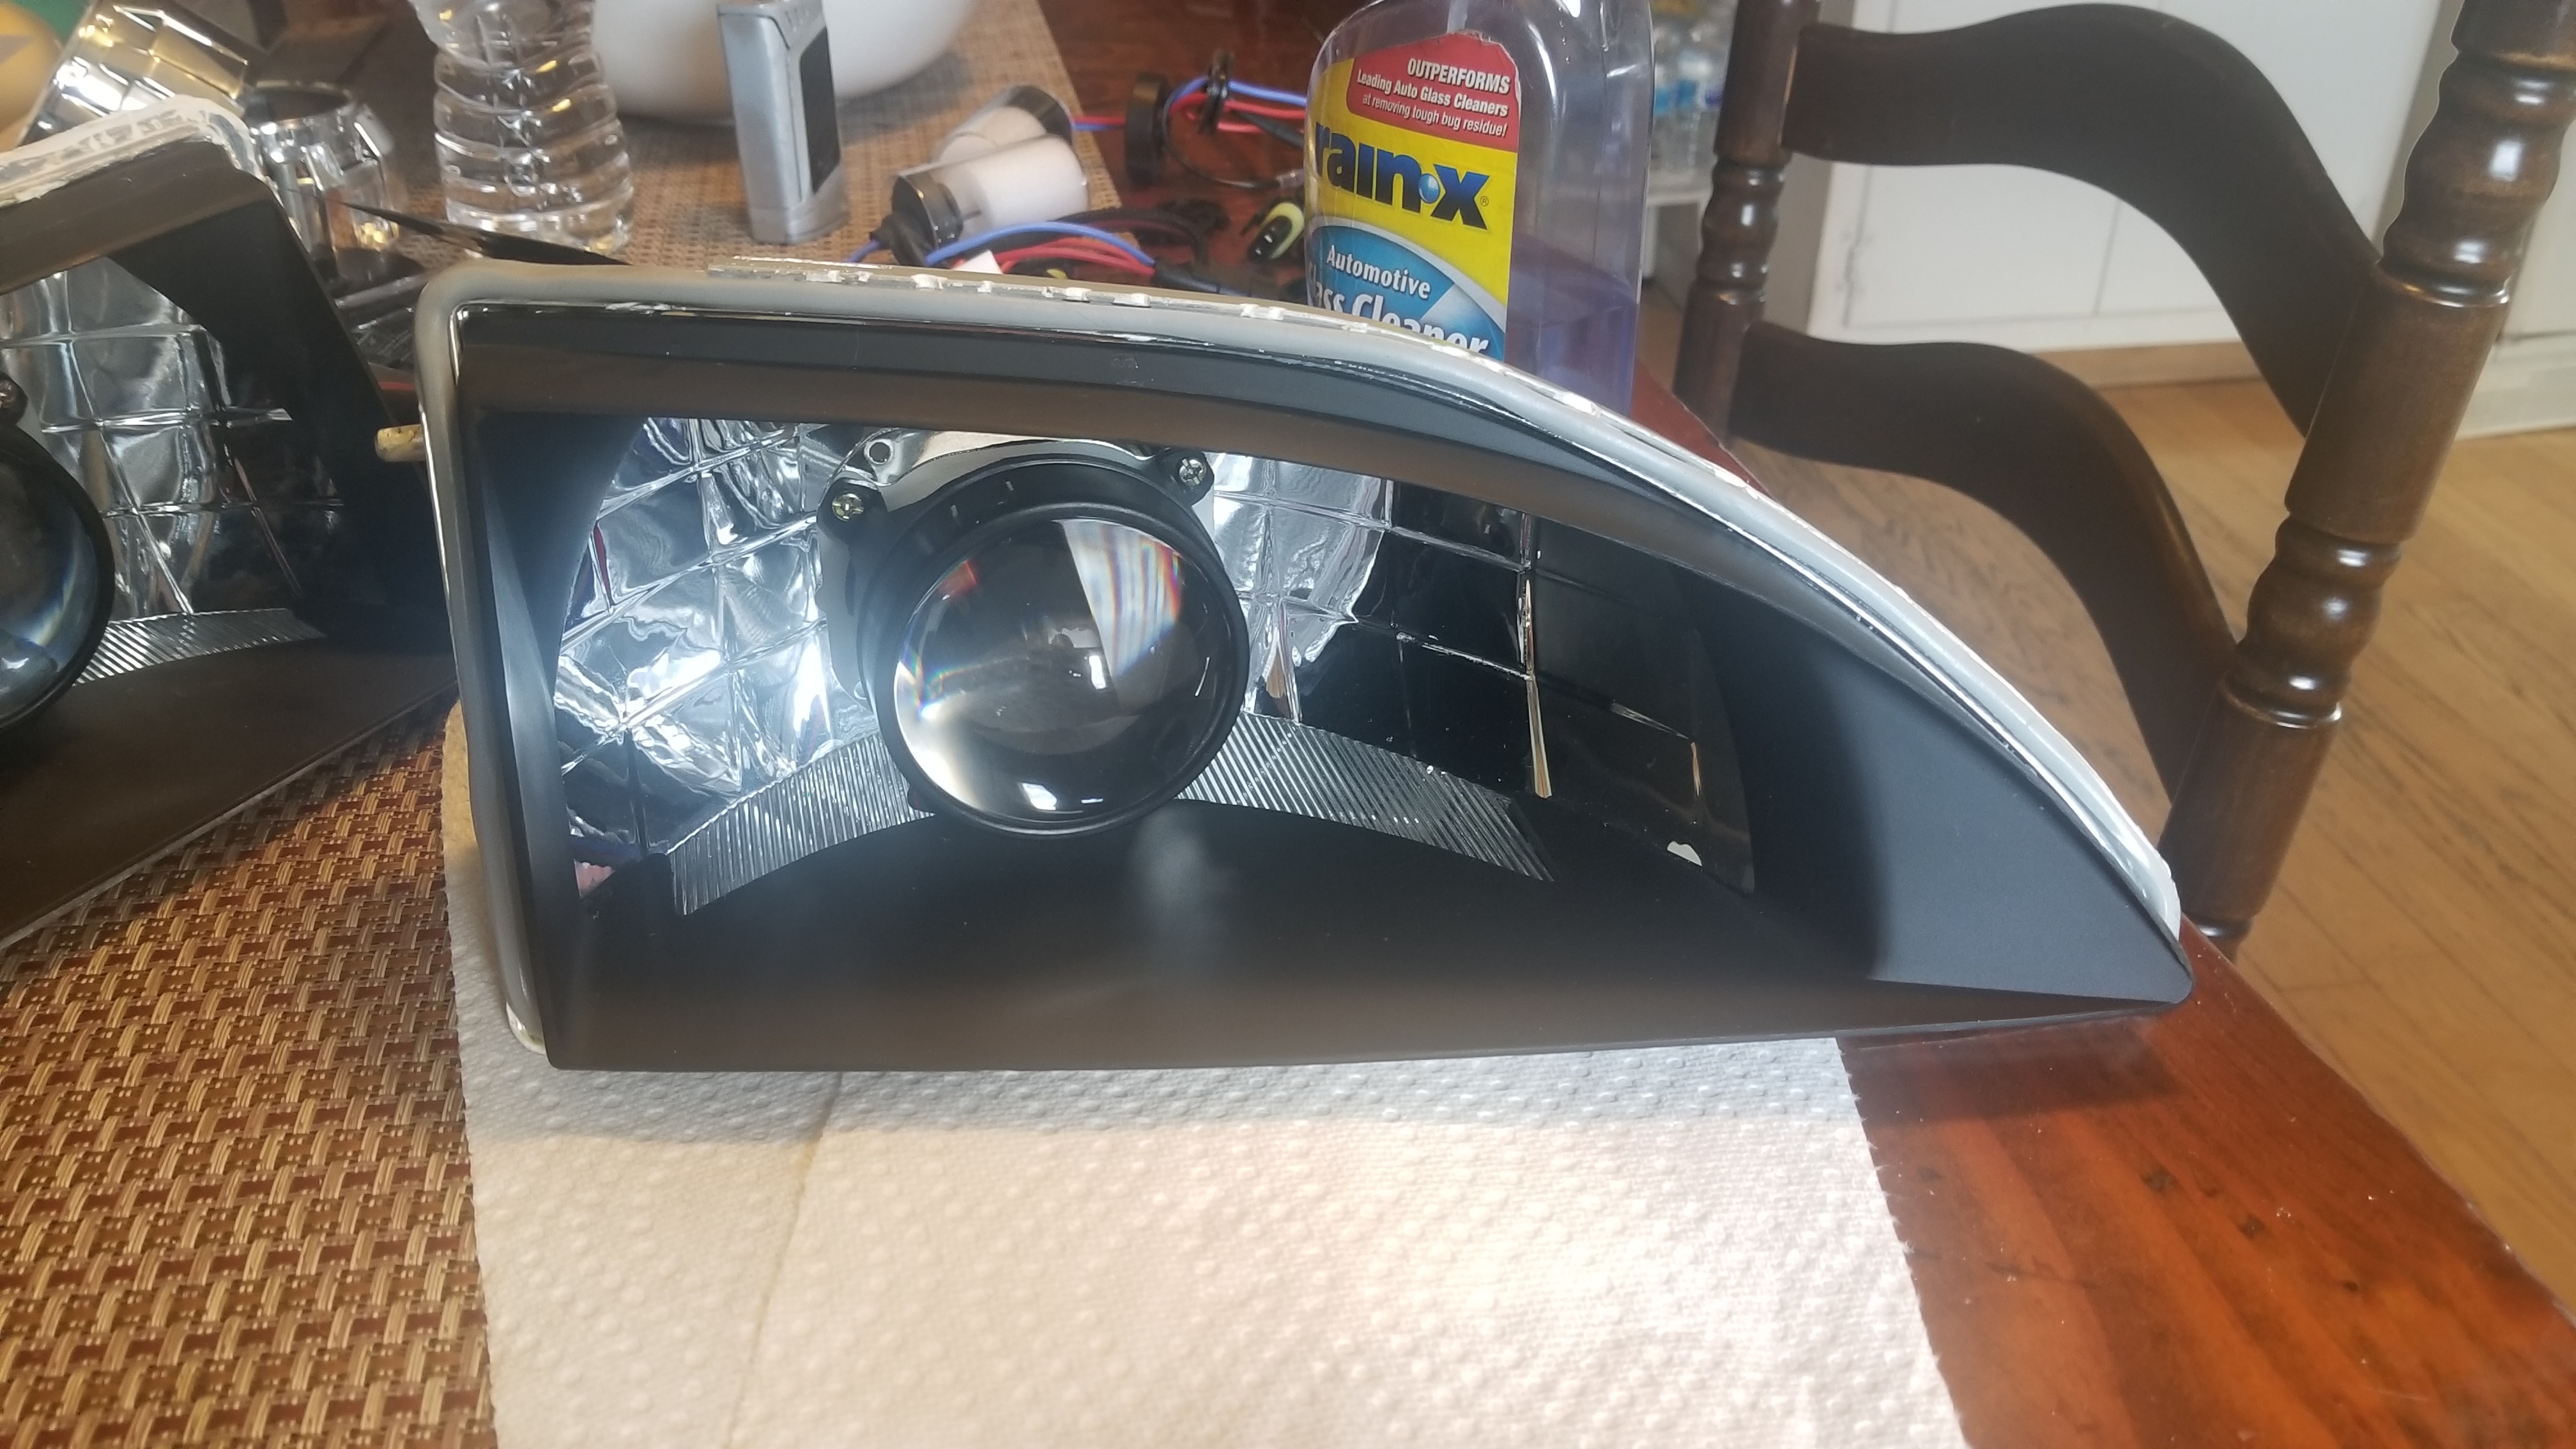
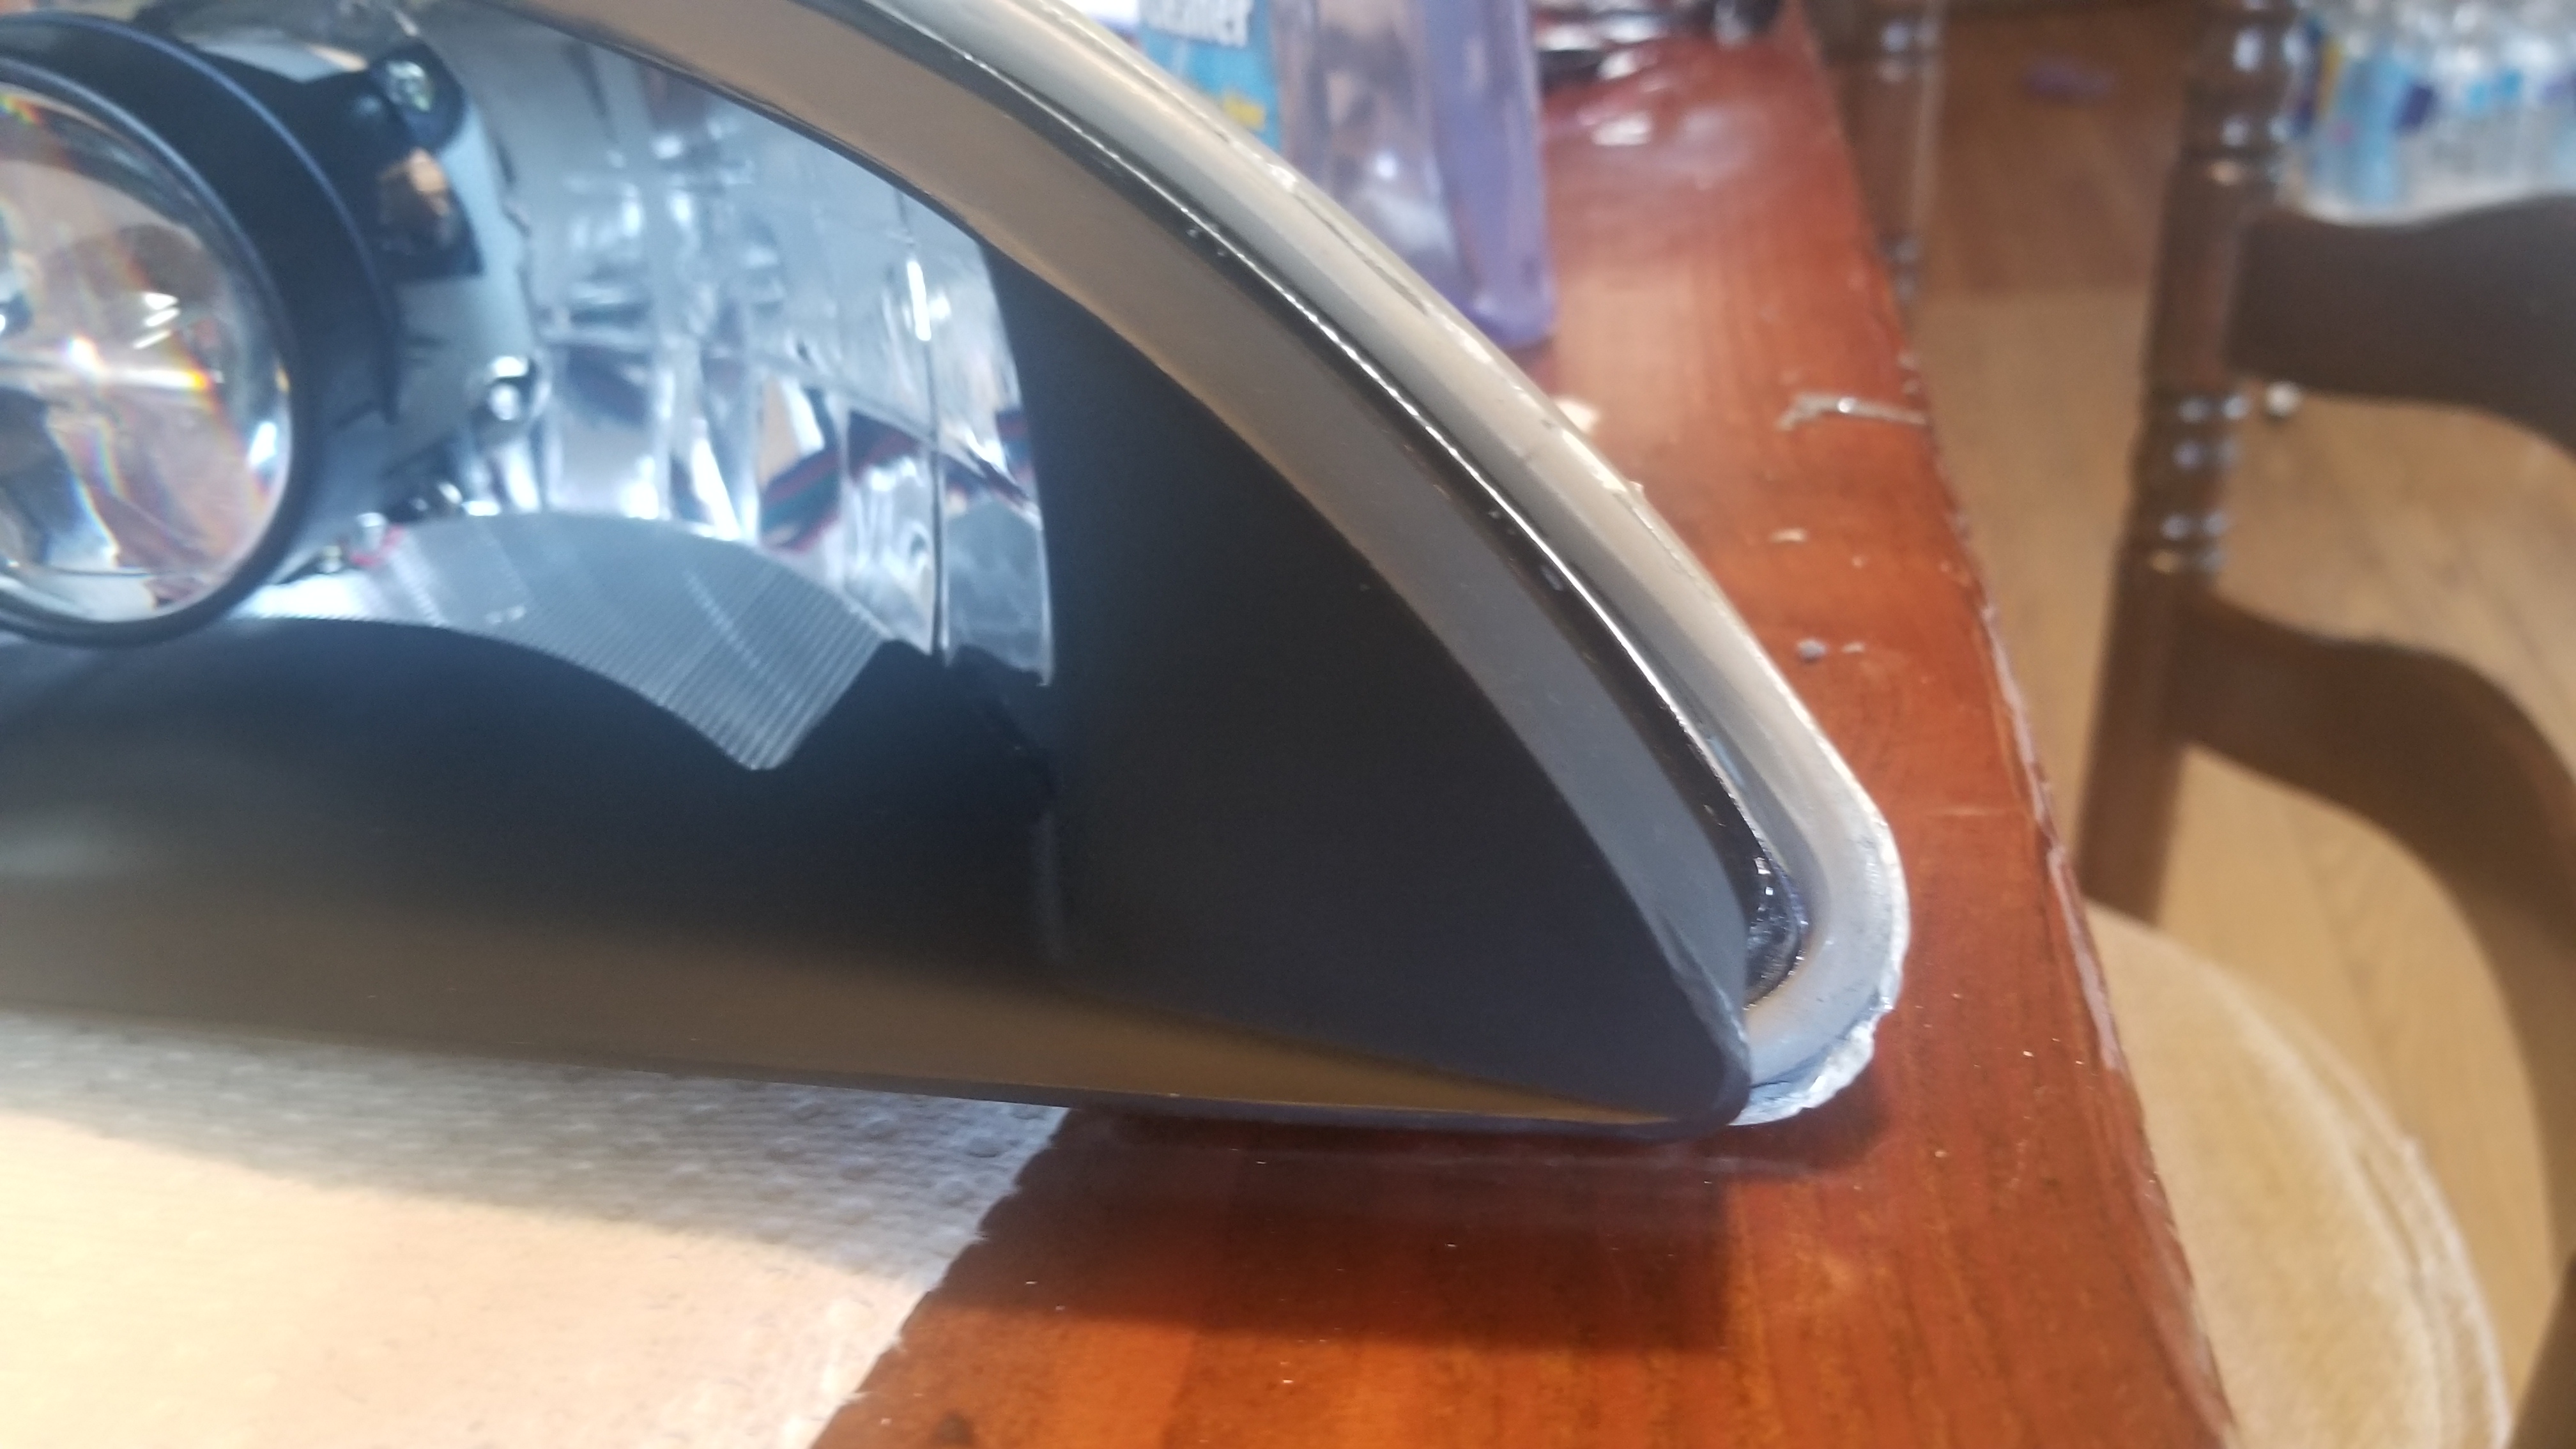
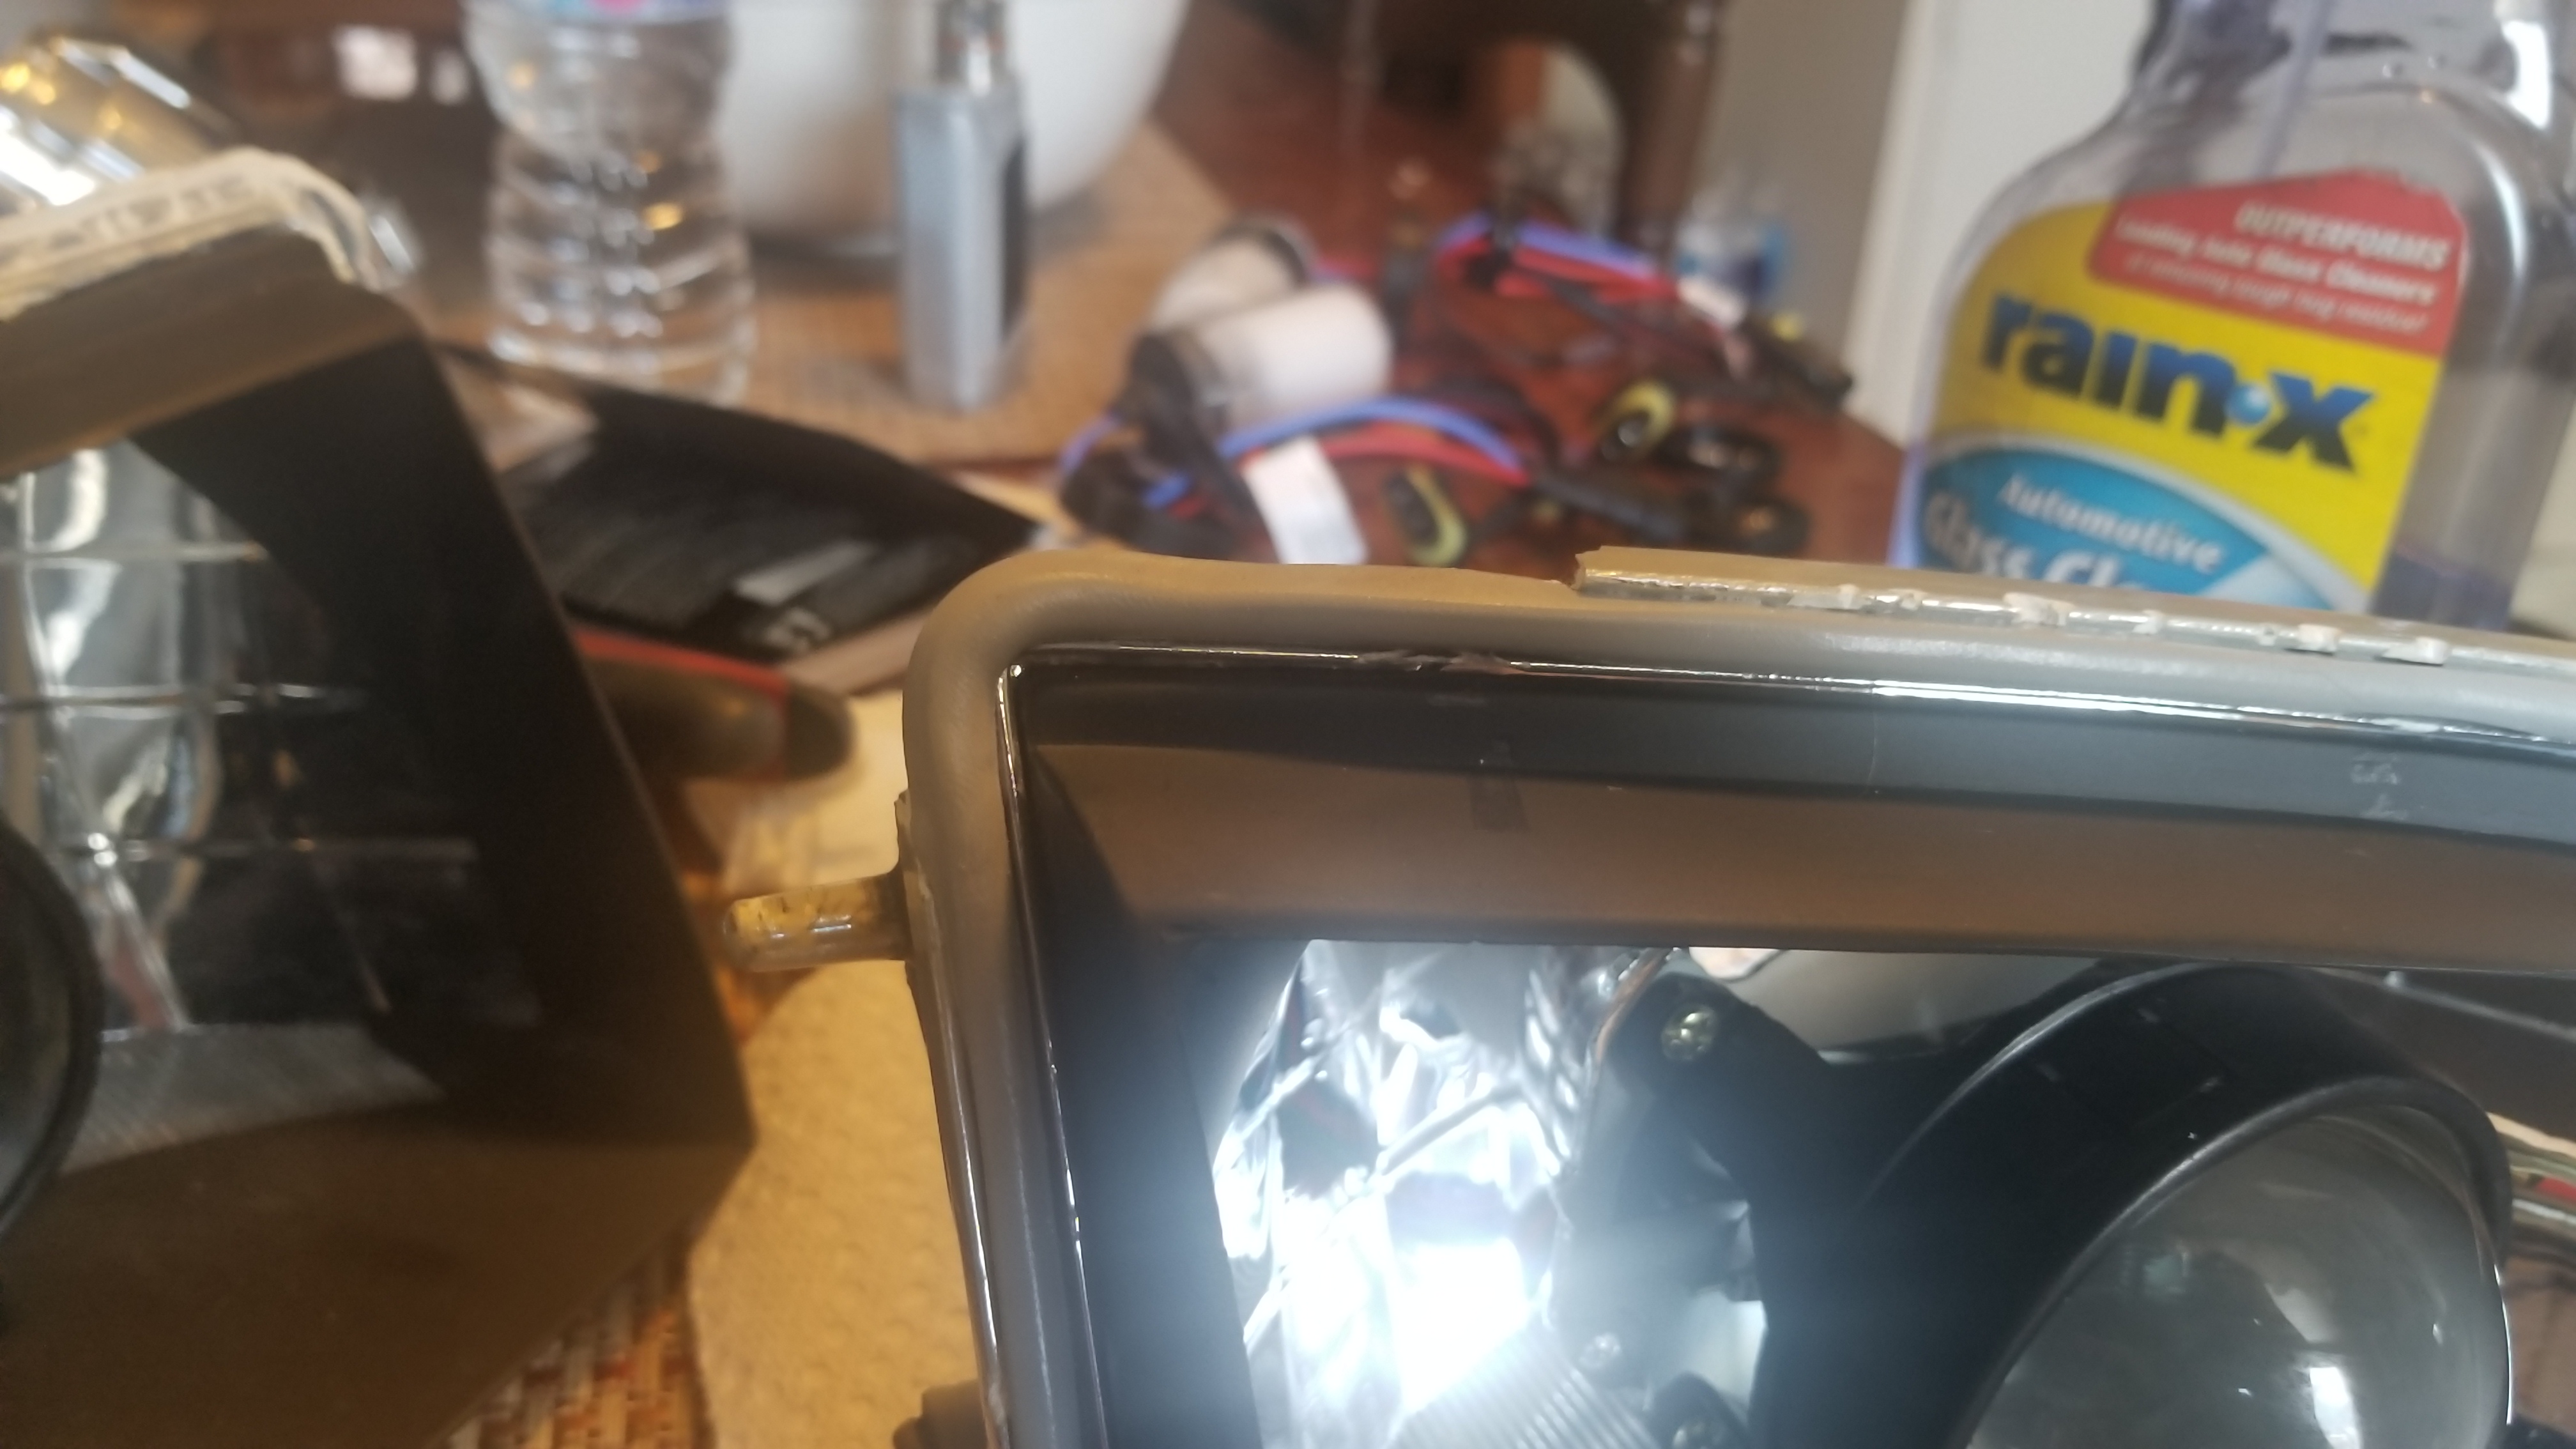
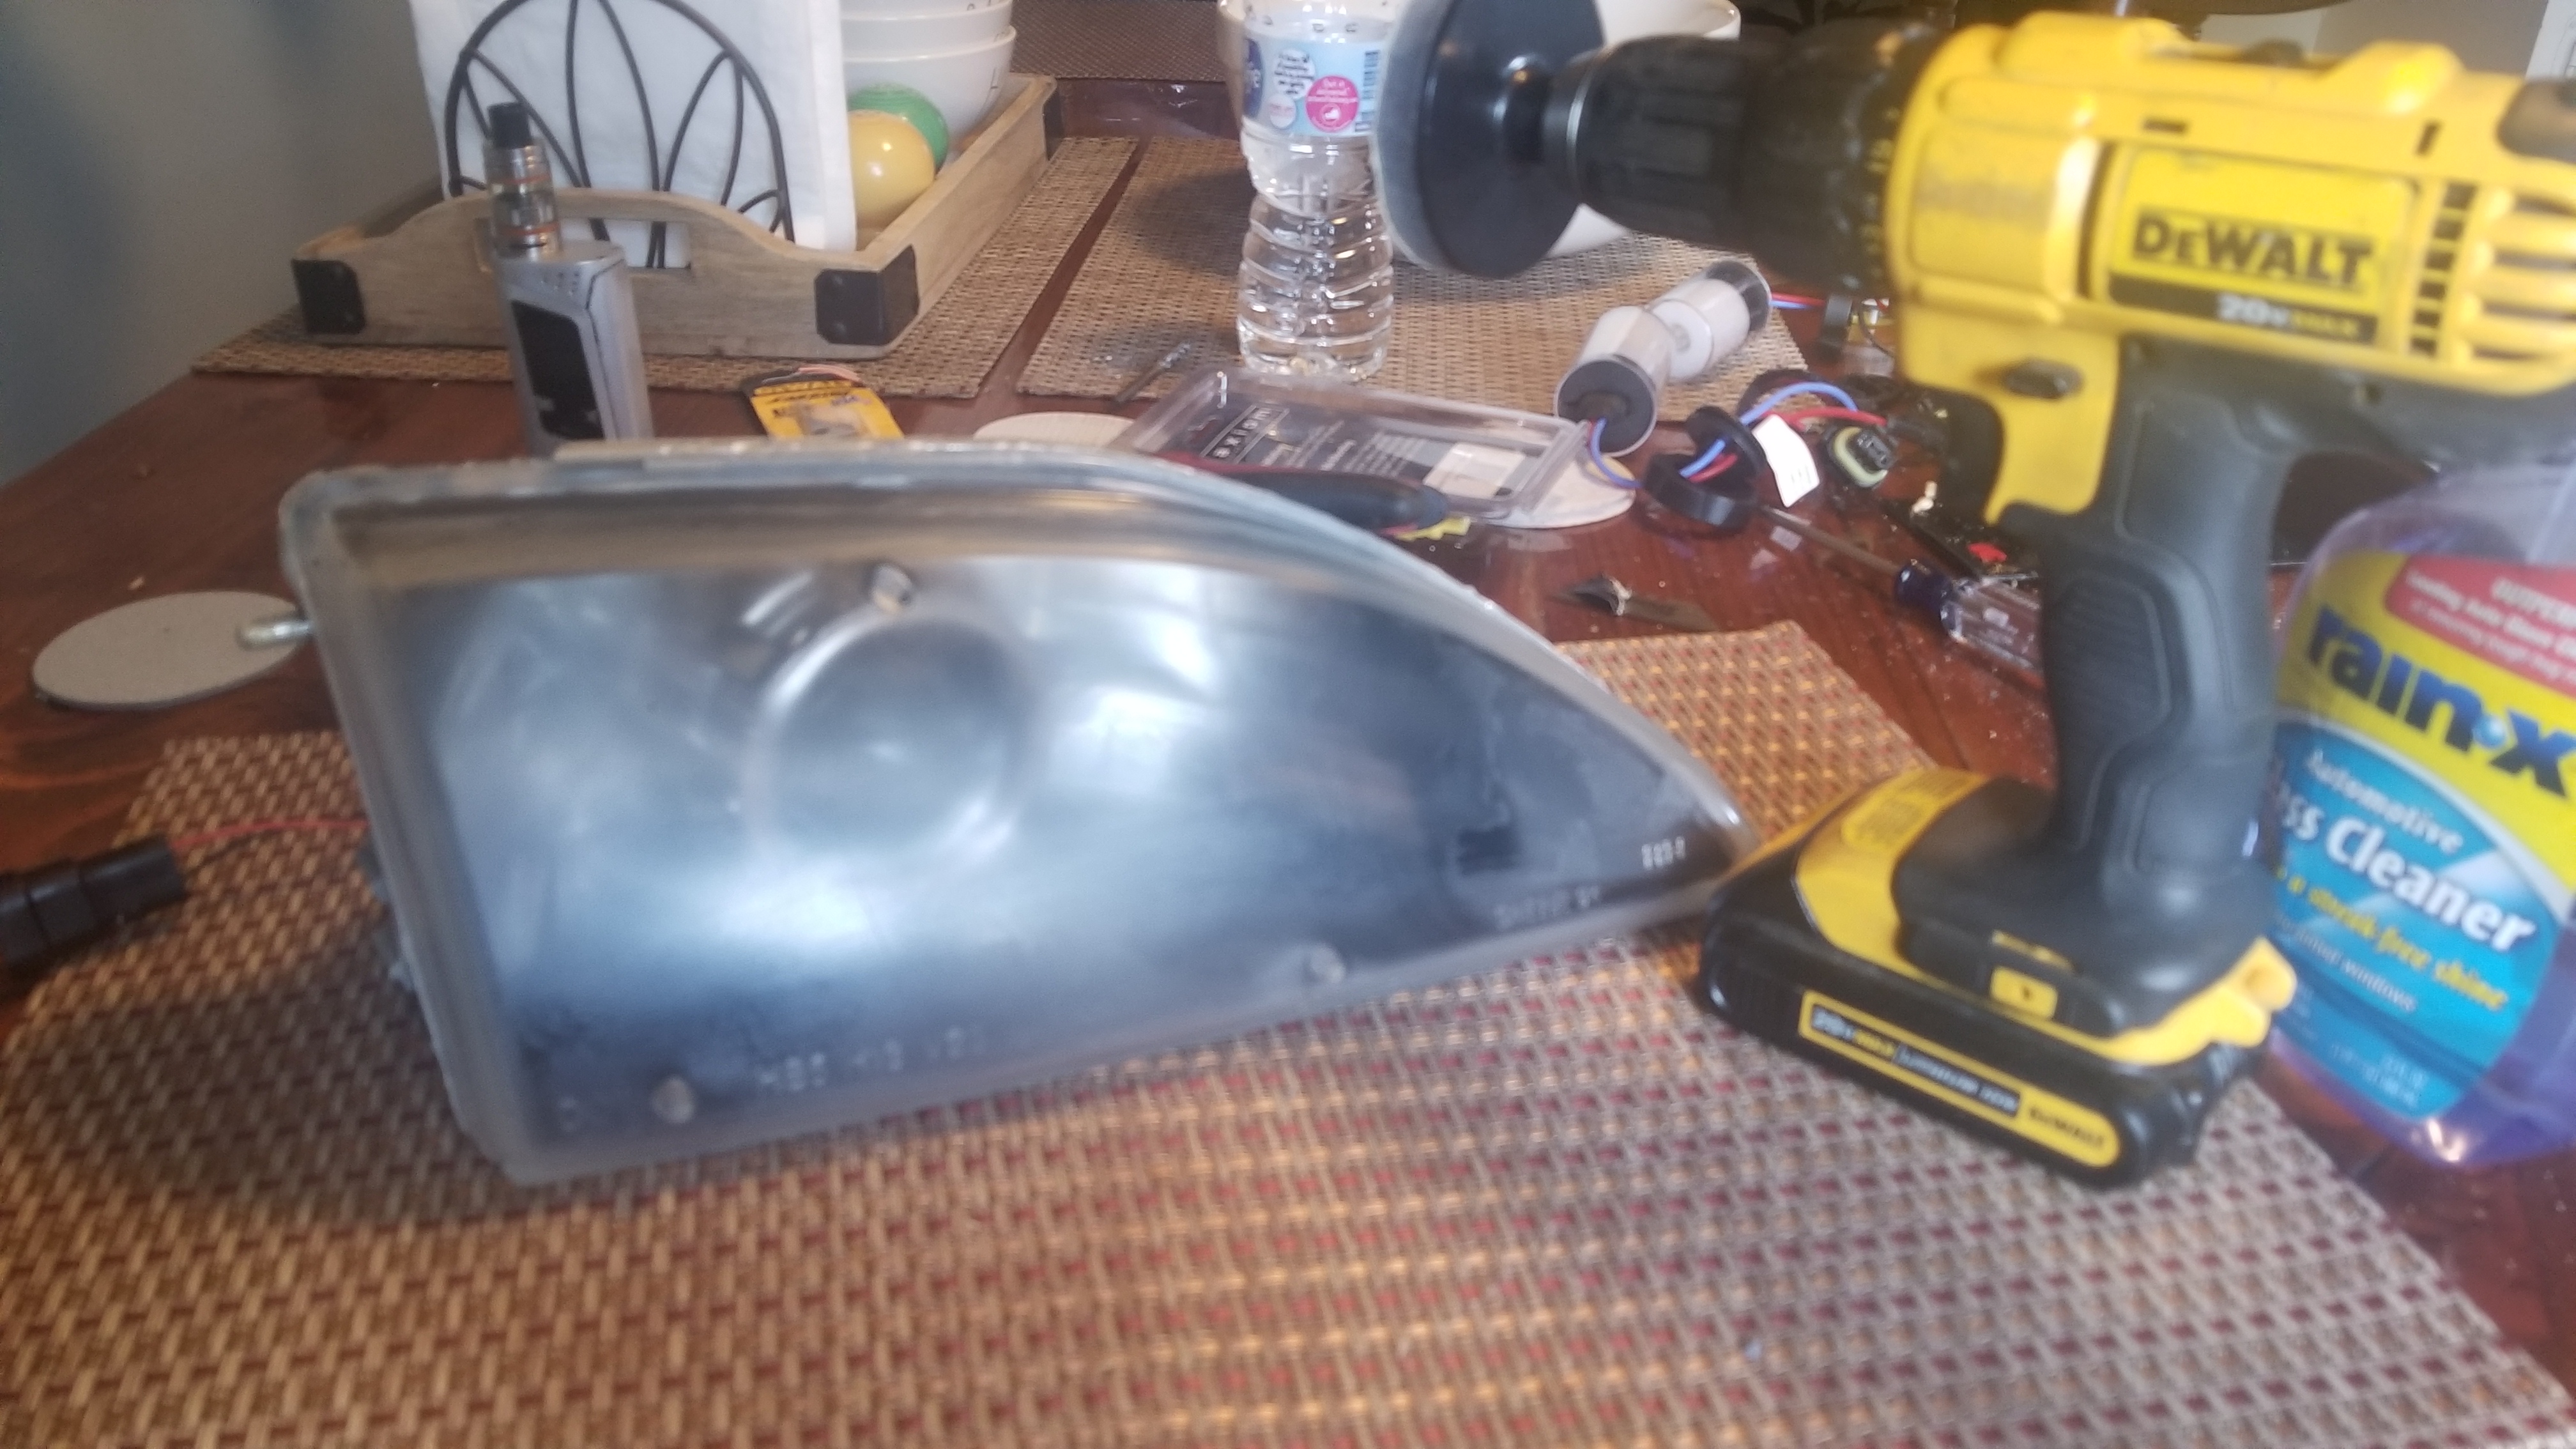
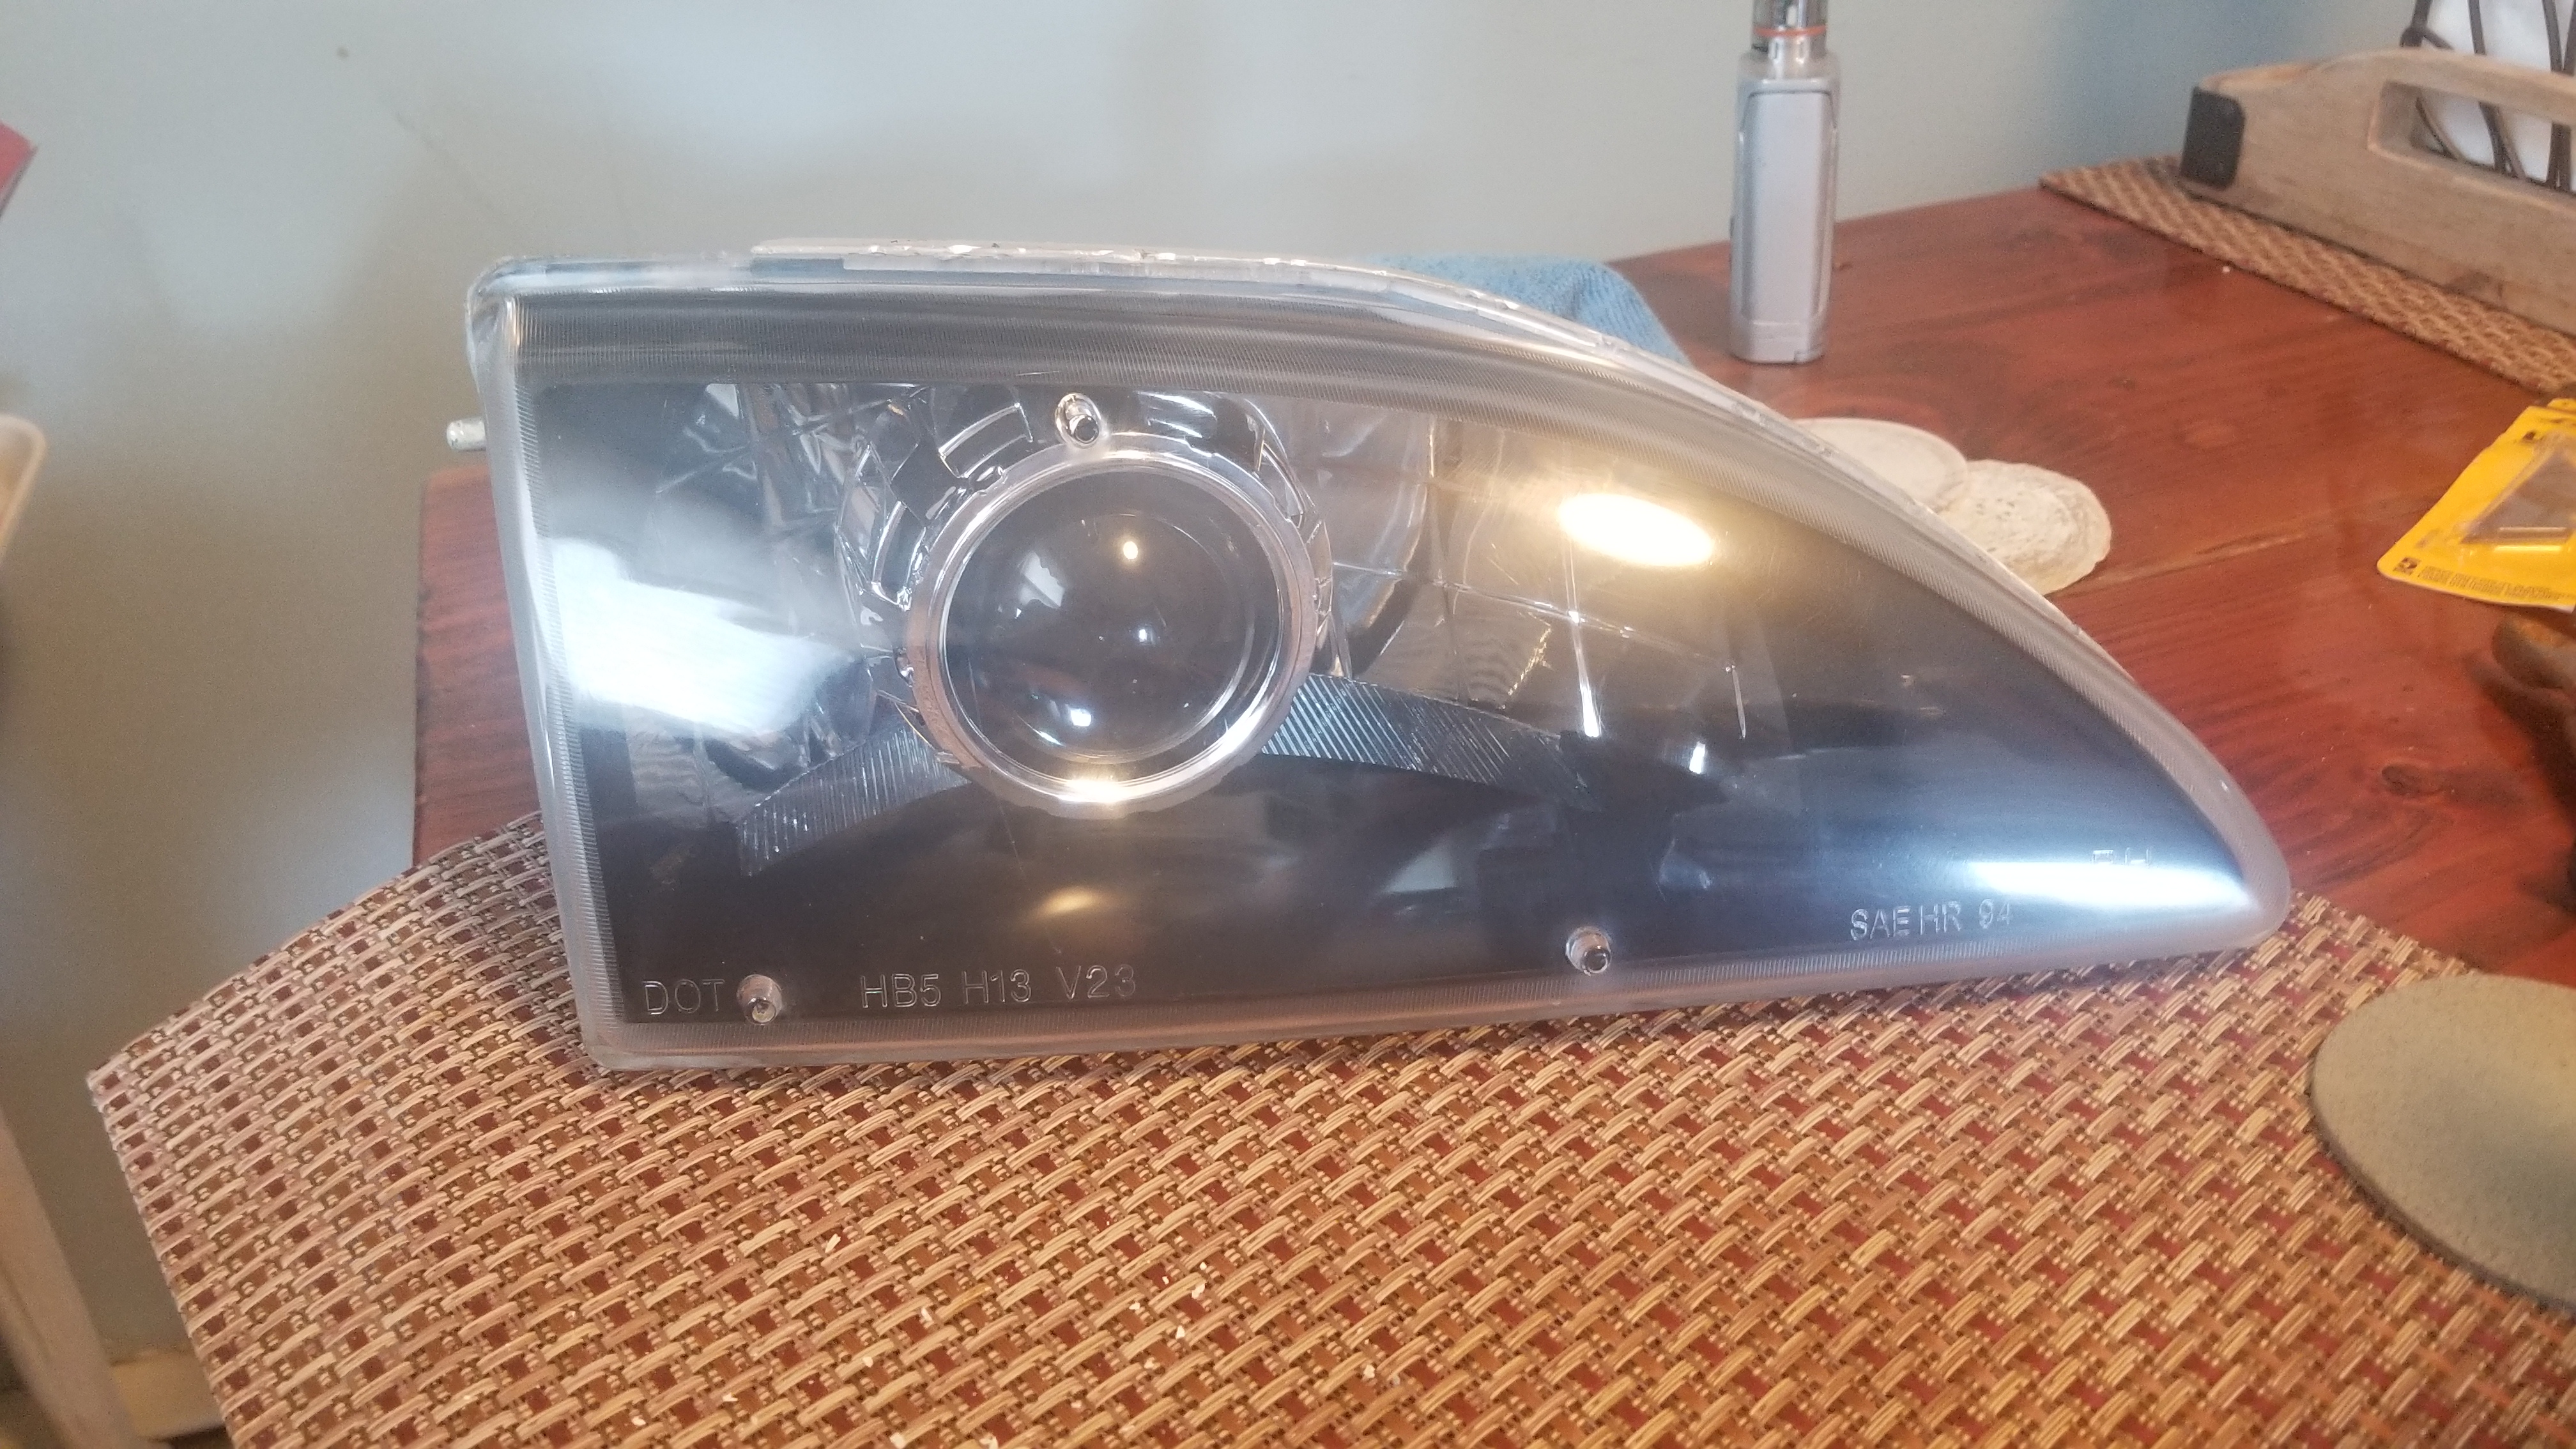
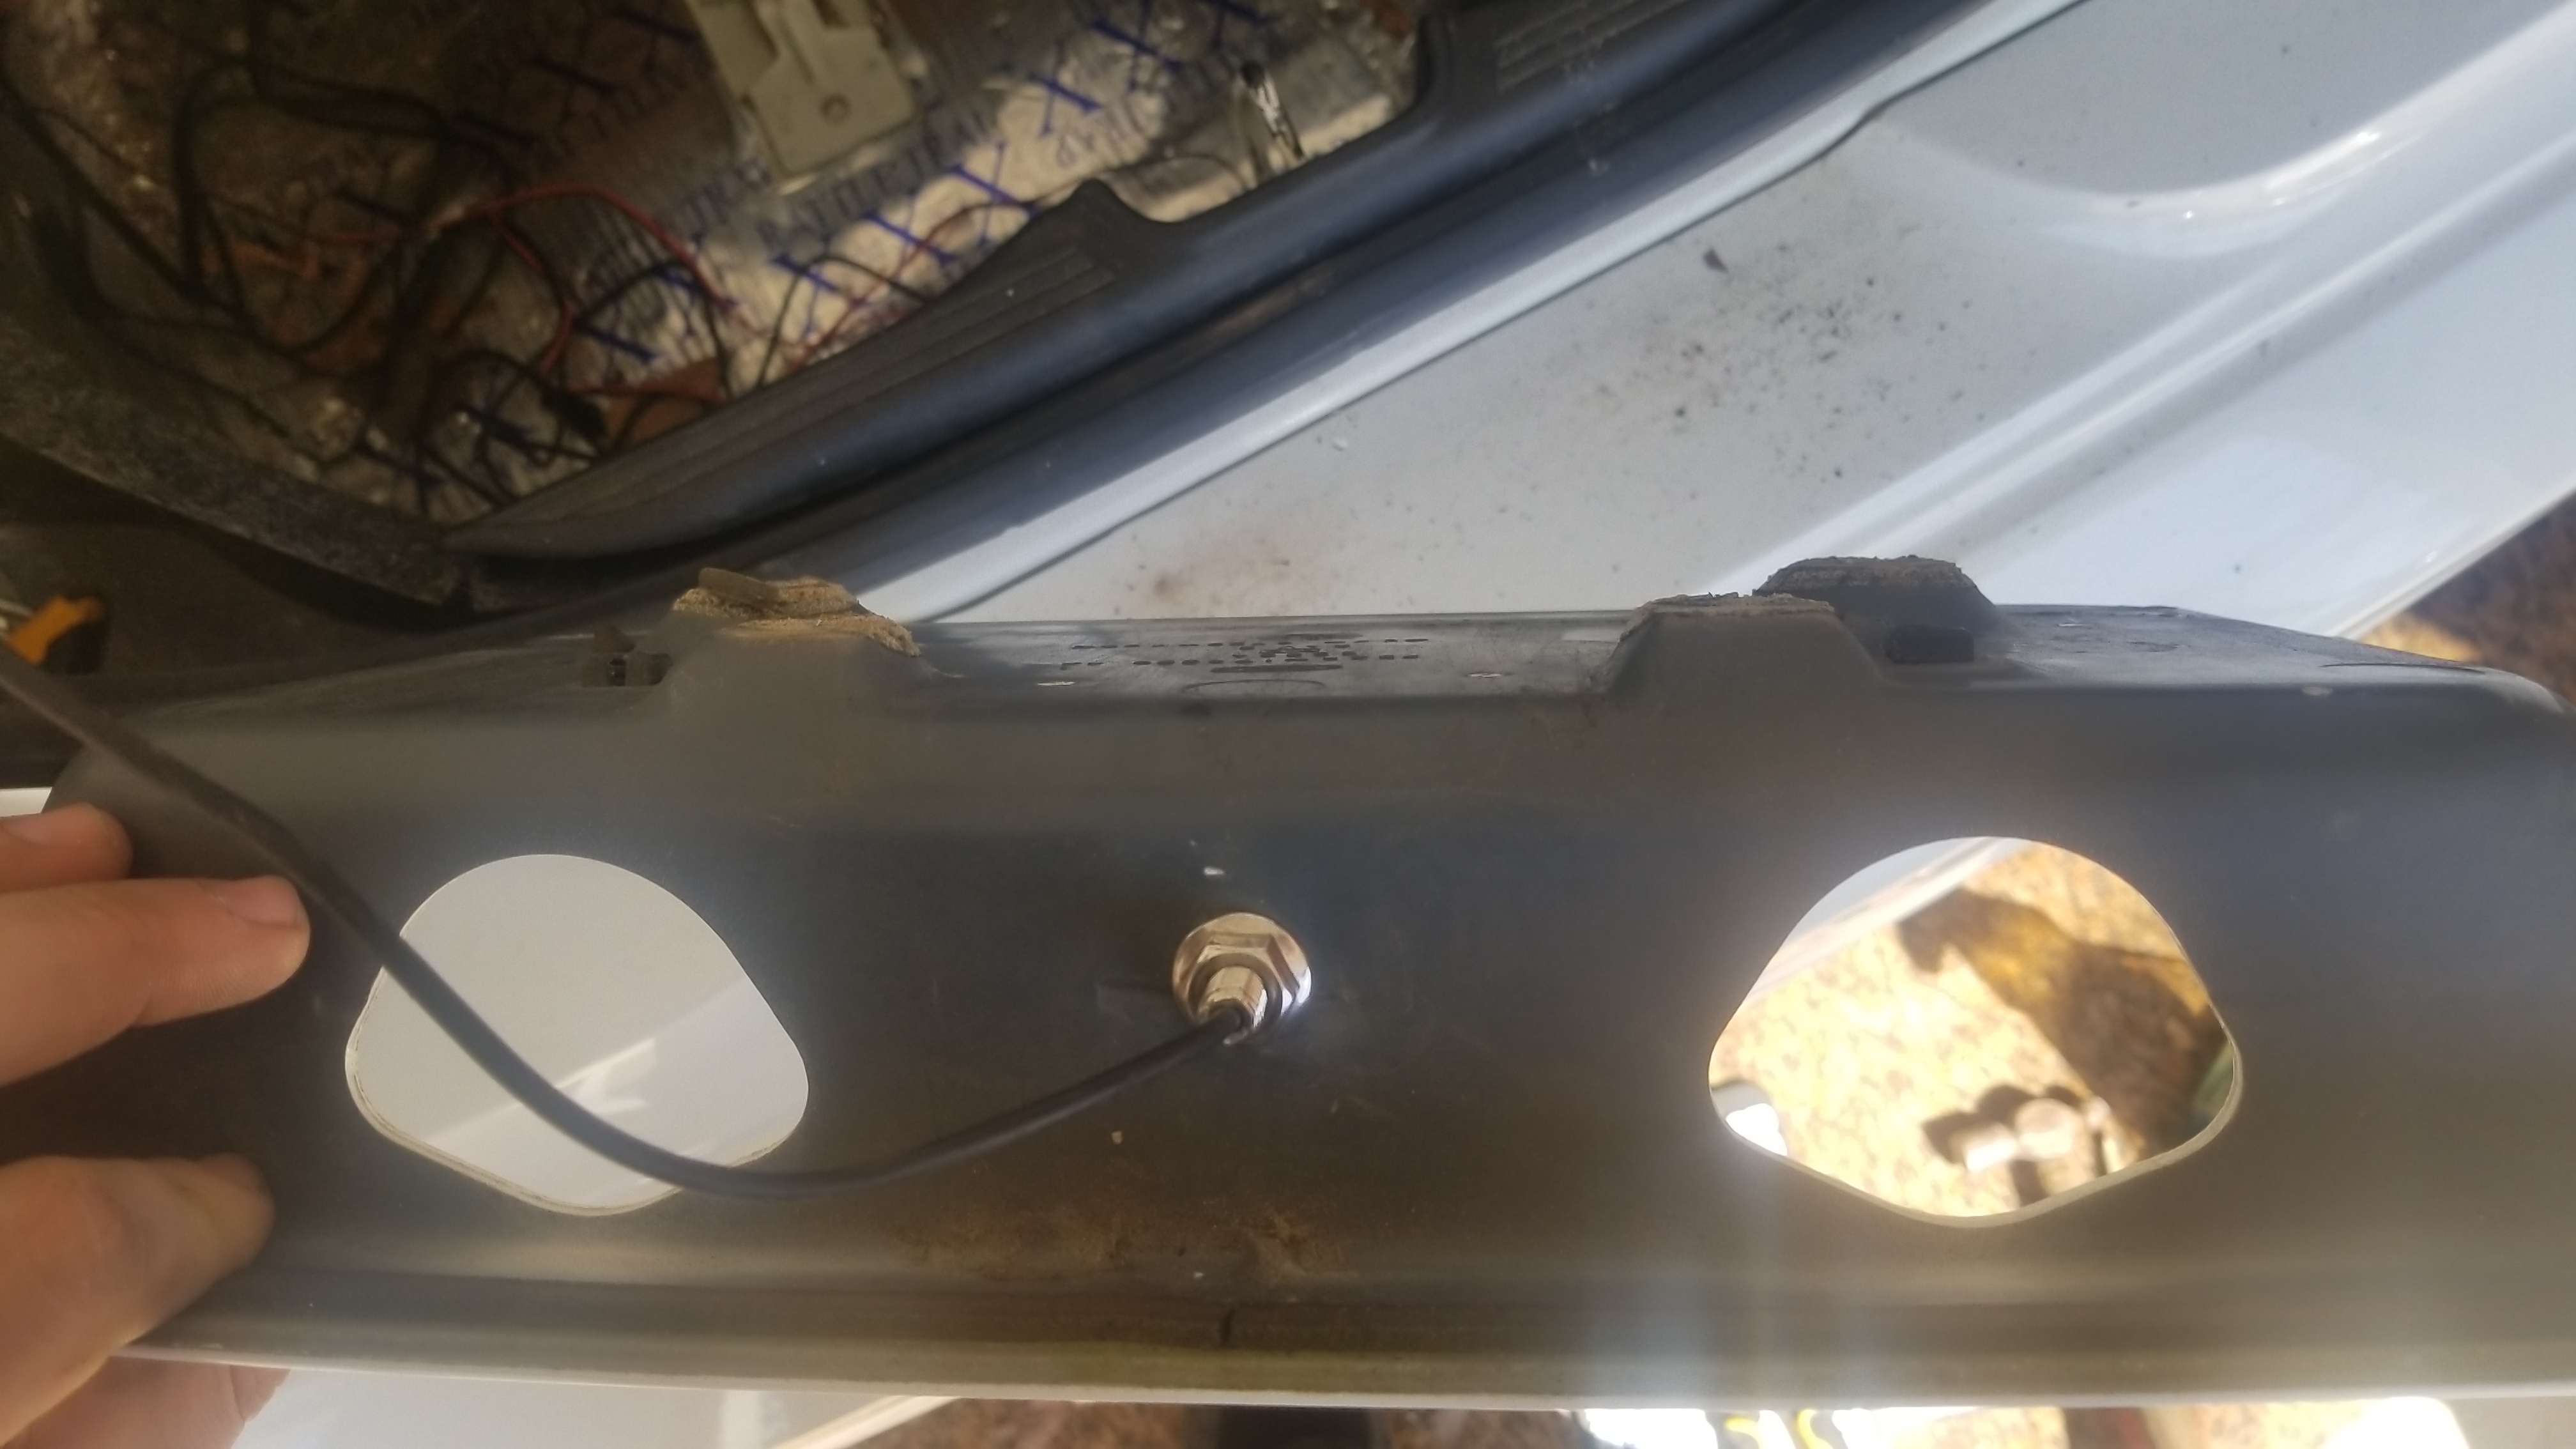
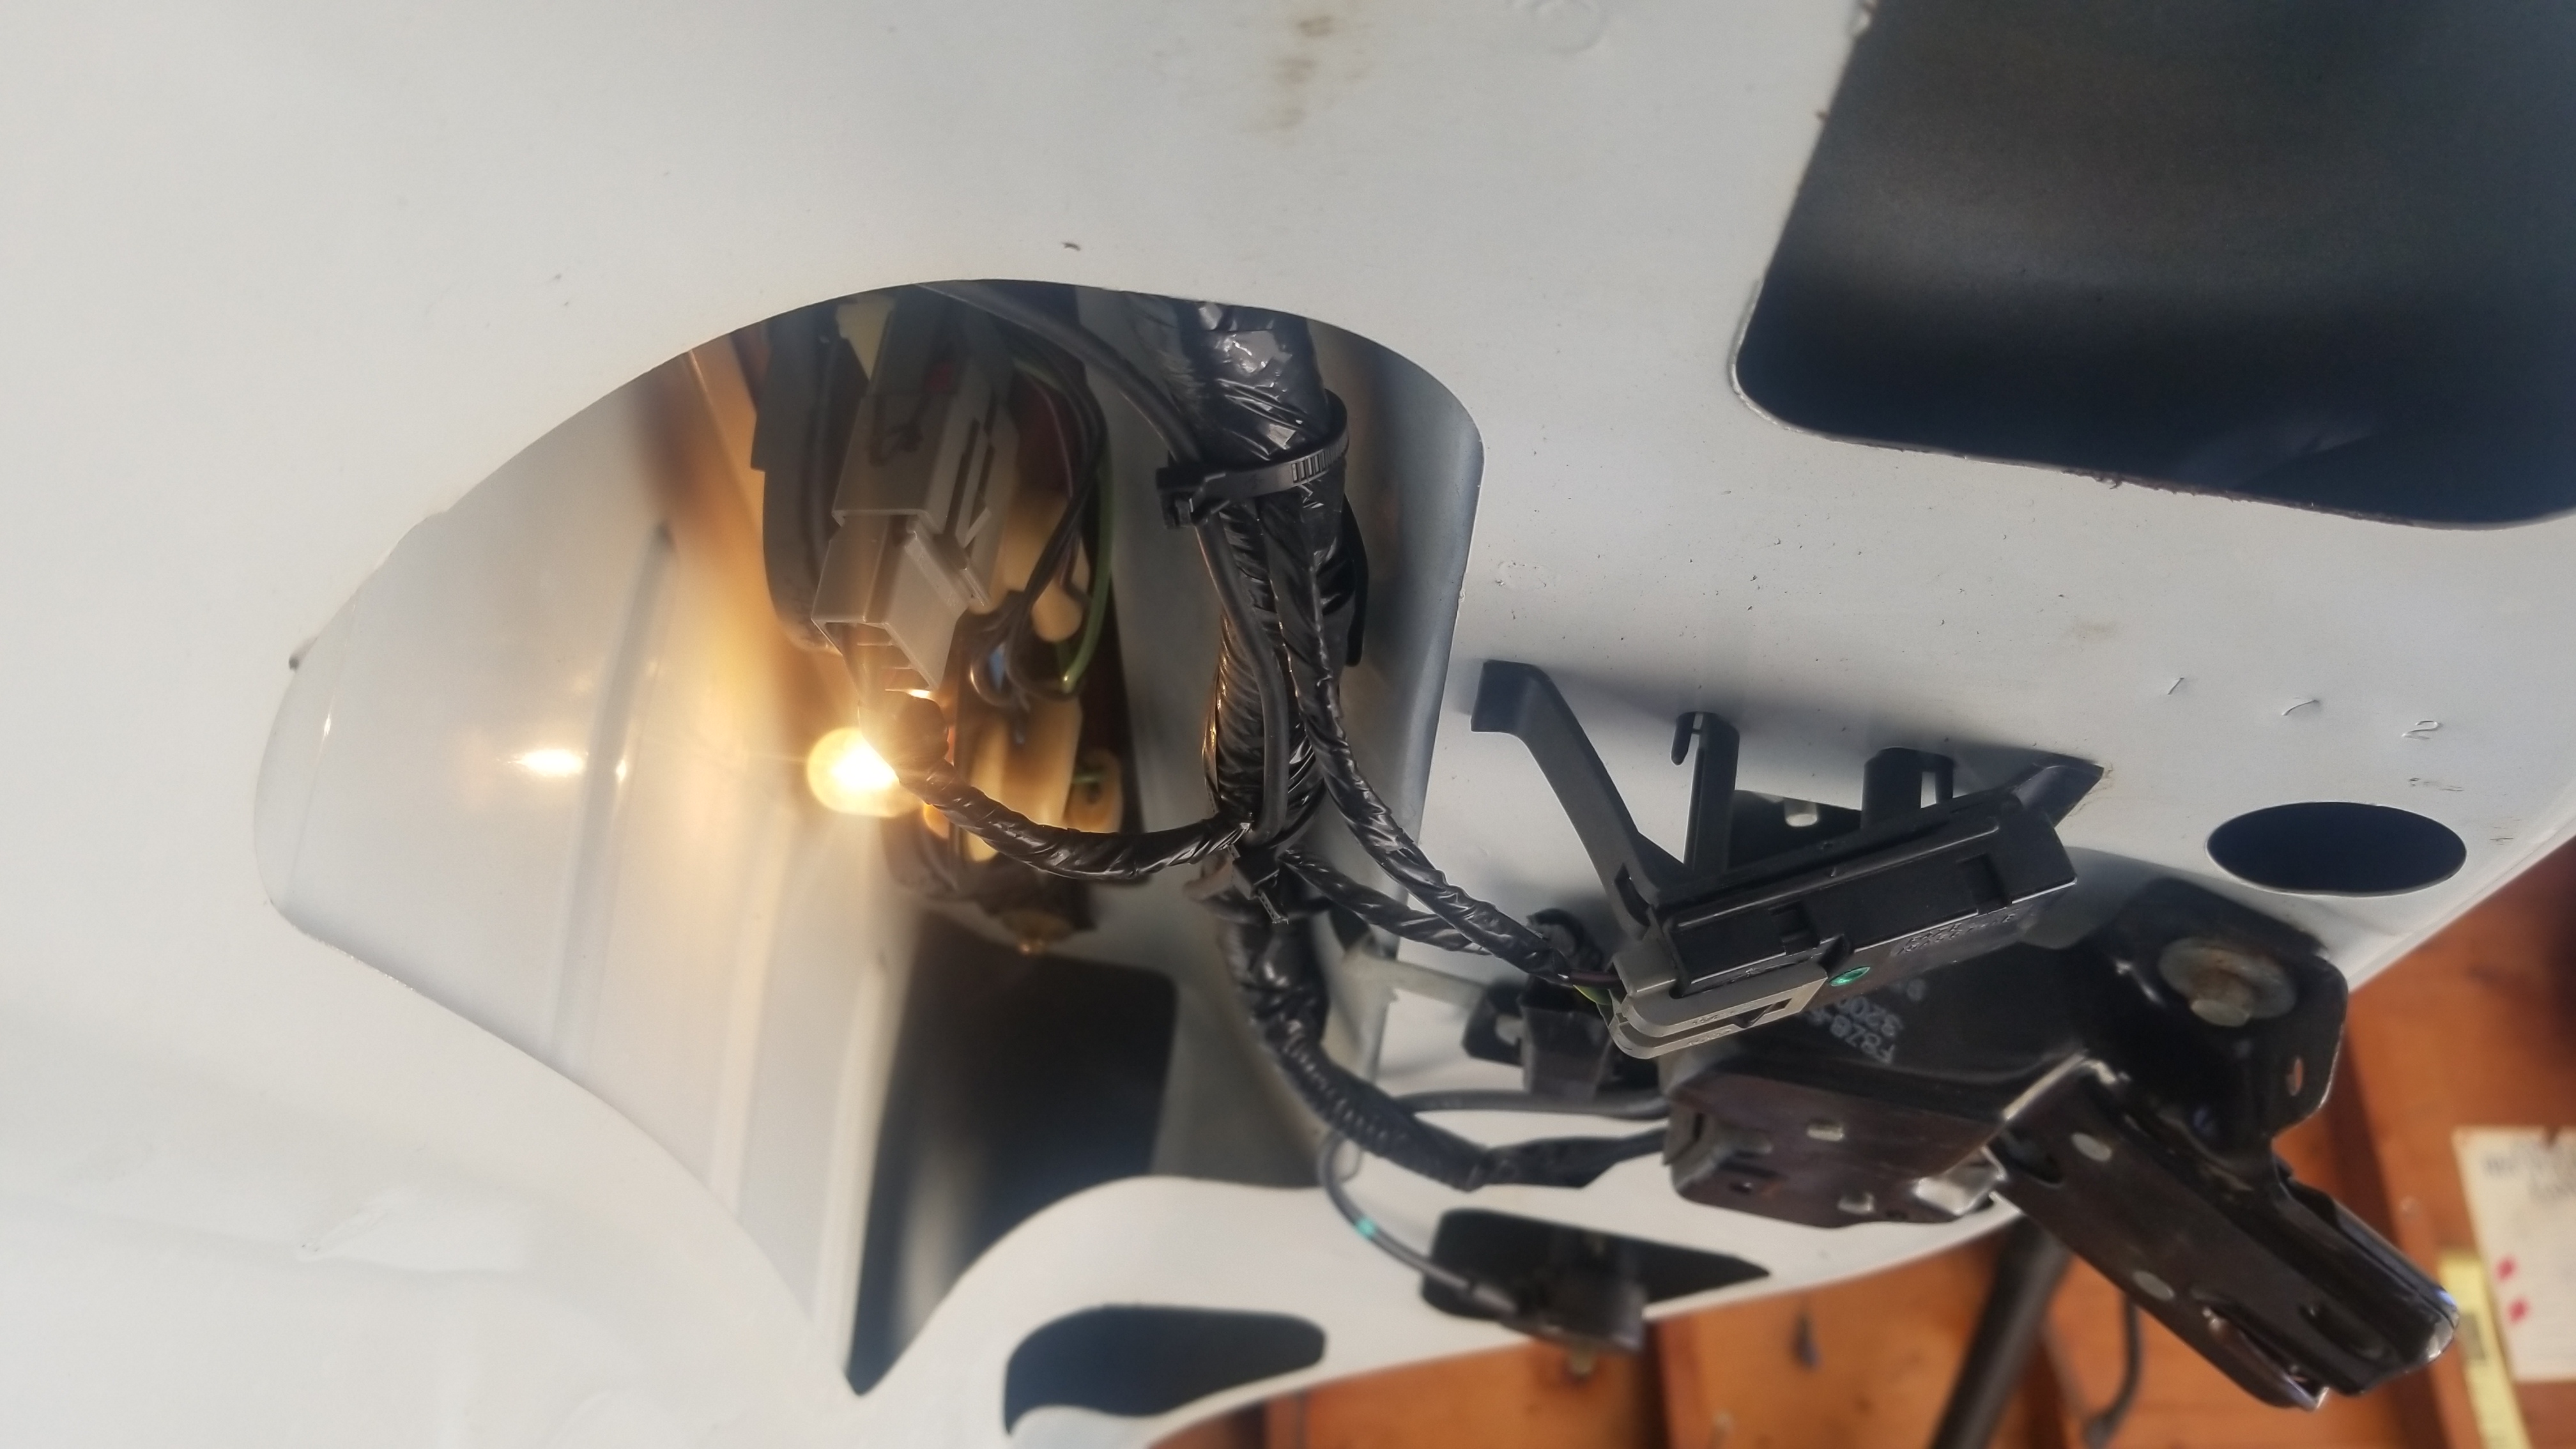
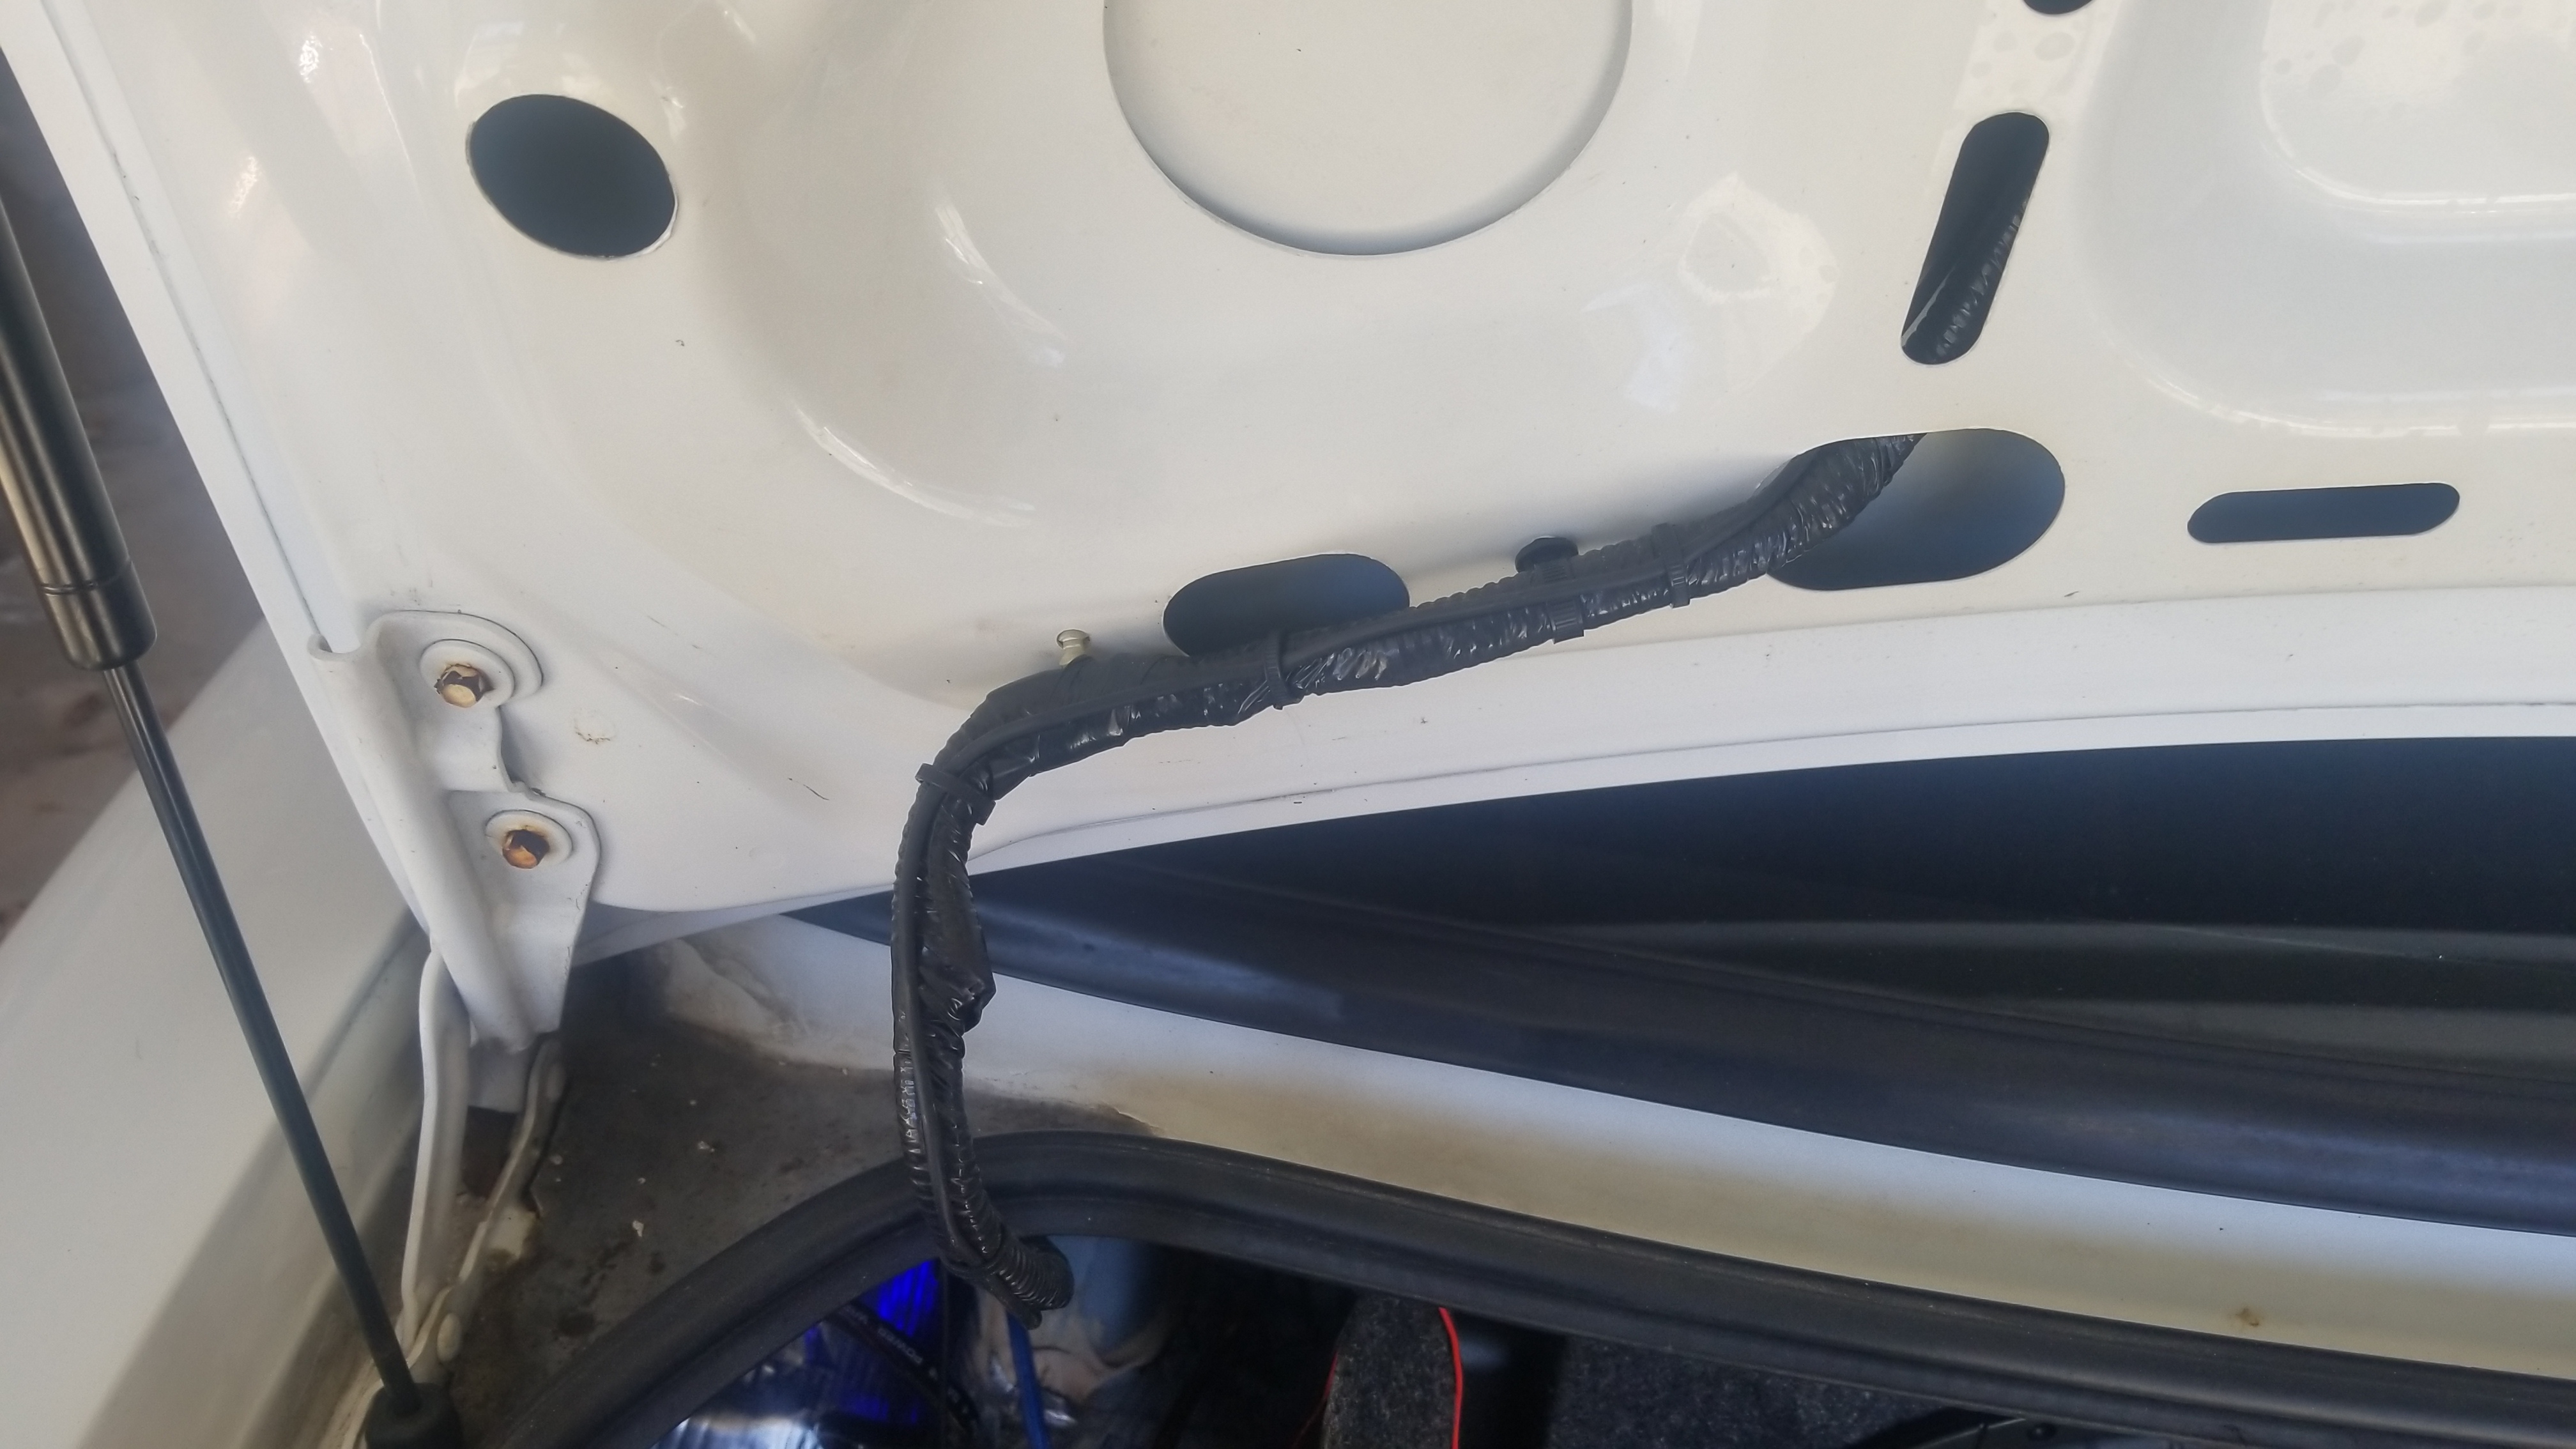
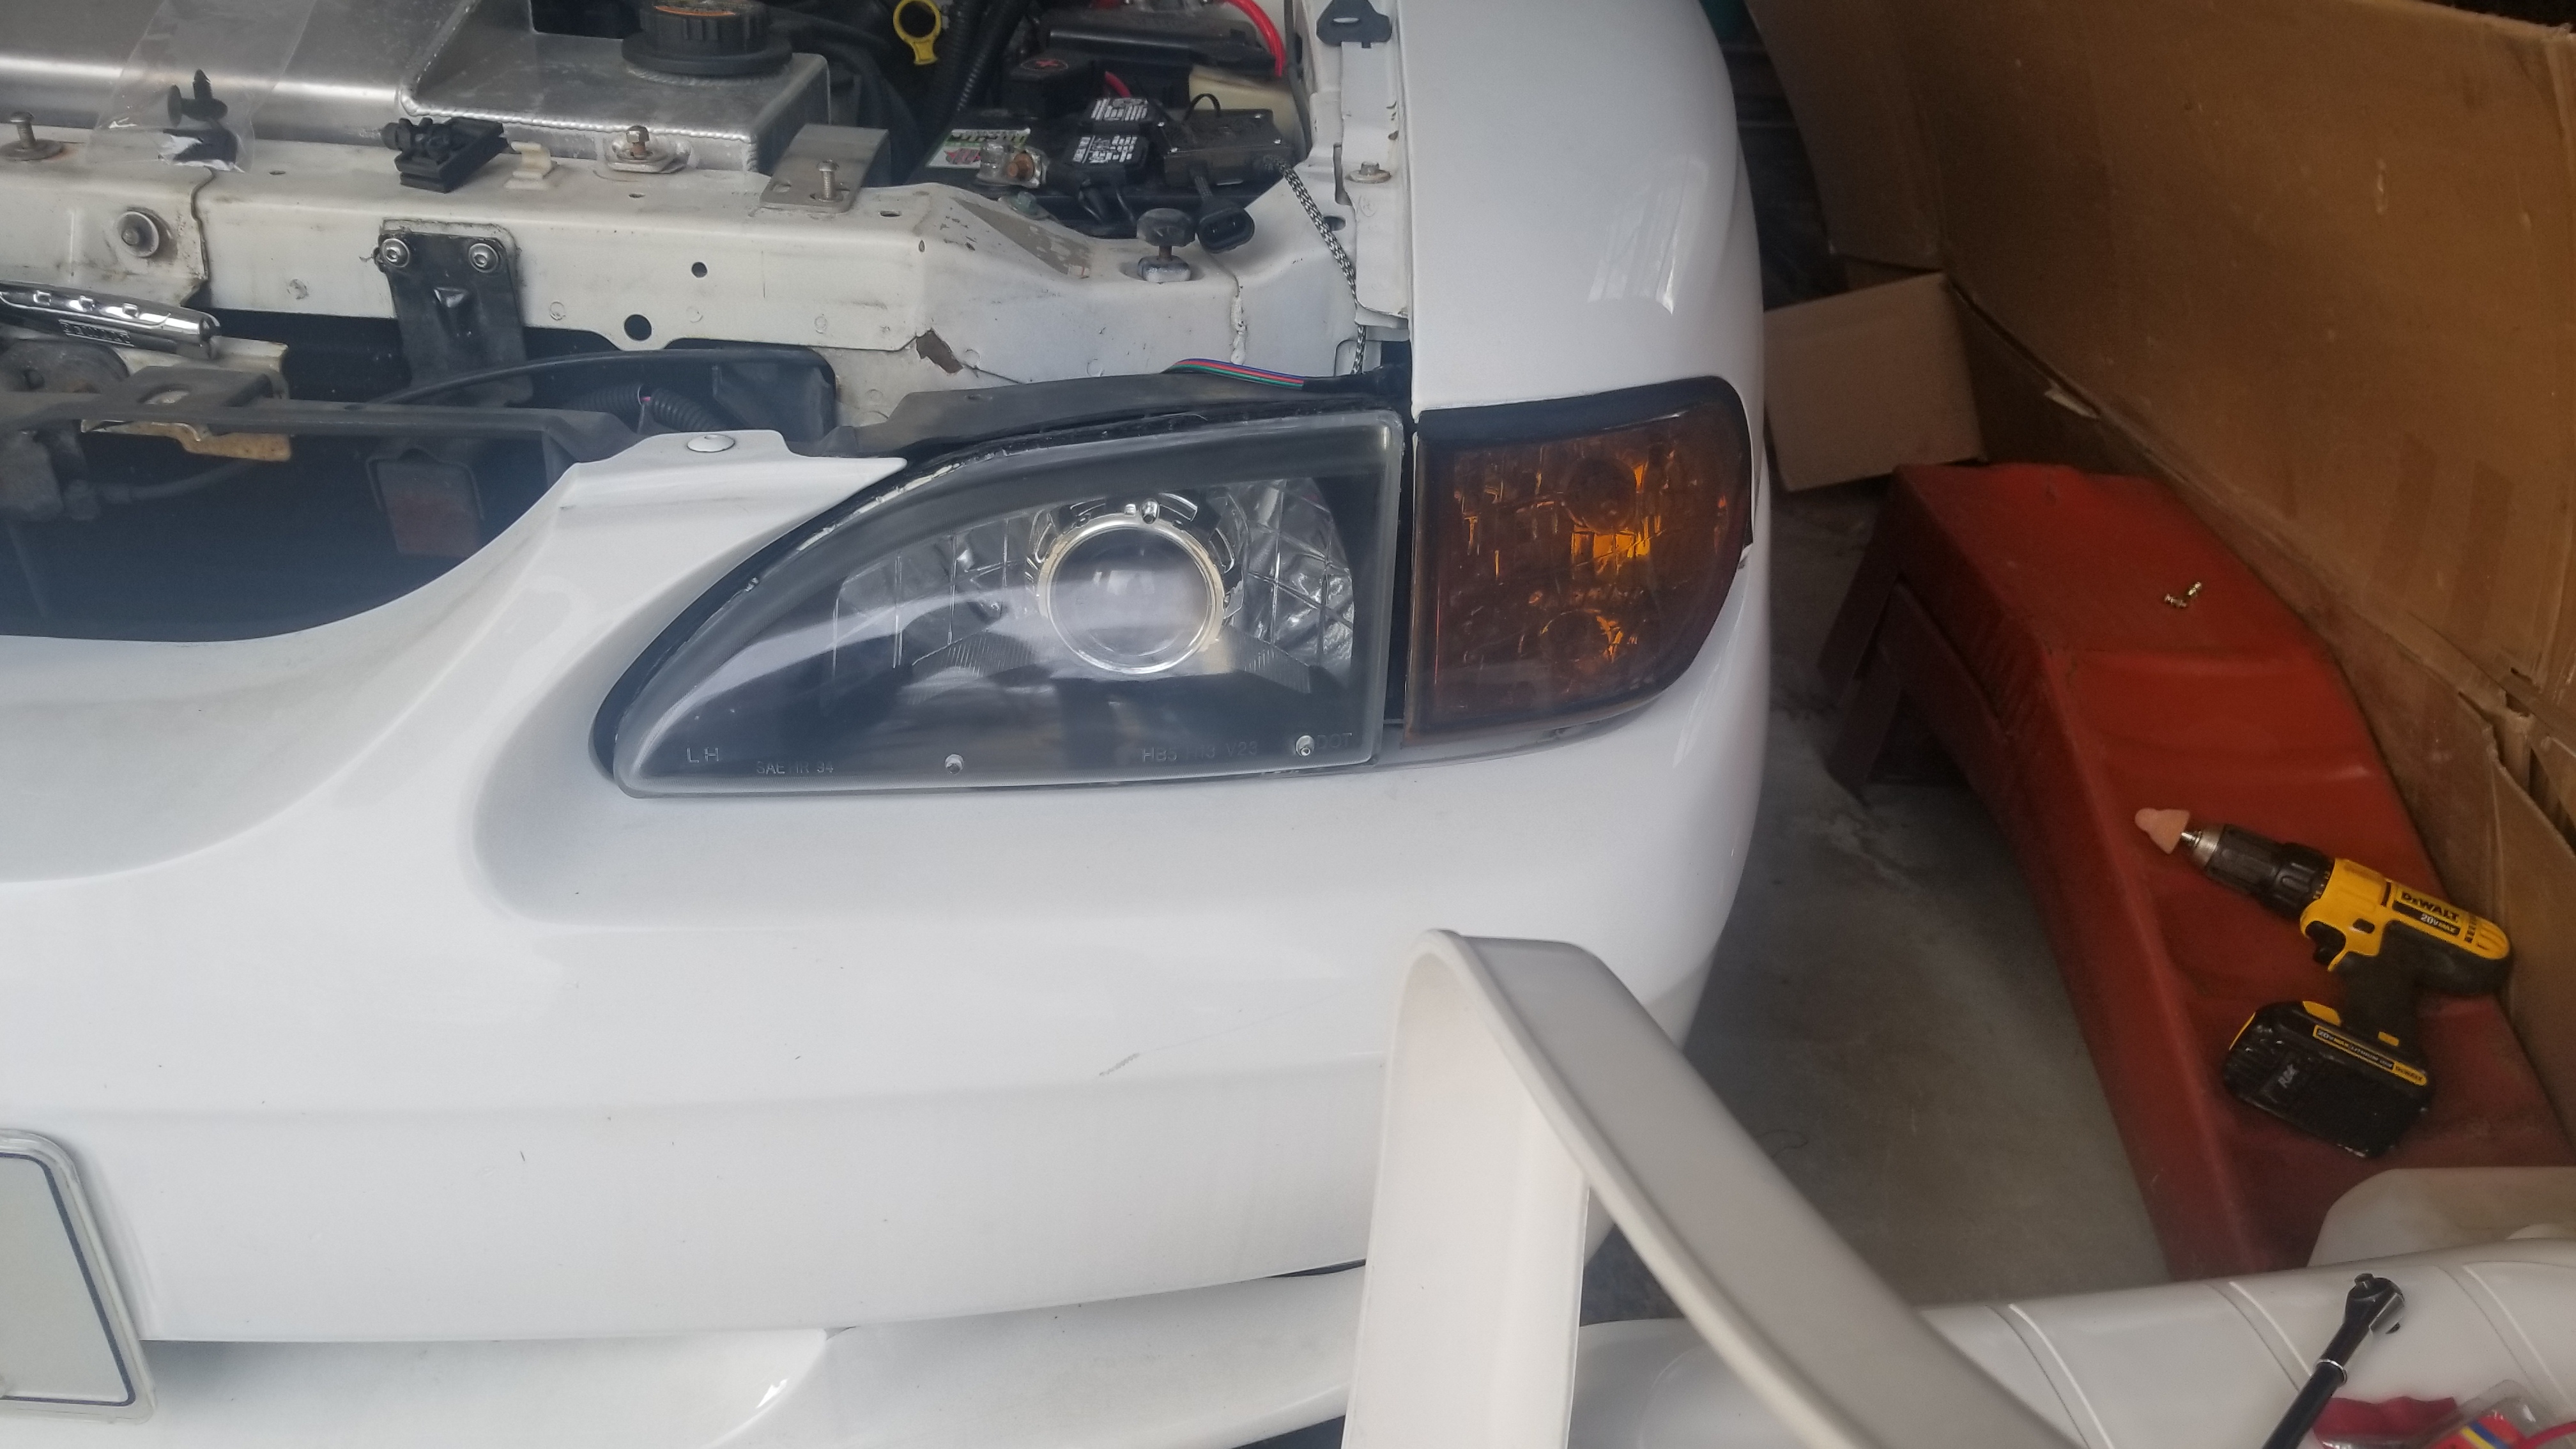
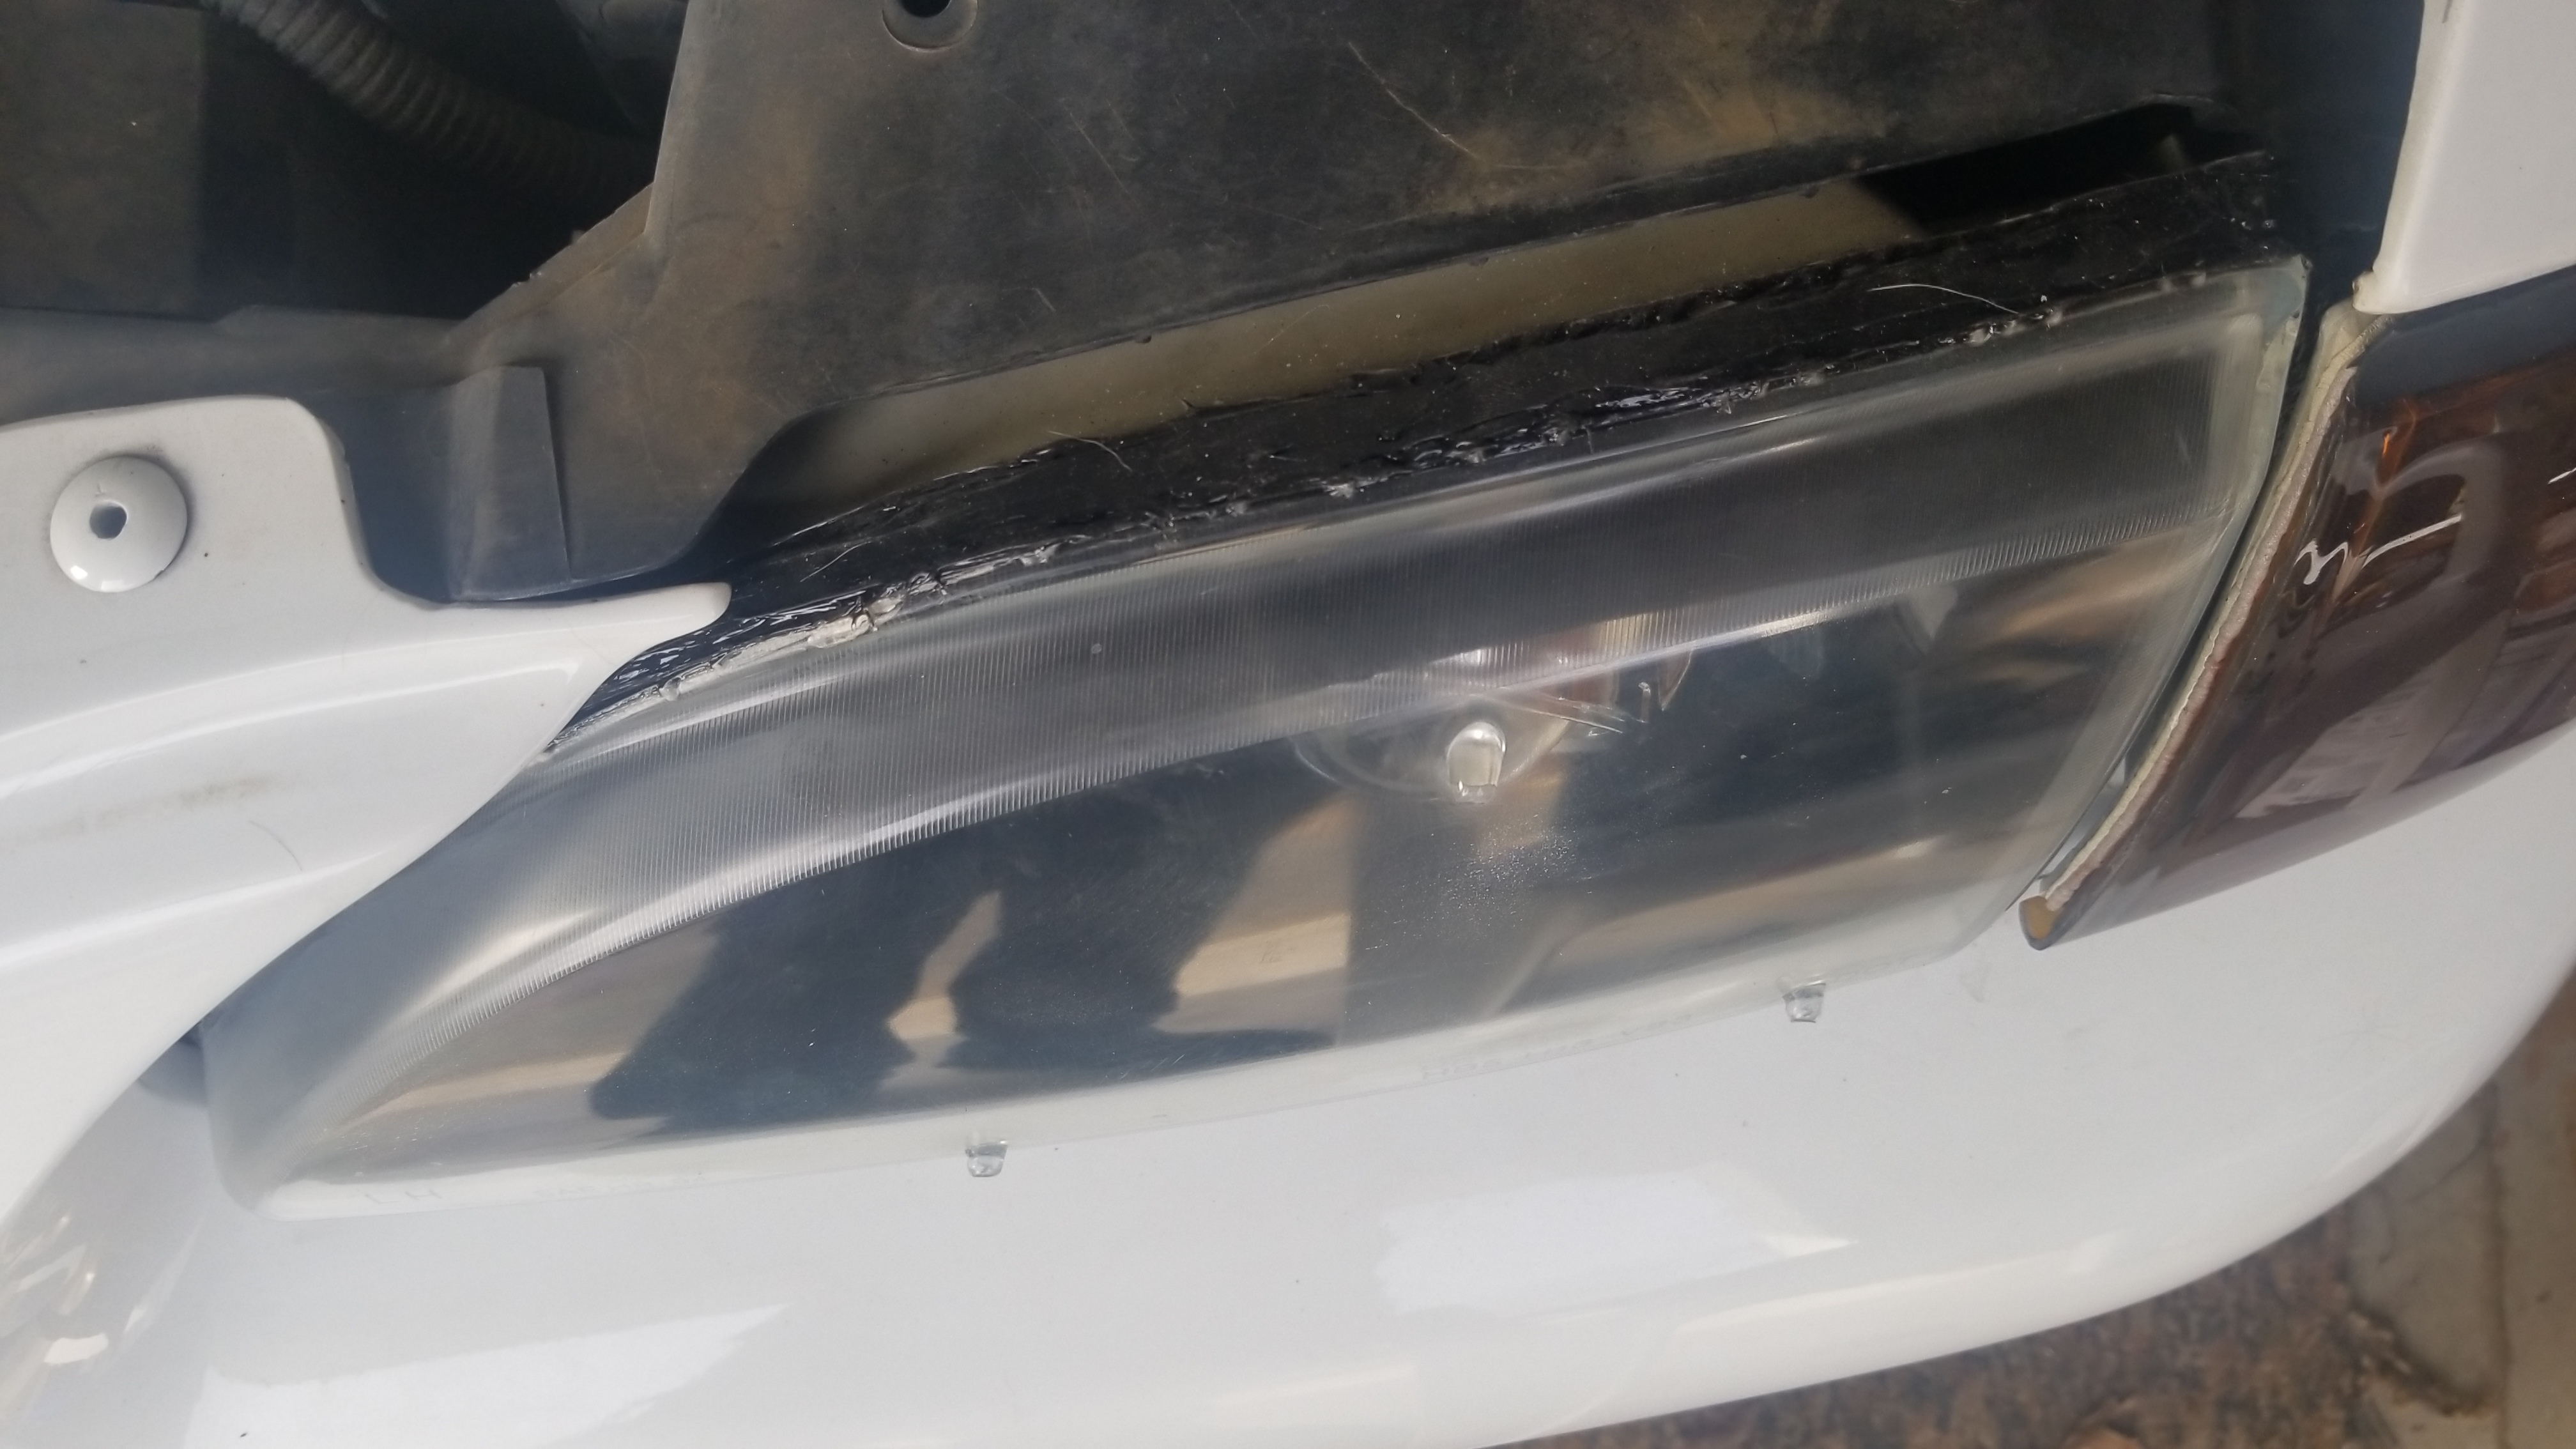
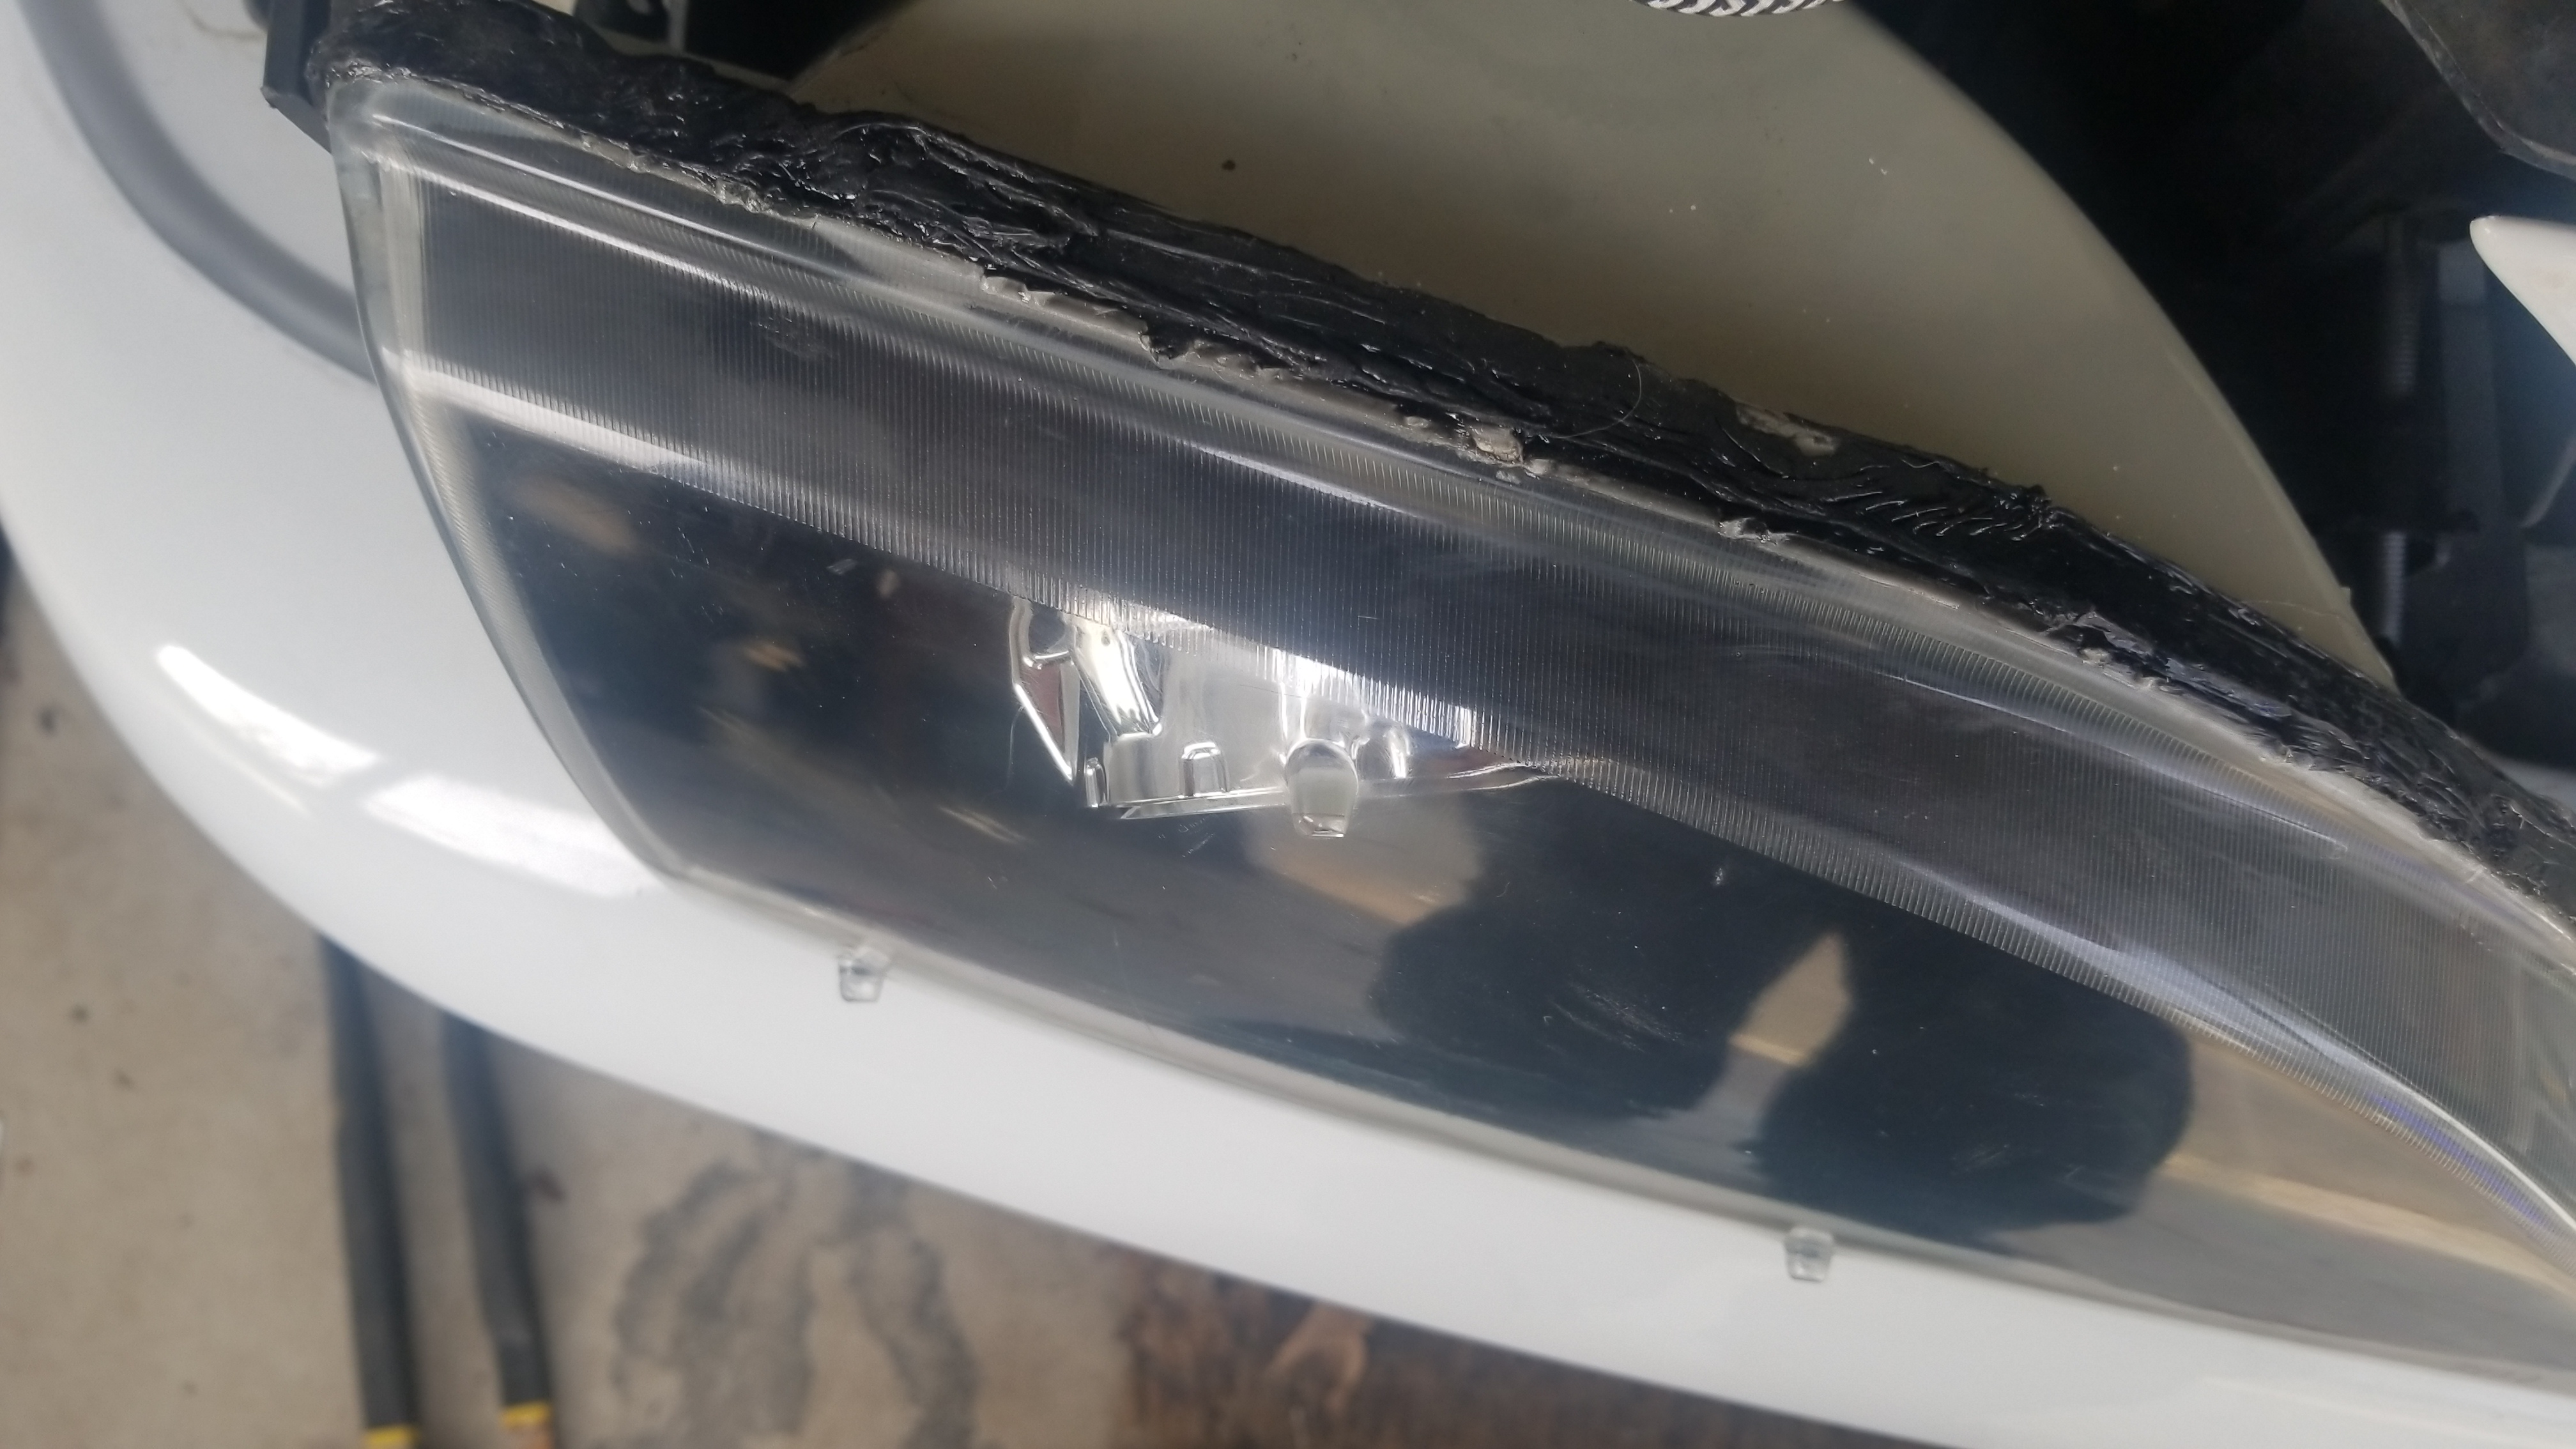
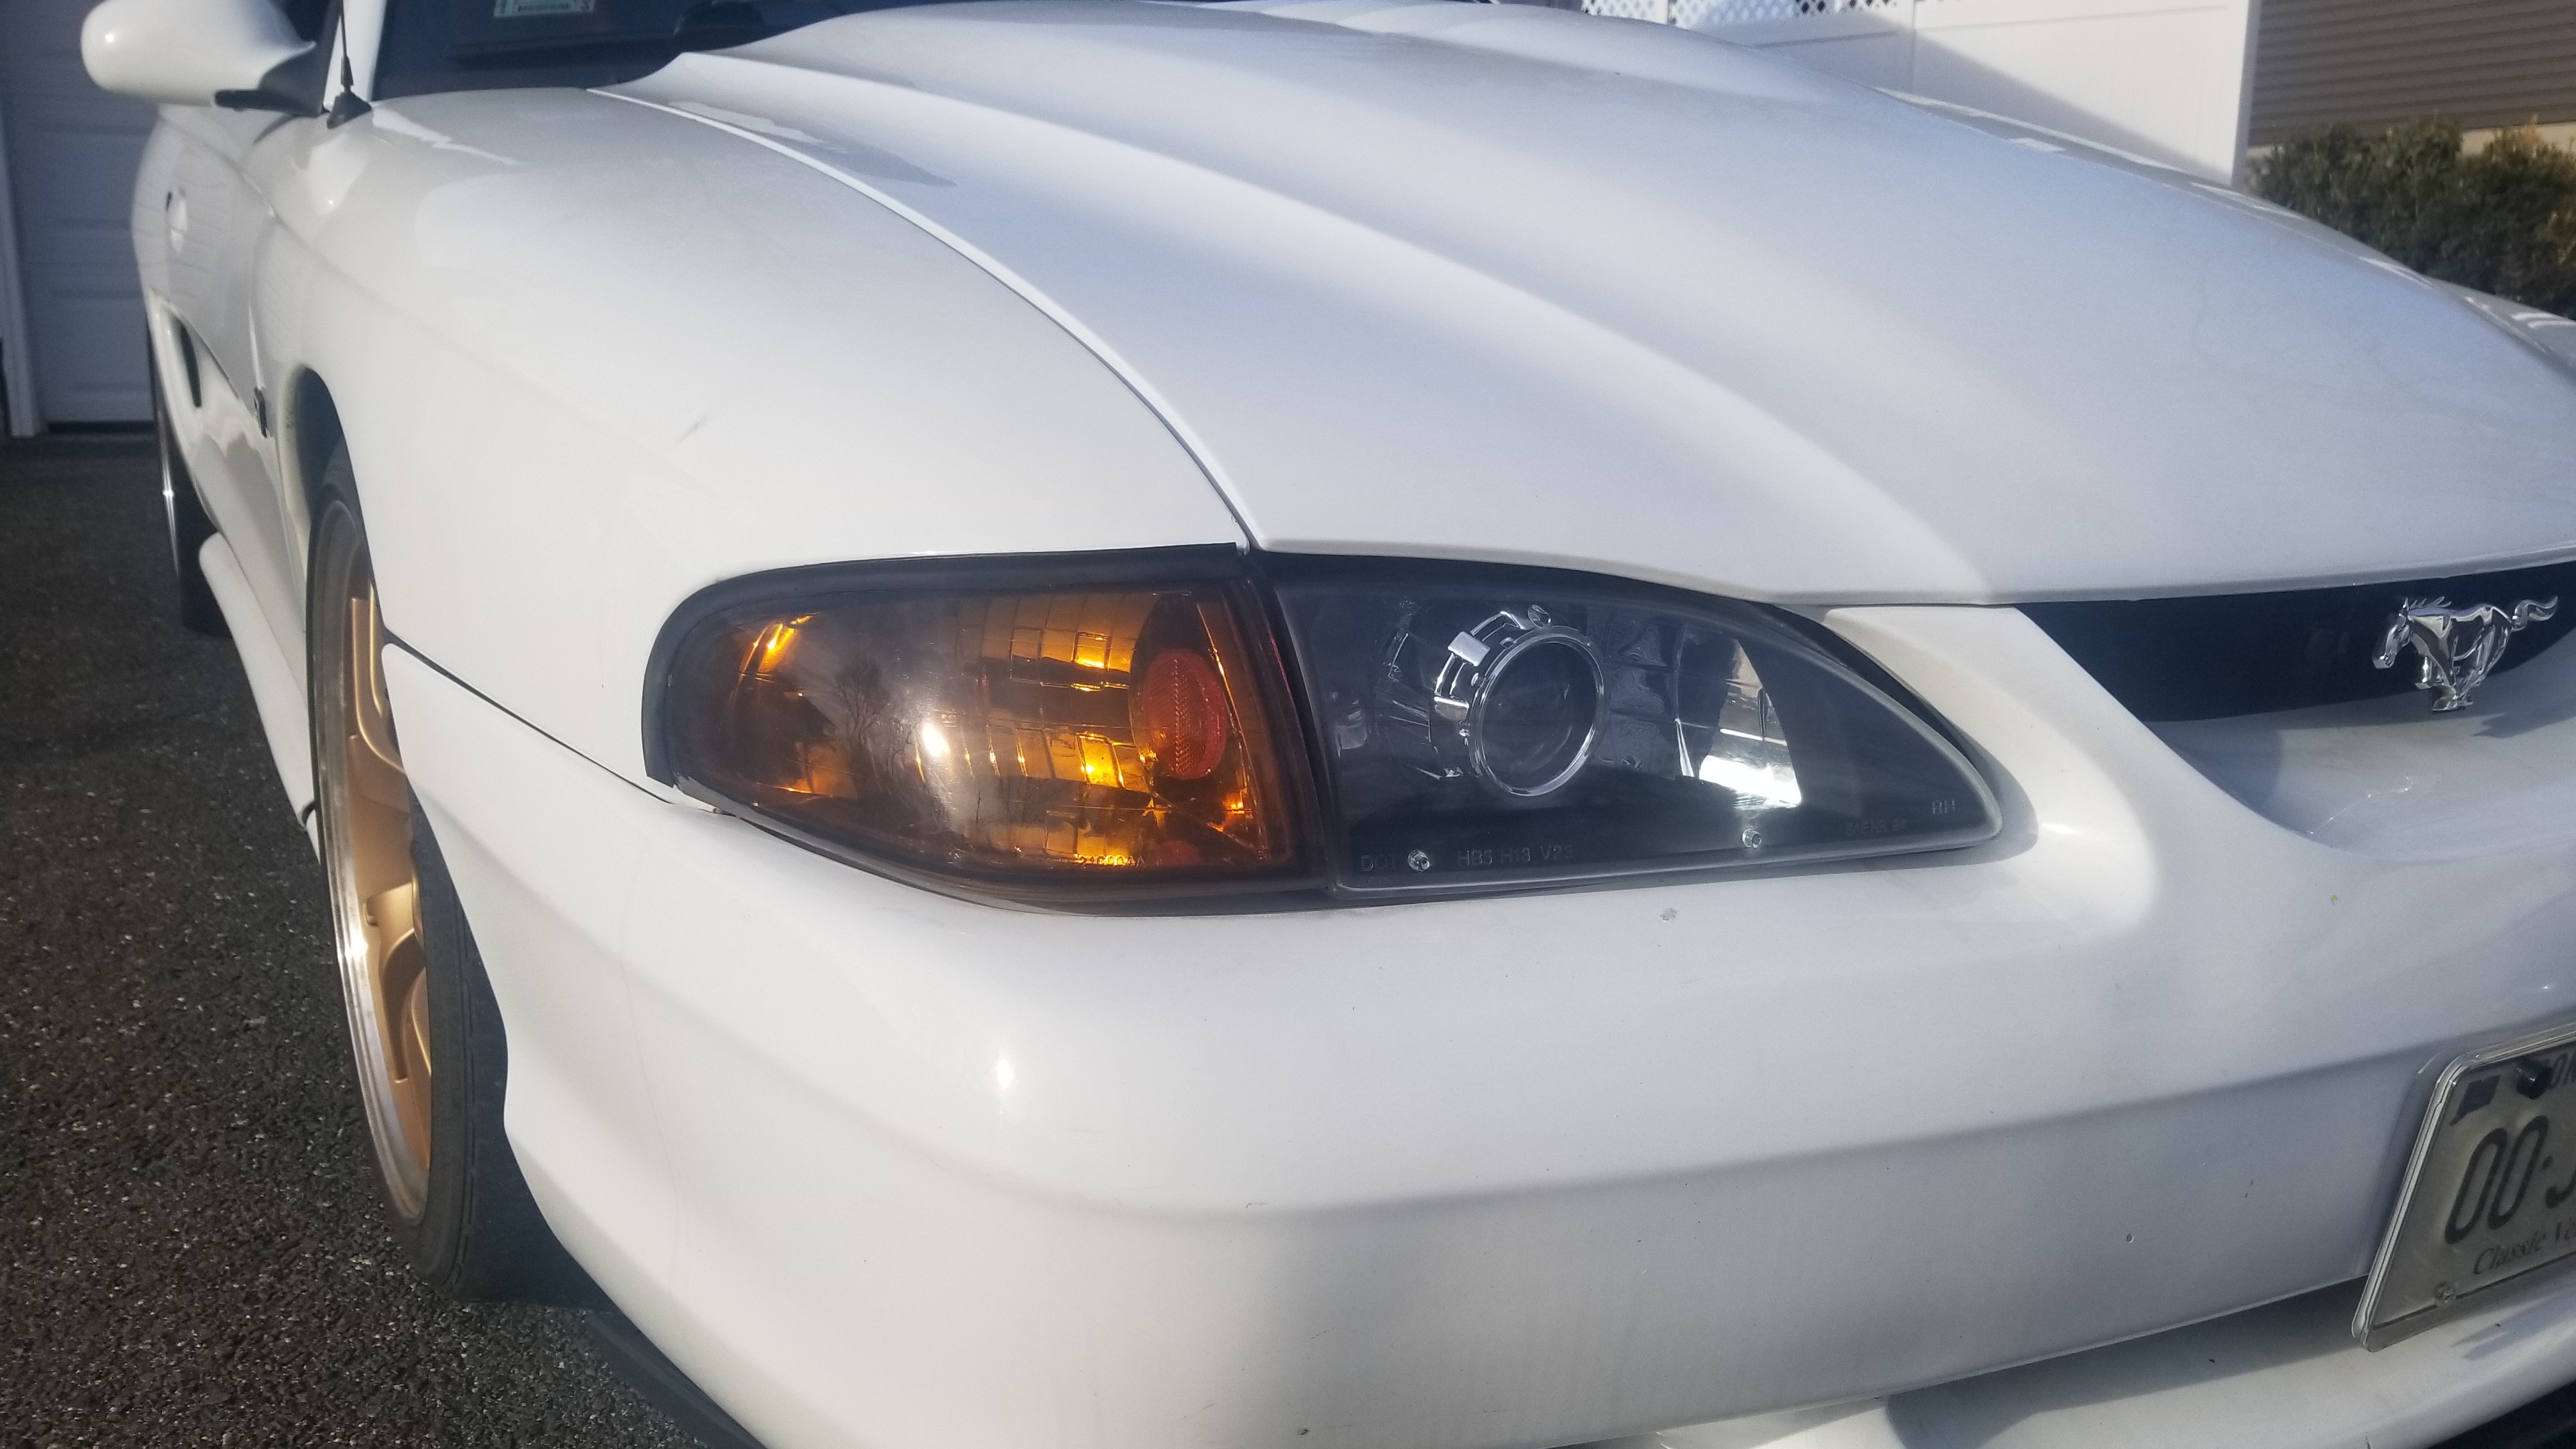
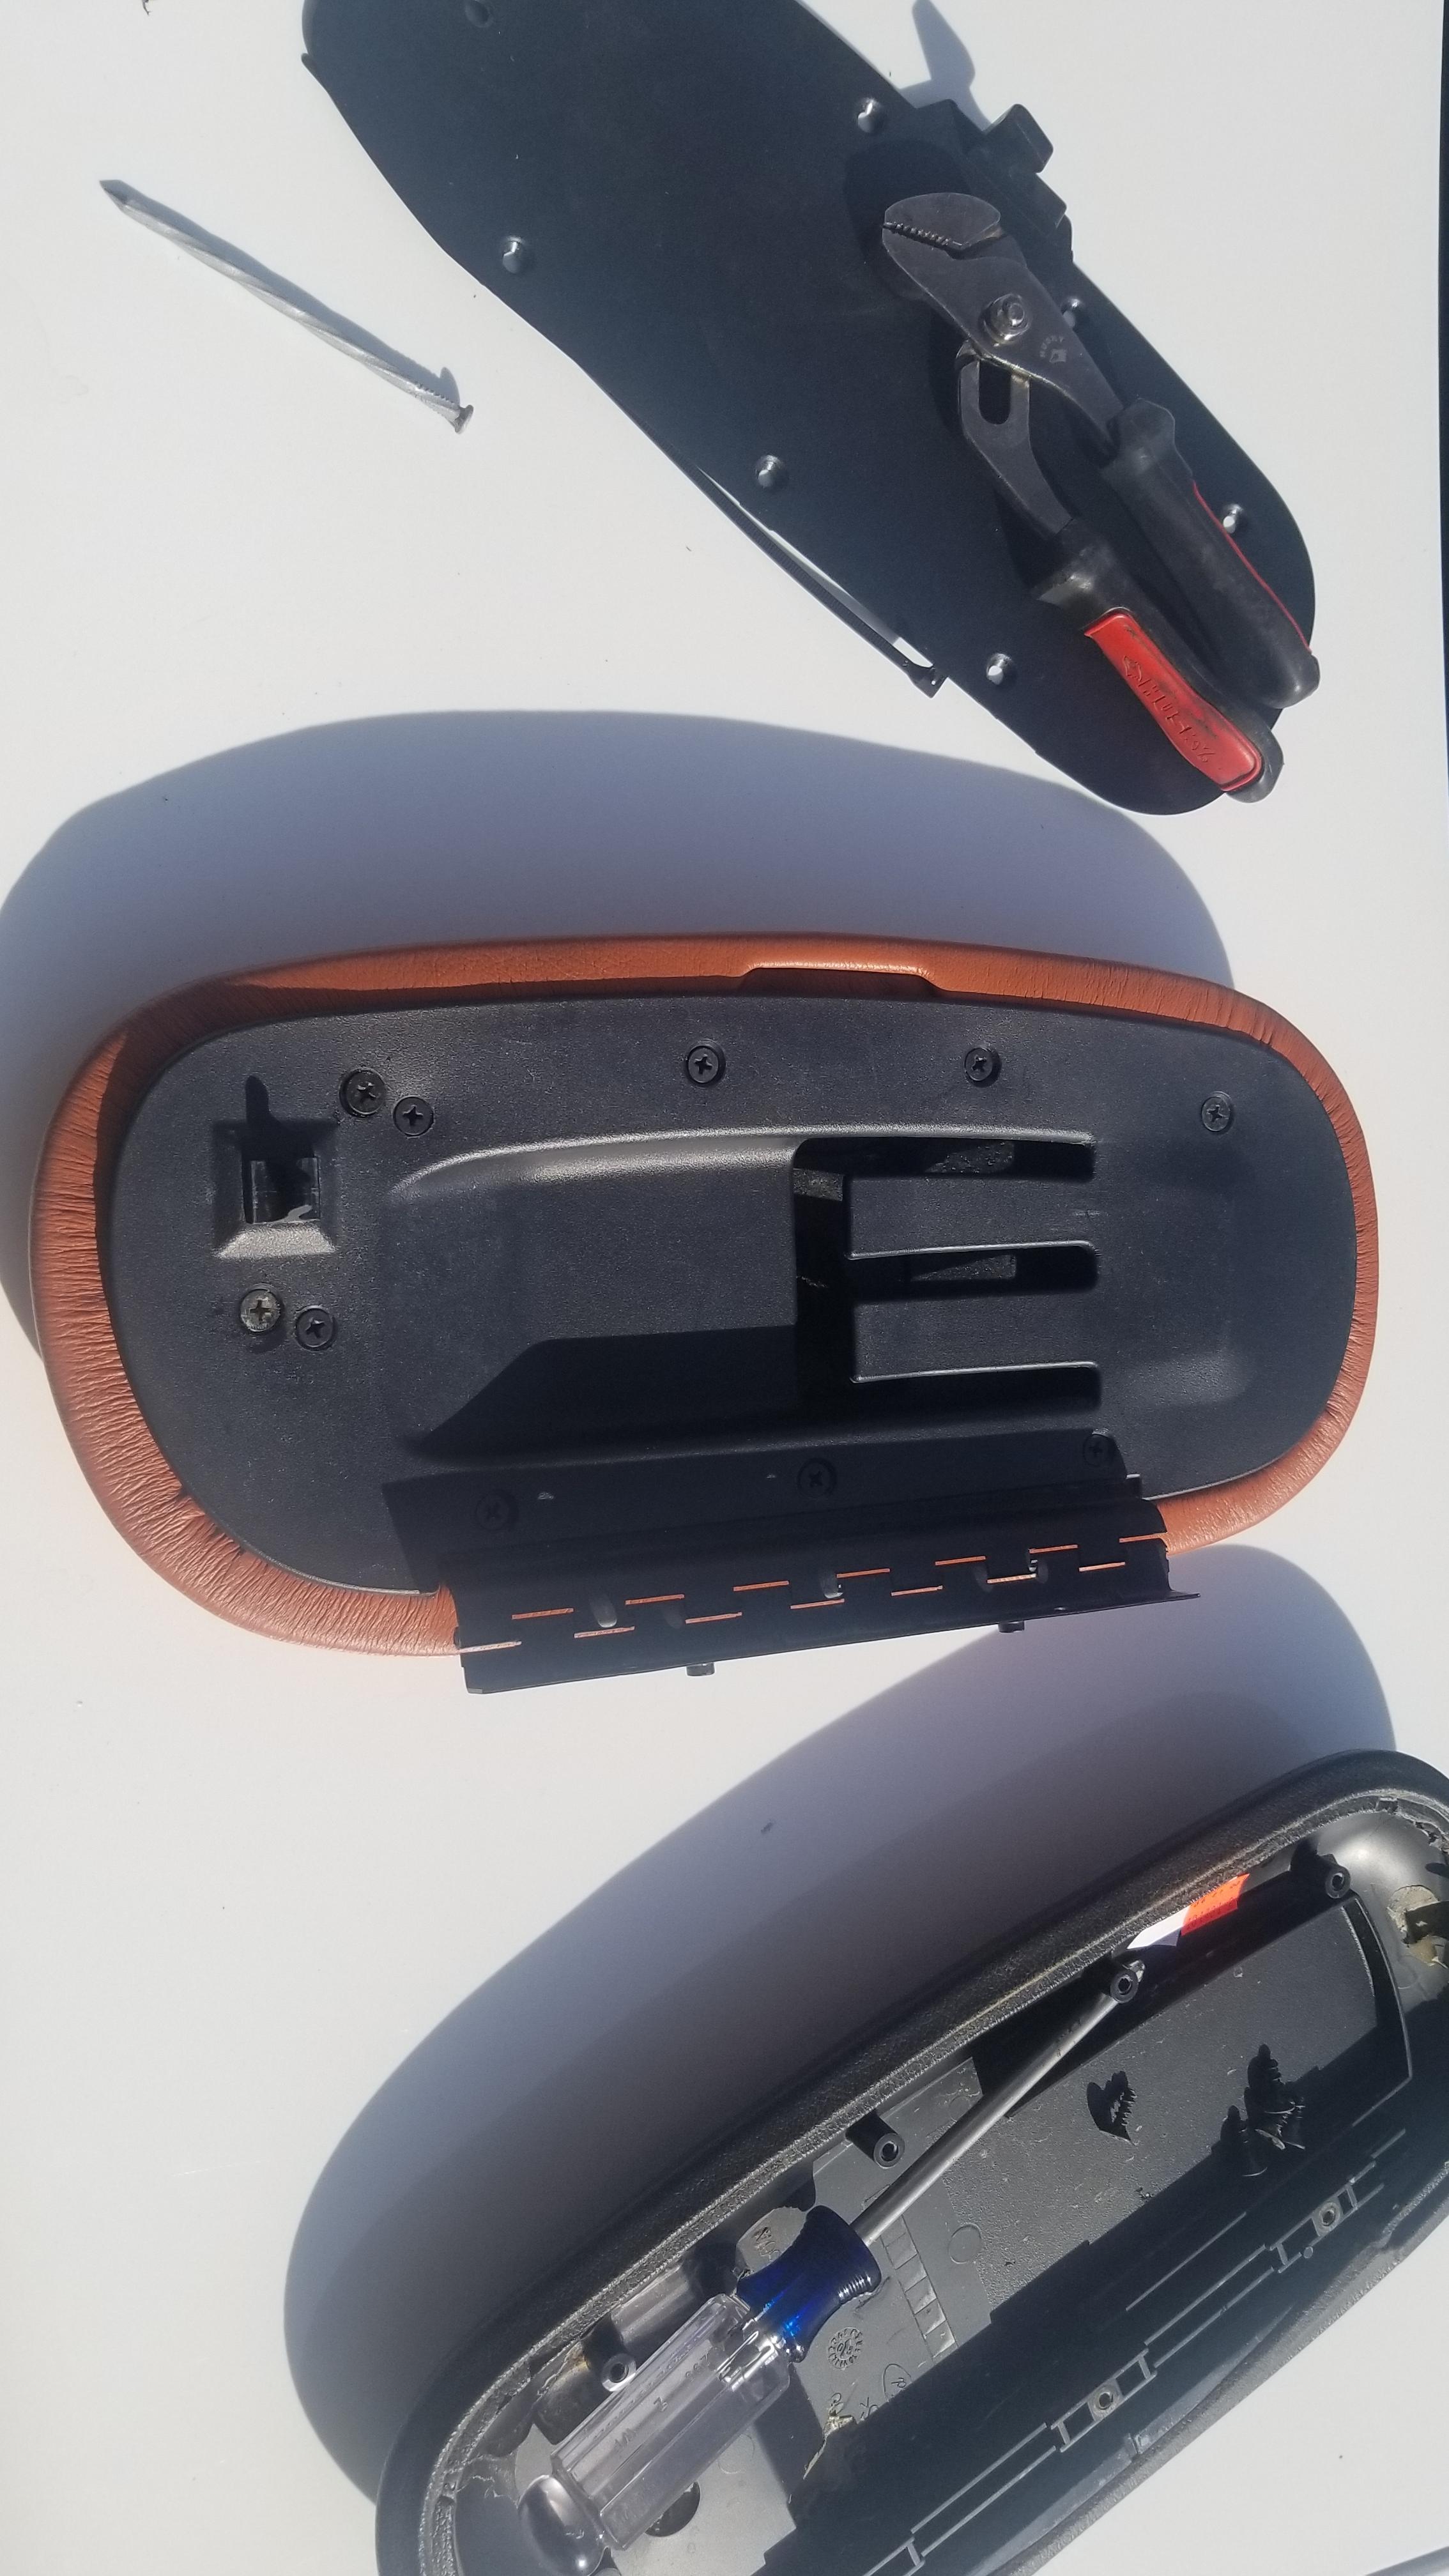
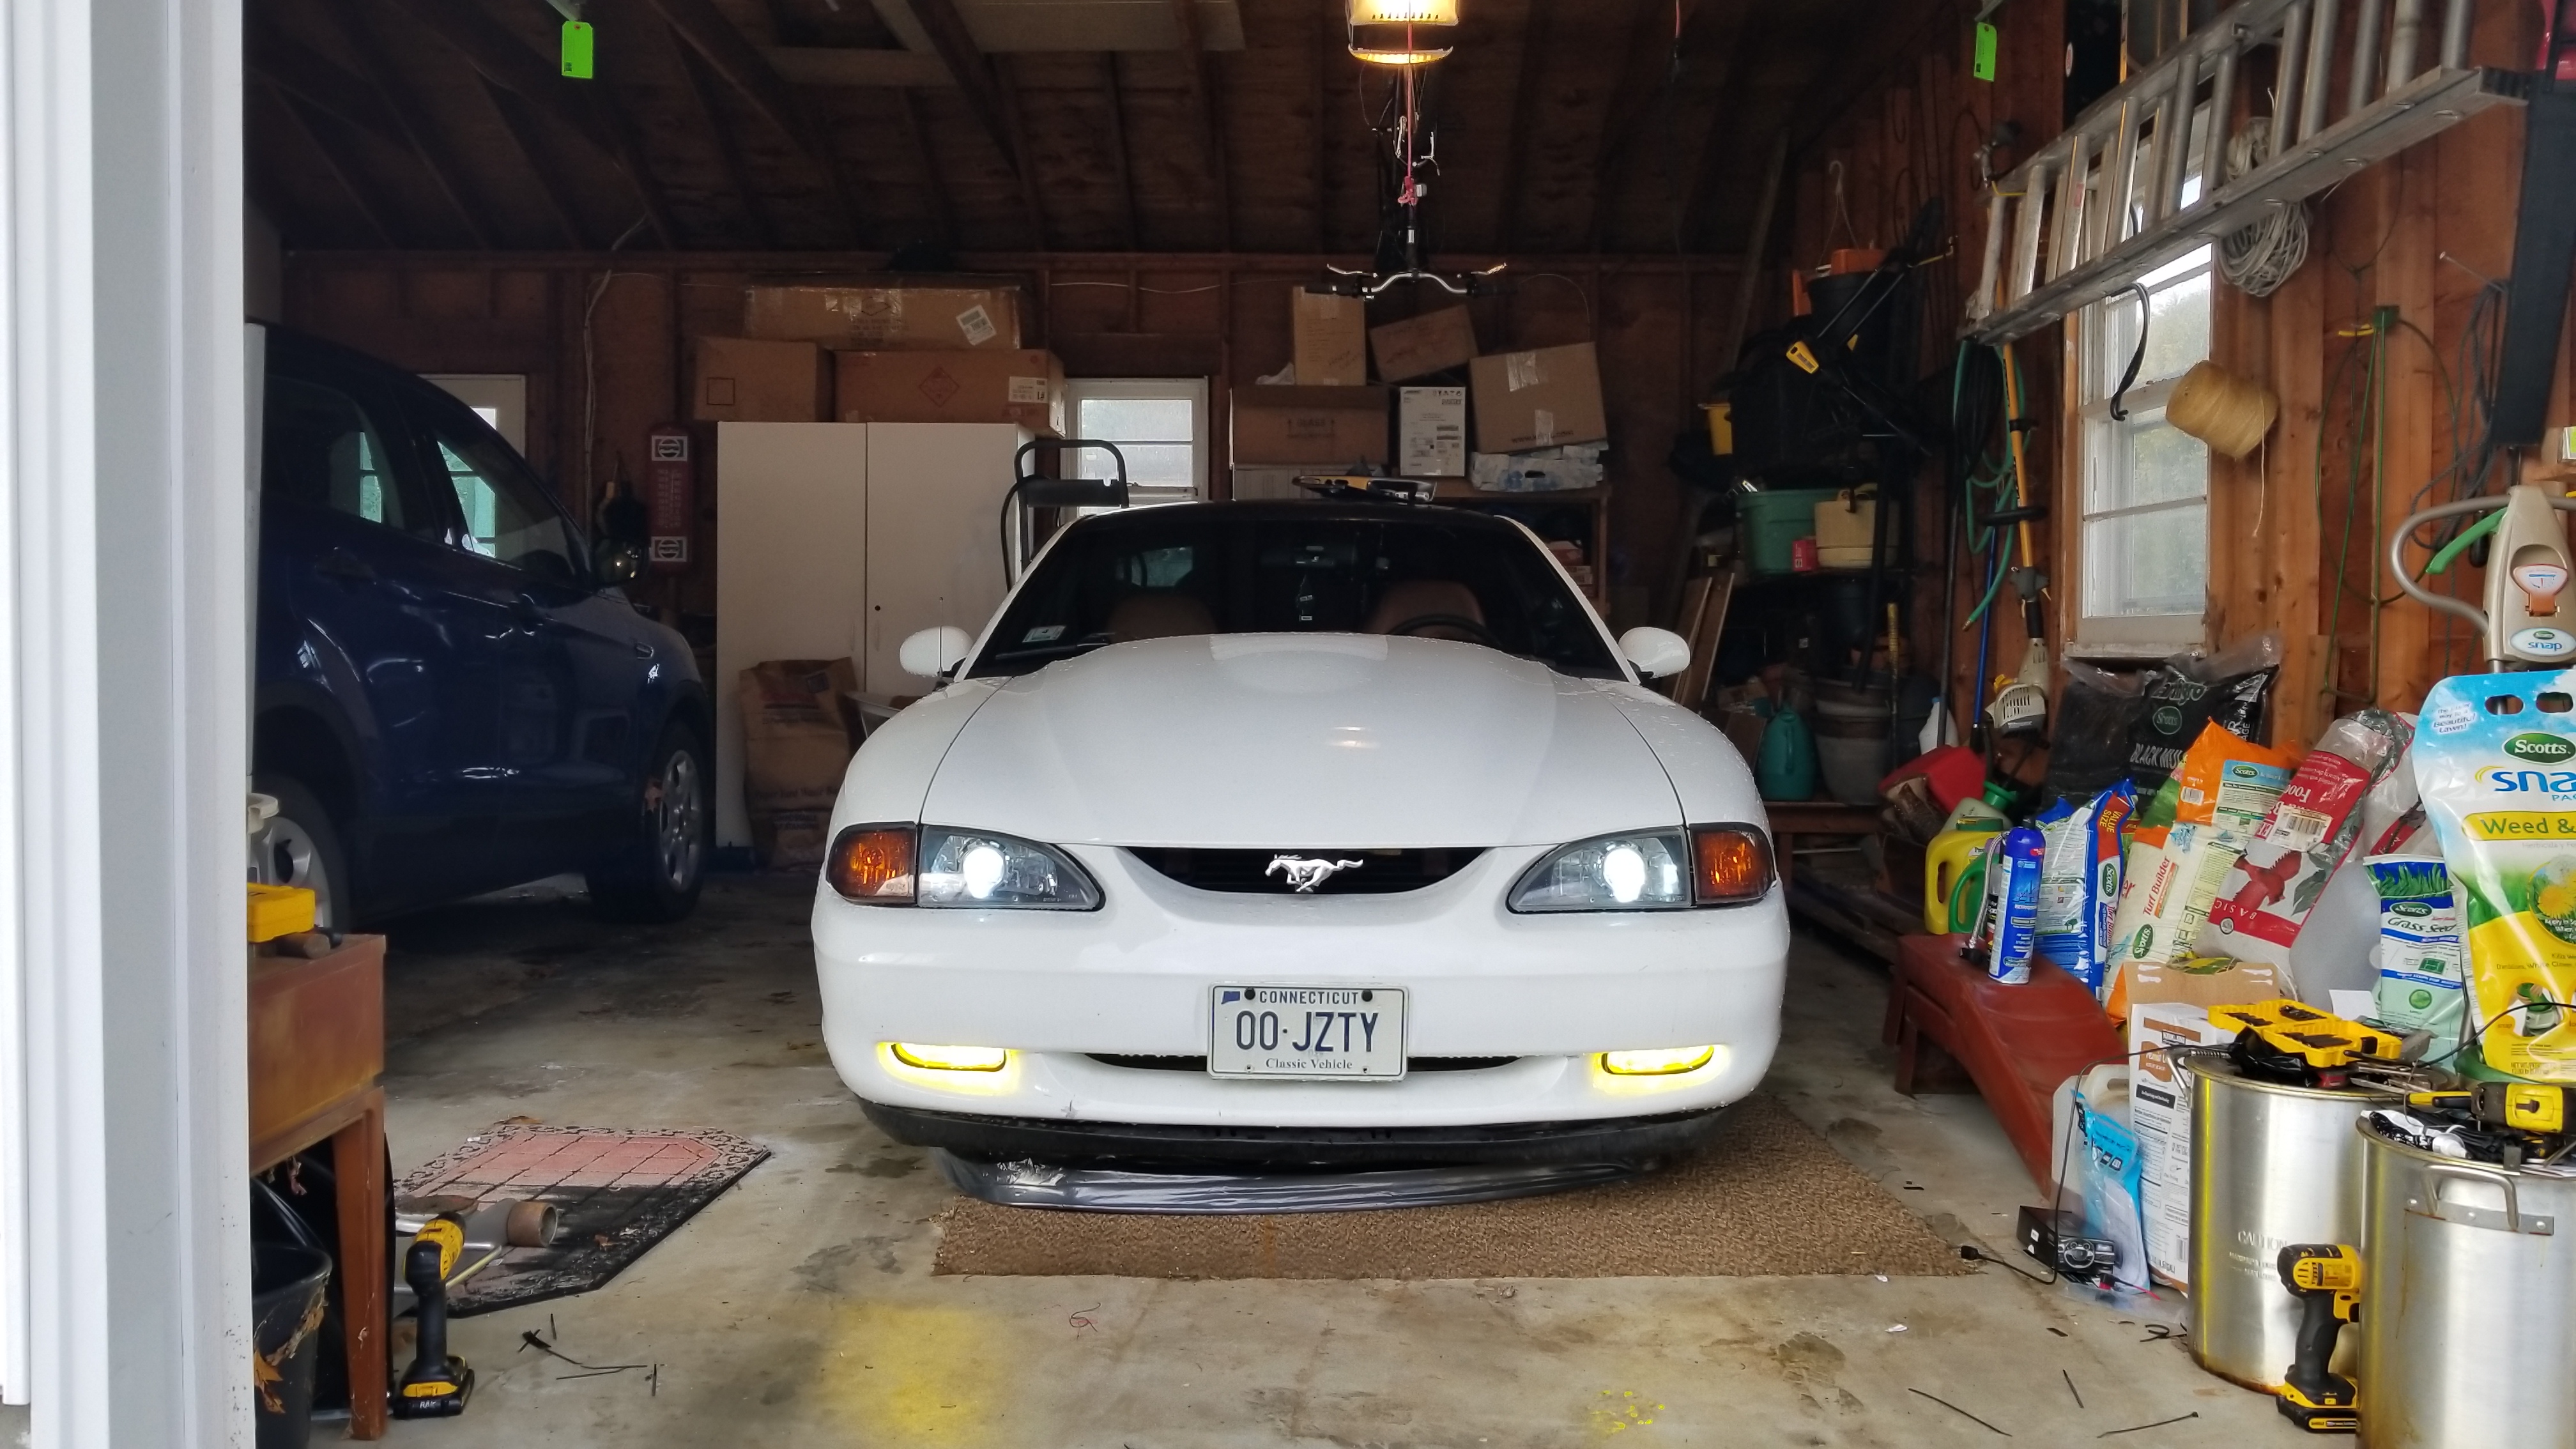
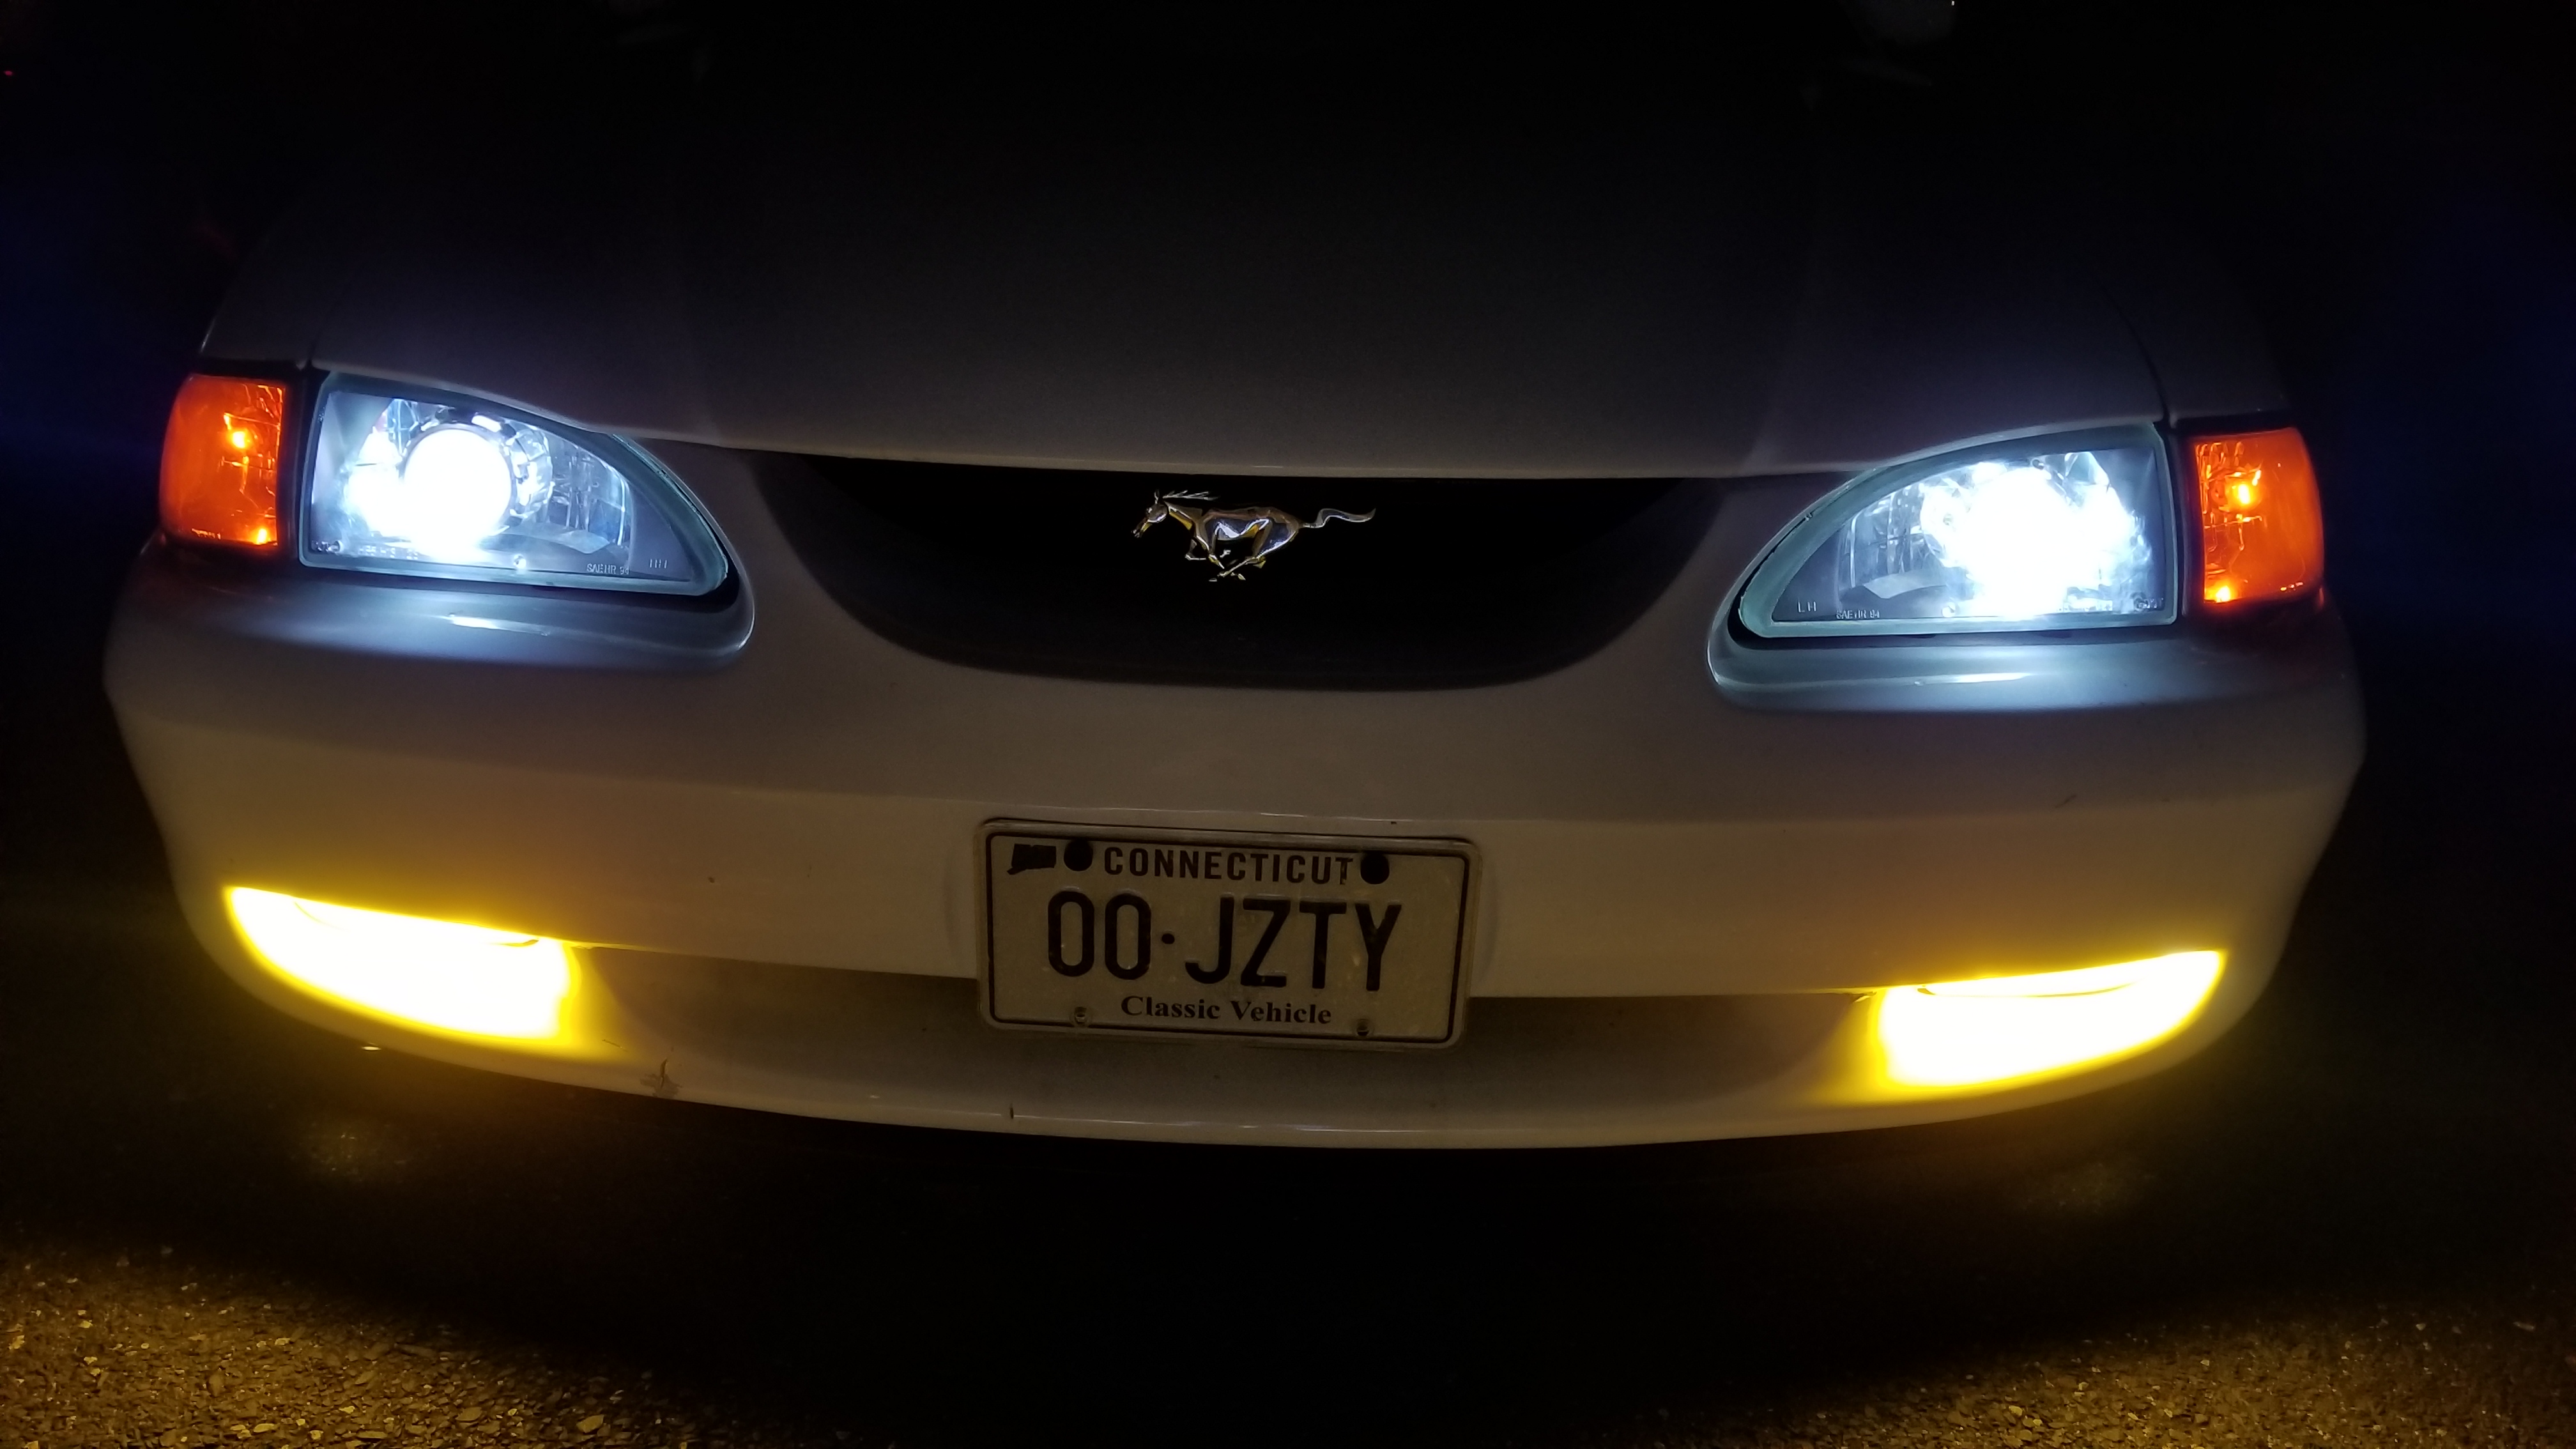
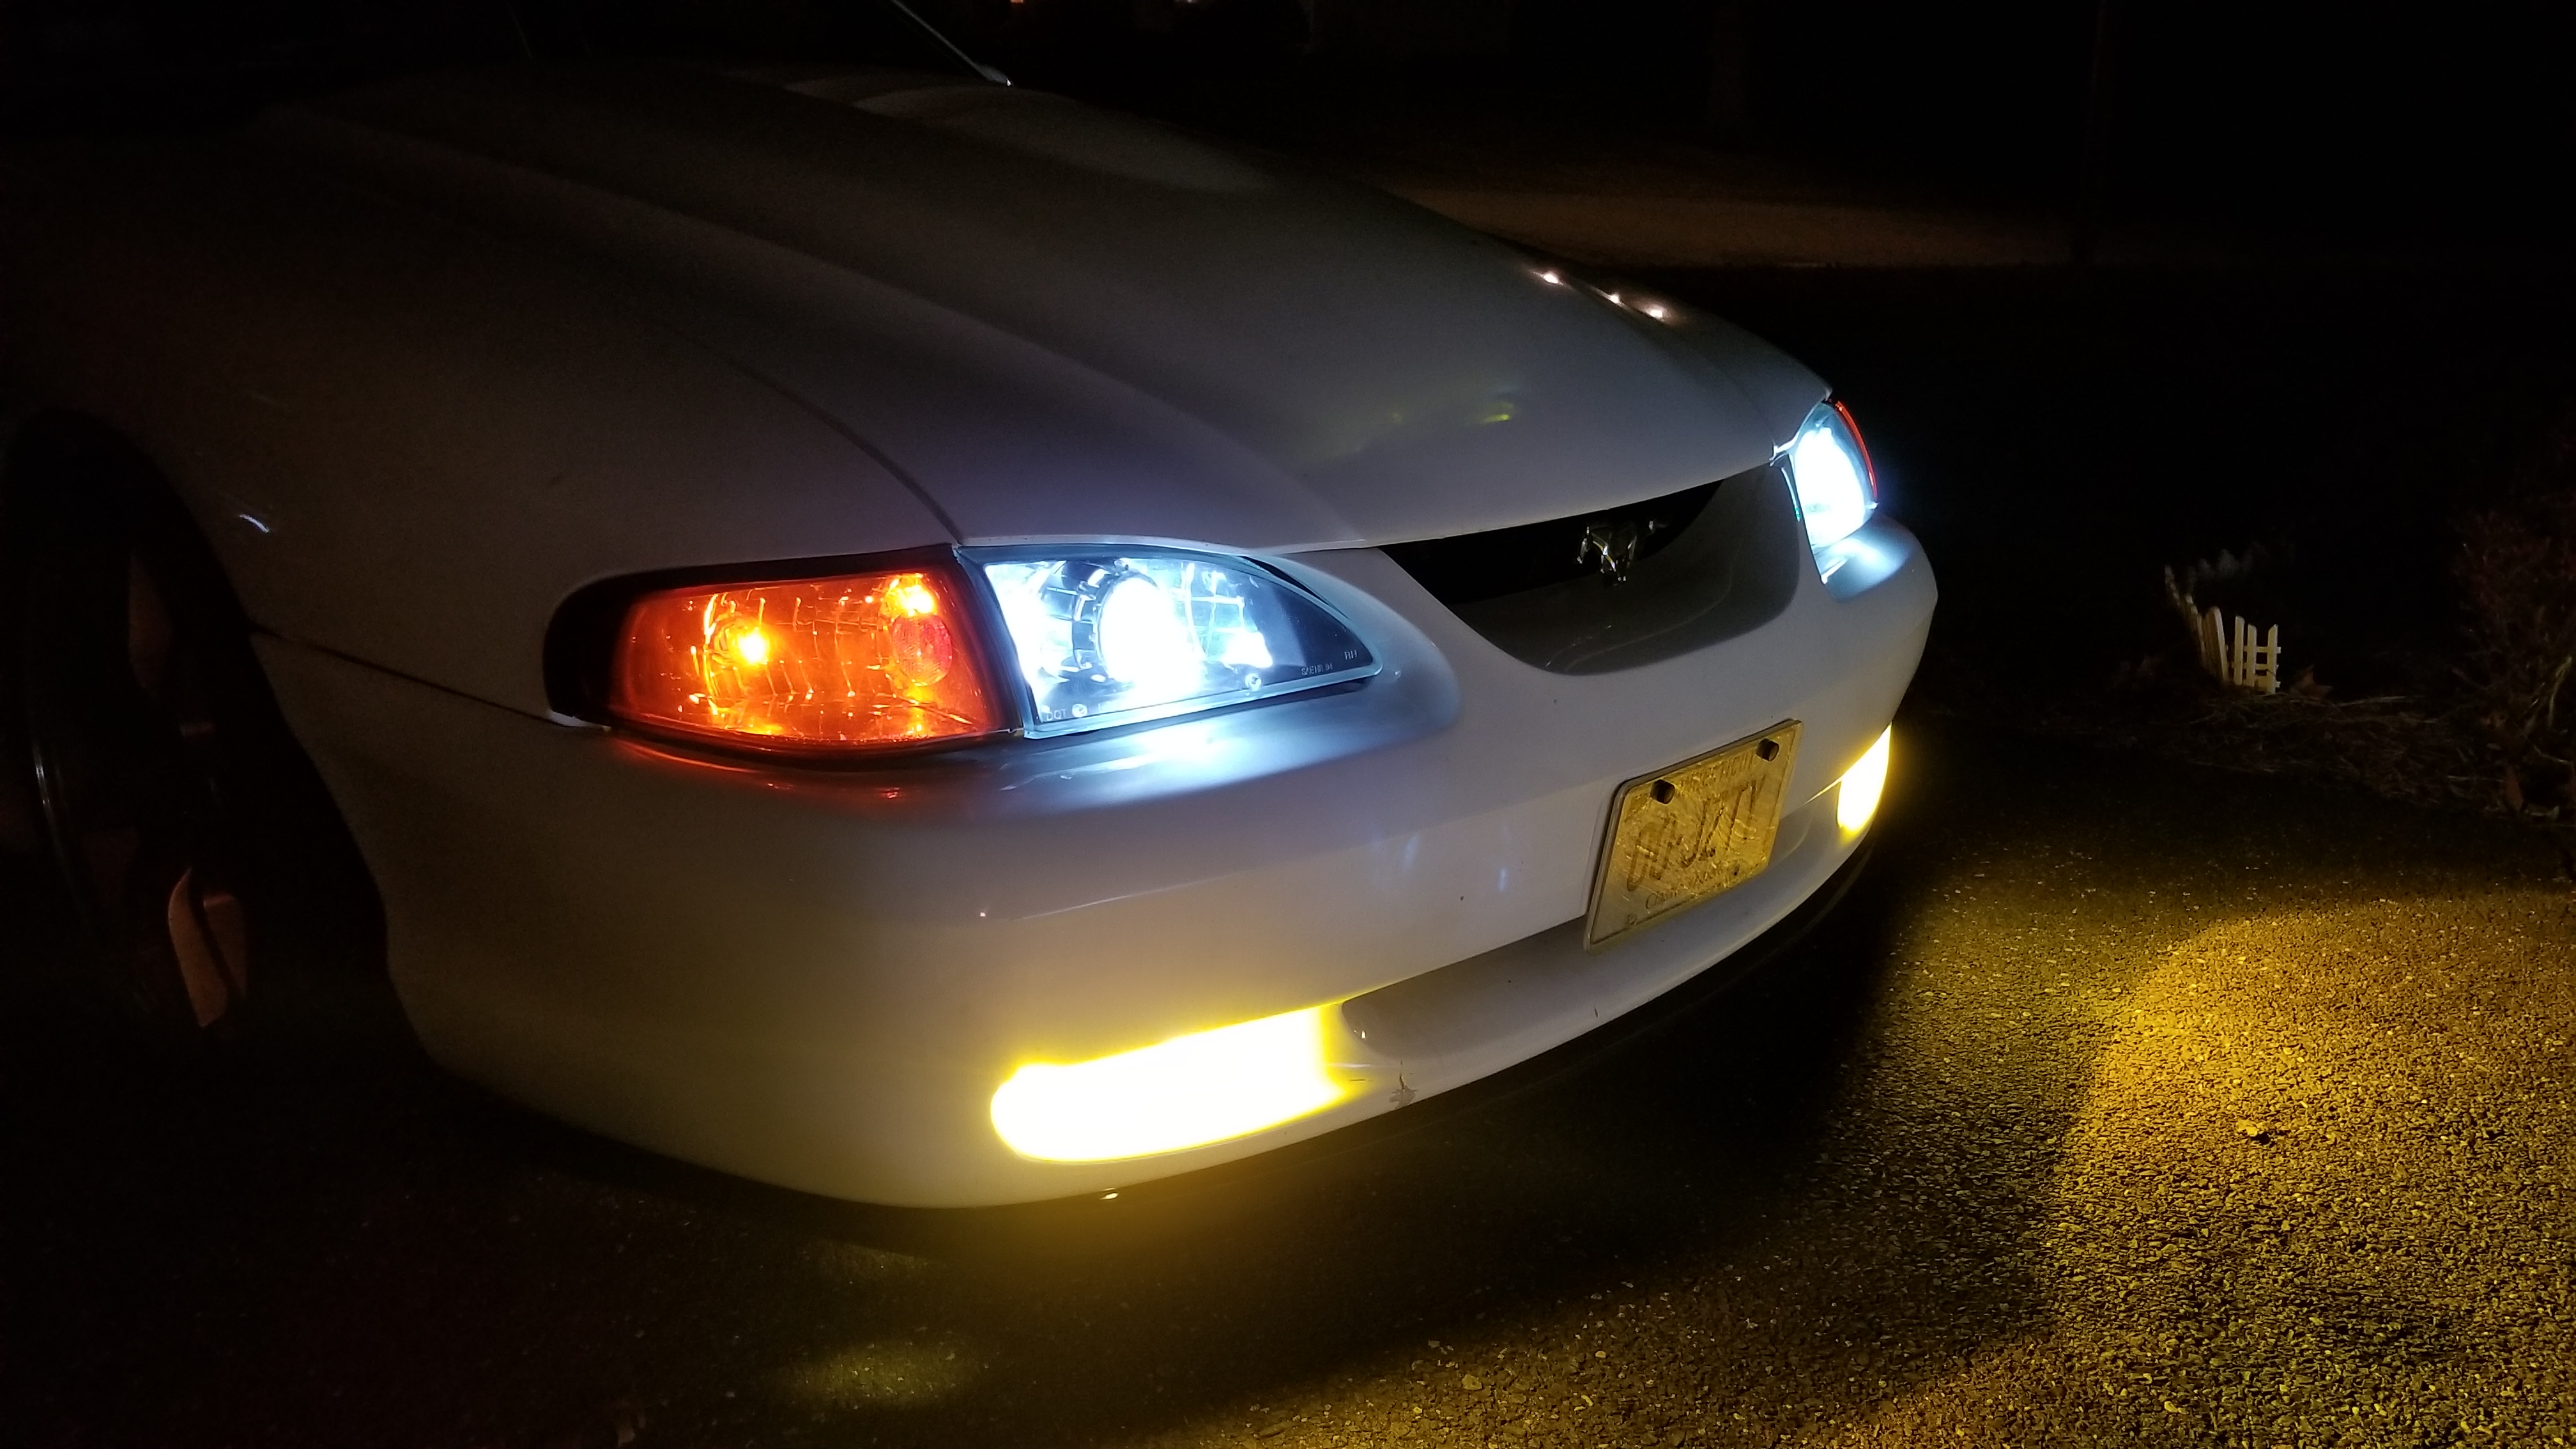
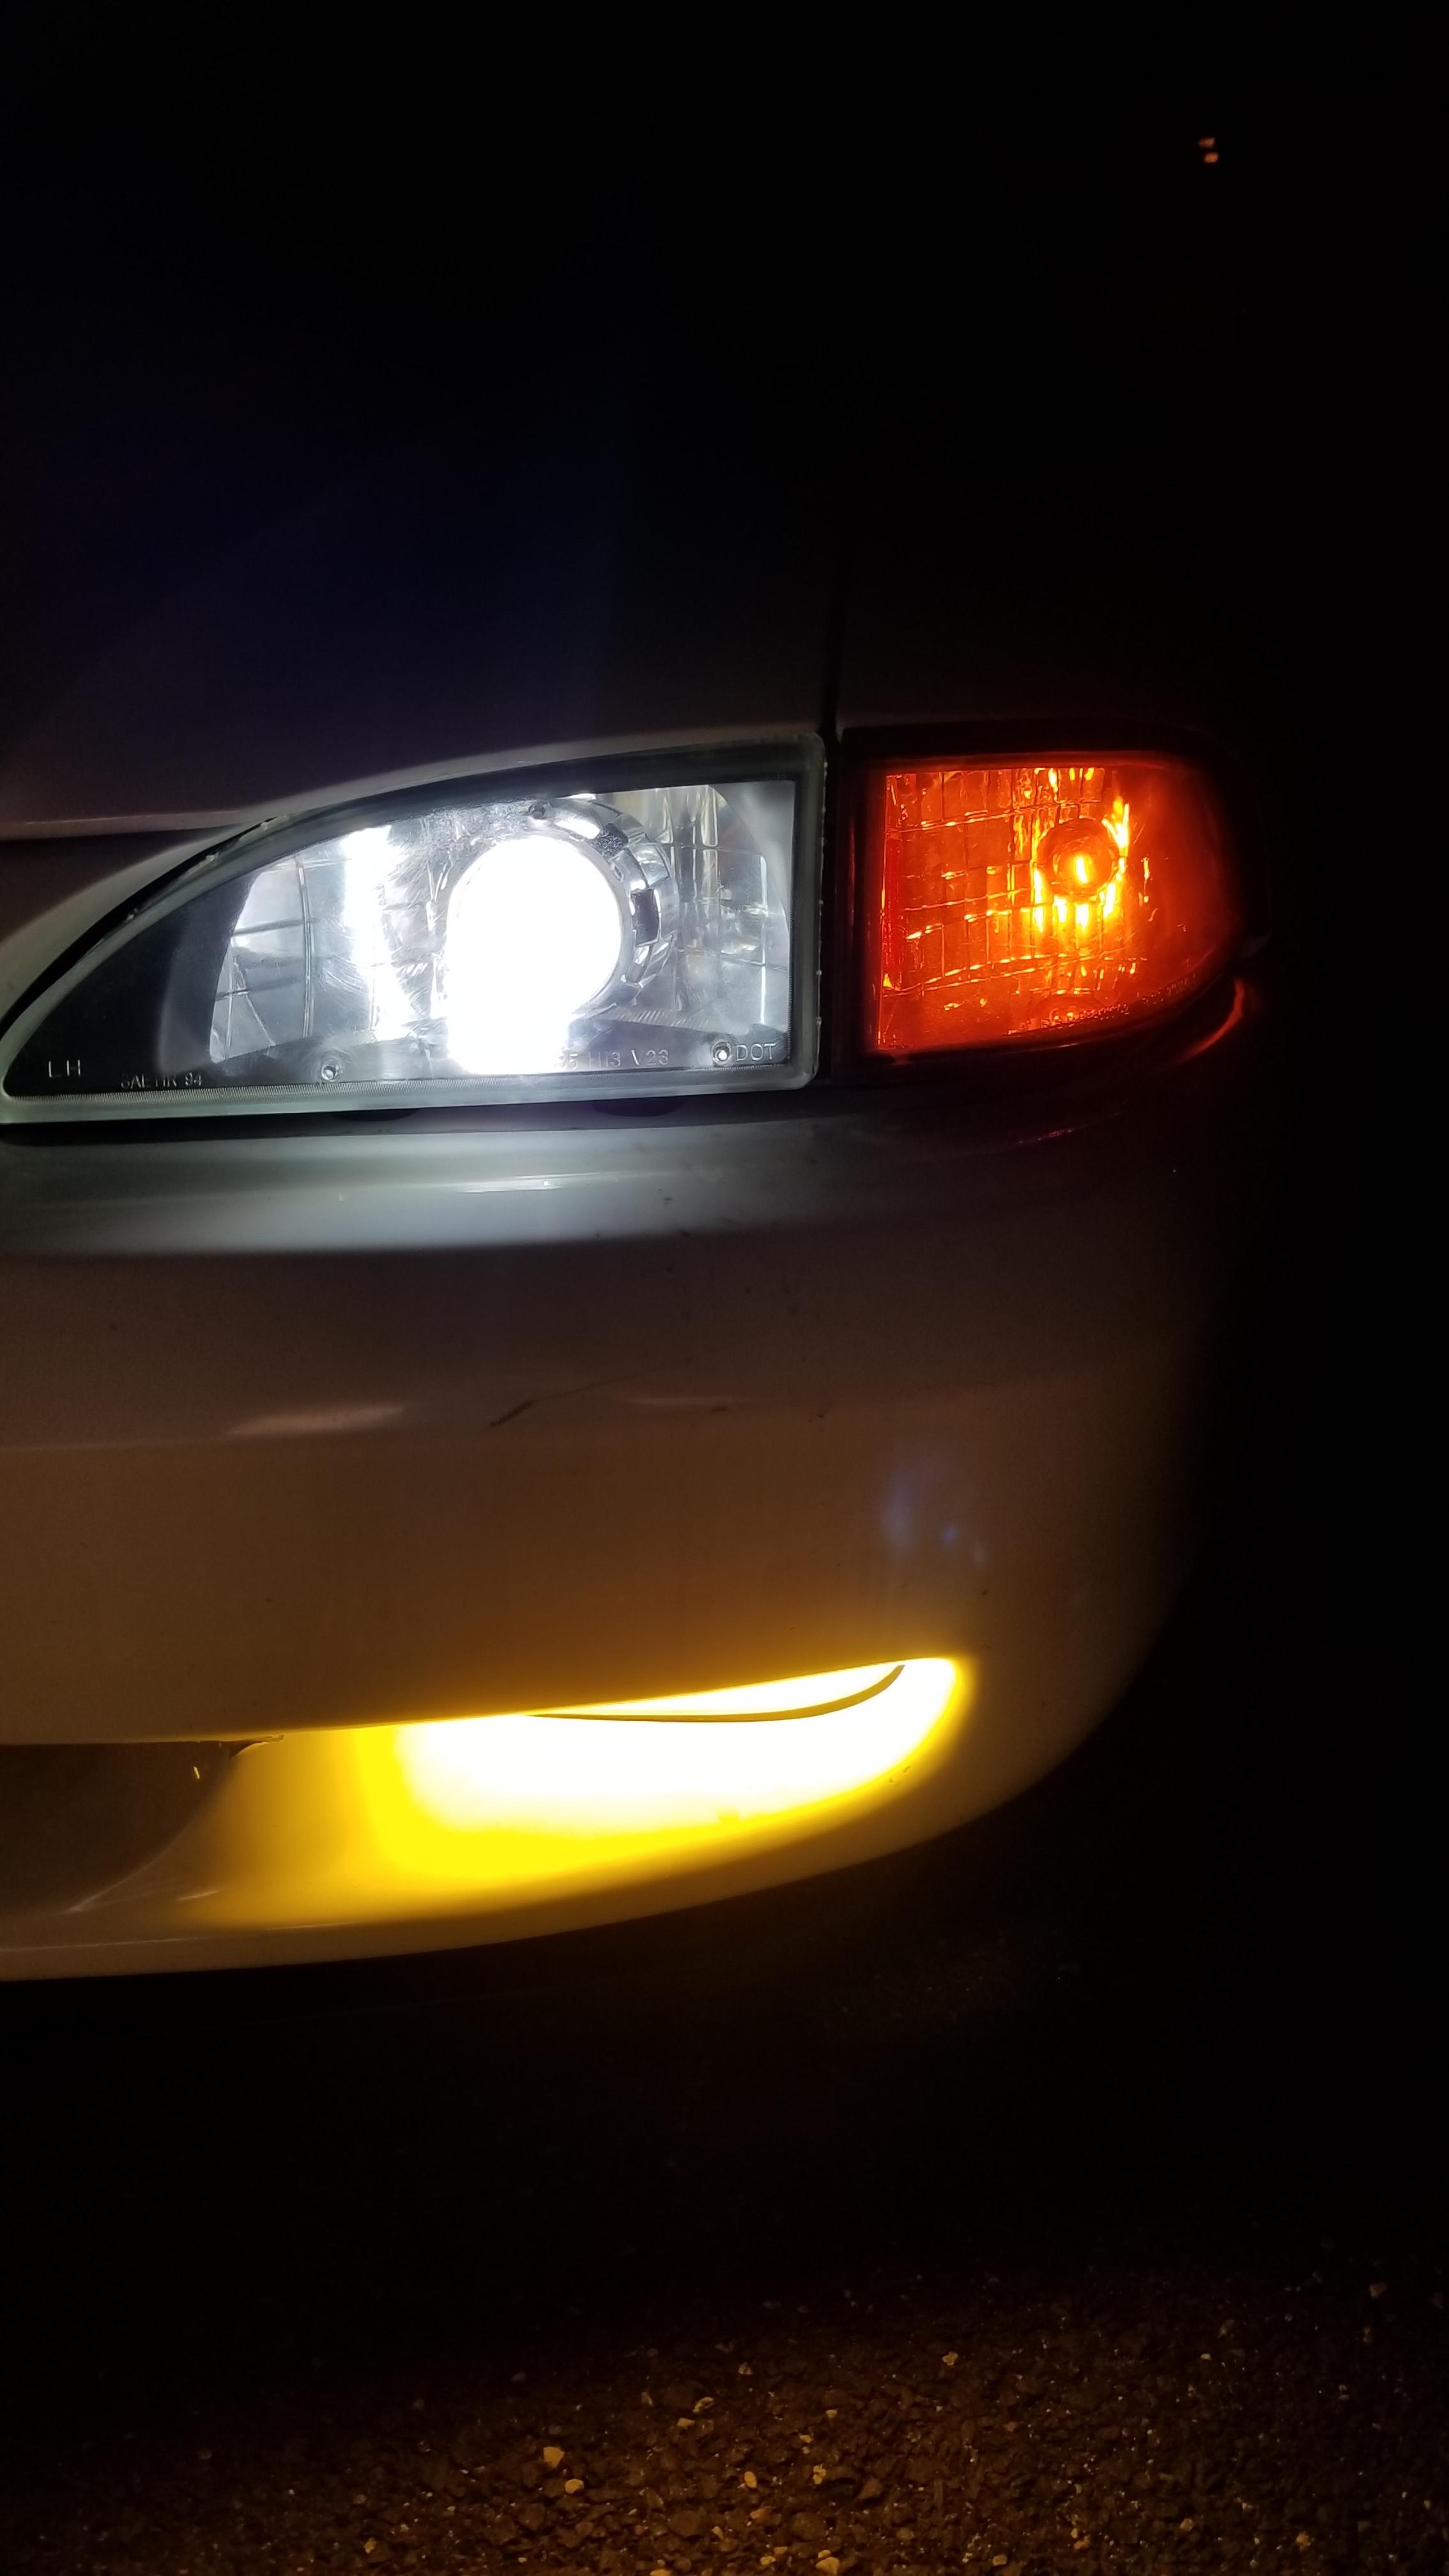
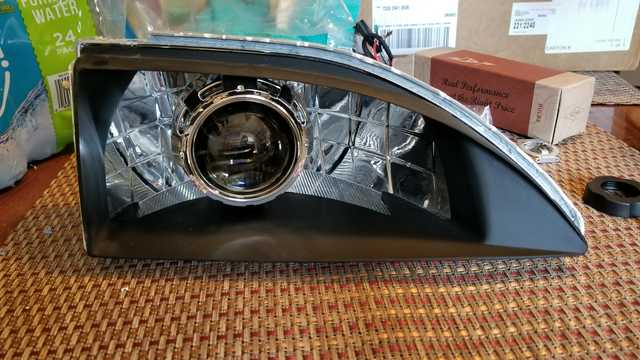
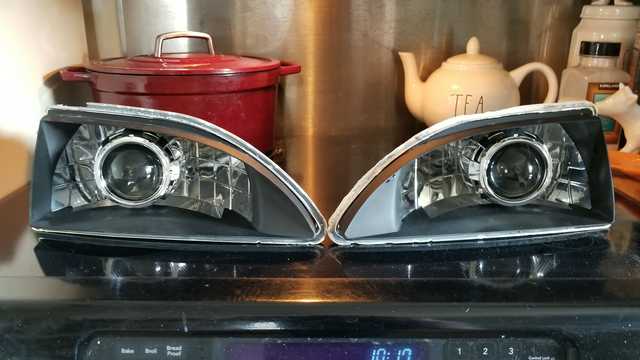
Got the projectors into my headlights after fighting for entirely too long getting the lenses off. The combination of me having no experience with opening headlights and retrofitting them and the fact these headlights are atleast 8 years old maybe even older posed a challenge. But I finally got them apart and didnt damage the housings edge too much. It should seal up well and I will add some caulking of some weather proofing kind in addition to the headlight sealant to prevent any potential leaking issues.

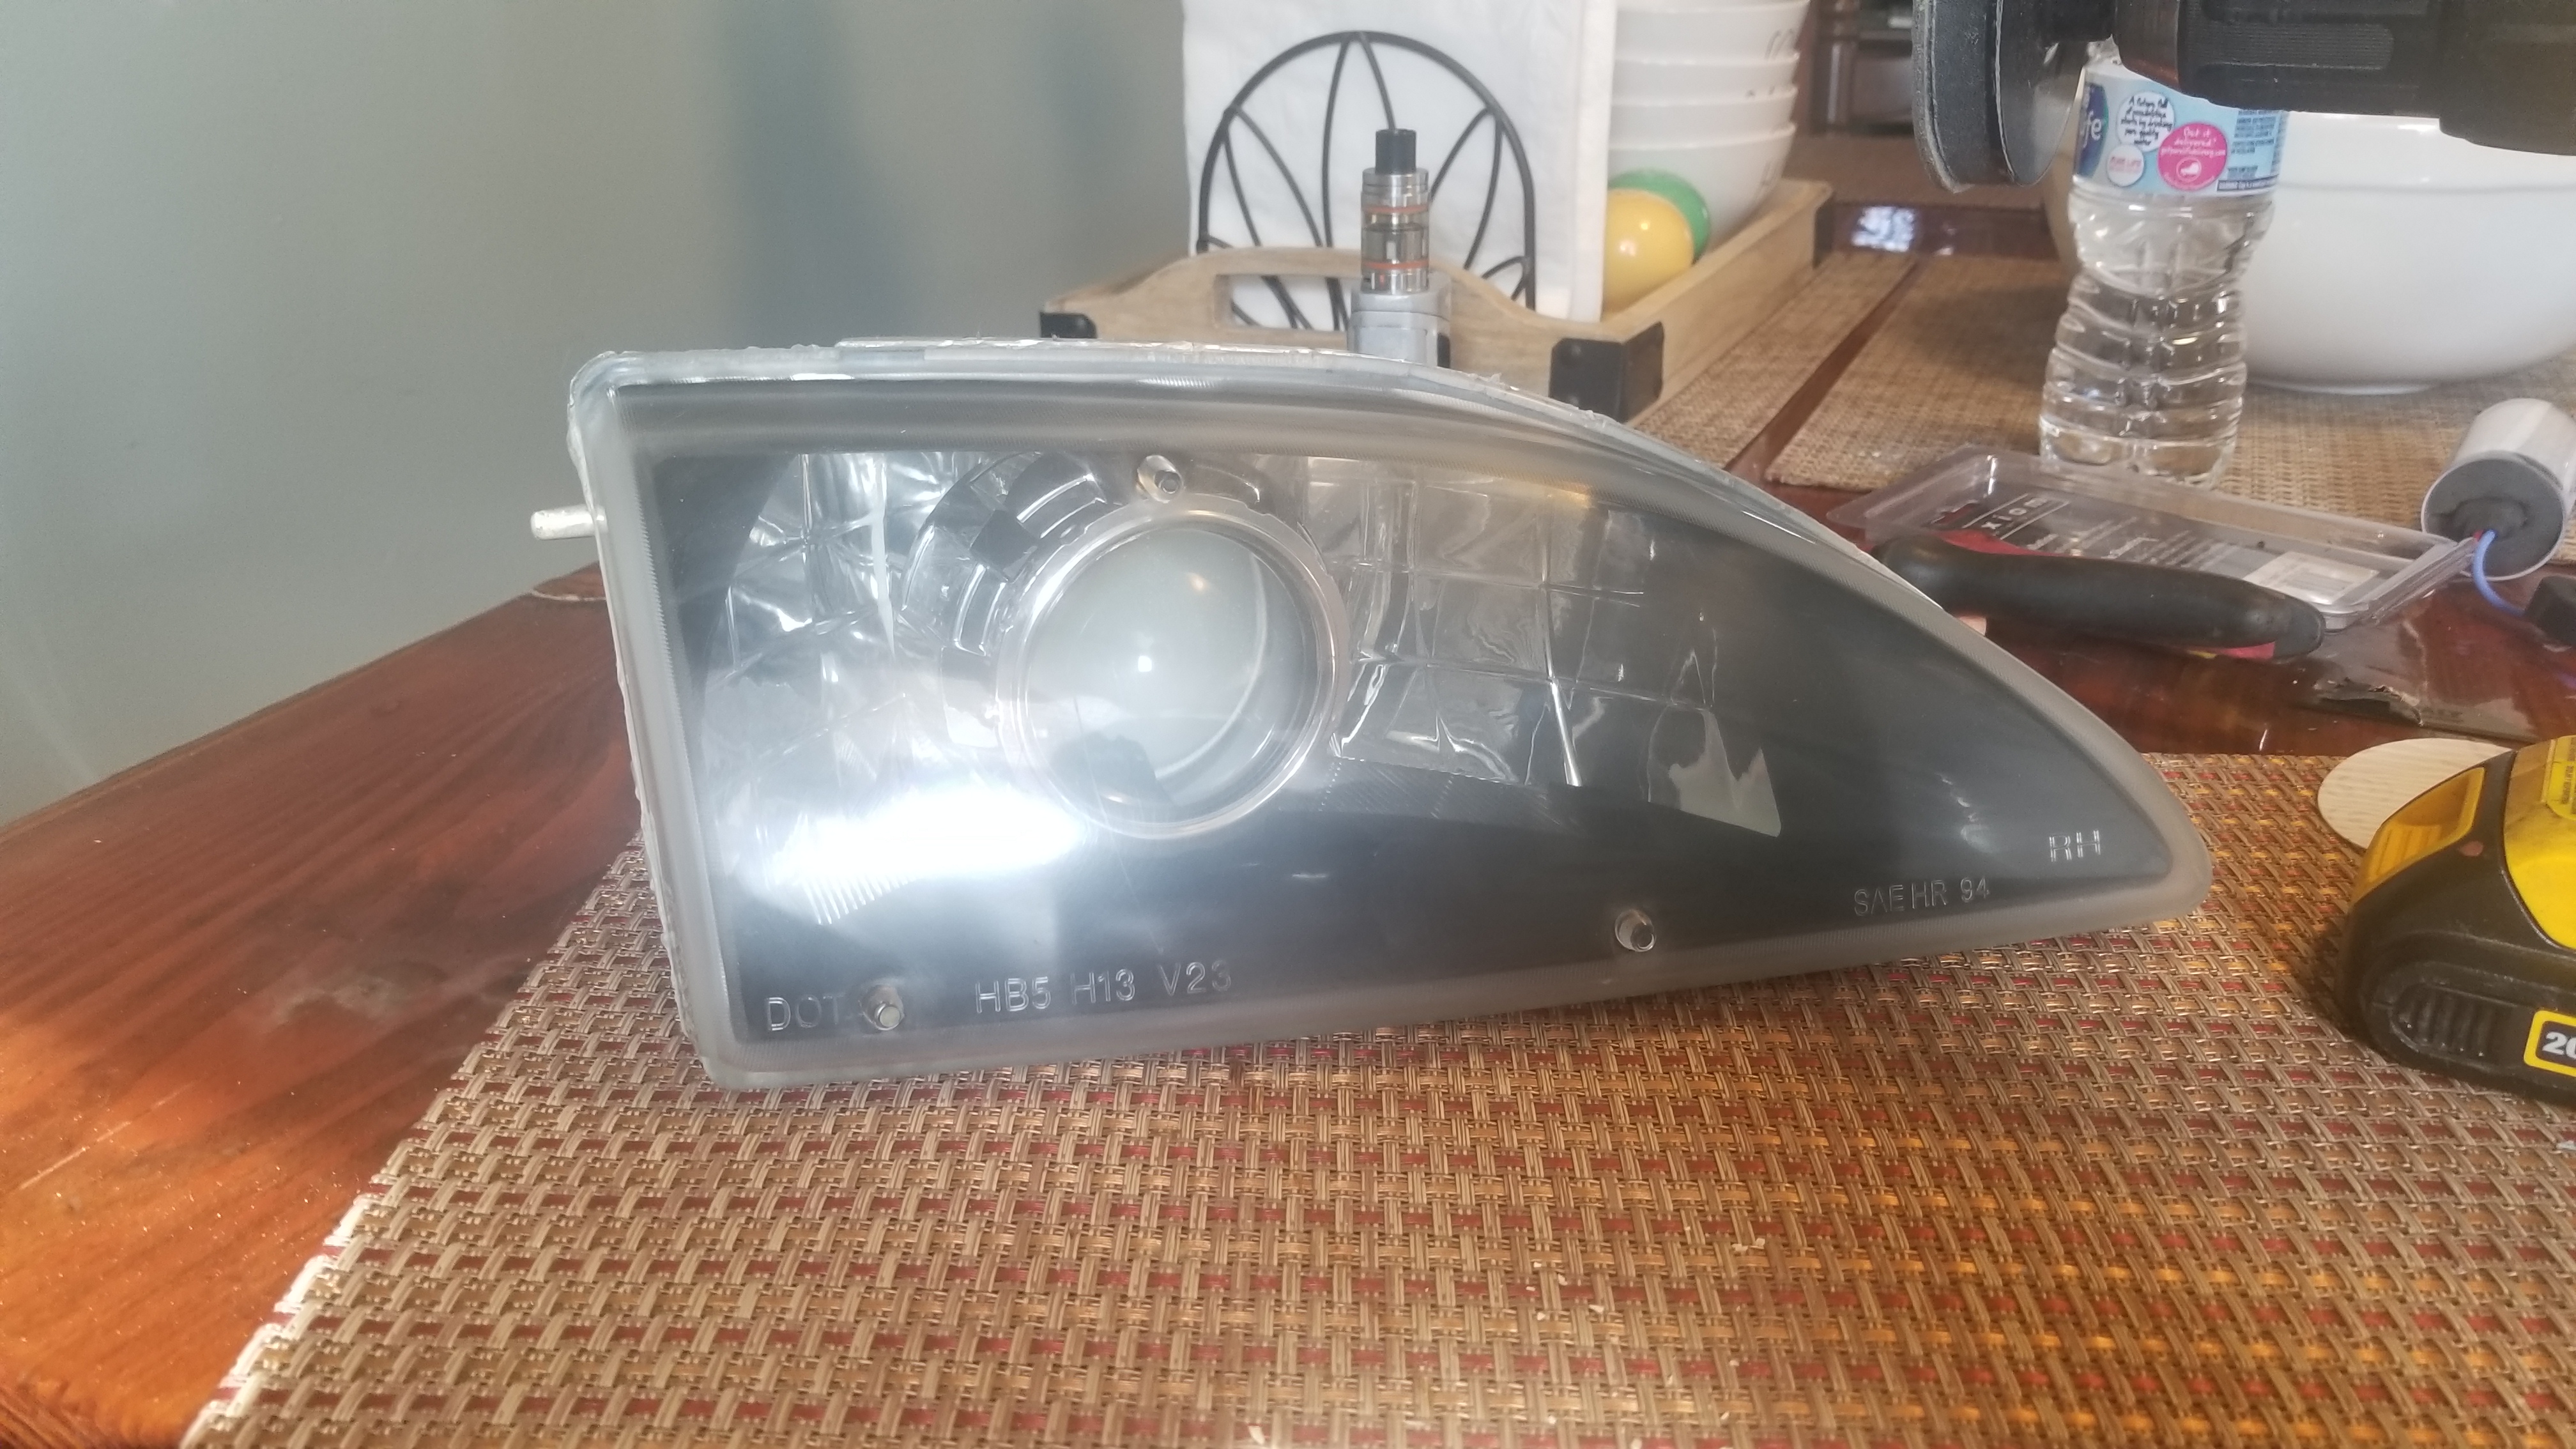
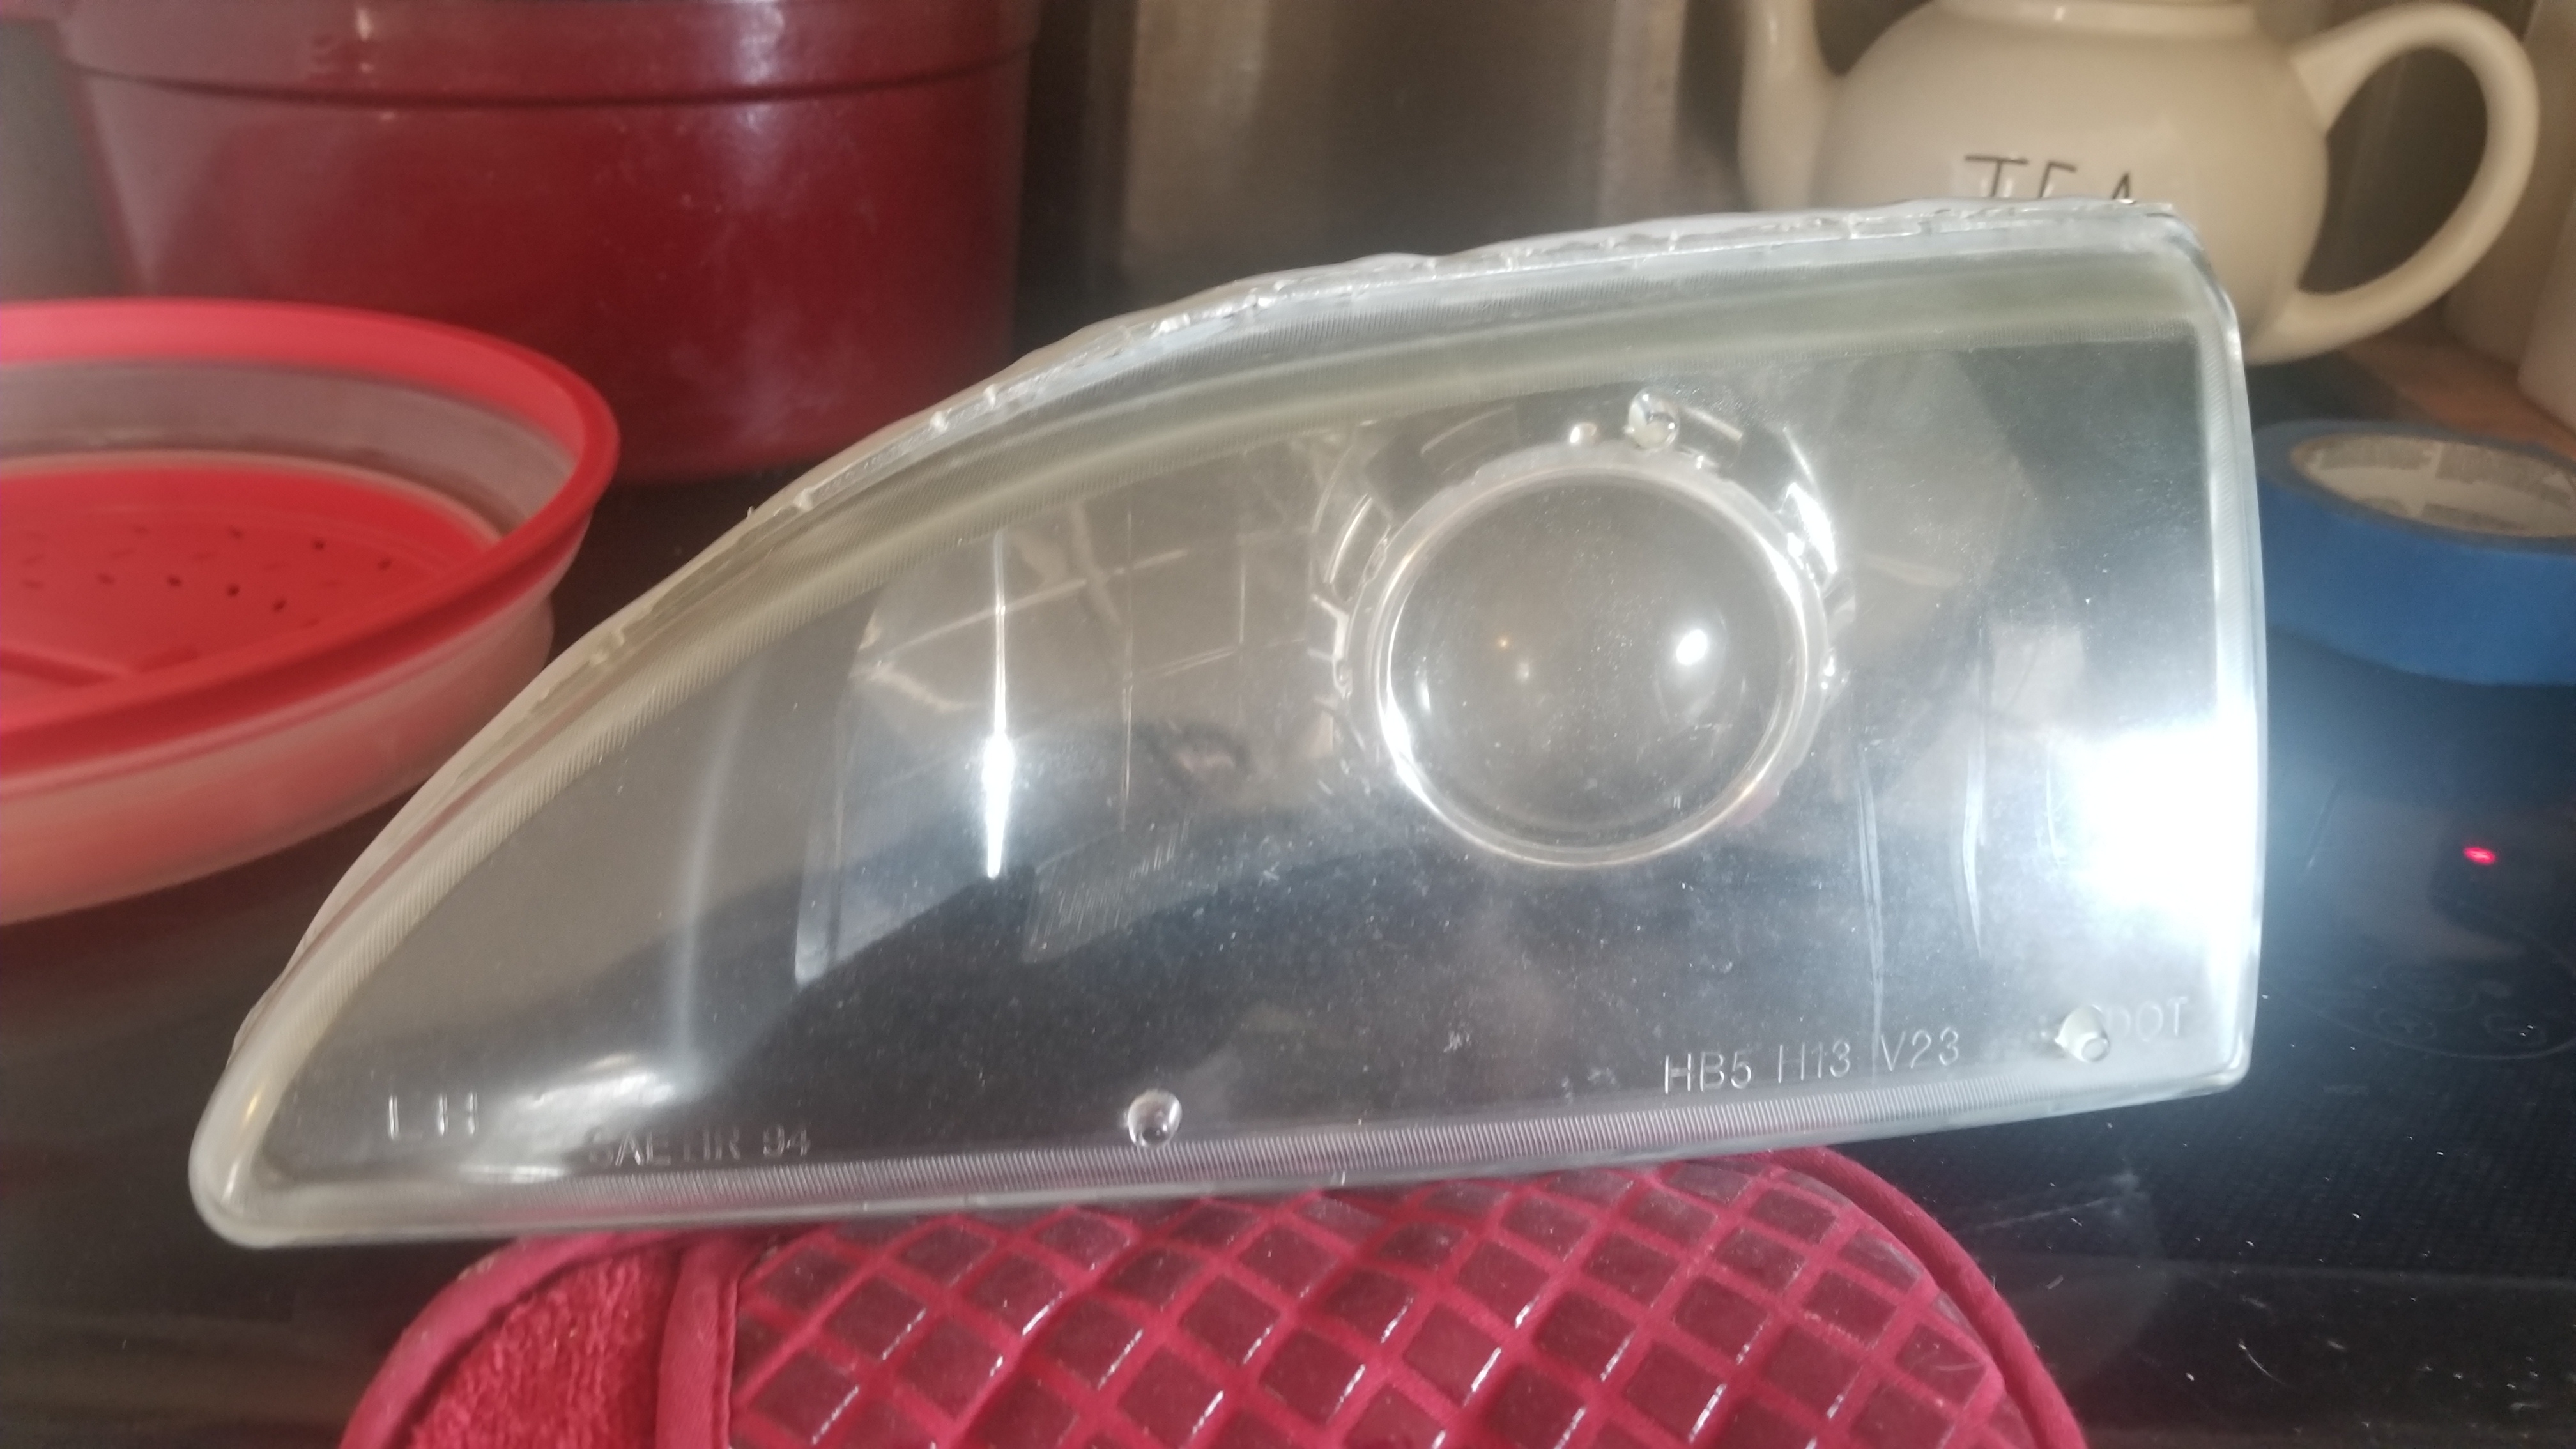
I need to restore the lenses and I'm thinking I want to clear coat them if anyone has any recommendations on a product to do that with?

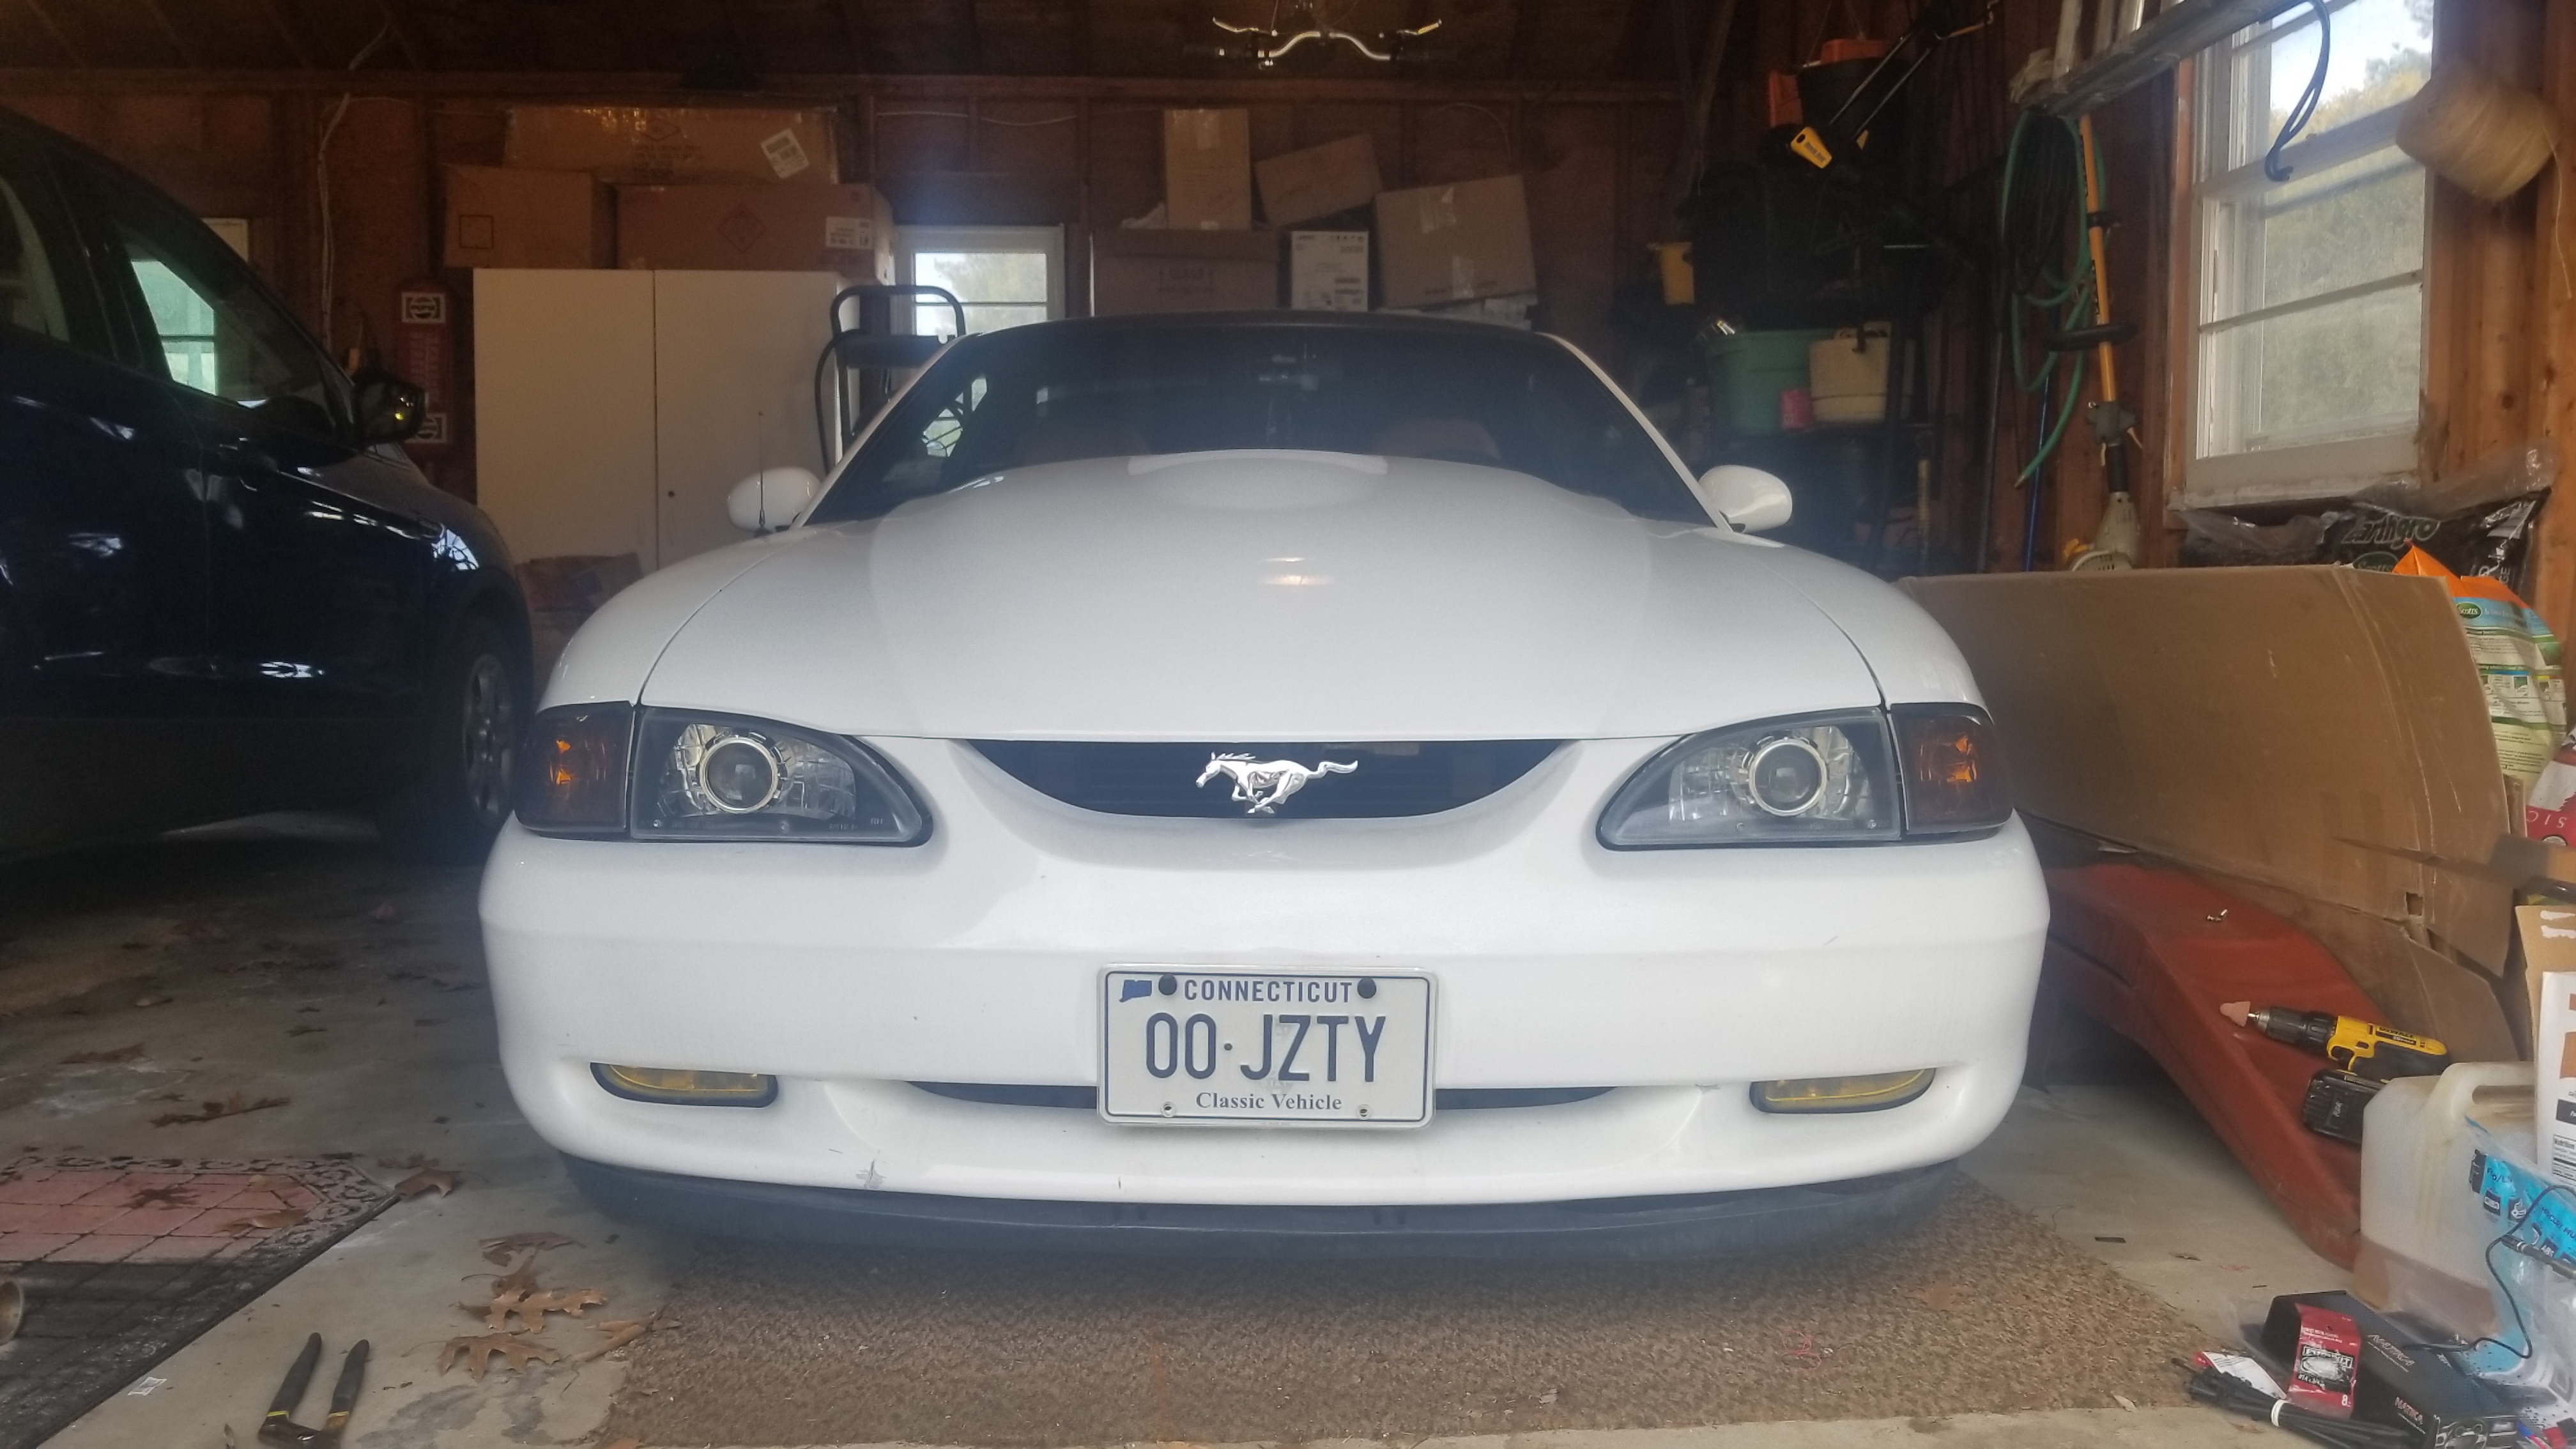
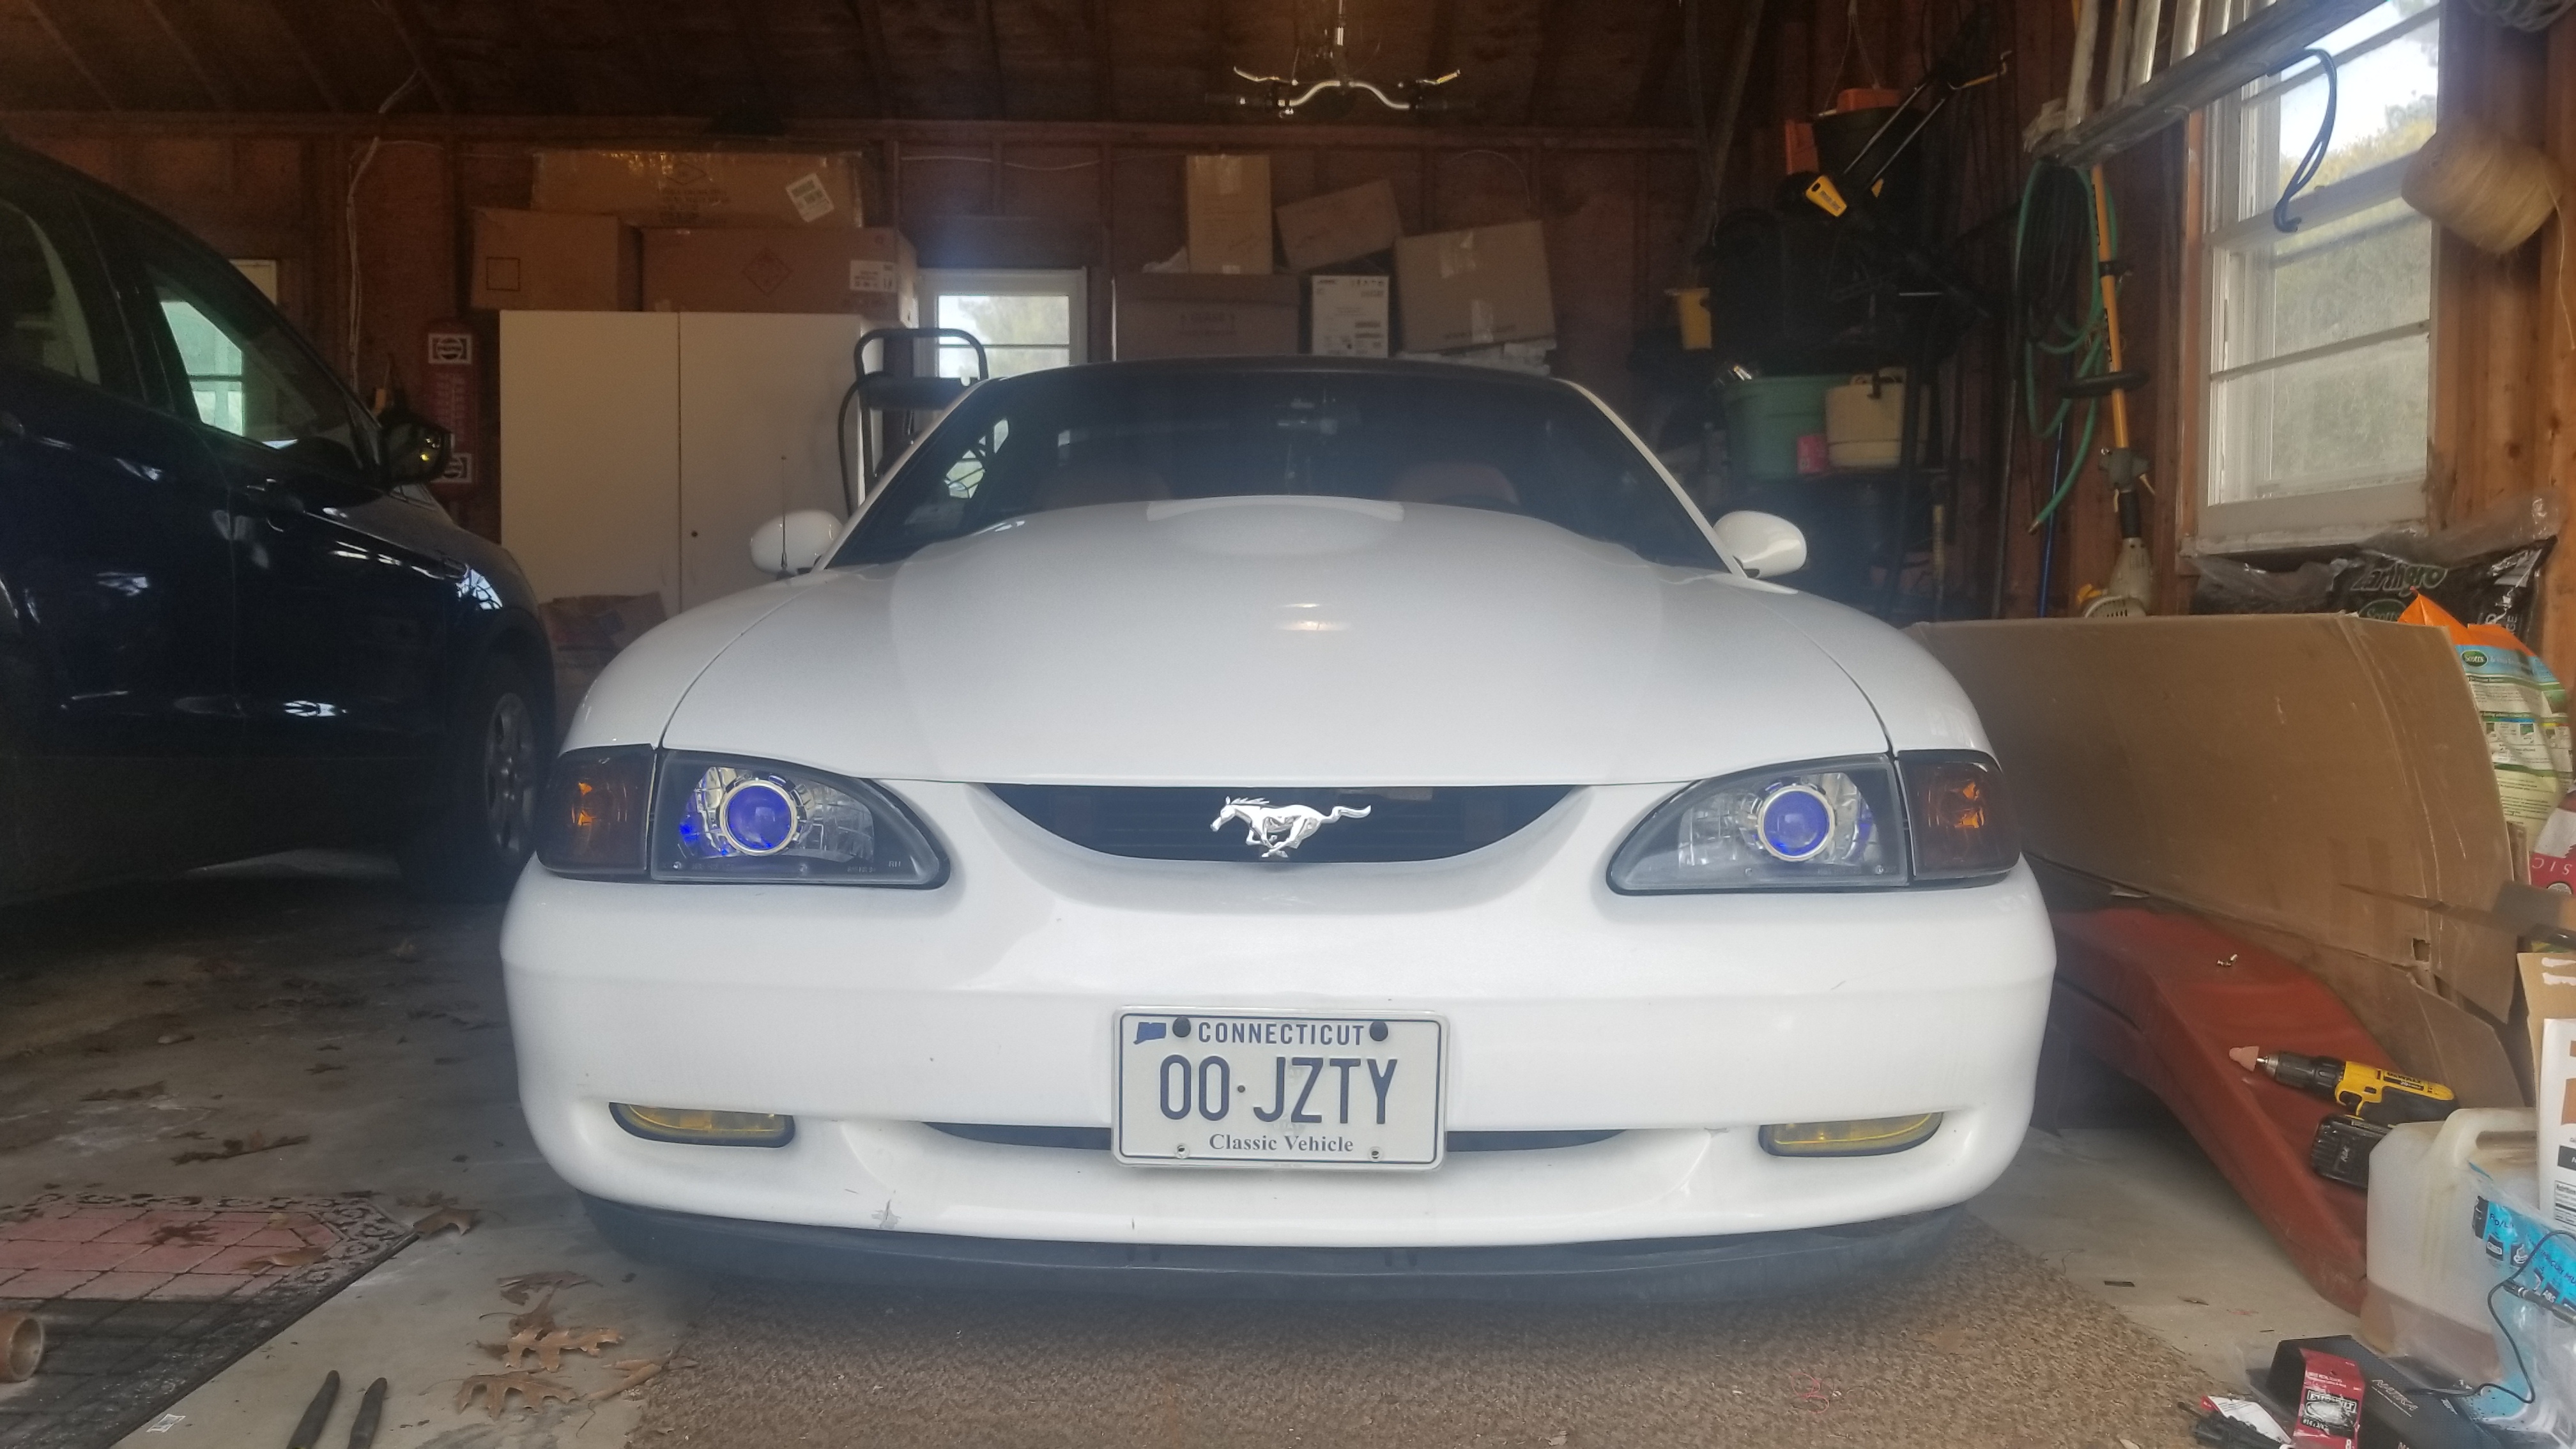
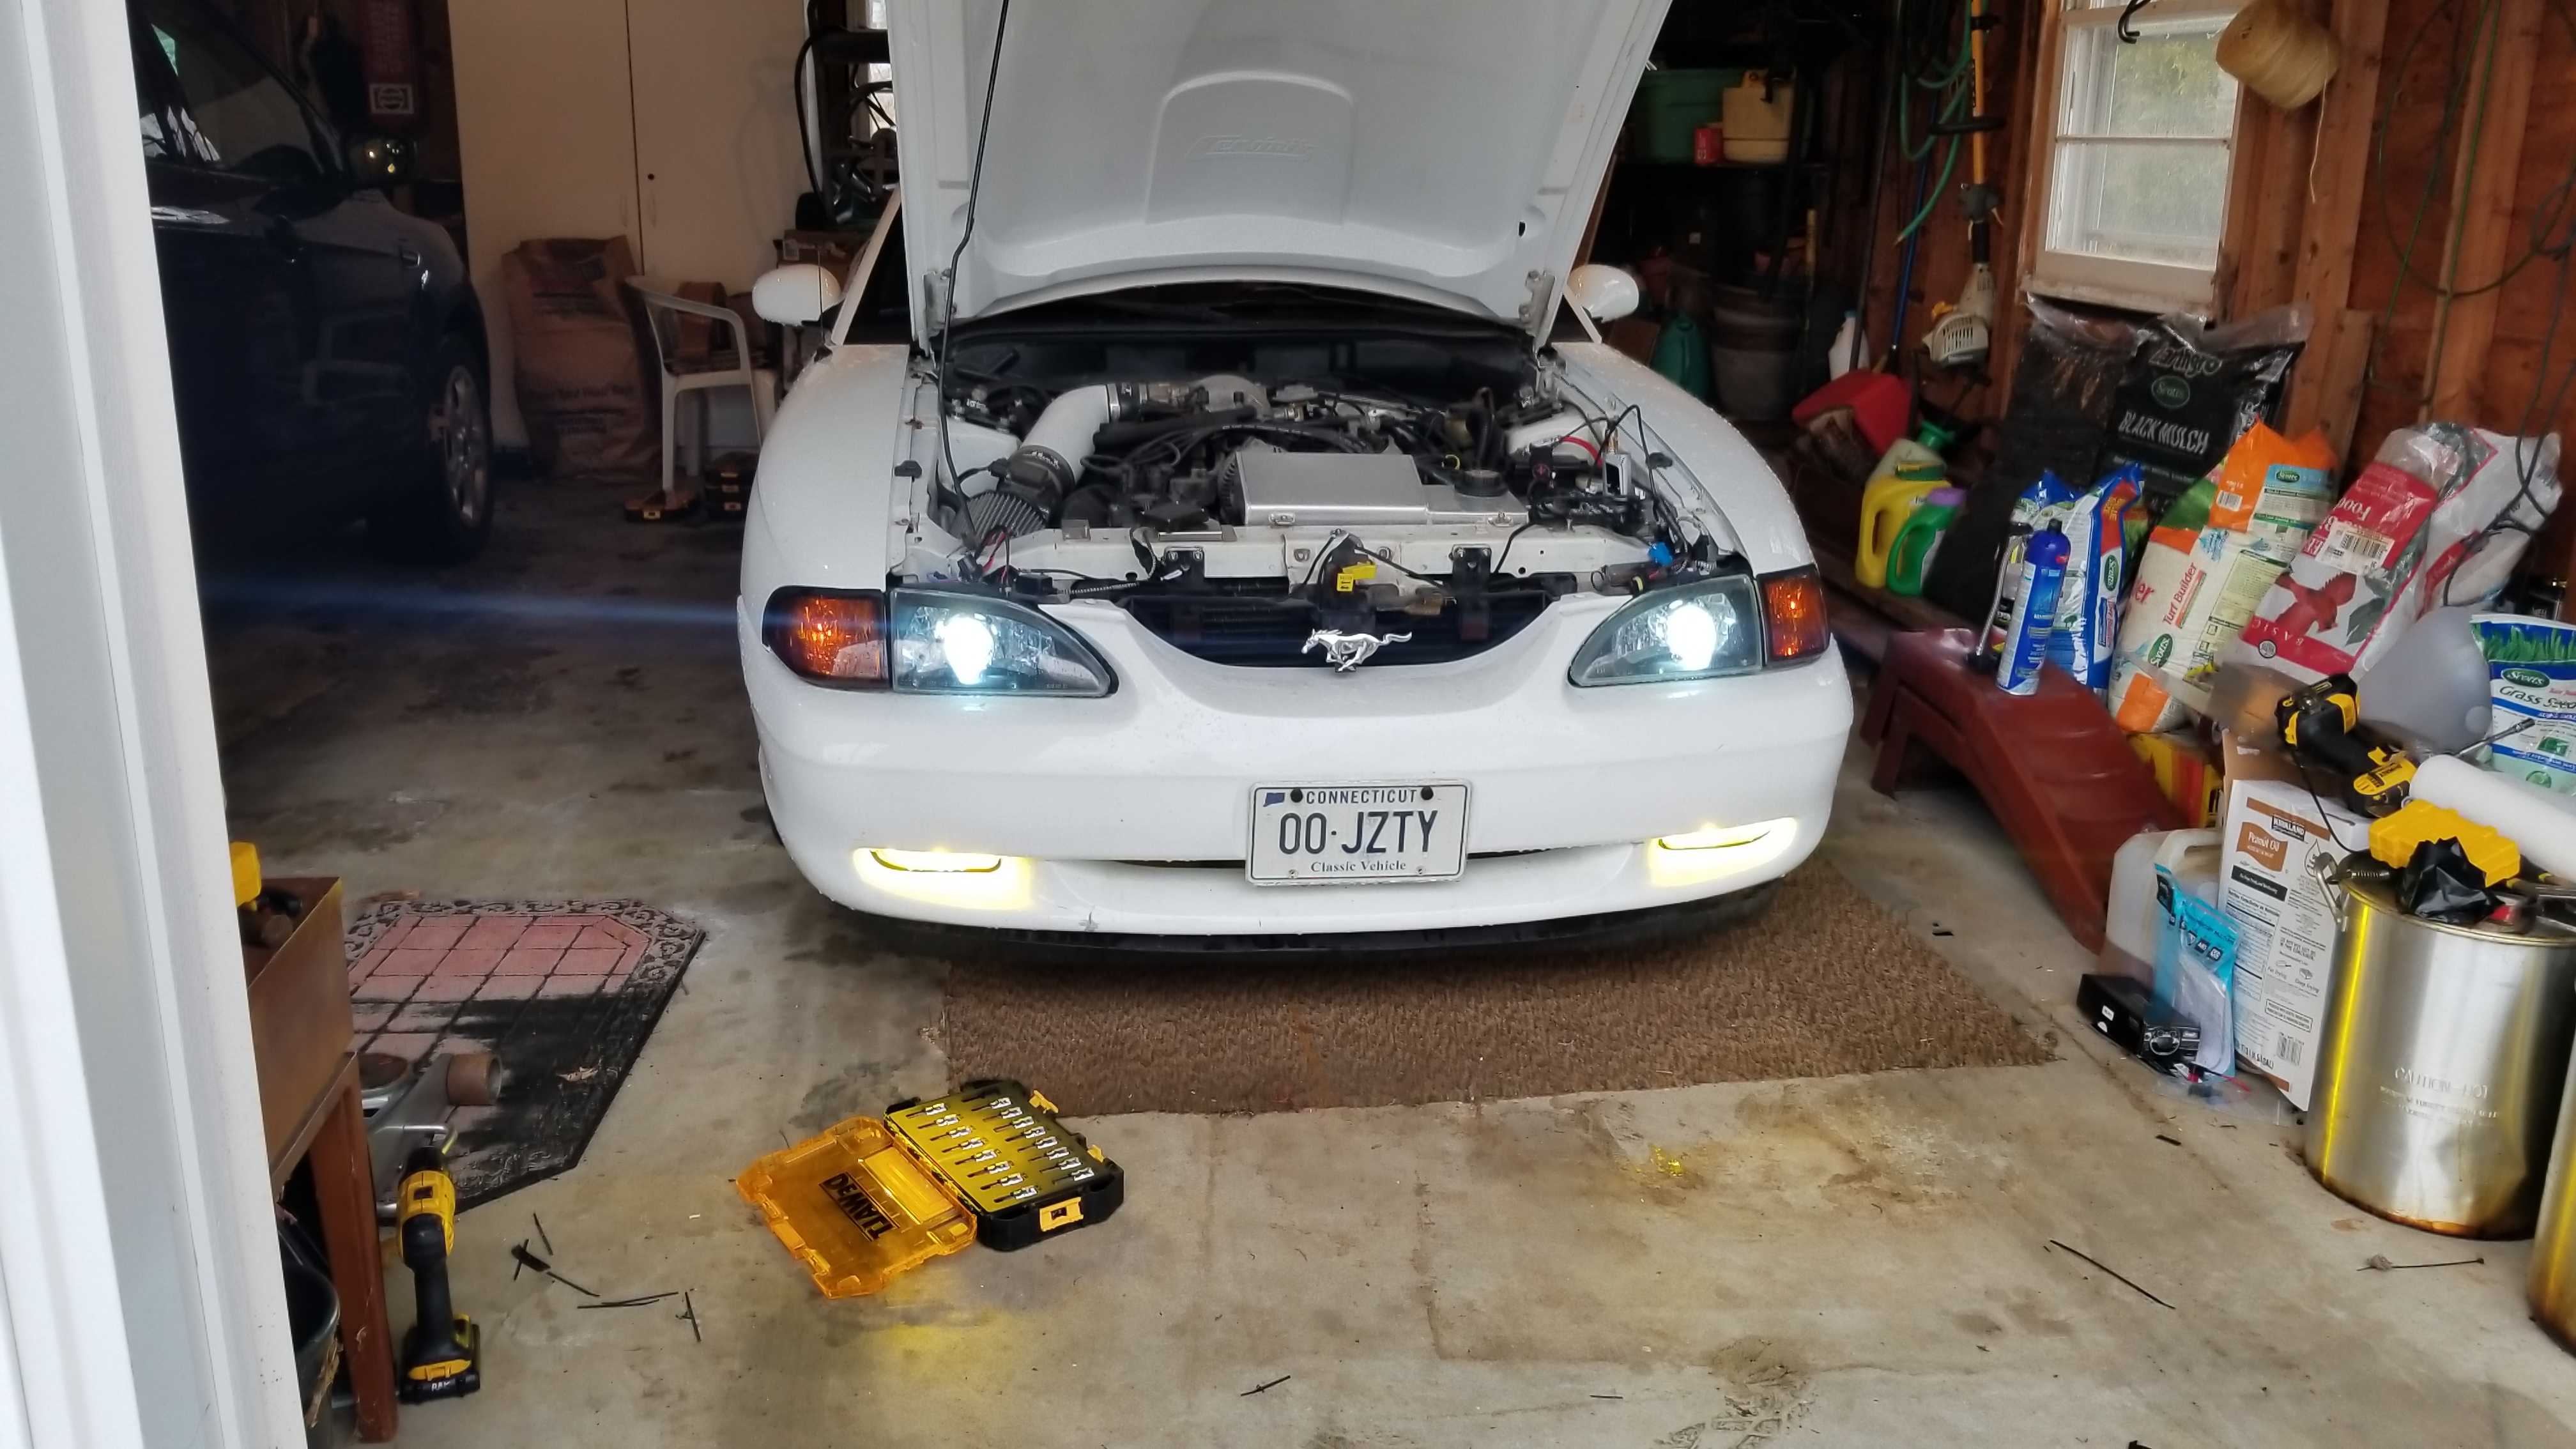
Also waiting on new headlight pivots and adjusters for these headlights and I'll be able to align and tighten down the projectors all the way and then seal them up for good.

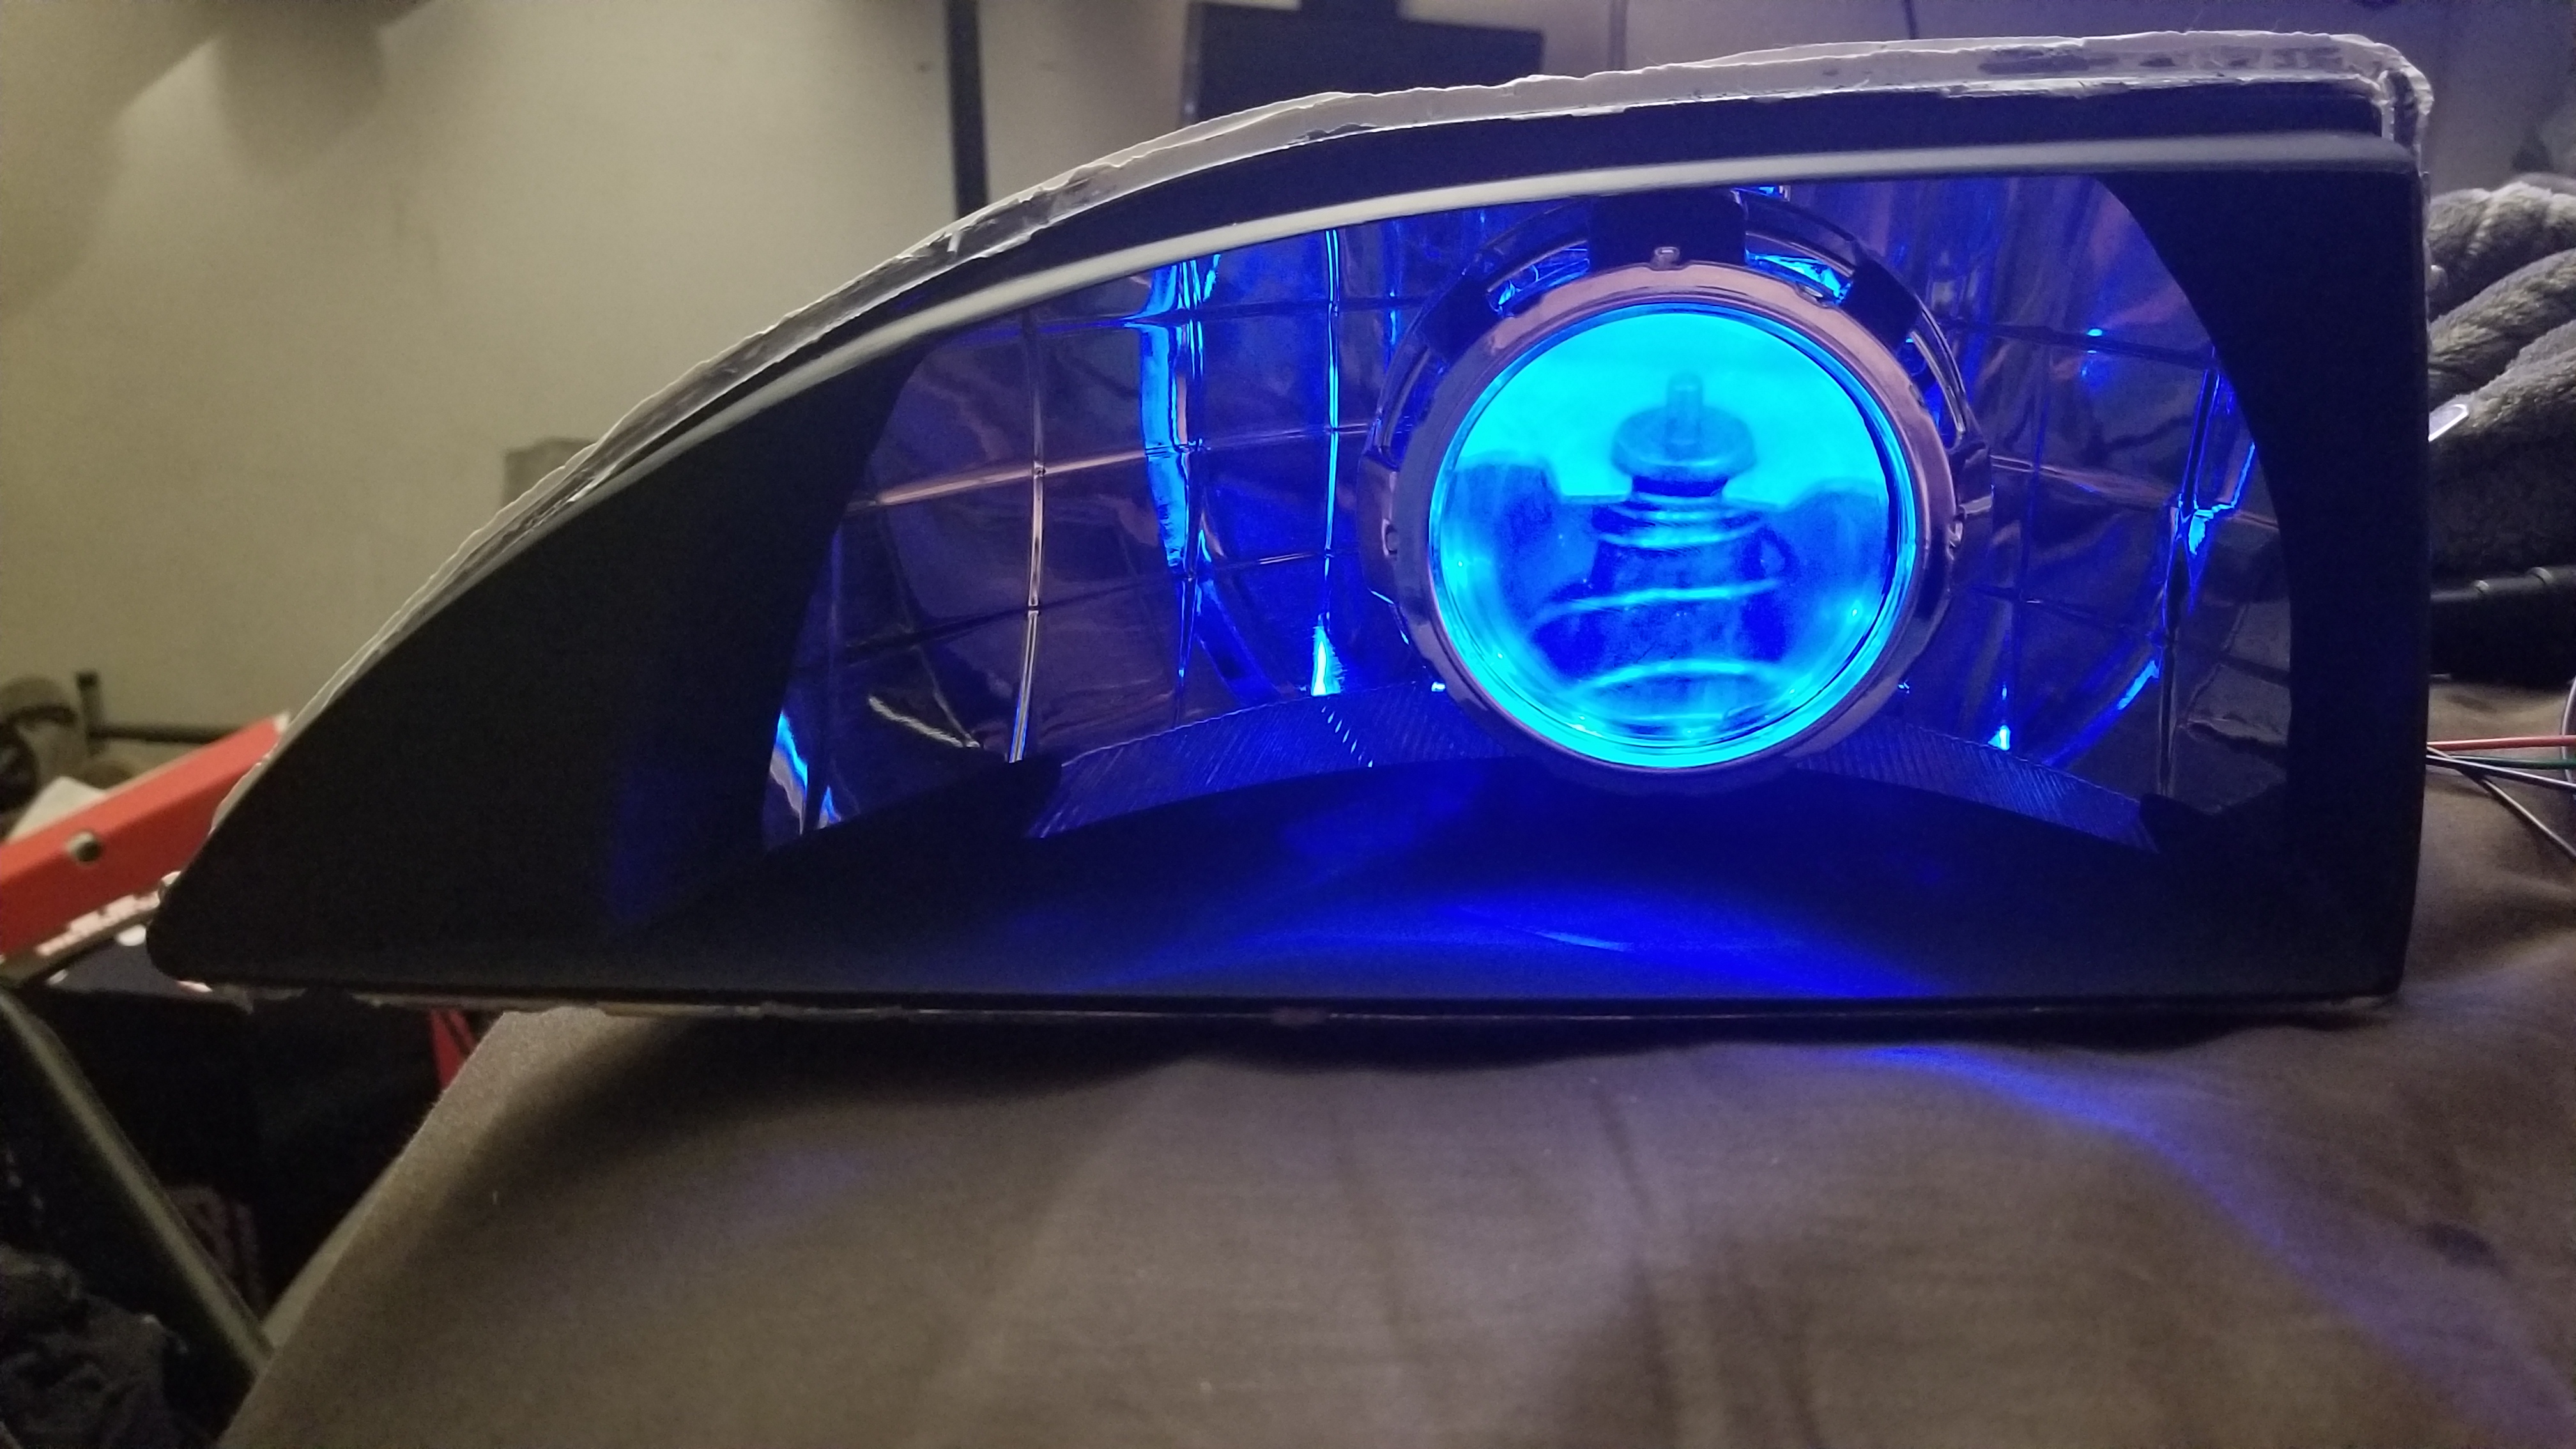
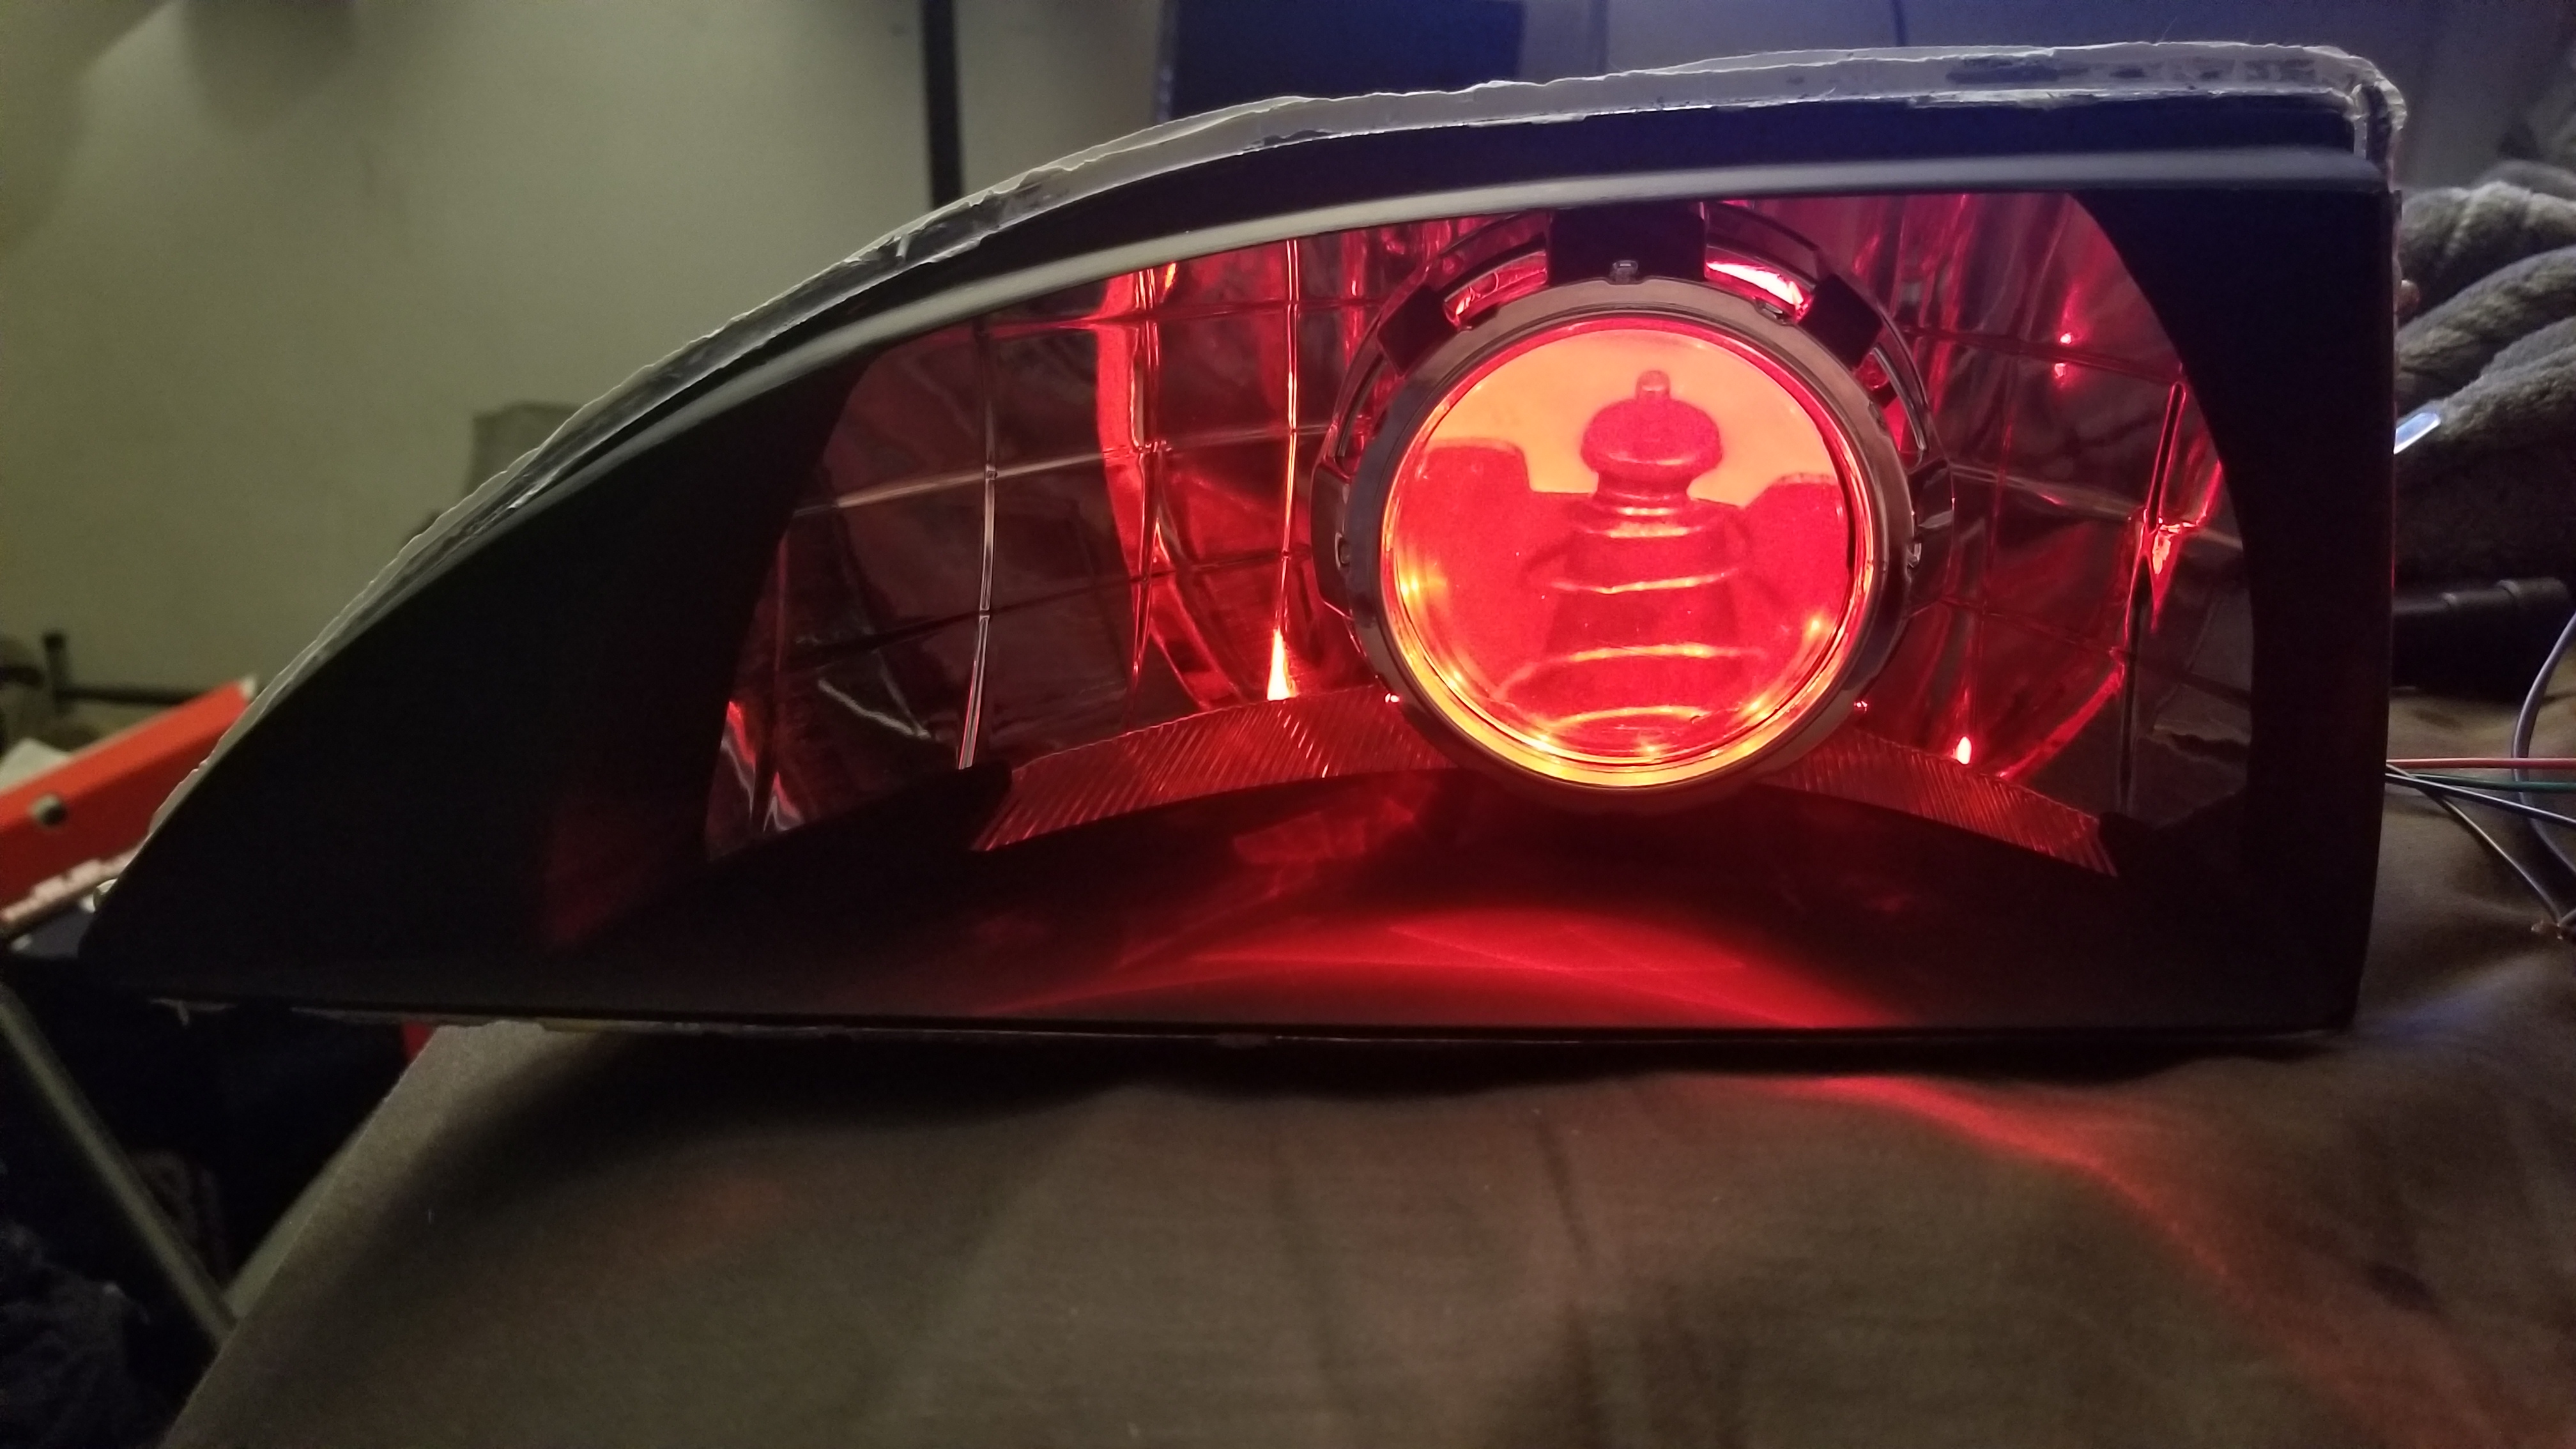
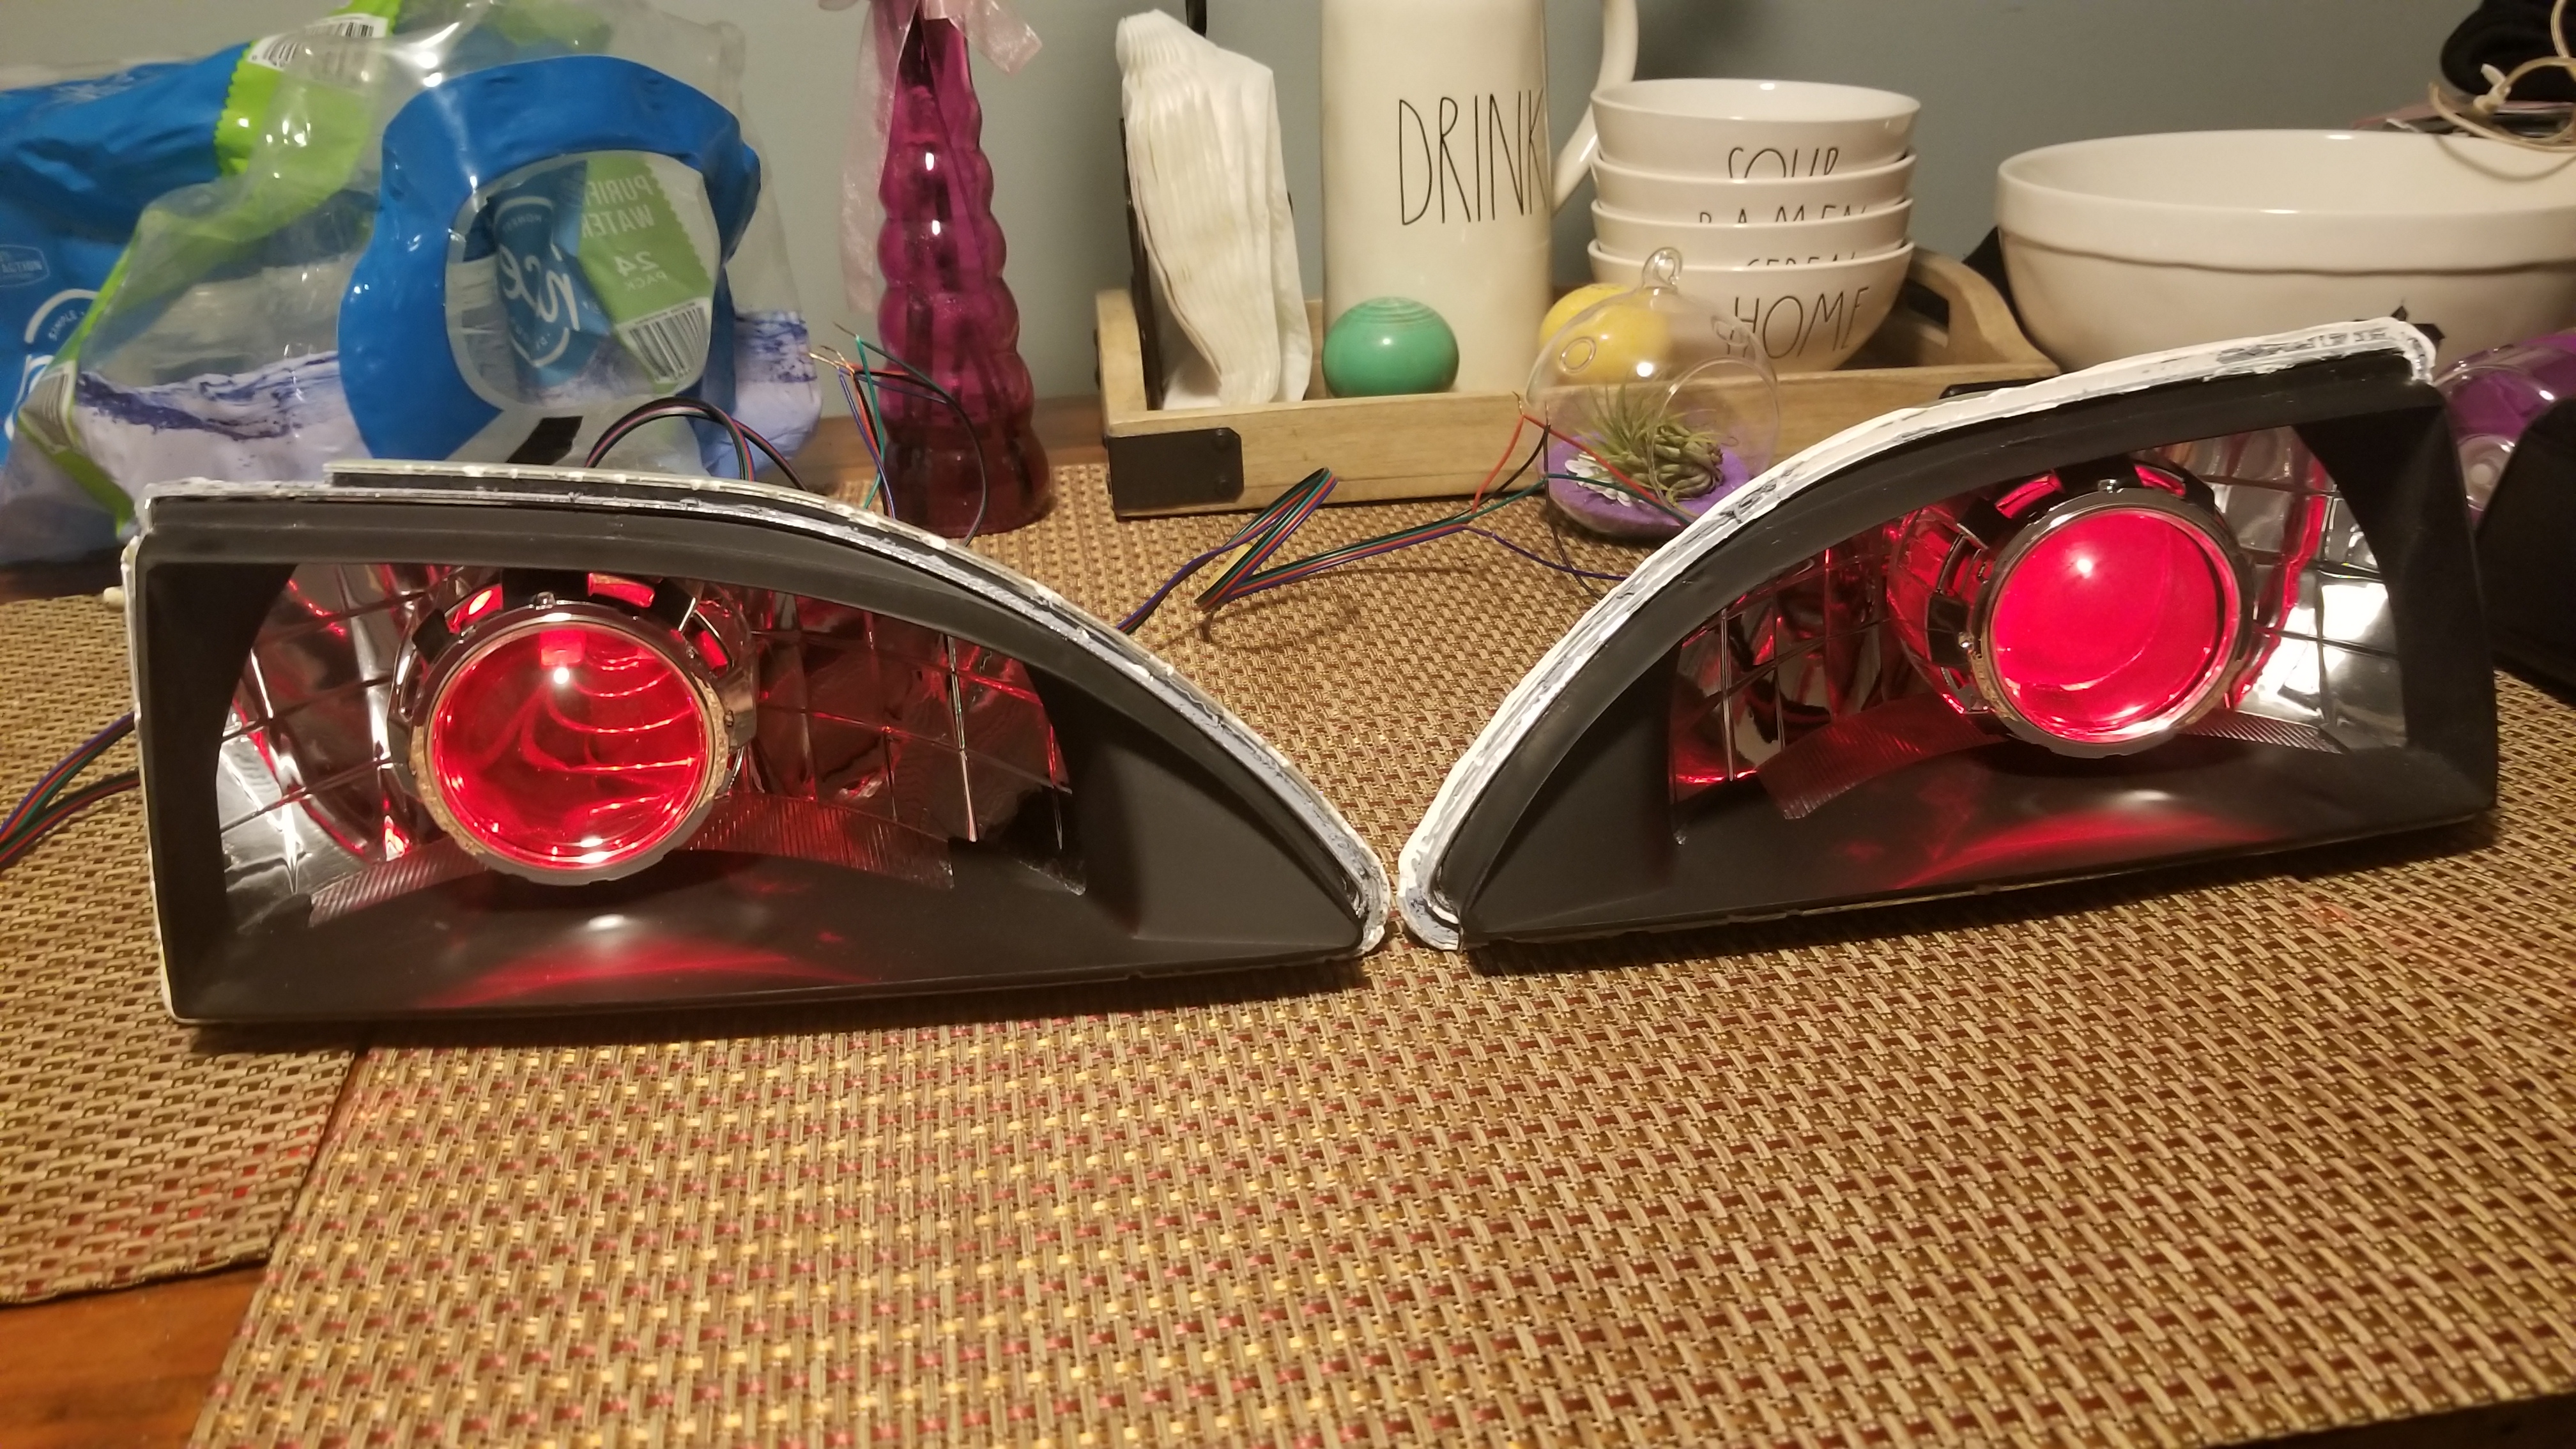
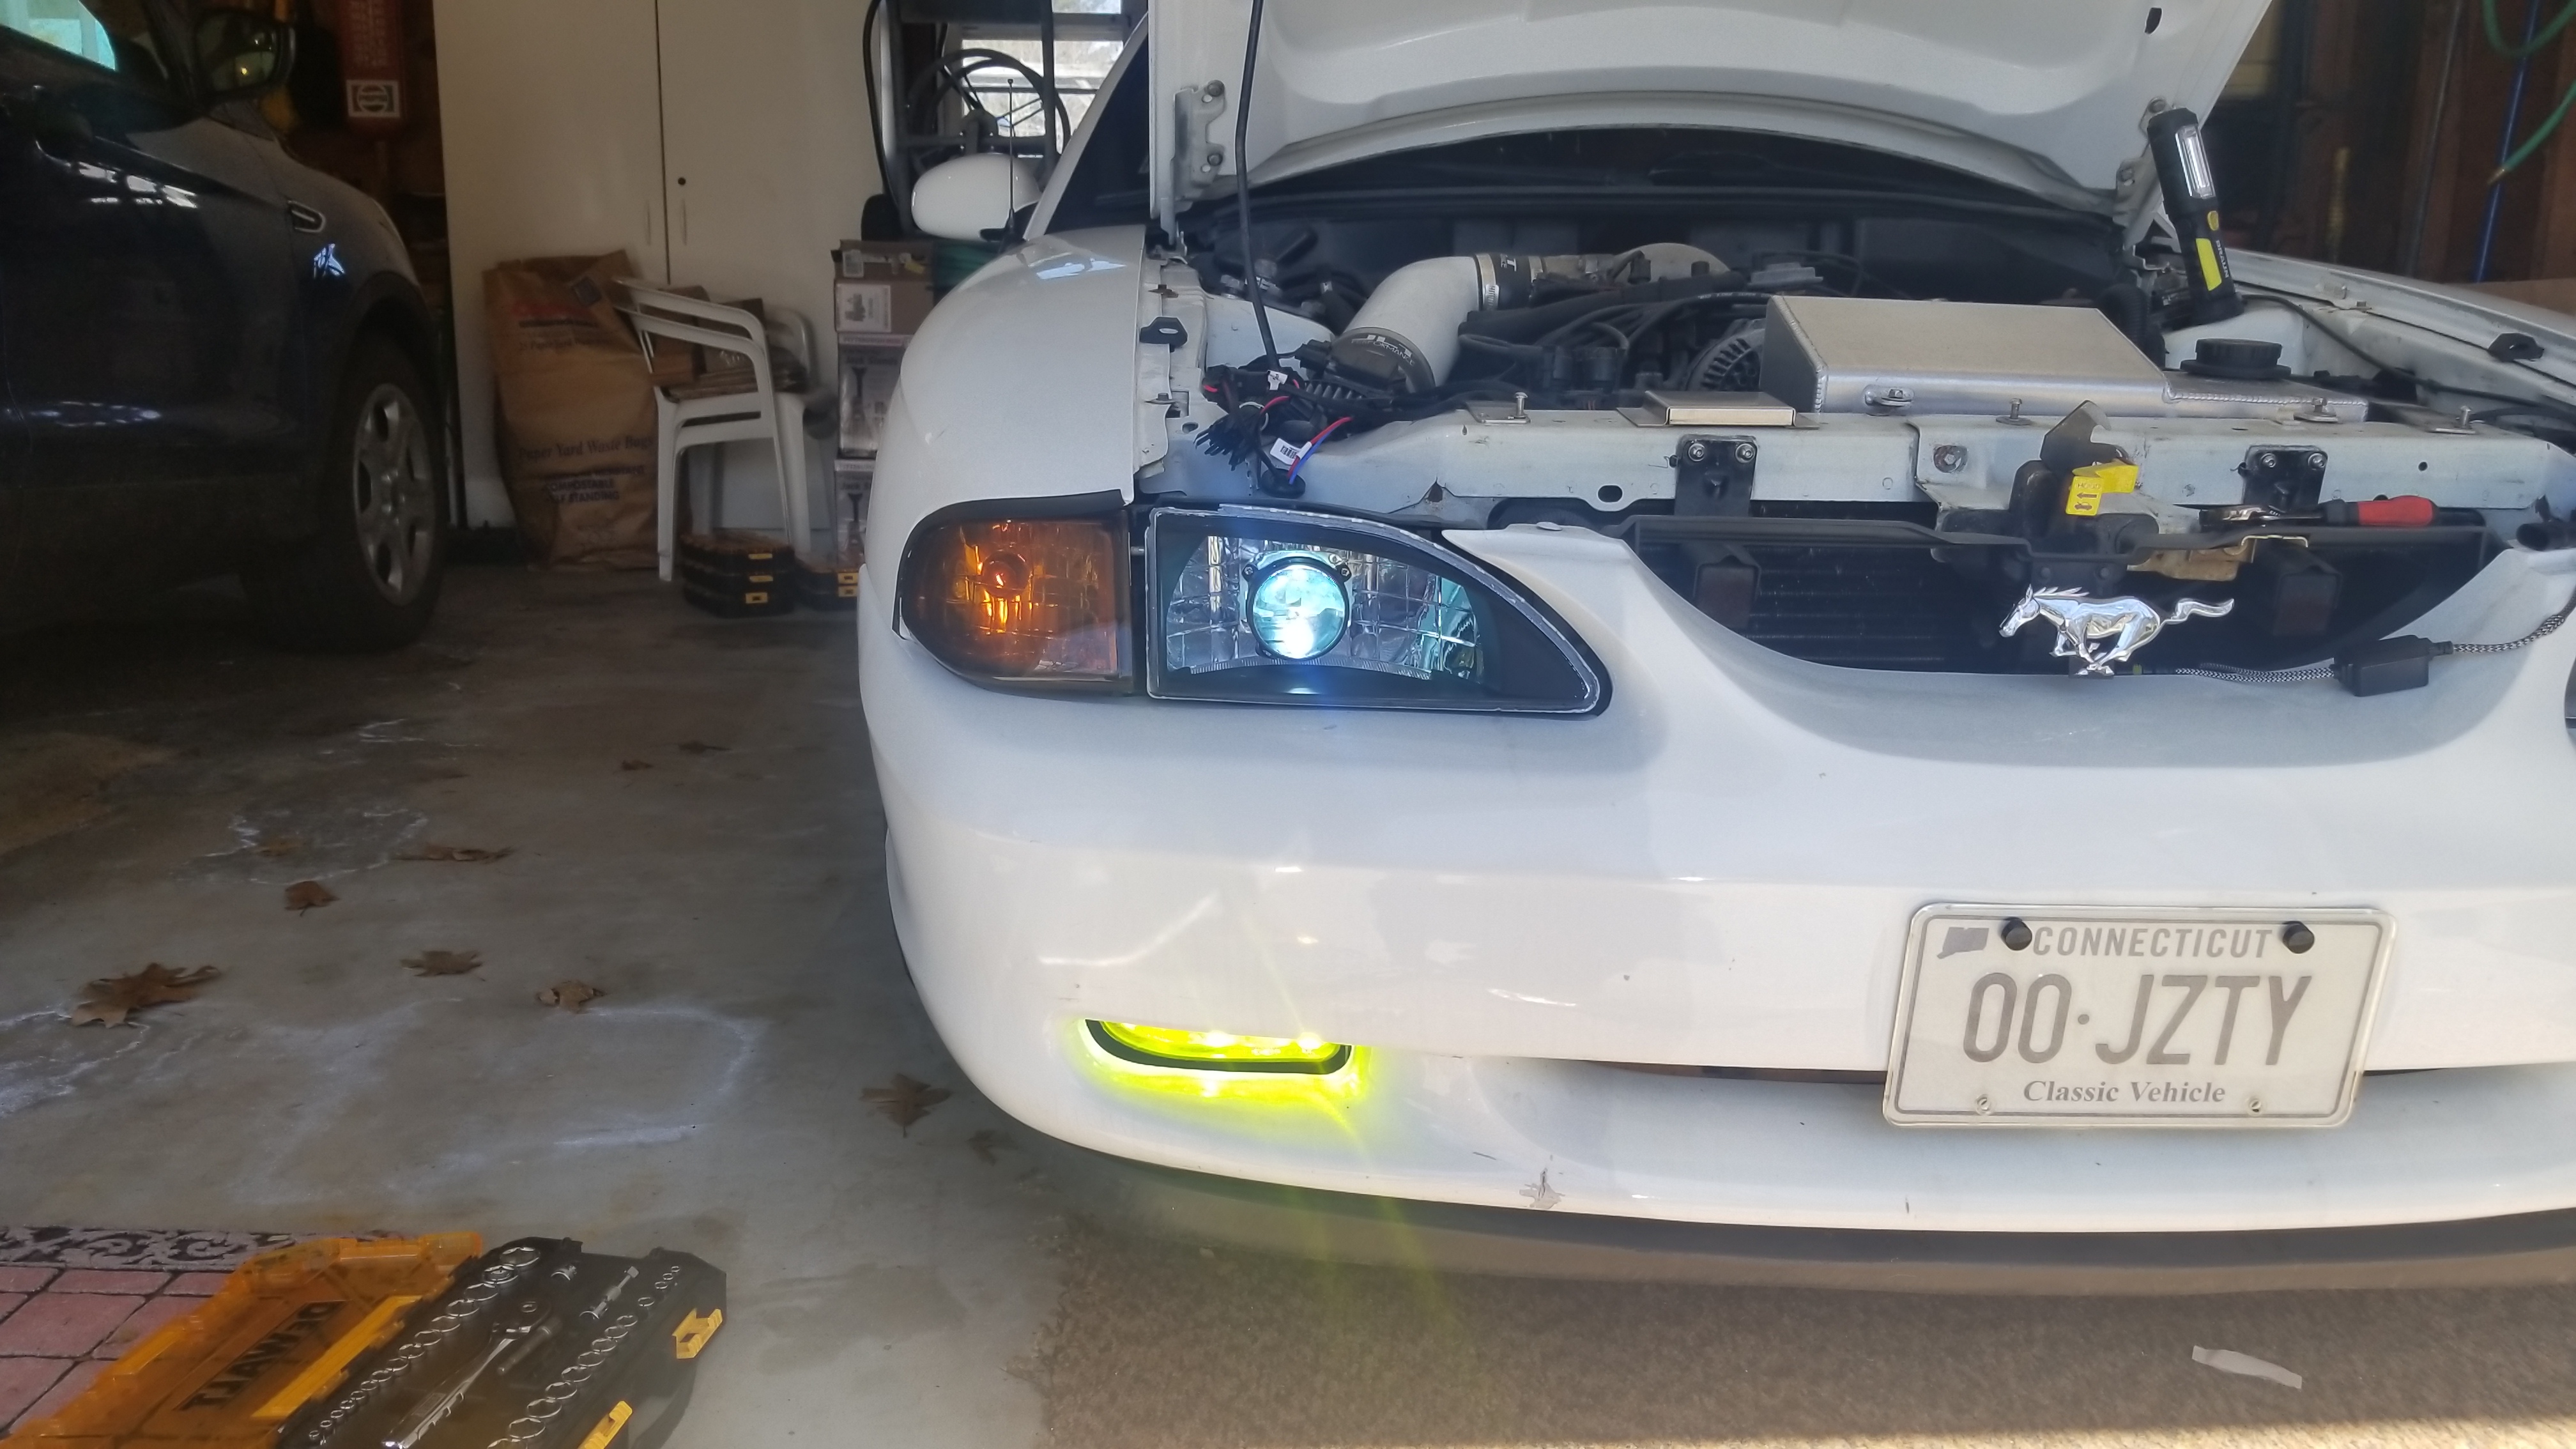
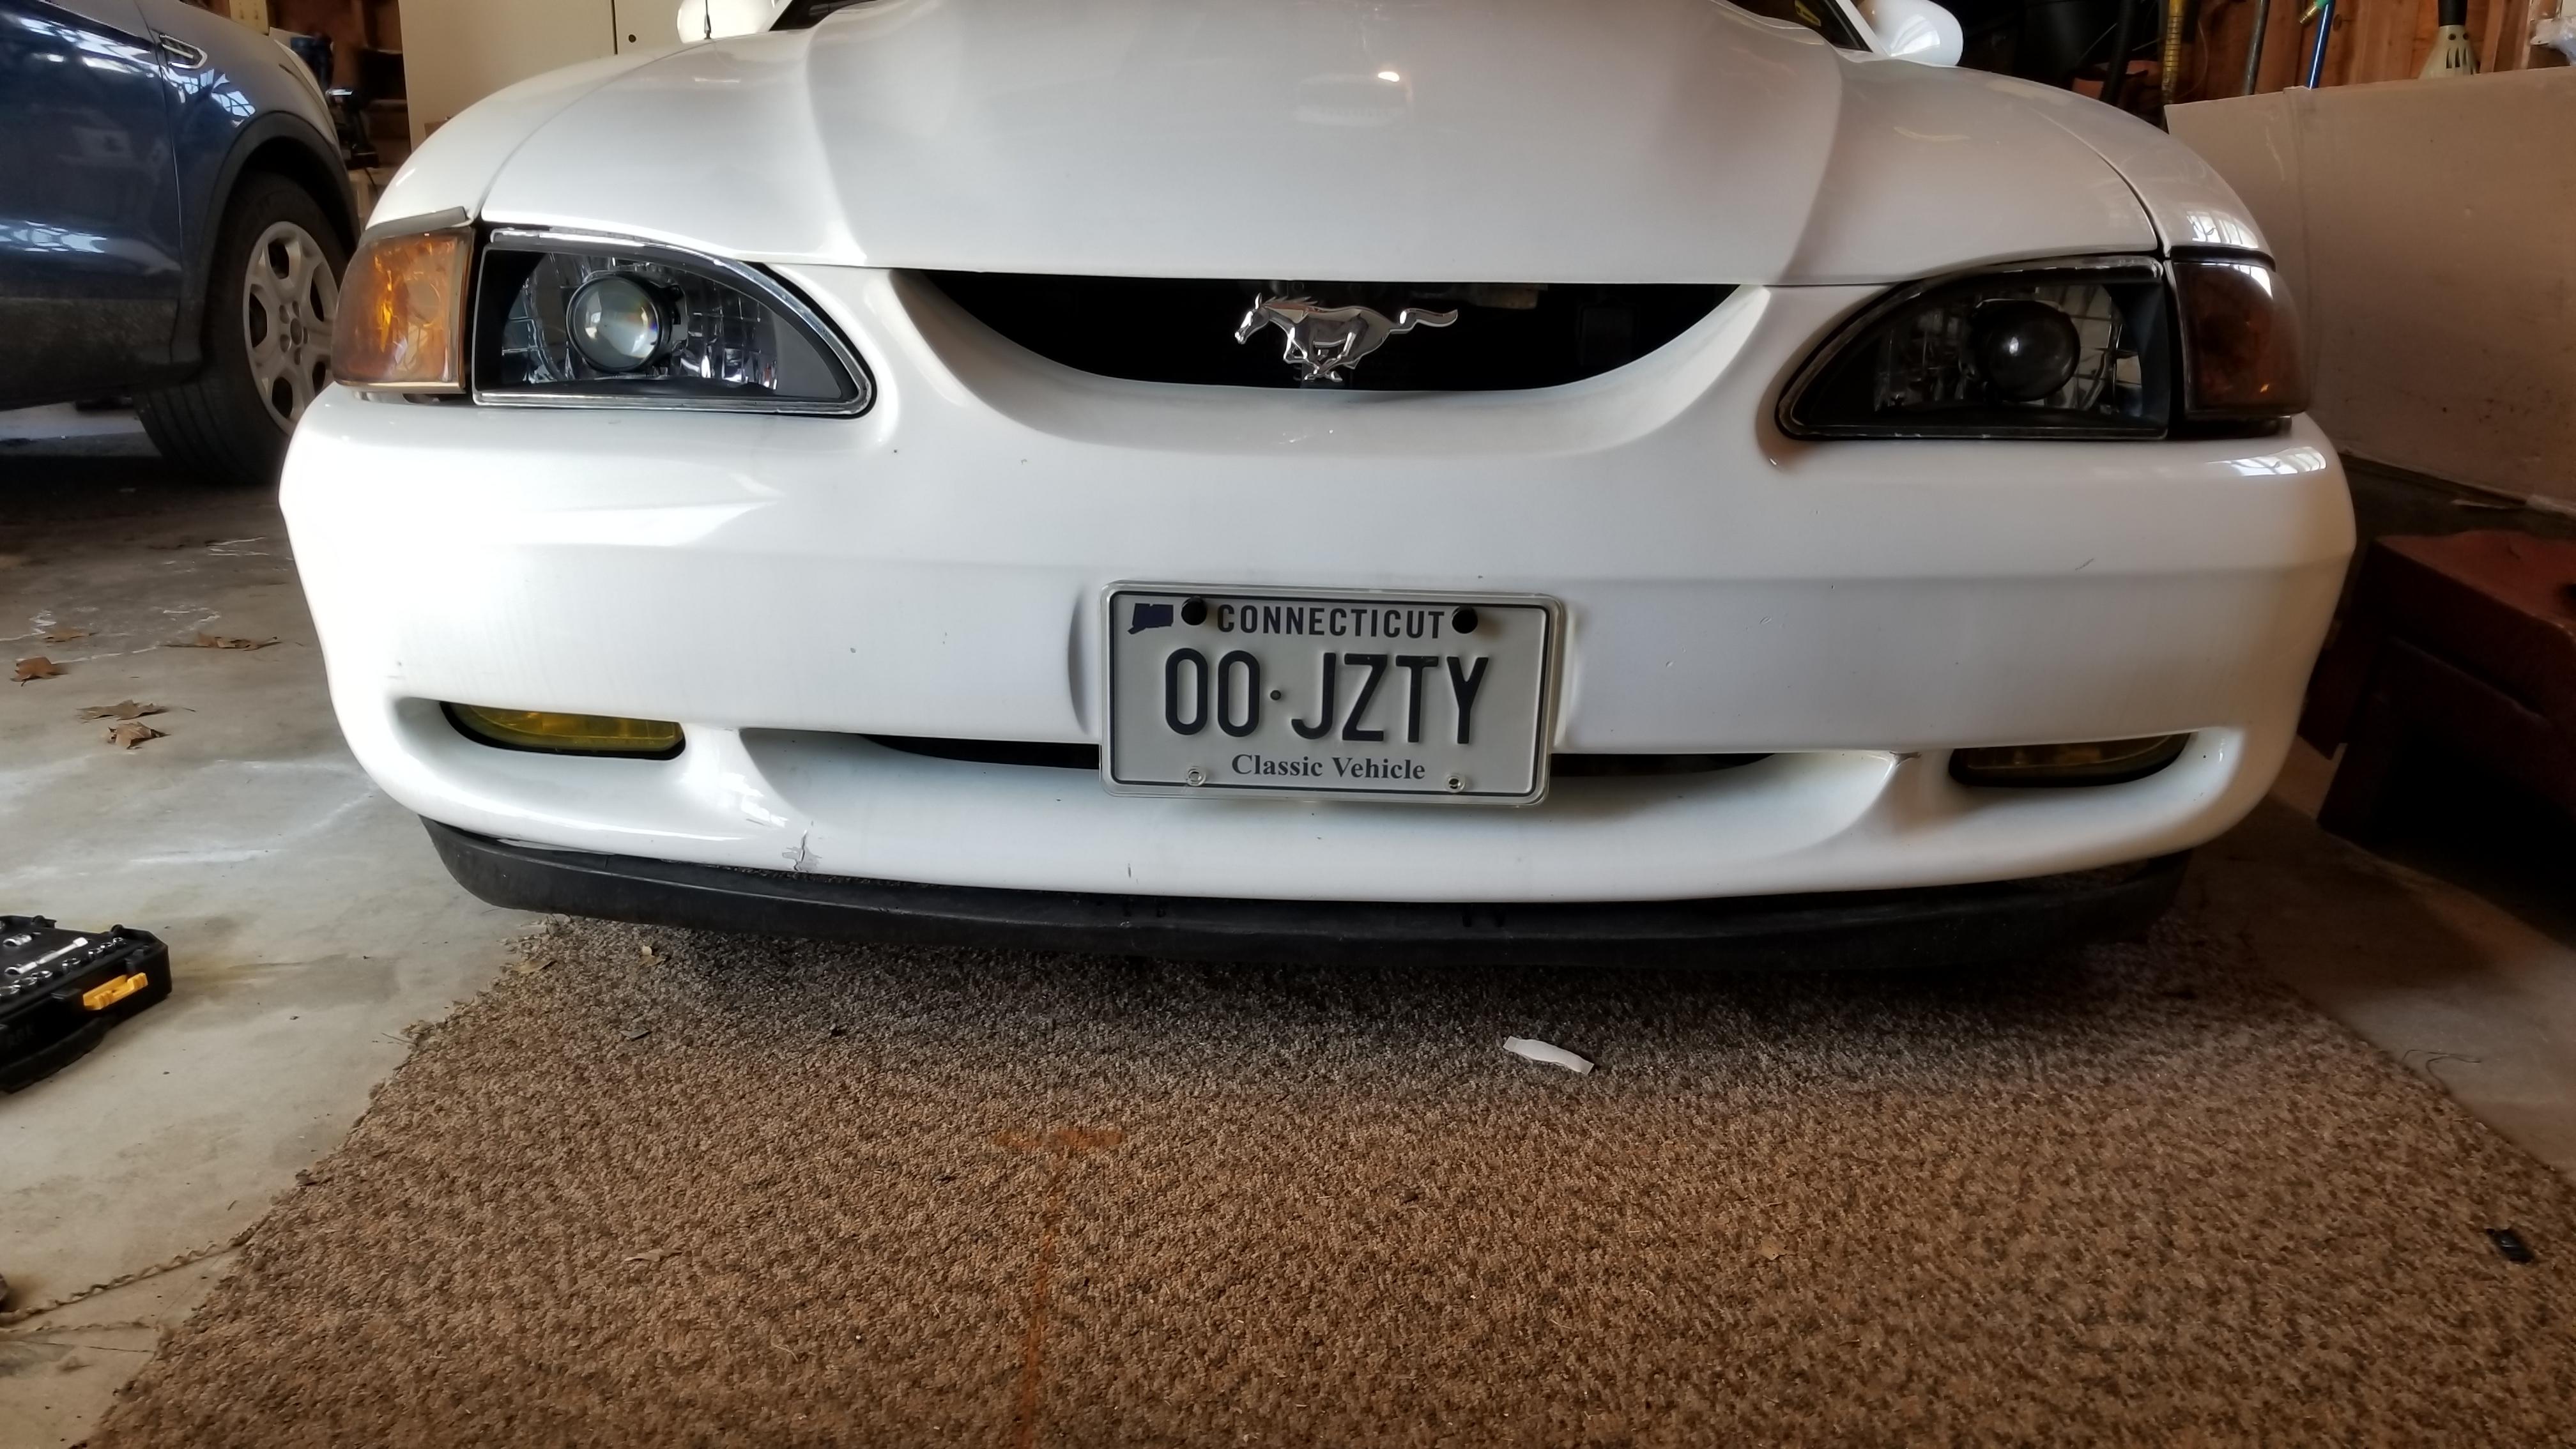
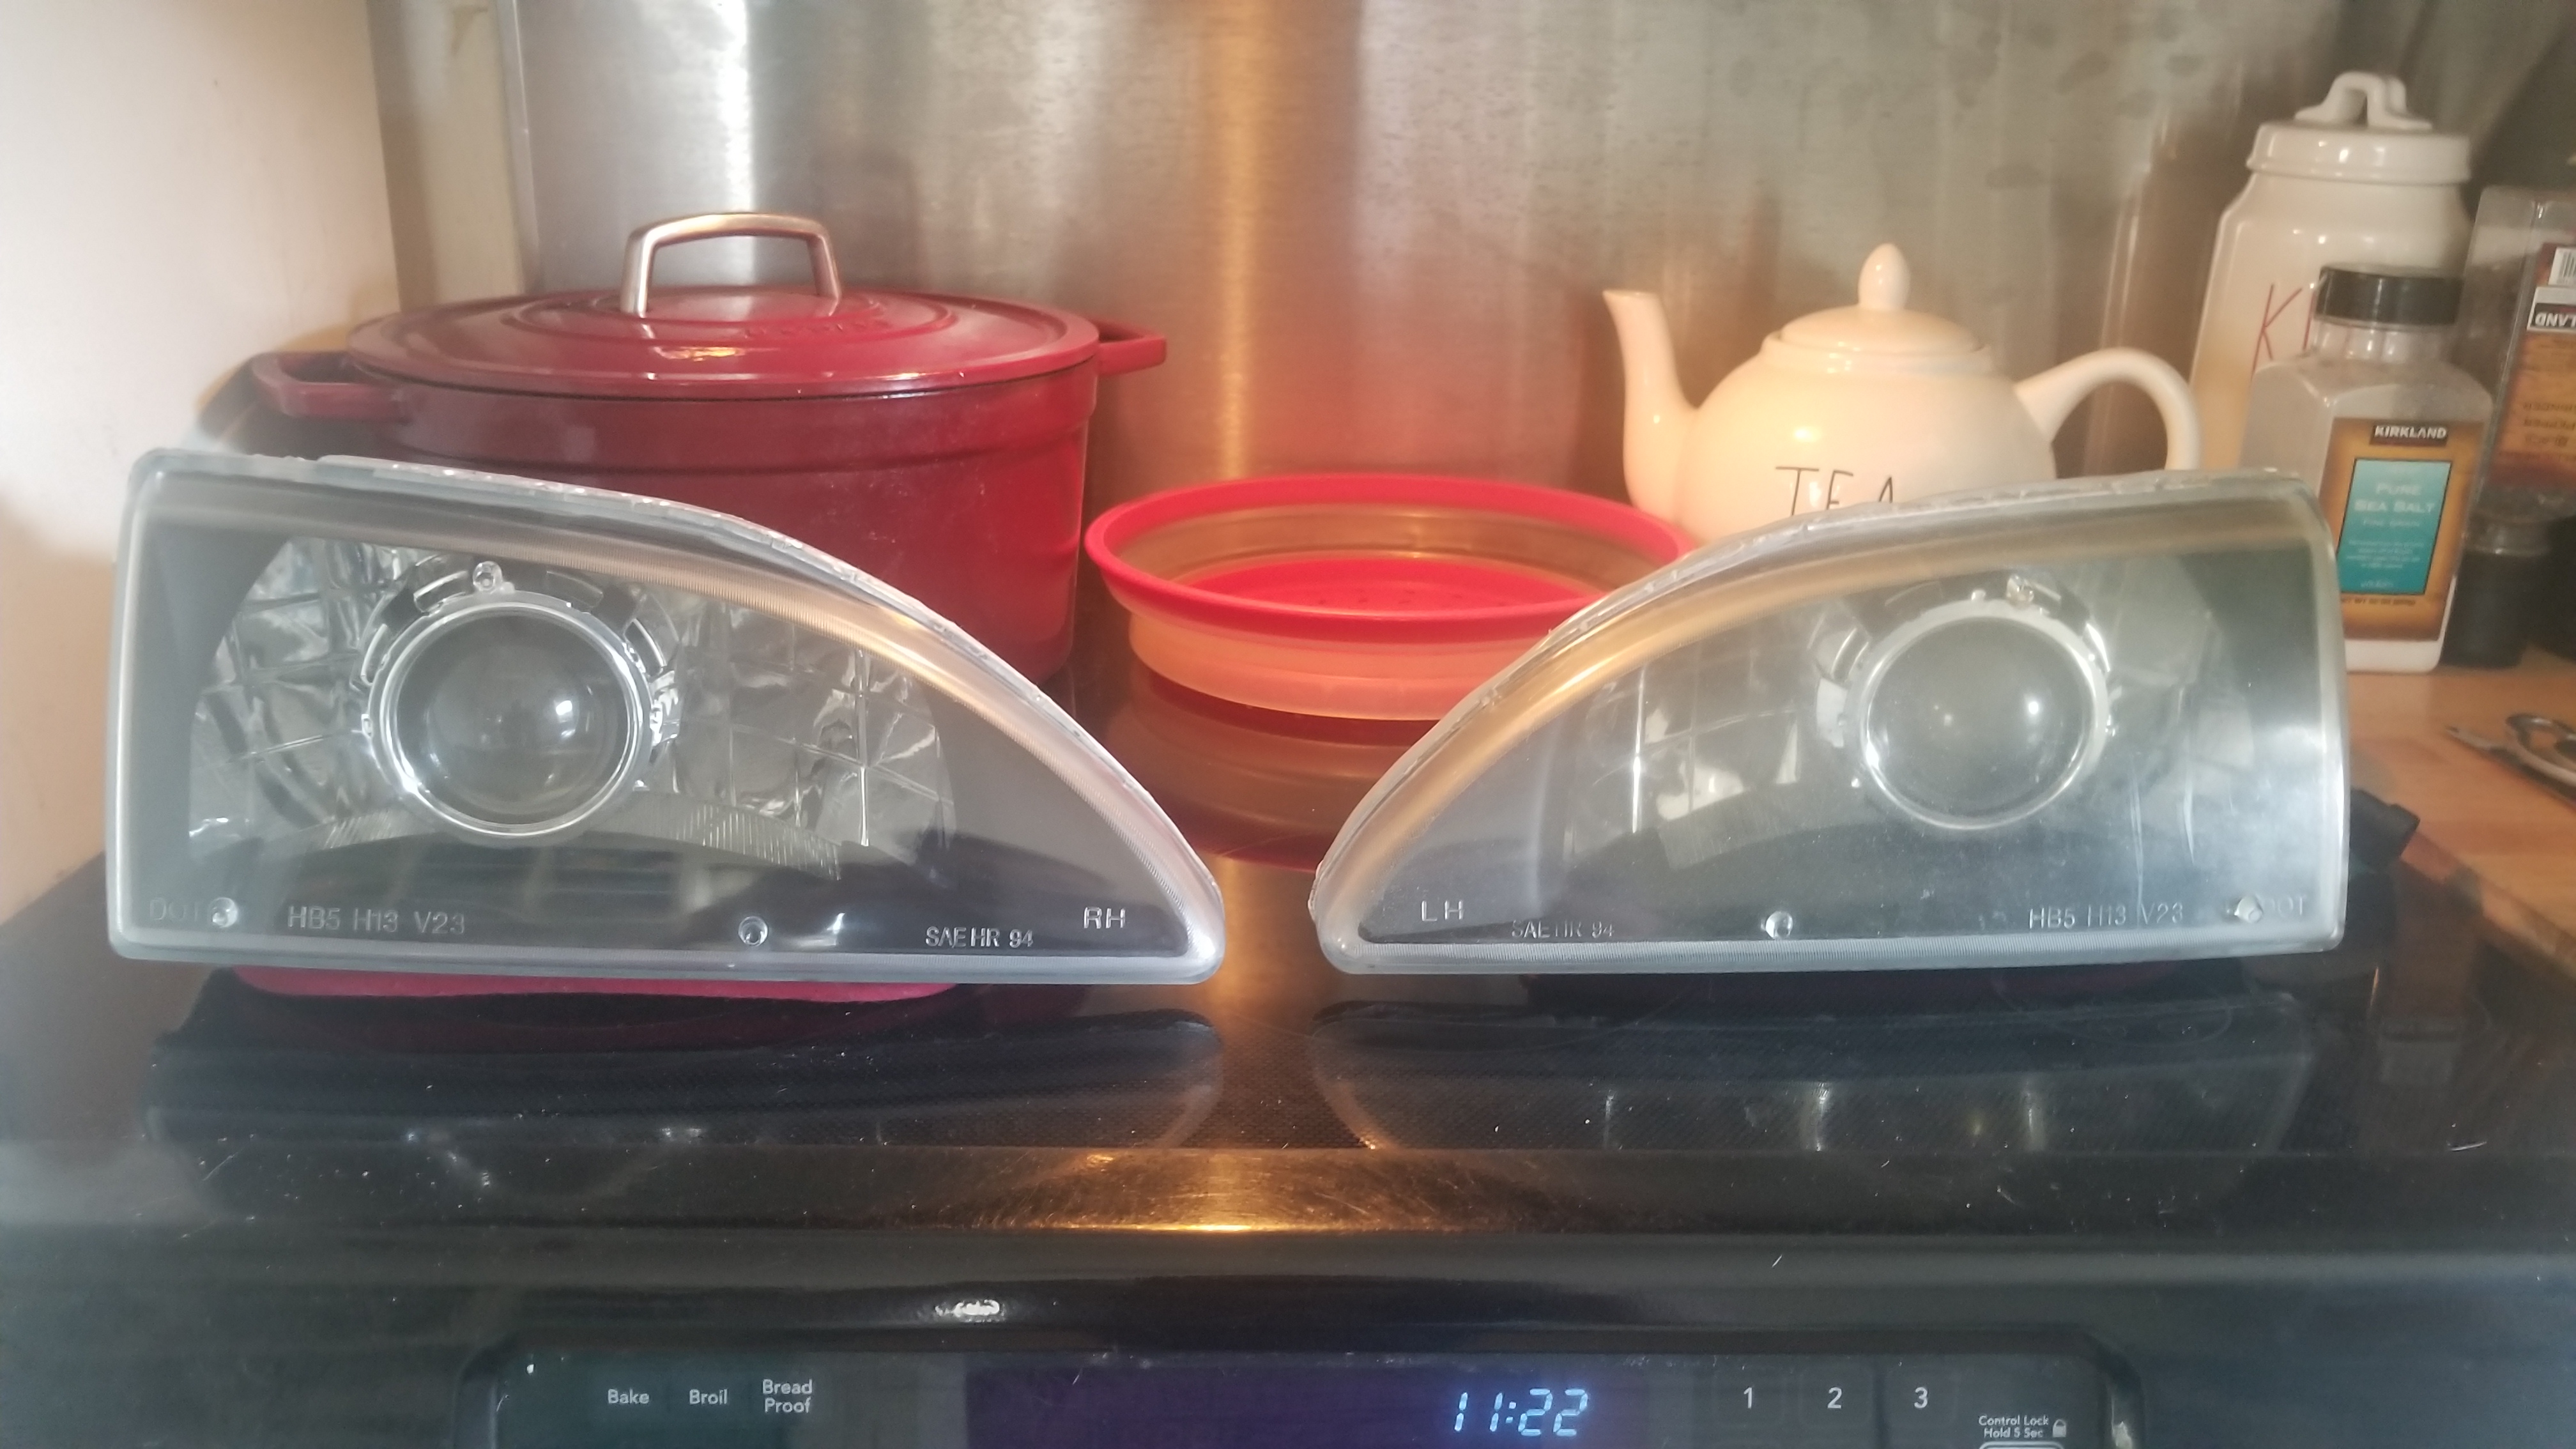
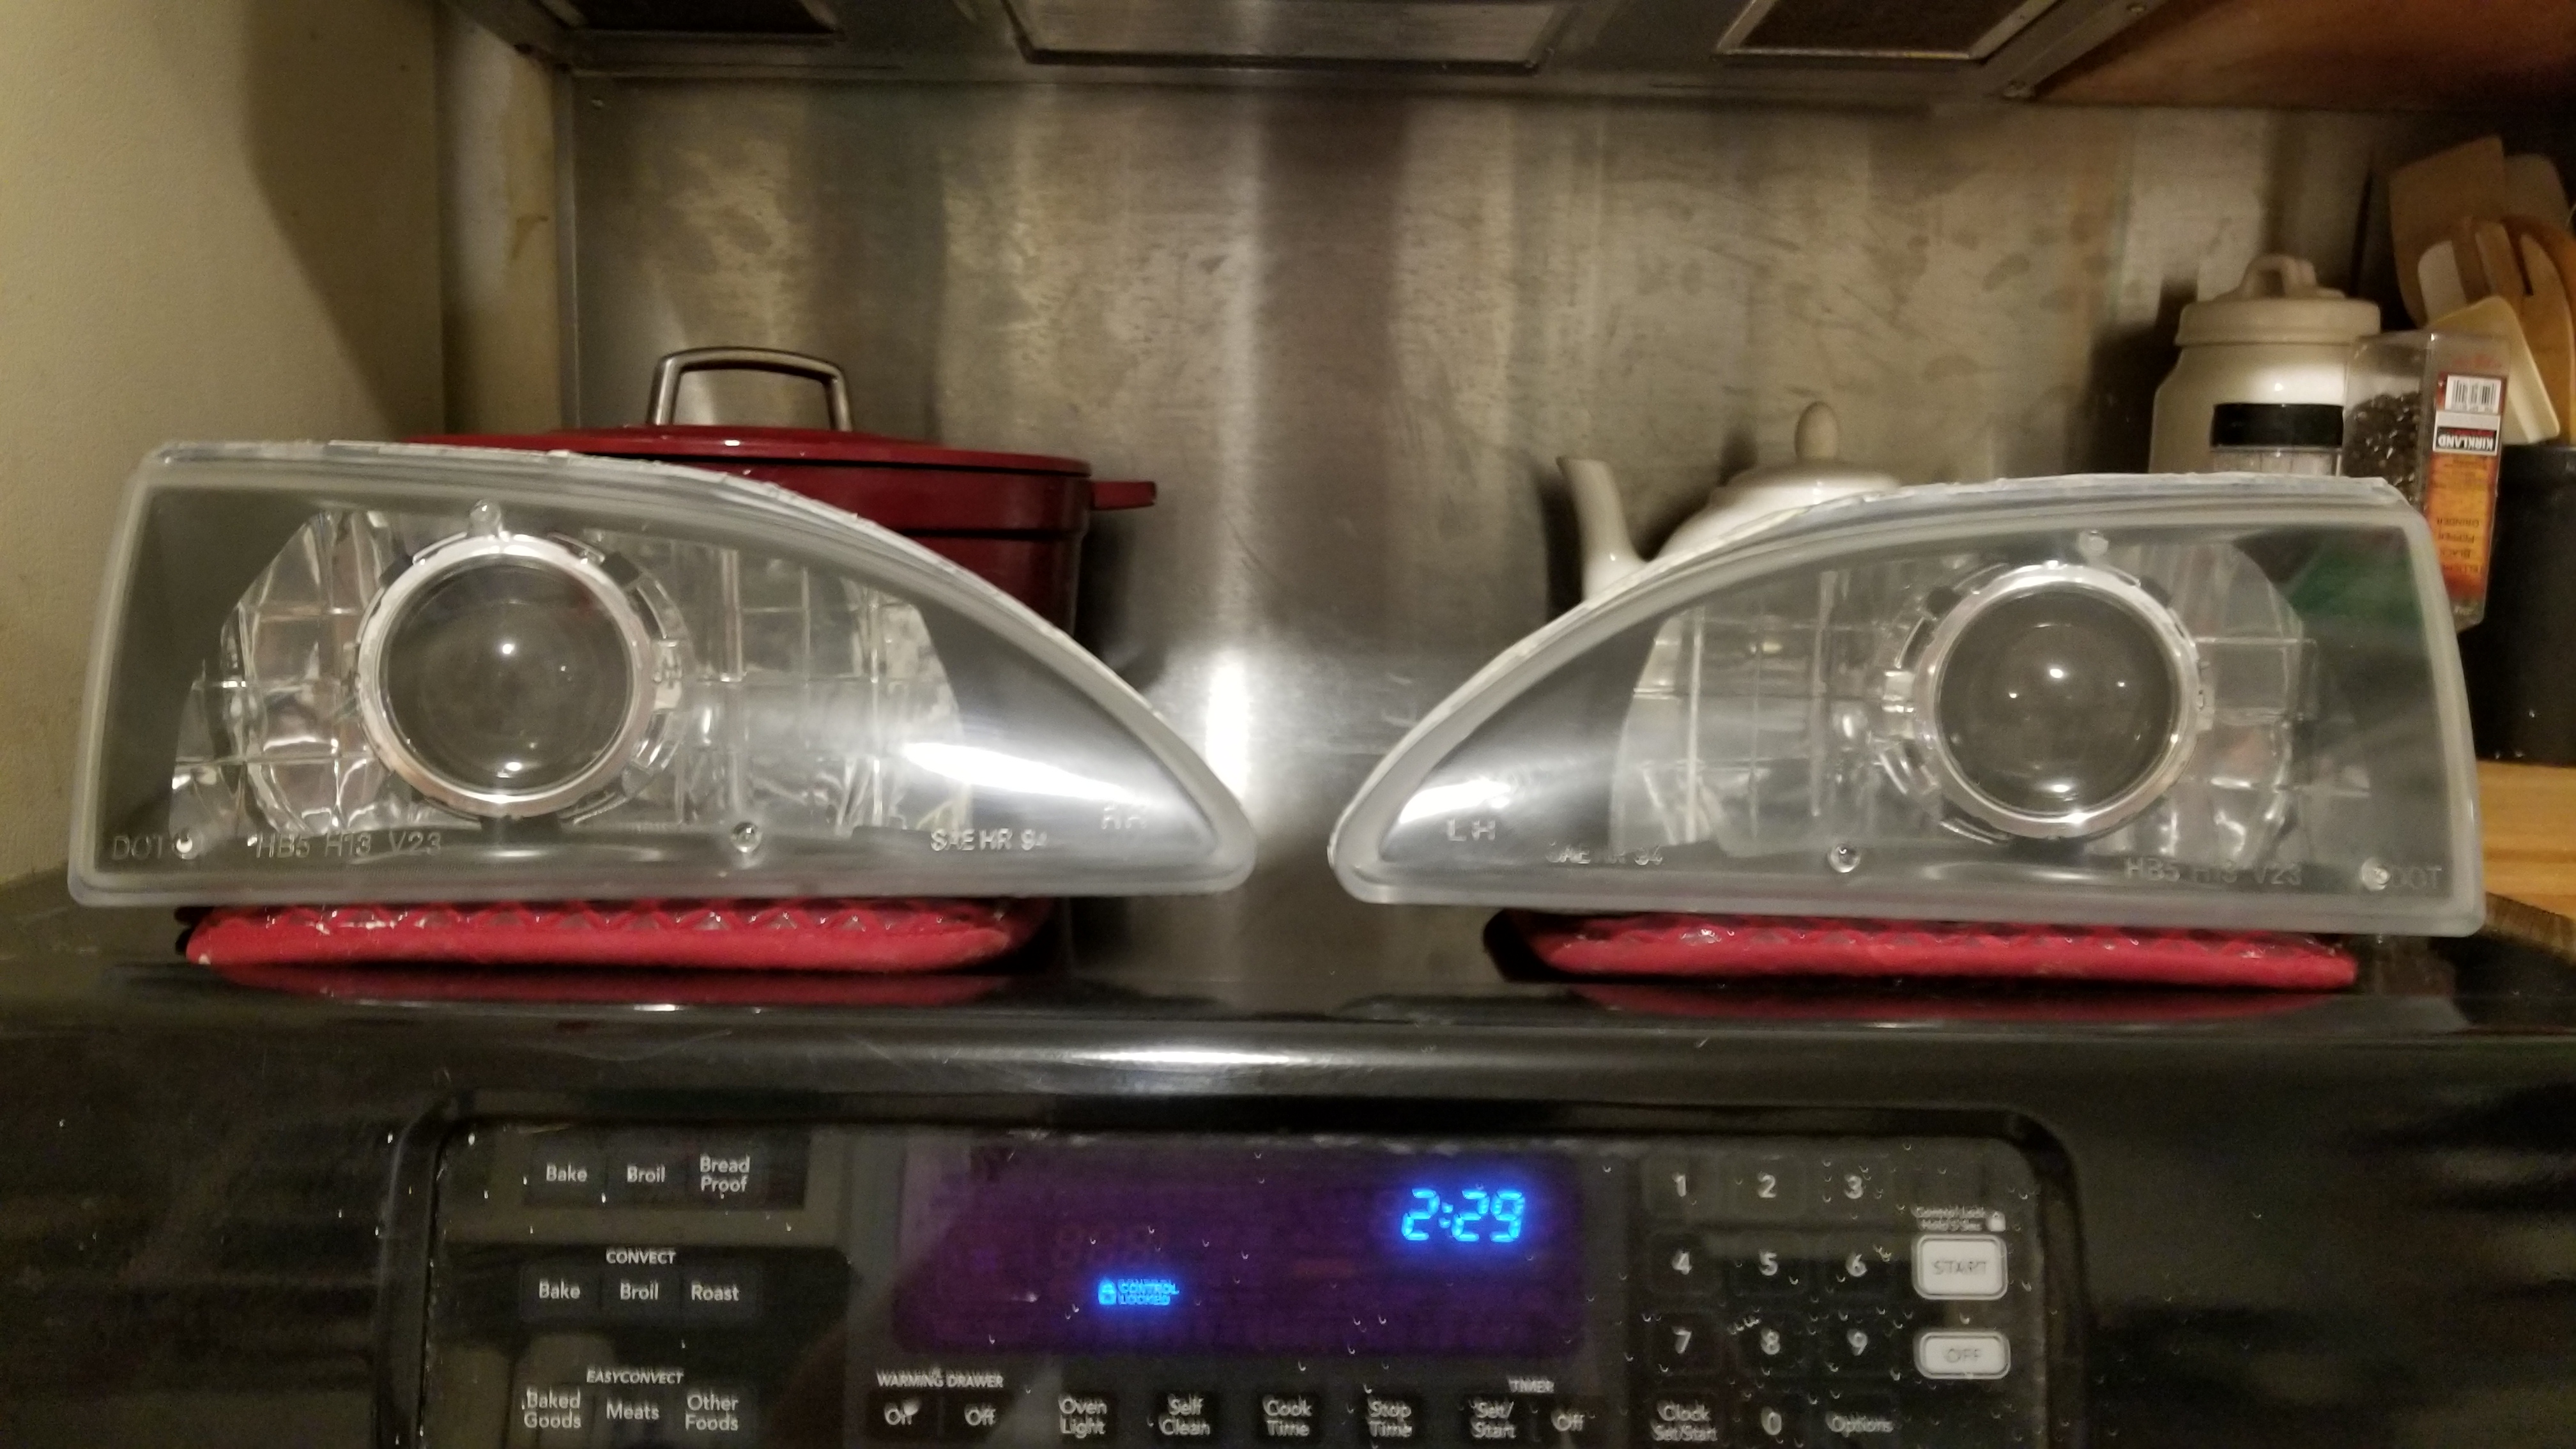
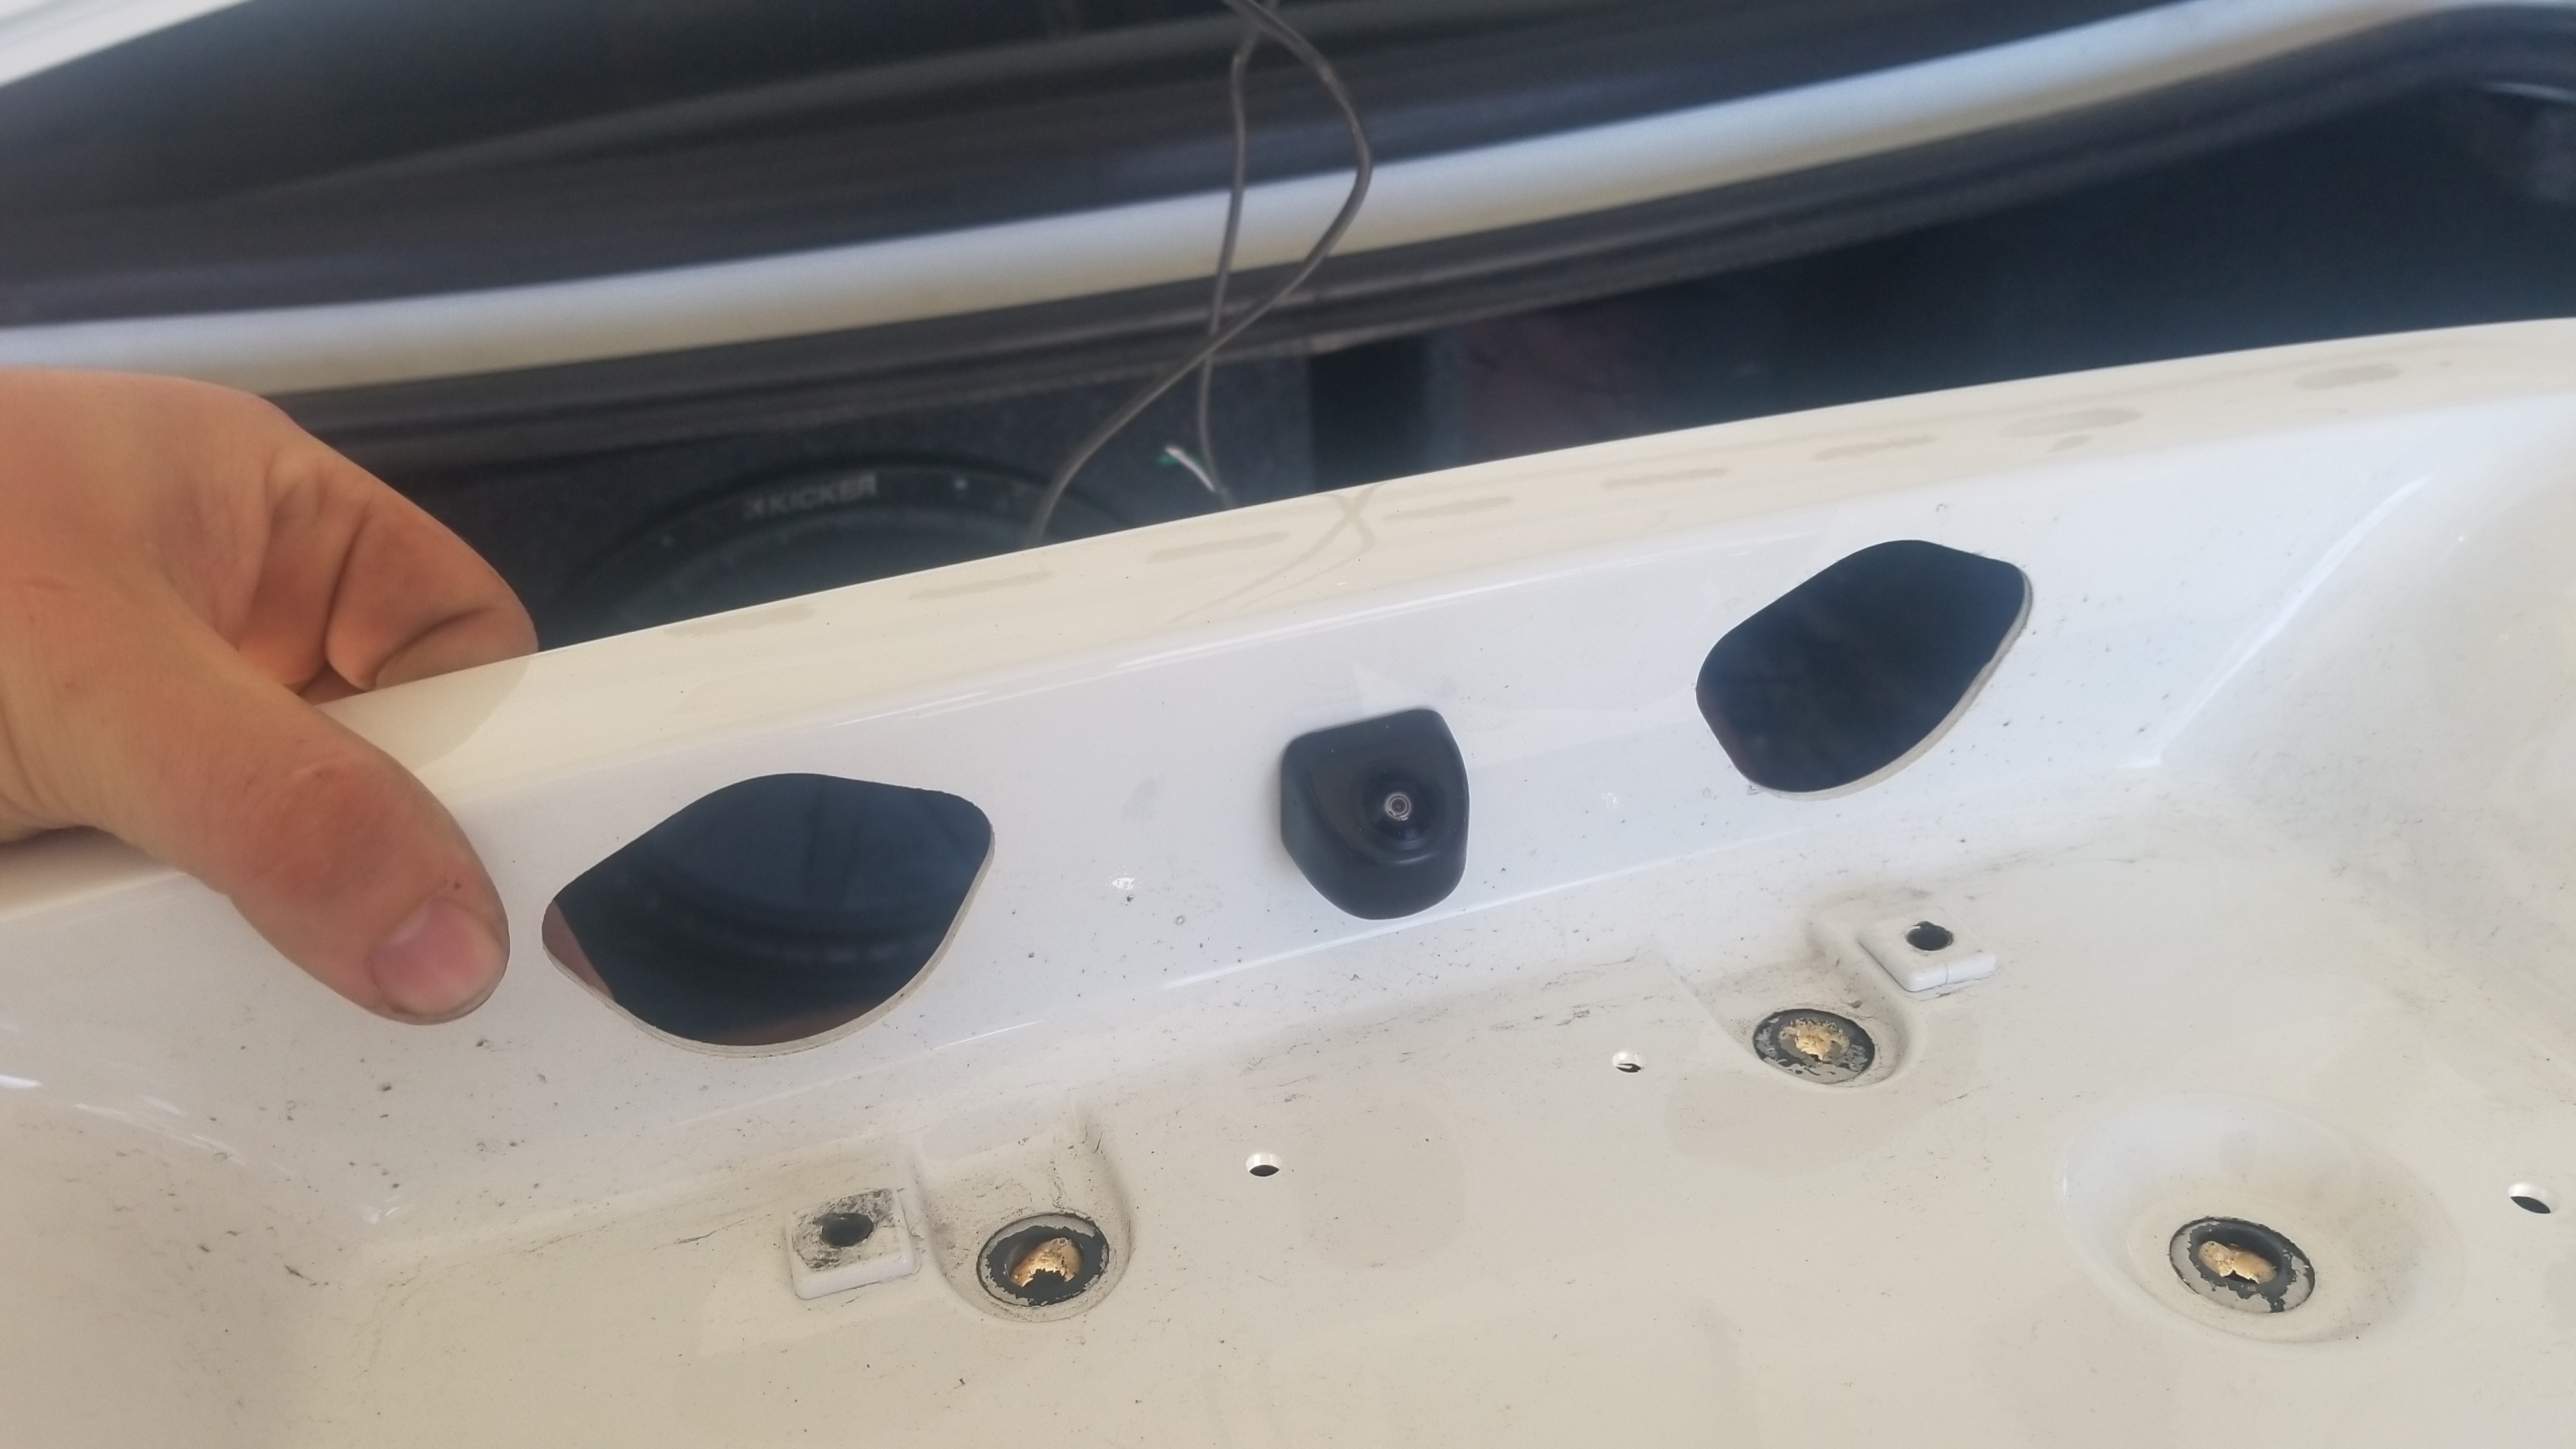
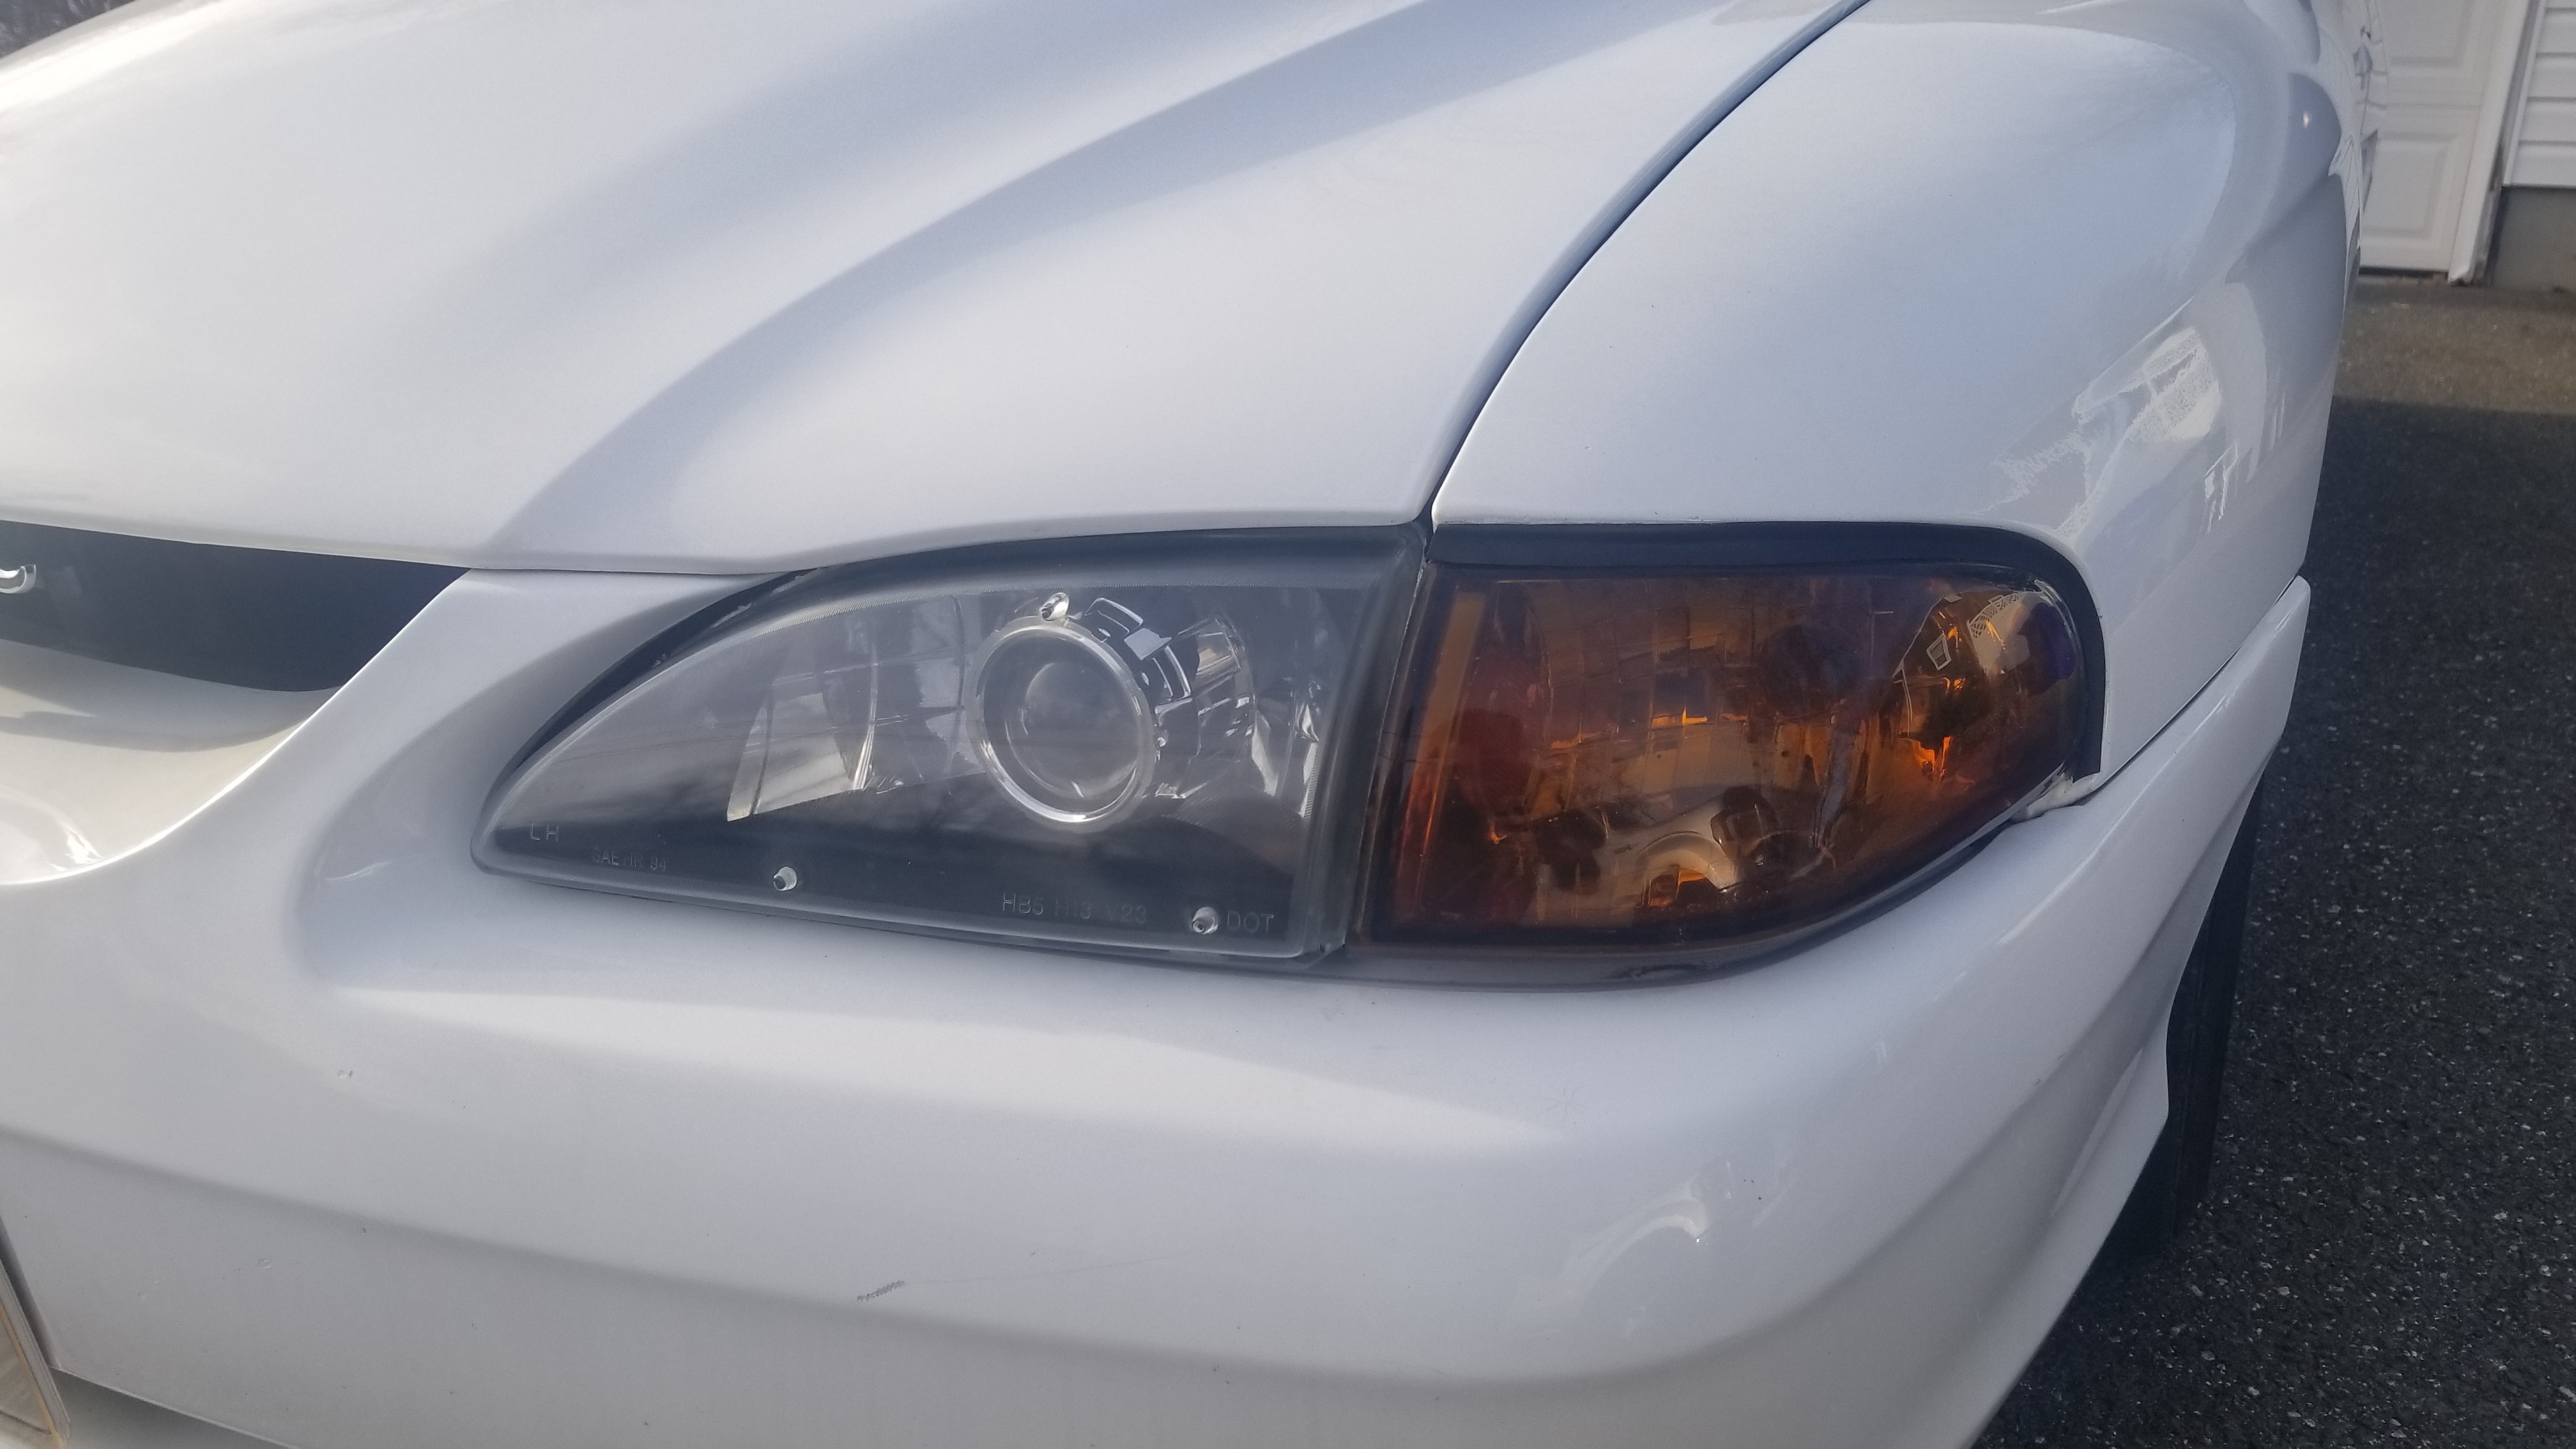
Anyways here they are lenseless. I decided to keep the black trim inside them instead of painting it white. I loved the look of them on the car before and I don't see a need to complicate this headlight build when I'm already happy with the look.
XD5GZxe_d.jpg
7aMoNpL_d.jpg
 
OP
OP
FivepointSlow

FivepointSlow

Well-Known Member
Joined
Oct 22, 2013
Messages
2,646
Reaction score
60
Location
Enfield, CT, USA
Export taillights are wired up and good to go! Just have to pickup a new flasher relay to prevent hyper flashing.
You can find my write up for how to do this here:

Video demonstrating all lights work as they should and independently(the brake lights don't also power the turn signal bulbs etc) https://i.imgur.com/3lNuvsa.mp4
Pictures if you don't want to bother with the video:
Running lights + Hazards
8Bvn0fP.jpg

Brake lights + Hazards
7OXMjyu.jpg

Brake lights
gTvjufz.jpg

Brake lights + Reverse
rGsfvtS.jpg

Brake lights + Reverse + Hazards
0xWepSb.jpg

3lNuvsa.mp4
 

Burninriverdiver

Well-Known Member
Joined
Jan 1, 2014
Messages
2,770
Reaction score
234
Nice work man the tail lights look like they're working great. The projector headlights are going to be awesome. Keep the updates coming
 
OP
OP
FivepointSlow

FivepointSlow

Well-Known Member
Joined
Oct 22, 2013
Messages
2,646
Reaction score
60
Location
Enfield, CT, USA
Remembered I had a demon eye kit intended for the Crown Victoria's headlights but I never got around to installing it into them... figured I already had these apart might aswell throw the kit in them before i close them up tomorrow after i align the projectors.. if i dont like them i can always just never turn them on. But I'm kinda digging this look!
cqdSsdo.jpg

IjnUB36.jpg

7YZPLA8.jpg

7kIsFRw.jpg

9u5I1OX.jpg

RHyQz7s.jpg

CmD6ZiQ.jpg


Also snagged some pictures of how I had to modify the housings for the projectors. Actually pretty simple.
Drilled a hole under the headlight socket for the projector wiring
OGOz2Cb.jpg

Ground down the back side of the housings to be flat to allow for the projector to be mounted
eT4u4C9.jpg
 
Last edited:
OP
OP
FivepointSlow

FivepointSlow

Well-Known Member
Joined
Oct 22, 2013
Messages
2,646
Reaction score
60
Location
Enfield, CT, USA
I put demon eyes in mine under the same idea, they can always be left off.
Dammit ttocs you replied before I got a chance to add the pictures haha.
Yea I already had the kit so it didnt even cost me anything so figured it can't hurt!
 
OP
OP
FivepointSlow

FivepointSlow

Well-Known Member
Joined
Oct 22, 2013
Messages
2,646
Reaction score
60
Location
Enfield, CT, USA
Mocked up the retrofits today to align the projectors so I can seal these things up tomorrow.
Most pictures I took are without the lenses placed on them because man are they foggy. Figured this whole process would be easier if I waited til after they are done so I didn't have to worry too much about scratching up the lenses when they'll be sanded down after anyways.
First side mocked up, wiring ran along the harness on top of the radiator. Need to pickup some hardware to mount the ballasts and relays but I have their positions figured out for a clean install.
58ReMIF.jpg

xpo4AiS.jpg

xAEicrY.jpg

jwOAbCV.jpg

and both of them in, without the shrouds on the projectors because I was so excited I totally forgot!
BXjnK2A.jpg

uqGpZaH.jpg

HwbNJL9.jpg

23sIZ0U.jpg

t8Gln4E.jpg

maD2qmn.jpg

And finally after remembering the shrouds
zOG6tfo.jpg

0o4hlEV.jpg
 
OP
OP
FivepointSlow

FivepointSlow

Well-Known Member
Joined
Oct 22, 2013
Messages
2,646
Reaction score
60
Location
Enfield, CT, USA
Sealed up the headlights the other day
Headlights sealant
ZEuCIqF.jpg

TiAzend.jpg

w9NfQ4C.jpg

And then restored he lenses
i5B5axl.jpg

GIGRoBh.jpg

T5gowcT.jpg

This is what they looked like untouched
vkm70I5.jpg

And after
DXHHIYq.jpg

wpljRta.jpg

R0Hvk72.jpg

Waiting on new headlight pivots and retaining clips to install them.
Also accidentally ordered a 9006 harness instead of a 9007 harness, so I have to exchange that aswell as pickup some RGB connectors to wire up the demon eyes properly and then we'll be good for a final install!
 
OP
OP
FivepointSlow

FivepointSlow

Well-Known Member
Joined
Oct 22, 2013
Messages
2,646
Reaction score
60
Location
Enfield, CT, USA
Installed a new head unit because I couldn't stand the Chinese android head unit that found its way into the car at some point..
While I was at it I decided to install a backup camera... I had an extra backup camera that I picked up while trying to figure out what I wanted to do for the one on the crown victoria. I ended up going with a flush mount camera in the location of the trunk key cylinder. So this one was unused.

Nothing ruins the rear end of a car more than a shotty and cheap rear camera install. I wanted it to be OEM looking. Ideally not even noticeable like the one on the Vic, but thats impossible with a white car. I am pleased with how this came out.

Drilled a 3/4 inch hole in the trunk
3o6NCYM.jpg


5/16 hole for the camera itself in the license plate trim panel. Made sure to measure and mark it to get it perfectly center.
0UV4jl1.jpg


y5o9bCv.jpg


Camera wiring ran along the trunk harness
FOLY205.jpg


cjL4Ss4.jpg


I tapped the reverse wire in the harness right by where the trunk harness meets everything else in the trunk

Final result
2rMCPHm.jpg


kAOEMev.jpg


Hardly noticable in the daylight. Just the way it should be
KtWoSDD.jpg


V7RArag.jpg


Perfect angle, just need to remove the grid lines... In my experience those never line up properly....
XTNNlBk.jpg


1P1mcga.jpg


dqJlrAL.jpg


DQTsOie.jpg


My sister got into a bit of an accident with a deer a few weeks ago and totaled her car. I had just installed a subwoofer/amp setup for her the week before. She gave me the green light to snag it all out of her car and keep it. So I tossed it in the Mustang.
This is definitely a temporary setup. I want to build a floor for the trunk and set the subwoofer into the spare tire well, aswell as put the amp off to the side where the security system module mount is and I even want to leave a small cubby for some airlift components in the future in the spare tire well...
But Spring is here and I currently don't have the time to do that, so this is a quick and easy solution.

I made sure to take my time running all the wires to the trunk, as they will be reused. No need to do it twice. But everything in the trunk I just kind of zip tied and didn't bother spending too much time making look pretty.

0Ks936f.jpg


LFWuhoZ.jpg


jFn9gfs.jpg


The wood is also temporary. I am going to pick up some MDF to cut and set into the spare tire well so I can throw the carpet back in without it falling into the well.
 
OP
OP
FivepointSlow

FivepointSlow

Well-Known Member
Joined
Oct 22, 2013
Messages
2,646
Reaction score
60
Location
Enfield, CT, USA
Still waiting on my harness from TRS but LMR came through with the headlighter adjusters today so the headlights are mounted!

First side was a PITA. The bottom outside adjuster was too short so after some fiddling I got it adjusted properly and then matched the other side so I only had to do it once..
xsjEDW2.jpg


After installing the 2nd side, I immediatly noticed a problem...
0z6qzJr.jpg

xeDoHcm.jpg

The shroud popped off and came forward... I took the headlight out and was able to very violently shake the housing around and got the shroud to pop back into place... Only for it to po back out when I closed the hood. I am not entirely sure how I am going to be able to fix this. It seems the only way would be to bake the headlights apart again, but I went over the headlight glue with black weather resistant epoxy and I am not sure how that would react to heat.... IDK i'll have to wait and see how much light leaks through when the lights are on. If it's not a noticeable amount I may just rock it til I do my next set of retrofits (this was the cheap test version cuz IDK what I am doing lol)

Was able to wire up the demon eyes though..
off
mWlCteU.jpg

on
Q3PRNFX.jpg


And pulled outside for me to step back and admire
lCOuF2Q.jpg

T59cOU4.jpg

yOzM8Ke.jpg

SpRXMFq.jpg


Was also able to reglue the weather stripping on the passenger side corner light, so that looks all good now too!

Finally I finished repairs on the radio bezel and received a new dash kit and did a final install on the head unit!
udvutwO.jpg


Tomorrow I will be painting my new center console and doing some vinyl work on the windows... And maybe mounting up the new chin spoiler....
 
OP
OP
FivepointSlow

FivepointSlow

Well-Known Member
Joined
Oct 22, 2013
Messages
2,646
Reaction score
60
Location
Enfield, CT, USA
I thought the bezels were held in by some small screws from the back?
It looked like that was the designed intention but I did not receive any screws to go with it. They fit very snug so I didn't think they would be necessary. The shrouds seemed to almost snap into place , but I think because the shroud are just a touch too big height wise the housing was pushing them from top and bottom and that must've been enough to cause them to pop out easily.

Painted the drivers door cup and shifter bezel
arBQdmE.jpg


The temporary floor solution in the trunk. I will be remaking this out of MDF board in the future and building the sub box into the spare tire well. But for now this will do. I ordered a new trunk carpet aswell because my old one was stained and looked like a mouse chewed on it..
lUZGkwl.jpg


Cleaned up the new center console
e338wDO.jpg


And painted it
gc57Kv7.jpg

nfEaOkw.jpg

K8mD4a8.jpg

LxTcofJ.jpg


Ran into an unexpected problem with my center console lid.
Normally this would just get painted to match the center console and no big deal. But it being wrapped to match the seats posses an issue.

I need to use the 1998 lid as the leather is glued and I don't want to deal with trying to remove and reglue it. But the latching mechanics are different between the 2 consoles, and reusing the old latch and old bin in the new console didn't seem easily obtainable.
7pF05jY.jpg


The lids are the same general shape, but the underside of them are pretty different. At first glance they're identical.
mRIzbCO.jpg

On the right side of them those 3 screws for the hinges are the same. great
On the left side, the top 3 screws are also the same, but then the similarities stop.
Dlc195o.jpg

It appears once that cover is removed, there are provisions for that extra screw on the newer lid, that just isnt used on the old lid.
I was wrong. Silly me thinking Ford would make it easy on me, those 2 bottom left screw holes are both off by about 1/3 of an inch between the new and old lid.

So I drilled 2 new holes, and feathered them out to allow the screws to sit flush, and then glued in 2 more screws in the unused holes just to satisfy my OCD, even though no one will ever see this.
nqujf5P.jpg

I want to go back and trim the panel around that latch area, as that bottom part is wider than the old one, so it doesnt quiet sit flush in there.

Side by side really has me excited for not knocking drinks over while shifting
fCBTX9P.jpg

gmoJWuo.jpg


I installed it but loosely as I am still waiting on my RedlineGoods care package thats going to require I take it back out again...
 
OP
OP
FivepointSlow

FivepointSlow

Well-Known Member
Joined
Oct 22, 2013
Messages
2,646
Reaction score
60
Location
Enfield, CT, USA
Working all weekend but I made some time after work tonight to get down to the garage and get some more things done as it was out first 70 degree day here in CT
Harness from TRS came in. Got that installed and all buttoned up, then aligned the headlights after fighting with a few stubborn adjusters.

ngqOXeY.jpg
V1bcEw3.jpg

lrf3EyO.jpg

RzIDFzE.jpg

QQe0Wp1.jpg

3iyeDVx.jpg

I am in love with this setup... Amber corners, 8000k retrofits, and yellow fogs ughh
V36d8AW.jpg

Center console installed. Heard from RedlineGoods that they just now received my leather... Only sent it out a month ago... So knowing I won't be getting it this week like I thought, and it will be probably 2 weeks til I get it, I threw the rest of the interior back together for now.
nbdFtEC.jpg

Had the same problem with the 94 when I swapped a New Edge console into it... The black paint from LMR never quite matches and gets as dark as the stock interior?? It is way more noticeable in this pic. IRL it's not terrible and I can live with it..
t40XuUG.jpg


Also slapped on a new rear window strip... No idea why the old one had been removed at some point as the tint on the rear window did not cover the dot matrix, so the bottom 90% of the window is 20% tint and the top 10% of the window was clear dot matrix...
Fixed up nicely.
KWvuOHV.jpg

My cousins fiance, also a good friend of mine, does photography for an automotive group called RollHard, they are based out of europe, and he is one of 5 American photographers for them, so I throw their sun strip on my car. The Vic had it and now the Mustang is rocking it.
VOpSAWv.jpg


Now that the front and rear window strips are on, in matte black, I now realize the vinyl on my roof isn't actually matte black... Seems to be a semi gloss?
Oh well I was gonna put off rewrapping the hood, as it is pretty faded and scratched, but was passable, now I have that final reason to just do it.

Tomorrow morning before work I am going to install a new front lip, and yank a nut and bolt from my drivers seat so I can match and pickup some new hardware for both seats... Currently missing both rear bolts on the passenger seat and on nut on the drivers seat... :oops:
 
OP
OP
FivepointSlow

FivepointSlow

Well-Known Member
Joined
Oct 22, 2013
Messages
2,646
Reaction score
60
Location
Enfield, CT, USA
I am going to be putting the Mustang back on the road April 5th, pickup my new rear tires on my way to work and have them installed at work...
This is what I am aiming to get done in the next week before then.
-Seat bolts
-Front lip
-Roll fenders
-Adjust rear lower control arms so the car sits level
-Touch up a few chipping paint spots, probably going to leave the flaking quarter panel.. Thinking about trying to repaint that area and blend it but I am not that confident in my sanding abilities..
-Pickup amber bulbs for my rear turn signals, currently just using white bulbs
-Remove and polish my exhaust tips
-Throw on my center cap decals I had made to replicate what Jon had on the FR500s originally, also made by the same guy
-Install a floor mat hook on the drivers side so my gas pedal stops getting jammed on the stupid mat :)
-Install rear tires
-Roof wrap

And in the week or so after it goes back on the road I am going to be getting the front windows tinted and have my cats replaced.
 

Latest posts

Forum statistics

Threads
77,508
Messages
1,504,009
Members
14,979
Latest member
TN95gt

Members online

No members online now.
Top