Project Red Headed 3v

OP
OP
T

Thomas_W

Well-Known Member
Joined
Jan 25, 2007
Messages
1,485
Reaction score
62
Location
Capon Bridge, WV
Sooo.....


Do i buy the MM steering shaft-$300ish

or

materials for the through floor subframe connectors- $120
 

DKblue98GT

Well-Known Member
Joined
Dec 19, 2009
Messages
1,406
Reaction score
333
The MM steering shaft makes the steering so positive. I highly recommend it.
 
OP
OP
T

Thomas_W

Well-Known Member
Joined
Jan 25, 2007
Messages
1,485
Reaction score
62
Location
Capon Bridge, WV
The MM steering shaft makes the steering so positive. I highly recommend it.

Its high on the list of mods to get. There is alot of welding tasks on this project and i need to borrow a welder, ao im trying to do all the welding tasks at once.

the factory steering shaft appears to have been ground down to cleae the header. If that is what has been done, i have little confidence in its structural abilities based on the quality of everything else done on this car. Subframe connectors are also high on the list due to the damage to the forward ones.

That said, i pretty much answered my own question. I can drive the car with the subframe issues with confidence, the steering shaft not so much.
 
OP
OP
T

Thomas_W

Well-Known Member
Joined
Jan 25, 2007
Messages
1,485
Reaction score
62
Location
Capon Bridge, WV
I got the steering wheel and air bag installed a few days ago:


i also picked up a 99-01 Cobra gauge cluster and swapped the guts over and installed it today:

 
OP
OP
T

Thomas_W

Well-Known Member
Joined
Jan 25, 2007
Messages
1,485
Reaction score
62
Location
Capon Bridge, WV
So i ordered the MM steering shaft from LMR. With their 7% off and free shipping, it was about $10 cheaper than from MM direct. It should be here thursday.


now if I could get these airplanes done and out of my garage ao i can rearrange things and get the car inside so it can stay on jackstands for awhile, i would be golden.


Ohh. I realized the lower control arms are also missing the swaybar mounts, so i need to call UPR and see about exchanging those
 
OP
OP
T

Thomas_W

Well-Known Member
Joined
Jan 25, 2007
Messages
1,485
Reaction score
62
Location
Capon Bridge, WV
The last front suspension item has arrived, the MM steering shaft:


with how work has been this past week, i need a few days of not working on other peoples stuff, so i think this weekend im going to take the time to install all of the suspension parts.

I would like to do the rear as well, But, i realized i got the LCA's without the sway bar mount, so i had to return those to UPR to exchange them for the correct ones. Tracking said they arrived today, so hopefully i will get a phone call tomorrow about that.
 
OP
OP
T

Thomas_W

Well-Known Member
Joined
Jan 25, 2007
Messages
1,485
Reaction score
62
Location
Capon Bridge, WV
Ita nice to be able to work on my own stuff at my own pace for once. I got started with the front suspension today. First task, lay out all the parts to make sure i wasnt missing anything:


Then I cleaned all the preservative oil off the MM steering shaft and hung it from the garage door with some safety wire. I also masked off the heatshrink dust shields on the telescoping ends, then applied three coats of etch primer:


while primer and paint was drying i worked on other parts. First up was the Steeda 4 bolt C/C plates. Whoever installed the previous set of C/C plates really should learn to read directions/use common sense. They placed the C/C top plate spacers Under the shock tower, which caused some damage to the shock tower sheetmetal. It took some judicious pounding with a hammer to straighten it all up. Luckily it was just some bend metal and easily fixed.


That took long enough for the final coat of primer to fully cure, then i sprayed a coat of silver VHT header paint onto the steering shaft:


i then started work on installing the coilovers and bumpsteer kit. Basic follow the instructions and it mostly all went fine. Some head scratching was involved though. I couldnt use All of the spacers with the CC plates bc there wouldnt be enough (read Zero) threads for the strut nut. So i used the Short stepped spacer on the bottom and the large stepped spacer on the top. During all this i was surprised to find Stock struts up front as the previous owner said strange 10 ways were on all four corners. Oh well, i'll have to invest in some bilsteins I guess. I then started removing the front control Arms:

 
OP
OP
T

Thomas_W

Well-Known Member
Joined
Jan 25, 2007
Messages
1,485
Reaction score
62
Location
Capon Bridge, WV
K member is bolted in place.


only issue's so far.

The brake lines on the passenger side had to be bent and moved forward. Reason for this is the factory routing has the brake line holder exactly where the front tube on the K member is.

on the driver side, the engine/frame bonding strap bolt is where the front K member tube is, again, it needs relocated.

If you get the Upgraded K member bolt kit, you'll need a 7/8" socket for the main Bolts and 15/16" sockets/wrench for the A arm bolts.
Also, the two forward most Main K bolt washers will need a fairly large side of it ground flat so it resembles a "D", this is so it clears the forward tube.

The included ball joints are also WAY to long. I mean 3/4" to long! The Castle Nut also bottom out on the threads before the balljoint seats in the spindle. Kind of frustrating. BUT! Remember those non-stepped spacers from the C/C plates i didnt use? Well, they are EXACTLY the right side for the spindle threads and in height to put the castle nut inline with the cotter pin hole. talk about lucky!
 
OP
OP
T

Thomas_W

Well-Known Member
Joined
Jan 25, 2007
Messages
1,485
Reaction score
62
Location
Capon Bridge, WV
Here is the spacer on the balljoint i mentioned in the last post:


The passenger side oil pan saver. I was actually on the fence about keeping these as i wasnt sure if they were worth the $200 extra. Honestly, not worth $200 IMO, $125 would of been more appropriate, especially considering neither of them fit against the forward control arm Tab vert well And the driver side had to have the rear side of the slots for the k member bolts cut all the way to the edge of the plate in order to be able to install the aft two K member bolts. The main reason i kept them.. Save my oil pan. The 3v's oil pan hung about 1" below the stock K member, with the tubular K it was far more, so i see these as good investments in case the front suspension were to bottom out for whatever reason.


driver side all done.. Minus tightening the aft control arm bolts (i lost my 15/16" deep well socket):


You can just barely see the MM steering shaft. It actully hits the header tubes worse than the modified stock shaft. So i'm going to pull the shaft back loose from the rack tomorrow and use a C clamp to collapse the header tube a little (hopefully). If the C clamp doesnt do the trick, i'll have to pull the header, which will allow me to test the fit of those turbo headers i bought :)

So once i get the reae control arm bolts tightened, the balljoints greased, rear K member bolts tightened and the steering shaft clearance issues fixed, i'm going to do some more cleaning to the underside of this thing, its still disgusting. Then i'll set ride height and do an initial alignment.
 
OP
OP
T

Thomas_W

Well-Known Member
Joined
Jan 25, 2007
Messages
1,485
Reaction score
62
Location
Capon Bridge, WV
Well, finished up the front suspension today.. Sort of. When i was doing the eyeball alignment, i found the passenger side inner tie-rod is a little sloppy, so i'll be replacing both inner tie-rod ends tomorrow. I also clearance the steering shaft/header, but unfortunately it wasnt enough. Im debating now on raising the engine 1/4" or doing some more clearancing.
 
OP
OP
T

Thomas_W

Well-Known Member
Joined
Jan 25, 2007
Messages
1,485
Reaction score
62
Location
Capon Bridge, WV
Thanks man! Getting this car back in shape has proven painful. My wife mentioned i should of just saved my money and bought the turbo cobra down the street... Lol
 
OP
OP
T

Thomas_W

Well-Known Member
Joined
Jan 25, 2007
Messages
1,485
Reaction score
62
Location
Capon Bridge, WV
It was already in there, but honestly with everything i have changed on the car, its like i did the swap minus dropping the motor in. Lol
 
OP
OP
T

Thomas_W

Well-Known Member
Joined
Jan 25, 2007
Messages
1,485
Reaction score
62
Location
Capon Bridge, WV
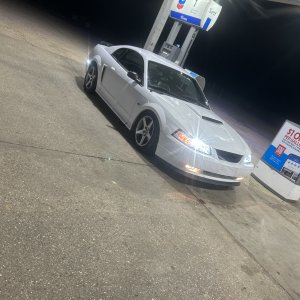
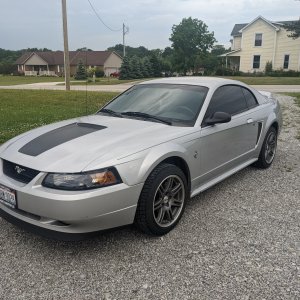
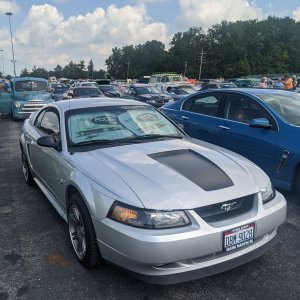
I figured with the car so close to being driveable on a daily basis, i should finish it up to where i can actually enjoy it.

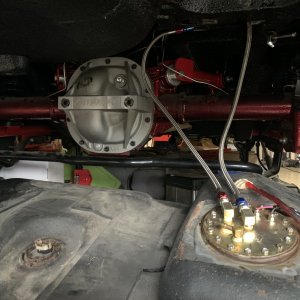
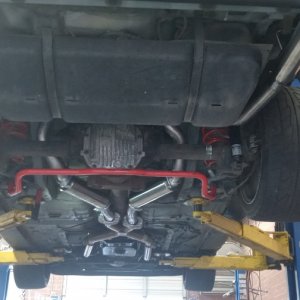
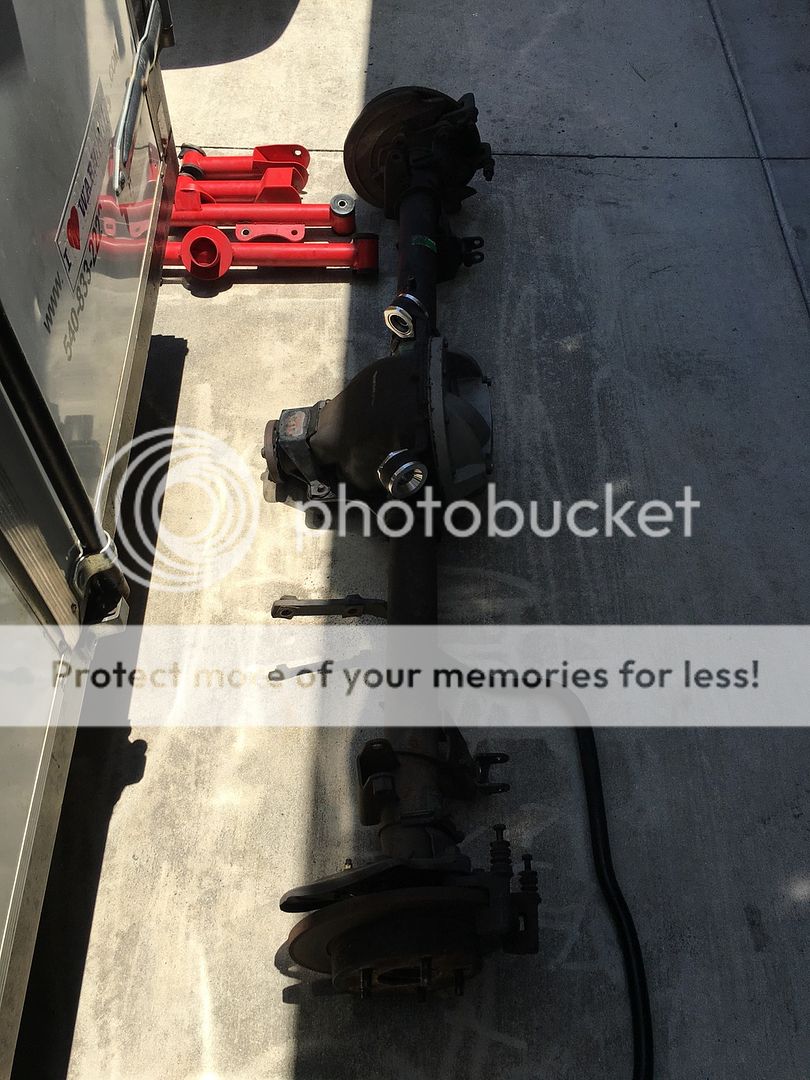
So the rear end, LCA's, UCA's ans UCA housing bushings all came out from under the car. This thing probably had 3" of road grime everywhere, so everything got sprayed down really well with some degreaser and soaked for about an hour. Then the pressure washer came out for a good scrub. Its still dirty, but 99% clean, i'll have to do one more cleaning session tomorrow before the rear end goes back in.

Since everything in the reae was getting replaced, i started to look at the bolts for the control arms. The lowers were Definitely the wrong bolts. Not surprising since near everything in this car done by the previous owners is half assed and wrong. Im REALLY glad its got an essentially stock motor!

So a trip to Ace hardwarw and $60 later, i had the correct 14mm grade 10 LCA hardware and metal lock nuts:


the upper hardware will only reuse the torque box side, the other end is new.


using the UPR housing bushing tool, the rubber bushings wete removed and spherical bushings installed. My only complaint with this, it would of been nice if the internal lock ring for the spherical bushing could of been oriented so the actual bearing could of been removed from the machined housing. Oh well


BTW, the control arms in the background as for sale for a good price. They need new bushings though.

Then the battle box kit came out and got a good coat of etch primer since it'll be a few weeks till these get welded in:


I've got the battle boxes mostly installed, but no pictures, i'll save that for tomorrow. :)
 
OP
OP
T

Thomas_W

Well-Known Member
Joined
Jan 25, 2007
Messages
1,485
Reaction score
62
Location
Capon Bridge, WV
Here is what the car looked like at the end of yeaterday:


Today i got all of the remainder of the battle boxes installed. For those planning to do so, heres a tip.

Uppers:
1. replace the 3/8-16 x 1" bolts with 3/8-16 x 1 1/2" bolts- ive done 3 sets of these now and these 3/8 bolts are Always Just to short to reach with modifying the interior plates. With 1 1/2" long bolts, they are much easier to get the nuts/washers on.
2. You'll need to notch the lower frame of your rear seat back to clear one of the Bolts.

Lowers:
1. If you have ABS and want to keep it, start planning where your going to relocate the wire grommet hole, the lower BB covers the factory location:
2. loctite!


Once the BB were all done, i worked on more cleaning (its way cleaner, but not perfect yet) and getting the exhaust sucked up si it didnt hang so low. The rear end then went in the car and all of the new control arms hooked up, ride height set, and the pinion angle set to -2* compares to the crank centerline.

Currently, this is as the car sits. 1 1/2" of rake, im still debating (and looking for opinions) on if i should lower it a little more both front and rear:


and this is what the bushings looked like in the old Control arms (new bushings are available for $100, so if anyone wants a good deal on these old arms, make me an offer!)


A steeda tri-ax and black 03/04 Cobra side skirts are also on there way here.
 
OP
OP
T

Thomas_W

Well-Known Member
Joined
Jan 25, 2007
Messages
1,485
Reaction score
62
Location
Capon Bridge, WV
Took the car for a short little 2 1/2 mile drive to see how the new suspension feels. MUCH BETTER! No more squirly rear end when you down shift. Also compared to before, the car is quieter. Even with the solid bushings the NVH is not all that bad.

That said, the rear end noise of this thing is HORRIBLE! The whine is just Really loud! So i guess i'll be pulling the diff cover (which sucks since i just put fluid in it) to verify they actually installed the gears correctly. Based on the noise it has, they didnt. Lol
 

Latest posts

Forum statistics

Threads
77,514
Messages
1,504,102
Members
14,982
Latest member
chasingomas

Members online

No members online now.
Top