Venom 's Build Thread

OP
OP
V

venom

Active Member
Joined
Mar 31, 2007
Messages
480
Reaction score
5
Got back front alternator casing, overflow cap and PS bracket. Everything else should be in a few days.


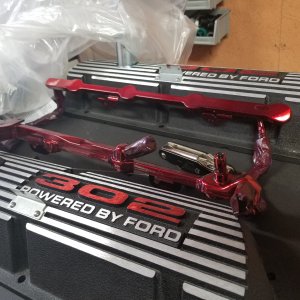
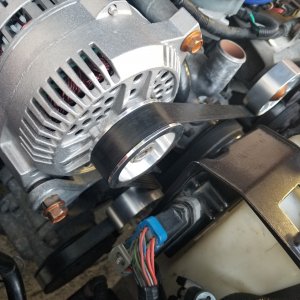
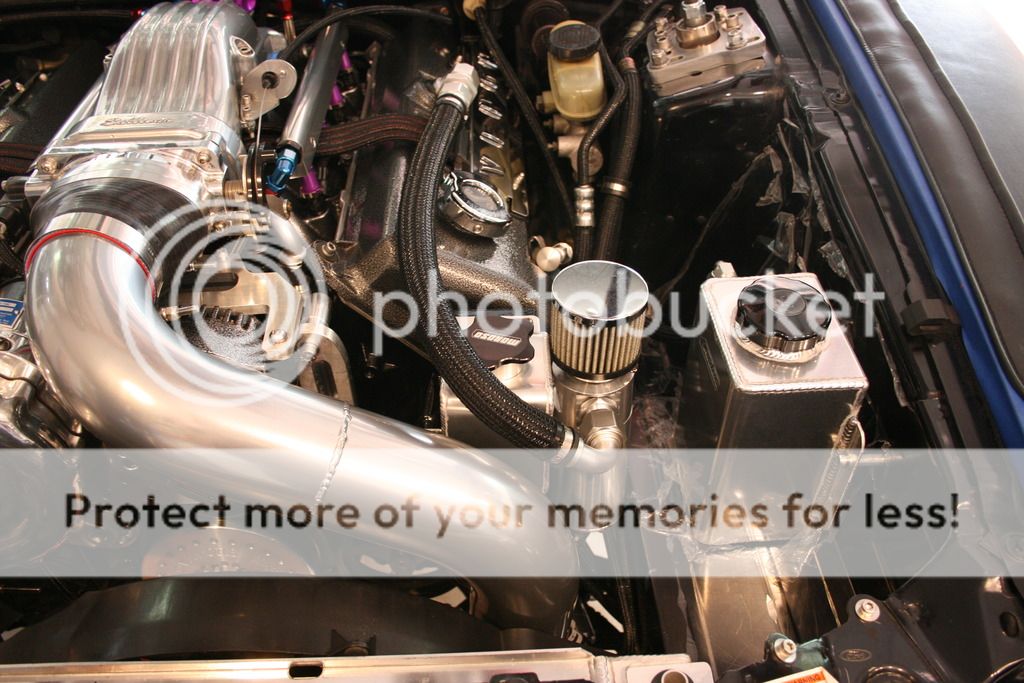
Decided to only powder coat the font and rear case. I went with hammer finish in the front and rear will match the pipes in chrome. I did not paint center section since if alternator fails the center section will be replaced. Most of the alternator will be hidden so not too concerned about that center section.

IMG_9361_zpsyzhtxi2a.jpg


IMG_9359_zpsn4ygjyuf.jpg


Over flow cap


IMG_9358_zpsxsap6p3o.jpg


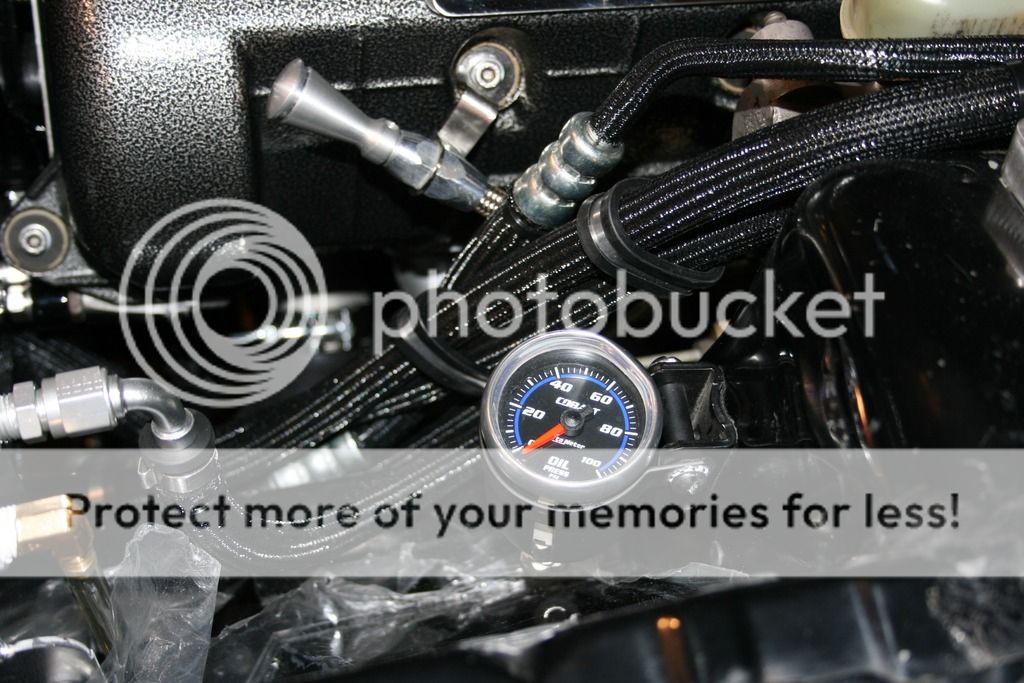
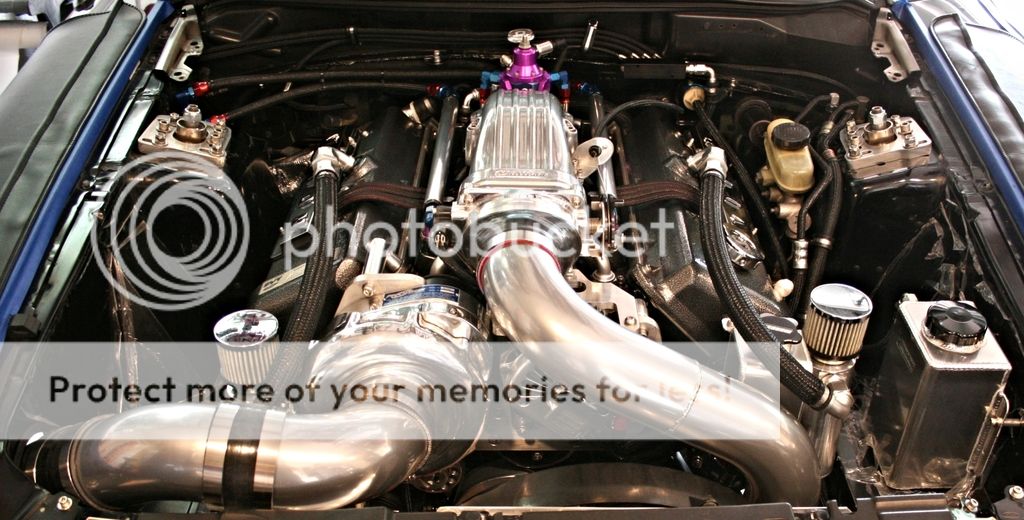
Got a lot of parts put back together. You can see the power steering all hooked up. I rerouted plug wires and hopefully it will be less visible when the rest of the parts go on. If not I will sleeve the wires in black to make them less visible.


IMG_9363_zpsmiufsrk3.jpg


IMG_9374_zpsdtgsbdzw.jpg


IMG_9375_zpshgndqvit.jpg
 

Tabres

Member
Joined
Feb 15, 2006
Messages
159
Reaction score
0
Location
Bloomington, Il
You're going to want to grind the powdercoat off of the top of the mounting ears on the alternator case. I'd encourage you to double check me, but as far as I understand, it grounds through the mount. That's what I was told by the shop that rebuilt my alternator a few years ago.

Also, if you ever find yourself in a position where you're still unhappy with the powersteering lines, here is a diagram showing how to convert them to AN fittings and lines that you could easily tuck.

PowerSteeringLineMap.jpg
 

ttocs

Post Whore
Joined
Oct 9, 2009
Messages
32,763
Reaction score
5,712
Location
Evansville Indiana
yes the alt does ground through the chassis and you will need to grind the powder off were it mounts to the block/bracket. I had mine powdered but it has a power and ground connection on top.

Looking killer as usual.
 
OP
OP
V

venom

Active Member
Joined
Mar 31, 2007
Messages
480
Reaction score
5
Great info, thanks! Going to see how PS lines look but they are in your face and unsightly. May tackle it afterwards when car is up and running and diagram is going to save on tons of research.


You're going to want to grind the powdercoat off of the top of the mounting ears on the alternator case. I'd encourage you to double check me, but as far as I understand, it grounds through the mount. That's what I was told by the shop that rebuilt my alternator a few years ago.

Also, if you ever find yourself in a position where you're still unhappy with the powersteering lines, here is a diagram showing how to convert them to AN fittings and lines that you could easily tuck.

PowerSteeringLineMap.jpg
 
OP
OP
V

venom

Active Member
Joined
Mar 31, 2007
Messages
480
Reaction score
5
yes the alt does ground through the chassis and you will need to grind the powder off were it mounts to the block/bracket. I had mine powdered but it has a power and ground connection on top.

Looking killer as usual.

I removed PC from the threads but will grind some off the top surface to be on the safe side.
 
OP
OP
V

venom

Active Member
Joined
Mar 31, 2007
Messages
480
Reaction score
5
Just like ttocs the spark plug wires are an eye sore. I went ahead and covered them with Painless braiding since I had a bunch of it and have yet to use it anywhere. Its split down the middle so you don't have to remove everything to install it. I made wire separators out of tie wraps since they are all hidden.

IMG_9377_zpsjrctije0.jpg
 
OP
OP
V

venom

Active Member
Joined
Mar 31, 2007
Messages
480
Reaction score
5
I went ahead and sleeved more items take note of the feed fuel lines, vac lines, PS lines and catch can lines.


IMG_9398_zpsuxgc5vnx.jpg
 
OP
OP
V

venom

Active Member
Joined
Mar 31, 2007
Messages
480
Reaction score
5
Thanks to all for May rotm nominee. I regretfully declined as my engine is not complete and I would be at a great disadvantage. Perhaps when I am further along the build I may have the honor of being nominated again.

Despite being at Pikes Peak this weekend all I could think about was the parts that were being PC. I picked them up today and they look great. As expected they look like polished aluminum since they have a clear which is the look I wanted. Here is a quick cell once pic.


9CF063F5-743B-42D1-9ECD-79FE2260420C_zpsp70er3m0.jpg
 
OP
OP
V

venom

Active Member
Joined
Mar 31, 2007
Messages
480
Reaction score
5
Pic warning!! Turns out the IAC was never connected to air before the throttle blade. Pretty much IAC was not doing anything. I went ahead and drilled a port on the IAC and under the throttle body to give it some air when throttle is closed.


IMG_9498_zpslmbaw2qa.jpg


IMG_9490_zpsh6qsklzm.jpg


IMG_9485_zpswqs6repr.jpg


IMG_9482_zpsqalmhvjo.jpg


IMG_9474_zpsxkbspeyy.jpg


IMG_9469_zpsyycwlgq4.jpg


IMG_9464_zpsgrbghe64.jpg


IMG_9463_zps6slefgba.jpg


IMG_9458_zps0iszx6ty.jpg


IMG_9444_zpsutzuw03s.jpg


IMG_9440_zps1ugm9yn1.jpg


Camber plates are brushed with stainless nuts and bolts.


IMG_9435_zpsefhysoli.jpg


IMG_9433_zps3fv1klr9.jpg


IMG_9430_zpsmhxbf5cf.jpg


IMG_9428_zpsrjuyhyif.jpg


IMG_9427_zpspw42jcyv.jpg


IMG_9419_zps5xmwe7xb.jpg


IMG_9418_zpsieypxzbn.jpg


IMG_9416_zpseq8kddte.jpg


IMG_9415_zpsn80rhdfp.jpg


IMG_9414_zps9hagtj7v.jpg


IMG_9412_zpsns8he05o.jpg


IMG_9410_zpsj7of56ee.jpg
 
OP
OP
V

venom

Active Member
Joined
Mar 31, 2007
Messages
480
Reaction score
5
Made a braket for the filter. The filter comes with a mounting stud for this purpose due to it size and weight.

IMG_9506_zpsglmamq8w.jpg
 
OP
OP
V

venom

Active Member
Joined
Mar 31, 2007
Messages
480
Reaction score
5
Today I removed the rest of the gas that was left in the tank. I also blacked out sump line.


IMG_9509_zpslz0x4wld.jpg
 
OP
OP
V

venom

Active Member
Joined
Mar 31, 2007
Messages
480
Reaction score
5
Well despite my best efforts to try and start it on Friday it did not work out. Today things are looking good for a startup. Theres some mis-information on the megasquirt in ref to sn95s. On Diyautotune it states that you can remove stock ECU and I tell you unless you are going to do away with the PATS system you can not get rid of stock ECU. Once everything is up and running Ill start a Megasquirt thread and document specifics of SN95 conversions.

I made an oil primer out of a sprayer. I had this laying around but you can buy one for 10-15 dollars. I used fittings that I had laying around but the point is to get oil into the motor threw the pump with out tuning on the motor. I hooked up a temporary oil pressure to see how it goes. I was able to get it to 16PSI with no leaks.


IMG_9522_zpso7wenjsf.jpg


IMG_9523_zpsay6ksijb.jpg


IMG_9524_zpsnignj2qg.jpg


Im upset that I drop the gauge and left a big dent in it but it is a tool more that anything at this point:mad:.

IMG_9526_zpsgwyvzx2u.jpg


Here is where ill spend most of my time MS is up and no errors. I did have an issue with a setting but was able to sort it with the help with the folks at MS forums.


IMG_9529_zpsbh37lqtb.jpg
 

lwarrior1016

Mr. Secondary Timing Chain
Staff
Joined
Sep 22, 2014
Messages
8,595
Reaction score
4,432
Location
South Mississippi
Oh man, I was really looking forward to getting rid of the stock ecu. Im tuned in for your write up on this conversion. I will be finishing my computer in the next couple weeks and then begin building the engine harness, so I'm looking forward to what you have for us.
 

Forum statistics

Threads
77,573
Messages
1,505,164
Members
15,037
Latest member
RevJon

Members online

Top