200,000 mile GT build

OP
OP
Akurma

Akurma

Active Member
Joined
Apr 22, 2020
Messages
283
Reaction score
353
Location
Pennsylvania
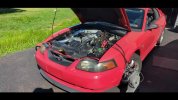
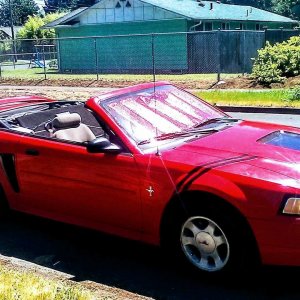
Not a super productive weekend as I spent a majority of it cruising around in the 65 Mustang. It drove great all weekend and then once I got home started giving me issues and is now running really rough :rolleyes: Always something I guess lol

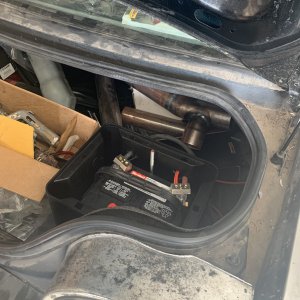
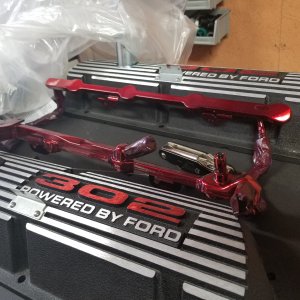
Got the replacement oil pressure sensor from AEM. Swapped them out and checked to make sure it read 0psi. sure enough it did so i put some thread sealant on it and snugged it in place

52175534843_e42052973d_o.jpg

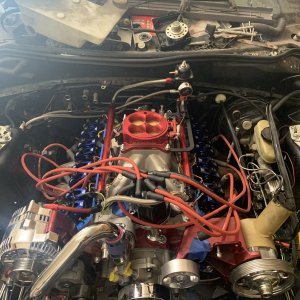
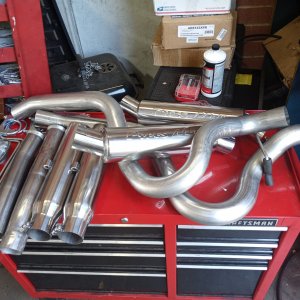
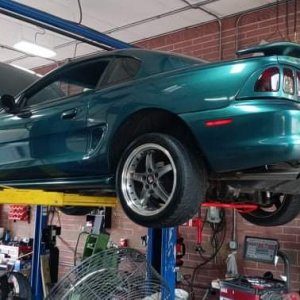
Besides that I loosely installed the SLP X-pipe. I ended up having to replace both of the catalytic converters. The one on the driver sides was starting to crumble and come apart. Figured I'd rather spend the money now and know I shouldn't have to touch them for a while.

52174503997_be98431ca5_o.jpg


Next up is painting the Autometer gauge bezels and install them. Going to try and paint them during the week so they are dry and good to install come this weekend. If I can find and extra pair of hands I'll install the gas tank and finish up the exhaust. It's sooo close to being "done"
 
OP
OP
Akurma

Akurma

Active Member
Joined
Apr 22, 2020
Messages
283
Reaction score
353
Location
Pennsylvania
Had some time today and crossed this off my list

Painted the two gauge pod bezels today! I think they turned out pretty well. I do have a small run in the paint on the cluster bezel but i dont think I'll be that noticeable. This was easy enough to do and I think the color match is pretty damn close. I used SEM #17013 paint since I have dark charcoal interior. I am 99% sure this is the same exact stuff that LMR sells just with a different label, also cheaper.

First up was to scuff the plastic before spraying them with an adhesive promotor. Just used a grey scuffy pad and went to town.

Before scuffing

52180754371_8a40e5b358_o.jpg

After Scuffing

52181003979_0180b766fb_o.jpg

Comparing the scuffed cluster bezel to the non-scuffed column pod

52180754286_ccd2b8ced9_o.jpg

Sprayed everything down with some wax & grease remove, dried them and then hit them with a light coating of Adhesive promotor.

52181003904_ce90f1f9f3_o.jpg

After letting the Adhesive promotor dry for some time I hit it with its first coat.

52179732532_0d90816b4d_o.jpg

Then I left them out to dry.

I placed the factory cluster bezel next to is to compare. It is pretty close, I think the painted one is a little bit of a lighter shade but it's better than the black that they were.


52180754196_95528bd399_o.jpg

52181243245_7d5b3477fd_o.jpg
 
OP
OP
Akurma

Akurma

Active Member
Joined
Apr 22, 2020
Messages
283
Reaction score
353
Location
Pennsylvania
Hope everyone enjoyed the 4th! I know I sure did!

Didn't get as far as I wanted to due to some fitment issues but it is what it is.

Finished up the gauge wiring and installed everything. All the gauges work and light up so that's one less thing on the list. Once I confirmed they all had power, I installed the gauge pods. They are pretty straight forward with the exception of the single pod on the steering column. I was under the impression it was a replacement trim piece... it is not, it simply slips overtop of the factory piece. Not a huge fan on that as it fits a little weird but its doable. The two gauge pod cluster bezel replacement fitment is ok. not perfect but acceptable. I did notice that I was shorted the two mounting screws. So we'll see how Autometer handles that.

Once the gauges were in place it was time to cable manage all the wires underneath the dash. Unfortunately i cant keep the fuse box cover as the add a circuits prevent the cover from clipping into place. oh well, cant even see it unless you're under the dash.

52194555669_49acec94c7_k.jpg

52193286247_fea7c89733_k.jpg


52194786850_33663afa90_k.jpg

52194555729_62f45a7e09_k.jpg

52194786890_36900cb50d_k.jpg

After that I made some upper alternator brackets. The Bullitt intake manifold has specific upper bracket for the alternator. Took some metal strips i can laying around and cut them to length. Not pretty but it works. I may paint these black to make them blend in more, But for now they work.

52194555734_2b0086f82e_k.jpg


After that it was time to test the Air Conditioning system! I have replaced every single AC component besides one of the lines. I mentioned this line a few pages back. I wanted to pull a vacuum on the system first to make sure all was good. After that passed I did a leak test. The system told me it passed. No I just need to add some PAG46 oil and fill it with R134a.

52194295986_6c42e728f5_k.jpg

52194314213_fea1ad16e0_k.jpg

52193286337_968fcbaf70_k.jpg

52194786970_2ce790dbaf_k.jpg

While the AC machine was doing its thing I figured now would be a good time to add oil to the engine. With the 7qt Canton pan I picked up 7qts of Pennzoil Platinum synthetic 5w30. I was going to just run Motorcraft stuff by couldn't find 7qts of it anywhere near me. I've used Pennzoil Plat. in other cars and even ran the regular non synthetic high mileage stuff in the old 200,000 mile motor. So i figured its good enough. Topped it off with a Motorcraft filter.

52194314243_7ef236c207_k.jpg


Next up is reinstalling the fuel tank. I attempted to do this but ran into fitment issues with the fuel filler neck and that gasket/grommet it slides into on the tank. I for the life of me cannot get it to slide into the tank. Ended up tearing the grommet and none of the local stores had one in stock. No idea what I'm doing wrong, I've tried heating the grommet up by leaving it in the sun. Tried spraying WD-40, spray lube, motor oil. Nothing still cant get it to fit correctly.

Its a shame because the tank is pretty much all that is needed to get this thing off of jack stands. Once the tank is in place I can finish up the exhaust and do the rear shocks.
 

joe65

Well-Known Member
Joined
Feb 4, 2020
Messages
1,478
Reaction score
1,444
man, you've been busy. I like the progress and the car. should be really nice when you're all wrapped up.
 
OP
OP
Akurma

Akurma

Active Member
Joined
Apr 22, 2020
Messages
283
Reaction score
353
Location
Pennsylvania
man, you've been busy. I like the progress and the car. should be really nice when you're all wrapped up.

Thanks man! I'm trying to get this thing on the road and put some miles on it before summer is over! I'm in the home stretch now
 
OP
OP
Akurma

Akurma

Active Member
Joined
Apr 22, 2020
Messages
283
Reaction score
353
Location
Pennsylvania
Keeping myself busy! Hopefully getting in touch with the tuner this week!

Knocked out the last... well hopefully the last major hurdle. Got the gas tank installed, my god does that fuel fill neck grommet absolutely suck to install! I fought for what seemed like forever to get the fill neck through the grommet and into the tank. Not looking forward to doing that again when I drop the tank again this winter for rust repair.

52206806142_4da3abaf97_k.jpg

Once that was installed I swapped out the rear shocks. When I got the car I replaced them with some regular KYB shocks. They did the job but over bumps would almost always bottom out with the Eibach sportline springs. I planned to pick up a set of Koni yellows and eventually do a MM rear coilover conversion but I found a good deal online for a pair for brand new KYB AGX adjustable rear shocks for only $100 for both. Couldn't pass up trying them out for the money, worst case I use them until I find a deal on some Konis or an MM coilover kit.

While I was under there I poked around at the upper rear axle bushings. The upper control arm bushings that attach to the body of the car seems good, couldn't see any cracking in the rubber.... The bushings that are on the actual axel itself though are pretty much done and have alot of cracks bit is still soft. I am assuming these are original to the car. Does anyone have recommendations for upper axle control arms? I currently have J&M lowers. I've heard factory replacements for the uppers if you have poly/spherical lowers

52207833483_dc248dcff5_k.jpg

52208310850_75e2bdfa86_k.jpg

52208310745_f5e7ce52da_k.jpg

While I was crawling around under the car I decided to finally fix the E brake bolt that got ripped out of the mount years ago. Pretty common on these cars and easy to fix just a pain if you don't feel like taking the entire center console out... like me. Got a new stainless steel bolt and some big washers. Should be good for a long while.

52208310675_759a2af89d_k.jpg

Last thing I messed with was adding trans fluid. I replaced the drain plug as it was starting to get rounded off. I also picked up 3qts of Pennzoil Synchromesh. I used this stuff in the past and it made a night and day difference for my T-45. I know technically it calls for 3.2qts but for whatever reason this stuff is hard to come by and three 3qts was all I could find after going to a few local stores. I'm sure there is at least .2qts left in the trans between fluid changes.

52208310685_41594aa90b_k.jpg
 
Last edited:

07GtS197

Well-Known Member
Joined
Mar 16, 2015
Messages
2,635
Reaction score
996
Location
Fort Myers, Fl
I have those same shocks with I think stock springs. They’re not bad. Looks like you’re making good progress.

I dropped the tank on my 87 Grand Marquis, which has a similar filler neck design, and it wasn’t bad. If you don’t angle it just right it’ll fight you lol.
 

joe65

Well-Known Member
Joined
Feb 4, 2020
Messages
1,478
Reaction score
1,444
Keeping myself busy! Hopefully getting in touch with the tuner this week!

Knocked out the last... well hopefully the last major hurdle. Got the gas tank installed, my god does that fuel fill neck grommet absolutely suck to install! I fought for what seemed like forever to get the fill neck through the grommet and into the tank. Not looking forward to doing that again when I drop the tank again this winter for rust repair.

View attachment 18805

Once that was installed I swapped out the rear shocks. When I got the car I replaced them with some regular KYB shocks. They did the job but over bumps would almost always bottom out with the Eibach sportline springs. I planned to pick up a set of Koni yellows and eventually do a MM rear coilover conversion but I found a good deal online for a pair for brand new KYB AGX adjustable rear shocks for only $100 for both. Couldn't pass up trying them out for the money, worst case I use them until I find a deal on some Konis or an MM coilover kit.

While I was under there I poked around at the upper rear axle bushings. The upper control arm bushings that attach to the body of the car seems good, couldn't see any cracking in the rubber.... The bushings that are on the actual axel itself though are pretty much done and have alot of cracks bit is still soft. I am assuming these are original to the car. Does anyone have recommendations for upper axle control arms? I currently have J&M lowers. I've heard factory replacements for the uppers if you have poly/spherical lowers

View attachment 18806

View attachment 18807

View attachment 18808

While I was crawling around under the car I decided to finally fix the E brake bolt that got ripped out of the mount years ago. Pretty common on these cars and easy to fix just a pain if you don't feel like taking the entire center console out... like me. Got a new stainless steel bolt and some big washers. Should be good for a long while.

View attachment 18809

Last thing I messed with was adding trans fluid. I replaced the drain plug as it was starting to get rounded off. I also picked up 3qts of Pennzoil Synchromesh. I used this stuff in the past and it made a night and day difference for my T-45. I know technically it calls for 3.2qts but for whatever reason this stuff is hard to come by and three 3qts was all I could find after going to a few local stores. I'm sure there is at least .2qts left in the trans between fluid changes.

View attachment 18810


I had to do that ebrake bolt fix on my last GT. worked great. When i got the car i was going what the hell and then saw what had happened. Yeah these are cars are getting old and if the were daily driven much they had surface rust all over the bottom. Actually the biggest reason I sold my red one, just too much rust underneath.
 

Venompower

Active Member
Joined
Aug 17, 2015
Messages
727
Reaction score
391
Location
Batavia, IL
MM only sells stock uppers... they apparently found them to be the best and not worth designing a replacement. I've also read the uppers should always use rubber bushing unless you welded up the torque boxes as poly can create bind that damages them.

I'll be interested to hear about the shocks, I replaced mine last fall with KYB Excel-G.
 

joe65

Well-Known Member
Joined
Feb 4, 2020
Messages
1,478
Reaction score
1,444
MM only sells stock uppers... they apparently found them to be the best and not worth designing a replacement. I've also read the uppers should always use rubber bushing unless you welded up the torque boxes as poly can create bind that damages them.

I'll be interested to hear about the shocks, I replaced mine last fall with KYB Excel-G.
I struggle with the MM argument about the upper control arms and the rubber vs poly bushings often. So many companies sell uppers with poly and i want to buy some. lol. I resist because I trust their experience.
 

Venompower

Active Member
Joined
Aug 17, 2015
Messages
727
Reaction score
391
Location
Batavia, IL
I struggle with the MM argument about the upper control arms and the rubber vs poly bushings often. So many companies sell uppers with poly and i want to buy some. lol. I resist because I trust their experience.
Aren’t the ones sold with poly adjustable? I mean for a car that sees a lot of track use and has reinforced torque boxes it’s probably no issue.
 

joe65

Well-Known Member
Joined
Feb 4, 2020
Messages
1,478
Reaction score
1,444
Aren’t the ones sold with poly adjustable? I mean for a car that sees a lot of track use and has reinforced torque boxes it’s probably no issue.
probably correct. the poly causes bind in corners....from my understanding.
 
OP
OP
Akurma

Akurma

Active Member
Joined
Apr 22, 2020
Messages
283
Reaction score
353
Location
Pennsylvania
Back with an update after a longer than expected break, life just happens to get in the way sometimes lol. Anyway exciting news! but first the boring stuff since my last post.

I finally got lucky and found someone willing to sell me a Bullitt throttle bracket. I searched high and low for one for months with no luck but posted on one of the Facebook groups and found a guy who had an extra. Never thought I'd spend $100 on a tiny piece of metal, yet here I am. Bullitt bracket on the right, GT on the left.

I do see why people dismiss the Bullitt intakes nowadays, its all the little Bullitt specific parts that make it a PITA, However I'm too far into it to turn around now.

52283858648_663c8c93ff_k.jpg

52284330255_2ab78290c4_k.jpg

52283848021_43c4f0b3d5_k.jpg

Up next was loading the base line tune! Had a hell of a time finding someone local to me who would do it. I either couldn't get a call back or they were booked out so far in advance it would have been months. SO I did some research on remote tuners and found a reputable one.

52283847976_3ddd0d9820_k.jpg

Loaded the base tune to the car and then crossed my fingers and turned the key. I left the fuel pump disconnected for the first crank as I wanted to listen for any odd sounds while cranking as well as built oil pressure. All sounded good to so next up was to throw the wheels back on it, fill the coolant system with water for now and off of jack stands for the first time in a looonggggg time.

"

"


I was so relieved that it all sounds good and no major issues happened. it sounds great and seems healthy!

However I did run into a few issues.. First issue is my AFR gauge randomly went out. its been working perfectly fine since I wired it up and then nothing. It came back once randomly but hasn't come back since. going to take a look at my wiring connections. Second issue is I have a leak at first i assumed the worst and thought it was an oil pan gasket or front seal. However after looking at it some more I think the water pump is leaking. Since I filled it with water it was hard to tell what exactly was leaking, especially at night.

Now the worst issue I have is the car wont idle unless I keep my foot lightly on the pedal. I double checked all my vacuum lines, intercooler piping and MAF sensor. Nothing seems to be out of place. I left it sit overnight with the battery disconnected. Fast forward to this morning I got the thinking that it seemed like an IAC valve issue. The Bullitt manifold came with one already installed and I didnt bother to change it. I dug out my old IAC from my old motor and swapped them over. Sure enough it fired right up and idled perfectly!

52283877686_4972e0dc43_o.jpg

... For about a minute, just enough to get this walk around video. Now it's back to not wanting to idle unless I lightly give it gas. For the hell of it i ordered a new IAC, should arrive tomorrow. In the mean time I am going to look into why my AFR gauge stopped working and drain the water out of the system to see why there is a leak.


Overall still excited and happy to know it at least runs with no major issues! All the hard work, time, money and effort has paid off!
 

Attachments

  • 52283874603_0cba9b109e_o.jpg
    52283874603_0cba9b109e_o.jpg
    36.2 KB · Views: 10
  • 52284411785_0c628dca9b_o.jpg
    52284411785_0c628dca9b_o.jpg
    489.6 KB · Views: 9
Last edited:

Snorky

Active Member
Joined
Feb 10, 2022
Messages
828
Reaction score
696
Congratulations, that is such a good feeling! I miss the way a centri blower sounds. That sweet jet sound is wild
 
OP
OP
Akurma

Akurma

Active Member
Joined
Apr 22, 2020
Messages
283
Reaction score
353
Location
Pennsylvania
Spent some more time with the car today. Super weird issue not getting it to idle. it will ONLY idle if I completely disconnect the battery for a few hours. What's even more strange is that it will ONLY idle ONCE after connecting the battery. If I shut it off after letting idle the first time and go to turn it back on seconds later it will NOT idle at all?! Very strange. I tried doing the IAC relearn procedure but that didn't work or I didn't do it correctly. I am going to reach out to the tuner to see what he thinks.

I think I fixed my AFR gauge, moved the ground to a different spot and it seems to be fine now. I also wired up the SCT Firewire while I was under the dash

52286682890_7420f54011_o.jpg

52286459944_425f954ed8_o.jpg


Also got new front tires delivered today. Went with Nitto NT555 G2's. Didn't need anything crazy for a street car that might see the strip or auto cross event a few times a year. I just wanted something sticky that would also be good in the rain. Was going to get Falken RT615+ but read they weren't great in the rain for a street car.

I'm sure these will be better than the Sumitomo HTR ZII's that I currently have... one of them is very questionable as it seems like a belt or something shifted to the left in the last photo.

52285217087_449e448cb8_o.jpg

52286459674_f3379ff3c7_o.jpg

Decided to look into the coolant leak. Confirmed it was coming from the water pump, you can see the dampness in the first photo right below the bottom bolt. I figured the O ring got messed up when I installed it. However upon unbolting it one of the bolts poured water out. Once I got it off I realized there is a casting defect on the pump itself!

52286682865_ea625b54b1_o.jpg

52286682755_fb96b50f46_o.jpg

It's hard to get a photo of but there are two small holes on the face of the pump. The first is below the weep hole in the corner. That hole leads to another hole inside the bolt hole. Coolant leaks out of both of these holes. Pretty annoyed at myself for not noticing this when I installed it but at the same time it was a brand new Edelbrock pump.. I assumed it would be good quality. I sent them an email to see if they'll send me a new pump so we shall see.

52285392307_75df890fc3_o.jpg

52286635669_bbc181852e_o.jpg


While I was in there I noticed a light amount of black dust around the area, especially around the bottom of the alternator. So the belt it rubbing on something but I can't figured out exactly where or why. The belt seemed to look fine, I don't see any obvious marks of rubbing on the belt itself. Will have to look more into this.

52286198333_e213f1b9e9_o.jpg


It's the #2 reason I miss the old supercharger setup. That sweet, sweet whistling purr of success!!

What is the #1 reason?
 

Attachments

  • 52286198523_29f6ec7d99_o.jpg
    52286198523_29f6ec7d99_o.jpg
    635.5 KB · Views: 6

weendoggy

Active Member
Joined
May 31, 2019
Messages
640
Reaction score
733
The G2's are a great tire. I use them for street and wet track conditions.
 

Snorky

Active Member
Joined
Feb 10, 2022
Messages
828
Reaction score
696
Spent some more time with the car today. Super weird issue not getting it to idle. it will ONLY idle if I completely disconnect the battery for a few hours. What's even more strange is that it will ONLY idle ONCE after connecting the battery. If I shut it off after letting idle the first time and go to turn it back on seconds later it will NOT idle at all?! Very strange. I tried doing the IAC relearn procedure but that didn't work or I didn't do it correctly. I am going to reach out to the tuner to see what he thinks.

I think I fixed my AFR gauge, moved the ground to a different spot and it seems to be fine now. I also wired up the SCT Firewire while I was under the dash

View attachment 19473

View attachment 19474


Also got new front tires delivered today. Went with Nitto NT555 G2's. Didn't need anything crazy for a street car that might see the strip or auto cross event a few times a year. I just wanted something sticky that would also be good in the rain. Was going to get Falken RT615+ but read they weren't great in the rain for a street car.

I'm sure these will be better than the Sumitomo HTR ZII's that I currently have... one of them is very questionable as it seems like a belt or something shifted to the left in the last photo.

View attachment 19476

View attachment 19482

Decided to look into the coolant leak. Confirmed it was coming from the water pump, you can see the dampness in the first photo right below the bottom bolt. I figured the O ring got messed up when I installed it. However upon unbolting it one of the bolts poured water out. Once I got it off I realized there is a casting defect on the pump itself!

View attachment 19477

View attachment 19478

It's hard to get a photo of but there are two small holes on the face of the pump. The first is below the weep hole in the corner. That hole leads to another hole inside the bolt hole. Coolant leaks out of both of these holes. Pretty annoyed at myself for not noticing this when I installed it but at the same time it was a brand new Edelbrock pump.. I assumed it would be good quality. I sent them an email to see if they'll send me a new pump so we shall see.

View attachment 19479

View attachment 19480


While I was in there I noticed a light amount of black dust around the area, especially around the bottom of the alternator. So the belt it rubbing on something but I can't figured out exactly where or why. The belt seemed to look fine, I don't see any obvious marks of rubbing on the belt itself. Will have to look more into this.

View attachment 19481


What is the #1 reason?
You bolt it on and go. It's easy and reliable, turbo systems develope hot side leaks, warped flanges. V BANDS, ETC. Things melt. Oil pressure and drainage issues can take time to figure out. Just super time consuming to make it perfect. Plus anytime you want to touchcyour accessories thewhole kit comes out. Then you need to trapeze yourself to holding the merge pipes together and in place while snugging up the V bands while making sure they are seated properly. Just a pain in the ass.. sure is fast though.
 
OP
OP
Akurma

Akurma

Active Member
Joined
Apr 22, 2020
Messages
283
Reaction score
353
Location
Pennsylvania
Nothing exciting for this update, just some simple things checked off the list. I did have a remote tune session but was short lived as they quickly discovered that one of my front o2 sensors wasn't working properly. Should have two new ones tomorrow and a rescheduled tune session for this Friday.

Swapped the new tires on and took off my stock wheels with roller tires on them, looks so strange with the factory starfish wheels.

52305903562_80fd4cd988_o.jpg

52307141744_a06ce8da40_o.jpg

Found and fixed an oil leak from the passenger side valve cover. I noticed this scratch/mark when I installed the valve covers but didn't think much of it just thought it was a scratch. Turned out to be a deep enough to develop a small oil leak. Taped off the area and put some RTV on it, so far no leaks. I'll replace the valve cover later on, I had no idea these things were about $100 each so this will do for now.

52305903582_af387fe399_o.jpg

52307154415_ddecb69c89_o.jpg

Last but not least I installed a new part store water pump. Edelbrock is going to warranty the pump I have but they are back ordered until October. So regular pump will have to do for the time being. Luckily these are super easy to change on these motors.


From left to right, Store brand AC Delco, Edelbrock, Original pump

52307154400_26a9bcf4d8_o.jpg

The G2's are a great tire. I use them for street and wet track conditions.

This is good to hear!

You bolt it on and go. It's easy and reliable, turbo systems develope hot side leaks, warped flanges. V BANDS, ETC. Things melt. Oil pressure and drainage issues can take time to figure out. Just super time consuming to make it perfect. Plus anytime you want to touchcyour accessories thewhole kit comes out. Then you need to trapeze yourself to holding the merge pipes together and in place while snugging up the V bands while making sure they are seated properly. Just a pain in the ass.. sure is fast though.

This was one of the main reasons I went with a Centri setup, especially a Procharger. I didn't want to have to run a dedicated oil feed line to the blower. Plus like you said, if I need to access the front of the engine its as simple as undoing the serpentine belt and a few bolts and it comes right off, doesn't get any easier!
 

Forum statistics

Threads
77,513
Messages
1,504,087
Members
14,981
Latest member
Cwacaser

Members online

Top